Transform a single pallet into a functional and attractive mini raised bed with this easy-to-follow guide. Discover how to repurpose materials and create a free backyard gardening solution.
Gathering Your Materials
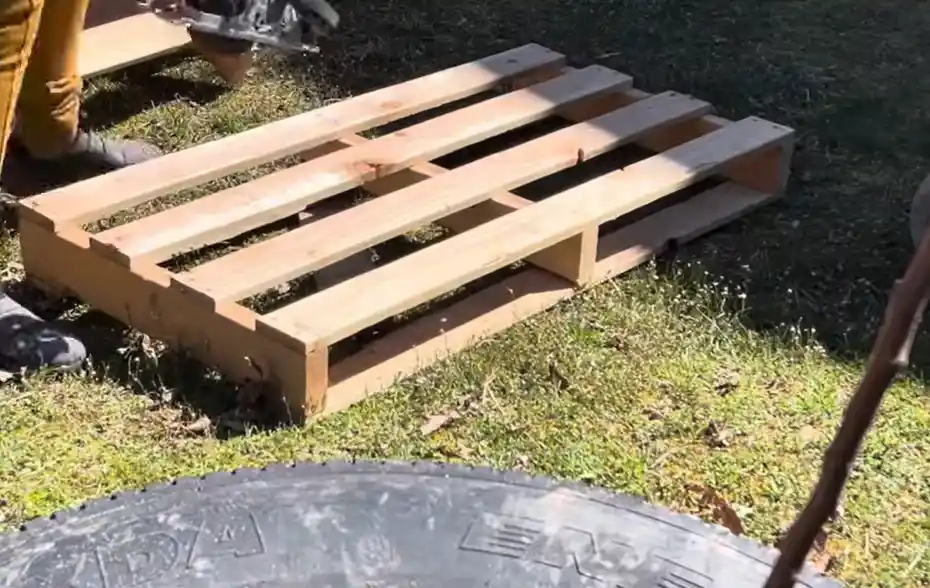
The first step is to collect a pallet. It is ideal to find one with a stamp that says HT, which stands for heat treated. Avoid pallets with a stamp that has MB on it, as this indicates methyl bromide treatment, which is toxic. A local recycling center is a good place to look for pallets. Selecting a quality pallet will make building the bed much easier.
Disassembling the Pallet
Instead of using a pry bar to remove the nails, which can be a lot of work and increase the chances of splitting the wood, a skill saw can be used. Run the skill saw as close as possible up against the nails without hitting them. This method is quicker and easier. Before making any cuts, adjust the blade so that the length is about the same as the width of the board to avoid cutting into the board beneath it too much.
Cutting the Sides
Once the blade is adjusted, cut along one side of the pallet. Then, flip the pallet and repeat the process on the other side.
Removing the Center Boards
To keep the center boards whole, use a Sawzall to cut out the nails from the back side instead of trying to pry them out. This will help prevent splitting the wood. Repeat this process for the rest of the pallet.
Preparing the Boards
After disassembling the pallet, ensure the cuts are square. If the cuts are not perfect, a square can be set up and the skill saw used to even out the edges, or a drop saw can be used. Remove as little material as possible to avoid wasting the length of the wood. Repeat this process for the rest of the boards, cutting one side square.
Ensuring Uniform Length
Find the shortest board and then measure it. Cut all the remaining boards to the same exact length as the shortest one.
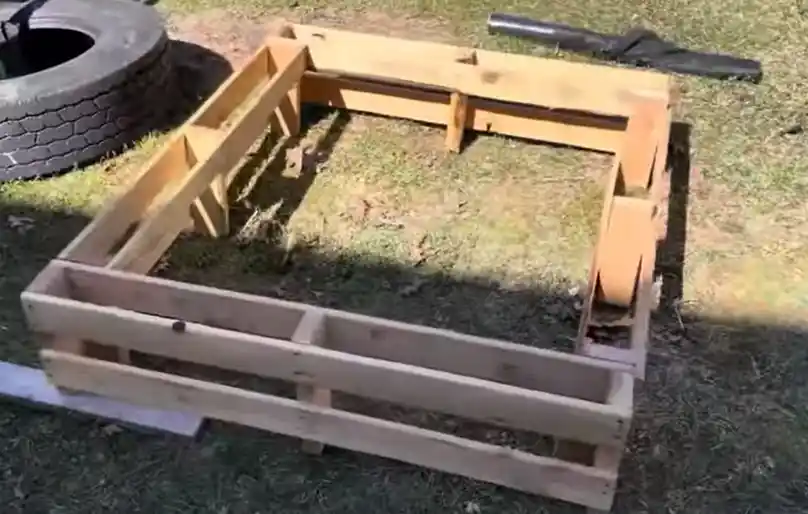
Assembling the Raised Bed
Nine pieces are needed to make up the frame of the bed: three for the front, three for the back, and three that will be cut in half to form the two ends. The remaining pieces will be used for braces.
Cutting the End Pieces
Cut two of the boards in half to create the end pieces. When selecting the boards to cut, avoid those with knots in the center, as this can weaken the board. Given the full length of the boards is 43 inches, measure and cut them at 21.5 inches. Ensure the cut avoids any nails.
Constructing the Sides
Lay the end pieces down and one of the side pieces. Line up the ends and use a clamp to hold the pieces together. Repeat on the other side.
Adding the Braces
Measure the height of the side, approximately 10 and a quarter inches. Cut a brace to this length and center it on the side. This brace will hold the side together. Use a square to mark the cut. Each board should yield four braces.
Center the brace, ensure it lines up at the top and bottom, and then pre-drill holes to prevent splitting. Attach the brace using inch and a quarter screws.
Building the Ends
The process for building the ends is similar to the sides. Lay out the end pieces, clamp them together in the center, and attach leftover scrap pieces as braces on the ends. These brace pieces should be approximately ten and a quarter inches long. Line up the braces, making sure they are flush at the top and sides, then pre-drill and screw them together.
Final Assembly
To assemble the entire bed, build it on a flat surface. Place one end piece and attach a side piece, ensuring everything is aligned. Attach the board to the side piece. Repeat for the other end. Position the side piece against the edge, keeping in mind that there may be a slight height difference, but the top will be flush. Use screws to attach everything together.
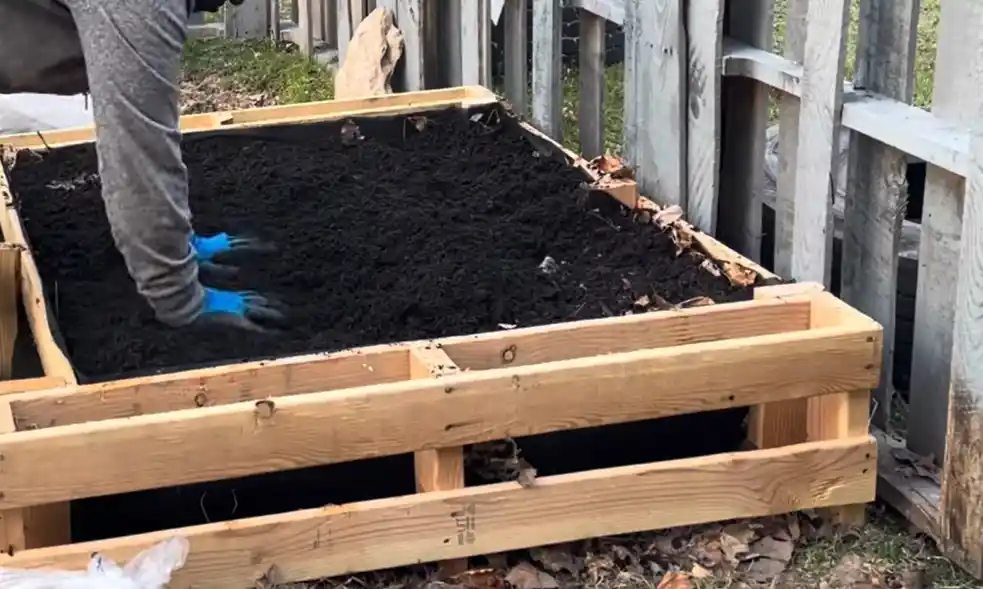
Planting Your Garden
Once the bed is assembled, fill it with soil and plant flowers, herbs, lettuces, and other desired plants. The raised bed is versatile and can be placed in a garden, on a porch, or anywhere else. Landscape fabric can be added to the inside, or an oil can be used on the outside to preserve the wood.
This DIY raised bed provides a free and easy way to grow organic food. Enjoy the satisfaction of harvesting fresh produce right from your own backyard.