Most “what to do with old greeting cards” advice starts the wrong way… it tells you to cut first and ask questions later. But a greeting card is two things at once: a personal message someone wrote to you, and a manufactured paper product with a coating… a fold, and maybe a hidden battery. Decide which one you are holding before you touch a blade, and the same free supply becomes memory folios, journal covers, desk organizers, and reusable gift pieces that actually hold up.
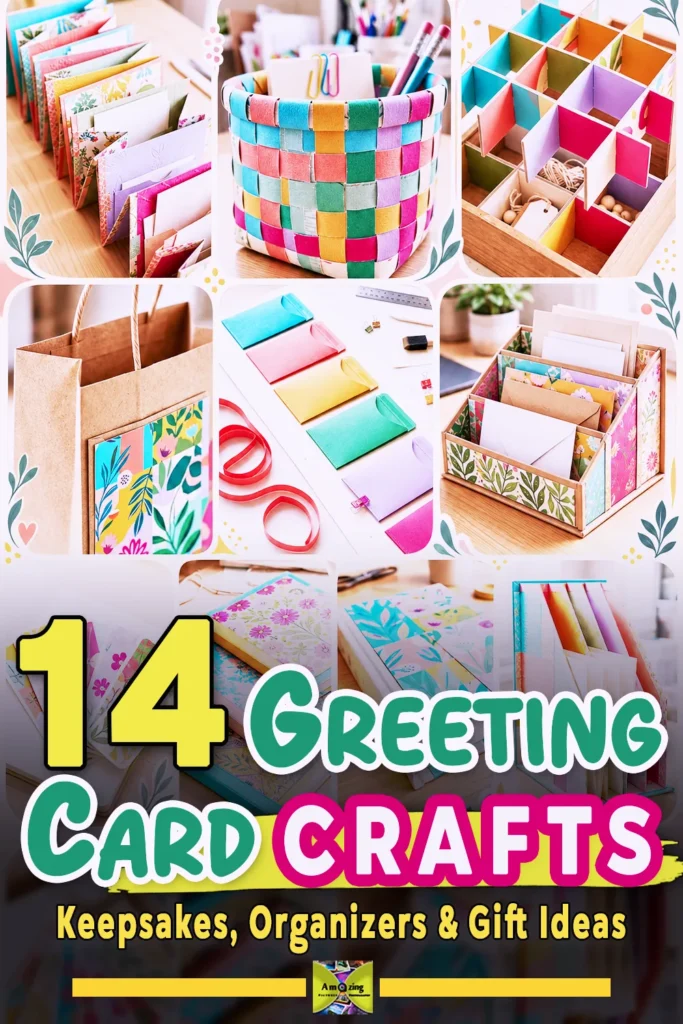
This guide walks through that decision first, then teaches you how to identify, inspect, flatten, measure, cut, score, fold, glue, back, finish, and care for the cards that are genuinely yours to reuse. At the end, fourteen complete projects show you how to do it — several of them in corners most roundups never cover.
Start with sorting, not cutting
Before any card becomes a bookmark or a basket, read it. The message, the sender, the date, the photograph, and the handwriting all matter more than the front’s retail price or how pretty it looks in a flat-lay.
Read the whole card before you decide anything
Open every card and read both sides, the inside panels, and any insert tucked into the pocket. A card that looks ordinary on the outside can carry a note, a signature, a dated message, or a photograph that changes everything. Do not assume a card is “just another birthday card” because its front is generic.
Separate the keep-forever cards from the craft candidates
Keep a card intact when it holds something you cannot replace: a parent’s handwriting, a signature from someone who has died, a family photograph, a dated note marking a milestone, original artwork, or a message with family-history detail. The retail price of the card is irrelevant — a 99-cent card with your grandmother’s note is worth more, emotionally, than an expensive card with nothing written in it.
Set the ordinary, replaceable cards aside as craft candidates. These are the printed fronts, the duplicate holiday cards, the cards with a one-line signature and nothing personal. If you are unsure, hold the card back and revisit it in a week. You can always cut later; you cannot un-cut a message.
Confirm ownership and get permission first
A card that was sent to you is yours to keep and reuse. A card you inherited, found in a shared family collection, received on behalf of a group, or found among a deceased relative’s things is different. Before altering it, confirm who owns it and ask before you cut or publish a message that belongs to someone else. School, workplace, club, and institutional cards may carry their own expectations about what happens to them.
Ownership of the physical card also does not transfer ownership of the printed artwork. Under U.S. law (17 U.S.C. § 202), owning the card does not give you the copyright to reproduce the illustrated design. Making a gift for a friend is one thing; photographing the artwork and publishing it, or selling items that reproduce a character or distinctive illustration, is another. If a project is going to be photographed, posted, gifted commercially, or sold, treat the artwork as copyrighted until you have confirmed otherwise.
Photograph or scan before any irreversible change
If a card matters to you but you want to let the physical copy go, photograph or scan both sides and the insert first — when it is lawful and appropriate to do so. Record the sender, recipient, date, occasion, relationship, and any known story, without inventing details you cannot confirm. A digital copy preserves the words; it does not replace the original’s emotional or historic weight, so do not present scanning as a reason to cut a card you would regret losing.
Check for private details before you cut or publish
Names, home addresses, telephone numbers, email addresses, signatures, school details, family photographs, travel information, medical information, and account details should never appear in a published or gifted project without clear permission. Before you photograph a finished piece, crop, cover, reverse, redact, or exclude those areas. This matters for your own family photos too, not just strangers’ cards.
A simple decision framework
- Keep intact as a personal or family object when it holds irreplaceable handwriting, signatures, photographs, or history.
- Preserve intact and seek professional guidance when a card may have historic, cultural, artistic, or family significance — an archivist or paper conservator is the right person, not a craft blog.
- Photograph or scan when lawful and appropriate, then decide separately whether to keep the original.
- Return to the sender or another family member when it matters more to them than to you.
- Donate only when a verified organization currently accepts that exact material.
- Use in a project when the card is ordinary, replaceable, and genuinely unwanted.
- Save expendable sections for construction and adhesive tests.
- Separate electronic or battery-bearing cards for appropriate handling.
- Recycle only when the local program accepts the card’s exact construction.
- Dispose of contaminated or rejected material according to local guidance.
Know your card before you cut it
A greeting card is not automatically “just paper.” The construction decides how it cuts, folds, glues, finishes, and disposes.
Plain paper, coated, photographic, and more
Uncoated card stock is porous and takes water-based adhesive and folding well. Coated and cast-coated stock has a smooth, often glossy surface that resists water-based glue. Laminated cards carry a plastic film. Photographic cards are layered and can delaminate when cut or wetted. Metallic foil, glitter, flocking, plastic gems, foam pads, ribbons, fabric, and magnets each change how the card handles and how it must be disposed of. A scented card or one with an unknown coating should be set aside for cautious assessment rather than treated like plain stock.
Folded, postcard, pop-up, fabric-covered, and layered
A folded card has a weakened score down its center. A postcard is a single flat panel. Pop-up and dimensional cards contain hidden folds, tabs, adhesive, thread, wire, or plastic components that plain cards do not. Fabric-covered and layered handmade cards behave differently again. None of these are interchangeable, and a pop-up mechanism should never be assumed to be all paper.
Why look and feel cannot confirm fiber, coating, or recyclability
Appearance and feel alone cannot tell you the fiber content, the coating chemistry, or whether a card is recyclable. A card that looks like paper can carry a plastic lamination, a photographic layer, or a clay-coated surface. Treat appearance as a starting point, not a conclusion, and test any card you plan to glue or finish on an expendable section first.
Paper grain, old folds, and why they crack
Paper has a direction — the machine direction the fibers ran during manufacture. Folding with the grain is cleaner; folding against it is more likely to crack, especially on thick coated stock. An existing fold is already weaker than the surrounding panel because repeated opening has broken fibers along the score line. A card that has been opened and closed many times will fold less cleanly than a fresh one, and a thick coating is more likely to crack at the crease.
Why mixing card types creates problems
Combining several card types in one project can create incompatible folding, bonding, drying, and recycling needs. A glossy photographic panel glued next to a plain matte panel may bond differently, dry differently, and refuse to be recycled together. Group cards by finish and thickness before you coordinate colors, and expect to test each distinct stock.
Inspect, clean, and flatten
Work only from clean, dry cards
Use cards from a known, clean, dry source. Check the cover, the interior, the fold, any pocket or insert, the envelope if you kept it, and any hidden layered section before you bring the card to your worktable.
What to reject outright
Reject cards with mold, mildew, insects, pest residue, floodwater or sewage exposure, chemical residue, smoke, grease, bodily fluids, unstable ink, a persistent odor, brittle paper, deep tears, delamination, loose coatings, shedding glitter, sharp staples or pins, or damaged components. Do not cover damage with a liner or a coat of finish — a contaminated or badly degraded card should not be concealed inside a project. Mold-suspect and battery-damaged cards should be isolated and handled according to authoritative local guidance.
Dry surface-cleaning only, and only when it is safe
A soft brush or a gentle dry wipe removes surface dust. Avoid aggressive tape removal, solvents, disinfectants, bleach, sprays, oils, soaking, and universal stain treatments — none of these are safe on unknown card stock. If a card needs more than dry dusting, treat it as a conservation question, not a craft question. Test ink stability before any moisture-based adhesive or finish touches it.
Remove loose non-paper decorations only when it is safe, permitted, and appropriate. If you remove staples or clips, support the card fully and use the right tool rather than tugging.
Flattening sound cards gently (and when not to)
There is no one flattening method for every card. A mildly bent plain card can rest flat between clean protective sheets under broad, moderate weight for a day or two. Do not iron, steam, spray, soak, or apply uncontrolled humidification to a greeting card. Photographic, laminated, metallic, glittered, mold-affected, brittle, and unknown cards should be treated differently — often simply accepted as they are or rejected — rather than forced flat.
Paper conservation guidance reserves humidification for plain, uncoated paper with stable media, and recommends testing media first and consulting a conservator for valuable items. For a household greeting card, resting it flat under gentle weight is the safer default. Workshop tip: Check a flattened card after several hours instead of leaving it under weight indefinitely. If the bend is relaxing evenly, return it between clean sheets and continue gently; if the coating begins to crack, curl, or transfer, stop and use the card without forcing it flatter.
Storing cards and panels between sessions
Store intact cards flat in clean, labeled enclosures, away from dampness, pests, direct sunlight, heat, and crushing. Store prepared panels flat and separated by project, so the fronts do not rub or shed onto each other.
Electronic and battery-bearing cards: handle separately
Musical, recorded-message, illuminated, motorized, and interactive cards are not ordinary paper stock. They contain components that change every rule in this guide.
How to spot the hidden components
Look for buttons, speakers, sound modules, lights, switches, wiring, battery compartments, rigid lumps, or concealed panels. Press the card if it is safe to do so; a card that plays, lights, or moves is electronic. A rigid bump inside the cover is often a battery and a small circuit board.
Why these cards are never ordinary paper stock
Do not cut, pierce, crush, shred, soak, heat, or place an electronic card in paper recycling while its components remain inside. The circuit, wiring, speaker, and battery are not recyclable as paper and can be damaged in ways that are unsafe. Casual disassembly is inappropriate when components are concealed or damaged — consult the card manufacturer, your local household hazardous-waste authority, a battery-collection program, or an electronic-waste service.
Button and coin batteries demand special care
Button and coin batteries are a serious ingestion hazard for children and pets. In the United States, they are regulated under Reese’s Law (16 CFR Part 1263), which sets performance and warning requirements for products containing them. Keep such batteries — and any card that still holds one — out of the reach of children and pets, and seek immediate medical attention if one is swallowed or inserted. A damaged, swollen, leaking, hot, corroded, or unidentified battery requires the manufacturer’s or local hazardous-waste authority’s handling instructions, not a guess.
Disposal through the right channels, not the paper bin
Check with your local household hazardous-waste program, battery-collection program, and electronic-waste service for the specific card. Do not promise that every component can be separated or recycled locally — availability varies. Batteries and electronic modules should not be reused in the projects in this collection, and cards with inaccessible electronics should be excluded from crafting entirely.
Measuring, templates, and layout
Measure usable areas, not the whole card
Measure each panel at several points — card sizes and folds are rarely perfectly square. Mark off the private information, weak folds, damaged areas, and unsuitable components first, then measure what remains usable. Record dimensions with a note to confirm them on your own cards; no universal number applies when card size, thickness, fold, and motif all differ.
Make a full-size template first
Draw a full-size pattern on expendable paper before you cut any card. A template lets you test fold placement, wrapped edges, hinge overlap, scoring, binding, and closure clearance without wasting a good panel. [MATERIALS PHOTO: Show the full-size paper templates laid beside the cards and tools.]
Choose a focal point and keep sensitive text out
Identify the most visually important image, typography, border, color block, or handwritten detail, and build the layout around it. Keep private information outside the selected layout. Keep weak folds away from corners, closures, handles, and structural junctions. Account for wrapped edges, hinges, overlap, scoring, binding, and closure clearance when you position the focal image.
Dry-lay and photograph before you cut
Lay the complete dry layout out, align repeated borders and motifs across adjoining panels, and use controlled patchwork where exact matching is impossible. Photograph the dry layout, then number adjoining pieces on the less visible side with a tested removable method — a light pencil mark on a scrap first to confirm it erases. Preserve the largest useful areas before cutting smaller parts.
Cutting, scoring, folding, and punching
Pick the right tool for the card
Scissors, a paper trimmer, a craft knife, a rotary cutter, punches, a scoring board, and a bone folder each suit a different card thickness and finish. A craft knife with a fresh blade handles thick and layered stock cleanly; a paper trimmer suits straight cuts on flat panels; decorative-edge scissors and punches need testing on matching waste sections because thick, layered, plastic-coated, or embellished cards can jam them.
Cut safely and slowly
Use every cutting tool only on an appropriate stable surface and a cutting mat. Cut away from your body, keep your supporting hand outside the blade path, and never hold a small card piece in your hand while cutting, drilling, punching, or setting hardware — secure it flat instead. Make several controlled knife passes rather than forcing a dull blade, and replace, store, retract, and dispose of blades safely.
Score to fold, not to cut
A score compresses the fibers so the card folds along a clean line; it should not cut through the coating or the paper. Choose the correct scoring side and pressure for the intended fold, and test whether the coating cracks when folded. On thick coated stock, a light score plus a careful fold is safer than a deep cut. Support existing weak folds rather than re-flexing them, and avoid repeated flexing of brittle card stock.
Punching and holes
Test punches on a matching offcut. Reinforce any hole a closure or cord will pull against, and finish exposed corners so they do not catch or scratch. Keep punched pieces and small embellishments away from young children and pets.
Adhesives and mounting: a comparison
No single adhesive works on every card finish. Glossy, laminated, photographic, metallic, and plastic-coated cards can resist ordinary paper glue, and too much wet adhesive warps stock and moves ink. The table below is a starting point; test your exact card on an expendable section before you commit. Material note: On smooth coated card, a dry double-sided adhesive film is a sensible first test because it adds no moisture. On porous matte stock, a very thin, even layer of paper adhesive is often easier to control. Whichever method you choose, test the exact card finish first and reject any bond that curls, stains, or lifts at the edges.
Adhesive comparison table
| Adhesive | Best for | Weak points | Moisture / warp risk | Reversible? | Ventilation / notes |
|---|---|---|---|---|---|
| Glue stick | Light porous paper, paper-to-paper | Weak on coated, glossy, or heavy panels | Low | Partly | None |
| PVA paper adhesive | Porous card and board | Resists plastic-coated stock; warps if over-applied | Moderate | Low | None |
| Tacky craft adhesive | Thicker grab; some non-porous surfaces | Still water-based; may not hold heavy gloss | Moderate | Low | None |
| Decoupage medium | Decorative layering and topcoat in one | Can darken, streak, or cloud; not structural | Moderate–high | Low | Follow label |
| Double-sided tape / film | Flat, dry, no-moisture mounting | Lifts on textured or glossy surfaces; not for stress | None | Semi | None |
| Repositionable mounting | Temporary or reversible placement | Low hold; may leave residue | None | Yes | None |
| Spray adhesive | Even coat on glossy or large panels | Overspray; needs ventilation and masking | Low | No | High — ventilate |
| Contact adhesive | Permanent flat joins on compatible substrates | Instant, cannot reposition; solvent-based | Low | No | High — ventilate |
| Wheat starch paste / methylcellulose | Reversible, conservation-grade paper work | Needs skill; slower; not for coated stock | High if wet | Yes | None |
| Photo corners | Reversible mounting of whole cards | Holds corners only; card can bow | None | Yes | None |
| Paper hinges | Flexible joins, accordions, folios | Fails if flexed too sharply or repeatedly | Moderate | Semi | None |
| Mechanical slots / interlocking tabs | Structural joins with no adhesive | Fit must be precise; loosens with wear | None | Yes | None |
A controlled bonding workflow
- Identify the card surface and the substrate.
- Make a matching expendable sample.
- Test ink and coating stability.
- Prepare a clean, flat substrate.
- Dry-fit and mark alignment points.
- Apply the minimum even adhesive layer the product instructions support.
- Position the card from a controlled reference edge.
- Smooth through a clean protective sheet without overworking wet paper.
- Remove excess adhesive according to product guidance.
- Press or weight the assembly evenly where appropriate.
- Allow complete drying or curing.
- Inspect for warping, stains, bubbles, coating changes, weak corners, and transfer before use.
Why one adhesive is never universally best
Excessive wet adhesive warps card stock and moves ink. Insufficient coverage creates dry pockets and lifted edges. A thick glue line can show through light-colored card. Foam pads and raised adhesive create weak or bulky structural joints. Spray and contact products require exact label compliance, ventilation, and overspray control. Adhesive alone is unsuitable for stressed folds, handles, loaded partitions, or frequently flexed joints — those need mechanical support or a hinge. Every assembly must dry or cure fully before you trim, fold, close, load, gift, or touch it.
Backings, hinges, edges, and reinforcement
Backing and reinforcement comparison table
| Method | Best for | Watch for | Reversible? | Testing |
|---|---|---|---|---|
| Reclaimed book board | Rigid covers, dividers, folio boards | Warp from wet glue; sharp edges wear paper | No | Check flatness after drying |
| Sound paperboard | Backing, liners | Reject damp, moldy, oily, or delaminated board | No | Check for warp and smell |
| Corrugated board | Rigid bases where hidden | Texture telegraphs through thin card | No | Mount a sample and check surface |
| Thin wood panel | Rigid bases | Sharp edges; heavier; needs sanding | Yes (separate) | Round edges and test |
| Woven fabric backing | Flexible jackets, organizers | Stretch and fray at cut edges | Yes | Test glue bleed-through |
| Paper hinges | Accordions, folio joins | Crack under sharp or repeated flexing | Semi | Flex many times before loading |
| Fabric hinges | Jacket spines, flexible joins | Bulk at the spine; glue bleed | Semi | Open and close repeatedly |
| Interlocking paper tabs | Box dividers, trays | Fit too loose or tight; loosens with wear | Yes | Fit and wiggle-test |
| Folded paper hems / wrapped edges | Protecting raw card edges | Add bulk; crack on thick coated stock | No | Fold a sample first |
| Overlapped / mitered corners | Clean corners on covered boards | Bulky corners; misalignment | No | Dry-fit all four corners |
| Edge binding | Wear points on organizers | Too wide a binding stiffens; too narrow frays | No | Run a finger along the edge |
| Reinforced punch holes | Closures and cords under tension | Unreinforced holes tear | No | Tug the closure |
| Removable rigid inserts | Where project and insert need different care | Loose fit lets the insert slide | Yes | Fit and remove repeatedly |
| Transparent cover panel | Protecting a display without coating | Needs smooth enclosed edges and support | Yes | Check it sits flat and closes |
Why backing, hinges, and edges fail
Damp, moldy, crushed, oily, or delaminated backing must be rejected. Corrugation telegraphs through thin card. Sharp backing edges wear through decorative paper. Narrow folds crack thick coated stock. Unprotected card edges delaminate under repeated handling, and wet adhesive applied unevenly warps the backing. Flexible projects need different hinges from rigid organizers, and loaded dividers need support at their base and junctions, not just at the top.
Edges and corners that survive handling
Finish exposed corners so they do not catch, scratch, or lift. A folded hem, a wrapped edge, a mitered corner, or a length of paper binding protects the raw card edge. Where a transparent panel or removable insert is used, keep its edges smooth and enclosed and give it stable independent support.
Finishes and protective layers
Most greeting-card projects do not need a coating. A finish can darken, stiffen, curl, cloud, spot, or delaminate card stock, and a wet finish can move ink or weaken the adhesive beneath it. Choose “no finish” unless the project genuinely needs one.
Finish comparison table
| Finish | Best for | Risks | Ventilation | Future repair |
|---|---|---|---|---|
| No applied finish | Most indoor paper projects | None added | None | Easy |
| Removable interleaving (glassine-like) | Separating stacked or stored panels | None if it stays dry | None | Easy |
| Transparent cover sheet / rigid panel | Display protection without coating | Static, glare, edge chipping | None | Easy (replace sheet) |
| Decoupage topcoat | Decorative sealing of layered card | Streaks, cloudiness, darkening, tackiness | Follow label | Hard |
| Water-based clear craft finish | Light sealing on stable card | Moves ink, warps, clouds, cracks over folds | Follow label | Hard |
| Acrylic spray | Even coat on glossy or large panels | Overspray, clouding, stiffening | High — ventilate | Hard |
| Edge-only sealing | Raw edges on organizers | Limited protection; edge flaking | Follow label | Moderate |
| Protective backing instead of coating | Where surface coating would damage the card | Adds thickness | None | Moderate |
What a clear coat does and does not do
Dry-to-touch does not mean fully cured, and a flexible fold can crack beneath a rigid film. A clear finish does not make a card project waterproof, washable, archival, food-safe, heat-resistant, scratch-proof, or suitable outdoors. Loose glitter and unstable decorative particles should be removed or excluded rather than hidden beneath a coating. If you do apply a finish, test it on a matching offcut first, use it in a ventilated space, and follow the label exactly. Finishing note: Test any clear finish on a hidden offcut and let it cure fully before judging it. If the surface darkens, becomes tacky, clouds, or changes the printed sheen, skip the coating and use a removable transparent cover or protective backing instead.
Memory preservation projects (projects 1–3)
These three projects let you keep meaningful cards organized without permanently altering them. They suit the cards you decided to keep intact.
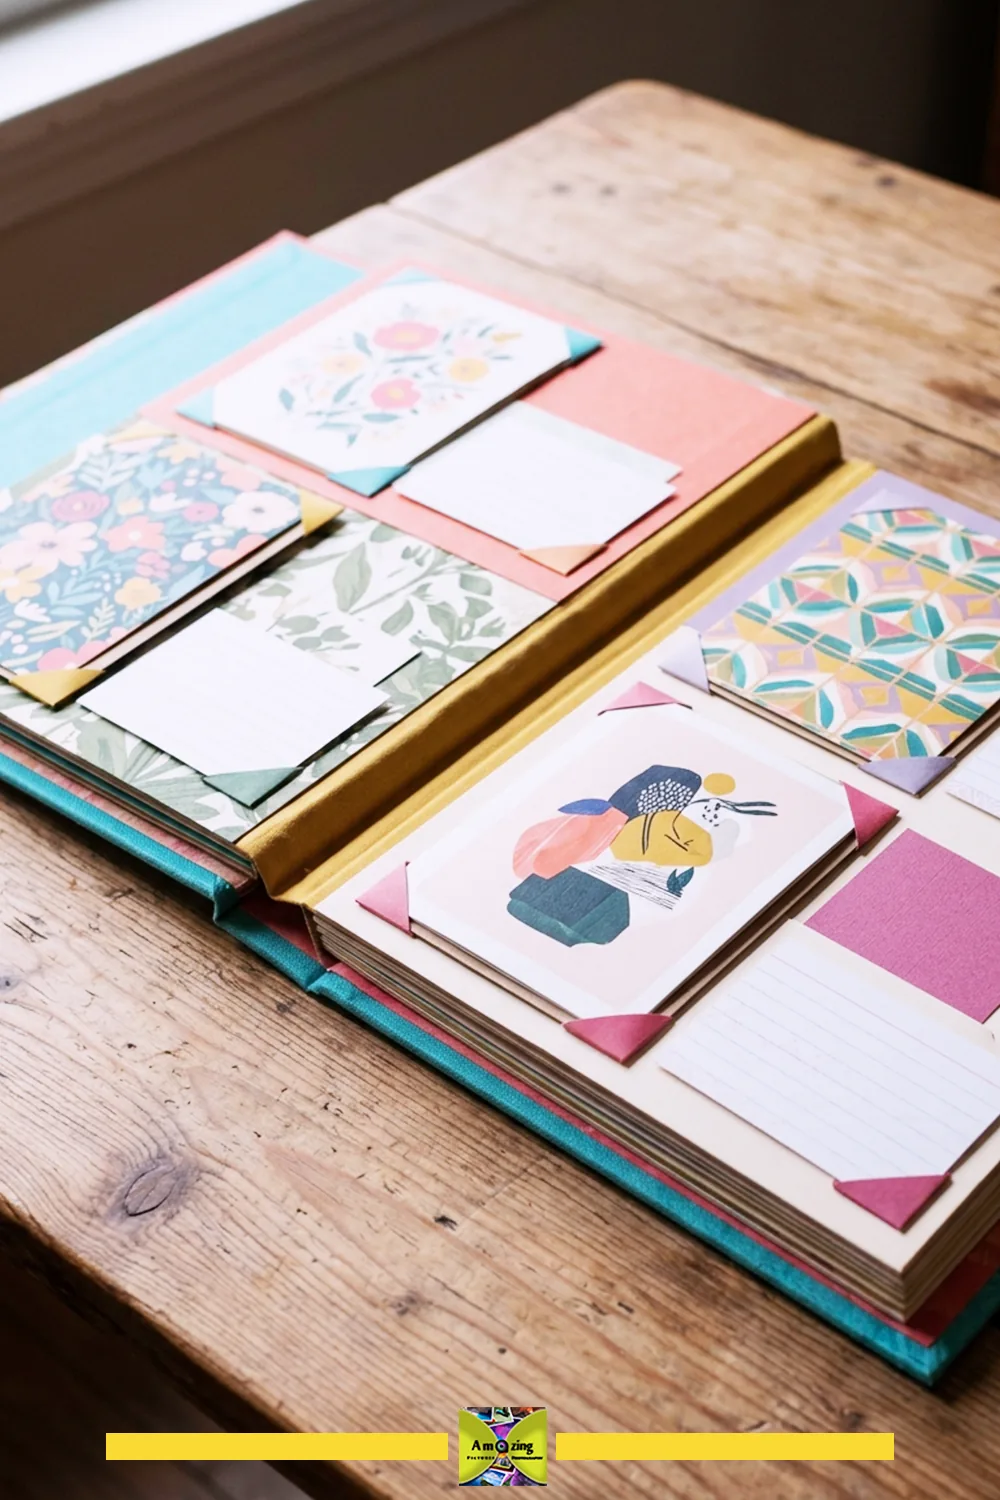
1. Whole-card memory folio
What it looks like: a flat folio of rigid boards covered in card stock, holding whole cards in removable photo corners, with a small index card recording sender and date. Best use: keeping irreplaceable cards together without ever gluing or cutting them.
- Measure your largest card and cut the two boards about 1.25 cm (½ in) larger all around, adjusting the allowance to the actual cards you plan to store.
- Cover each board with the card panel, wrapping the edges and mitering the corners, then press flat until dry.
- Join the two boards with a paper or fabric hinge, leaving a gap so the folio opens flat without binding.
- Mount each card with photo corners — never adhesive directly on the card or on handwriting.
- Add a small index card to each page recording sender, date, occasion, and any known story, with private details kept off the page.
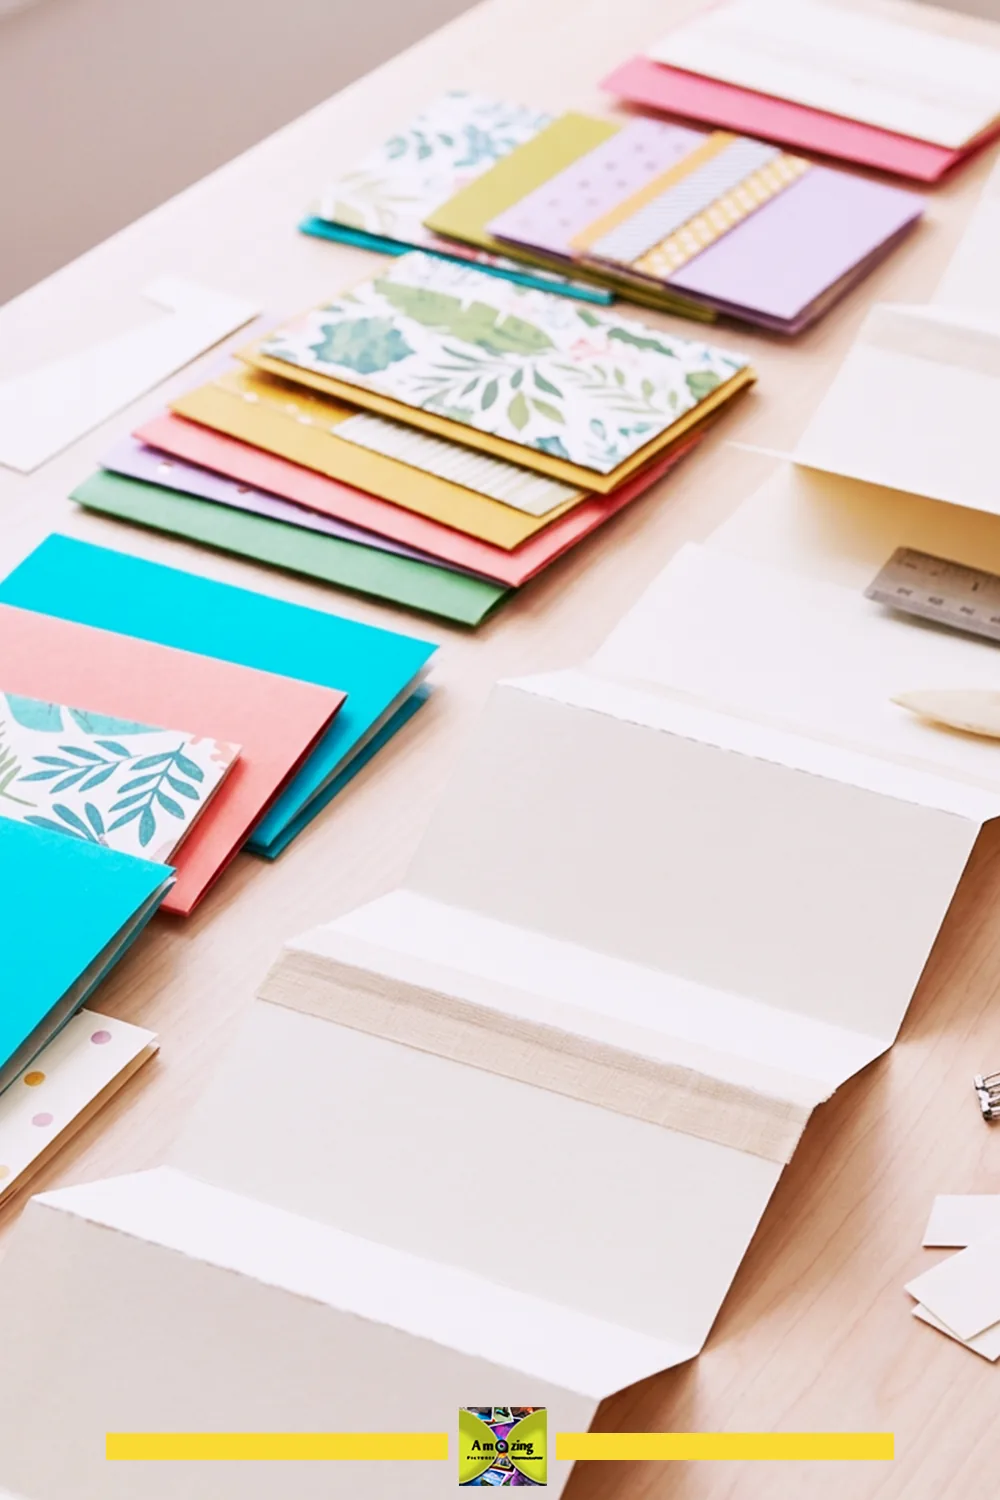
2. Accordion occasion archive
What it looks like: a folded accordion strip of selected card panels, each pocket holding a written context note or a copy of a message. Best use: a compact, browsable archive of ordinary cards from one occasion or one sender.
- Choose panels from cards you are comfortable keeping in the archive; photograph anything you still want to preserve before altering it.
- Cut the backing strip and score the fold lines so the accordion lies flat without cracking the coating.
- Reinforce each fold with a paper or fabric hinge so repeated opening does not split it.
- Attach each panel to a face, keeping handwriting and photographs visible where permission and privacy allow.
- Add a pocket to each face for a written note or a copy of the original message.
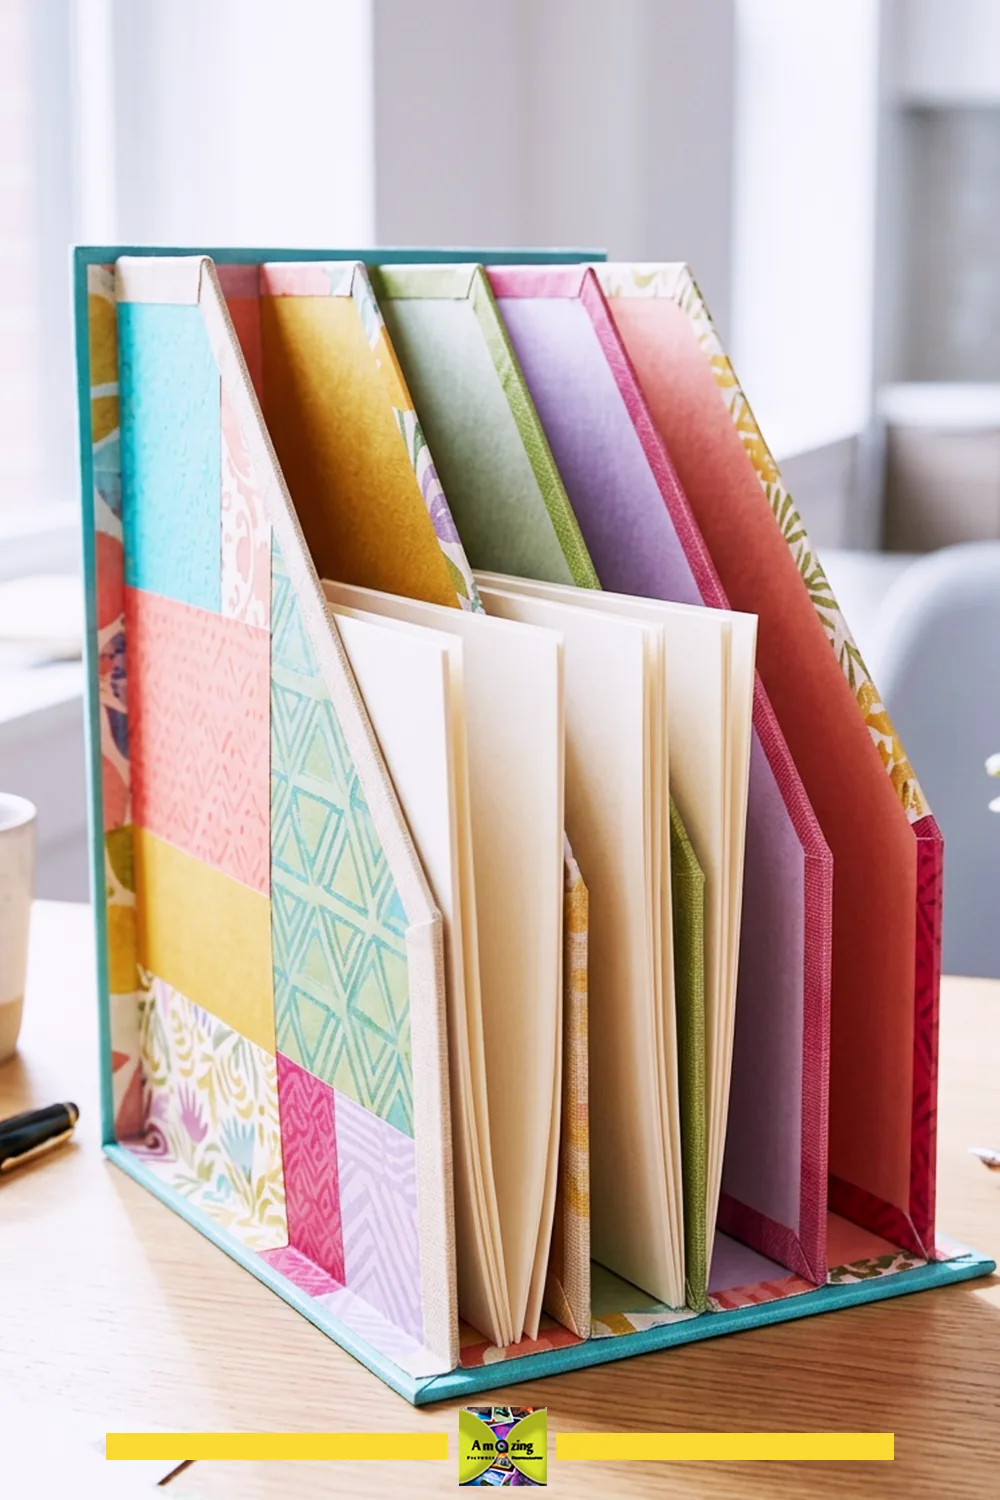
3. Standing correspondence portfolio
What it looks like: a freestanding folder with card-stock dividers, a broad base, and protected folds, holding lightweight note paper. Best use: a desktop holder for cards and notes you want to read, not hide. Competitors rarely cover this.
- Cut the back and base boards so the base is broad enough to keep the portfolio standing — width is what prevents tipping, so confirm the footprint before cutting.
- Hinge the back to the base and cover both with card panels, wrapping edges cleanly.
- Cut divider panels to the portfolio’s inside width and reinforce their lower edge where they meet the base.
- Assemble the dividers, dry-fit note paper, and check the whole thing stands without leaning.
- Weight the base while it dries and test it with lightweight non-fragile contents before use.
Desk and paper organization (projects 4–9)
These projects turn ordinary card fronts into polished paper accessories for a desk or a craft table. Each one keeps the card a meaningful visual or structural component.
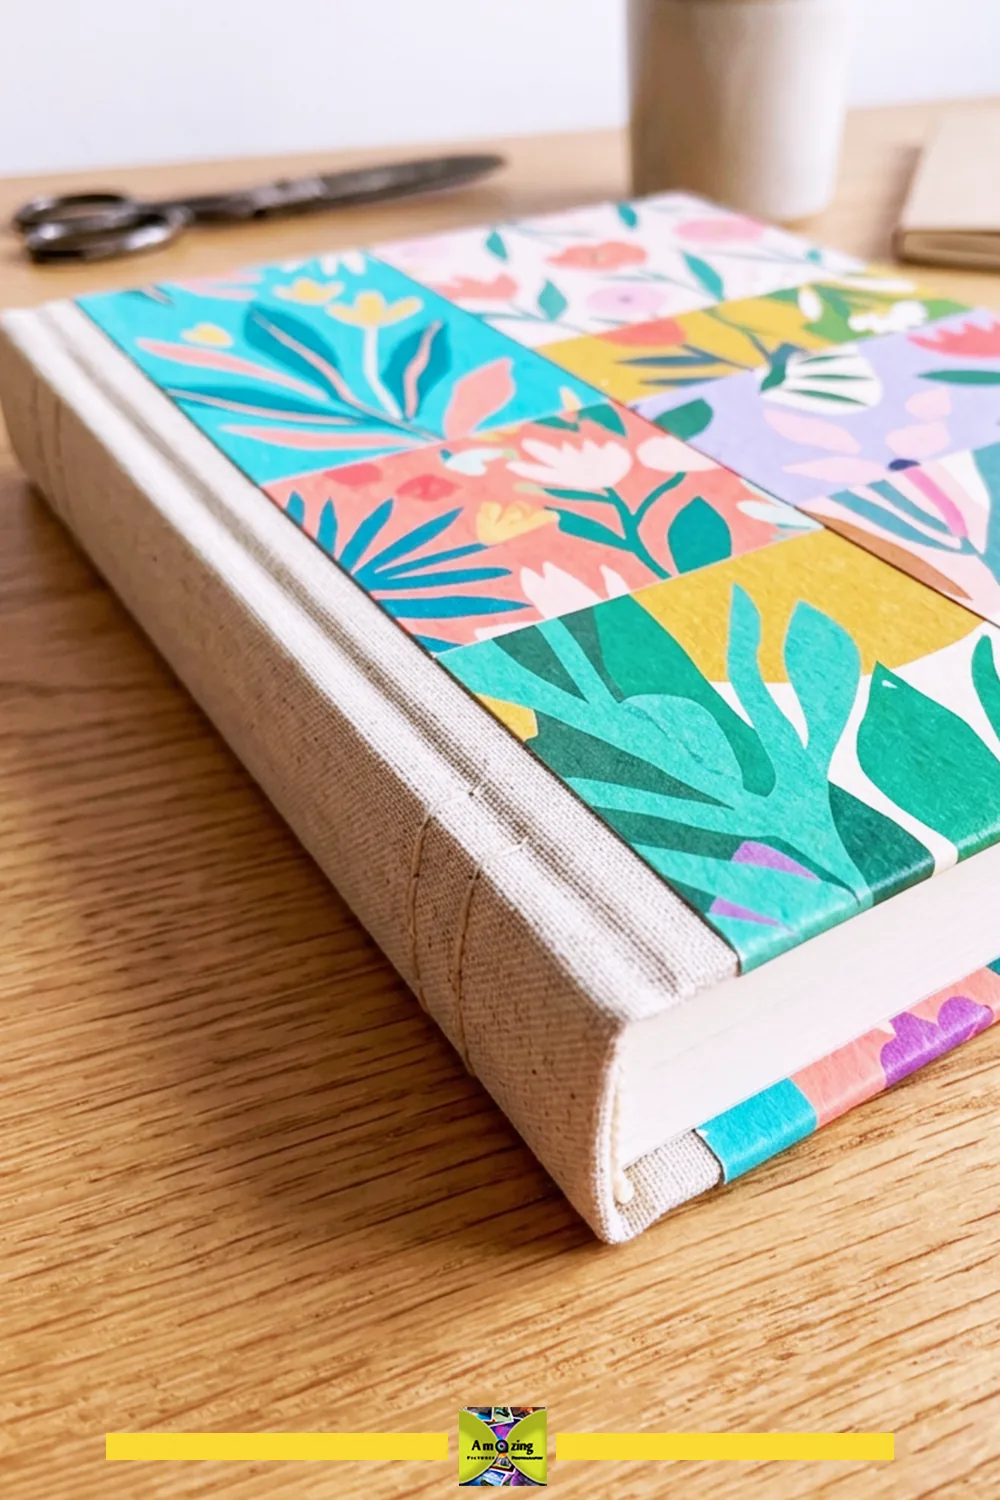
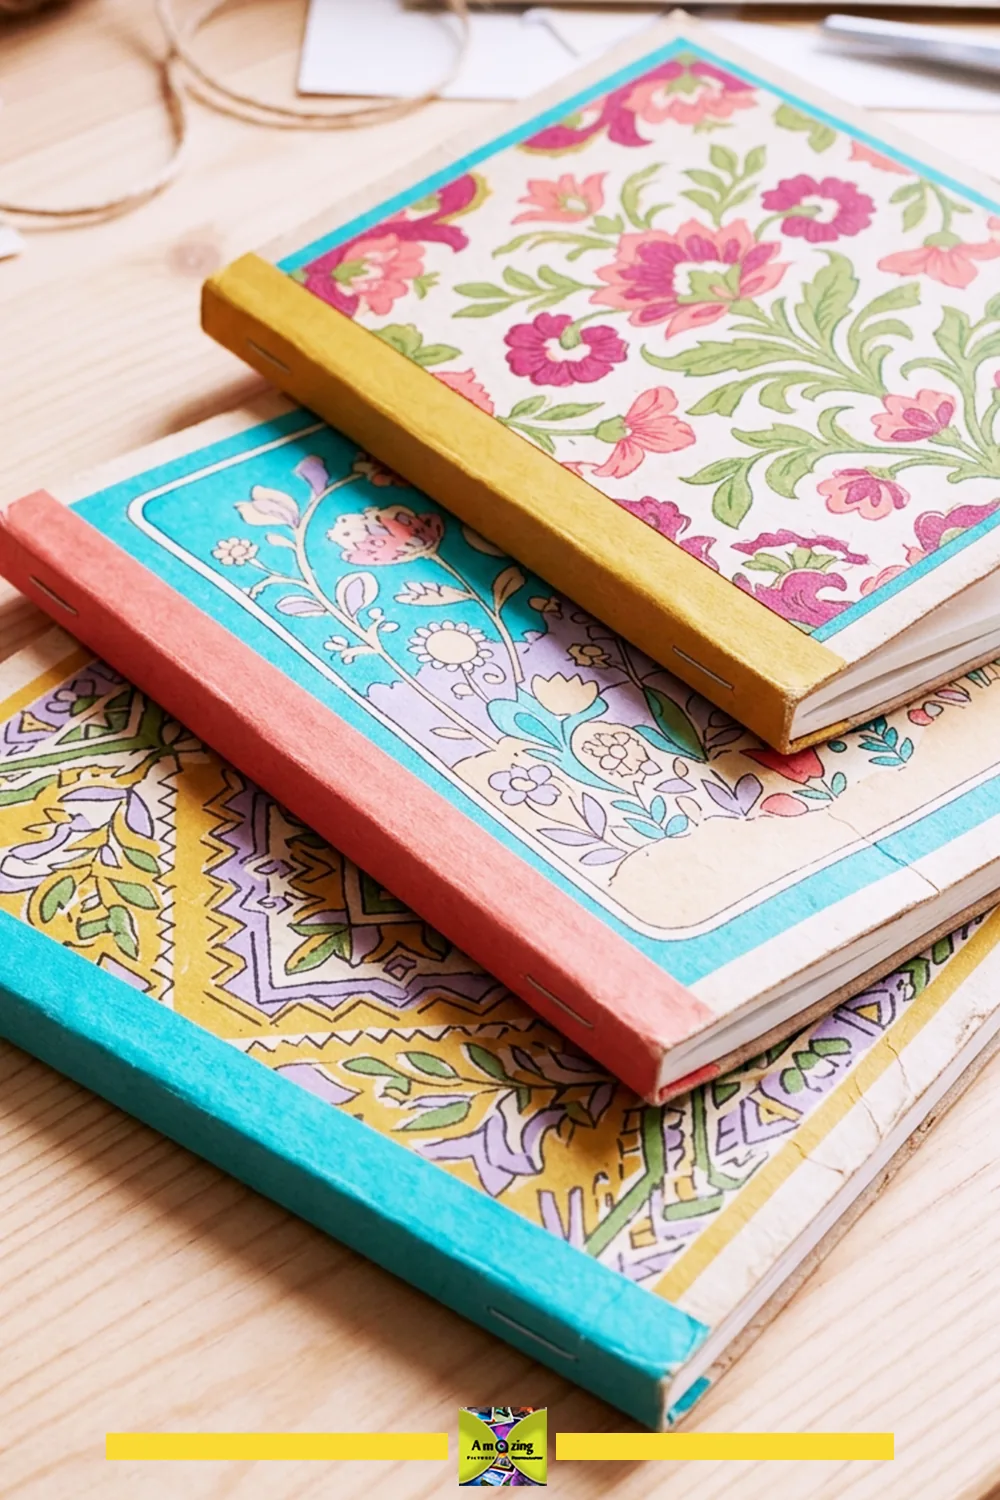
4. Removable journal jacket
What it looks like: a flexible cover made from joined card fronts over a woven backing, sliding onto a journal. Best use: changing the look of a notebook without gluing anything to it.
- Measure the journal’s height, width, and spine, and add clearance so the jacket slides on without binding — confirm the allowance on your notebook.
- Cut the backing larger than the journal, then lay out and join the card fronts over it.
- Hinge the spine section with fabric so the jacket opens with the book without cracking.
- Fold and glue the flap edges over the backing, protecting the raw card edges.
- Slide it onto the journal, open and close several times, and trim anything that binds.
5. Coordinated pocket-notebook covers
What it looks like: fitted covers sized to a specific pocket notebook, with scored folds and reinforced corners. Best use: a set of matching covers for several notebooks you actually carry.
- Measure the notebook and make a full-size paper template with the folds marked.
- Score the fold lines, choosing the scoring side and pressure that does not crack the coating — test on a scrap first.
- Cut the cover with extra allowance for the wrapped edges.
- Reinforce the corners with a folded hem or an extra paper layer.
- Fold, test the fit, and let any adhesive cure fully before sliding the notebook in.
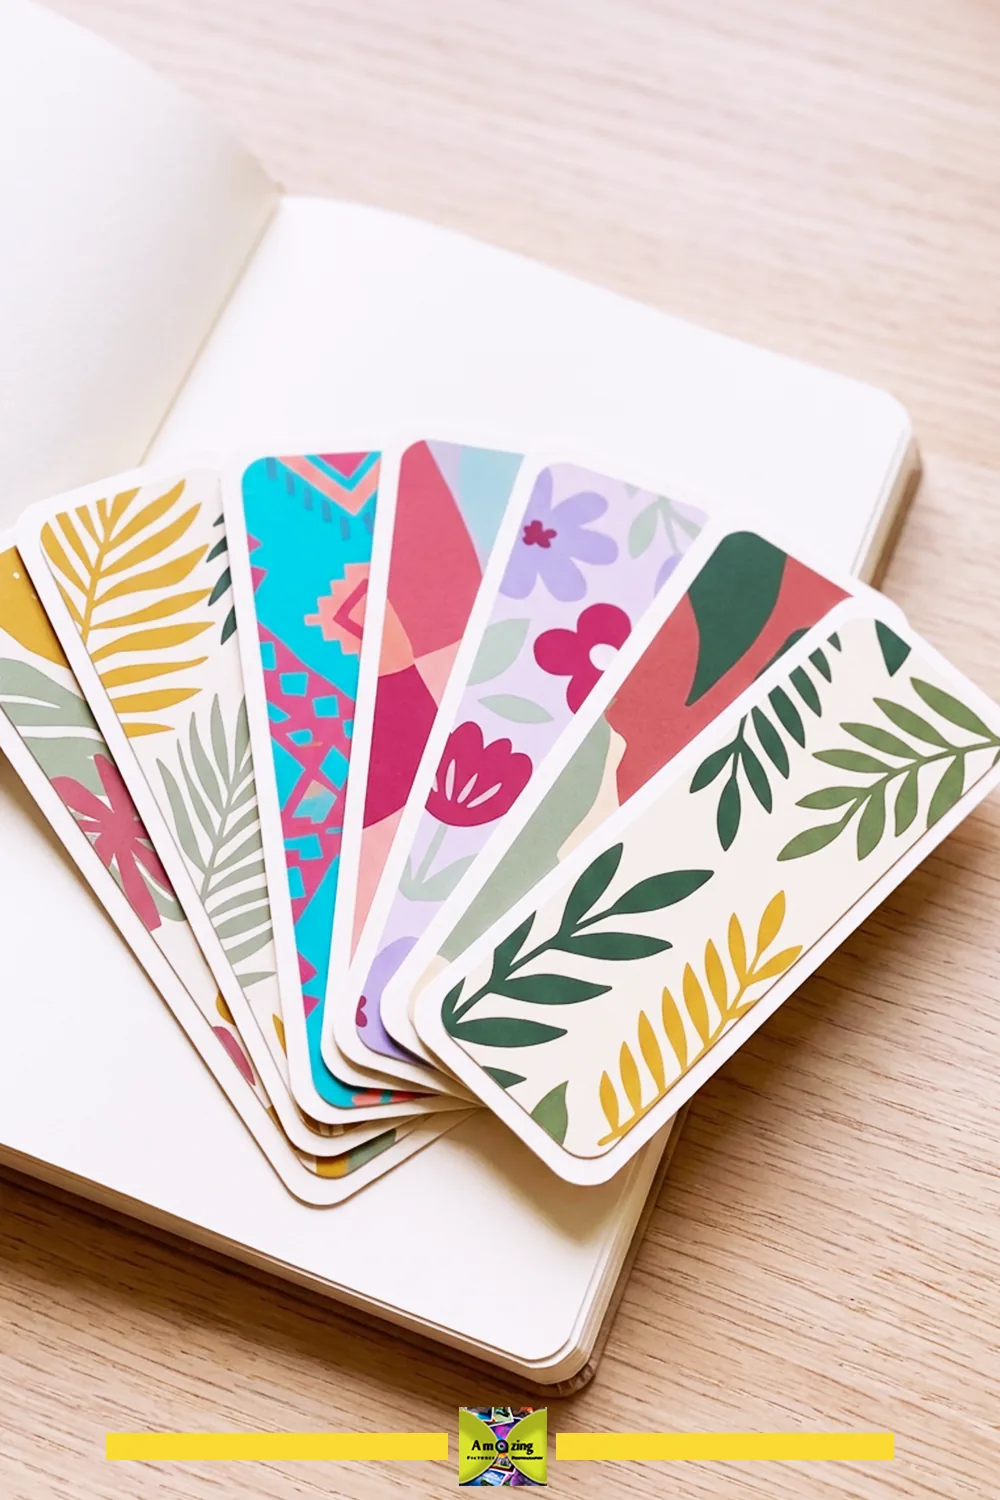
6. Flat illustrated bookmarks
What it looks like: smooth, flat bookmarks with rounded corners, a suitable backing, and restrained decoration. Best use: a small, fast project that keeps pretty card fronts in circulation.
- Cut the card front and a matching backing to the same size — a common bookmark is around 5 cm × 15 cm (2 in × 6 in), but adjust the proportions to suit the artwork and the books you use.
- Glue the backing to the card to stiffen it, then press flat until dry.
- Round the corners with a punch or a careful cut so they do not catch on pages.
- Keep the decoration flat — no bulky pieces that could dent pages.
- Test one in a book overnight and check it leaves no ink or glitter behind before making more.
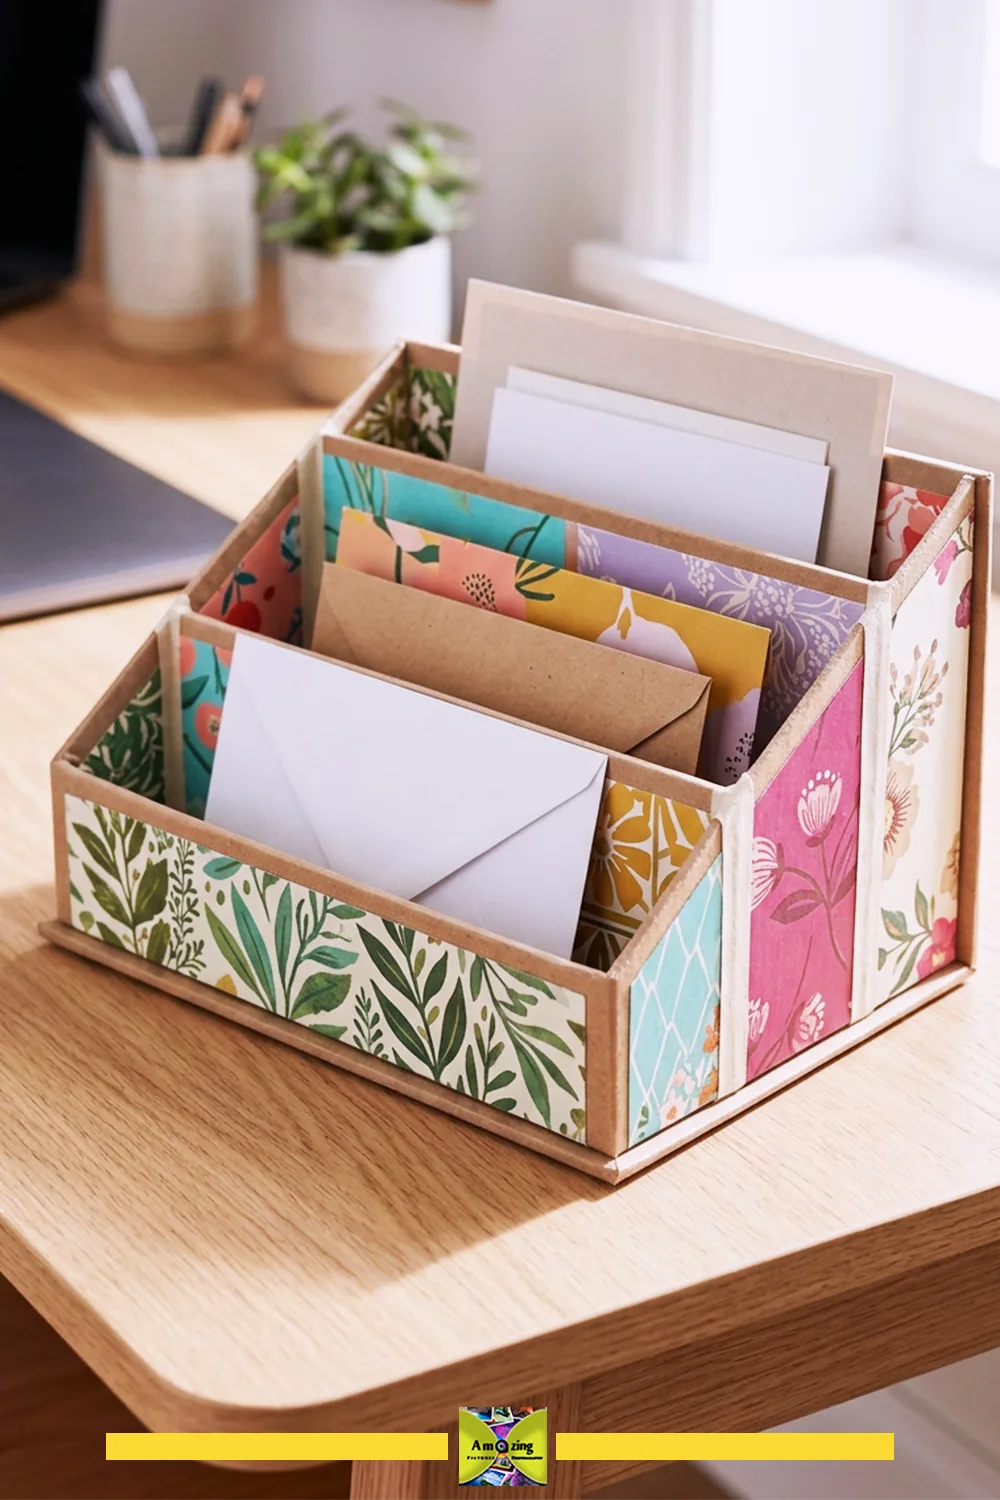
7. Desktop incoming-mail sorter
What it looks like: a set of compartments built from laminated card panels over a rigid reclaimed base. Best use: sorting incoming mail and notes with a conservative, tested capacity.
- Lay out the compartments as a full-size pattern with square construction and a stable base.
- Cut the base and the partition panels, reinforcing every slot and junction.
- Laminate the card panels onto the partitions, pressing each layer flat until dry.
- Assemble the sorter, check it is square, and weight it while the adhesive cures.
- Load it gradually with lightweight mail, and retire it if the partitions bow or the joints separate.
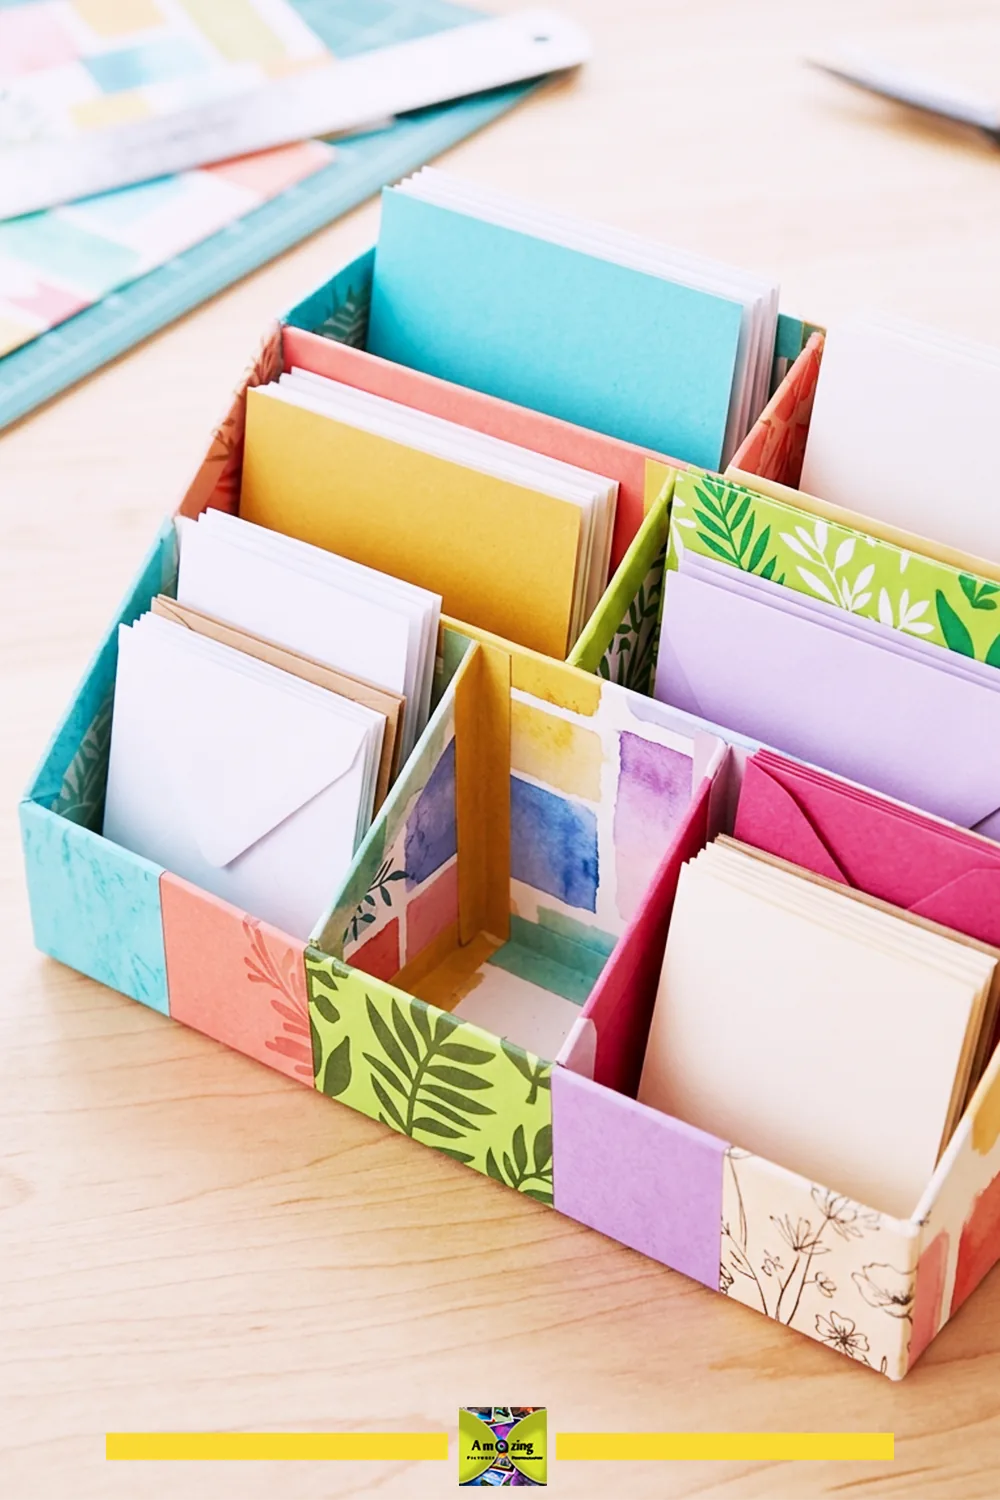
8. Compact note-card and envelope holder
What it looks like: a small box with measured compartments for note cards and envelopes. Best use: keeping dry stationery sorted on a desk.
- Measure your note cards and envelopes, and build the compartments to fit them — confirm every dimension against the real items.
- Cut the box and divider panels with a full-size pattern.
- Reinforce each junction with an extra paper strip or tab, then assemble square.
- Weight the box while it dries, then dry-fit the stationery.
- Use it for dry stationery only, and empty it before moving.
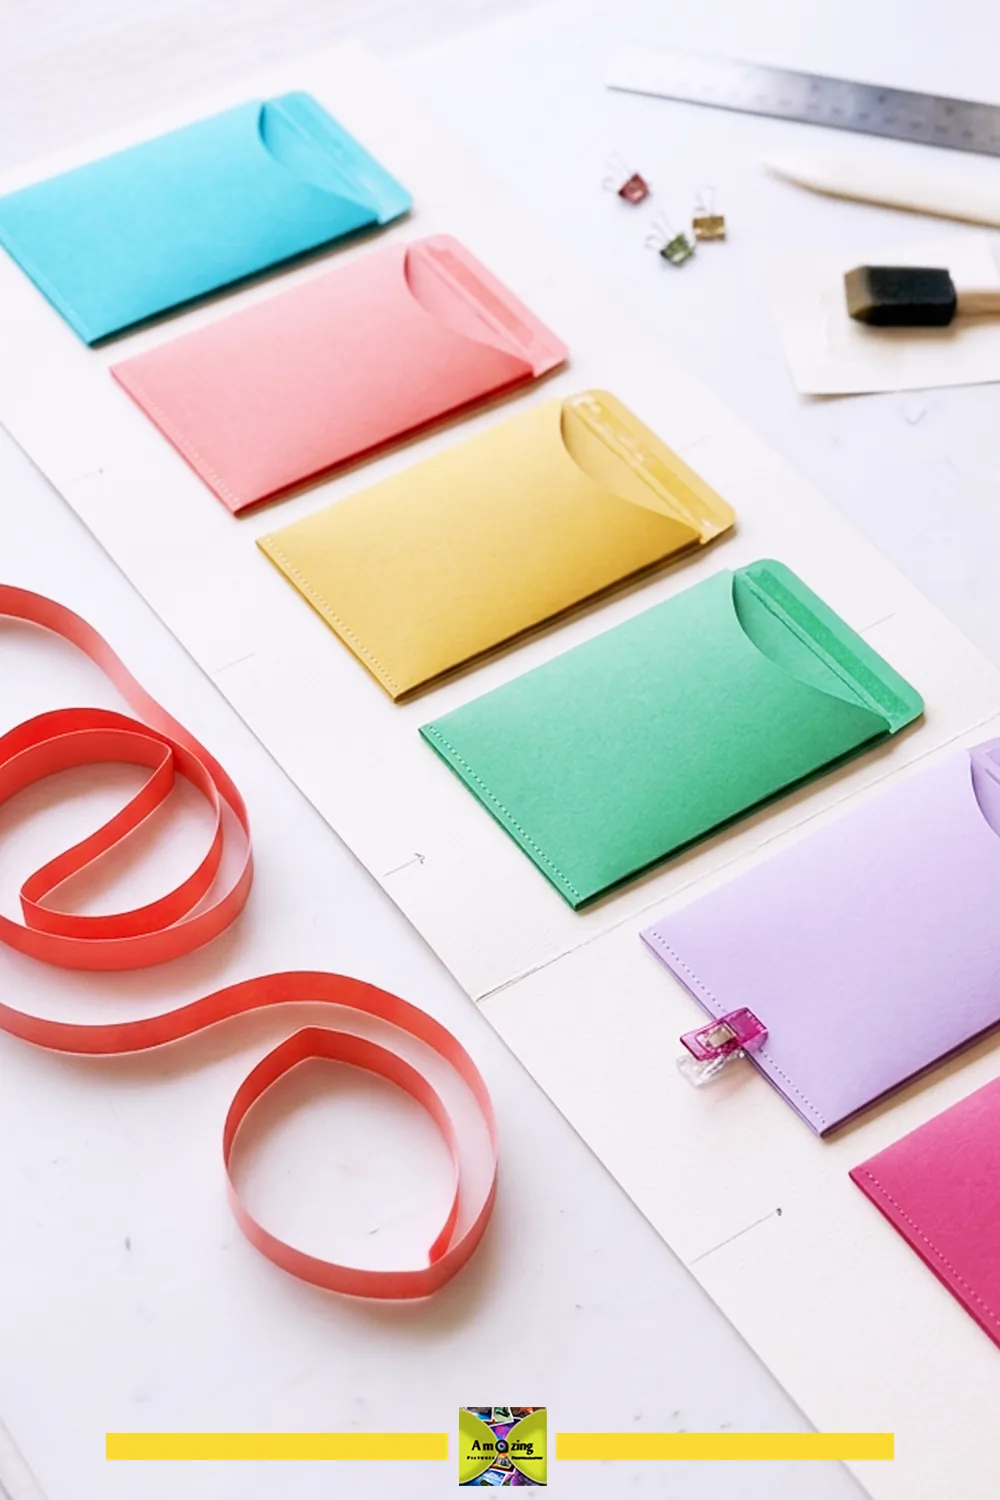
9. Roll-up paper-template organizer
What it looks like: a flexible backing with card-stock sleeves holding lightweight paper templates or stencils, rolling up for storage. Best use: keeping paper patterns and stencils flat and sorted — a project competitors barely cover.
- Measure your largest template and cut the backing so every sleeve clears it with room to slide in.
- Cut card panels into sleeves and glue three edges down, leaving the top open — keep the contents to lightweight paper only.
- Reinforce the sleeve edges so they do not tear when templates slide in and out.
- Add a ribbon closure at the roll, and test that the roll stays closed without crushing the templates.
- Roll and unroll a few times, then check the sleeves have not shifted.
Reusable gift components (projects 10–11)
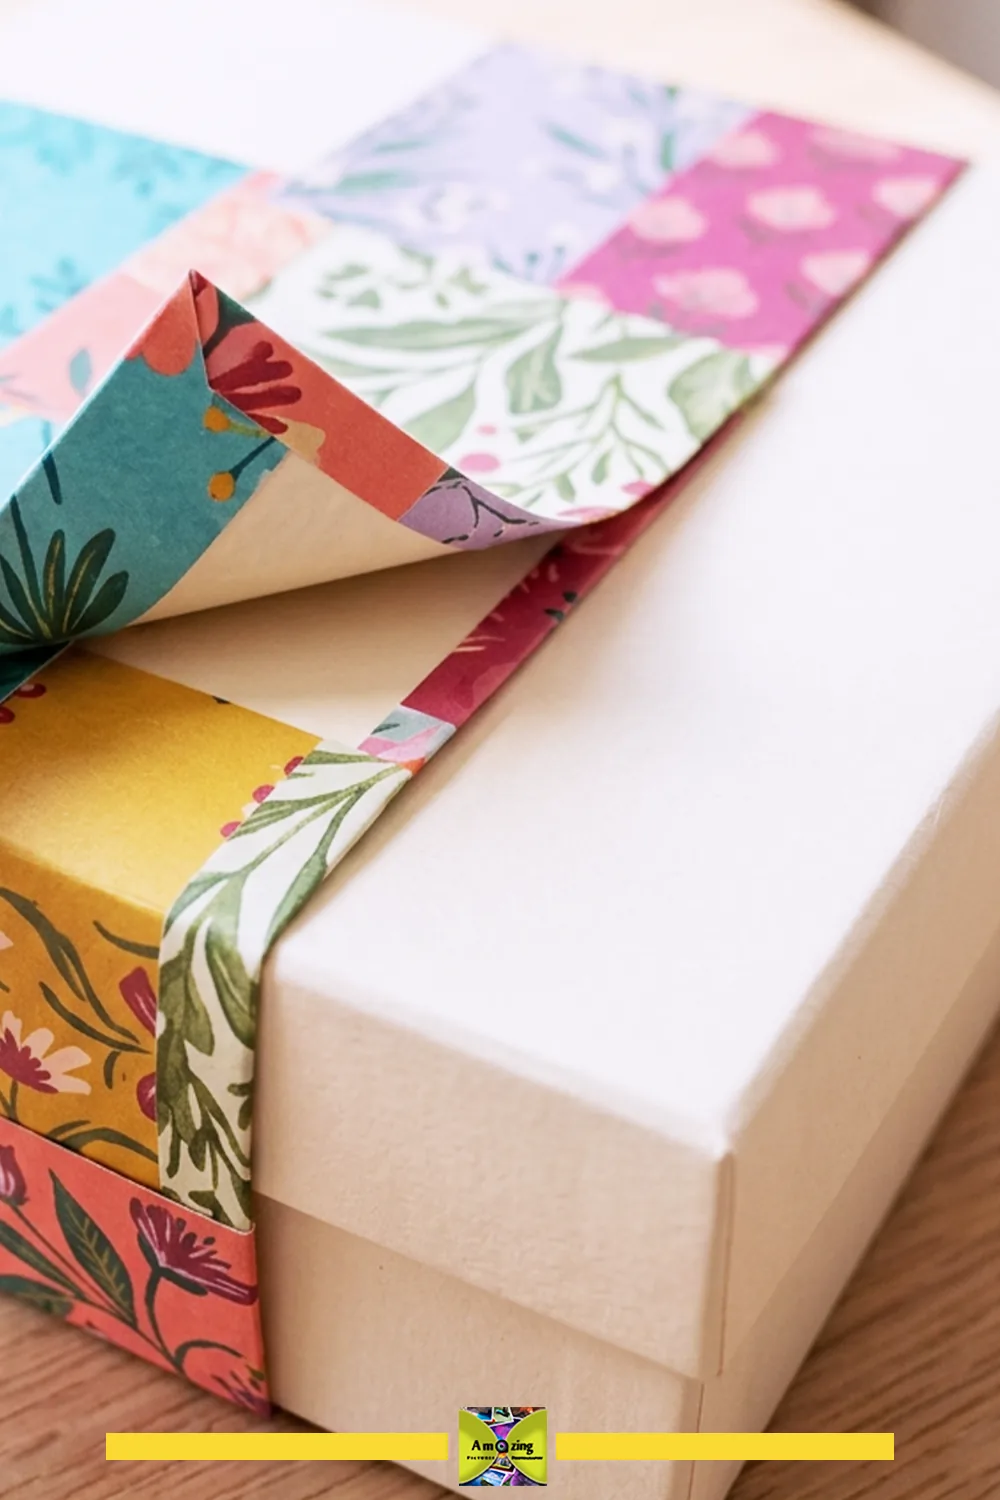
10. Reusable flat gift bands
What it looks like: a flat band of joined card panels sized to a specific box, sliding on and off easily. Best use: a reusable wrap accent that replaces ribbon on a box you reuse.
- Measure the box’s circumference and depth, and cut the band to slide on and off without tearing — confirm the length on the real box.
- Join card panels into one long band, overlapping the seams and pressing flat.
- Back the band so the printed side stays protected and the band keeps its shape.
- Finish the ends so they do not fray or scratch the box.
- Test the fit, then store the band flat between uses.
11. Decorative gift-bag reinforcement panels
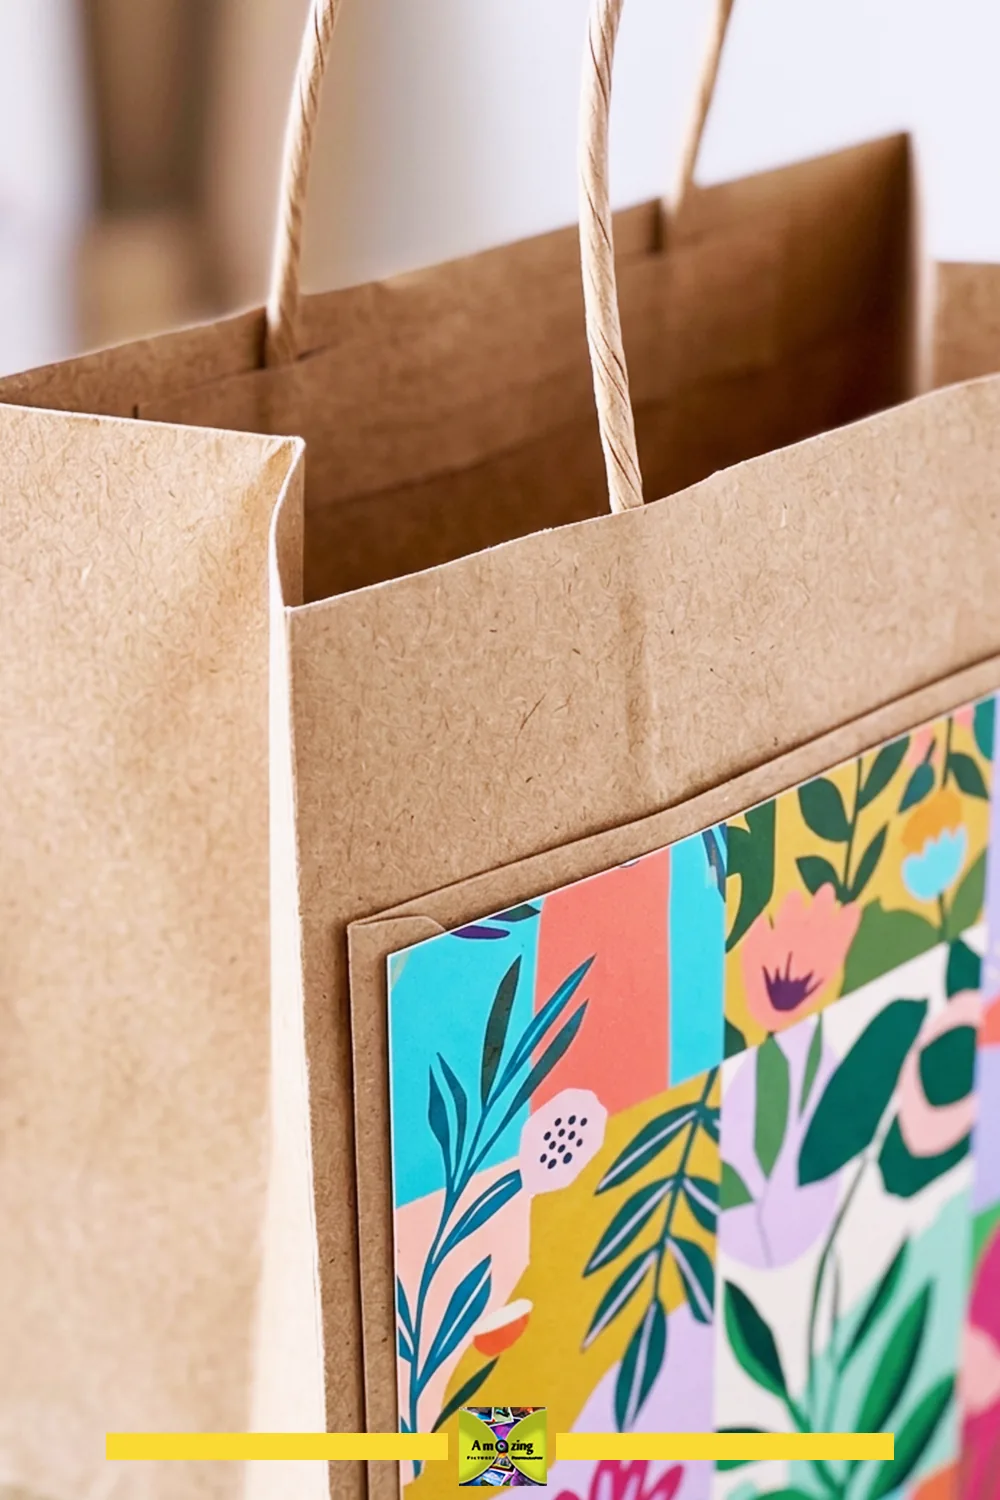
What it looks like: card-stock panels applied to a sound reclaimed paper bag, with reinforced top edges. Best use: dressing up a plain paper bag that is still structurally sound.
- Inspect the bag and reject it if it is torn, damp, or worn through — the panel decorates, it does not repair.
- Measure a panel to sit below the bag’s rim and reinforce the top edge where it folds.
- Glue the panel flat, smooth through a clean sheet, and press until dry.
- Keep the bag’s own handles and rim independent of the decorative panel — the panel is never a handle or a structural patch.
- Use the bag for lightweight, dry contents only.
Small home organizers (projects 12–14)
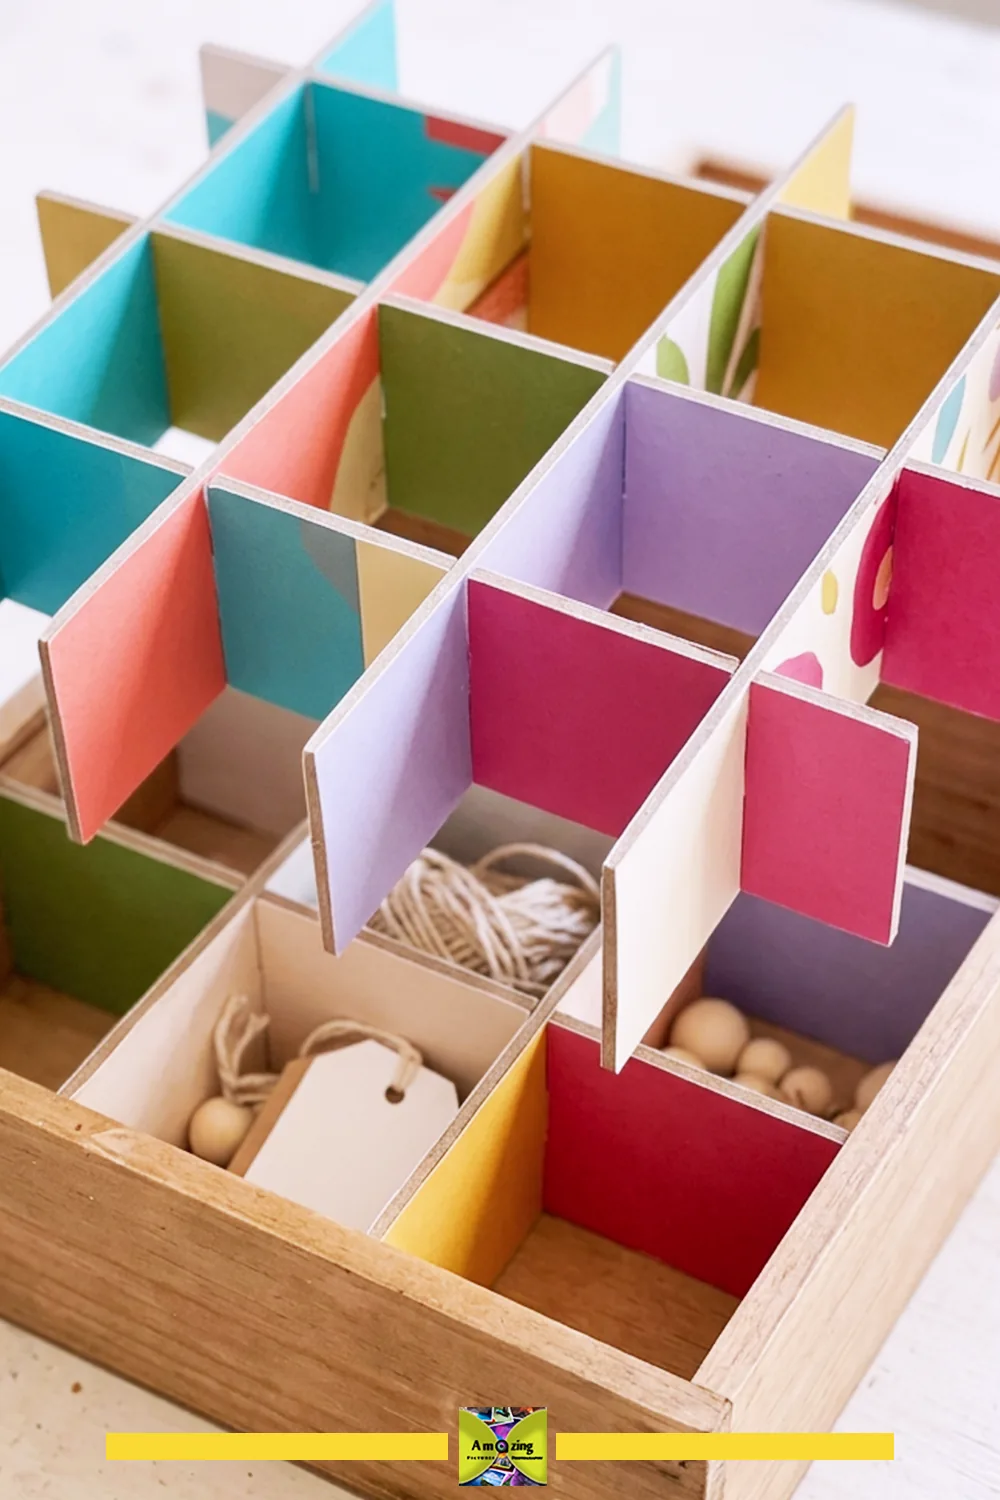
12. Removable keepsake-box divider system
What it looks like: interlocking card panels that divide an existing box into compartments, removable as one piece. Best use: organizing a keepsake or craft box without altering the box itself — a project competitors rarely cover.
- Measure the box interior and draw the divider grid to scale on a full-size pattern.
- Cut the divider panels and the interlocking slots, leaving smooth edges.
- Reinforce each slot so the joints do not tear under use.
- Assemble the grid, drop it into the box, and trim until it sits without forcing.
- Keep it to lightweight, dry contents, and lift the whole grid out rather than tugging a single divider.
If you enjoy this kind of paper-structure project and want to build a box from scratch rather than fitting dividers into an existing one, our separate guide to turning waste paper into a treasure chest takes the construction further.
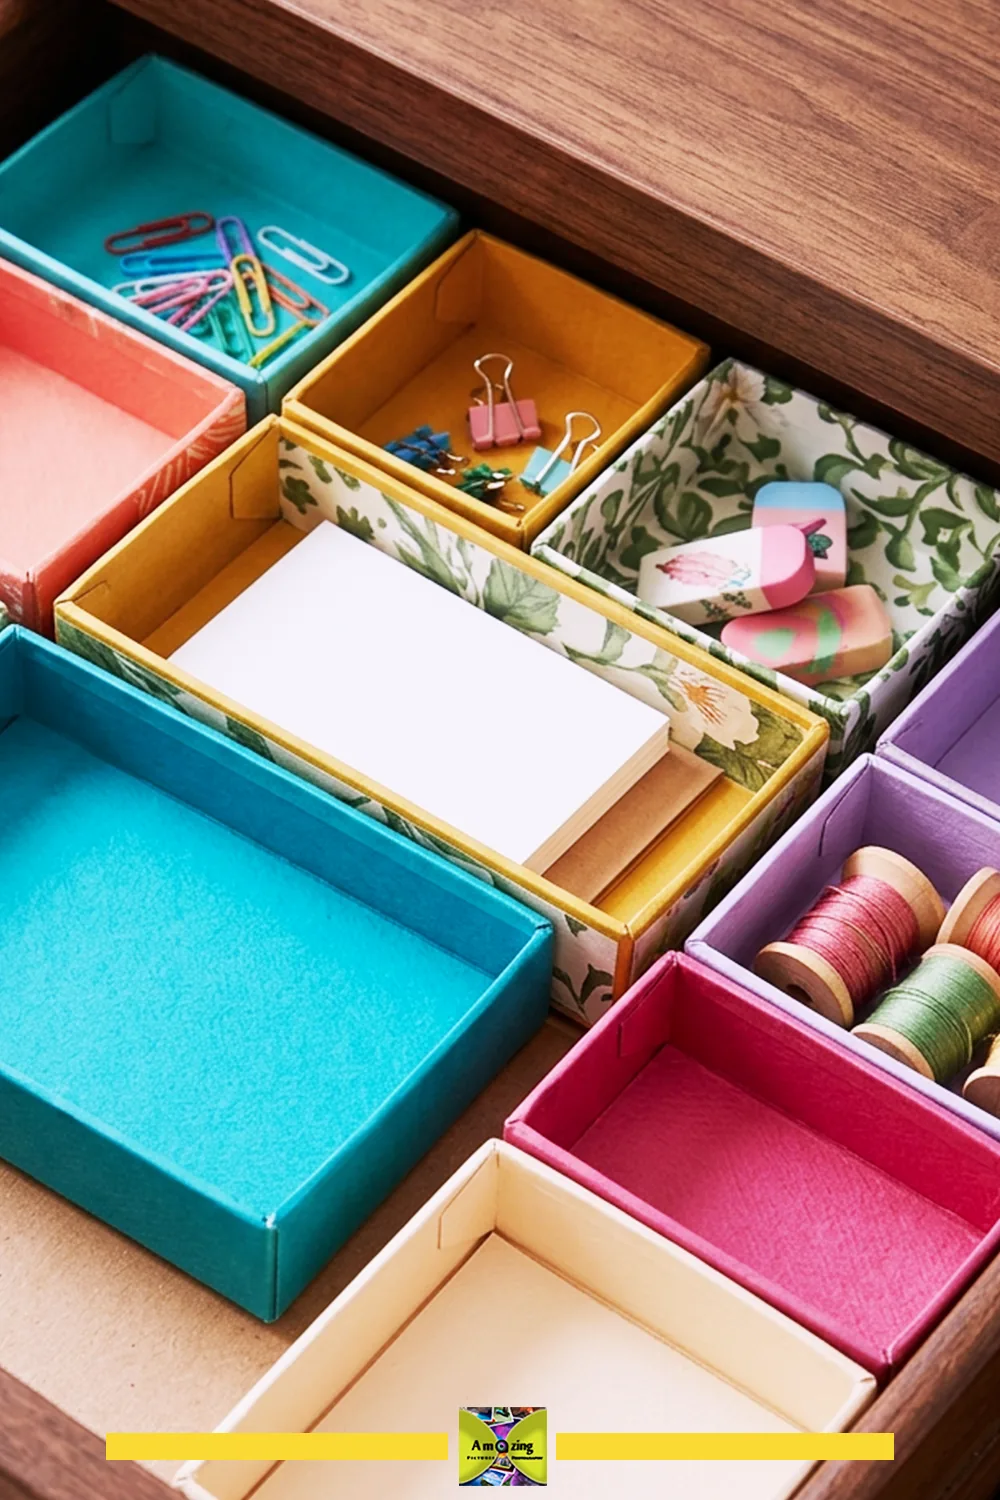
13. Fitted drawer sorting trays
What it looks like: reinforced card-stock trays over a removable backing, sized to a specific drawer. Best use: sorting light craft or desk supplies in a drawer that is otherwise a jumble.
- Measure the drawer and its contents, and lay out the tray grid to fit both — confirm the drawer’s inside depth before cutting.
- Cut the tray sides and base, reinforcing each junction.
- Assemble the trays over the removable backing and weight them while they dry.
- Drop the set into the drawer and test that the trays do not shift or bind when the drawer opens.
- Load them gradually with lightweight dry supplies, and retire a tray if it bows or the backing warps.
14. Small woven desktop basket
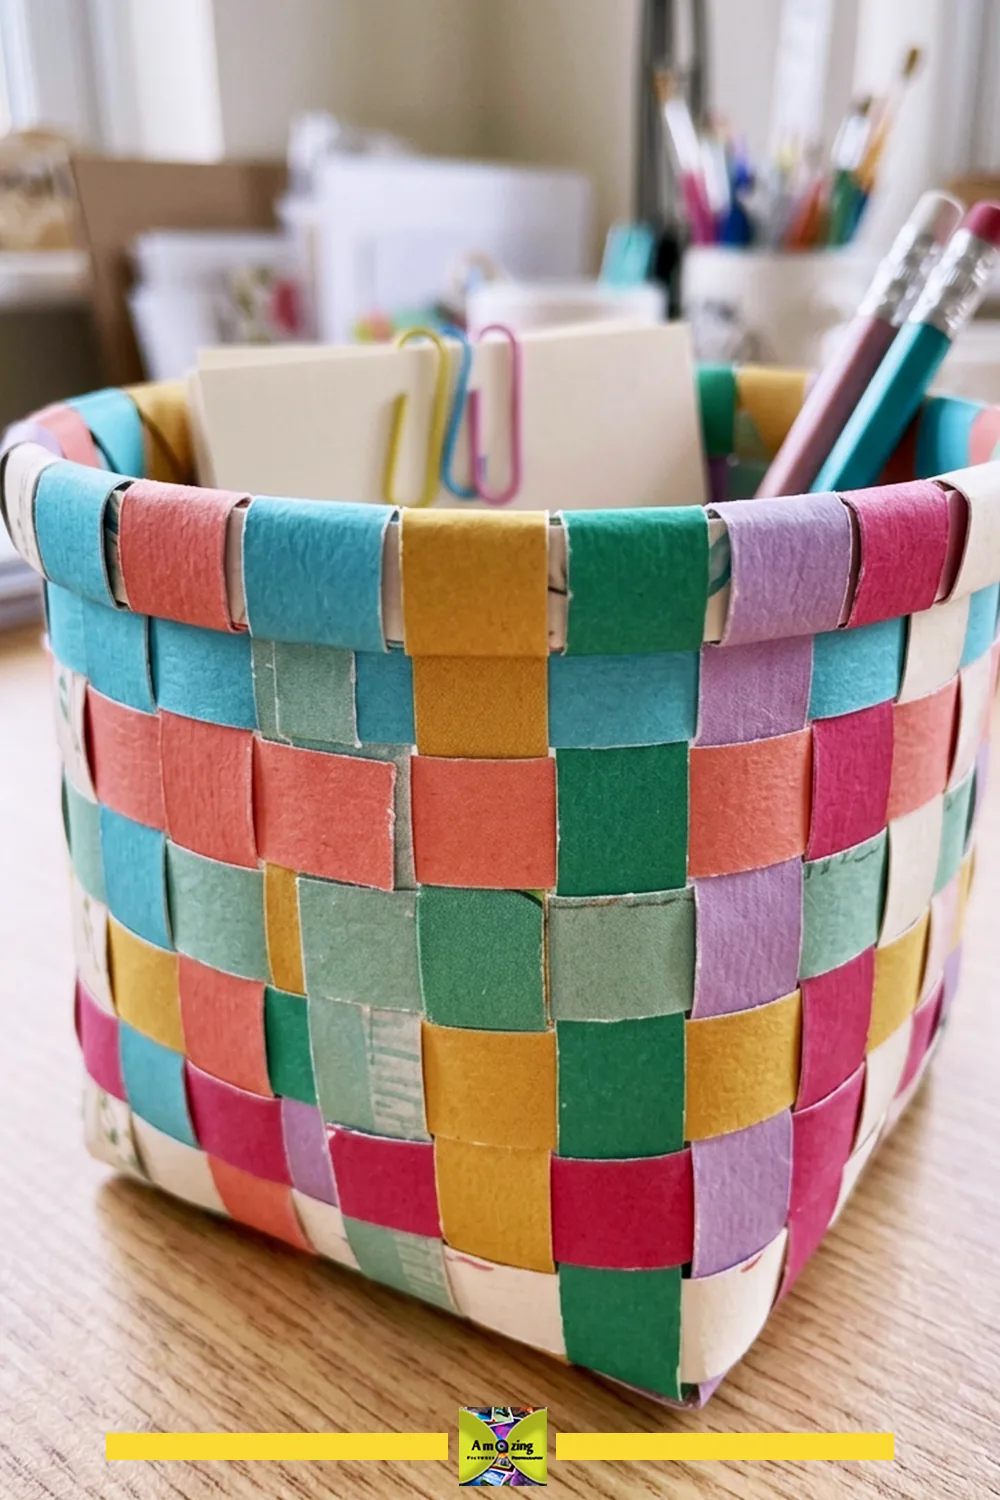
What it looks like: a small woven basket from tested card strips over a separate rigid base, with protected strip ends and a reinforced rim. Best use: corralling light desk supplies on a tabletop.
- Cut a full-size strip plan and sequence, keeping every strip the same width so the weave stays even.
- Fold-test a few strips before weaving, and reject any that crack or split.
- Weave the sides over the rigid base, tucking and protecting the strip ends.
- Reinforce the rim so the top edge does not open under handling.
- Use it for lightweight dry desk supplies only, and retire it if strips split, joints slip, the rim opens, or the base distorts.
Make mixed cards look deliberate
Mixed greeting cards can look chaotic or intentional — the difference is control, not luck. Limit each project or coordinated set to about two to five dominant colors, and group cards by finish and thickness before you group them by color. Choose one visual theme — botanical illustration, geometric pattern, typography, landscapes, or restrained seasonal imagery — and pick one main card image as the focal point.
- Pair detailed artwork with plain neutral backing so it can breathe.
- Repeat panel dimensions, border widths, and corner shapes across the set.
- Align stripes, printed borders, and directional motifs; mirror focal placement on paired objects.
- Use controlled patchwork where exact matching is impossible.
- Build light-to-dark, warm-to-cool, or muted-to-bright progressions instead of random placement.
- Coordinate backing paper, bindings, closures, thread, and visible hardware.
- Conceal reinforcement, raw board edges, adhesive, and exposed tabs.
- Limit glitter, ribbons, gems, foam shapes, and unrelated embellishments.
- Preserve readable handwriting only when permission and privacy allow it.
- Photograph glossy cards against a matte neutral background so they read clearly.
In close-up photos, show the paper thickness, the folds, the protected edges, the clean corners, the hinges, and the reinforcement — those are the details that make a card project look finished rather than pasted together.
Care, maintenance, and when to retire a project
Keep projects dry and away from direct sunlight, excessive heat, pests, and crushing. Dust only through a method compatible with the card, ink, coating, and embellishments — no universal washing, disinfecting, polishing, or stain-removal instructions apply. Test for ink, glitter, adhesive, dye, coating, and odor transfer before a project touches books, stationery, fabric, painted furniture, or anything valuable.
Empty organizers before moving them, and support rigid bases rather than lifting by paper dividers or decorative panels. Check folds, hinges, edges, corners, slots, adhesive joints, closures, bases, and protective layers regularly. Repair early lifting or splitting only when the repair will not damage meaningful content. Retire a project that develops mold, a persistent odor, active pest evidence, loose components, exposed sharp backing, severe warping, delamination, brittle folds, or failed joints. A practical maintenance habit is to inspect paper projects every few months and again before or after seasonal storage. Pay closest attention to folds, exposed corners, glued edges, hinges, and any point that carries repeated handling.
Troubleshooting common greeting-card craft problems
Most failures have a specific cause, and most are caught in the test phase if you test on a scrap first.
- Discovering an important message after cutting begins: stop, photograph what remains, and preserve it intact. You cannot un-cut, but you can stop before more is lost.
- Unclear ownership or permission: ask before you cut or publish; when in doubt, return or preserve.
- Private information in the layout: crop, cover, reverse, redact, or exclude it before any photo or gift.
- Uncertain reproduction rights: treat the artwork as copyrighted; avoid publishing or selling without rights research.
- Unknown card construction: test on an expendable section, or set the card aside rather than guessing.
- Hidden electronic components: stop cutting and handle the card as electronic, not paper.
- A leaking, swollen, or corroded battery: keep it away from children and pets and follow the manufacturer’s or local hazardous-waste authority’s instructions.
- Mold, pest evidence, or persistent odor: reject the card and handle it per local guidance.
- Old tape refusing to release: do not force it; leave it or set the card aside rather than tearing the surface.
- Loose glitter or flocking shedding: exclude or remove the shedding area rather than coating over it.
- A photographic layer delaminating: reject the card; moisture and cutting make it worse.
- Laminated stock splitting at a fold: score more lightly, fold with the grain, or avoid folding that stock.
- A card refusing to lie flat: rest it under gentle weight between clean sheets; do not iron or soak it.
- An old fold cracking when opened: support the fold and avoid re-flexing it; do not force brittle stock.
- Scissors creating crushed edges: switch to a craft knife with a fresh blade for that stock.
- A craft knife tearing rather than cutting: replace the blade and make several light passes.
- A paper trimmer failing on layered card: cut layered stock by hand on a mat instead.
- A punch jamming in thick stock: punch a thinner sample and test before the real panel.
- A score line cutting through the coating: lighten the pressure; score to compress, not to cut.
- A folded corner becoming bulky: miter or trim the corner before folding.
- Ink transferring during an adhesive test: do not use that wet adhesive on that ink; switch to a dry method.
- Wet adhesive causing curl: use less, or switch to a dry film or tape.
- Adhesive showing through light paper: use a thin, even layer or an opaque backing.
- Glossy surfaces refusing to bond: try a tacky or solvent adhesive, or scuff lightly only if the card is expendable — and test first.
- Bubbles or dry spots beneath a panel: smooth from the center out through a protective sheet and press evenly.
- Edges lifting after drying: re-press the edges, or reinforce them with a wrap or hem.
- Backing board warping: apply adhesive evenly, weight it while it dries, and reject damp board.
- A paper hinge cracking: widen the hinge or switch to fabric at that joint.
- Dividers fitting too loose or tight: trim gradually; a snug, smooth slot beats a forced one.
- A journal cover binding at the spine: add spine clearance and re-test the open position.
- A bookmark catching on pages: round the corners and keep the body flat.
- A portfolio leaning: widen the base or lighten the contents.
- Mail-sorter partitions bowing: reinforce the base junctions and reduce the load.
- Drawer trays shifting: add a small lip or snug the fit to the drawer.
- Gift bands cracking during removal: loosen the fit and store bands flat.
- Bag panels peeling at the edges: reinforce the rim and keep the panel away from the fold.
- Woven strips splitting: use same-weight strips and protect the ends.
- A coating becoming cloudy, streaked, or tacky: it was applied too thick or too wet, or the stock rejected it — strip is rarely possible, so test before coating next time.
- Finished projects looking chaotic: cut the palette to two or three colors, repeat one shape, and add plain neutral backing.
Safety when repurposing old greeting cards
A few rules keep this hobby safe and honest.
- Resolve ownership, sentiment, privacy, and rights first. Do not cut or publish a card until you have sorted those questions.
- Use only clean, ordinary, structurally sound cards. Reject moldy, flooded, chemically contaminated, pest-damaged, battery-damaged, or deeply soiled material.
- Isolate electronic and battery-bearing cards from your paper work and from children and pets.
- Work on a stable cutting mat in a well-lit area, cutting away from your body and keeping your hands outside the blade, punch, and scoring paths.
- Secure small pieces flat rather than holding them while cutting or punching.
- Retract, cap, store, and dispose of blades safely.
- Avoid open-flame testing, burning, heated cutting, ironing, and uncontrolled steaming on unknown coatings.
- Ventilate and follow labels exactly for adhesives, sprays, coatings, and cleaners.
- Keep paper, dust, adhesives, solvents, and coatings away from heat, sparks, and flame.
- Keep blades, staples, pins, batteries, electronic parts, cords, glitter, punched pieces, and detachable decorations away from children and pets.
- Make no direct food-contact, archival, waterproof, heat-resistant, electrical, medical, protective, child-safe, pet-safe, structural, or load-bearing claims.
- Retire a project when the paper, backing, joints, closures, or components begin to fail.
Recycling and donating: what you can actually claim
Greeting cards can contain virgin or recycled paper fiber, plastic film, photographic layers, lamination, foil, glitter, flocking, fabric, ribbon, foam, adhesives, dyes, printing inks, varnish, and — in some cases — batteries, speakers, lights, wiring, and magnets. That mixture is exactly why “just recycle it” is not always true.
Plain paper cards and envelopes are generally recyclable in the paper stream. Glittered cards are not — glitter is a microplastic that cannot be separated from the paper fibers, and several municipal programs explicitly reject glittered and foiled cards. Photographic and laminated cards are often rejected from curbside programs too. When a card has a glittery, foiled, or laminated front and a plain paper back, one common tip is to tear off the decorated front and recycle the plain back. Remove batteries, ribbons, bows, and other embellishments first.
On donations, the picture has changed recently. The St. Jude’s Ranch for Children recycled-card program — for decades the most-repeated destination for used card fronts — concluded in 2025 after about 35 years and no longer accepts mailed cards. Older articles still list its Boulder City, Nevada address and “fronts only” rules; do not send cards there. Hallmark accepts old Hallmark-brand cards for its archives and display use. Beyond that, local schools, senior centers, churches, and reuse organizations vary — call ahead to confirm a program currently accepts the exact material you have before mailing anything.
Local curbside-paper, specialty-paper, battery, electronic-waste, household hazardous-waste, donation, and disposal rules differ. Confirm acceptance with card manufacturers, local governments, recycling authorities, battery programs, electronic-waste services, charities, reuse organizations, and receiving facilities before making any claim. Do not describe a glued, coated, laminated, glittered, fabric-backed, or electronically enhanced project as recyclable or compostable. Use precise words — “reuse,” “repurpose,” “use an unwanted card,” or “give existing card stock another practical use” — rather than “zero-waste” or “eco-friendly.”
An intact card can have more value through preservation, return to the sender, family sharing, documentation, or donation than through crafting. Choose the projects you will actually use, and avoid storing unlimited card scraps without a plan.
Frequently asked questions
Clean, ordinary cards become memory folios, accordion archives, correspondence portfolios, journal and notebook covers, bookmarks, a mail sorter, a note-card holder, a roll-up template organizer, gift bands, gift-bag panels, keepsake-box dividers, drawer trays, and a woven desktop basket. Keep cards with meaningful handwriting, signatures, or photographs intact, and reserve the ordinary, replaceable cards for projects.
Keep any card with irreplaceable handwriting, a signature from someone important to you, a photograph, a dated milestone message, original artwork, or family-history detail. The card’s retail price is irrelevant — a cheap card with a meaningful note matters more than an expensive blank one. When in doubt, hold it back and revisit later.
Photograph or scan both sides and any insert when it is lawful and appropriate, and record the sender, recipient, date, occasion, relationship, and known story. A digital copy preserves the words but does not replace the original’s emotional value, so do not treat scanning as a reason to cut a card you would regret losing.
Glossy, laminated, photographic, metallic, and plastic-coated cards resist ordinary water-based glue and glue sticks. A tacky craft adhesive, a solvent-based adhesive, or spray adhesive generally bonds better to non-porous surfaces; decoupage medium suits decorative layering. Always test on an expendable section of the exact card first.
Use a craft knife with a fresh blade and make several light passes rather than forcing a dull blade, on a cutting mat. Score to compress the fibers rather than cutting through the coating, choose the scoring side and pressure for the intended fold, and fold with the paper grain where possible. Test on a matching scrap first.
Treat them as electronics, not paper. Do not cut, pierce, crush, soak, heat, or place them in paper recycling while the components remain inside. Button and coin batteries are an ingestion hazard for children and pets, so keep such cards out of reach and seek immediate medical help if a battery is swallowed. Handle disposal through the manufacturer or your local household hazardous-waste, battery, and electronic-waste programs.
The long-running St. Jude’s Ranch for Children recycled-card program ended in 2025 and no longer accepts mailed cards, despite older articles still listing its address. Hallmark accepts old Hallmark-brand cards for its archives. Local schools, senior centers, churches, and reuse organizations vary — call ahead to confirm a program currently accepts the exact material you have before mailing anything.
Generally not in curbside recycling. Glitter is a microplastic that cannot be separated from paper fibers, and photographic and laminated cards are often rejected too. If a card has a decorated front and a plain paper back, you can sometimes tear off the decorated front and recycle the plain back. Check your local program’s rules.
Final thoughts: keep what matters, craft what is left
The right answer to “what to do with old greeting cards” is rarely one thing. Some cards belong in a memory folio, untouched. Some belong back with the person who sent them. Some are ordinary, replaceable, and genuinely unwanted — and those are the ones worth turning into a journal jacket, a drawer tray, or a gift band.
Sort first, confirm ownership and privacy, test on a scrap, and choose a project you will actually use. That is the difference between a drawer full of paper clutter and a small collection of things you made on purpose. If you enjoy this method of careful, material-aware upcycling, our guide to plastic bottle cap crafts applies the same inspect-test-plan-make approach to a very different material. Author tip: Start with one ordinary card you would genuinely discard and one small project, such as a bookmark or notebook cover. It gives you a low-risk way to learn how that particular coating cuts, scores, and bonds before you commit better card stock to a larger build.
Sources
- 17 U.S.C. § 202 — Ownership of copyright as distinct from ownership of the material object
- U.S. Copyright Office — Visual Art & Copyright.
- CPSC — 16 CFR Part 1263, Safety Standard for Button Cell or Coin Batteries (Reese’s Law).
- CPSC — Reese’s Law implementation and button/coin-battery ingestion hazard.
- Library of Congress — Stabilization Treatments and Storage Enclosures.
- National Park Service — Conserve O Gram 13/02 (humidification and flattening).
- ALA / ALCTS — Humidification and Flattening of Paper.
- Smithsonian National Postal Museum — Flattening Folded or Rolled Documents.
- American Forest & Paper Association — How to Recycle Paper During the Holiday Season
- St. Jude’s Ranch for Children — Recycled Card Program.
- Recycle for Greater Manchester — Greetings cards and wrapping paper.