DIY Mesh Drying Rack for Painted Craft Pieces
Keep your painted crafts safe and organized with this DIY mesh drying rack. It’s a simple and practical solution for drying small, delicate pieces.
- Difficulty
- Medium
- Time
- 35 minutes
Materials
- wooden slats
- wooden blocks
- saw
- screws
- screwdriver
- mesh sheet
- scissors
- staple gun
- paintbrush
- painted craft pieces
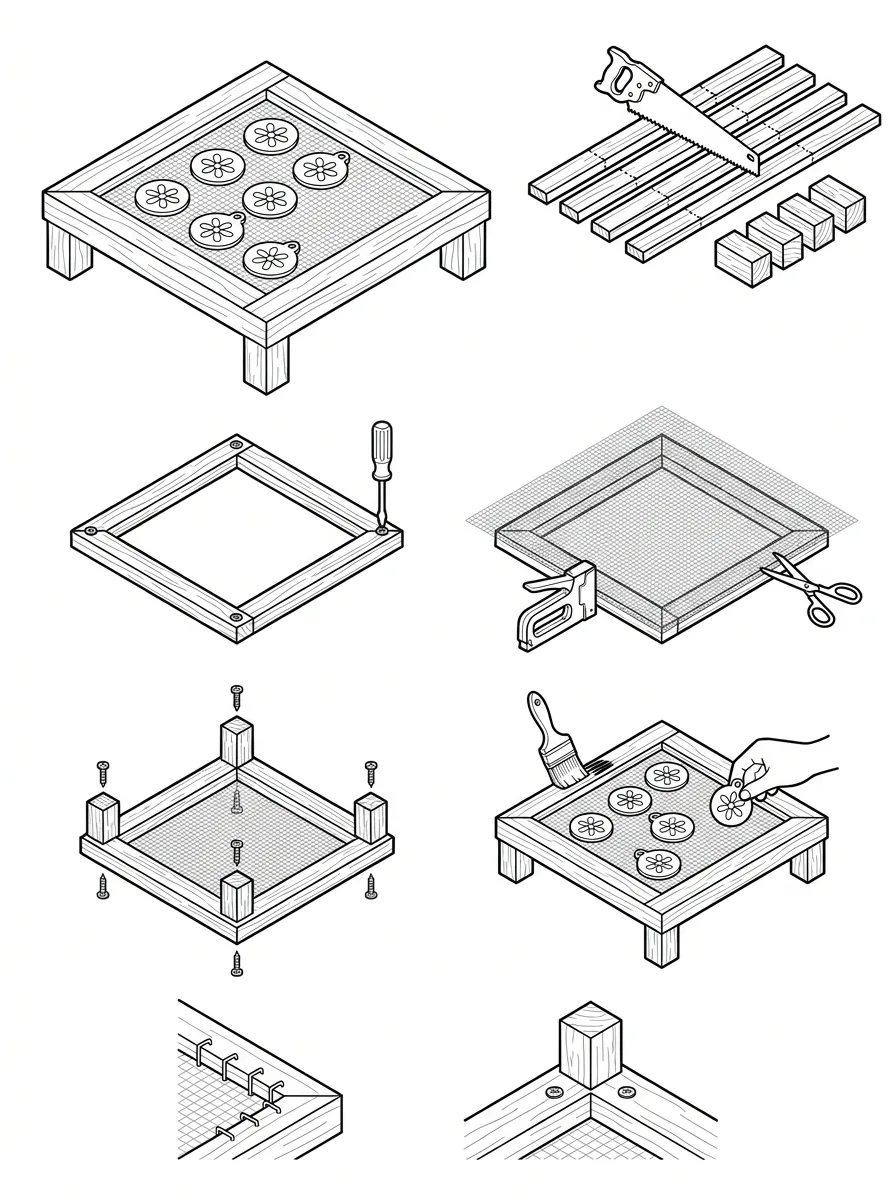
How to make it
- Cut wooden slats and blocks to size using a saw.
- Assemble the wooden slats into a square frame and secure with screws.
- Cut mesh to fit the frame and staple it tightly across the top.
- Attach the wooden blocks as legs to each corner of the frame.
- Paint or finish the rack if desired and place painted craft pieces on the mesh to dry.
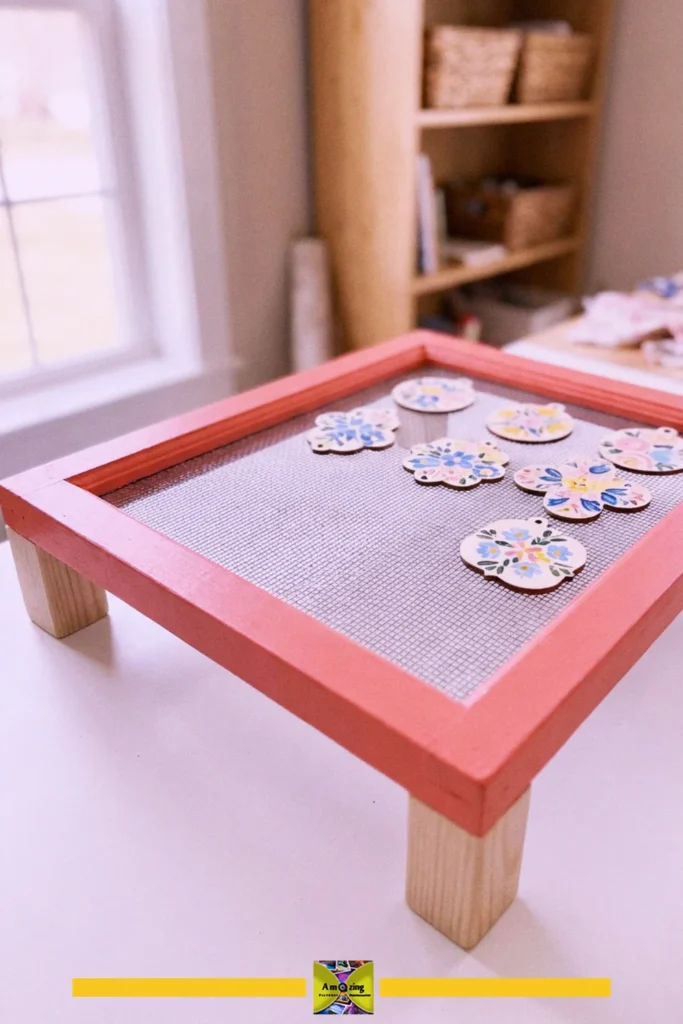
A diy mesh drying rack is a handy tool for drying painted craft pieces and keeping them organized. This rack features a mesh surface and sturdy wooden legs, making it ideal for air-drying small, delicate items.
The elevated design allows air to circulate underneath, helping your painted crafts dry evenly and preventing smudges. Its compact size makes it easy to use on any tabletop or workspace.
For best results, place the rack on a flat, stable surface and avoid stacking items too closely to ensure proper airflow and prevent accidental damage to your painted pieces.