Keeping your car clean is essential, yet it can be a significant challenge. For instance, a car is used every day, and if it is not maintained with regular cleaning, it can quickly turn into a big mess. Here are some tips to follow on a weekly basis to maintain a tidy and pleasant environment in a car.
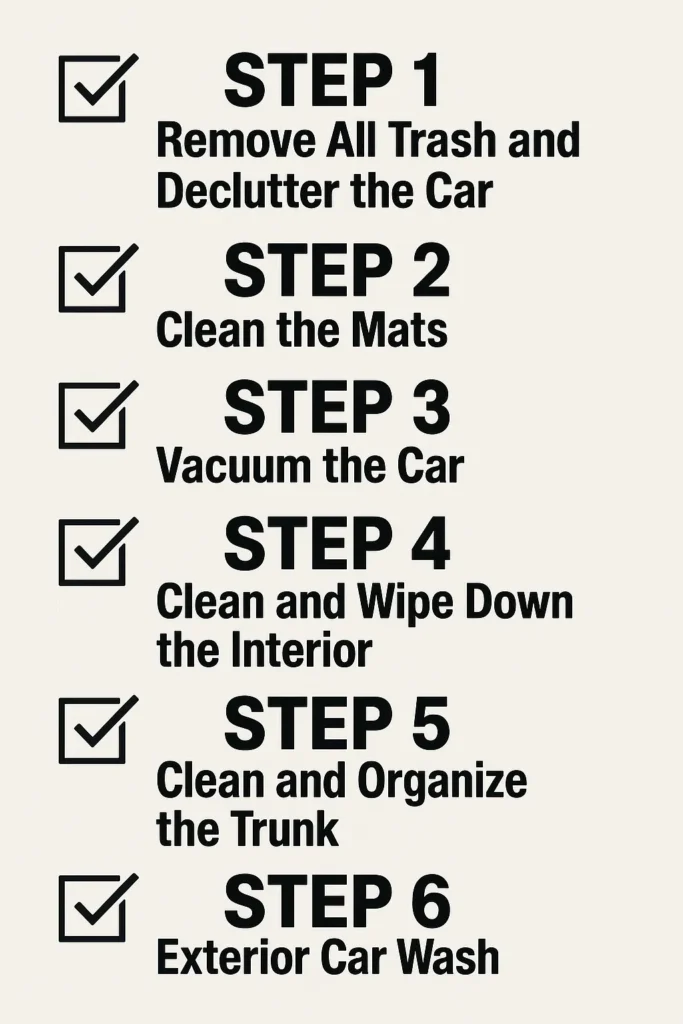
Step 1: Remove All Trash and Declutter the Car
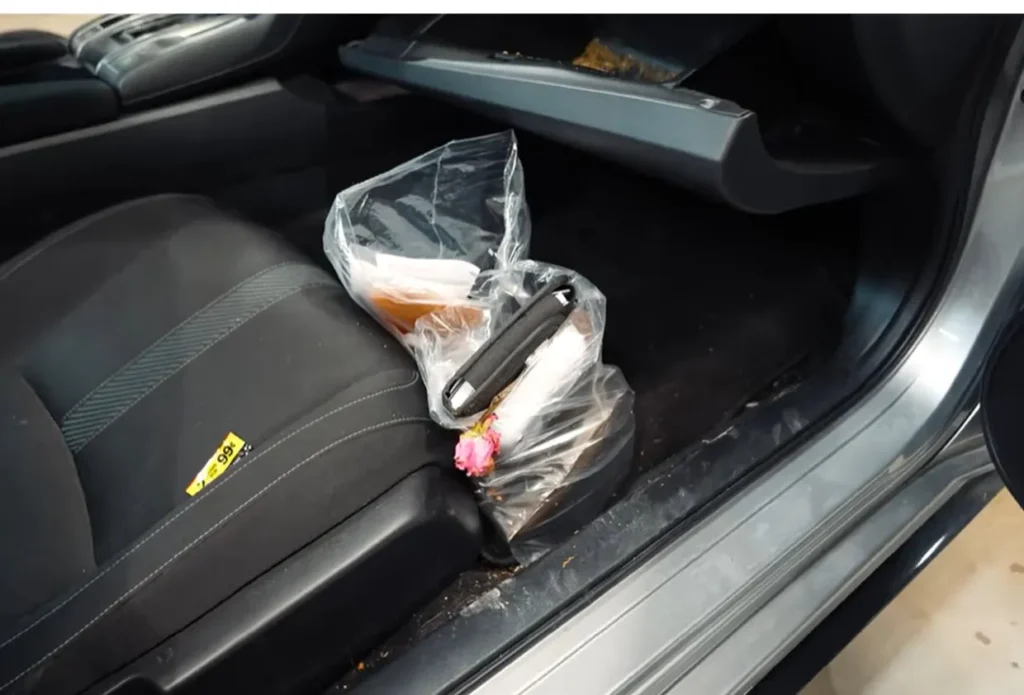
The first step on the checklist is to remove all trash and declutter your car. One effective strategy I’ve adopted over the years is the rule that anything I bring into the car must be taken out on the same day. This rule applies to shopping bags, leftover food, your backpack—essentially, anything you bring along for the ride. By cultivating the habit of removing what you bring in, you’ll find that maintaining a clean and organized car becomes much easier.
Building the habit of keeping your car clean brings numerous benefits. Each time you step back into your vehicle, you’ll notice it isn’t cluttered with trash anymore. Your cup holders will be empty, and if you’re giving friends a ride, you can be proud that your seats and back seats are clear of debris. Additionally, by regularly removing trash, you ensure your car maintains a pleasant scent, free from any unpleasant lingering odors.
Every time someone goes through a drive-through, they receive a straw wrapper, which often ends up in the side compartment of the door. Over time, this accumulates and creates a mess. A helpful solution to contain this mess is a simple small garbage can found on Amazon. It’s convenient because it can be placed in the door or even in a cup holder, ensuring there’s always a place for the garbage, and it’s very easy to empty out.
Also, if there are kids, it’s a great idea to just throw one in the back seat. That way, there are no things like old French fries, candy wrappers—you might even find a Pokémon card stuffed between the seat cushions—and kids always have a place to go with their trash.
Step 2: Clean the Mats
The next thing on the checklist is to clean the mats. Usually, the mats are grabbed, brought it outside, and give it a good shake. Because this is done on a weekly basis, they are typically not super dirty, so that shake outside is enough. However, in Wisconsin, the winters can be pretty rough, salty, and nasty on the mats. During those times, they will be spot cleaned as needed.
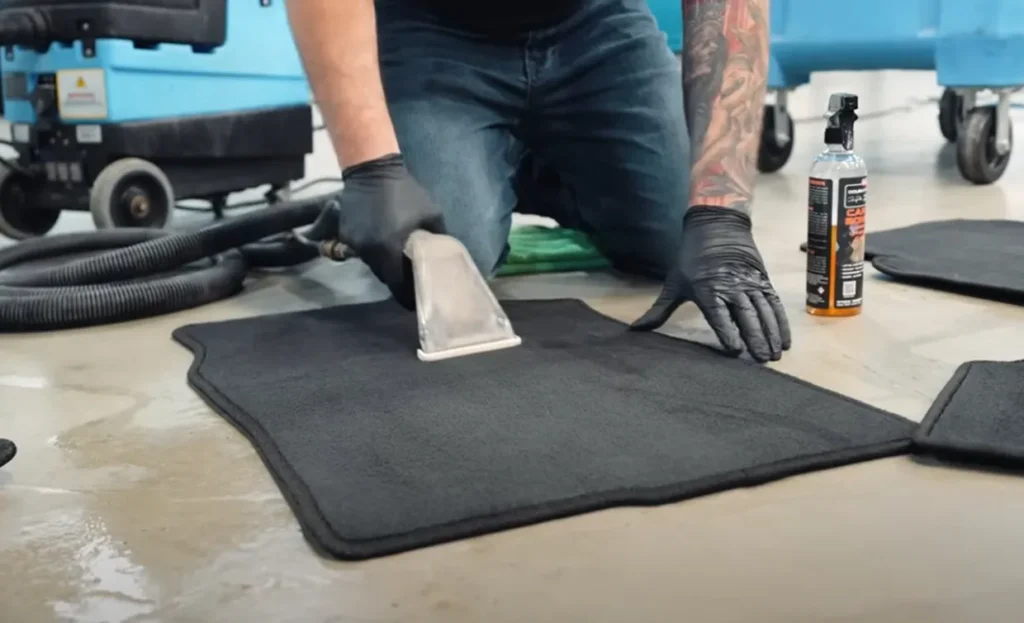
Now, you’ll notice that this mat here has some sand on it. Whenever you’re taking your mats out of your car, especially if they’re rubber, it’s best to fold them like a taco, as shown here. If you pull one from only one side, all of that sand will end up in the carpet, making it necessary for you to vacuum it up afterward
Now, if carpeted mats like this one are present, they should still be shaken out. However, hair and similar debris can stick to the carpet, remaining even after shaking. A lily brush can be used, or an old rubber spatula, to quickly brush down the mats. This trick will collect all the hair, making it easy to pick up. Now, the next step can be prepared.
Step 3: Vacuum the Car
Vacuuming the car can be a daunting task due to the many nooks and crannies present. However, it’s important to focus on high-touch areas, such as cup holders and the front seat mat, where dirt and debris tend to accumulate. If any area shows signs of dirt buildup, it should be addressed promptly.
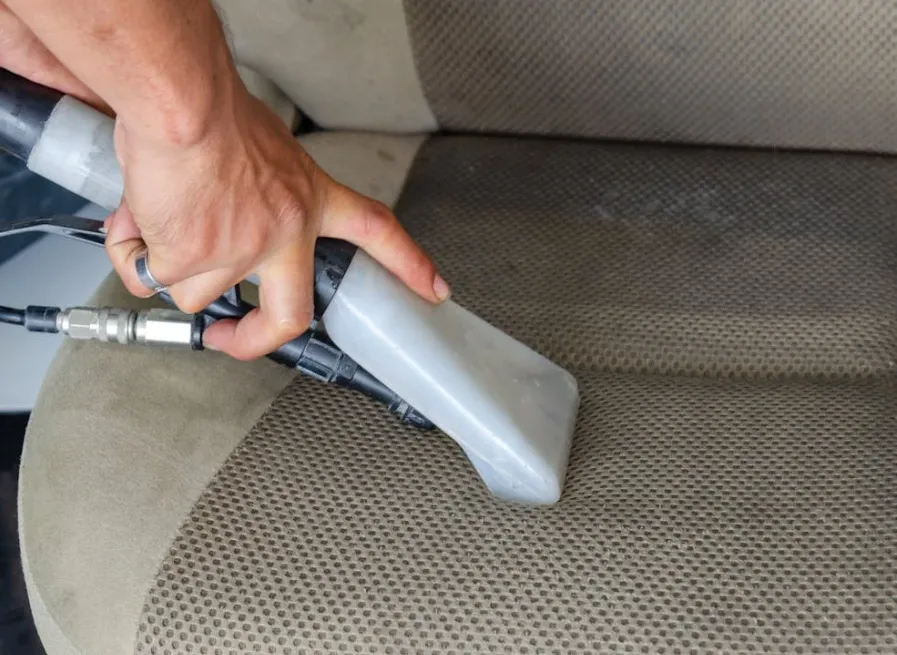
If someone gets into a cleaning zone, equipped with rubber gloves, they can thoroughly vacuum every square inch. However, it’s often more practical to set a timer for about 10 to 15 minutes to vacuum as much as possible within that time frame before finishing the task.
Step 4: Clean and Wipe Down the Interior
Next up is to clean and wipe down the interior of the car. To do this, it’s best to keep things really simple. A Swiffer Duster, like the one below, works great on the dash and even on the speedometer, as well as any nooks and crannies that are hard to get to. The Swiffer Duster is your best friend.
For cleaner, this one called Express Interior Cleaner is recommended for a few reasons. The first being that it’s safe on all surfaces, including leather seats if they are present. The second is that it doesn’t leave a residue, which is beneficial because rinsing the surfaces after cleaning is unnecessary. Additionally, it doesn’t contain additives like protectants that would remain on the surface. Cleaners with such additives tend to dry sticky, build up, and get gummy on the surface, attracting more dirt and causing the car to get dirty faster.
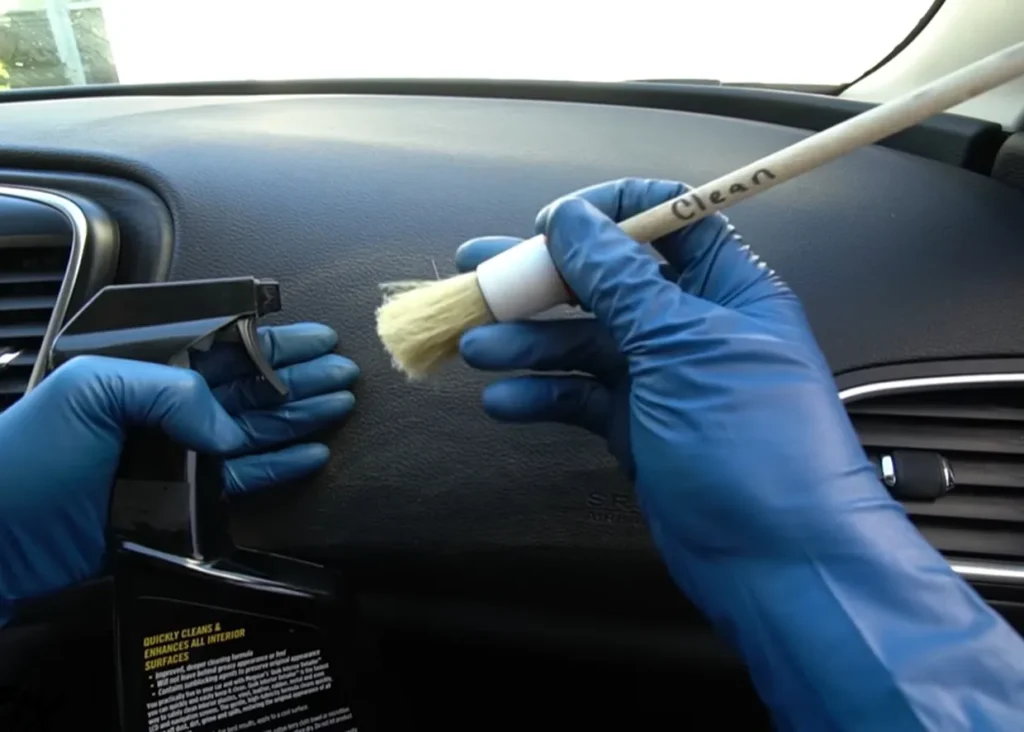
The third point is that it has a nice pleasant odor, which leaves the car smelling nice, clean, and fresh. However, it is important to note that if there is a screen in the car, it is advisable not to spray it with glass cleaner or similar products, as they can cause damage. Instead, using a microfiber towel, typically dry, will effectively remove all fingerprints.
Greasy fingerprints on surfaces can be stubborn, but usually, a little moisture can effectively remove them. A quick buff will make the surface look almost brand new. Special attention should be paid to high-touch areas like the steering wheel, door handles, and armrests, where body oils tend to accumulate. Regularly wiping these areas down, especially on a weekly basis, prevents buildup and helps maintain a clean car.
One thing to look out for when you’re wiping down the inside of your car is just to check the carpet or if you have cloth seats for any spots and spills. Usually, it’s best to clean those up sooner rather than later, especially if it was a food spill.
Step 5: Clean and Organize the Trunk
Next up on the checklist is to clean and organize the trunk. This task will vary for everyone due to the different types of cars. However, it’s beneficial to take a few minutes to remove anything unnecessary from the trunk. It often becomes a dumping ground for various items that are easily forgotten. It can be frustrating to open the trunk with an armful of groceries, only to find no space to set them down.
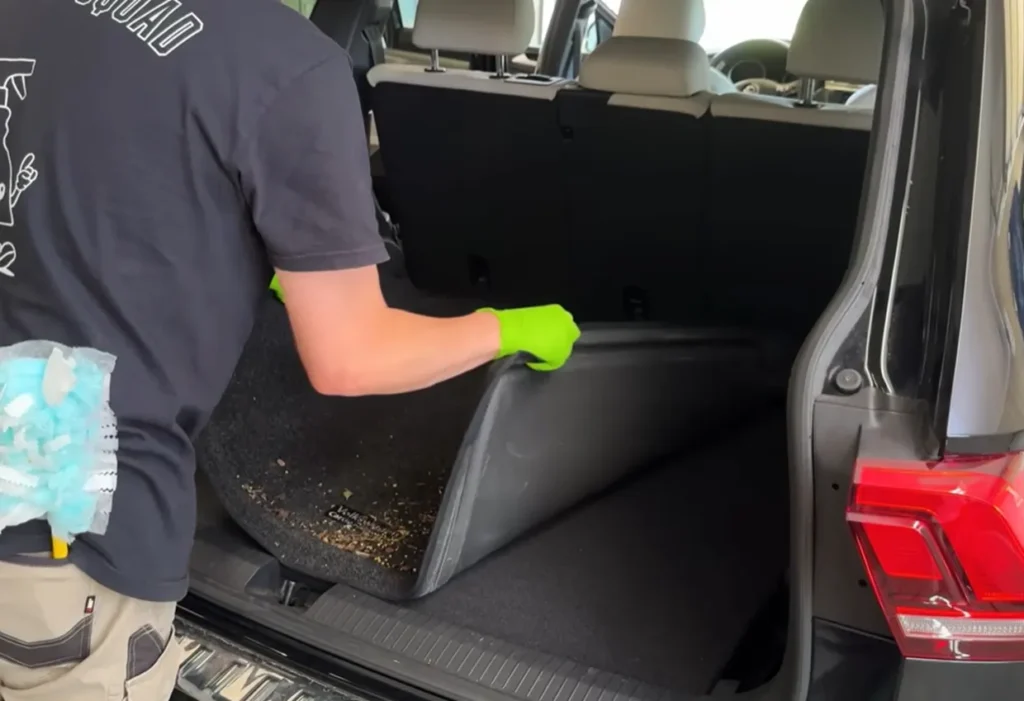
A helpful tip is to use an organizer, which can be found on Amazon. An organizer can hold roadside assistance items, a battery charger, reusable shopping bags, and cleaning supplies.
Step 6: Clean the Windows and Windshield
Next is to clean the windows and windshield. For this, a product called Invisible Glass is recommended. The reason being that it’s safe on tint, so it won’t cause any damage. Just spray it on and use a two-towel system: one towel to clean the window with the cleaner, and then a dry, clean microfiber cloth to buff and remove any streaks that might be left behind.
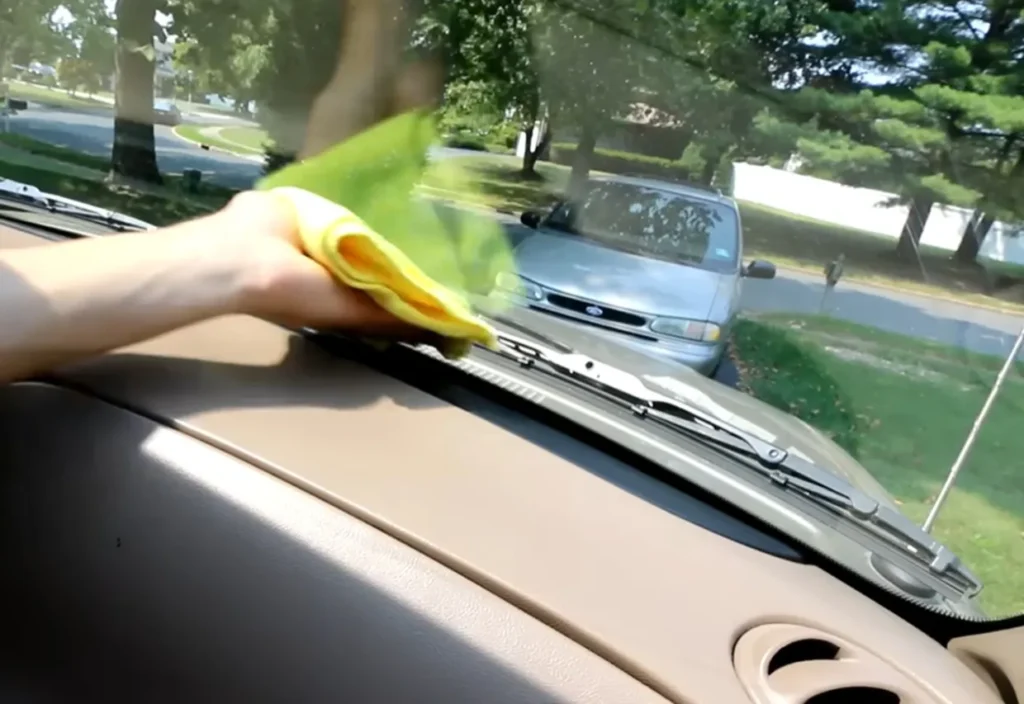
Now, one area where grime tends to accumulate is when the window goes up into the weather stripping. A little bit of glass cleaner is used, rolling down the window to address this top edge.
For the windshield, the same process of using the two-towel system and glass cleaner is followed. However, achieving a completely streak-free finish can be a bit tricky.
When the car is nice and clean, it often feels like it runs better and possibly even drives faster. This sensation could purely be psychological, but it raises an interesting question: what do others think? Feel free to share opinions in the comments.
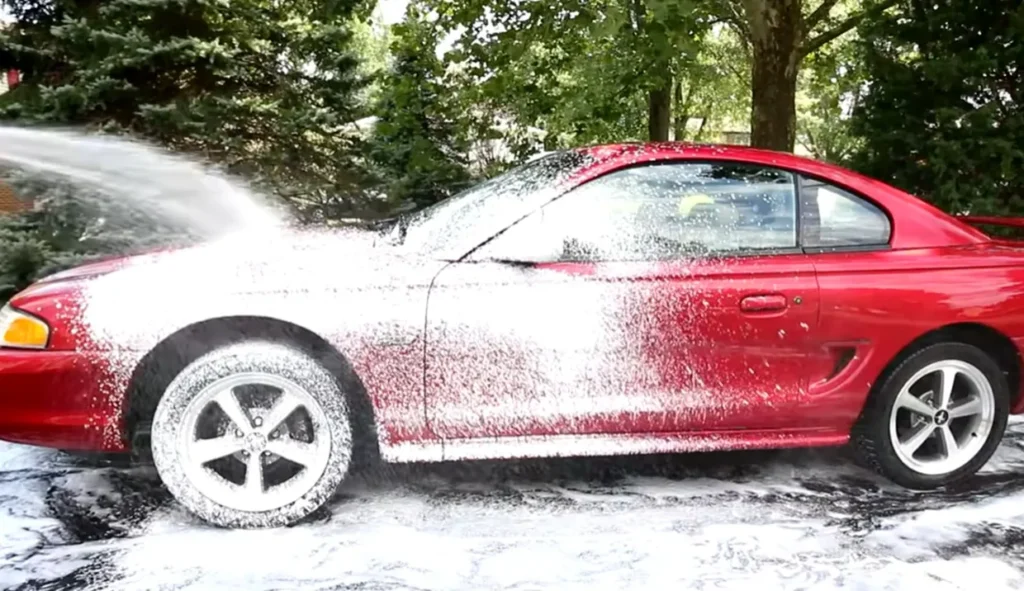
Final Step: Exterior Car Wash
The last step is to get an exterior car wash, which is what is being done right now. It should be noted that for the car wash, touch-free is preferred over soft touch. While the soft touch can do a slightly better job scrubbing, there have been some bad experiences of it scratching paint. Therefore, it is usually safer to choose touch-free.
And there you have it. Now you know the best way to keep your car nice and clean. Thank you so much for reading..