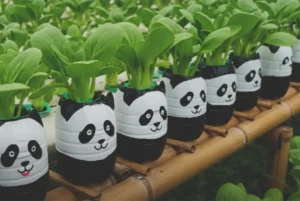
Who would have thought a handful of thrown-out plastic bottles and a plain weathered wall could turn into such a head-turning garden setup? This simple upcycling idea flips everyday trash into bright hanging lantern planters, turning a completely forgotten corner into something vibrant and full of life. It’s way more than just a clever reuse project—it’s a slick vertical gardening trick that leaves those old bottles looking totally unrecognizable.
It all starts with a stack of large clear plastic bottles, carefully measured and marked right around the middle. Rather than just slicing them in half, long, evenly spaced lines are drawn between two guide rings and sliced to create narrow, flexible plastic strips. Keeping the top and bottom intact means that when the bottle is compressed those plastic ribs bow outward into a gorgeous lantern silhouette!
After drilling a quick hole through the center for a hanging cord… each frame gets blasted with a bold coat of red, yellow, or blue spray paint… Hanging them at staggered heights instantly turns a plain wall into a lively vertical art piece. Once flowering plants—or small potted liners to hold the soil tight—get tucked inside, those discarded bottles disappear completely into brilliant, open-ribbed garden décor.
Here is the step-by-step process broken down into a table to make thing more clear:
| Step | What to Do | Materials or Tools | Helpful Tip |
|---|---|---|---|
| 1. Choose the bottles | Collect several large plastic bottles with similar shapes and sizes. | Empty plastic bottles | Smooth-sided bottles are easier to measure, cut, and shape evenly. |
| 2. Clean and dry them | Remove the labels, wash away any residue, and let the bottles dry completely. | Soap, water, cloth | Paint adheres better to clean, dry plastic. |
| 3. Mark the first boundary | Draw a circular line around the bottle near one curved end. | Permanent marker | This line marks where the long strips will stop. |
| 4. Mark the second boundary | Measure the usable center section and draw another circular line near the opposite end. | Ruler, marker | Keep both boundary lines as straight and even as possible. |
| 5. Draw the strip guides | Use a ruler to draw evenly spaced lines lengthwise between the two circular boundaries. | Metal ruler, marker | Equal spacing helps the finished lantern ribs bend consistently. |
| 6. Cut the plastic strips | Cut along each lengthwise line, stopping at both circular boundaries. | Strong scissors or craft knife | Do not cut through the end sections. The strips must remain connected. |
| 7. Smooth rough edges | Trim any sharp or uneven plastic left by the cuts. | Scissors, fine sandpaper | Wear gloves because cut plastic can be sharp. |
| 8. Make the hanging hole | Drill or carefully pierce a centered hole through one end of the bottle. | Drill, awl, or heated metal tool | The hole should be large enough for the cord but not so wide that the knot slips through. |
| 9. Shape the lantern | Press the bottle inward from both ends so the cut strips bend outward into a rounded form. | Cut plastic bottle | Rotate the bottle while pressing to keep the lantern shape balanced. |
| 10. Adjust the ribs | Separate and straighten the strips until they form an even circular cage. | Hands, protective gloves | Correct uneven strips before painting, while the plastic is still easy to handle. |
| 11. Prepare all planters | Repeat the measuring, cutting, drilling, and shaping process for the remaining bottles. | Additional bottles and tools | Use the first finished bottle as a size and spacing guide. |
| 12. Prepare for painting | Place the shaped bottles on a protected outdoor surface. | Drop cloth, cardboard, gloves | Work outdoors or in a properly ventilated area. |
| 13. Apply spray paint | Coat each lantern planter with a plastic-compatible spray paint. | Spray paint | Apply several light coats instead of one heavy coat to reduce drips. |
| 14. Let the paint dry | Leave the painted forms untouched until they are fully dry. | Drying area | Follow the drying time stated on the paint can. |
| 15. Add a second coat | Apply another coat where the plastic remains transparent or uneven. | Spray paint | Rotate the planter so the inner sides of the ribs are also covered. |
| 16. Prepare the plant container | Place a lightweight nursery pot, fabric liner, or fitted plastic container inside the lantern form. | Small inner pot or liner | The ribbed bottle alone may not hold loose soil securely. |
| 17. Check drainage | Make sure the inner pot has drainage holes and can release excess water safely. | Drill or nail, inner pot | Avoid letting water collect inside the plastic shell. |
| 18. Add the plant | Fill the inner container with potting mix and place a suitable flowering plant inside. | Plant, potting mix, inner pot | Choose compact plants that will not make the planter top-heavy. |
| 19. Thread the hanging cord | Pass strong cord through the drilled hole and secure it with a large knot, washer, or internal support. | Nylon cord, rope, washer | The support must carry the weight of the planter, soil, plant, and water. |
| 20. Test the knot | Lift the planter close to the ground and check that the cord does not slip. | Completed planter | Test it with extra weight before hanging it overhead. |
| 21. Install the support bar | Secure a strong horizontal pole, bracket, or overhead support. | Pole, hooks, brackets, screws | Fasten the support into solid masonry or framing, not weak surface material. |
| 22. Hang the planters | Suspend the colorful planters at different heights. | Hooks, cord, support bar | Staggering the heights creates a fuller vertical-garden effect. |
| 23. Arrange the colors | Alternate red, yellow, blue, or other shades across the display. | Painted planters | Repeating colors helps the wall arrangement feel intentional. |
| 24. Water carefully | Water the plants slowly with a watering can or hand sprayer. | Watering can or pressure sprayer | Check that runoff does not stain the wall or collect below. |
| 25. Maintain the display | Remove dead flowers, check the cords, and touch up damaged paint when needed. | Garden shears, replacement cord, paint | Inspect the hanging points regularly, especially after strong wind or rain. |
The video has transformed from a simple step by step demonstration into a space for sharing inspiration and practical experiences among passionate craftspeople worldwide. The diverse feedback from various countries illustrates how simplified educational content can motivate individuals to use their free time constructively. Praise for the craftsperson’s skill and enthusiastic comments expressing viewers’ desire to create their own pieces demonstrate that successful handmade projects offer aesthetically pleasing, low-cost solutions and provide practitioners with ongoing motivation to develop and innovate.
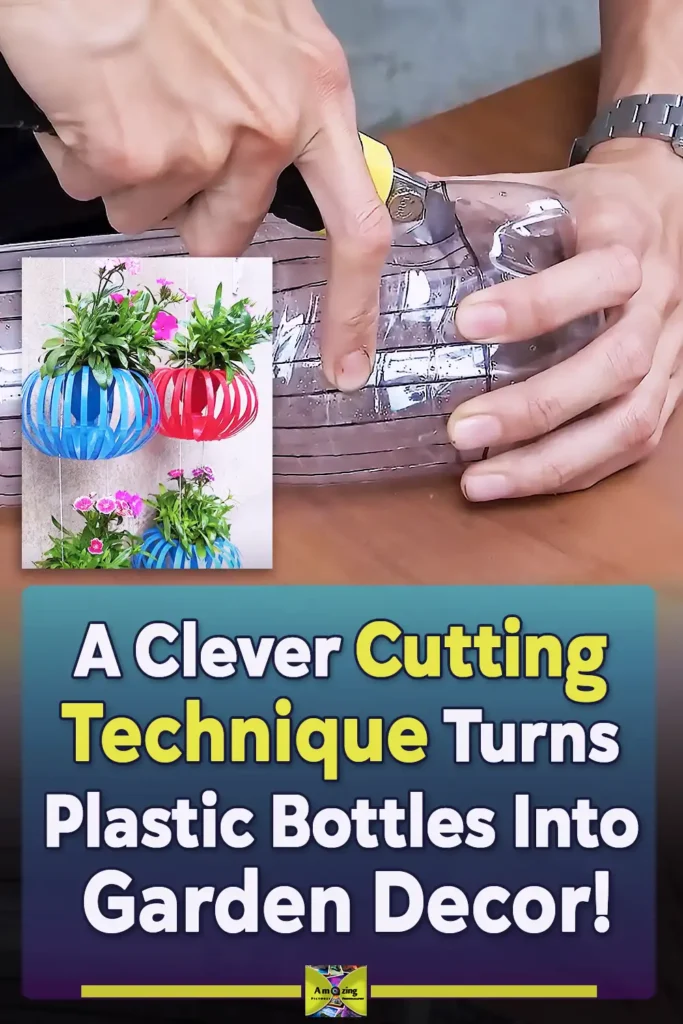
When plastic trash feels like it’s taking over everywhere, little projects like these hanging bottle planters hit totally different. The real genius is that slotted-rib trick—it takes a rigid, boring plastic container and arches it into this gorgeous, rounded lantern shape for practically zero dollars.
Slap them up on a faded brick wall, hang them along a tight apartment balcony, or stack them into a full vertical garden; it completely shifts how you view everyday garbage. Turns out, waking up a dead, forgotten corner doesn’t take a massive budget—just a splash of paint, a couple of flowers, and one sharp idea.
Posted by: Med Houssem · In: Decoration, DIY, Gardening, HOW TO, Upcycling