A roll of chicken wire left over from a fence or garden job is a strange material: flexible enough to fold, thin enough to cut with hand tools, and sharp enough to draw blood the moment you stop paying attention. Most “chicken wire crafts” roundups skip that third part. They show pretty memo boards and cabinet doors, tell you to “fold the sharp ends in,” and move on. This guide takes the opposite approach. It starts with knowing what you actually have, then walks through safe cutting and edge containment, and only then gives you fifteen projects you can build and use without opening a second tutorial.
A quick note on the term. “Chicken wire” is a nickname. The material is more accurately called poultry netting or hex netting — thin, flexible, galvanized (or polymer-coated) steel wire twisted into hexagonal openings. The distinction matters, because the same word gets slapped on welded hardware cloth, chain-link fabric, expanded metal, and decorative craft mesh, none of which behaves the same way when you cut, fold, or fasten it.
What chicken wire actually is — and which mesh you have
Poultry netting vs. hardware cloth and other mesh
Flexible poultry netting is made from thin steel wire twisted into a continuous hexagon pattern. Openings are usually around 1 inch (25 mm), though ½-inch and 2-inch versions exist, and the wire is commonly around 20-gauge (roughly 0.8 mm / 0.032 in diameter), though gauges vary by product. Welded hardware cloth is a different product: thicker wire joined at square or rectangular intersections, typically with smaller openings from ⅛ to ½ inch (3–13 mm). Chain-link fabric is heavier still and woven in a diamond pattern; expanded metal and stucco lath are cut-and-stretched sheet; decorative craft mesh may be plastic or thin coated wire that looks similar in photos but behaves nothing like poultry netting.
The practical difference is strength and stiffness. Chicken wire is light, flexible, and easily cut, torn, or bent by hand — which is exactly why it suits craft and organizer work and exactly why it is not suitable for predator-proofing, security, or anything load-bearing. Hardware cloth is sturdier and resists tearing. For crafts, you want genuine flexible poultry netting; if you have hardware cloth or another mesh, most of the projects below still work only after you redesign the cutting and edge treatment, because the wire is thicker and the edges behave differently.
Do not identify the material by color, hexagon size, or how stiff it feels. Verify against the packaging or the manufacturer’s documentation whenever possible.
Gauge, opening size, and coating — verify, don’t guess
Three facts decide nearly everything downstream: wire diameter (gauge), opening size, and coating. Lower gauge numbers mean thicker, stronger wire — 19-gauge is heavier than 23-gauge. Opening size determines what will pass through, snag, or slip between clips. The coating — galvanized zinc, polymer (often PVC), paint, or none — determines corrosion behavior and whether paint will stick.
A magnet can tell you the wire is ferrous (steel) but cannot confirm the exact alloy, coating, or cleanliness. If you have the label or packaging, keep it and note the manufacturer, material, gauge, opening size, coating, and original intended use. If you don’t, treat the wire as unidentified and be conservative about every claim you make about its strength and durability.
Which offcuts to keep and which to reject
Prefer clean, unused offcuts left from a documented household or garden installation. Before using anything, inspect both faces and the roll core for damage, hidden fasteners, and contamination. Reject mesh that shows any of the following: animal waste or nesting residue, pesticides, fertilizer, oils, fuel, paint, mold, fire damage, demolition dust, sharp embedded objects, broken or missing wire, detached coating, white corrosion products (zinc rust), red rust, deep bends, stretched openings, or brittle wire. A magnet does not prove cleanliness, and brushing, grinding, or painting over the problem does not fix it — reject contaminated or seriously corroded mesh instead.
If you take discarded material from a contractor, farm, store, school, or community project, confirm you have permission first and that the source and cleanliness are known. Mesh removed from animal enclosures, contaminated soil, compost systems, demolition waste, or industrial settings should be treated as unacceptable unless its source and cleanliness are authoritatively confirmed.
Remove any attached staples or clips only with suitable pliers while wearing eye and hand protection. Clean suitable, documented material according to the manufacturer’s guidance, without prolonged soaking or uncontrolled chemical cleaners, then dry it completely — including overlaps and twisted junctions, where moisture hides.
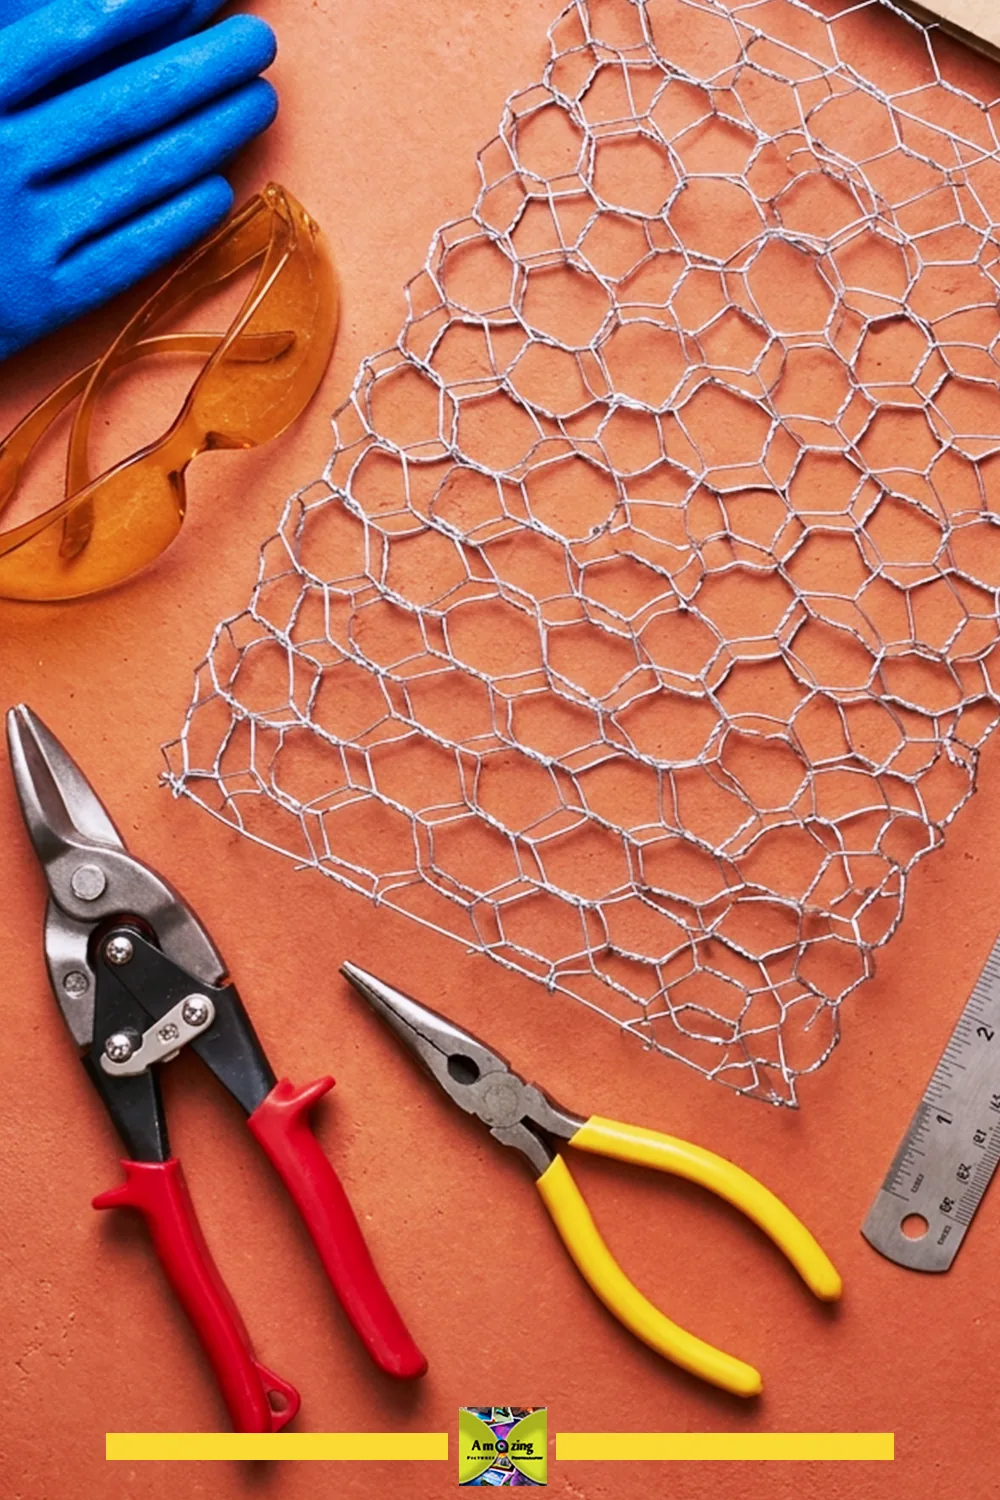
A quick decision framework for leftover mesh
For each offcut, decide one of the following: (1) save it to repair the original, compatible, non-safety-critical installation; (2) use it for a suitable light-duty project; (3) keep a small labeled piece as a cutting or fastening sample; (4) offer clean, usable offcuts through an appropriate reuse channel; or (5) dispose of it. Check local scrap-metal and waste rules before disposing of anything. Isolate unidentified industrial, agricultural, demolition, or fire-damaged mesh and seek authoritative advice rather than guessing.
How rolled chicken wire behaves
Spring-back, hexagon distortion, and cut tails
A rolled sheet stores spring energy. Remove the ties or clamps holding the roll and it can uncoil and recoil with real force. Keep the roll restrained until your work surface, clamps, weights, gloves, and eye protection are ready, and orient it so it opens away from your body and any bystanders.
The mesh does not behave like fabric. It stretches diagonally, distorts under uneven tension, and flattens one area while distorting another. Cutting a twisted junction can leave multiple sharp tails at once, because you are severing several strands that cross at the same point. Plan every cut so those tails have somewhere to go — folded through a complete opening, captured in a groove, or covered by trim.
Galvanizing, coatings, corrosion, and why paint can’t fix lost wire
Galvanizing is a zinc coating that protects the steel from corrosion. “Galvanized-before-weaving” wire is coated before it is twisted, giving a more uniform coating along the strands; “galvanized-after-weaving” netting is dipped after weaving, which can build coating up at the twisted joints. Polymer-coated (often PVC) wire has a plastic jacket over the metal. These differ in how they cut, how paint adheres, and how they corrode, so compare them only through reliable documentation, not by look.
White surface corrosion is zinc corrosion (often called “white rust”); red rust is steel corrosion. Flaking coating and broken wire are separate problems with separate causes. Paint can protect a sound, cleaned surface, but it cannot restore wire thickness or structural integrity that is already gone. Cut ends lose some coating protection, which is why edge containment and — outdoors — touch-up matter. Outdoor life varies with coating, cut edges, salt, soil contact, irrigation, pollution, fasteners, and maintenance; do not promise a specific lifespan.
Flattening, measuring, and laying out the mesh
Work in a cleared area large enough for the full roll. Keep the roll restrained until everything is ready, and orient it so it unrolls away from you. For large pieces, use a helper only after you have both agreed on coordinated handling. Secure the leading edge before releasing more material, and flatten gradually with broad boards or suitable weights — never by stepping on the mesh.
Establish straight reference lines through repeated junctions rather than trusting the mesh edge. Align hexagons consistently across paired panels, and measure a frame opening at several points (frames are rarely perfectly square). Make full-size paper or cardboard templates for any folded form. Add enough mesh beyond the visible opening for your verified fastening and edge-capture method — usually several complete hexagons. Mark cut lines with removable high-contrast tags or a marker you have tested, number matching panels, and dry-fit mesh, trim, backing, rods, hooks, and doors before final fastening.
Cutting and forming chicken wire safely
Tool choice depends on the actual wire diameter, coating, access, and number of cuts. Aviation snips (compound-action snips) give the most leverage for long, straight cuts; straight-cut snips are typically the yellow-handled style. Diagonal cutters (side-cutting pliers) work well for small, precise cuts and tight spaces but cut one strand at a time. Household paper scissors are generally unsuitable unless the tool manufacturer explicitly rates them for the exact wire.
Inspect cutters for damaged jaws, loose pivots, worn grips, and insufficient capacity before starting. Wear safety glasses with side protection, suitable puncture-resistant work gloves, long sleeves, long pants, and closed footwear. Clamp or weight the sheet so it cannot jump or roll, and cut close to a junction only when that supports the planned edge treatment. Hold the waste side with pliers rather than bare fingers where recoil is possible, cut one controlled segment at a time, and direct cut ends away from your face and body. Capture every small clipping immediately in a rigid container.
For bending, use needle-nose, duckbill, flat-jaw, or seaming pliers, and bend around a form rather than squeezing an unsupported point by hand. Avoid repeated bending, which work-hardens and breaks wire. Never use grinders, rotary abrasive tools, torches, or uncontrolled powered cutting on unknown coated or galvanized mesh — heating or burning galvanized material can release hazardous fumes. Stop when a tool cannot cut cleanly without excessive force.
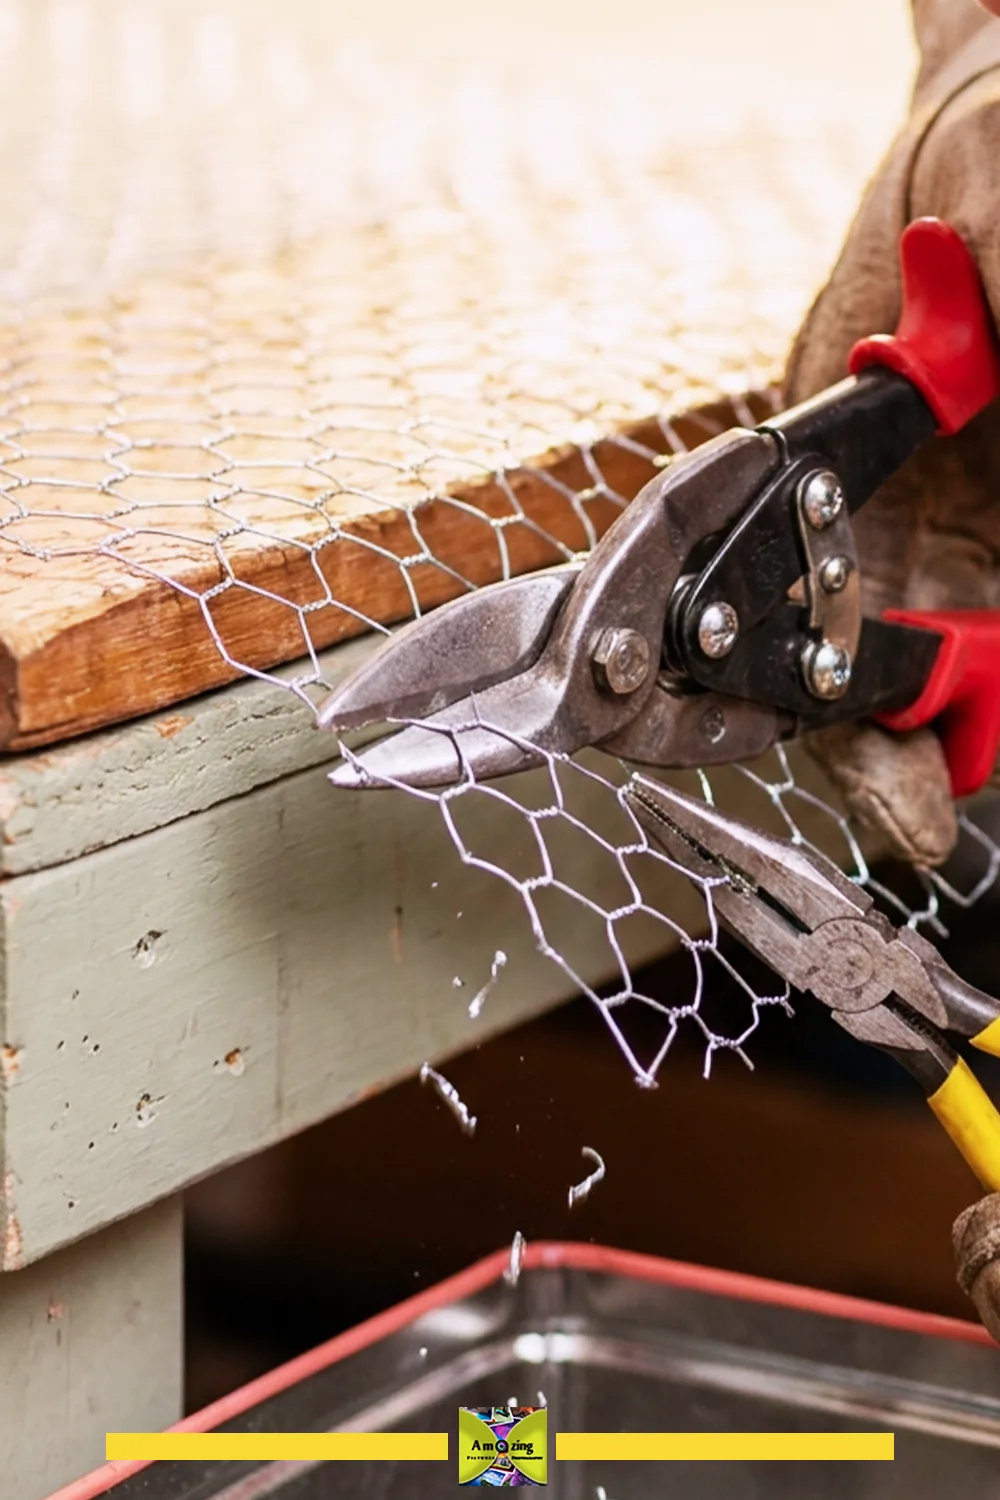
How to contain every cut edge
“Bend the sharp ends inward” is not a complete method — you have to show where every end goes and how it stays unreachable during normal handling. Choose an edge treatment that matches the mesh and the project:
- Folding the mesh back through complete openings creates a double-thickness hem; suitable for flexible poultry netting, but the fold needs to be full and pressed flat so no tail pokes out.
- Rolling an edge around a smooth rod or mandrel produces a rounded, snag-resistant rim.
- Capturing the perimeter between two wood trim pieces hides every edge entirely — the most reliable option for anything people will touch.
- Insetting the mesh into a routed or constructed groove buries the cut line in the frame.
- Covering a rim with a compatible U-channel or edge trim caps the edge; verify the channel seats fully and stays put.
- Binding an edge with folded heavy fabric or webbing wraps the cut ends; confirm the fabric holds and is not flammable or absorbent where it matters.
- Lacing an edge with cord through a reinforced fold can be decorative, but only after the fold itself is sound.
- J-clips, mesh clips, or rings secure an edge to a frame or another panel; they must not leave accessible points.
- A separate rigid rim (wire rod or wood) adds structure and covers the cut line.
- Capping isolated ends only with products designed to stay secure.
For each method, check the finished edge for bend radius, coating damage, snag risk, reversibility, and — most important — whether any end can still be reached. Test by running a folded cloth, not a bare finger, along every edge before the project goes into use.
Fasteners, framing, and mounting
The mesh is flexible; the frame is rigid. That division of labor is the whole rule. Adhesive alone is generally unsuitable for securing flexible mesh under repeated handling, because the mesh flexes and peels the bond. Fasteners must bridge wire rather than split it, and narrow fastener heads can pull straight through the large openings.
Options to match to the mesh, frame, and environment:
- Manual staples — quick, but a staple must bridge two wire strands, not split a thin wood frame, and must not stand proud.
- Pneumatic staples — only with tool-specific training and safe setup.
- Fence staples or U-shaped nails — heavier holding for outdoor frames.
- Screws with broad washers — the washers spread load across the opening so the head can’t pull through.
- Wood battens or trim strips that capture the mesh — the cleanest way to hide edges and hold the panel flat.
- Bolts with washers and locknuts — for anything that will be loaded or handled repeatedly.
- J-clips, mesh clips, and compatible rings — for joining panels and edges.
- Stainless or coated lacing wire — for tying joints where metal is already the fastener.
- UV-rated cable ties — limited, replaceable outdoor attachments only.
- Sewn fabric or webbing bindings — for soft edges, provided the seam holds.
- Construction adhesive — supplementary only, and only where the product is rated for both surfaces.
- Metal primer, paint, and clear finish — surface treatment, never fastening.
Mismatched metals can accelerate corrosion through galvanic action, so pair fasteners with the mesh and frame sensibly. Wall and cabinet mounting must rely on the rigid frame, never on the mesh itself. Confirm edge distance, fastener spacing, and wall-anchor capacity against real testing or manufacturer guidance, and load-test every mount before trusting it.
Painting and finishing galvanized wire
Only paint if there is a reason, and check the product first. Sound, documented galvanized mesh can be left unpainted; polymer-coated mesh is usually best kept in its original finish. If you do paint galvanized wire, clean the surface first (galvanized metal resists ordinary paint), use a primer formulated for galvanized metal (such as a zinc-chromate or galvanized-metal primer), and apply a compatible metal paint. Spray products work better than brushing on open mesh, but they require ventilation, overspray control, label-specified respiratory precautions, and complete curing.
Do not aggressively sand or grind galvanized wire — it removes protective coating and creates dust. Do not disturb unknown old paint without researching it first. Do not cover rust with paint. Expect that paint bridges can clog small openings and crack at twisted joints when the mesh flexes. Dry-to-the-touch is not cured, and a coating does not make the mesh food-safe, child-safe, pet-safe, waterproof, or permanently corrosion-free.
Making it look deliberate, not accidental
The difference between “farmhouse” and “forgot to finish” is restraint. Limit each project to roughly two to five colors and one metal finish plus one compatible frame finish. Align hexagonal openings consistently and center the mesh pattern inside visible frames. Keep border widths equal, repeat one clip, hook, or rod style, and use symmetry for cabinet panels and paired baskets while letting memo grids and botanical displays be deliberately asymmetrical. Galvanized gray pairs well with pale wood, matte black, warm white, muted sage, or another restrained palette. Paint the frame rather than coating sound mesh when that gives a cleaner result, and conceal staples, washers, folded edges, and backing strips. Keep labels simple and removable, style organizers with realistic lightweight contents, and photograph raking light across the mesh so the pattern stays visible. Skip the bows, beads, glitter, and lettering.
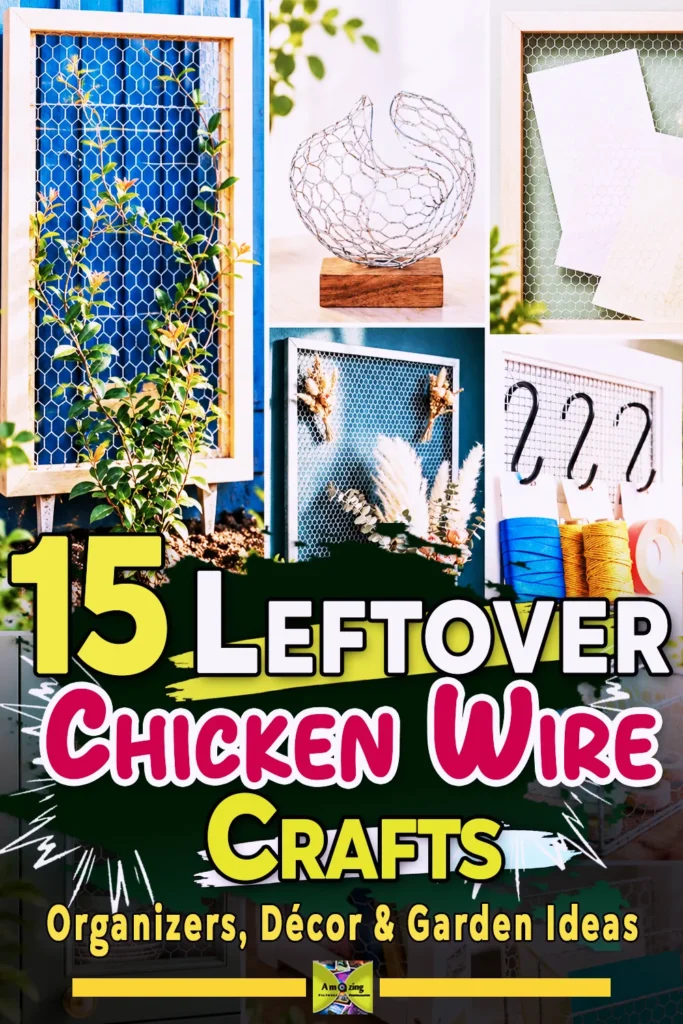
15 leftover chicken wire crafts
Desk and craft-room organization
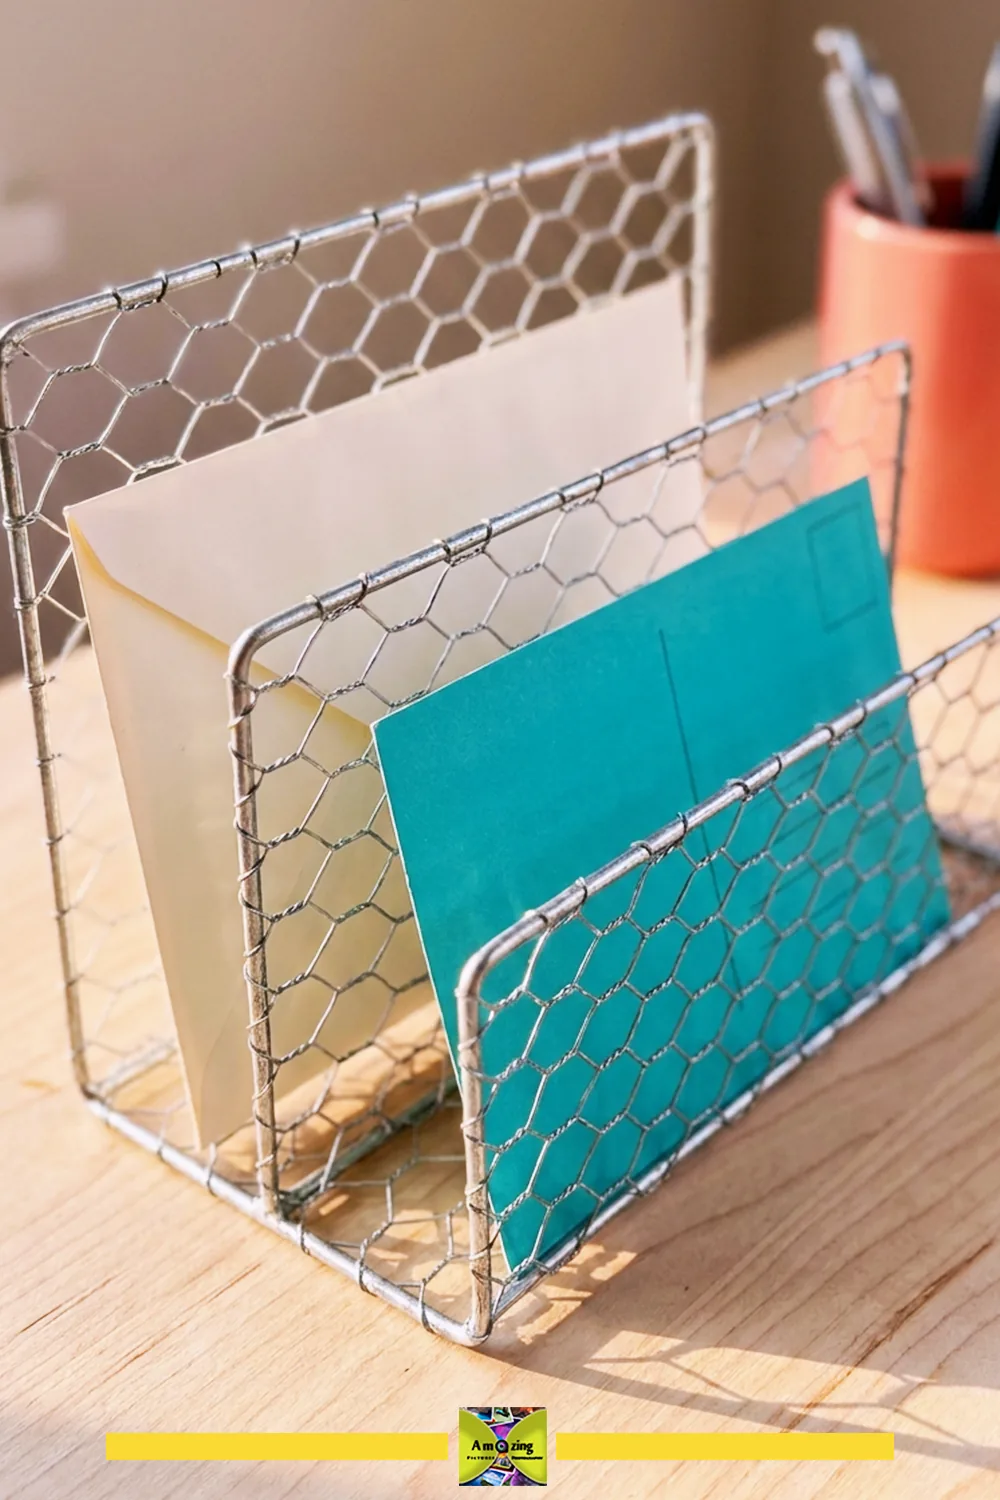
1. Folded-mesh desktop letter sorter
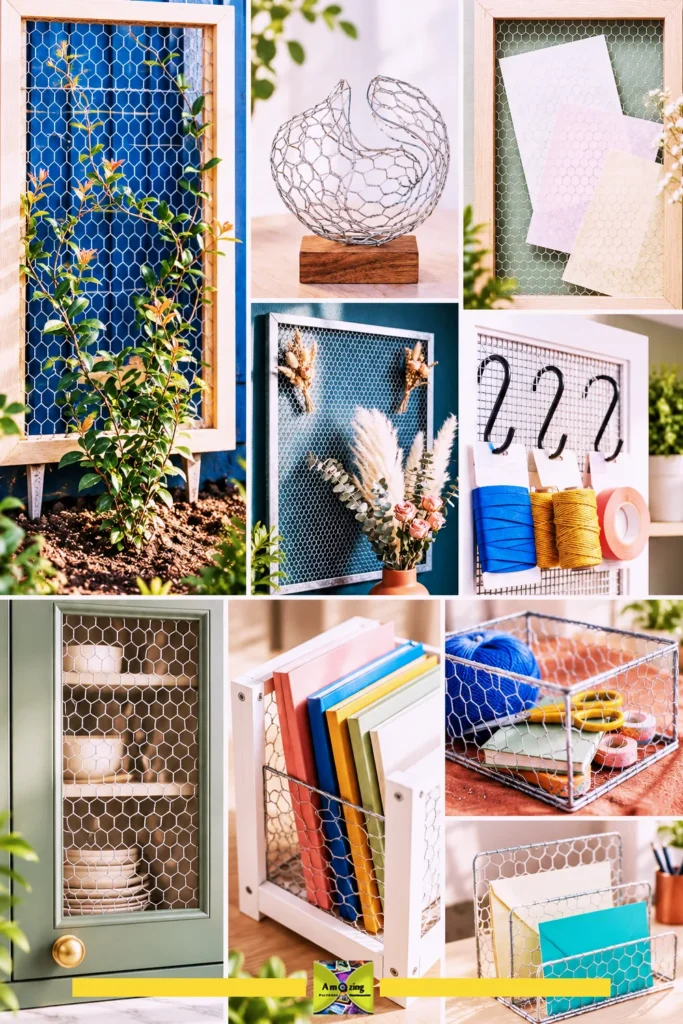
A low wooden tray with two or three folded mesh dividers that stand on their own captured edges — a place for incoming mail, envelopes, and slim folders that reads as a clean desktop accessory rather than fencing.
Best use: sorting a small number of letters, bills, and slim papers on a desk or entry table. Difficulty: Easy. Time: roughly 1.5 hours (including cutting, hem flattening, and grooving the base).
Mesh spec: flexible poultry netting, about 1-inch (25 mm) openings, roughly 20-gauge galvanized or sound polymer-coated, clean and free of corrosion. Do not substitute welded hardware cloth or chain-link — the fold and hem behavior will change and the edges are harder to contain.
Materials: one clean offcut sized to your tray; a broad wooden base (¾-inch / 19 mm stock, width and length sized to your mail); two or three wood battens or a routed groove to capture each divider’s bottom edge; small screws or finish nails; optional paint or clear finish for the base.
Tools: safety glasses, puncture-resistant gloves, straight-cut aviation snips or diagonal cutters, needle-nose pliers, a measuring tool, a marker or removable tag, a drill/driver, sandpaper.
How to make it:
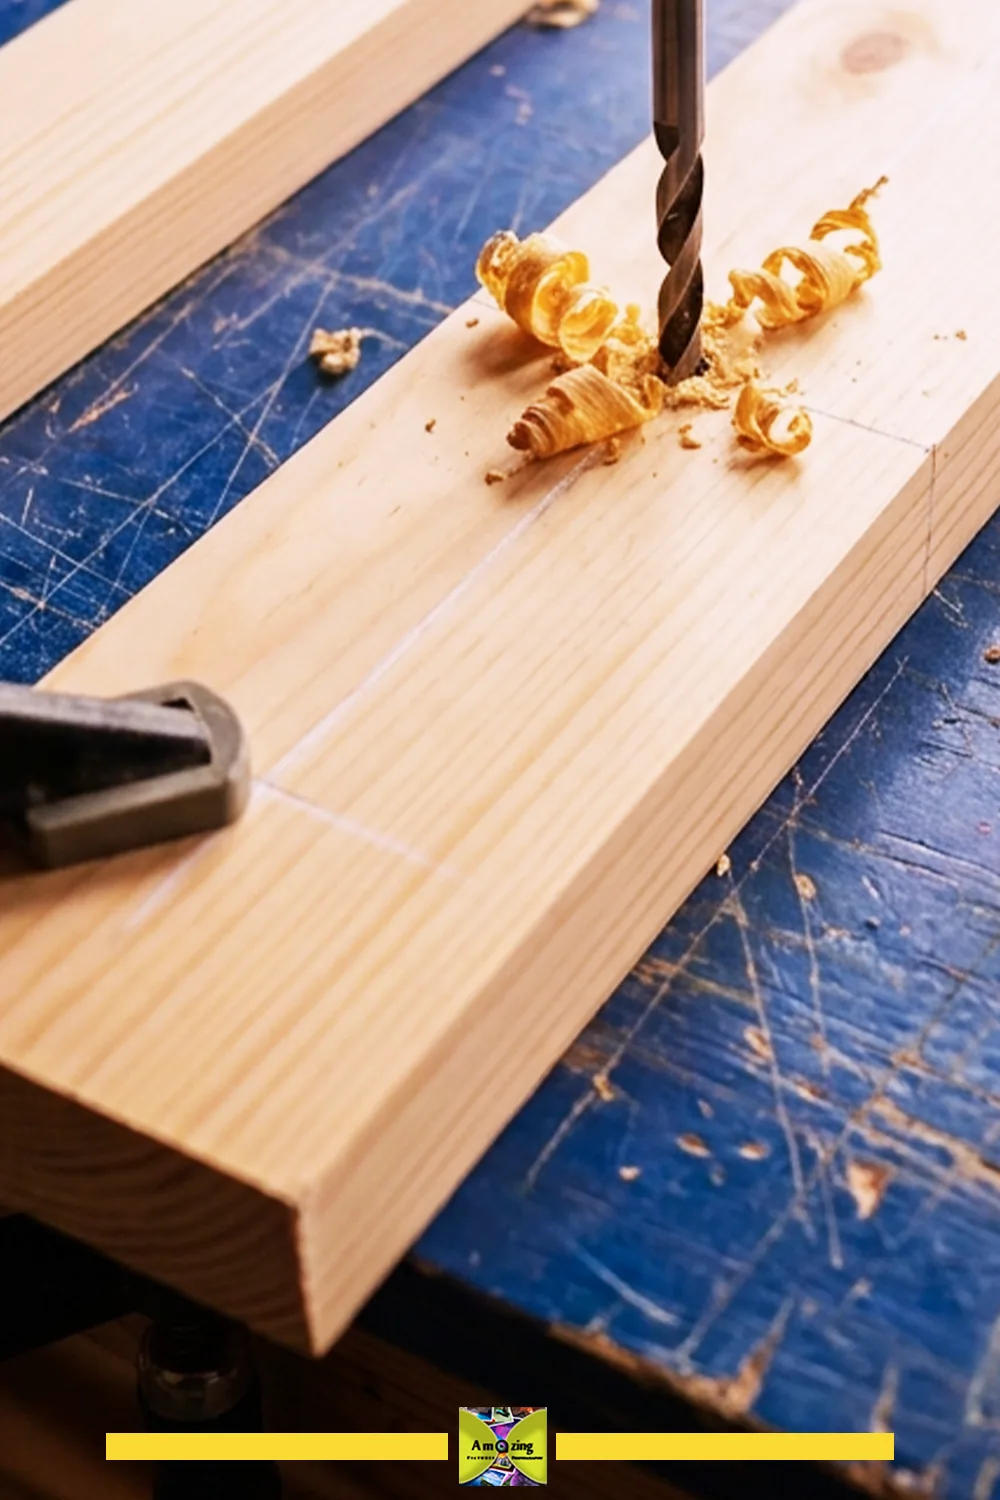
- Decide the finished sorter dimensions from your actual mail — make the base about 1 inch (25 mm) wider and longer than your largest envelope. Mark every measurement for firsthand confirmation.
- Cut a full-size paper template of each divider, adding at least two complete hexagon rows beyond the visible height for the folded hem and the captured bottom edge.
- Restrain the roll, flatten the panel, and mark cut lines through repeated junctions so the top edge ends on full hexagons. Cut with snips, holding the waste side with pliers and capturing clippings.
- Fold the top and side edges back through complete openings and press the hem flat with pliers so no tail protrudes. Leave the bottom edge long to capture.
- Route a groove or screw a batten along the base to trap each divider’s bottom edge and cover its cut ends. Dry-fit, then fasten so the mesh is captured, not merely stapled.
- Load-test with a few envelopes, watch for tipping, and widen the base if it leans.
Customize it: orient the hexagons so the points run vertically for a taller look; paint the base matte black or warm white while leaving the galvanized mesh visible; add removable paper labels per slot.
Tip: capture the divider edges in a groove rather than stapling them on top — a groove hides every cut end and keeps the dividers square.
Likely mistake: cutting the top edge mid-hexagon so short tails stick out above the hem. Cut on full openings instead.
Safety note: run a folded cloth, not your fingers, along every folded hem before use; a single escaped tail will find a hand.
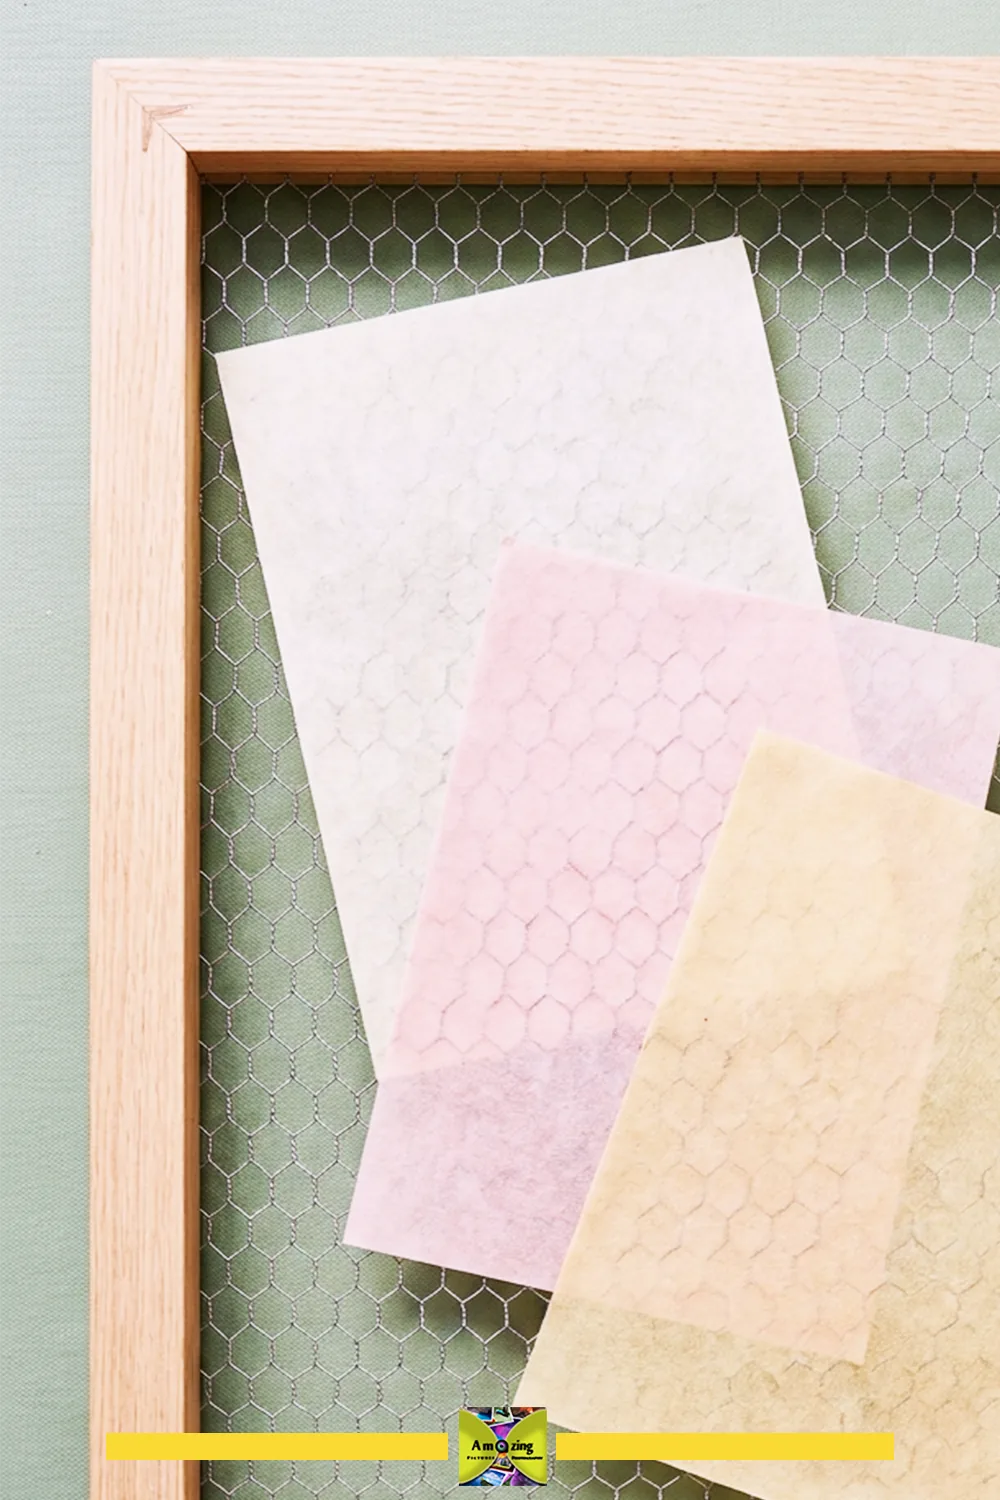
2. Framed wall memo and receipt grid
A narrow reclaimed frame holding a single taut panel of mesh, mounted through the frame so clips and notes never pull on the wire itself.
Best use: pinning a few photos, receipts, and reminders where they stay visible and easy to swap. Difficulty: Easy. Time: roughly 1–2 hours.
Mesh spec: flexible poultry netting, 1-inch (25 mm) openings, ~20-gauge, clean galvanized. Do not substitute hardware cloth unless you also switch to heavier clips and verify the frame can take the extra tension.
Materials: a reclaimed frame with a flat reverse; a mesh panel cut larger than the opening; backing board; small smooth clips (mini clothespins or paper clips) sized to the openings; screws and wall anchors rated for the filled weight.
Tools: snips or diagonal cutters, needle-nose pliers, gloves, safety glasses, stapler or small screws and washers, drill/driver, level.
How to make it:
- Confirm the frame is sound and not valuable, rented, or historically significant.
- Cut the mesh several complete hexagons larger than the opening on every side.
- Pull the mesh taut over the reverse and capture the perimeter between the frame and the backing, or staple it with the cut edges folded under. Never leave a bare cut edge where it can be reached.
- Attach the clips and verify none has an exposed point.
- Mount through the rigid frame into wall anchors rated for the filled weight; level it and load-test before trusting it.
Customize it: paint the frame and leave the mesh gray; align openings so clips hang symmetrically; use matching clips for a set.
Tip: keep contents to paper, photos, and light flat items — clips on chicken wire are for display, not for hanging weight.
Likely mistake: mounting through the mesh or hanging heavy items from a single opening, which pulls the hexagon out of shape.
Safety note: no exposed points behind or beneath the board; check after any re-stapling.
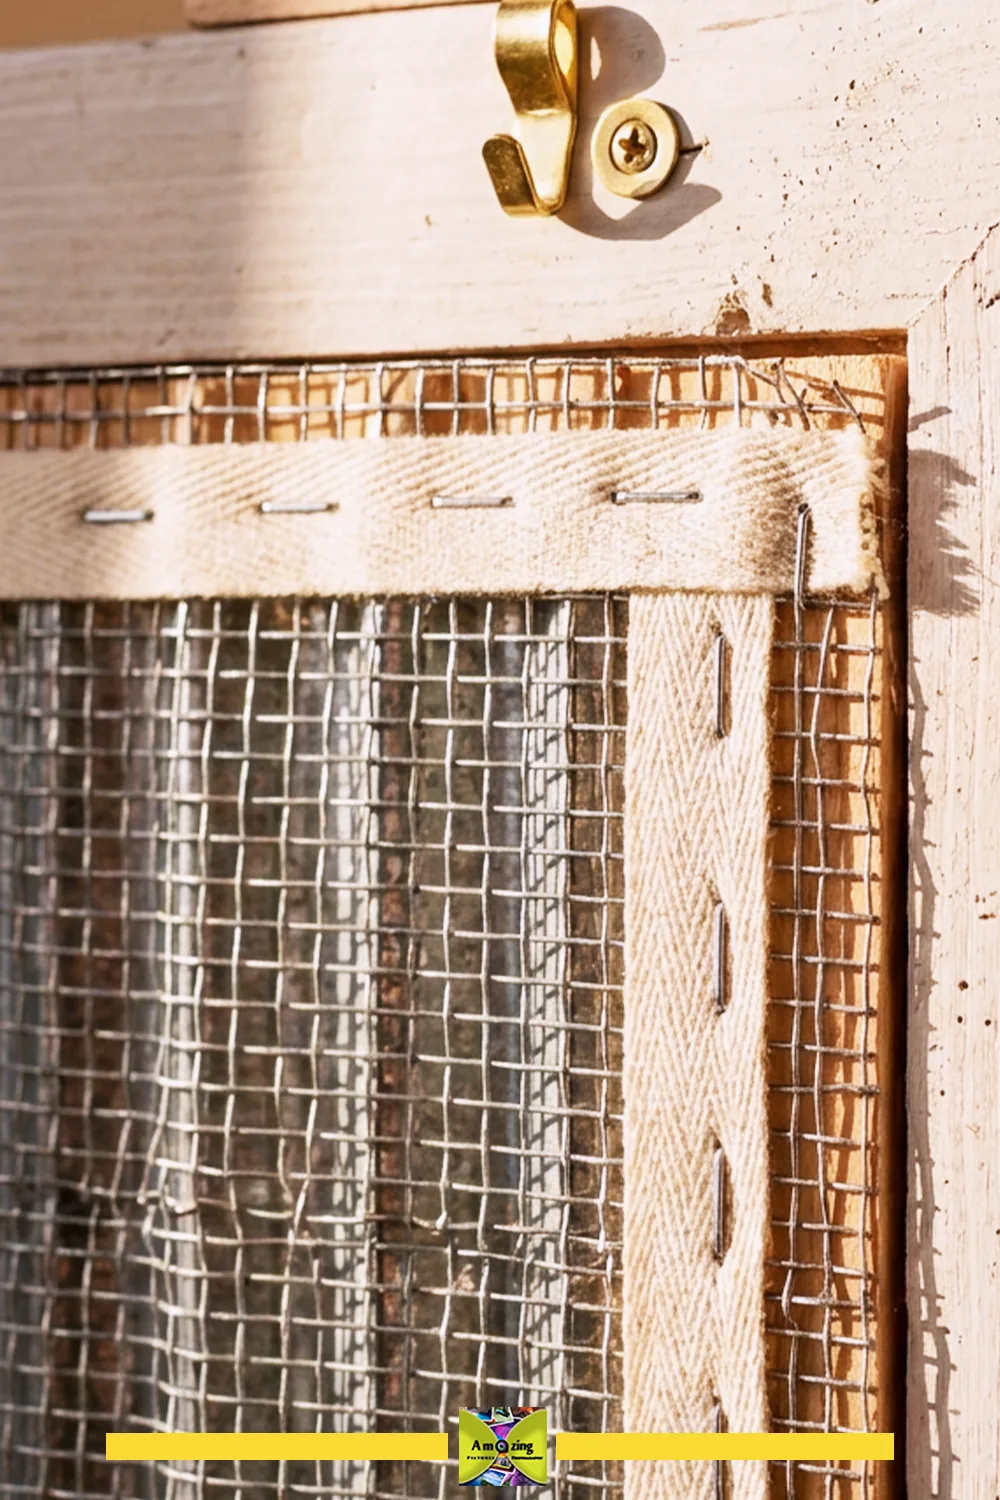
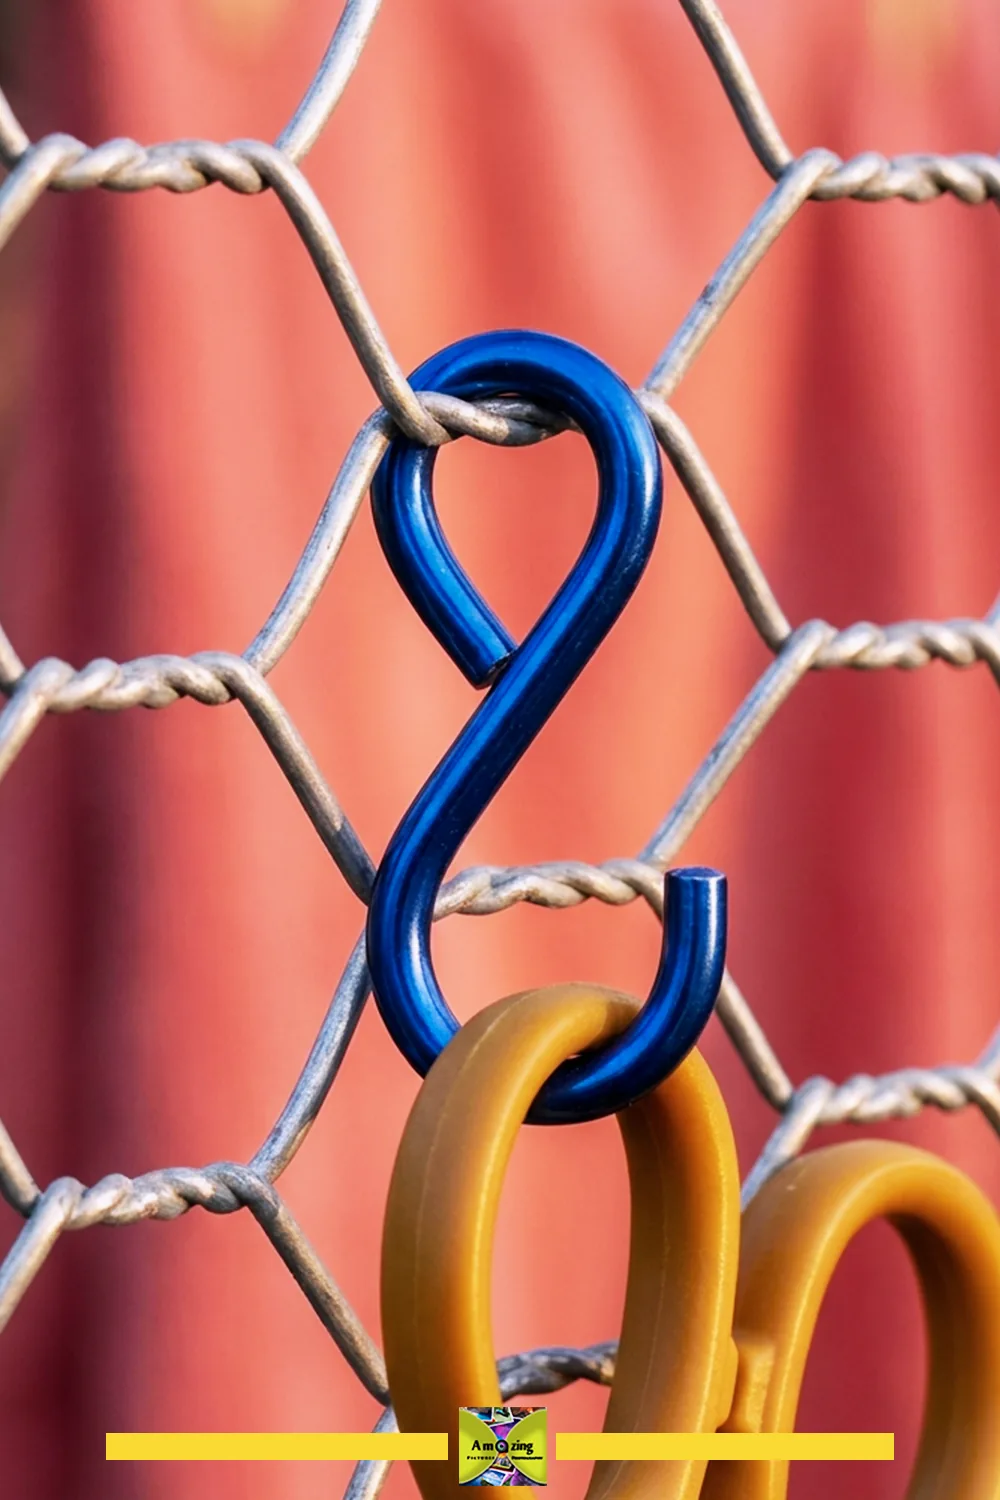
3. Craft-tool clip panel
A framed mesh panel with smooth clips holding lightweight scissors (tips closed), rulers, swatches, and packaged supplies — a vertical organizer that keeps tools visible and off the bench.
Best use: tidy storage for light, closed, non-sharp craft tools and packaged items in a craft room. Difficulty: Easy. Time: roughly 1–2 hours.
Mesh spec: flexible poultry netting, 1-inch (25 mm) openings, ~20-gauge, clean. Use only smooth, closed-tip items; no loose blades, hot tools, chemicals, medicine, food, or breakable valuables.
Materials: a rigid frame; mesh panel; clips and hooks rated for the intended items and sized to the openings; screws and wall anchors.
Tools: snips or cutters, pliers, gloves, safety glasses, drill/driver, level, stapler or screws with washers.
How to make it:
- Build or reclaim a rigid frame; cut the mesh larger than the opening and capture the perimeter fully.
- Fold or cover every cut edge; dry-fit the clips so their tips face inward and none overhangs an opening.
- Mount through the frame, not the mesh, into rated anchors.
- Hang the lightest items first, then load-test gradually with non-fragile objects. Remove from use if the panel bows or clips detach.
Customize it: coordinate clip finish with the frame; label sections with removable tags; keep the mesh gray under a matte-black frame.
Tip: hang scissors tips-down and closed so a bump cannot open or stab.
Likely mistake: overloading a single opening so the wire stretches into a sagging pocket.
Safety note: no sharp or loose tools; a clip that releases a heavy item is the failure you are designing against.
4. Spool-and-tape storage rack
A rigid frame carrying removable rods for spools of thread and rolls of tape — the rods rest in the frame, not in unsupported wire openings.
Best use: keeping spools and tape rolls visible and reachable without pulling the mesh out of shape. Difficulty: Easy. Time: roughly 1–2 hours.
Mesh spec: flexible poultry netting, 1-inch (25 mm) openings, ~20-gauge, clean. The mesh here is mostly a visual/light-holding surface; the rods are supported by the frame.
Materials: a rigid box or U-shaped frame; wooden or metal rods sized to your spool holes; mesh panel to back the frame; screws and finish.
Tools: snips, pliers, gloves, safety glasses, drill/driver, measuring tool.
How to make it:
- Size the frame to your spools and tape rolls; measure your largest roll and mark dimensions for firsthand confirmation.
- Drill rod holes in the frame sides so rods rest in wood, not wire.
- Back the frame with mesh for a finished look, capturing every edge.
- Insert rods, load spools, and test that the rods don’t flex and the frame doesn’t lean forward.
Customize it: paint the frame; use matching rods; leave the mesh as a back panel only.
Tip: make the rods removable so you can restock or clean without stressing the frame.
Likely mistake: threading rods through mesh openings so the wire carries the weight and sags.
Safety note: keep it against a wall or anchored if top-heavy; don’t overload the front row.
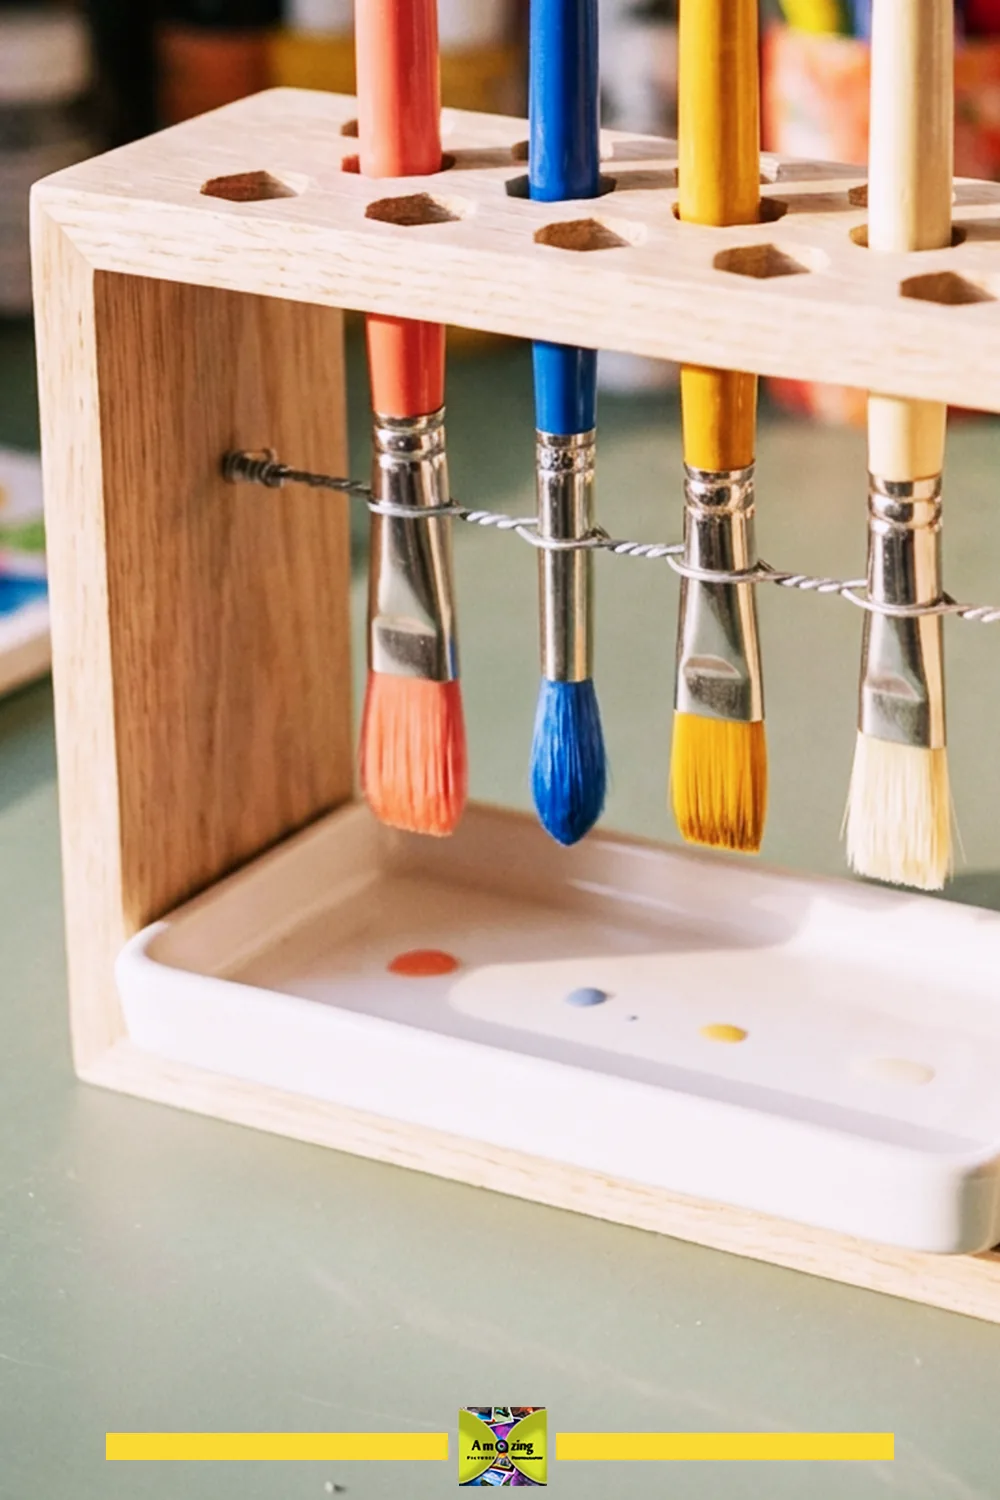
5. Paintbrush drying rack
A framed horizontal mesh deck that holds cleaned brushes by the handle so they dry bristles-down, over a separate drip tray.
Best use: drying cleaned brushes that are no longer dripping, bristles pointing down so water runs away from the ferrule. Difficulty: Easy. Time: roughly 1–2 hours.
Mesh spec: flexible poultry netting, 1-inch (25 mm) openings, ~20-gauge, clean. For brushed-out water-based paint only; no solvent, oil, or still-dripping brushes.
Materials: a shallow frame; a mesh deck captured in a groove; a separate non-absorbent drip tray beneath; small blocks or feet to raise the deck.
Tools: snips, pliers, gloves, safety glasses, drill/driver, measuring tool.
How to make it:
- Size the deck to your longest brushes plus clearance. Mark dimensions for firsthand confirmation.
- Cut the mesh to the frame opening plus a full capture margin; capture the perimeter in a groove or between two trim pieces so no edge is reachable.
- Set the deck on feet above a separate drip tray; confirm the tray catches the drips and the deck stays level.
- Place brushes handle-up, bristles-down, one per opening, and only after they have stopped dripping.
Customize it: paint the frame to match your craft room; add a small lip to the tray; size openings to your brush handles.
Tip: use this only for brushes that have already been cleaned and shaken out — it is a drying rack, not a rinsing station.
Likely mistake: leaving brushes dripping so water runs down the handle and into the ferrule, which is what the rack is meant to prevent.
Safety note: no solvents or oily rags near the rack; empty and dry the tray between uses.
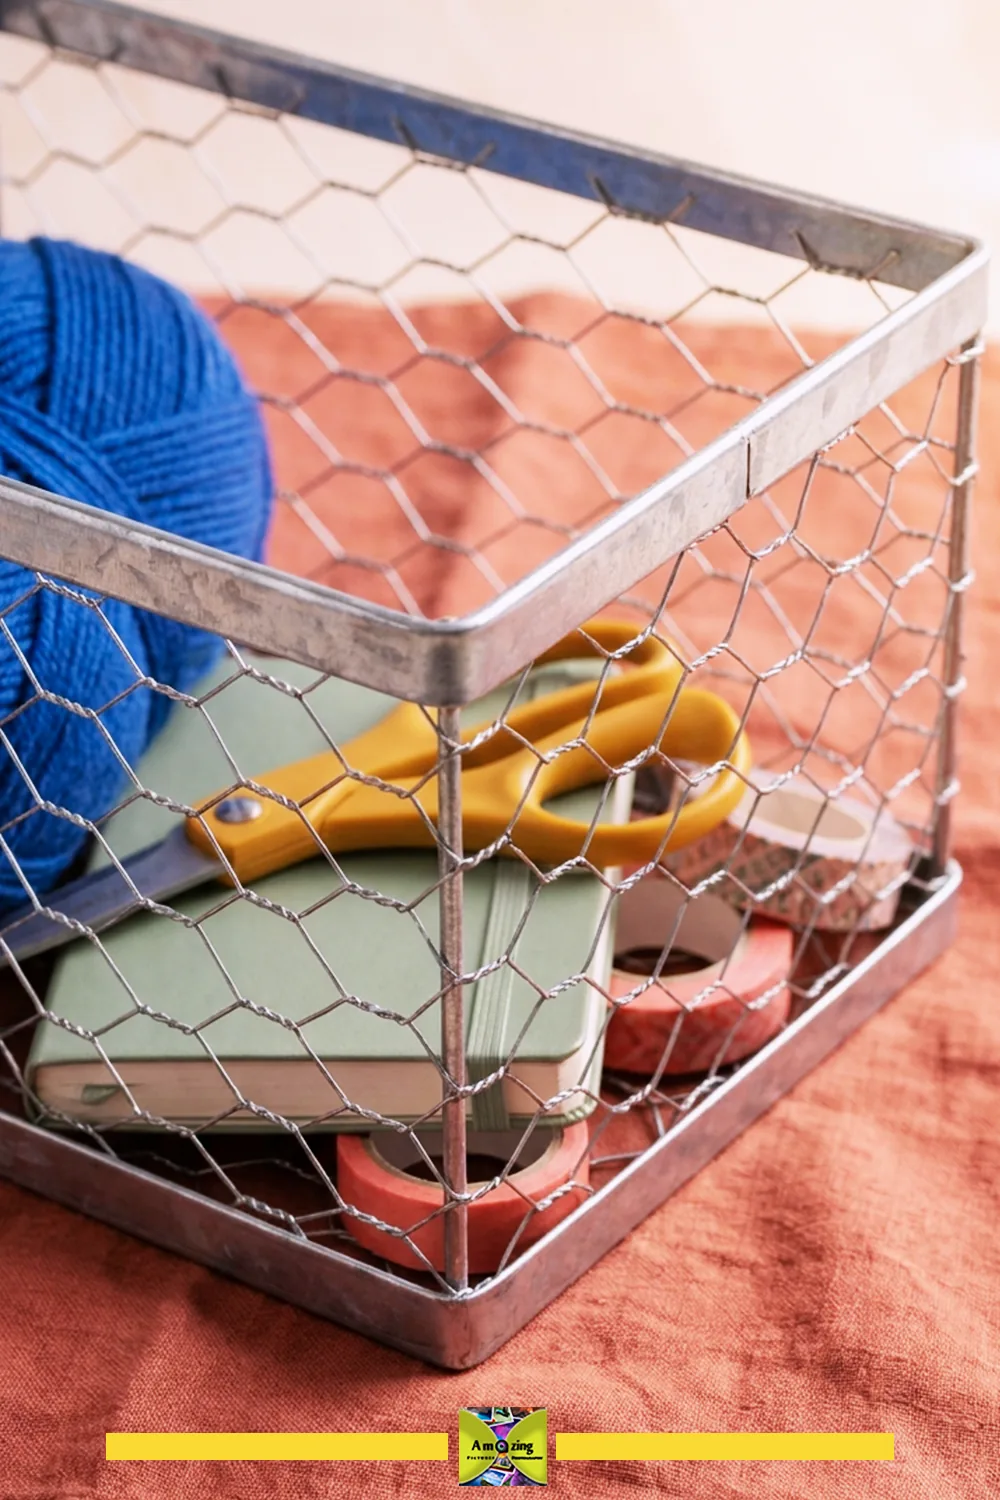
6. Lightweight rectangular mesh basket
A small basket with a rigid base, a bound rim, and reinforced corners, sized for dry craft supplies.
Best use: corralling yarn, ribbon, fabric scraps, or packaged notions that won’t poke through the openings. Difficulty: Moderate. Time: roughly 2–3 hours.
Mesh spec: flexible poultry netting, 1-inch (25 mm) openings, ~20-gauge, clean. Contents must be dry and larger than the openings; no liquids, food, or anything sharp.
Materials: a mesh panel; a rigid base (wood or hardboard) cut to the basket footprint; edge binding (folded fabric, webbing, or U-channel); corner reinforcement (lacing wire or clips); smooth feet or pads.
Tools: snips, needle-nose or seaming pliers, gloves, safety glasses, measuring tool, clamps.
How to make it:
- Make a full-size paper pattern for the base and four sides, adding hem allowances, and cut the mesh with the roll restrained.
- Fold the sides up around the base, bending around the rigid base rather than by hand at unsupported points.
- Reinforce each corner with lacing wire or clips so the basket holds its square; bind the top rim so no cut end is reachable.
- Add smooth feet and load-test gradually with non-fragile objects. Retire it if the mesh stretches, the base separates, or any wire end emerges.
Customize it: line the base with felt to stop small items slipping; paint the feet; keep the mesh gray.
Tip: bend around the base itself so the corners come out square instead of rounded.
Likely mistake: cutting the corners short so the sides can’t fully fold and a gap opens at the base.
Safety note: a bound rim is the minimum; check corners after every load, because that’s where tails escape first.
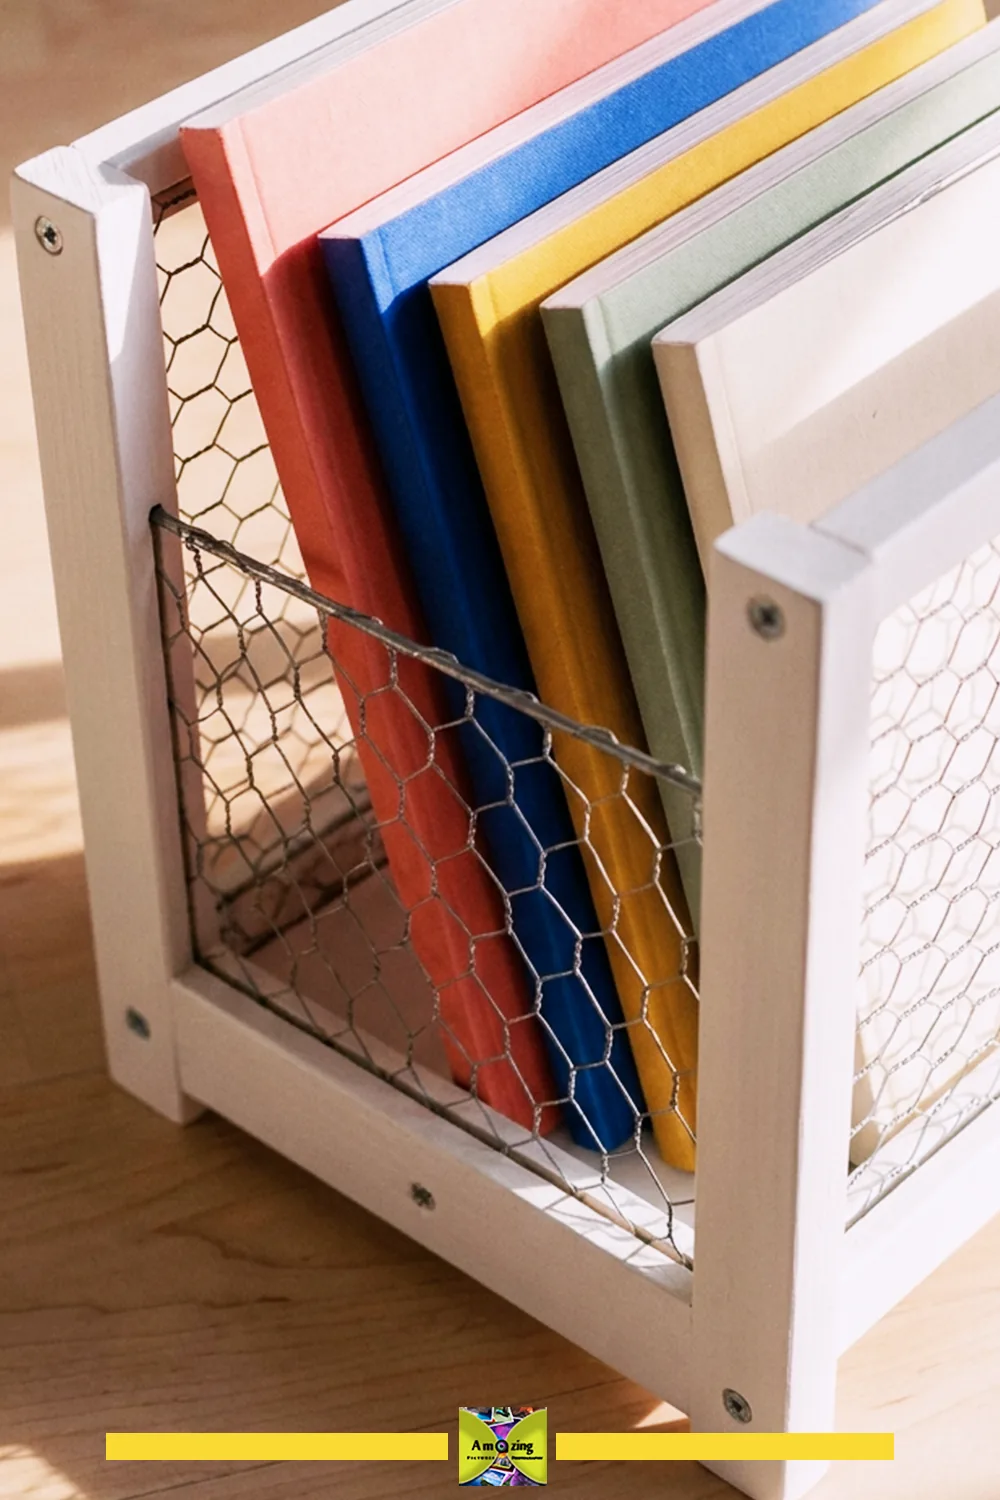
7. Freestanding magazine and paper-file rack
A framed rack with two mesh sides and a broad anti-tip base, holding a small number of lightweight magazines or files.
Best use: keeping a few magazines, file folders, or papers upright in an office or craft room. Difficulty: Moderate. Time: roughly 2–3 hours.
Mesh spec: flexible poultry netting, 1-inch (25 mm) openings, ~20-gauge, clean. Capacity limited to a small number of lightweight items; do not load it like a bookshelf.
Materials: two mesh side panels; a rigid frame (wood) for the base and back; a broad anti-tip base; fasteners.
Tools: snips, pliers, gloves, safety glasses, drill/driver, measuring tool, square.
How to make it:
- Size the rack to your largest magazine plus clearance, and make the base wider than the body so it resists tipping. Mark dimensions for firsthand confirmation.
- Cut two matched side panels, aligning the hexagons so the pair reads as a set; capture every edge in the frame.
- Assemble the base and back square, then fasten the mesh sides into grooves or under battens.
- Load a few magazines and test that the rack does not tip when you pull one out.
Customize it: paint the frame; angle the back for a display feel; keep contents to a handful of items.
Tip: a wide, heavy base is the entire anti-tip strategy — don’t skimp on it.
Likely mistake: loading the rack until the mesh sides bow outward and the frame racks out of square.
Safety note: keep it off narrow ledges; if it tips once, reduce the load, don’t just push it back.
Cabinet and storage updates
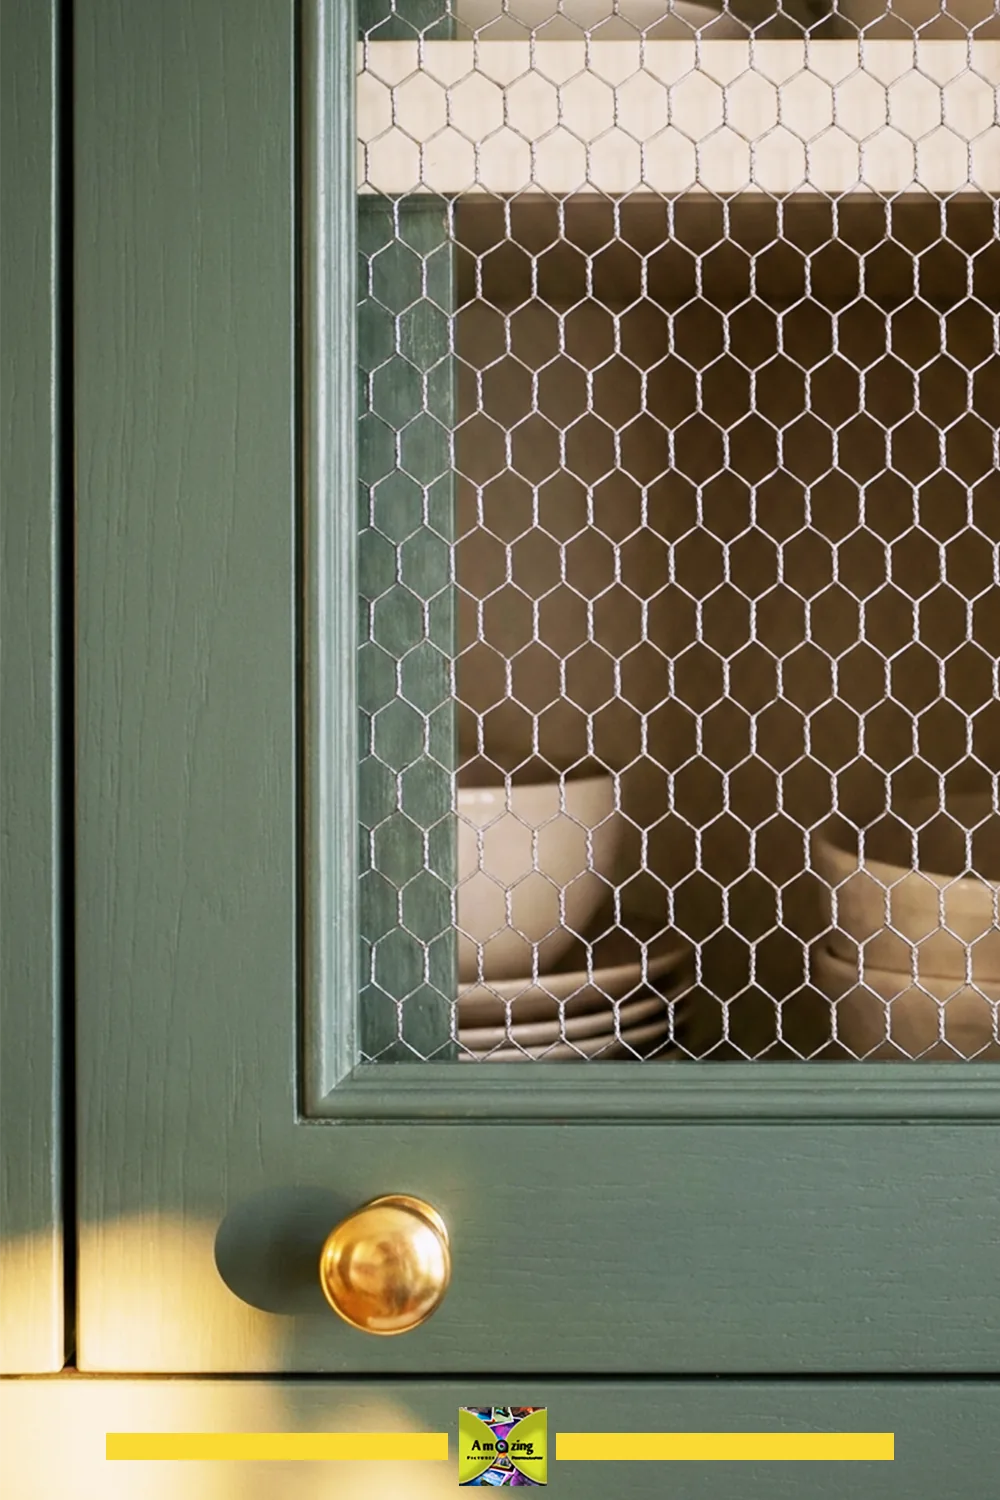
8. Decorative cabinet-door panel insert
A mesh panel installed in a cabinet-door opening and captured from the reverse with trim that covers the full perimeter.
Best use: replacing a dated solid or glass panel with an airy, farmhouse look while hiding some clutter. Difficulty: Moderate. Time: roughly 2–4 hours per door.
Mesh spec: flexible poultry netting, 1-inch (25 mm) openings, ~20-gauge, clean. This is decorative only; it does not contain stored objects safely.
Materials: a mesh panel cut to the opening plus capture margin; trim or a routed groove; small screws; optional paint.
Tools: snips, pliers, gloves, safety glasses, drill/driver, measuring tool, a way to remove and reinstall the door.
How to make it:
- Verify the door is suitable for alteration — not valuable, rented, historically significant, or part of a fire- or safety-rated assembly.
- Remove the door where practical and protect hinges, glass, finishes, and surrounding surfaces.
- Make a template from the actual opening, not a guessed dimension, then cut the mesh larger than the opening.
- Capture the perimeter from the reverse with trim or a groove so the panel is held by the trim, not staples alone, and no edge is reachable from the front.
- Reinstall the door and check hinge, latch, and swing clearance.
Customize it: paint the door while leaving the mesh gray; use matching trim; keep the inside of the cabinet tidy since it stays partly visible.
Tip: attach the mesh to the reverse of the door so the face shows only clean mesh and trim.
Likely mistake: relying on staples where the panel can be touched, which lets the mesh sag or a cut end surface.
Safety note: remove and reinstall the door carefully; a dropped or mis-swung door is a real hazard.
9. Inside-cabinet accessory rack
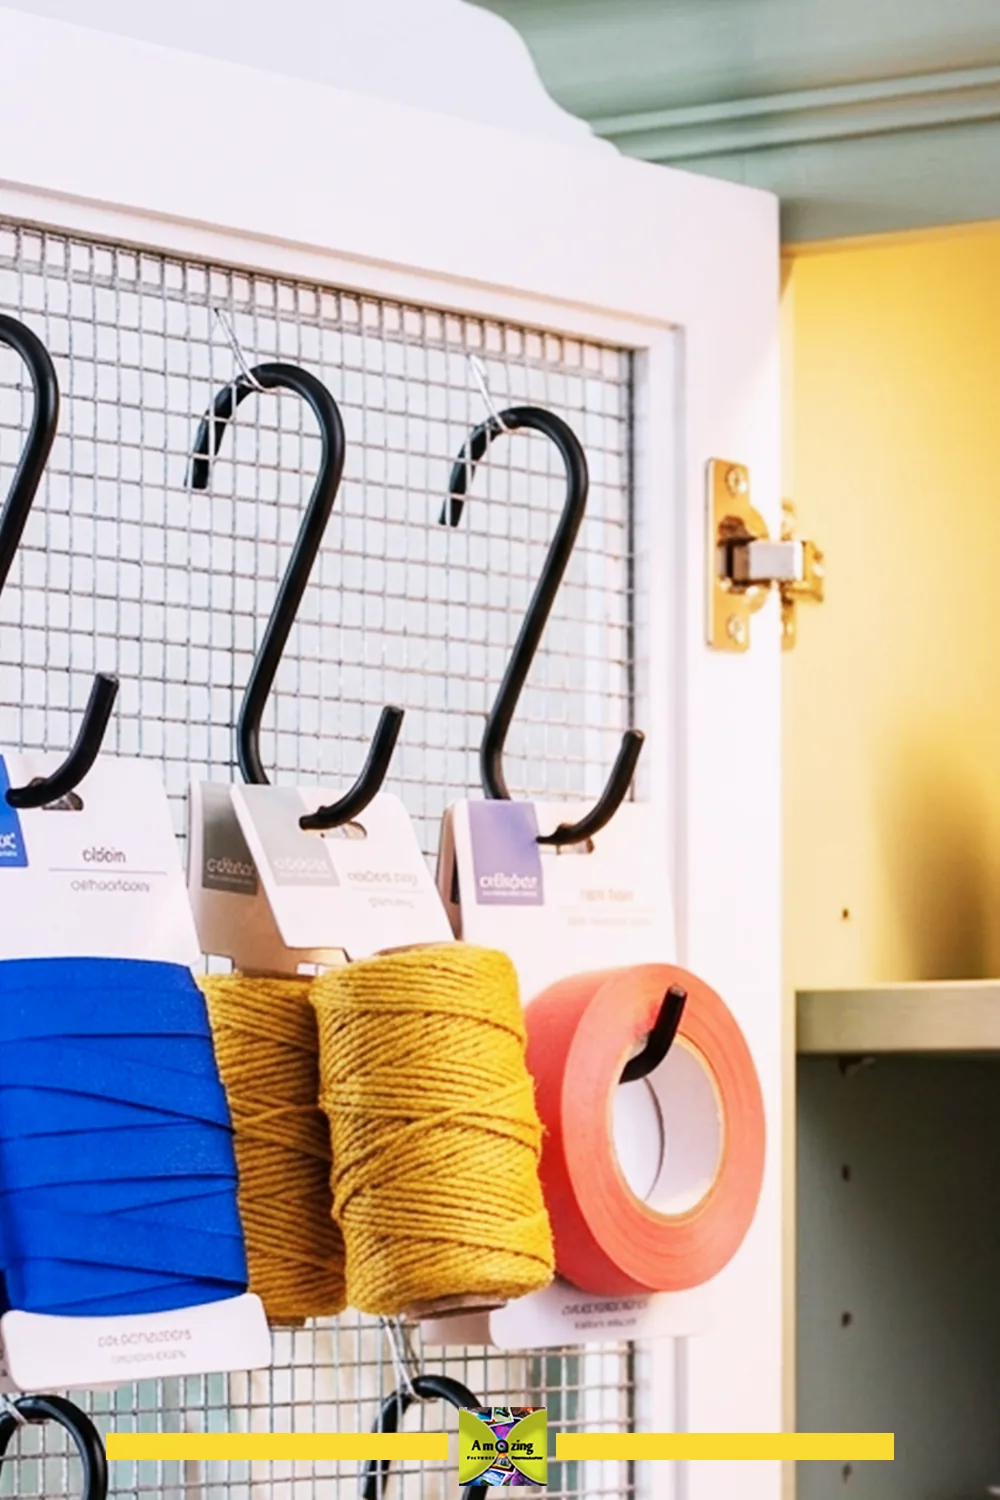
A framed mesh panel mounted inside a cabinet with shallow hooks for lightweight packaged supplies, sized to clear the door, shelves, and hinges.
Best use: adding a little visible organization inside a cabinet without losing door clearance. Difficulty: Easy. Time: roughly 1–2 hours.
Mesh spec: flexible poultry netting, 1-inch (25 mm) openings, ~20-gauge, clean. Lightweight packaged supplies only — no food, no sharp or heavy tools.
Materials: a framed mesh panel; shallow hooks sized to the openings; screws sized to the cabinet interior; spacers if needed.
Tools: snips, pliers, gloves, safety glasses, drill/driver, measuring tool.
How to make it:
- Measure the interior and the door swing, and test door, shelf, hinge, and latch clearance before mounting anything.
- Build or size a framed mesh panel with every edge captured; mount it through the frame to the cabinet interior.
- Add shallow hooks, dry-fitting them so nothing strikes a shelf or stored object when the door closes.
- Hang only lightweight packaged supplies and confirm the door still closes without binding.
Customize it: paint the frame to match the cabinet interior; label hook sections; keep hooks shallow.
Tip: mount the panel so its hooks face away from the hinge line, and test the full swing before loading.
Likely mistake: hooks that protrude far enough to catch a shelf or stored item, so the door binds or scratches.
Safety note: no sharp tools or heavy items on interior hooks; a falling object onto a reachable shelf is the risk you are avoiding.
Restrained decorative projects
10. Removable dry-botanical arranging grid
A mesh grid that sits over a separate decorative container to hold dried stems upright — decorative and dry only.
Best use: arranging dried grasses, branches, and preserved botanicals without florist foam. Difficulty: Easy. Time: roughly 30–60 minutes.
Mesh spec: flexible poultry netting, 1-inch (25 mm) openings, ~20-gauge, clean. Dry use only; no prolonged water contact, and no claim that galvanized wire suits wet flower arranging.
Materials: a mesh panel cut to the container mouth plus a fold-over margin; a separate watertight container or vase; optional edge binding.
Tools: snips, pliers, gloves, safety glasses, measuring tool.
How to make it:
- Cut a panel slightly larger than the container mouth, then fold the margin down and in so every cut end is captured and no edge is reachable from any viewing angle.
- Rest the grid across the mouth of the container; confirm it sits without tipping or shifting.
- Insert dried stems through the openings into the empty (dry) container beneath.
- Retire the grid immediately if rust, coating loss, staining, or a sharp end appears.
Customize it: paint the container, leave the mesh gray; shape the grid as a circle or oval to match the vessel.
Tip: keep the vessel dry — this is for preserved botanicals, not fresh-cut stems in water.
Likely mistake: using it for fresh flowers in water, which invites rust and stains.
Safety note: no candles, lights, incense, food, or fragile objects in the arrangement; the mesh is structural support, not a flame screen.

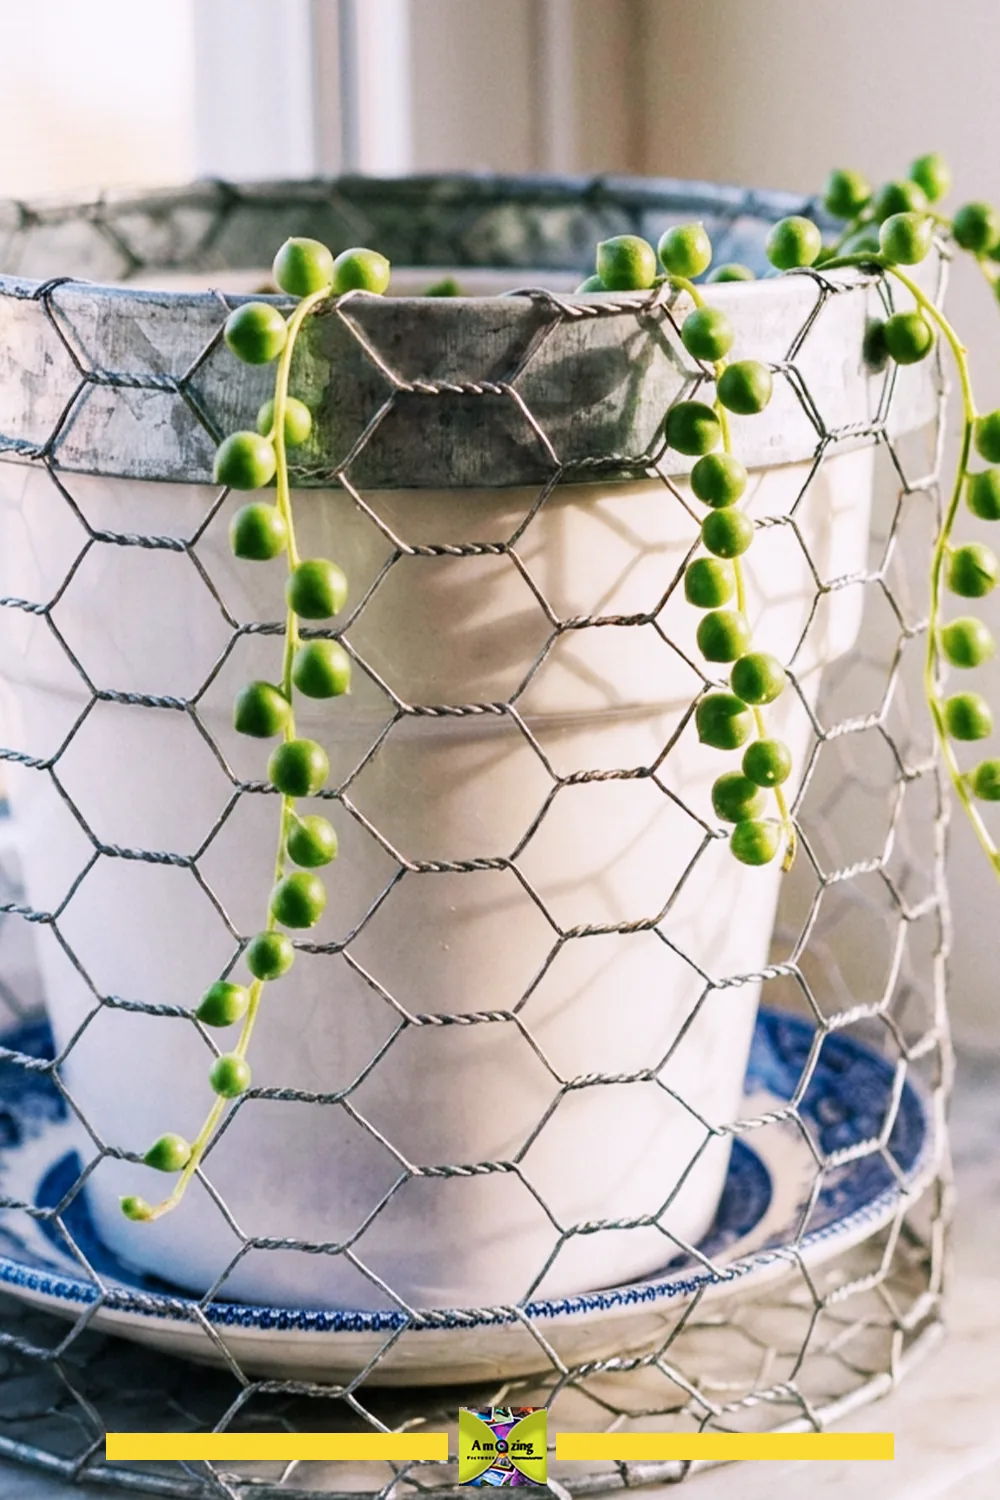
11. Ventilated cachepot sleeve
A mesh sleeve that surrounds a separate watertight plant pot and saucer, keeping the wire away from damp soil and water.
Best use: dressing up a plain nursery pot with a breathable, removable outer sleeve. Difficulty: Moderate. Time: roughly 1–2 hours.
Mesh spec: flexible poultry netting, 1-inch (25 mm) openings, ~20-gauge, clean. The plant lives in a separate pot; the mesh must not touch damp soil or standing water.
Materials: a mesh panel; a rigid base (wood or hardboard) with smooth feet or pads; a separate watertight pot and saucer that fit inside; edge binding.
Tools: snips, pliers, gloves, safety glasses, measuring tool, clamps.
How to make it:
- Size the sleeve to the outer pot plus clearance, and build the rigid base so it carries the weight. Mark dimensions for firsthand confirmation.
- Form the mesh into a cylinder or box around the base, binding the rim and reinforcing the seam so no cut end is reachable.
- Set the separate pot and saucer inside so nothing damp touches the wire.
- Retire it if rust, coating loss, or staining appears, or if the base separates.
Customize it: paint the base to match the room; use a cylinder for round pots or a box for square ones; keep the mesh gray.
Tip: a rigid base and a watertight inner pot are what keep this decorative — remove the plant to water it, or lift the whole pot out.
Likely mistake: letting the mesh sit directly against wet soil so it rusts and stains the surface beneath.
Safety note: broad, stable base; no candles, lights, or food around the sleeve.
12. Flat craft-paper / print-drying screen
A shallow framed screen with a supported mesh deck for drying flat paper, prints, or craft sheets.
Best use: air-drying clean, flat craft paper or prints that are not dripping, in a dust-free spot. Difficulty: Easy. Time: roughly 1–2 hours.
Mesh spec: flexible poultry netting, 1-inch (25 mm) openings, ~20-gauge, clean. No archival or food-drying claim; this is casual craft-paper drying only.
Materials: a shallow frame; a mesh deck captured in a groove; small feet or a way to stack multiple screens.
Tools: snips, pliers, gloves, safety glasses, drill/driver, measuring tool.
How to make it:
- Size the frame to your largest paper sheet plus margin; add cross-supports beneath the mesh so it cannot sag. Mark dimensions for firsthand confirmation.
- Cut the mesh to the opening plus a full capture margin and capture the perimeter in a groove or under trim.
- Add small feet and confirm the screen sits flat and level.
- Dry only clean, non-dripping sheets, and clean the mesh if anything transfers.
Customize it: build several and stack them with small spacers; paint the frames; keep the mesh gray.
Tip: add a support rail under the center of a wide screen — open mesh will sag under its own span.
Likely mistake: making the frame too wide without support, so the deck bows and papers curl.
Safety note: this is not a food-drying rack and not archival storage; don’t dry anything wet enough to drip through.
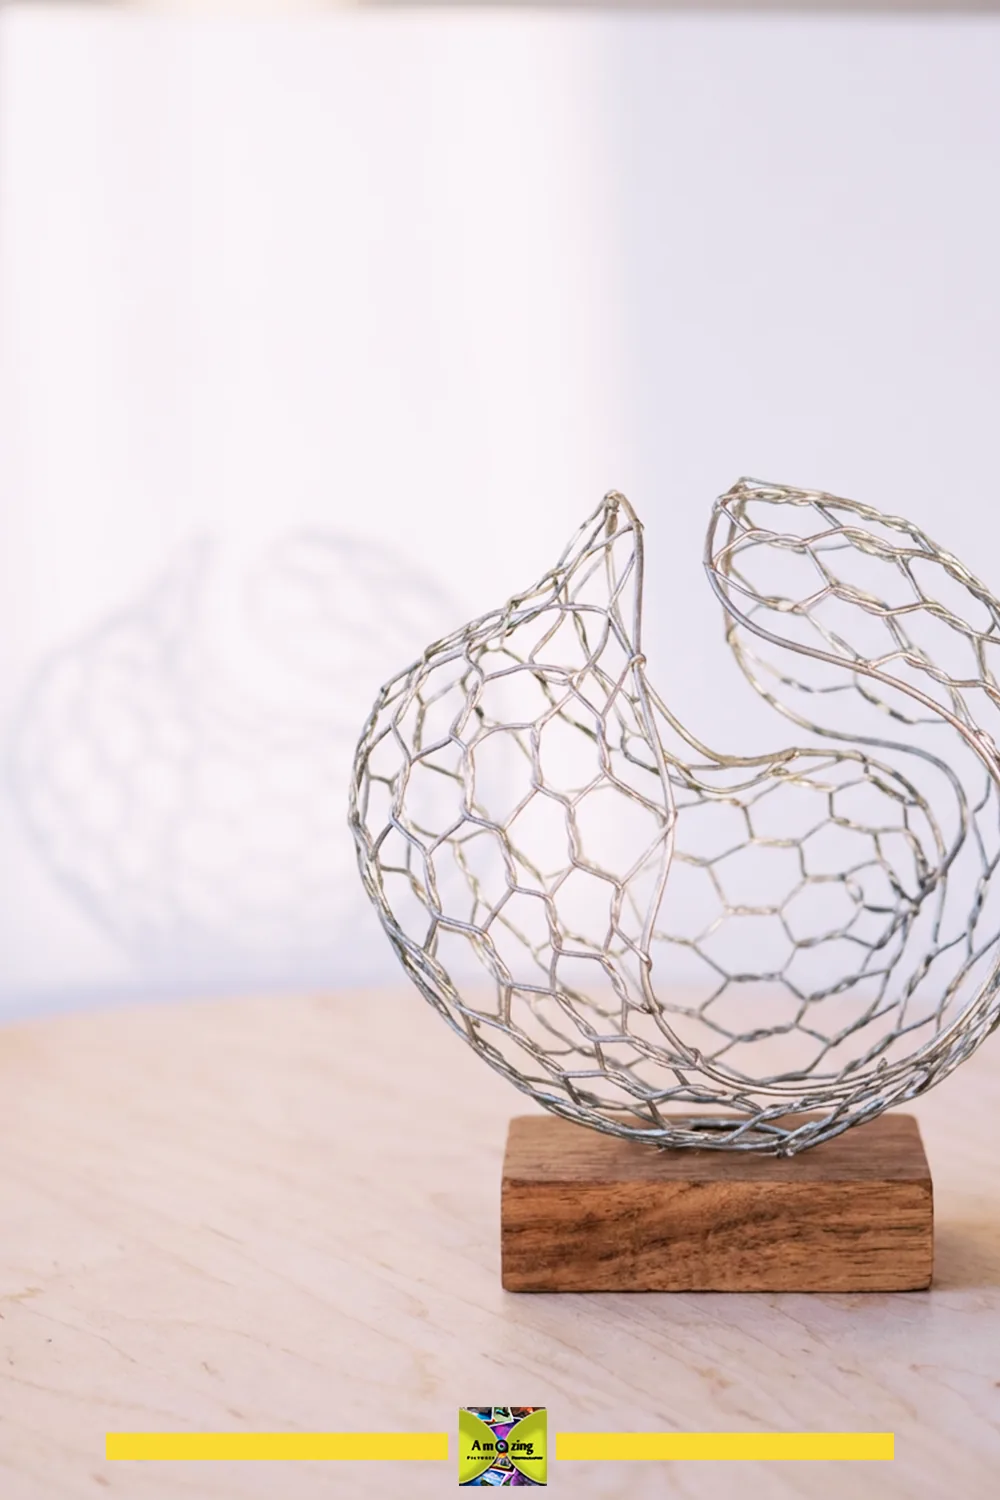
13. Geometric tabletop wire sculpture
A small abstract form bent over a removable template and mounted to a stable base, finished with no exposed points.
Best use: a sculptural desk or shelf accent, alone or in a small cluster. Difficulty: Moderate. Time: roughly 1–3 hours.
Mesh spec: flexible poultry netting, 1-inch (25 mm) openings, ~20-gauge, clean. Dry decorative use only.
Materials: a mesh panel; a removable template (cardboard or wood) of the shape; a weighted base; a way to anchor the form to the base (rod, clip, or bracket); optional paint.
Tools: snips, needle-nose or seaming pliers, gloves, safety glasses, measuring tool.
How to make it:
- Cut and fold a template of the shape you want, then bend the mesh around it, working around the form rather than squeezing unsupported points.
- Fold, roll, or capture every cut end; on an abstract form, the joins are where tails hide, so check each one from every viewing angle.
- Anchor the form to a weighted base so it cannot rock or tip, and smooth any protrusion.
- Retire it if rust, coating loss, or a sharp end appears.
Customize it: paint the form matte black or leave it galvanized; make two or three forms as a set; mount on a wood or stone base.
Tip: a weighted base does more for a tabletop piece than any amount of wirework — start there.
Likely mistake: leaving a joining tail proud of the surface, which catches fingers and clothes.
Safety note: no candles, lights, or fragile objects hung on the sculpture; check every join before it goes on a shelf at hand height.
Garden helpers
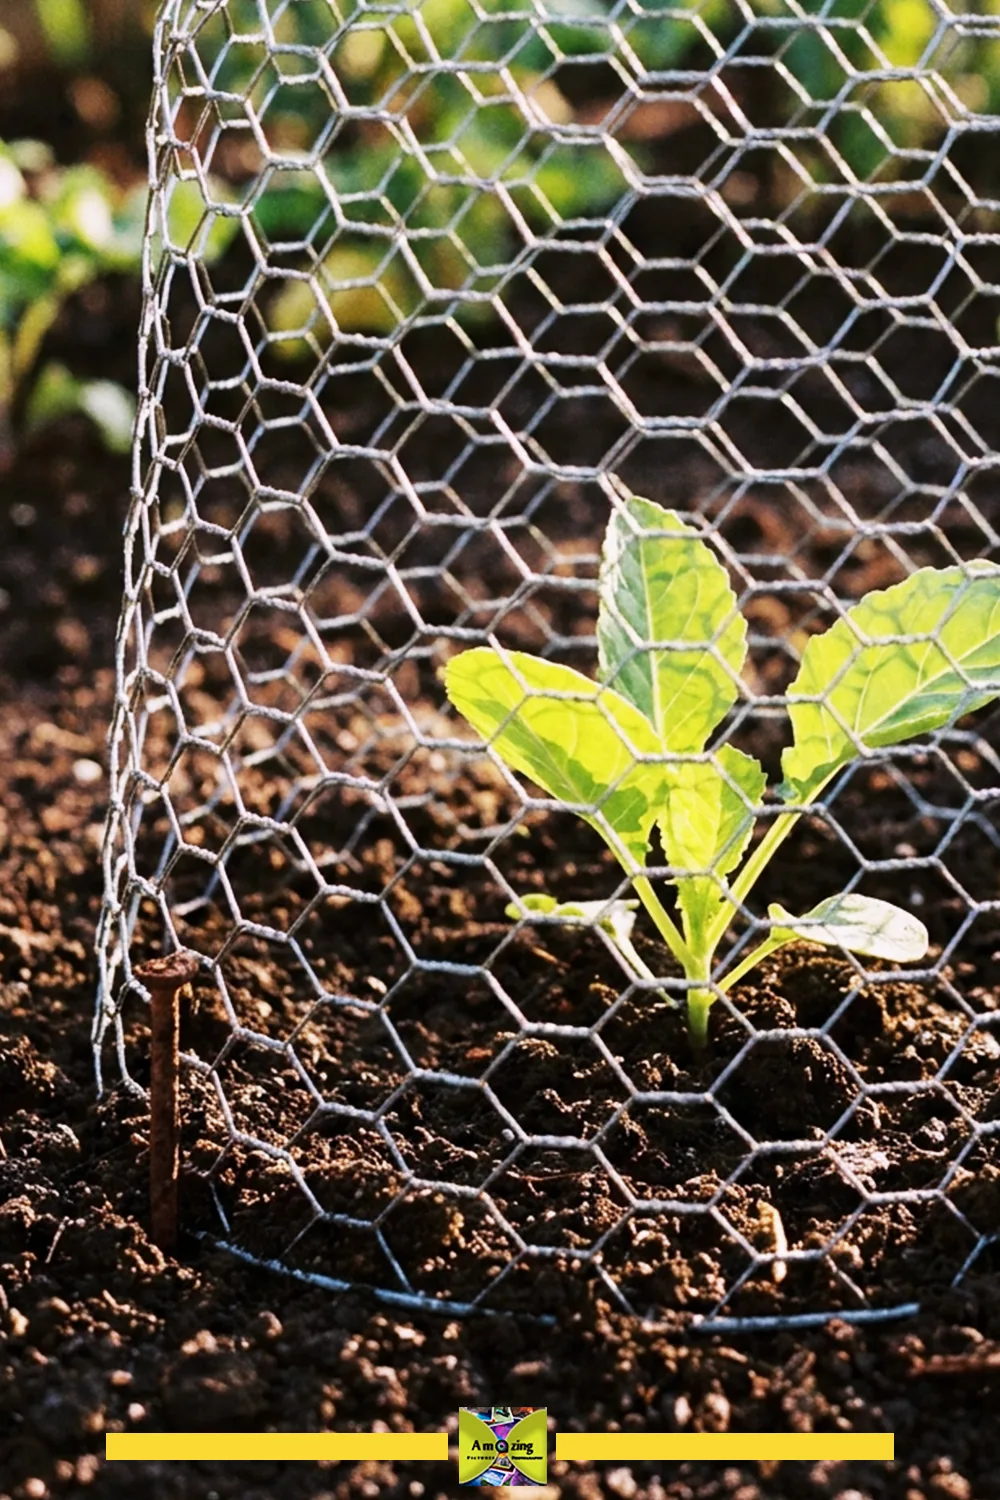
14. Removable ventilated seedling cloche
A mesh dome shaped over a form, anchored so it won’t lift in wind, sized to the actual plant.
Best use: a removable, ventilated cover that deters larger browsing animals while letting in light, rain, and air. Difficulty: Moderate. Time: roughly 1–2 hours.
Mesh spec: flexible poultry netting, 1-inch (25 mm) openings, ~20-gauge, clean galvanized. Openings this size will not exclude small rodents, insects, or birds — say so honestly.
Materials: a mesh panel; a form (a pot or bucket) to shape the dome; landscape pins or stakes to anchor the base; optional lacing wire.
Tools: snips, pliers, gloves, safety glasses, measuring tool.
How to make it:
- Check current horticultural guidance for your actual plant and purpose, and size the cloche with clearance for growth, watering access, and airflow.
- Cut the mesh and shape it over the form, gathering or folding the top so rain sheds and no opening lets a snout reach through easily.
- Anchor the base into the soil so the cloche cannot lift in wind, without leaving wire fragments or loose ends.
- Inspect after wind, irrigation, plant growth, and weather; remove it before the plant grows through the mesh in a way that prevents safe release.
Customize it: add a hinged flap for watering; shape a cylinder instead of a dome for upright plants; leave the wire galvanized.
Tip: the anchoring step is the one most often skipped and the reason cloches blow away — pin the base firmly.
Likely mistake: promising the mesh excludes every animal when 1-inch openings let small rodents and birds through.
Safety note: keep it away from paths, play areas, and pets, and cut the base ends so nothing trips a foot.
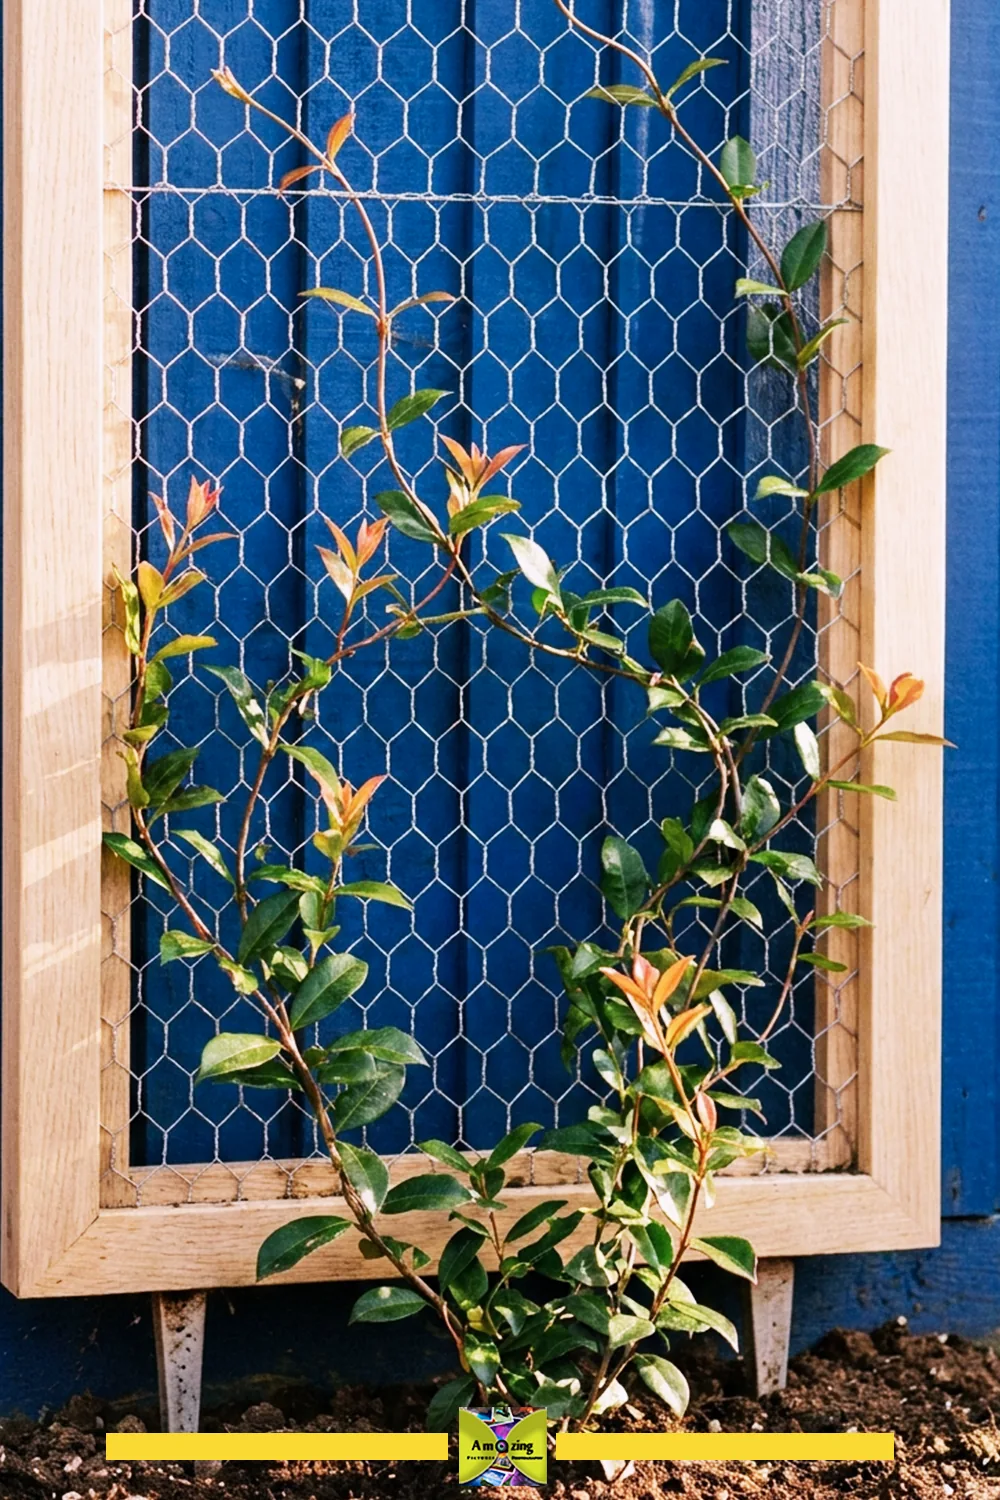
15. Freestanding climbing-plant trellis
A rigid frame holding a mesh panel for climbing plants, with a protected perimeter and conservative height.
Best use: supporting lightweight climbing plants in a container or bed, with plant-specific guidance. Difficulty: Moderate. Time: roughly 2–4 hours.
Mesh spec: flexible poultry netting, 1-inch (25 mm) openings, ~20-gauge, clean galvanized. Choose openings for the actual plant’s tendrils and weight, and support the mesh with a rigid frame — the wire alone is not structural.
Materials: a rigid frame (wood); a mesh panel; a stable base or ground anchors; fasteners with washers.
Tools: snips, pliers, gloves, safety glasses, drill/driver, measuring tool, square.
How to make it:
- Research the actual plant’s habit and mature weight, and size the trellis conservatively. Mark dimensions for firsthand confirmation.
- Build a square, rigid frame and capture the mesh around the full perimeter so no cut edge is reachable.
- Anchor the frame so it cannot tip or lift; keep it clear of paths, play areas, and powered garden tools.
- Tie plants loosely so tendrils don’t grow through in a way that can’t be released, and inspect after wind and growth.
Customize it: paint the frame, leave the mesh galvanized; angle it against a wall; add a planter box base.
Tip: support the mesh across its full span with the frame — a tall, free-floating wire panel will bow under a heavy vine.
Likely mistake: trusting the wire to hold the plant’s weight, or letting stems grow through the mesh so they can’t be removed without cutting the plant.
Safety note: no loose ends or entanglement loops at eye or hand height; retire the panel if the wire begins to pull or rust through.
Troubleshooting common problems
- The mesh type or coating is unknown. Treat it as unidentified; keep it for a sample or a low-stakes project, and make no strength or durability claims.
- A roll recoils during setup. Stop, re-restrain it, and only release the leading edge once clamps and weights are in place.
- The sheet won’t lie flat. Flatten gradually under broad boards or weights; don’t step on it.
- Hexagons stretch out of shape. Work along reference lines through repeated junctions and release tension evenly.
- A cut line drifts across openings. Mark the line through junctions and cut one controlled segment at a time.
- Cut ends come out longer or sharper than expected. Cut adjacent to junctions and fold or capture the tails before they snag anything.
- Cutters crush rather than sever. The tool is under-sized for the wire, or the jaws are damaged; stop and use a cutter rated for the diameter.
- Polymer coating tears near a cut. Cut at full strands and fold the coating inward with the wire; avoid yanking.
- Small clippings scatter. Work over a cloth or tray and capture every clipping in a rigid container immediately.
- A folded rim springs open. Bend it fully around a form and press it flat; a half-fold is a pending scratch.
- Edge trim won’t stay seated. The channel is the wrong size or the mesh is too thick; test the fit before committing.
- Staples miss the wire or stand proud. Aim for the wire, drive flush, and re-seat any that missed.
- Staples split a narrow frame. Use a wider frame or switch to screws with washers or a batten.
- Screws and washers distort openings. Use broad washers and don’t overtighten past the wire’s limit.
- Clips or rings leave accessible points. Choose closed loops and face the sharp side away from handling.
- A mesh panel bows inside a frame. Re-tension evenly or add a center support; the wire is not structural.
- A basket twists out of square. Reinforce the corners and bend around the rigid base.
- A base separates from the mesh. Re-capture the base edge with trim or lacing; never rely on staples alone.
- A letter sorter or magazine rack tips. Widen and weigh the base, and reduce the load.
- Spool rods pull against the mesh. Rest the rods in the frame, not the wire.
- Brushes slip through openings. Match opening size to handle diameter or add a second support.
- Cabinet doors bind after an insert. Re-check hinge, latch, and swing clearance, and trim the capture so nothing protrudes.
- Hooks strike shelves or stored objects. Dry-fit hooks and test the full door swing before loading.
- A botanical grid shifts on its container. Add a folded lip or size the grid to grip the rim.
- A cachepot sleeve traps moisture. Keep the inner pot watertight and lift it out to water; don’t let the wire touch wet soil.
- A sculpture rocks on its base. Weight and widen the base, and re-anchor the form.
- A cloche lifts in wind. Anchor the base into the soil and re-check after every storm.
- A plant grows into the mesh. Loosen and redirect growth before it can’t be released without cutting.
- White corrosion or red rust appears. For white zinc rust, assess and treat or retire; for red rust, retire and replace the wire — it has lost steel.
- Primer or paint peels from galvanized wire. The surface wasn’t cleaned or the primer wasn’t formulated for galvanized metal.
- Finished projects look rough rather than intentional. Limit the palette, align the openings, equalize borders, and conceal fasteners.
Safety checklist
- Select clean, documented, structurally sound offcuts; reject contaminated, corroded, fire-damaged, painted, or unidentified mesh.
- Control roll spring-back before unrolling, and keep hands and body out of the recoil path.
- Wear safety glasses with side protection, suitable puncture-resistant gloves, long sleeves, long pants, and closed footwear.
- Work on a stable surface with clamps and broad weights; never step on sharp mesh.
- Choose cutters by documented wire capacity, and stop when a tool can’t cut cleanly.
- Capture every wire clipping immediately, and inspect the floor, bench, clothing, and footwear after cutting.
- Keep cut ends covered during work and fully contained in the finished piece.
- Watch for plier, stapler, hammer, drill, clamp, and pneumatic-tool hazards, and disconnect or isolate powered tools before setup changes, as the manual directs.
- Use ventilation and follow label precautions for cleaners, primers, paints, and adhesives.
- Never grind, weld, solder, torch-cut, burn, or heat unknown coated or galvanized material — heating galvanized metal can release hazardous fumes.
- Keep mesh, offcuts, clips, staples, fasteners, and tools away from children and pets.
- Avoid food, flame, electrical, animal-containment, child-barrier, security, machine-guarding, protective, structural, and unsupported heavy-load uses.
- Inspect every project for protruding ends before installation and during maintenance, and retire anything that rusts through, separates, or develops a reachable point.
Reuse, recycling, and disposal
Use precise words: “reuse,” “repurpose,” “use a clean offcut,” or “give leftover mesh another practical use” — not automatic “zero-waste” or “sustainable” claims. Poultry netting may contain steel, zinc coatings, polymer coatings, paint, corrosion products, clips, staples, ties, adhesives, primers, and finishes, so it is not a simple single-material recyclable.
Galvanized steel wire is recyclable as scrap metal, but it does not belong in a curbside bin. Take it to a scrap-metal facility, cleaned of soil and organic matter, cut or coiled to a manageable size, and separated from wood, plastic, concrete, and non-ferrous metals. Some yards refuse woven wire because it tangles in shredders, so call ahead. Do not burn galvanized wire — heating it can release hazardous zinc fumes. Painted, coated, glued, fabric-bound, wood-framed, heavily rusted, or mixed-material projects may not be accepted everywhere, so confirm with your local government, scrap facility, manufacturer, waste service, or receiving organization before making any acceptance claim.
Finally, a sound offcut may be more useful repairing its original compatible installation than becoming a craft. Make projects you need, and avoid accumulating sharp fragments.
Frequently asked questions
Clean, flexible poultry netting makes good organizers and light-duty helpers: a framed memo board, a desktop letter sorter, a craft-tool clip panel, a paintbrush drying rack, a small basket, a cabinet-door insert, a cachepot sleeve, or a seedling cloche. The key is capturing every cut edge and keeping the loads light.
Chicken wire is thin, flexible, galvanized steel twisted into hexagons, usually with about 1-inch openings. Hardware cloth is thicker wire welded into a square grid with smaller openings, often ⅛ to ½ inch. Chicken wire keeps chickens in; hardware cloth keeps predators out. They are not interchangeable.
Keep the roll restrained until your work surface, clamps, weights, gloves, and eye protection are ready, and orient it to open away from you. Release the leading edge gradually, secure it, and flatten under broad boards or weights — never step on it.
Aviation snips (compound-action snips) handle long, straight cuts; diagonal cutters work for small, precise cuts. Match the tool to the actual wire diameter and stop if it crushes rather than severs. Household paper scissors are generally unsuitable.
Fold the mesh back through complete openings, roll it around a smooth rod, capture it between two trim pieces or in a groove, cover it with a U-channel, or bind it with folded fabric. Whichever you choose, confirm no cut end remains reachable during normal handling.
Capture the mesh under trim or in a groove and fasten through the frame; staples can hold it if they bridge the wire and sit flush, but screws with washers are stronger and won’t pull through the openings. Never mount by the mesh itself.
Yes, if you clean the surface and use a primer formulated for galvanized metal, then a compatible paint. But sound galvanized or polymer-coated mesh is often fine unpainted, and paint won’t make it permanently rust-proof.
As scrap metal, usually yes — but not in a curbside bin. Take it cleaned, cut or coiled, and separated from other materials to a scrap-metal facility, and call ahead, since some yards refuse woven wire. Never burn it.
Conclusion
Leftover chicken wire becomes something worth keeping when you treat it as the sharp, flexible fencing it is instead of as soft craft fabric. Identify the material, reject anything contaminated or corroded, control the roll, cut with the right tool, capture every edge, and mount through the frame. Build one organizer or garden helper you actually need, and you’ll have a piece that reads as deliberate — not as a farmhouse photo waiting to bite someone.