Empty coffee sacks are one of the most tempting upcycling materials you’ll ever meet. They’re cheap or free, they carry bold printed lettering, and their rough weave has exactly the kind of texture that photographs beautifully. But a coffee sack is also industrial packaging — a bag built to move sixty to seventy kilograms of green beans across oceans, warehouses, and loading docks. It was never designed to be washed, cut, or sewn into a tote bag.
That distinction changes everything about how you should approach these projects. Get it right and you’ll make organizers and accessories that look deliberate and last for years. Get it wrong and you’ll drag musty, shedding, unstable fabric into your home and stitch it into something that fails the first time you load it.
This guide walks through the whole process: where to find clean sacks, how to identify what they’re made of, when to clean them and when to walk away, how to cut them without watching them unravel, and how to sew them so the result holds up. At the end, you’ll find 15 complete projects, each with a materials list, tools, step-by-step instructions, and an honest note on what the finished piece can and cannot handle.

Before You Start: A Coffee Sack Is Packaging, Not Fabric
Craft burlap from a fabric store and a retired coffee shipping sack are not the same material. Craft burlap is usually lighter, cleaner, more uniform, and sold in a predictable width. A shipping sack is heavier, stiffer, coated in dust and sometimes oils, and built to a price rather than a standard. Its printed graphics may sit off-grain, its seams may be chain-stitched with coarse thread, and its fibers may have spent months or years in a damp warehouse.
Treat every reclaimed sack as an unknown until you’ve documented it. The two questions that matter most are: what is it made of, and what has it been through.
What Coffee Sacks Are Actually Made Of
- Jute (hessian / burlap). The classic coffee sack. A coarse, plain-weave fabric spun from the jute plant. Strong, stiff, absorbent, and eager to shed short fibers. It ravels quickly at a cut edge and shrinks or distorts when wet.
- Sisal. Stiffer and scratchier than jute, made from the agave plant. Some agricultural sacks use sisal instead of jute, and it behaves a little differently under a needle.
- Hemp. Rare in coffee shipping but common in other commodity sacks. Similar weave, generally strong, and still prone to raveling.
- Cotton. A finer, softer weave sometimes used for higher-end or retail-adjacent sacks. Handles more like heavy fabric but still needs testing.
- Woven polypropylene and synthetic blends. Increasingly common. Often printed with a glossy, fused graphic, sometimes with a laminated inner film. These are plastic, not plant fiber. They may melt under an iron, resist some paints and adhesives, and follow different disposal rules.
- Laminated or coated sacks. A film or coating bonded to the weave. The coating blocks airflow, changes cleaning and pressing behavior, and usually means the sack is not a simple natural fiber.
Appearance, smell, color, and feel cannot reliably tell you the fiber content. A coarse jute sack and a coarse polypropylene sack can look nearly identical in a dim photo. If the sack came with any label, tag, or supplier documentation stating fiber and treatment, keep it. If it didn’t, you’re making an educated guess, and every project below should be treated as a test on scrap before you commit. The stiffness of this plain weave is also why it behaves nothing like a stretchy knit — if you’ve repurposed sweaters, it’s worth understanding how knit fabric behaves differently from woven sackcloth.
Why this matters beyond curiosity: open-weave jute shifts, skews, and ravels around needle holes. Printed graphics may be off-grain because the sack was printed flat and then sewn into a tube, so the lettering doesn’t line up with the weave. Original sack seams are not designed to be handles or structural joins. Old fibers can be brittle even when the sack still looks complete. And moisture — whether from washing or from a spill before you got it — can cause shrinkage, swelling, odor, and ink movement. A shipping sack’s original strength tells you nothing about whether it’s now suitable for a bag, a cushion, or repeated laundering.
Sourcing, Documentation, and Contamination Screening
Where to get sacks. The best source is a known coffee roaster, importer, café, or distributor who can tell you something about the sack. Roasteries often have more empty sacks than they know what to do with and are glad to pass a few to a maker. Some sell or give them away through a reuse or donation program, and a few packaging suppliers run coffee-bag take-back programs. Check with the source rather than assuming a pile in a loading area is free to take — get permission first.
What to ask. Try to learn, in a few friendly sentences:
- What the sack held (green coffee is the norm, but confirm).
- Where it was stored and whether it got wet or sat on the floor.
- Whether any treatment is known — fumigation, pesticide, oil, or a spill.
- The material if they know it (jute, sisal, plastic, laminated).
What to keep. When available, retain any label, tag, or paperwork that names the supplier, commodity, origin, fiber, treatment, lot, or shipping history. That paper is more useful than the pretty print on the front.
How to inspect. Work over a flat, protected surface in a ventilated area. Check both faces, the seams, the folds, the corners, and the inside. Look for mold and mildew, insects, eggs, droppings, webbing, food residue, oil, grease, fuel, chemical odor, water marks, smoke, fine dust, foreign seeds, splinters, staples, wire, glass, and other debris. Feel for brittle fibers, torn yarns, enlarged openings, pulled seams, holes, abrasion, and unstable printing. Check for previous repairs.
Attractive printing does not establish cleanliness or material composition. A clean-looking front can hide a stained, oily interior fold.
The keep-or-reject decision. Use this framework:
- Preserve an intact, attractive sack as a documented collectible if that’s what it is.
- Return it for commercial reuse where an authorized program exists.
- Offer a clean, usable sack through a verified reuse channel.
- Use sound panels in a suitable light-duty project.
- Keep matching offcuts for construction and care tests.
- Separate synthetic, laminated, or mixed-material sacks.
- Check local textile, agricultural-packaging, or waste rules.
- Reject and dispose of contaminated or severely degraded material per authoritative local guidance.
If a sack is mold-suspect, pest-affected, chemically exposed, strongly odorous, oiled, flood-damaged, or simply unidentified, do not carry it through your home. Isolate it. Ordinary washing does not automatically make a contaminated sack safe, and it can spread whatever the sack is carrying. When exposure is genuinely uncertain, consult public-health, agricultural, workplace-safety, or local waste authorities. Keep only sacks suited to a planned, low-risk project, and avoid building a large indoor stockpile of dusty or unidentified sacks.
Dust Control, Cleaning, and Drying — Only When Appropriate
There is no single correct way to clean a coffee sack, because no two sacks are in the same condition. The goal is to remove what is safe to remove without damaging the weave or spreading unknown dust through your home.
Start dry. Work in a ventilated area suited to the known material. If authoritative guidance indicates that the dust or loose fibers require it, wear a suitable mask and eye protection. Do not beat or aggressively shake an unknown sack indoors, and avoid compressed air or hard dry brushing — those spread fine dust. A vacuum can work only when the equipment manufacturer supports that use and your contamination assessment says it’s safe; otherwise leave it. Remove surface debris with controlled tools while the sack lies flat and supported.
Know what to reject, not wash. Mold, pests, chemical exposure, oil, fuel, sewage, floodwater, or unidentified residue means rejection or professional guidance — not home washing. Follow reliable supplier or fiber-care information when you have it.
Before any wet treatment, test. Dampen an expendable scrap — a corner or an offcut — and blot with a white cloth to check whether ink transfers. If the print bleeds, spot-clean only, or keep the piece dry. Immersion washing can shrink the fabric, fray the raw edges badly, blur or lift print, change the stiffness, and take a very long time to dry. Spot cleaning can leave rings or “tide marks.” Avoid bleach, strong solvents, uncontrolled disinfectants, fragrance masking, twisting, wringing, and high-heat drying.
If washing is warranted, support the wet sackcloth fully, reshape it without pulling the weave out of square, and dry it completely — on both sides and through every fold — before cutting or storing. After drying, check again for odor, mold evidence, ink transfer, brittleness, and distortion. If you cannot confirm safe preparation, reject the sack.
Deconstruct, Map, and Cut the Sack
Photograph first. Before you alter anything, photograph the intact sack from both sides and along the seams and closure. Record its dimensions, seam type, closure thread, printed faces, holes, repairs, and strongest panels. This is your reference if a panel doesn’t fit or a seam behaves unexpectedly later.
Check before you open. Run your hands along seams and folds for hidden staples, wire, pins, or sharp debris. Remove anything embedded with pliers, not your fingers.
Remove seams slowly. Use a seam ripper or suitable scissors only where you can see the stitch path. Keep the blade directed away from your supporting hand. Cut closure thread gradually rather than yanking it and pulling the weave apart. Separate any liners, labels, reinforcement, or foreign components. Open side and bottom seams without cutting sound fabric, then let the opened panels relax before you measure them.
Map what you have. Mark holes, thin spots, unstable printing, stains, and no-use margins. Preserve original selvages only where they remain sound. Reserve printed focal areas for visible panels and plainer areas for interior reinforcement. Label every panel and offcut by source sack. Save only offcuts large enough for realistic testing or a planned use.
Measure, pattern, cut. Measure the opened sack at several points rather than trusting one corner. Identify the warp and weft threads rather than relying on printed borders, which can be off-grain. Make full-size paper patterns before cutting anything, and add allowances based on the actual weave, binding, lining, seam type, and thickness. Plan all major pieces before cutting small details. Center illustrations, origin marks, typography, stripes, and color blocks deliberately, and check whether the displayed branding is appropriate for publication or commercial use. Mirror motif placement on paired pieces. Keep holes and weak areas away from handles, corners, zippers, closures, pocket openings, and mounting points.
For tools: use stable pattern weights, pins, or clips according to your sample results; mark the less-visible face with a tested removable method; and stabilize planned cut lines when a tested method supports it. Use sharp fabric shears for suitable material. Use a rotary cutter only on an appropriate mat with a stable ruler and safe hand placement. Always cut away from your body, keep your supporting hand outside every blade path, cut one manageable layer at a time, and store or dispose of damaged blades safely. The same scrap-first discipline applies to the adhesive and reinforcement tests that follow, just as it does when working with rigid upcycled materials.
Fray Control, Seams, and Edge Finishes
No single edge finish is best for every sack. The right choice depends on the weave, the project, and how much bulk you can afford. This table compares the main options; test on matching offcuts before committing.
| Method | Best for | Tools | Bulk / stiffness | Fray control | Abrasion | Visible finish | Limitations & safety |
|---|---|---|---|---|---|---|---|
| Retain sound selvage | Any weave with intact selvages | None | None | Excellent | High | Clean, original | Only works on existing edges; limited length |
| Stay-stitching | Open weaves before cutting | Sewing machine | Low | Good (pre-cut) | Moderate | Visible line | Not a finished edge on its own |
| Narrow zigzag | Light-to-medium open weave | Machine, zigzag | Low | Good | Moderate | Visible stitching | Can tunnel/pucker; test width/length |
| Machine overcast | Medium weaves | Machine or overcast foot | Low-moderate | Good | Moderate | Fine thread wrap | Needs testing on very open weave |
| Serged edge | Medium-to-heavy weaves | Serger/overlocker | Low-moderate | Very good | Good | Clean 3-thread | Can distort if thread pulls fabric; test |
| Turned double-fold hem | Stable, lighter weaves | Machine, iron | Moderate | Good | Good | Clean folded edge | Bulky on thick sacks; test turn-of-cloth |
| Bound edge | Nearly all | Machine, binding | Moderate | Very good | Good | Crisp band | Adds steps; measure binding width |
| Bias-bound edge | Curves, awkward shapes | Machine, bias tape | Moderate | Very good | Good | Soft finish | Bias needed for curves |
| Fabric-facing strip | Neckline/opening edges | Machine, fabric | Low-moderate | Good | Good | Near-invisible | Needs a stable facing fabric |
| Flat-felled seam | Medium weaves, high-wear | Machine | Moderate | Excellent | High | Double-stitch ridge | Bulk; only where weave permits |
| Lapped seam | Layered/panel joins | Machine | Low | Good | Moderate | Slight overlap | Direction matters for drainage/wear |
| French seam | Fine/light weaves only | Machine | Moderate | Excellent (encased) | Good | Clean interior | Too bulky on coarse open weave |
| Turned-and-topstitched | Bags, pouches | Machine | Moderate | Good | Good | Crisp topstitch | Needs seam allowance for turn |
| Fully lined construction | Any lined project | Machine, lining | High | Excellent | High | No raw edges shown | Lining shares load; plan it carefully |
| Enclosed boxed corners | Bags with bases | Machine | Moderate-high | Good | High | Flat base | Bulk at corner; trim carefully |
| Folded fabric channel | Drawstrings, casings | Machine | Low-moderate | Good | Moderate | Clean channel | Keep cord ends enclosed, not long loops |
| Sewn reinforcement patch | Handles, stress points | Machine, extra fabric | Moderate | — | High | Hidden or styled patch | Must extend into sound body panel |
| Fray-check liquid | Light fraying, stable weaves | Applicator | Low | Good (spot) | Moderate | May darken | Test first; does not replace stitching |
| Adhesive-backed stabilizer | Backing, low-stress | Iron, stabilizer | Moderate | Good | Moderate | Hidden | Test heat/adhesive; can scorch or show through |
Key rules that apply across all of them: cutting open-weave sackcloth without stabilization causes rapid yarn loss. Very narrow seam allowances pull apart. Very short stitches can perforate weak yarns. Repeated stitching in the same place weakens the weave. Tight machine tension puckers or draws yarns together. Adhesives can darken, stiffen, stain, or show through, and an adhesive edge treatment never replaces structural stitching where a seam carries load. Coarse raw edges must not stay exposed inside frequently handled projects. And a lining should be joined so the sackcloth and the lining share stress rather than fighting each other.
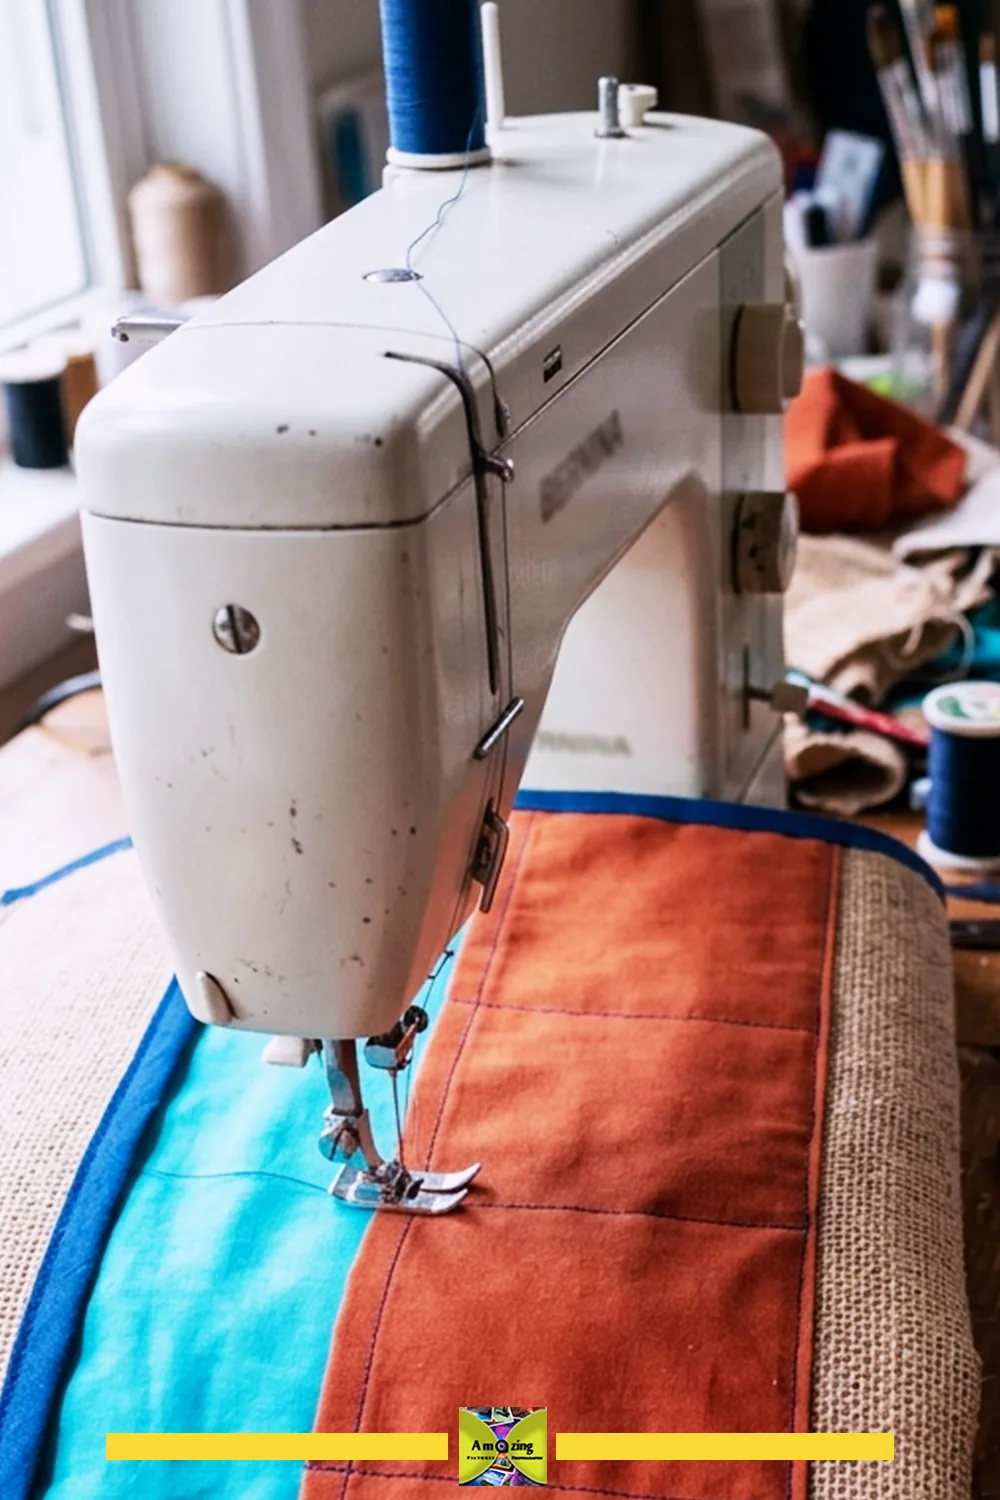
Sewing Machine, Needles, and Thread
Don’t reach for a universal needle and hope. Jute is abrasive and dulls needle points fast, and a dull needle is the main cause of skipped stitches and broken needles.
- Machine capacity. Confirm your machine can handle the completed layer stack — sackcloth plus lining plus binding plus reinforcement. If it stalls or fights, redesign or use equipment suited to the job.
- Needle. A denim/jeans or heavy-duty/sharp needle is generally the starting point, sized to the layers: around 90/14 for a single light layer, 100/16 for two-plus layers, 110/18 for thick seams like handles. Replace bent, blunt, or burred needles immediately.
- Thread. A strong polyester thread is usually the safe structural choice, since natural jute holds moisture and can rot cotton thread over time. Match upper and bobbin thread. Upgrade to heavy-duty thread for load-bearing seams.
- Settings. Test straight, reinforced, and zigzag stitches, and adjust stitch length, tension, and presser-foot pressure only through your machine manual and sample results. An even-feed or walking foot often helps prevent layer shifting on the open weave. Use a removable stabilizer when the weave feeds poorly.
- Technique. Start away from bulky seam intersections, grade seam allowances only where strength permits, and reduce corner bulk without cutting structural stitching. Never pull the work from behind the presser foot, never force a stalled machine, and keep fingers clear of the needle. Switch the machine off before changing needles, feet, or bobbins per the manual.
- Hand sewing. Choose hand needles sized to the weave, use a thimble, and reach for pliers only where suitable. Recognize when a dense, brittle, coated, or unstable sack needs a redesign or professional equipment instead.
Clean the machine afterward — burlap sheds jute dust into the feed-dog area and bobbin case.
Linings, Stabilizers, Handles, and Closures
| Option | Suits | Weight / bulk | Shedding & abrasion | Heat / adhesive | Moisture / care | Pull-through risk | Limitations & tests |
|---|---|---|---|---|---|---|---|
| Lightweight cotton lining | Totes, pouches, organizers | Low | Good | Safe | Washable | Low | Won’t hide coarse weave fully |
| Medium woven lining | Bags, covers | Moderate | Good | Safe | Washable | Low | Adds structure |
| Smooth abrasion-resistant lining | Pouches, machine cover | Moderate | Excellent | Safe | Varies | Low | Choose for pale/sensitive contents |
| Sew-in interfacing | Structure, collars, flaps | Low-moderate | Good | Safe | Varies | — | No heat needed |
| Woven backing | Runners, wall pieces | Moderate | Good | Safe | Varies | — | Protects furniture from fibers/ink |
| Fusible interfacing | Light stabilization | Low-moderate | Good | Requires heat test | Wash conflicts | — | Can scorch, bubble, or fail to bond on jute |
| Removable rigid base insert | Bags, baskets | Moderate | — | — | Removable | — | Enclose edges; removable for care |
| Fabric binding | Edges, rims | Low-moderate | Good | Safe | Washable | — | Measure width to the weave |
| Cotton/synthetic webbing handles | Totes, bags | Low-moderate | Good | Safe | Washable | Low (stitched through body) | Must extend into body, not just top edge |
| Fabric handles through body | Totes | Moderate | Good | Safe | Washable | Low | Reinforce stitching into sound panels |
| Zippers | Pouches, cushions | Low-moderate | — | Safe | Varies | — | Reinforce ends; avoid wavy zips |
| Drawcord channels | Drawstring sacks | Low | Good | Safe | Varies | Low | Enclose raw edges; finish cord ends |
| Buttons + reinforced loops | Closures | Low | Good | Safe | Varies | Low | Reinforce loop anchor |
| Snaps through reinforcement | Closures | Low | Good | Safe | Varies | Moderate | Snaps can pull through open weave |
| Hook-and-loop | Flaps, organizers | Low | Good | Adhesive may fail | Varies | Moderate | Sew the hook side, don’t glue |
| Fabric-strip ties | Rolls, sleeves | Low | Good | Safe | Washable | Low | Keep short; no long loose loops |
| Decorative hardware | Accents | Moderate-high | — | — | Varies | — | Only on reinforced fabric |
The recurring principle: the lining must not be expected to rescue severely weakened sackcloth. Handles stitched only to an unsupported top edge will tear through the weave, so reinforcement should extend into sound body panels. Heavy metal hardware distorts open weave. Drawcord channels need enclosed raw edges and finished cord ends, and long accessible loops should be avoided — they catch and can be a hazard. Rigid inserts need smooth enclosed edges and should be removable when care requirements differ. Closures must be tested through repeated opening without pulling yarns apart.
Paint, Printing, Adhesives, and Finishing
Original coffee-sack printing is a big part of the appeal, so the safest decorative choice is usually to leave it alone. If you do add a finish, choose it for the verified fiber and test on scrap.
- Leaving it unchanged is lowest-risk and often the best look.
- Textile paint, screen ink, block-print ink, fabric markers, and stencils each behave differently on a coarse open weave. Paint can bridge the weave and create stiff, brittle areas, and heavy paint reduces flexibility and can interfere with stitching.
- Sewn appliqué and embroidery through stabilized areas avoid the paint problems but add bulk and needle demand.
- Fabric adhesive is suitable only for low-stress decorative placement, and can darken, stiffen, or show through.
- Sprays and clear coatings should be used only when appropriately rated for the exact textile and safely applied.
Assume original printing may bleed, fade, crack, transfer, or contain unknown ink. Sanding or aggressively abrading printed sackcloth is inappropriate. Fusible products can scorch, discolor, flatten, or distort jute, and unknown synthetic components may melt under heat. Every pressing temperature, heat-set method, ventilation requirement, and drying or curing time must come from reliable guidance and your own testing. Dry-to-the-touch does not mean ready to sew, fold, launder, or set against furniture. And no coating makes sackcloth waterproof, food-safe, flame-resistant, skin-safe, washable, or outdoor-durable.
The 15 Projects
Every project below assumes a clean, documented, tested sack. Check every size against your actual sack, contents, inserts, and installation. Fit a full-size paper pattern before cutting the fabric, then adjust seam and finishing allowances to suit your sample. Work the tests on matching offcuts before you cut the real panel.
Portable Accessories
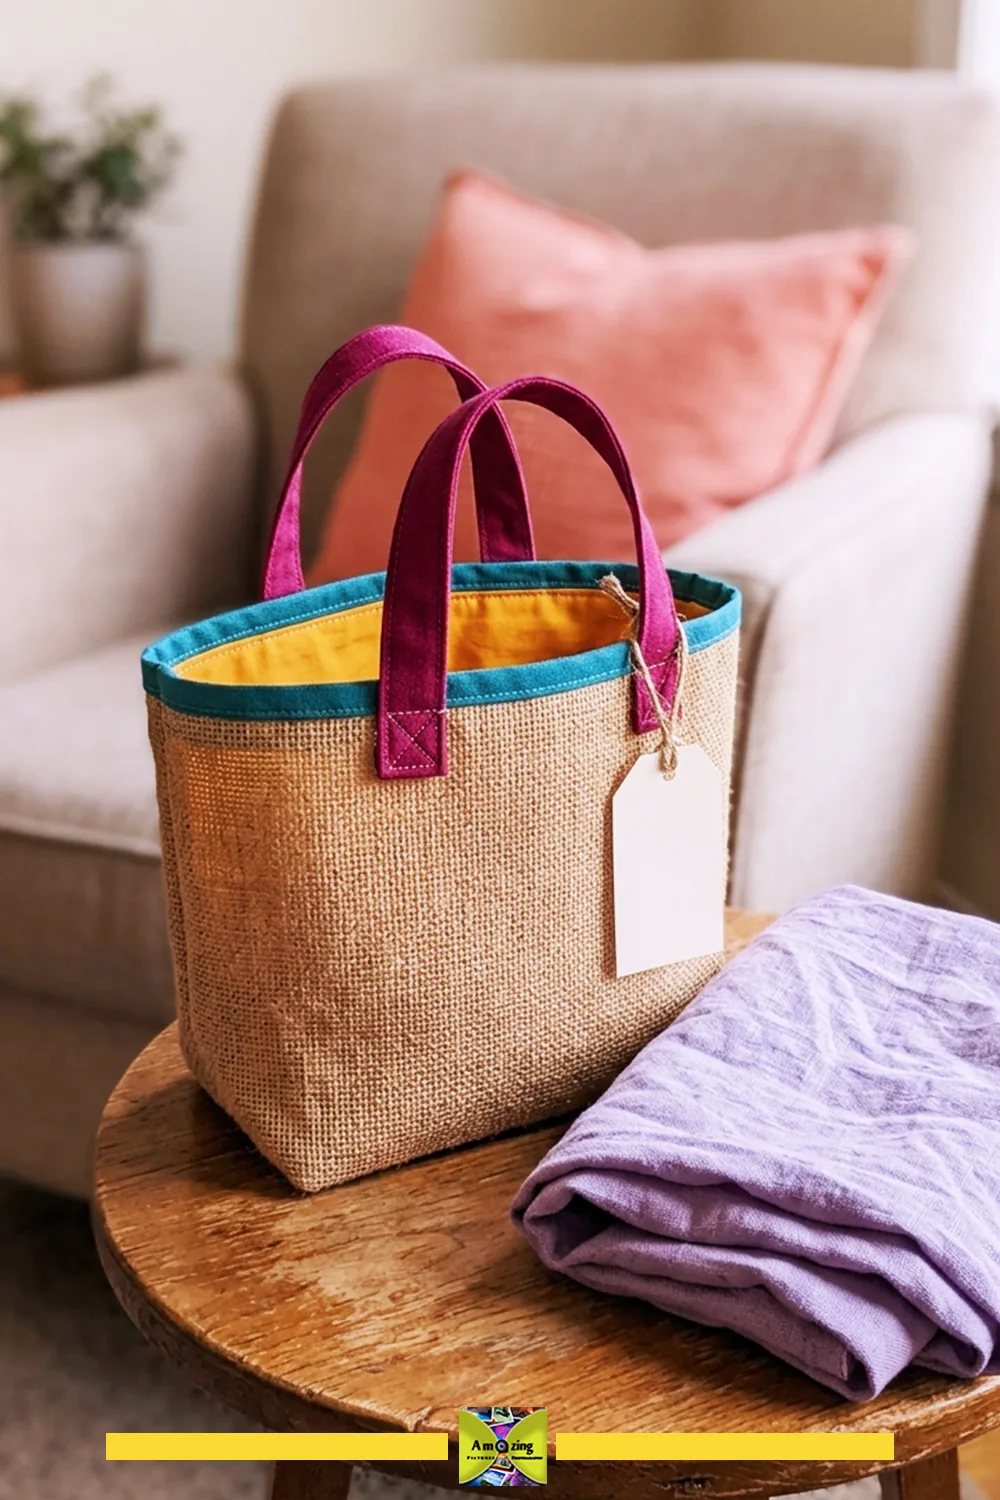
1. Lined Lightweight Market Tote
What you’ll make. A soft, boxed-base tote with a full lining, enclosed seams, and reinforced handle panels. The sack’s print becomes the front face; the lining carries the everyday wear.
Best for. Carrying a few light, dry, non-breakable items — a book, a scarf, a water bottle in its own sealed container, a light grocery trip.
Difficulty. Beginner-intermediate. Time. About 3–4 hours, plus test time. Planning estimate; allow extra time for material preparation, sample stitching, and fitting.
Materials.
- One sound printed sack panel (front) plus plainer sack for reinforcement
- Medium-weight cotton lining
- Light-to-medium woven interfacing or a second lining layer for the top band
- Two handle blanks
- Polyester thread
Tools. Sewing machine with denim/jeans needle; fabric shears; rotary cutter and mat (optional); clips or pins; seam ripper; iron and press cloth; ruler and paper for pattern.
Cut list. Two sack body pieces, two lining body pieces, four handle-reinforcement patches, two handles (or one folded), plus seam allowances sized to your test.
Instructions.
- Test a sample seam on scrap: sackcloth + lining + interfacing, at your planned stitch length and tension.
- Cut the sack body and lining with matched grain. Box the bottom corners on both outer and lining by cutting a square notch at each base corner.
- Sew the outer bag side and bottom seams; sew the lining the same way, leaving a turning gap.
- Reinforce the handle areas: stitch a patch of plainer sack (or lining + interfacing) into each upper side panel before attaching handles, so the handles load a sound multi-layer area.
- Attach handles, stitching through the reinforcement into the body.
- With the bag turned out and the lining wrong-side out, join at the top edge, turn through the lining gap, and topstitch the rim.
- Close the lining gap and topstitch.
- Load-test gradually with light, non-fragile items before any real use.
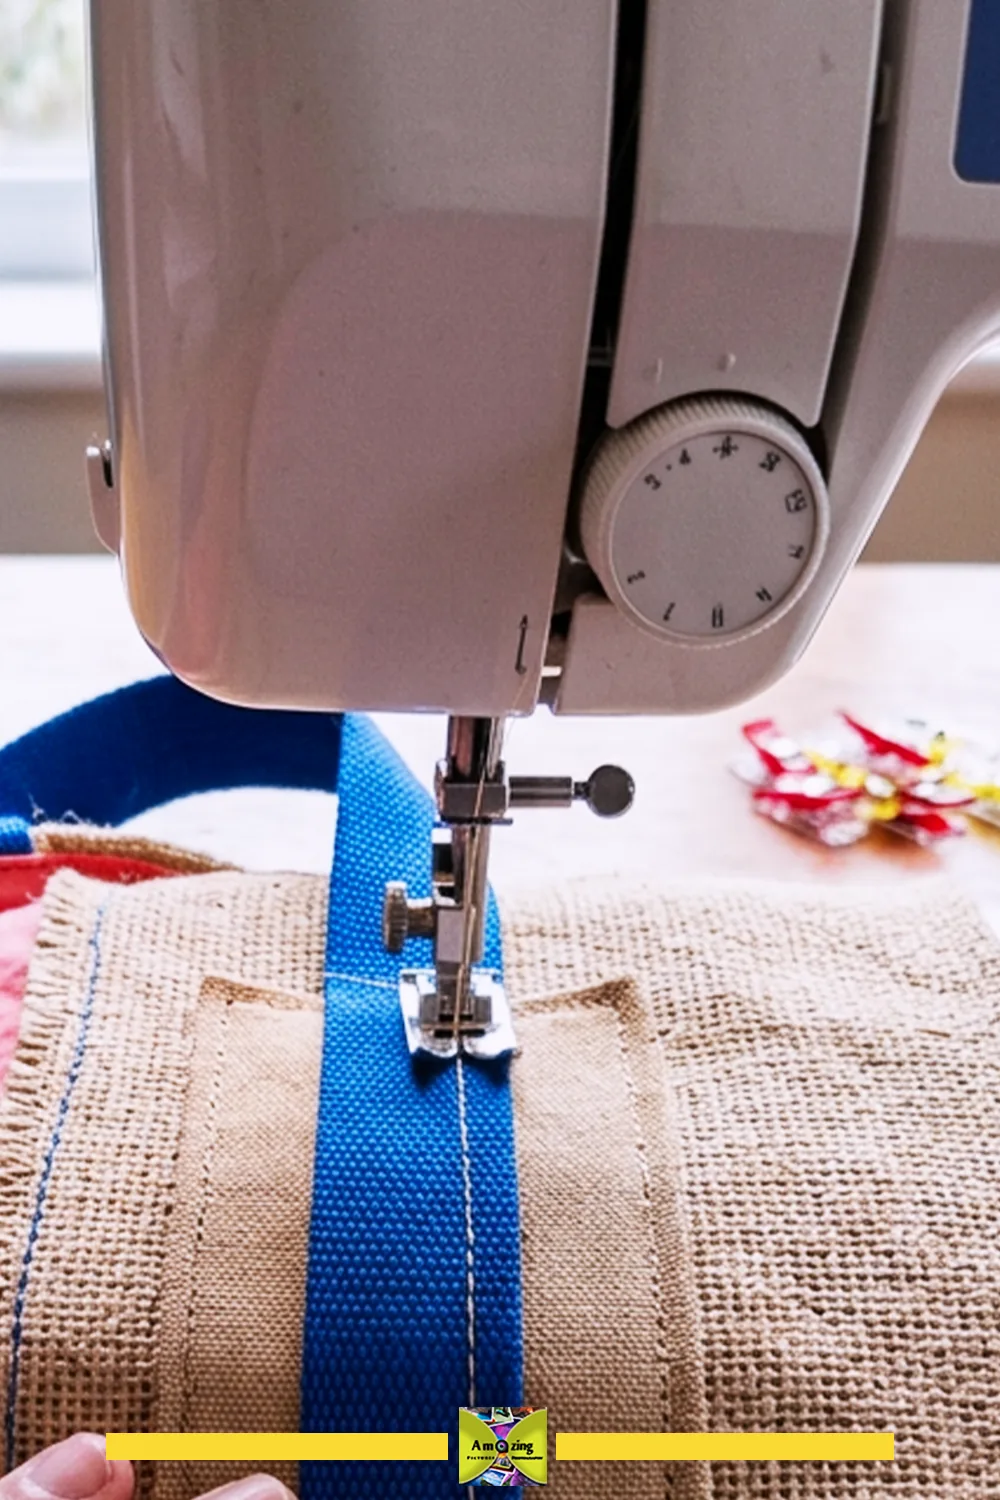
Customize. Move the print to the front or a centered band; match the lining and topstitch to one accent color; add a slim interior slip pocket in the lining.
Practical tip. A removable rigid base insert (cardboard sealed in lining fabric) keeps the base flat — but keep it removable for cleaning.
Watch for. Handles stitched only to the top edge will tear through the open weave under load.
Safety note. No food, liquids, loose blades, hot tools, chemicals, or valuables. No heavy-load or waterproof claim.
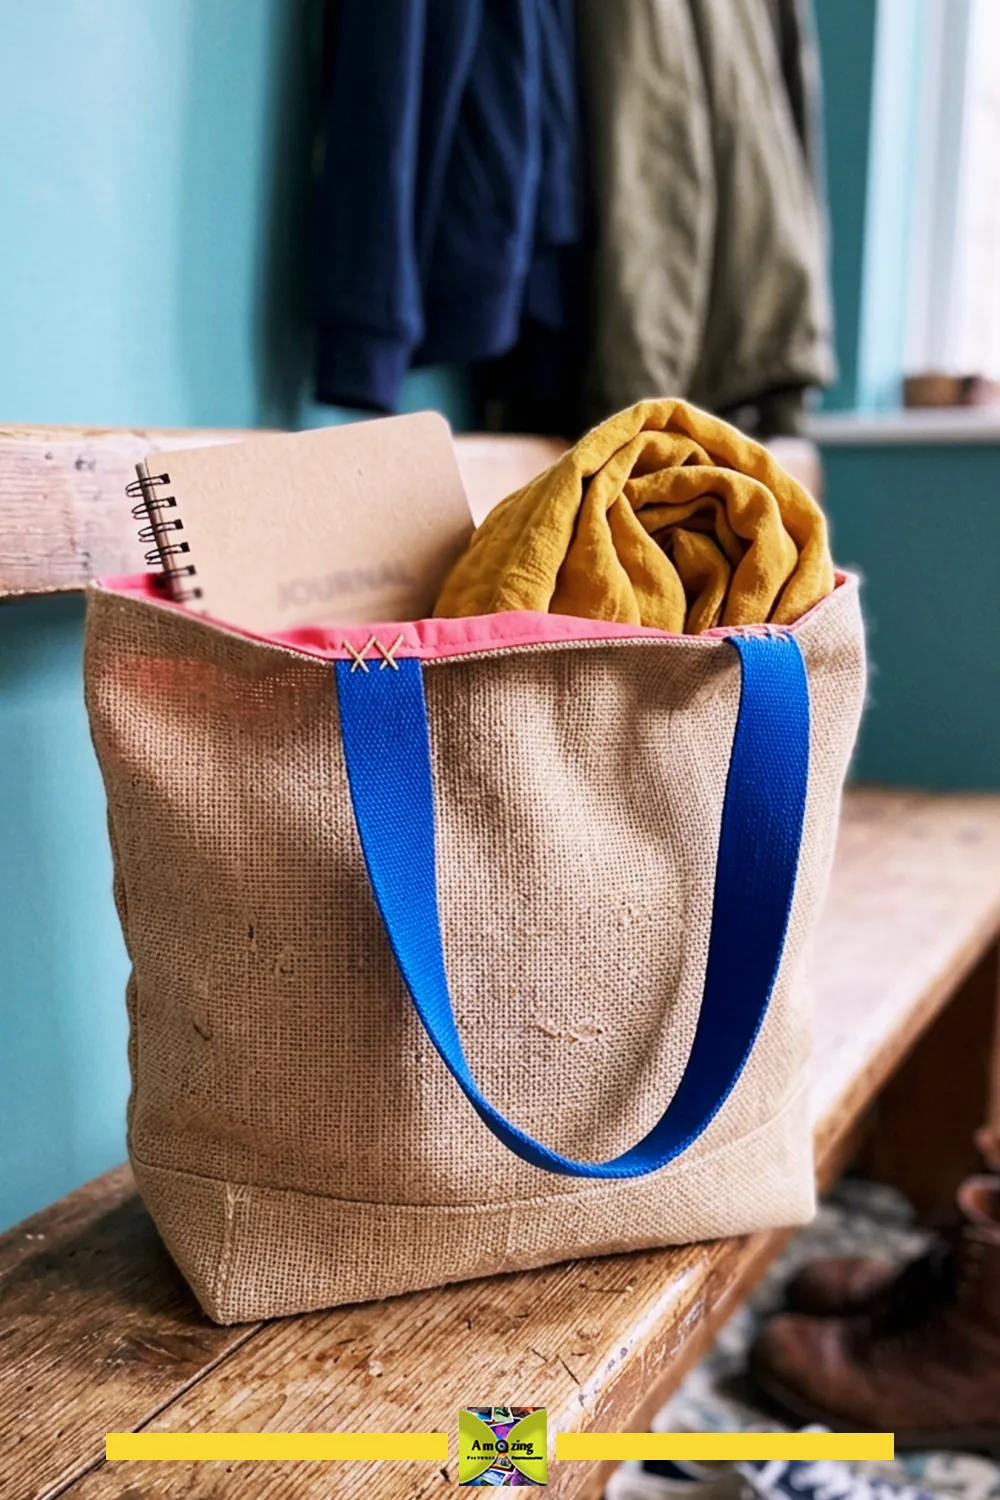
Before taking it out: Try the tote with the light items you actually plan to carry, holding it just above a padded surface. Look closely at the handle anchors and boxed corners for spreading yarns or opening stitches. Keep the first outings light, and check those same areas afterward; the sack’s original shipping capacity is not a weight rating for your finished bag.
Retire it when. Handles stretch, seams open, closures fail, or fibers shed heavily.
2. Structured Zippered Project Pouch
What you’ll make. A flat, structured pouch sized to one printed panel, with a smooth lining, bound internal seams, and reinforced zipper ends.
Best for. Storing small dry craft or stationery items — needles in a case, washi tape, a small notebook.
Difficulty. Intermediate (zipper). Time. About 2–3 hours. Planning estimate; allow extra time for material preparation, sample stitching, and fitting.
Materials. One printed sack panel; smooth abrasion-resistant lining; a zipper; light interfacing or a stiffener for structure; binding for internal seams; polyester thread.
Tools. Sewing machine with denim needle and zipper foot; shears; clips; iron; ruler.
Cut list. Two outer panels, two lining panels, two binding strips, and two small fabric tabs for the zipper ends.
Instructions.
- Center the print on the outer panel and cut both outer and lining pieces to the same finished size plus allowance.
- Stabilize the outer cut edges (zigzag or binding) before assembly.
- Sew the zipper between the two outer panels, then between the two lining panels, adding a small fabric tab at each zipper end to protect and finish it.
- Bind the internal seams so no raw sack edge sits inside.
- Sew the outer and lining together around the perimeter, leaving a turning gap, then turn and topstitch.
- Test the zipper through many openings before use.
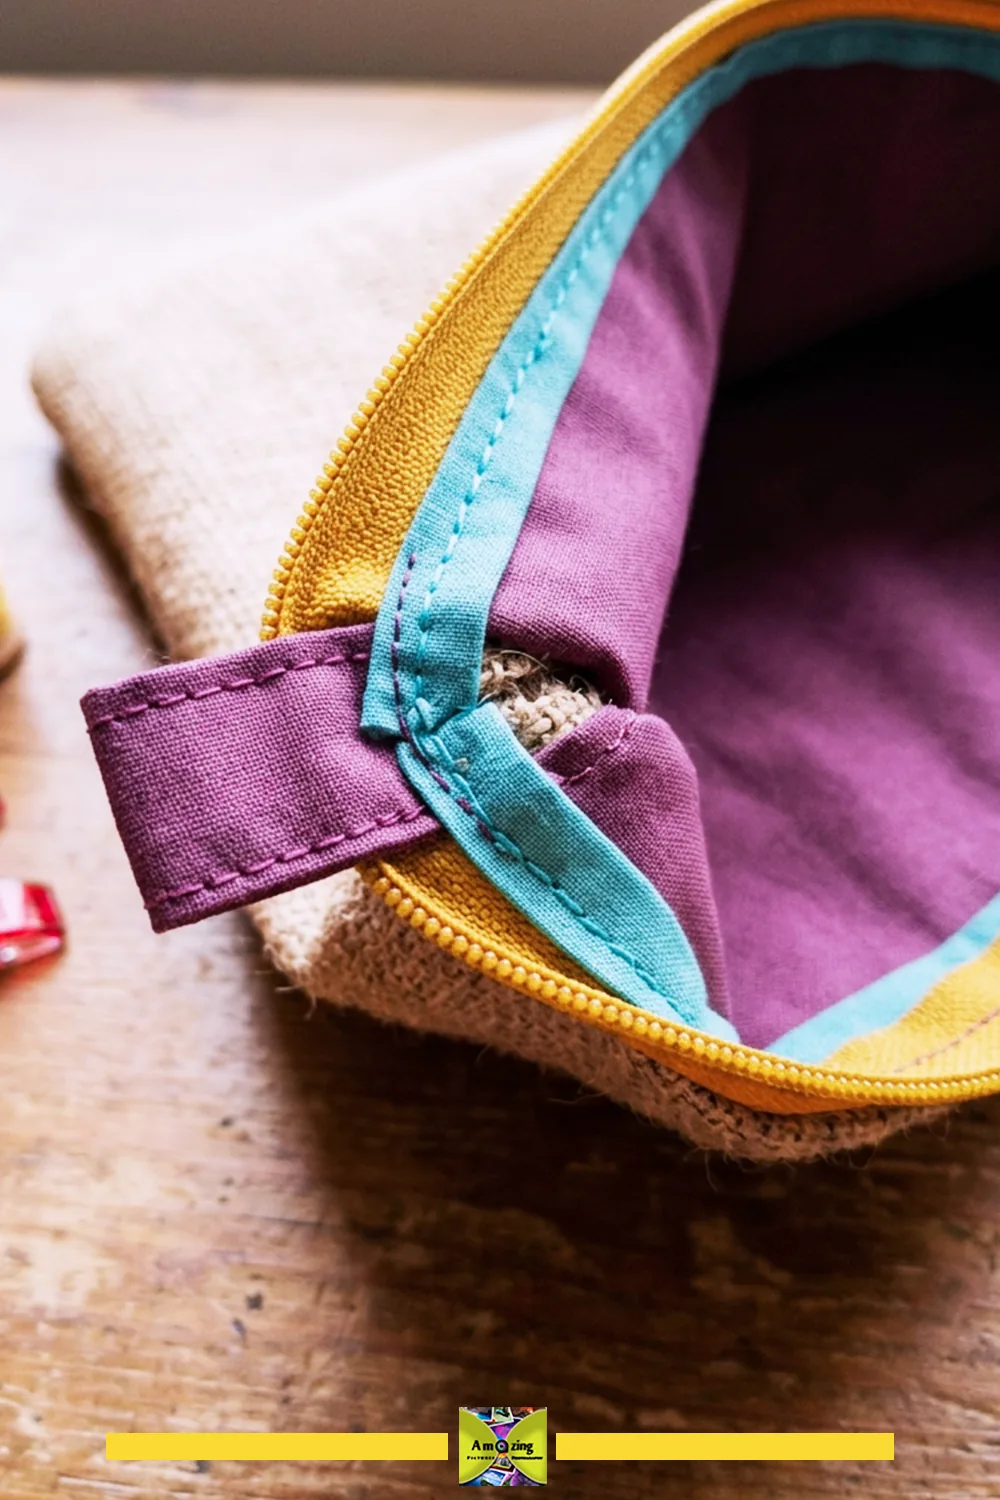
Customize. Add a wrist loop made from a folded, reinforced fabric strip; vary the binding color; add an interior divider.
Practical tip. Reinforce the zipper ends first — that’s where a pouch fails.
Watch for. A zipper that waves because the outer and lining were cut slightly different sizes.
Safety note. No wet, sharp, or chemically contaminated contents.
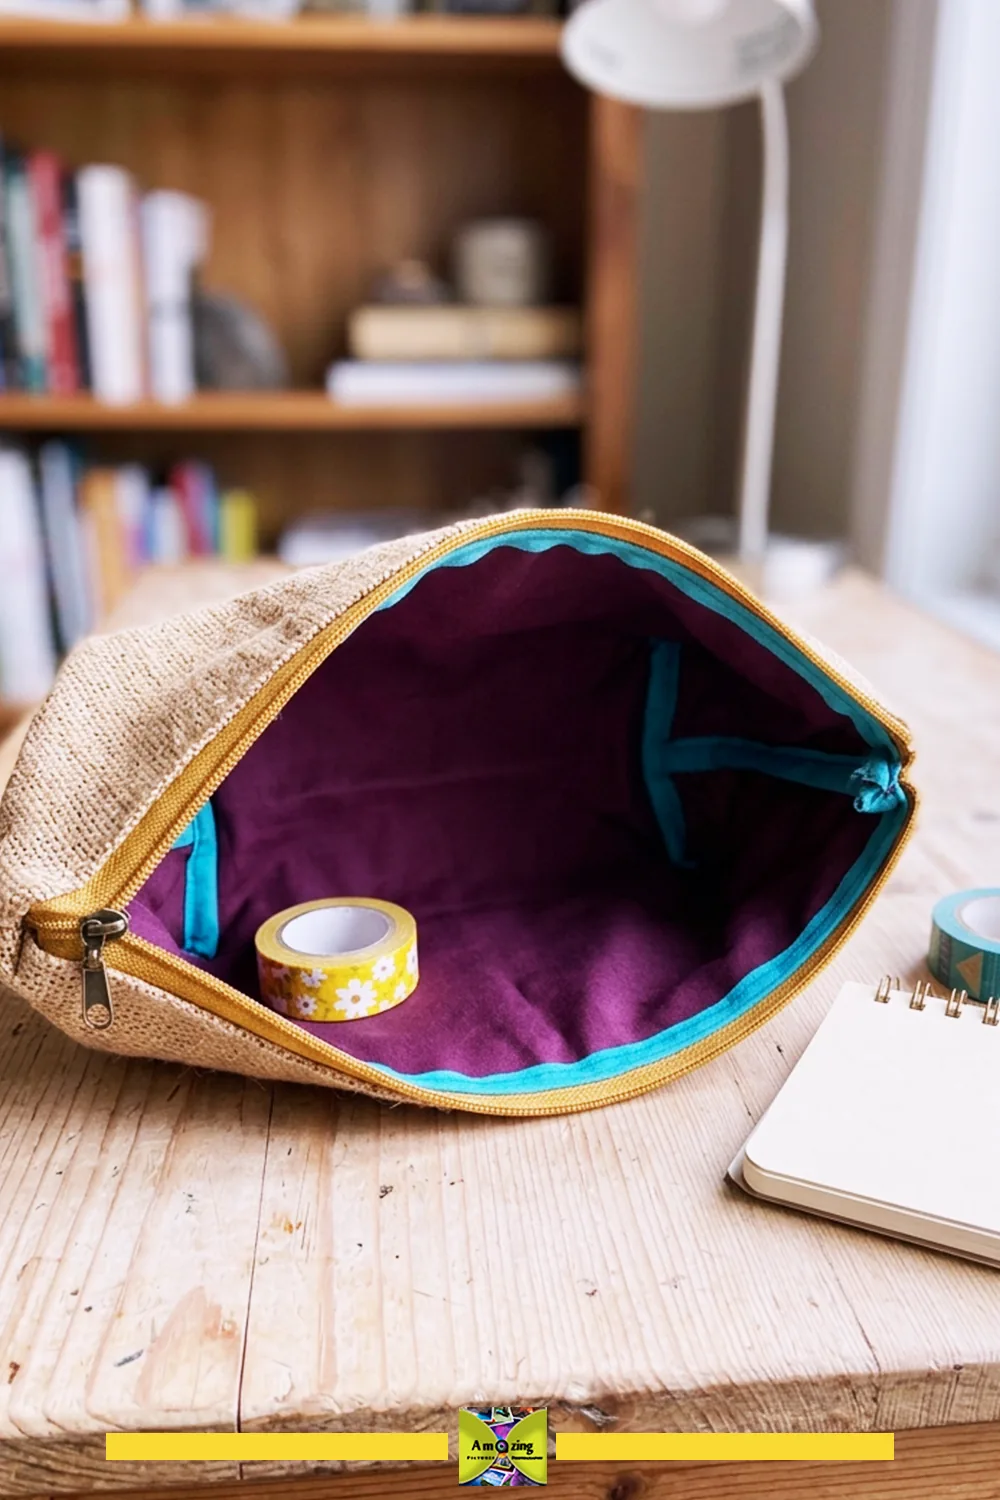
Keep a seam sample: Build a scrap stack that includes the outer fabric, lining, stabilizer, and binding used at the bulkiest join. Choose a compatible needle and thread using your machine manual, then adjust the stitching on that sample. Keep the successful sample with a note of the settings. If the machine struggles or the yarns split, reduce the bulk or change the construction before sewing the pouch.
Retire it when. The zipper ends pull loose or the binding wears through.
3. Coordinated Drawstring Storage Sacks
What you’ll make. A set of soft drawstring sacks with enclosed channels and finished cord ends, in matching or coordinated prints.
Best for. Lightweight dry craft, closet, or shelf contents — yarn, fabric scraps, holiday décor.
Difficulty. Beginner. Time. About 1–1.5 hours per sack. Planning estimate; allow extra time for material preparation, sample stitching, and fitting.
Materials. Sack panels (plain or lightly printed); lightweight cotton lining (optional but recommended); drawcord; polyester thread.
Tools. Sewing machine; shears; safety pin or bodkin for threading cord; iron.
Cut list. One body panel (or two for a lined version) per sack, plus cord.
Instructions.
- Cut a rectangle sized to your contents; stabilize the top and side edges.
- Fold and stitch a drawcord channel at the top, enclosing the raw edge.
- Sew the side and bottom seams, either bagging a lining or finishing raw edges by binding.
- Finish the cord ends with a knot, heat-sealed end (synthetic cord only), or a small fabric tab so they don’t fray.
- Thread the cord through the channel.
- Make the rest of the set to the same proportions so they look coordinated.
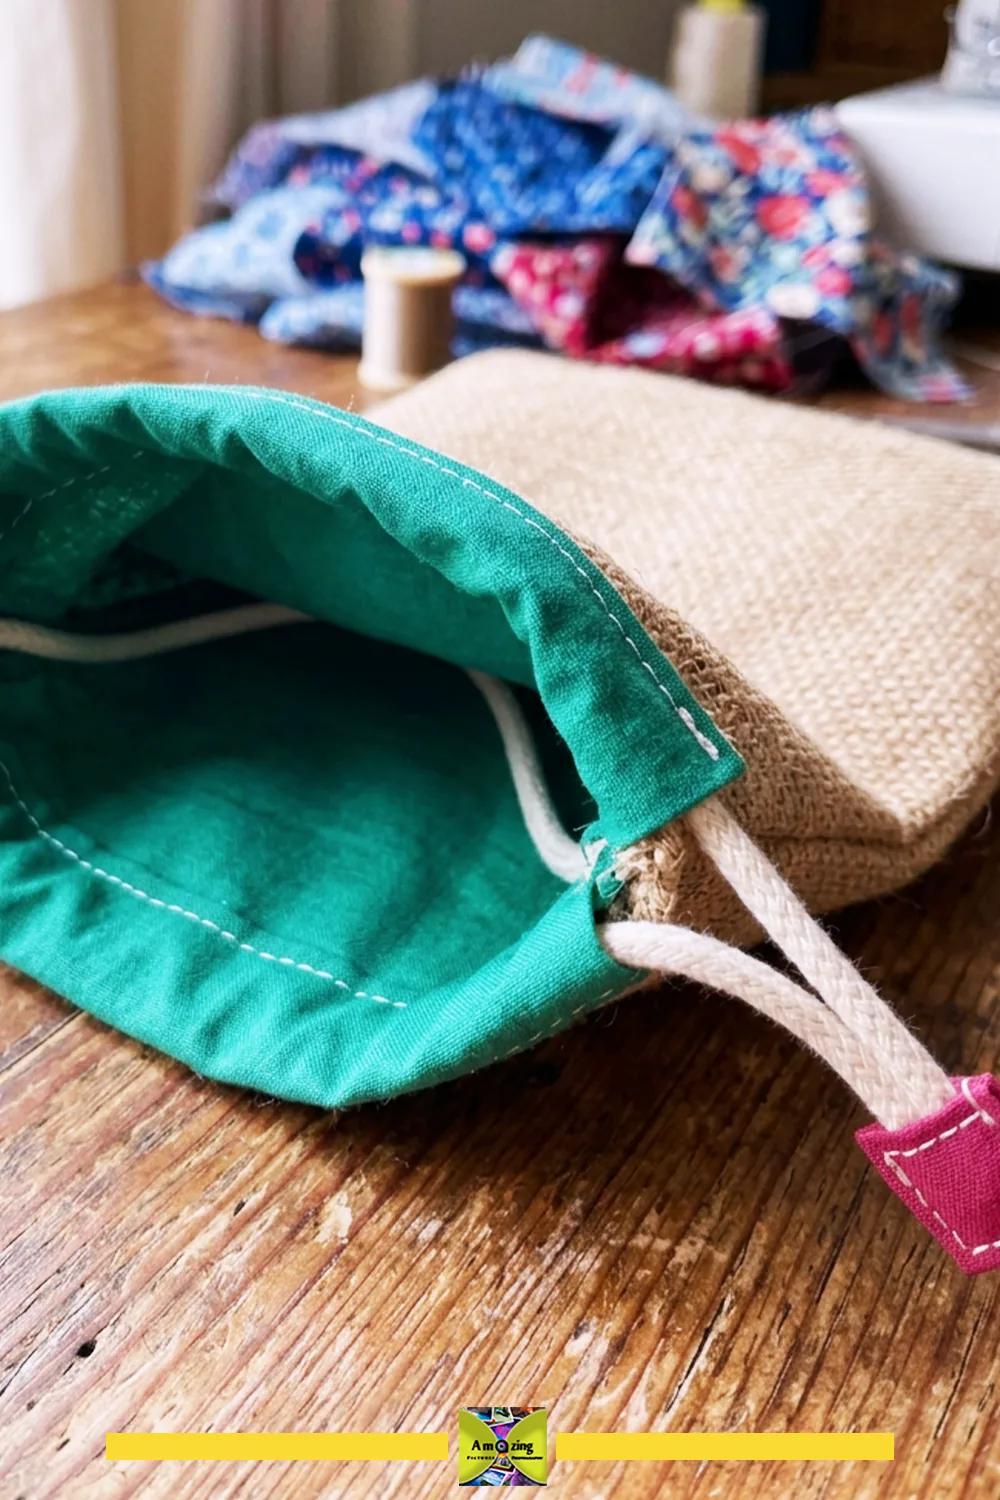
Customize. Use one strong printed motif per sack; repeat panel and channel heights across the set; match cord color to the binding.
Practical tip. Keep cords short — a long loop catches and is a hazard.
Watch for. An unenclosed channel fraying internally after a few uses.
Safety note. Lightweight dry contents only; keep cords away from children and pets.
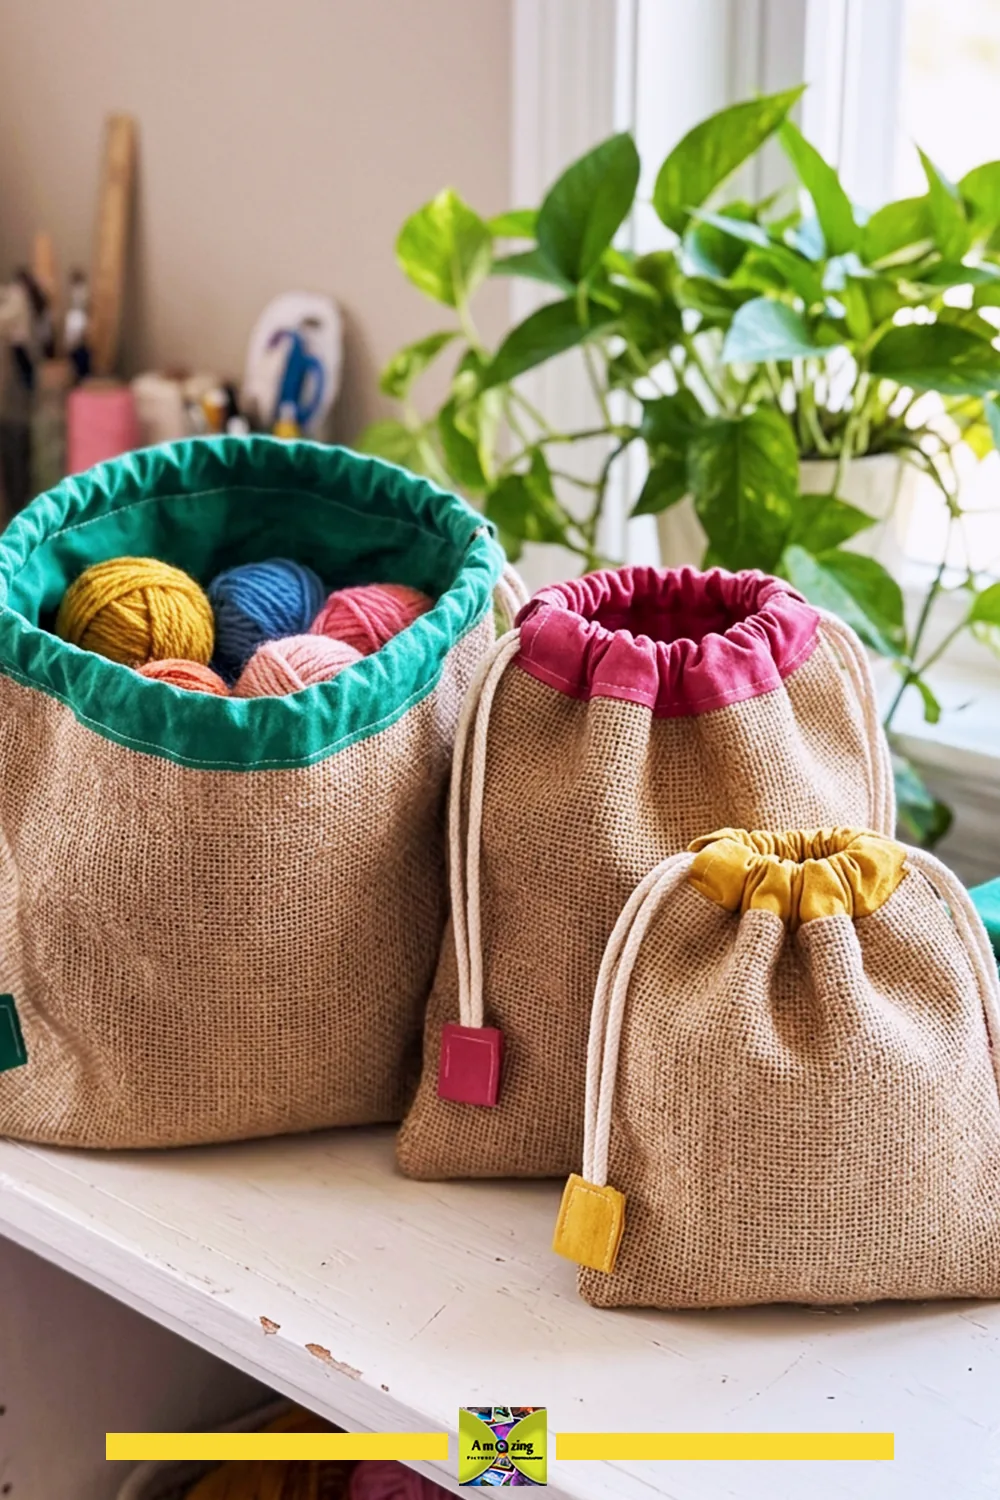
Make one before the set: Fill a sample sack with the yarn or scraps you intend to store and try the closure. Contents should sit below the channel so you can gather it without forcing the cord. Add a fabric label to the outside rather than repeatedly opening every sack, and check inside the channel for loose fibers when you empty it.
Retire it when. The channel frays, the cord frays, or the seams begin to open.
4. Roll-Up Paintbrush and Dry-Art-Tool Organizer
What you’ll make. A lined roll with divided pockets and a protective flap, tied closed with short fabric strips.
Best for. Transporting dry paintbrushes and clean, dry art tools. One of the least-covered, genuinely useful ideas in this collection.
Difficulty. Beginner-intermediate. Time. About 2–3 hours. Planning estimate; allow extra time for material preparation, sample stitching, and fitting.
Materials. One sack panel (plain or lightly printed); smooth lining; a sturdier woven backing layer; short fabric ties; polyester thread.
Tools. Sewing machine; shears; clips; ruler; iron.
Cut list. One outer panel, one lining, one backing, one flap, two short tie strips, plus pocket dividers sized to your tools.
Instructions.
- Size the roll to your longest tool, then cut outer, lining, backing, and flap.
- Make a lined pocket strip, stitch vertical divider lines to fit your tools, and attach it to the backing with the raw edges enclosed.
- Sandwich the pocket strip between the lining and backing, then attach the outer sack panel on the back, fully enclosing all edges.
- Add the flap at the top and two short ties so the roll closes without a long loose loop.
- Roll and test the fit before use.
Customize. Vary pocket widths for different tools; add a small top flap to protect brush tips; choose a lining that won’t catch brush bristles.
Practical tip. Only store dry, clean tools — never wet, sharp, or chemically contaminated ones.
Watch for. Pocket seams that sag or pull once tools are inserted.
Safety note. No wet brushes, loose blades, or solvents.
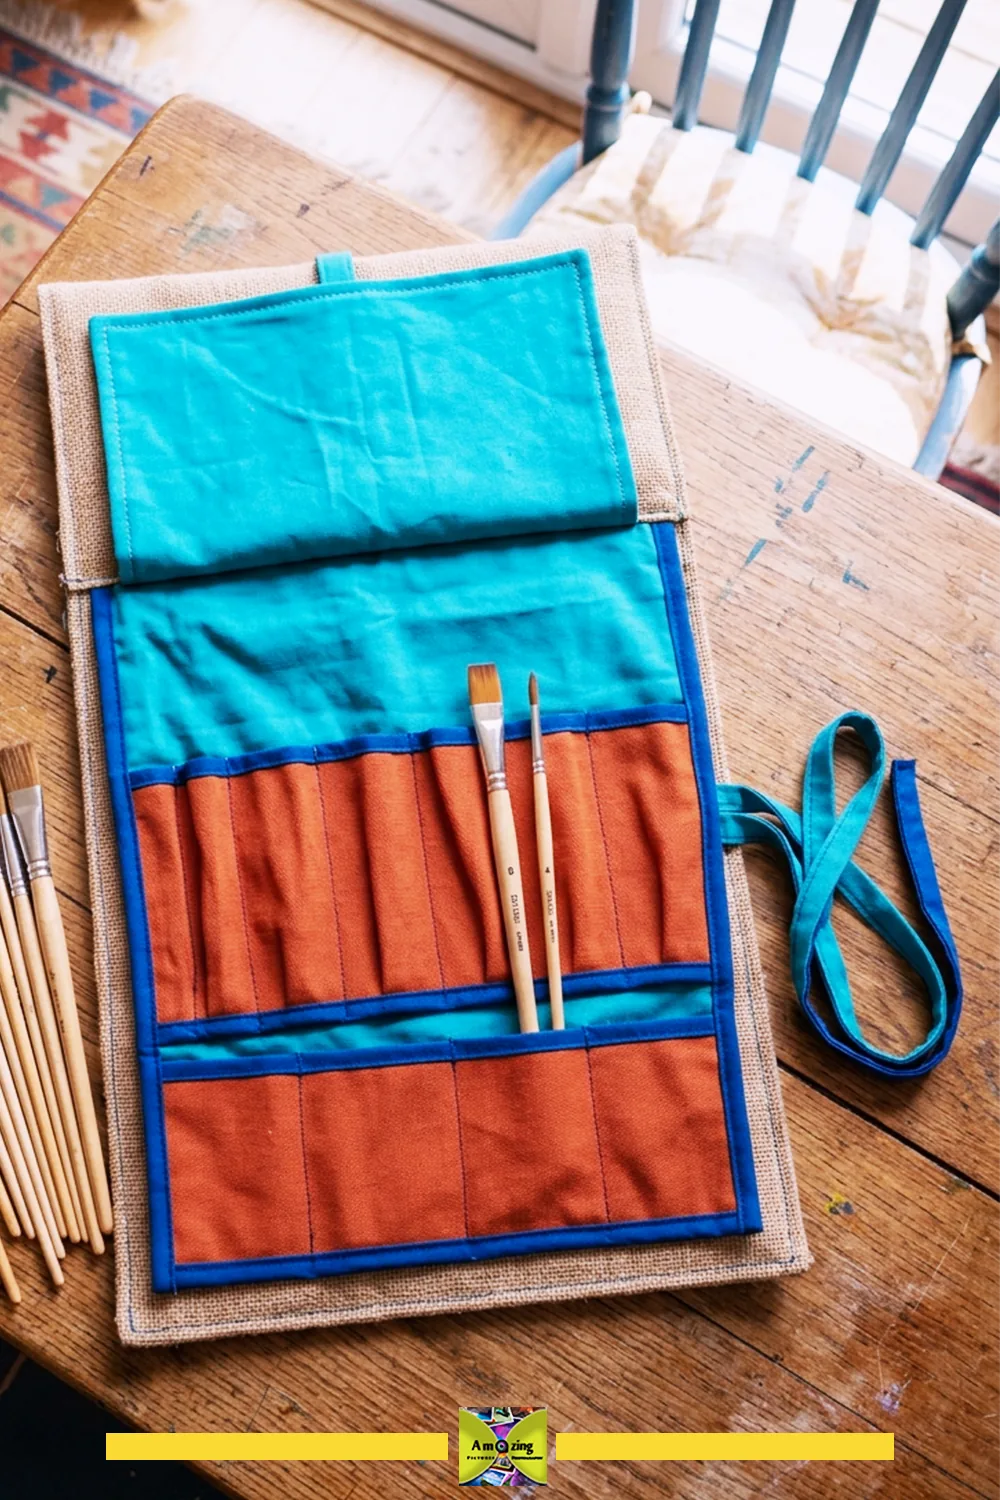
Let the tools set the spacing: Lay out your clean, dry brushes on the lining before marking pocket divisions. Allow room around the widest handles, then try the loaded roll before stitching every divider. The flap should cover the tips without bending the bristles, and the ties should close the roll without squeezing its contents.
Retire it when. Pockets sag, ties fray, or raw fibers emerge.
5. Reusable Lined Gift Bag
What you’ll make. A lined gift bag with reinforced handles and a stable, removable base insert.
Best for. Lightweight dry gifts — a book, soap in its own wrapper, a scarf.
Difficulty. Beginner-intermediate. Time. About 2 hours. Planning estimate; allow extra time for material preparation, sample stitching, and fitting.
Materials. One printed sack panel; cotton lining; handle material; removable base insert; polyester thread.
Tools. Sewing machine; shears; clips; iron; ruler.
Cut list. Two outer panels, two lining panels, a base insert (cardboard sealed in lining fabric), and two handles.
Instructions.
- Cut outer and lining to size, box the base corners, and sew each into a bag shape.
- Reinforce the handle areas, then attach handles so they load the body, not just the top edge.
- Join lining and outer at the top edge, turn, and topstitch.
- Drop in the removable base insert.
- Test with a light dry gift before giving it away.
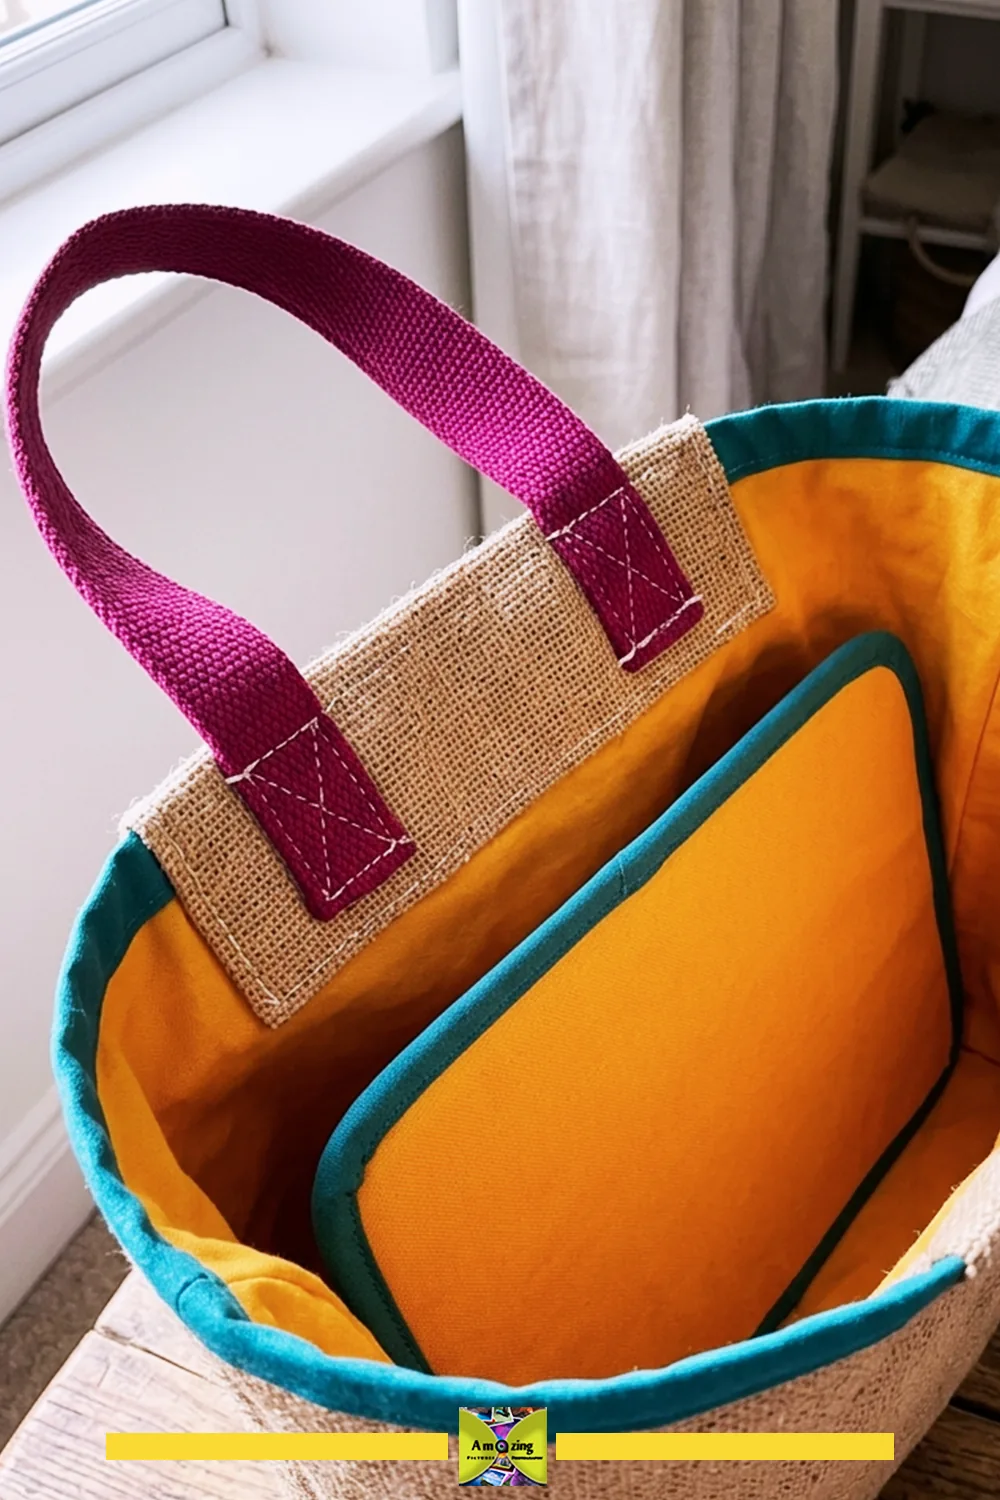
Customize. Keep the printed motif centered and front-facing; coordinate the lining and ribbon; add a fabric tie instead of a bow.
Practical tip. Make the base insert removable so the bag can be spot-cleaned or flattened for storage.
Watch for. Handles that pull yarns apart under a too-heavy gift.
Safety note. Lightweight dry gifts only; no food, liquids, or heavy items.
Fit the gift, then the insert: Use the actual lightweight gift to check the bag’s width and height before cutting. Round the base insert’s corners and enclose it in smooth lining fabric so it cannot rub directly against the sackcloth. The insert should lift out easily. When presenting the bag, support its base rather than relying on the handles alone.
Retire it when. Handles stretch, the base insert wears through the lining, or seams open.
Desk and Craft Organization
6. Magazine-File Sleeve
What you’ll make. A fitted sleeve stretched over a sound, rigid reclaimed magazine file, with protected lower edges.
Best for. Holding lightweight paper — magazines, file folders, notebooks — inside an existing rigid body. A low-competition idea with real utility.
Difficulty. Beginner. Time. About 1.5–2 hours, plus fitting. Planning estimate; allow extra time for material preparation, sample stitching, and fitting.
Materials. One sack panel; a sound rigid magazine file as the body; light backing fabric; adhesive or double-sided tape (tested); polyester thread.
Tools. Scissors or rotary cutter; ruler; clips; iron.
Cut list. One body panel sized to wrap the file, one backing panel, plus seam/overlap allowances.
Instructions.
- Measure the magazine file at several points and make a paper template that wraps it fully, including the bottom.
- Back the sack panel with a smooth backing so the coarse fiber never touches the paper inside.
- Fold and glue or stitch the sleeve into a tube, protecting the lower edge where it meets the desk.
- Slide the sleeve over the file and trim the top edge clean.
- Confirm the file still sits flat and square.
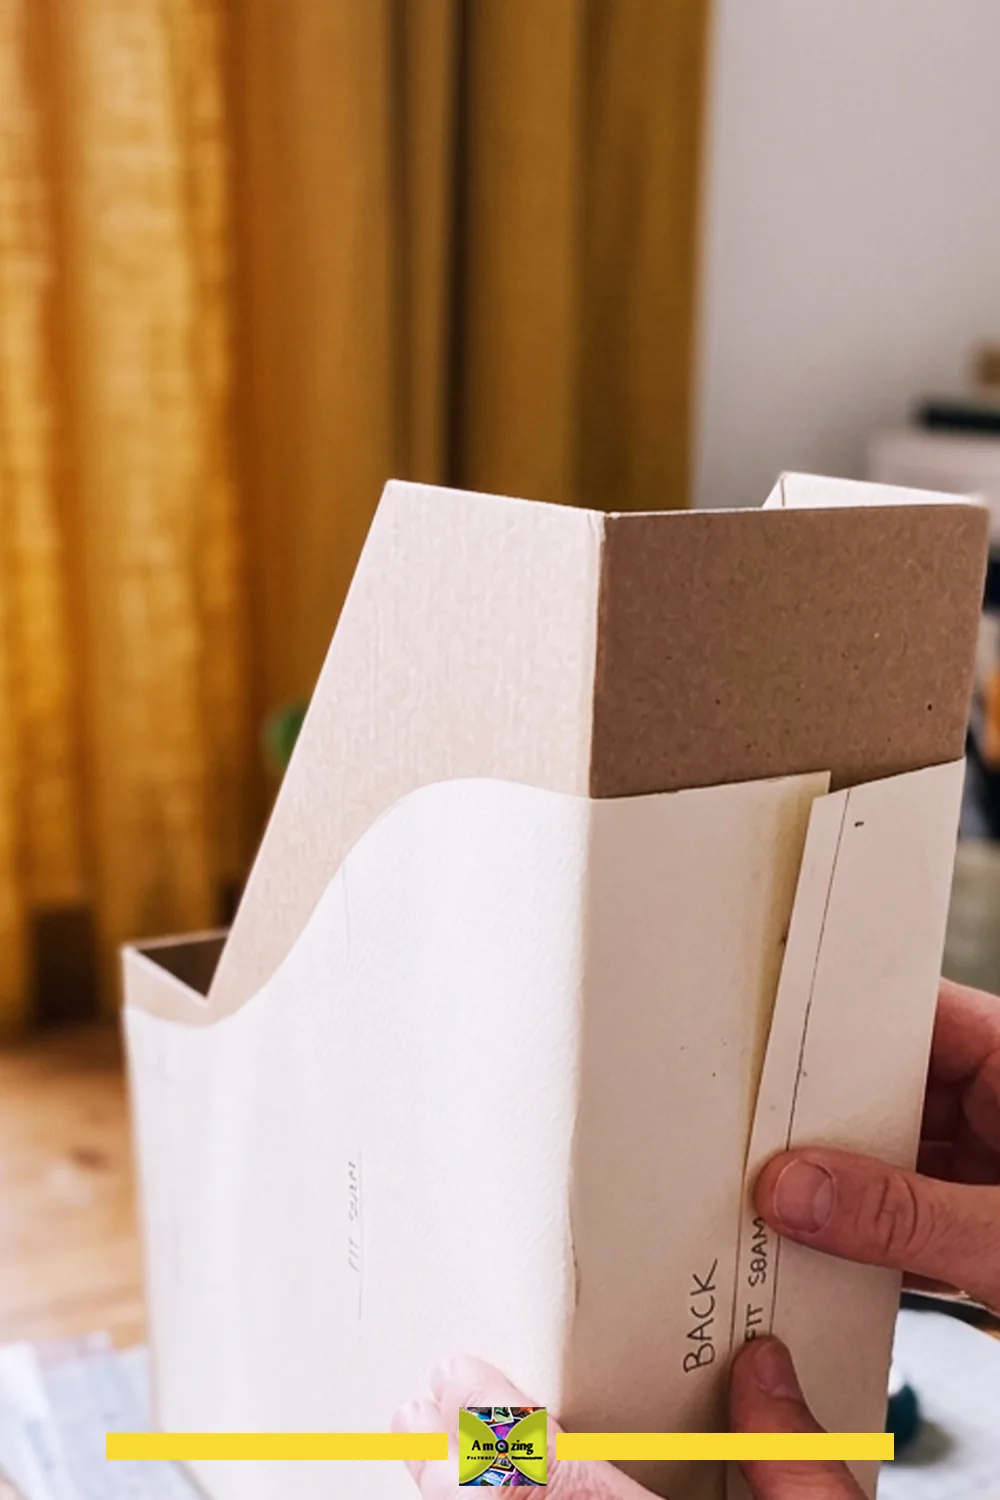
Customize. Keep the print on the front face; bind the top and bottom edges in a matching tone; label the spine with a small stitched tag.
Practical tip. Test the adhesive on scrap first — some adhesives darken or stiffen jute.
Watch for. The lower edge peeling where the sleeve rubs the desk.
Safety note. Lightweight paper contents only; don’t overload a file that then tips.
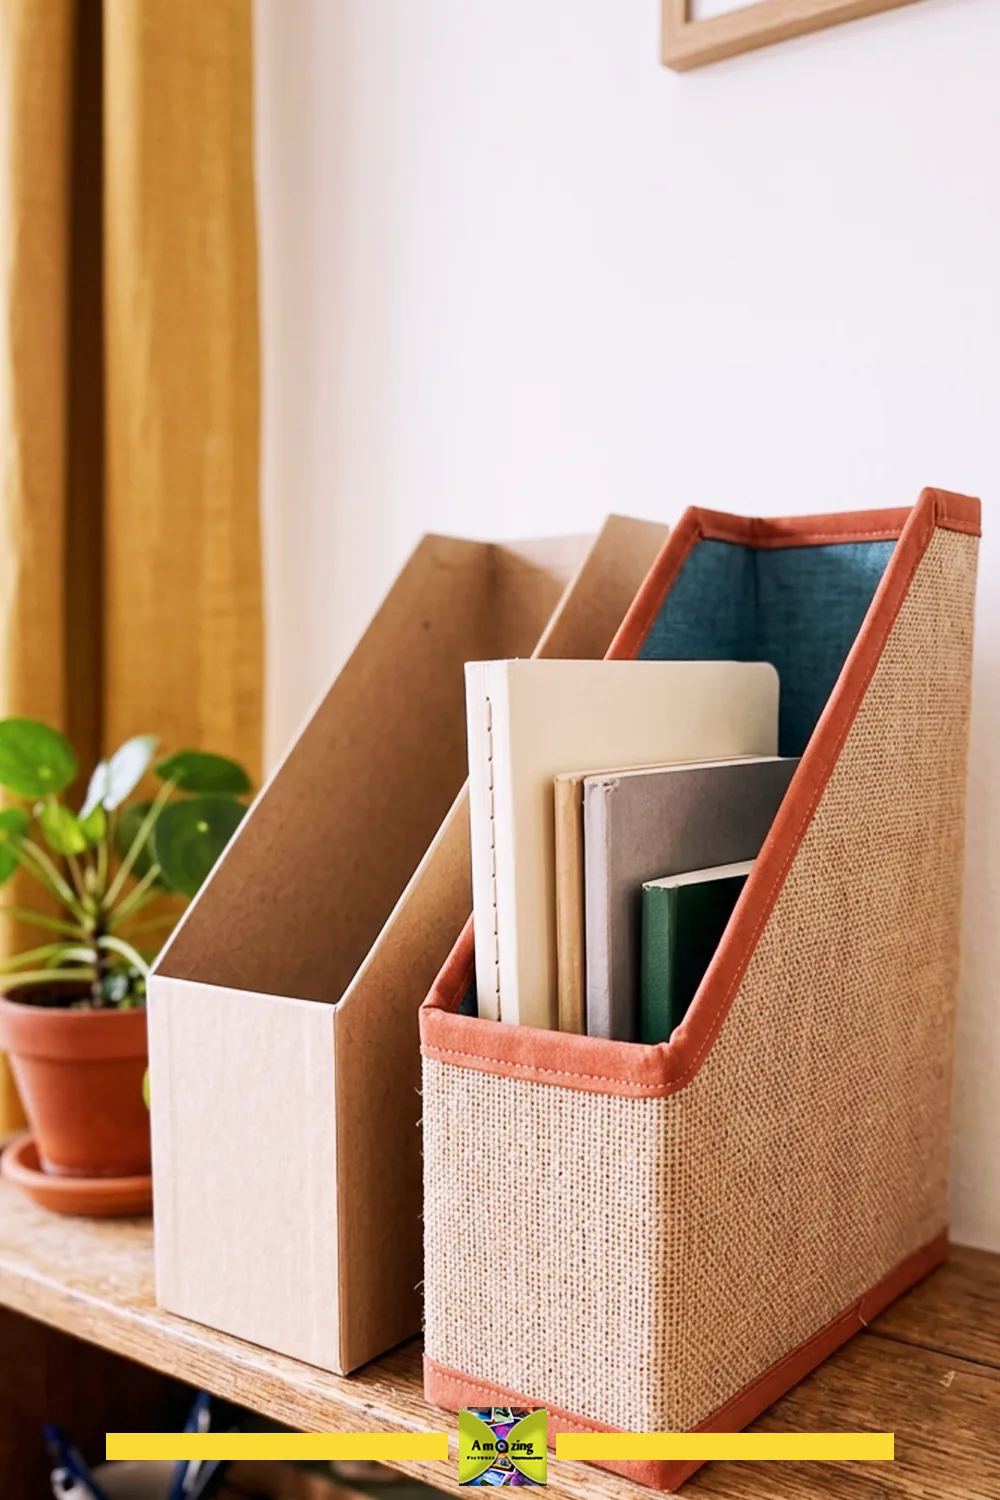
Watch the bottom edge: Place the sleeve’s overlap on the back of the file, away from the part you grip. Finish the lower edge so it lies flat without a thick ridge beneath the rigid base. After fitting, slide the empty file a short distance on a protected surface and check for snagging, loose fibers, or a sleeve that rides upward.
Retire it when. The lower edge peels, the sleeve shifts, or raw fibers emerge.
7. Framed Wall-Pocket Organizer
What you’ll make. Lined, shallow pockets on a rigid backing, mounted through the backing — not through the sackcloth.
Best for. Lightweight dry mail, stationery, and craft flat-packs near a desk or entryway.
Difficulty. Intermediate (mounting). Time. About 3–4 hours. Planning estimate; allow extra time for material preparation, sample stitching, and fitting.
Materials. Sack panels (pockets and face); smooth lining; a rigid backing board; light woven backing; mounting hardware; polyester thread.
Tools. Sewing machine; drill or screwdriver (for mounting); level; stud finder if needed; clips.
Cut list. One face panel, two to three pocket panels, backing and lining panels, plus seam allowances.
Instructions.
- Size the face and pockets to the rigid backing; keep pockets shallow so they don’t sag.
- Line and edge-finish each pocket, then attach them to the face with reinforcement at the pocket openings.
- Wrap the face over the rigid backing, capturing all edges, and add a smooth backing to protect the wall.
- Mount through the rigid backing into wall anchors or studs — never through unsupported sackcloth.
- Load-test with the intended contents, then leave it empty overnight to confirm nothing shifts.
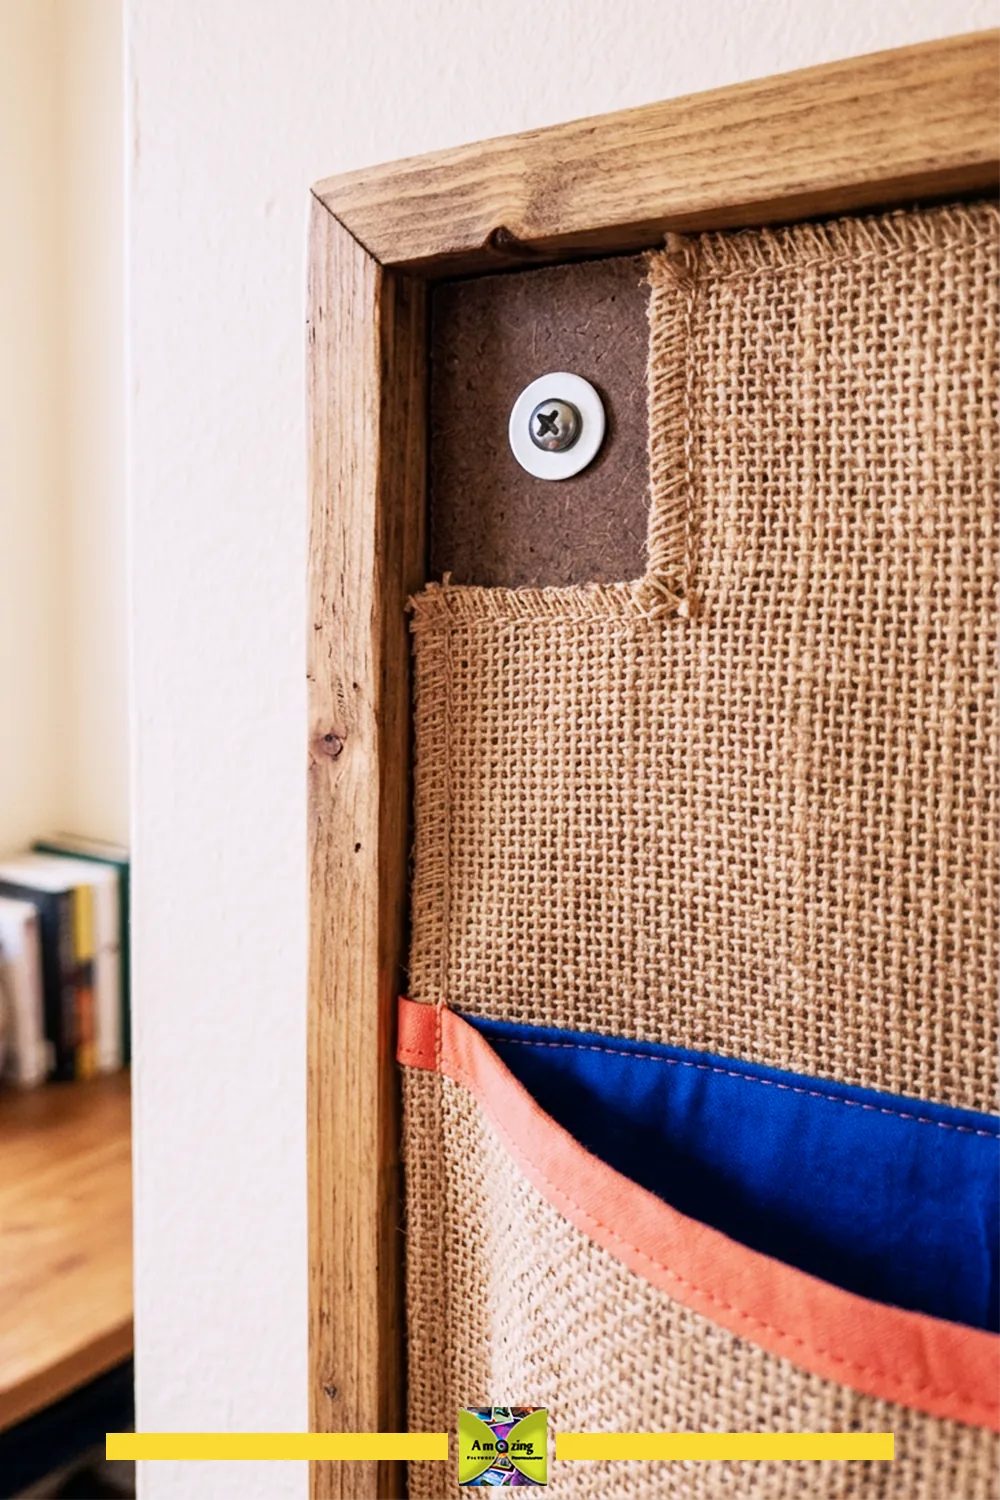
Customize. Keep one bold motif across the face; align pocket tops; match hardware finish across the room.
Practical tip. Mount through the rigid backing and test completed weight before trusting it.
Watch for. Pockets sagging because they were made too deep or attached without reinforcement.
Safety note. Lightweight dry paper only; no medicine, liquids, sharp tools, or valuables. Keep pins and hardware away from children and pets.
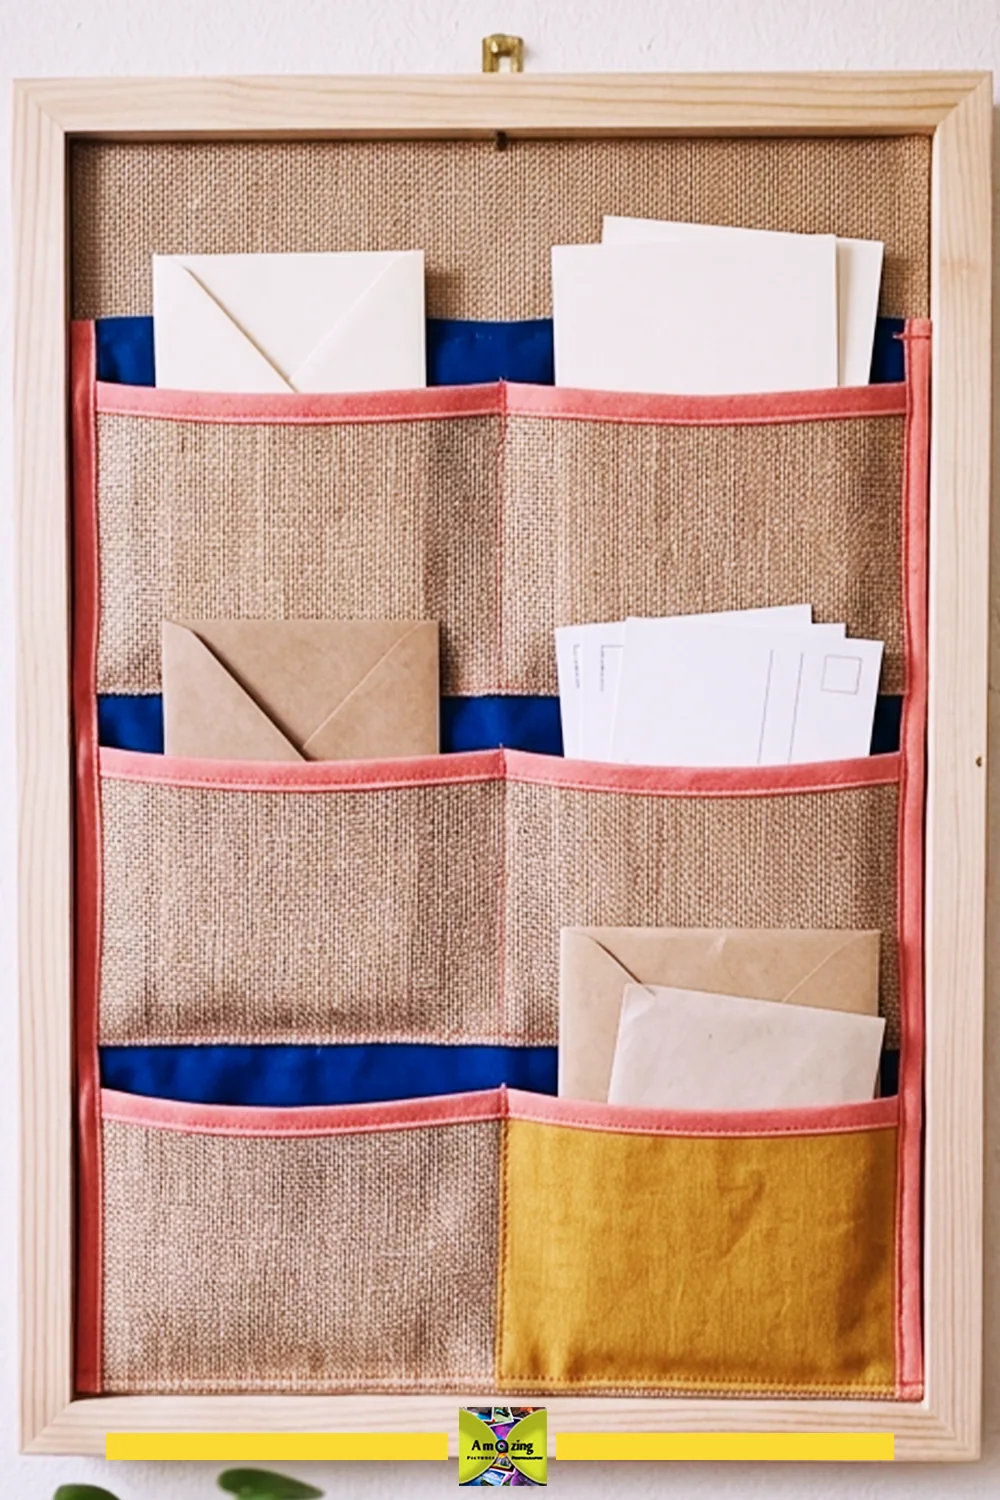
Check the whole mounting system: Select fixings for the wall type and the completed organizer’s weight, following the hardware maker’s instructions. Mount through the rigid backing and add only a few lightweight papers at first. Check for movement at the fixings, gaps behind the board, and pocket stitching that pulls the weave apart. An empty organizer staying in place does not establish a loaded capacity.
Retire it when. Pockets sag, mounts loosen, the backing warps, or raw fibers emerge.
8. Small Desktop Supply Basket
What you’ll make. A lined basket with a separate rigid base, bound rim, and reinforced corners — no carrying handle.
Best for. Holding light dry desk supplies — pens, clips, washi tape — on a desktop.
Difficulty. Beginner-intermediate. Time. About 2–3 hours. Planning estimate; allow extra time for material preparation, sample stitching, and fitting.
Materials. One sack panel; cotton lining; a separate rigid base; binding for the rim; polyester thread.
Tools. Sewing machine; shears; clips; iron; ruler.
Cut list. Four side panels (or one wrap), one base panel, one lining base, binding strips, and corner reinforcement patches.
Instructions.
- Build the rigid base first and cut the side panels to fit it exactly.
- Line and edge-finish the sides, then join them with reinforced corners.
- Bind the top rim so no raw edge shows.
- Drop the rigid base into the bottom (or sew a base sleeve) and confirm the basket sits square.
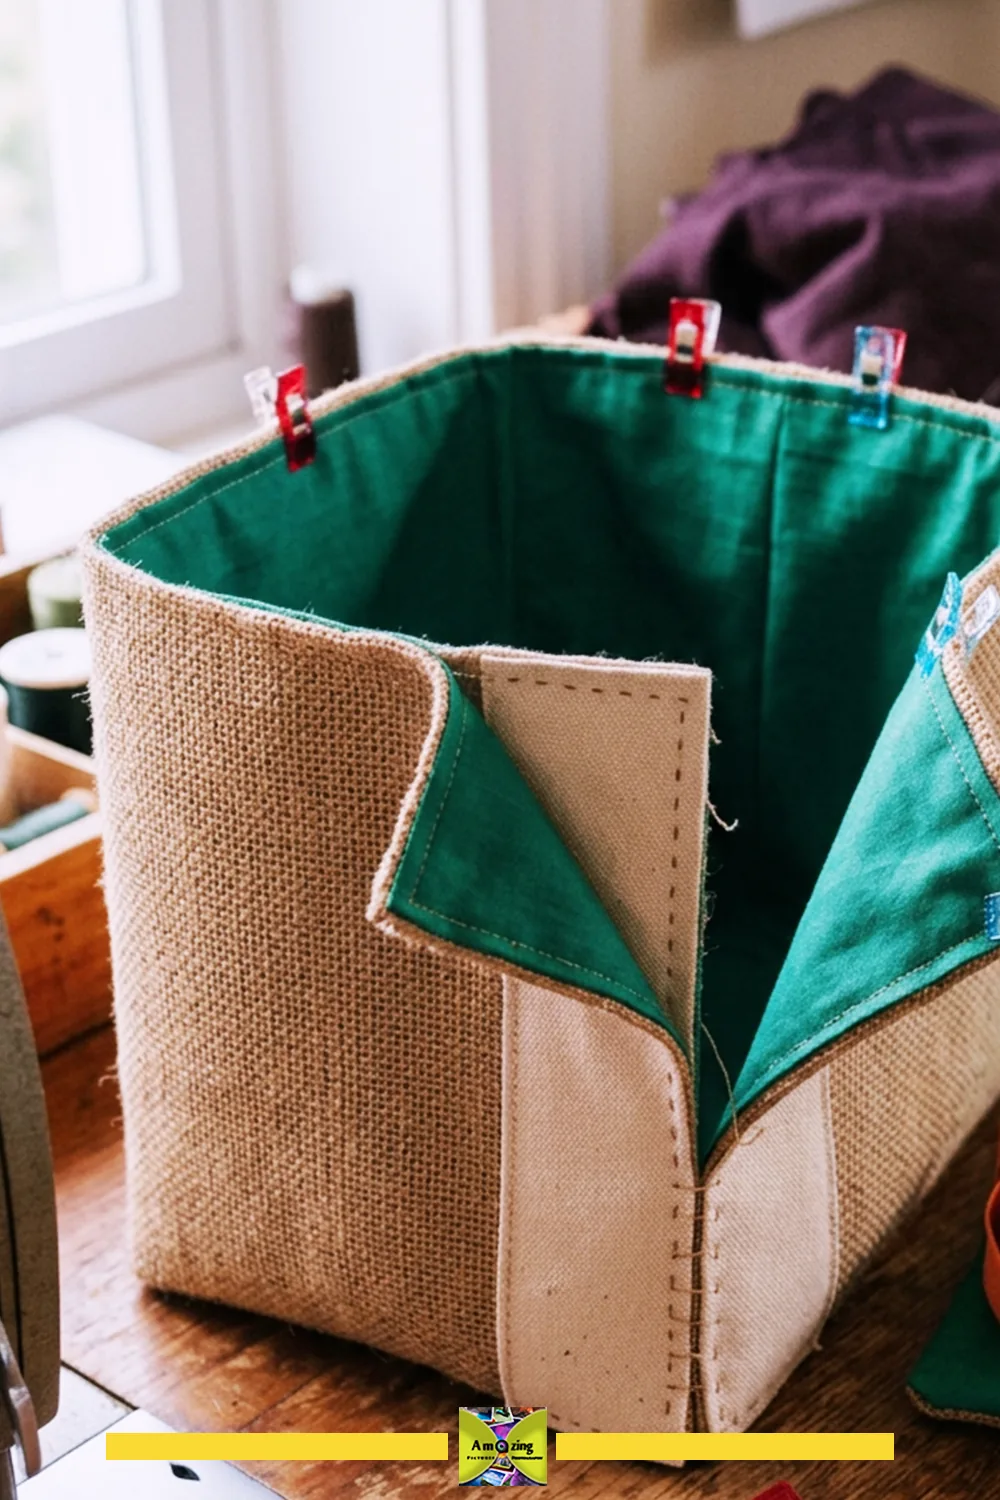
Customize. Keep the print on one front-facing panel; bind the rim in a contrasting tone; add a small interior divider.
Practical tip. A separate rigid base keeps the basket square and is easier to clean than a sewn-in one.
Watch for. The basket twisting out of square if the sides were cut off-grain.
Safety note. No carrying handle — this is a desk piece, not a tote. Light, dry supplies only.
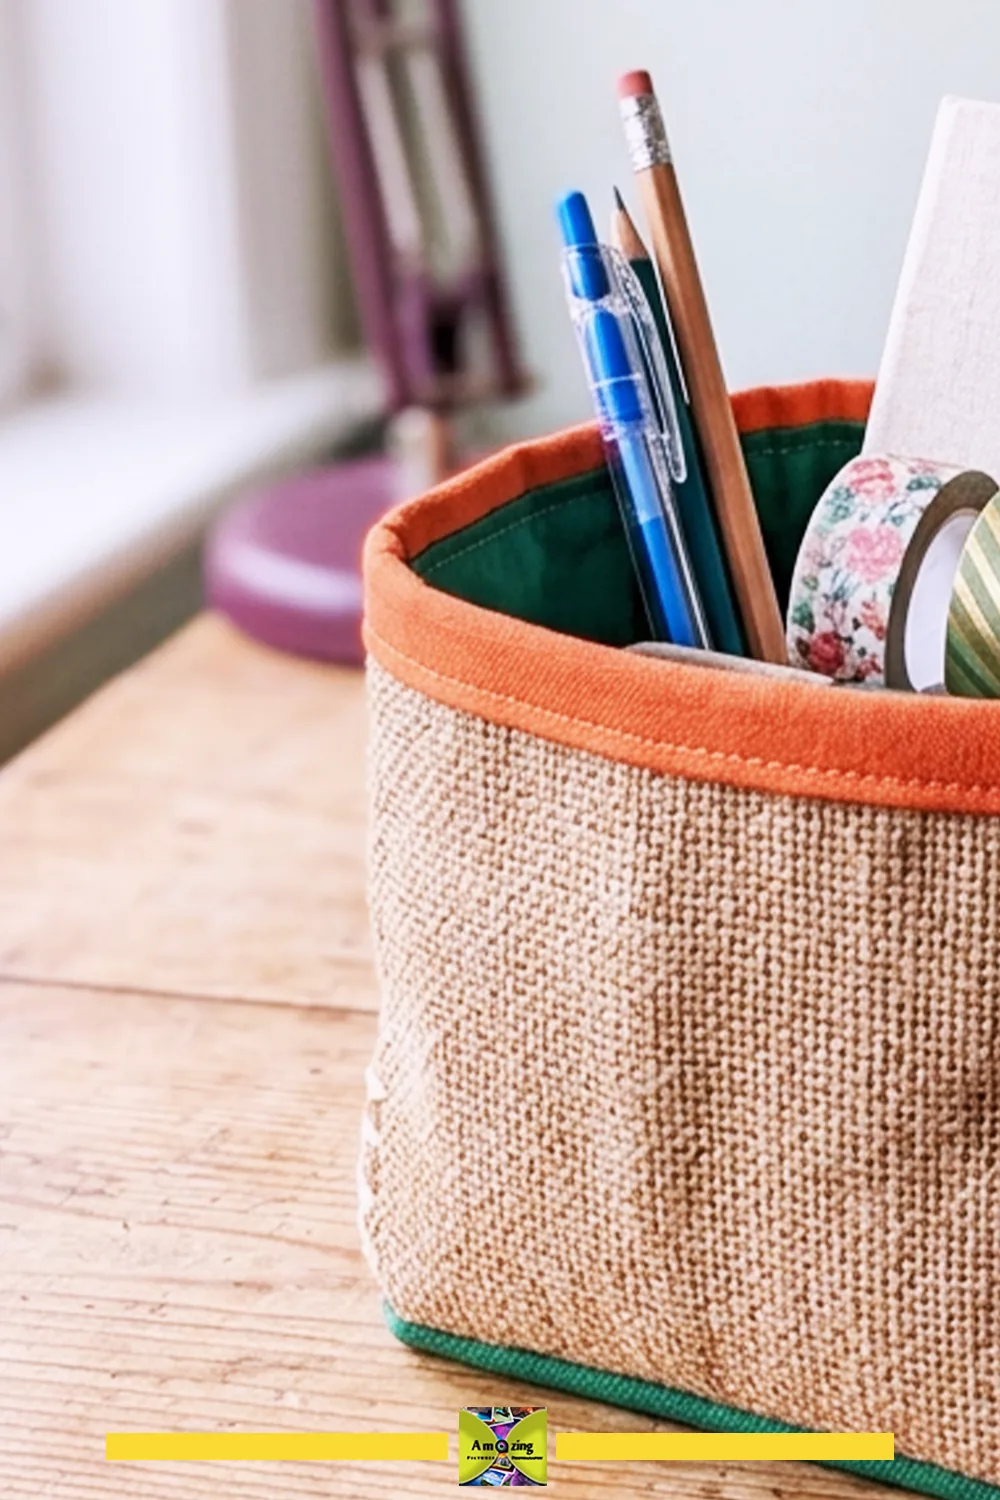
Square it before binding: Set the partly assembled basket on a flat surface with its base insert in place. Check that the corners stand evenly and the rim is level before sewing on the binding. Correct a twisted side now rather than tightening the binding to hide it. Keep the insert removable, and move the basket by supporting underneath.
Retire it when. Corners soften, the base wears through the lining, or the rim binding frays.
9. Removable Drawer-Bin Sleeves
What you’ll make. Smooth-lined sleeves that slip over existing rigid trays or bins, hiding the coarse fiber and protecting contents.
Best for. Neatening existing desk or dresser trays without attaching anything to valuable furniture. Another low-competition idea.
Difficulty. Beginner. Time. About 1–2 hours per sleeve. Planning estimate; allow extra time for material preparation, sample stitching, and fitting.
Materials. Sack panels; smooth lining; light backing; tested adhesive or tape; polyester thread.
Tools. Scissors or rotary cutter; ruler; clips; iron.
Cut list. One wrap panel and one backing per sleeve, sized to the tray.
Instructions.
- Measure the tray, then make a paper template that wraps it with a small overlap.
- Back the sack panel with smooth lining so the fiber never touches the tray’s contents or the furniture.
- Finish all edges (fold-and-topstitch or bind) before assembly.
- Fit the sleeve over the tray; it should slide on without binding.
- Confirm the tray still slides freely in its drawer.
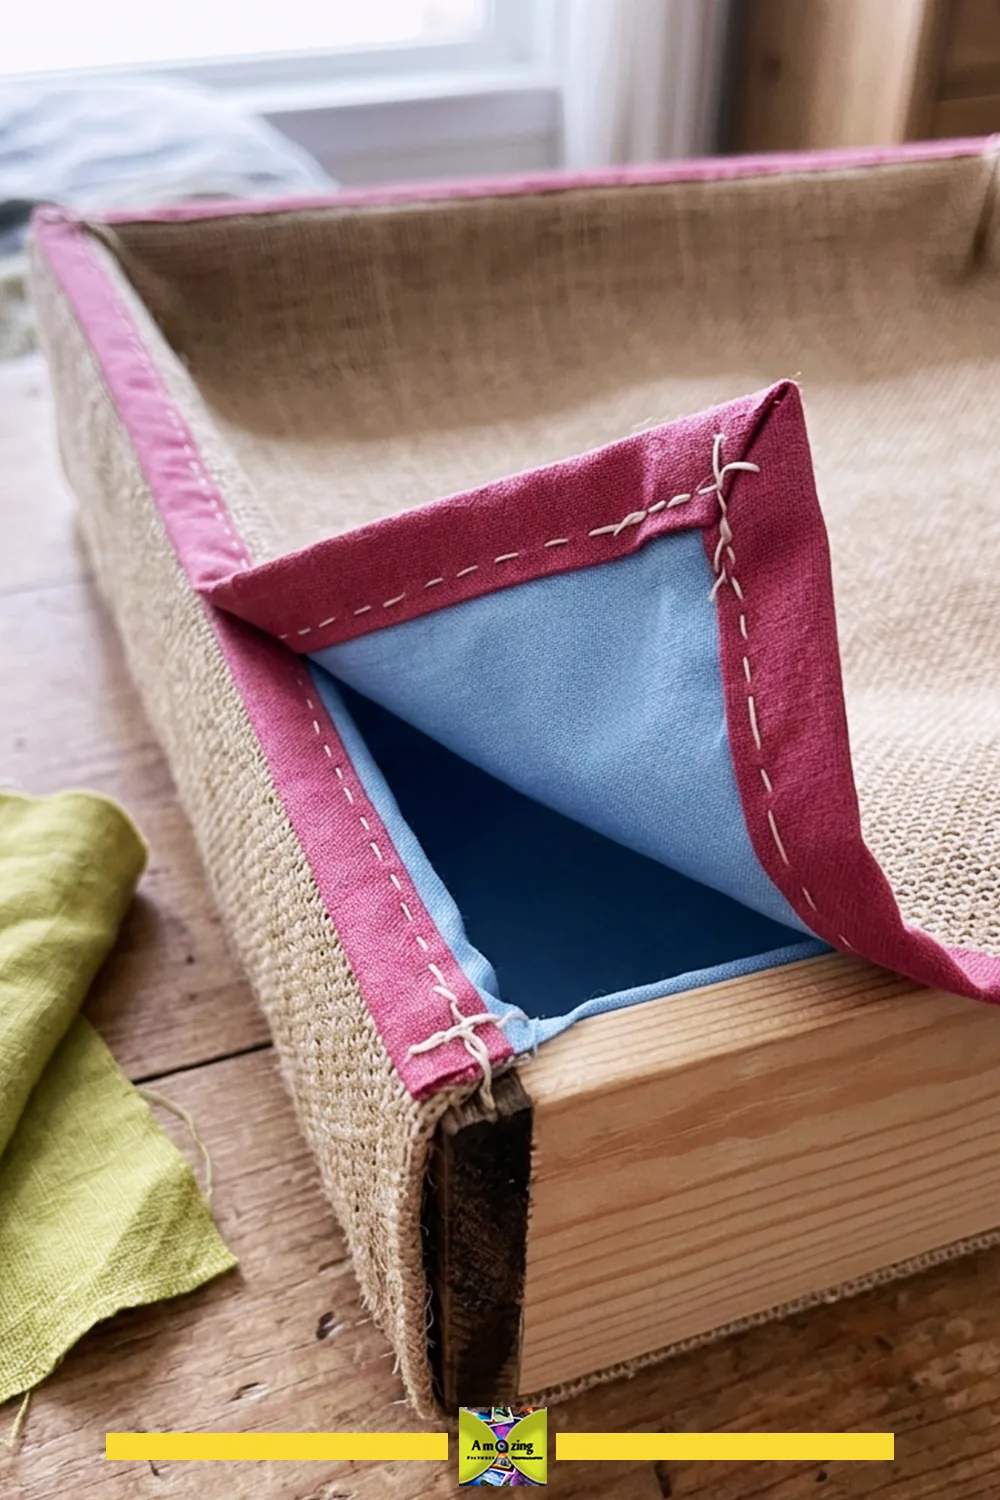
Customize. Match sleeves across a set; keep one motif centered per sleeve; add a small finger-tab.
Practical tip. Keep the fit slightly loose — a too-tight sleeve binds when the drawer slides.
Watch for. A sleeve that shifts or binds because it was sized without an overlap allowance.
Safety note. No direct attachment to valuable furniture; light dry contents only.
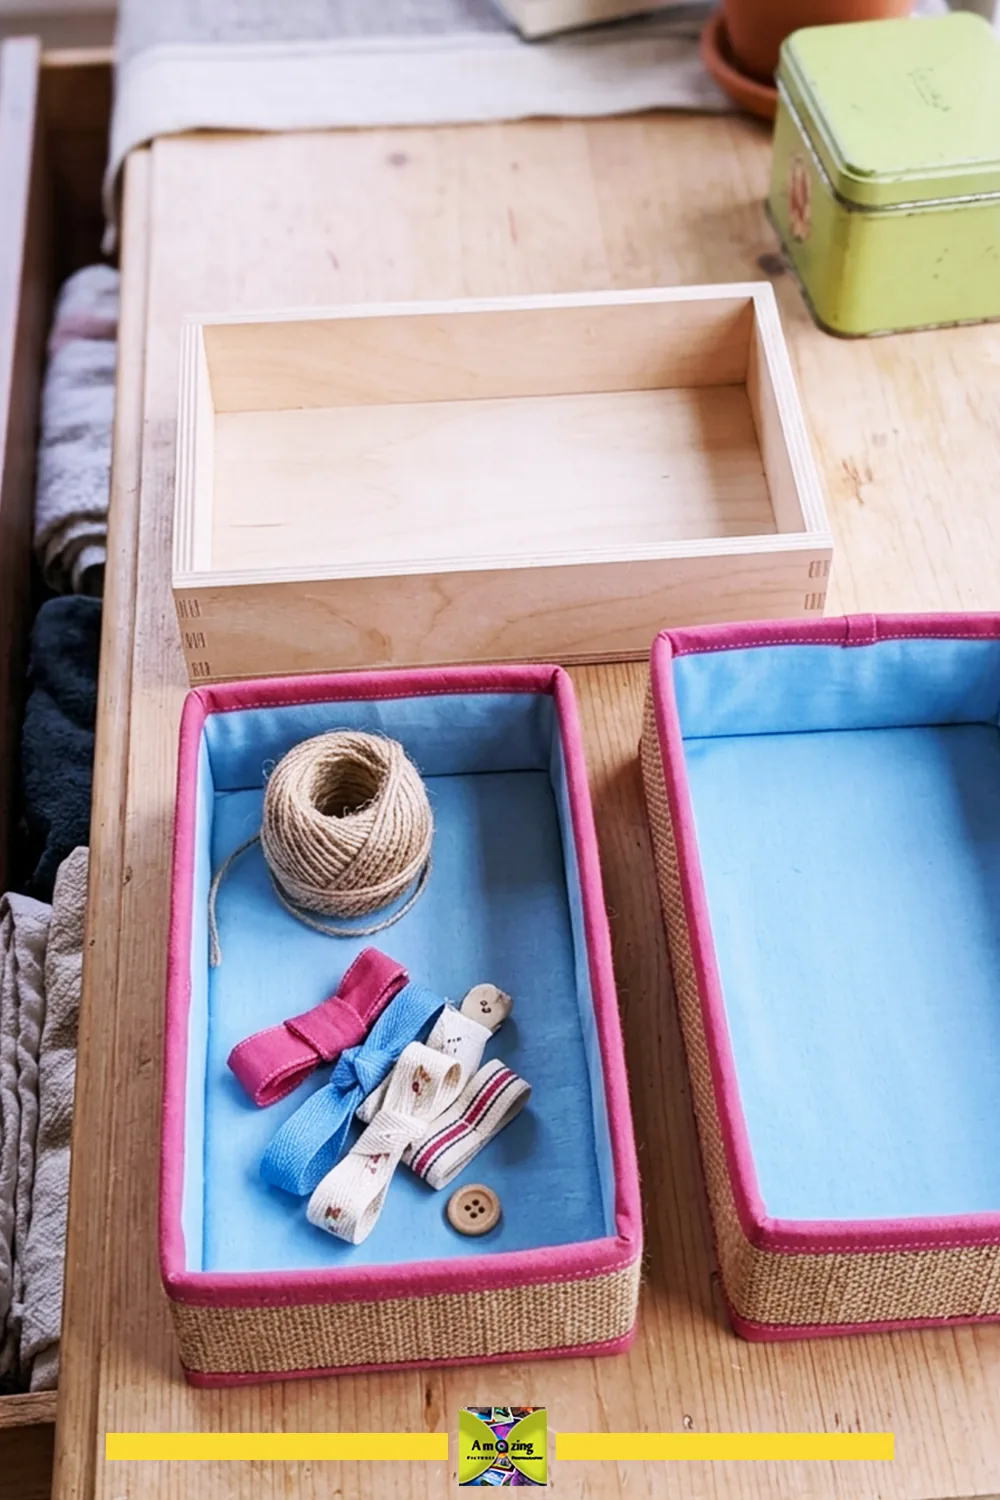
Test the drawer with everything in place: Fit all the sleeved bins together before calling the sizing finished. The lining, overlap, and edge binding each take up space that a paper pattern may not show. Open and close the drawer gently, checking that no rim catches or rubs. Reposition bulky seams toward an open gap rather than between tightly packed bins.
Retire it when. The sleeve shifts, the lining frays, or the edges peel.
10. Removable Journal Jacket
What you’ll make. A removable cover for one specific book, with a stable lining, reinforced spine clearance, and wrapped edges.
Best for. Protecting a frequently used notebook or journal and giving it a distinctive cover.
Difficulty. Intermediate (fitting). Time. About 2–3 hours. Planning estimate; allow extra time for material preparation, sample stitching, and fitting.
Materials. One printed sack panel; a stable woven lining; light interfacing for the flaps; polyester thread.
Tools. Sewing machine; shears; clips; iron; ruler.
Cut list. One cover panel, two lining panels, two flap pieces, plus spine-clearance allowance sized to the book.
Instructions.
- Measure the book closed, open, and at the spine, and make a template that accounts for spine movement.
- Center the print on the front cover and cut the outer panel.
- Build the lining with flaps to hold the book covers, leaving clearance so the spine can flex.
- Join outer and lining, wrap the edges, and topstitch.
- Fit it on the book and open and close it fully before use.
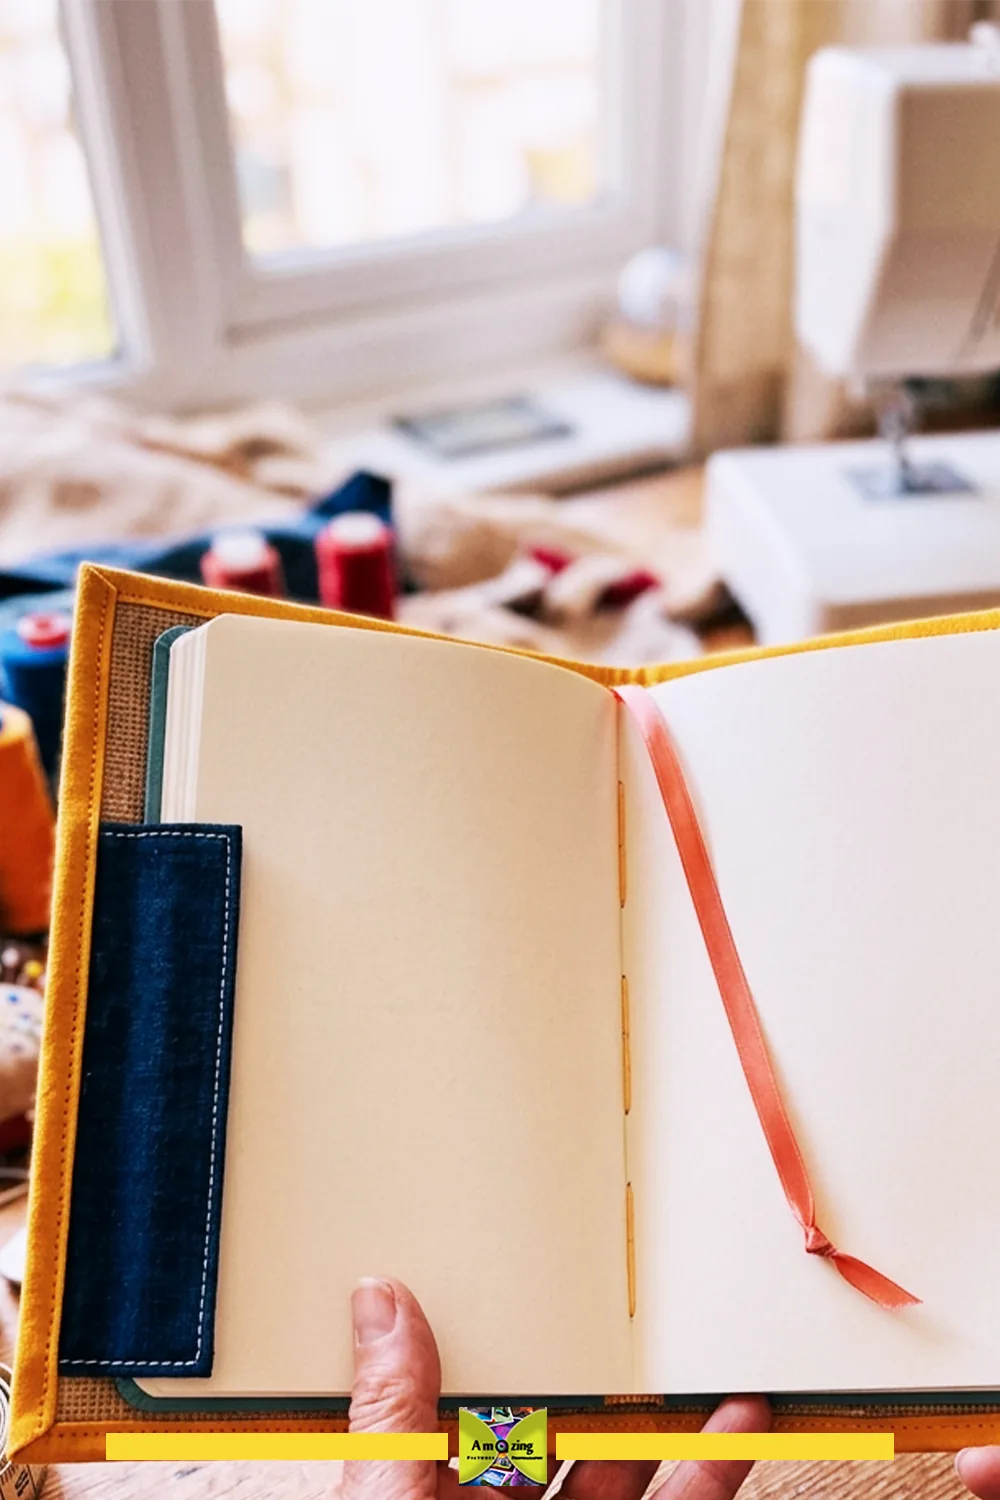
Customize. Center the motif; add a fabric bookmark ribbon sewn into the spine; topstitch in a matching tone.
Practical tip. Fit it to one specific book — a “universal” jacket rarely opens cleanly.
Watch for. A cover that resists spine movement because it was cut too tight.
Safety note. No archival or stain-resistance claim; transfer-test the sack against pale paper before contact.
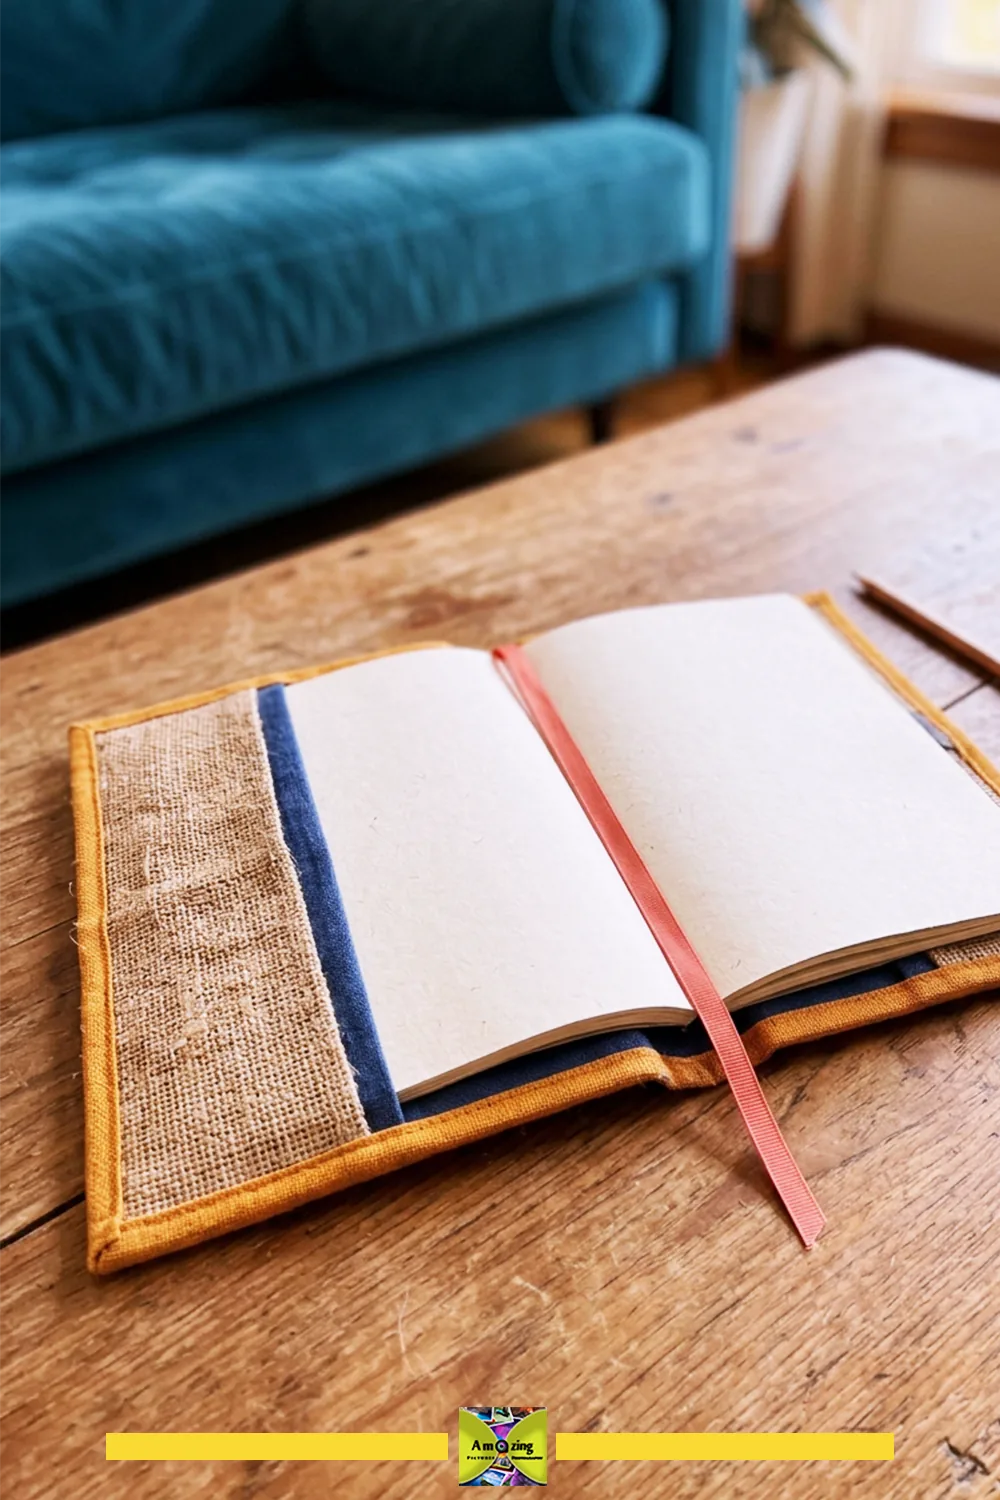
Protect the pages first: Use a spare notebook while fitting the jacket, and place clean white scrap paper between the cover and the book during the initial handling check. Open it at several points and look for loose fibers or transferred print afterward. Any visible transfer calls for a different panel or construction; a clean short trial is not a guarantee against future staining.
Retire it when. Ink transfers, yarns break, closures expose sharp parts, or the lining shifts.
Restrained Home Décor
11. Removable Decorative Cushion Cover
What you’ll make. A removable cover with a complete inner lining, an enclosed zipper, and a centered motif — for a sofa cushion insert, not the floor.
Best for. Adding a restrained rustic accent to a sofa or chair, where the cover stays dry and lightly used.
Difficulty. Intermediate (zipper). Time. About 3–4 hours. Planning estimate; allow extra time for material preparation, sample stitching, and fitting.
Materials. One printed sack panel; a complete cotton lining; a zipper; polyester thread.
Tools. Sewing machine with denim needle and zipper foot; shears; clips; iron; ruler.
Cut list. One front panel (motif centered), one back panel, two lining panels, plus a zipper.
Instructions.
- Center the printed motif on the front panel before cutting, and cut the back and both lining panels to the same size.
- Sew the lining into a full inner cover so no raw sackcloth touches the cushion insert.
- Install the zipper in the back, with reinforced ends.
- Join the lined front and back, enclosing the zipper ends.
- Insert the cushion and zip closed; transfer-test against pale upholstery before leaving it in place.
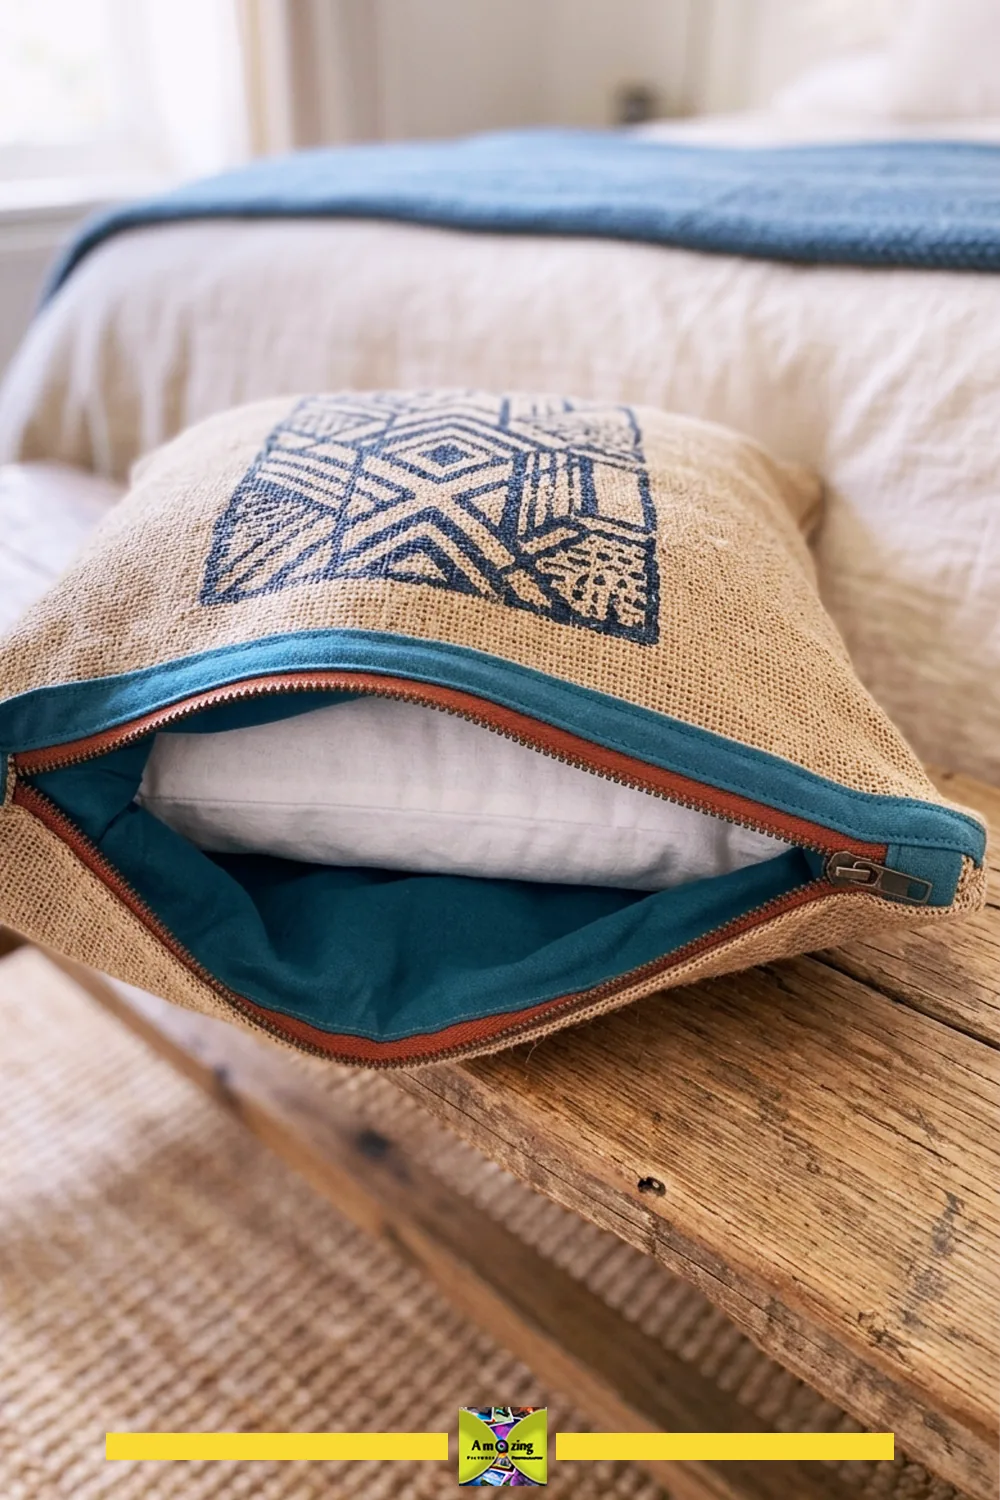
Customize. Center the strongest motif; keep the back plain sackcloth; choose a zipper color that disappears.
Practical tip. A complete inner lining is what makes coarse sackcloth comfortable and safe on a sofa.
Watch for. Fibers shedding through the lining onto pale upholstery.
Safety note. No outdoor or floor-cushion claim; no stain-resistance or skin-comfort claim. Keep away from heat and flame.
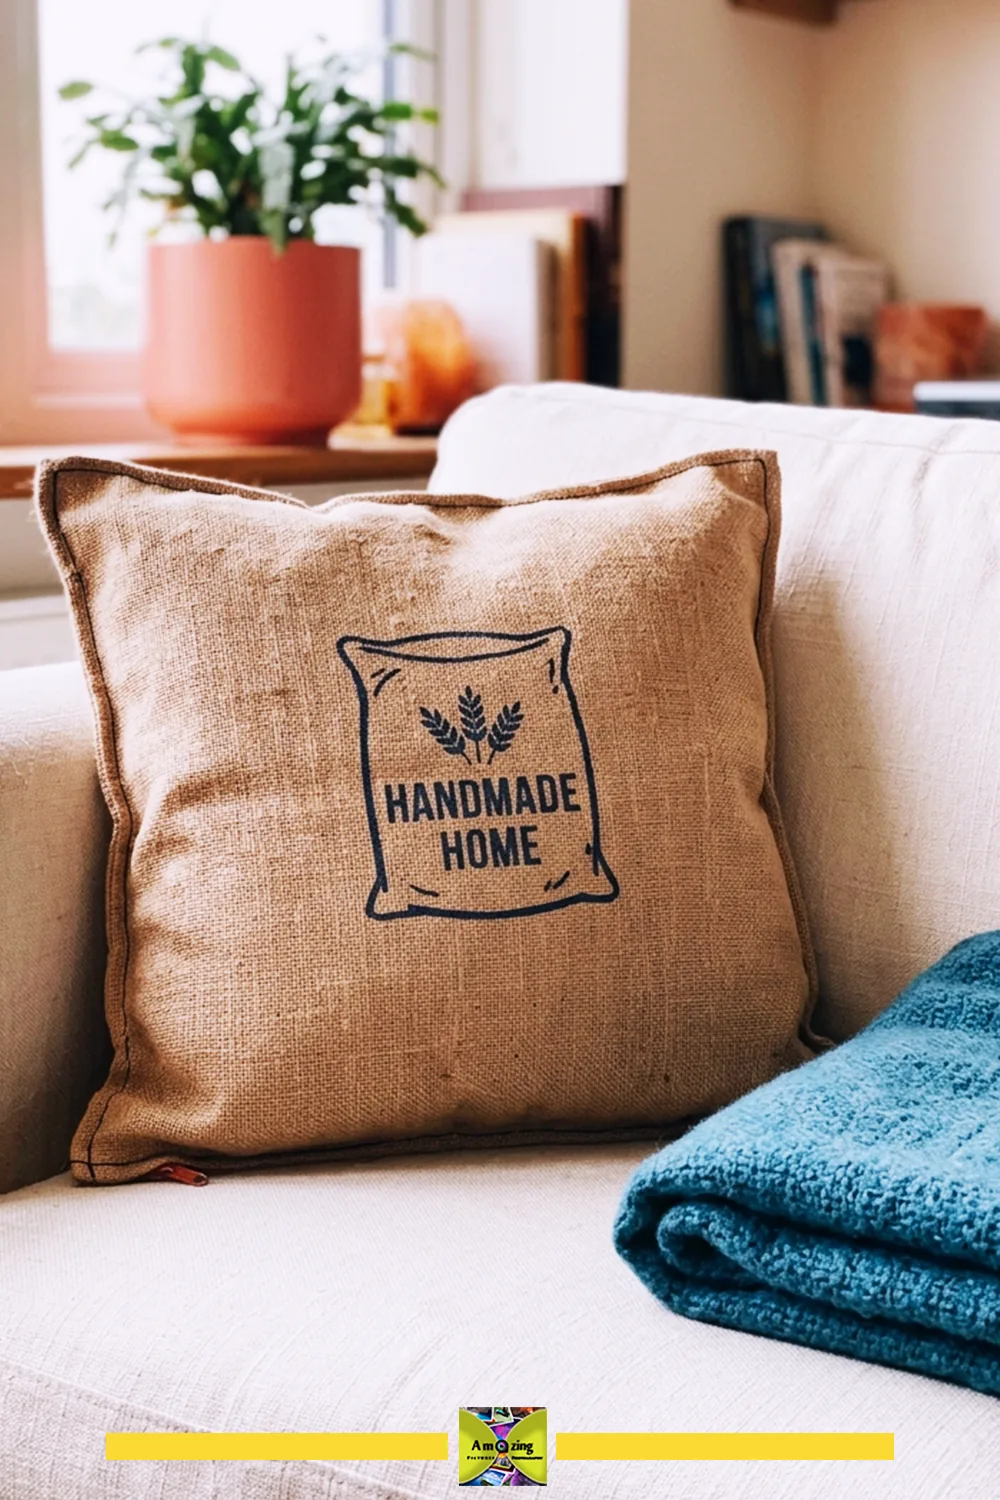
Check the outside too: A full lining encloses the inside, but the outer sackcloth still touches the sofa. Handle a finished sample over a clean white cloth and inspect for loose fibers or print transfer before placing the cushion on upholstery. If the outer fabric remains scratchy, sheds, or marks the cloth, choose another material for this project.
Retire it when. Ink transfers, yarns break, the zipper exposes sharp parts, or the lining shifts.
12. Decorative Console Runner
What you’ll make. A stabilized runner with full backing, controlled fringe or bound edges, for dry display only.
Best for. A console table or sideboard accent, where it won’t be walked on or contacted by food.
Difficulty. Beginner. Time. About 2 hours. Planning estimate; allow extra time for material preparation, sample stitching, and fitting.
Materials. One long sack panel (or two joined); a full woven backing; binding or a controlled-fringe method; polyester thread.
Tools. Sewing machine; shears or rotary cutter; ruler; iron.
Cut list. One top panel, one backing panel, plus binding or a fringe allowance.
Instructions.
- Cut the top panel to the console length, aligning the print to the weave.
- Back the full panel so the coarse fiber and ink never contact the furniture.
- Finish the ends with bound edges or a short, secured fringe — never raw.
- Lay it flat and confirm no curl at the ends.
- Transfer-test against the furniture surface after any finish has fully cured.
Customize. Keep one strong motif centered; use measured color blocking if joining panels; bind edges in a neutral tone.
Practical tip. Full backing is non-negotiable here — it’s what protects the furniture.
Watch for. A runner that scratches or stains furniture because it was left unbacked.
Safety note. Dry display use only; no food-contact or heat-protection claim; keep away from flame.
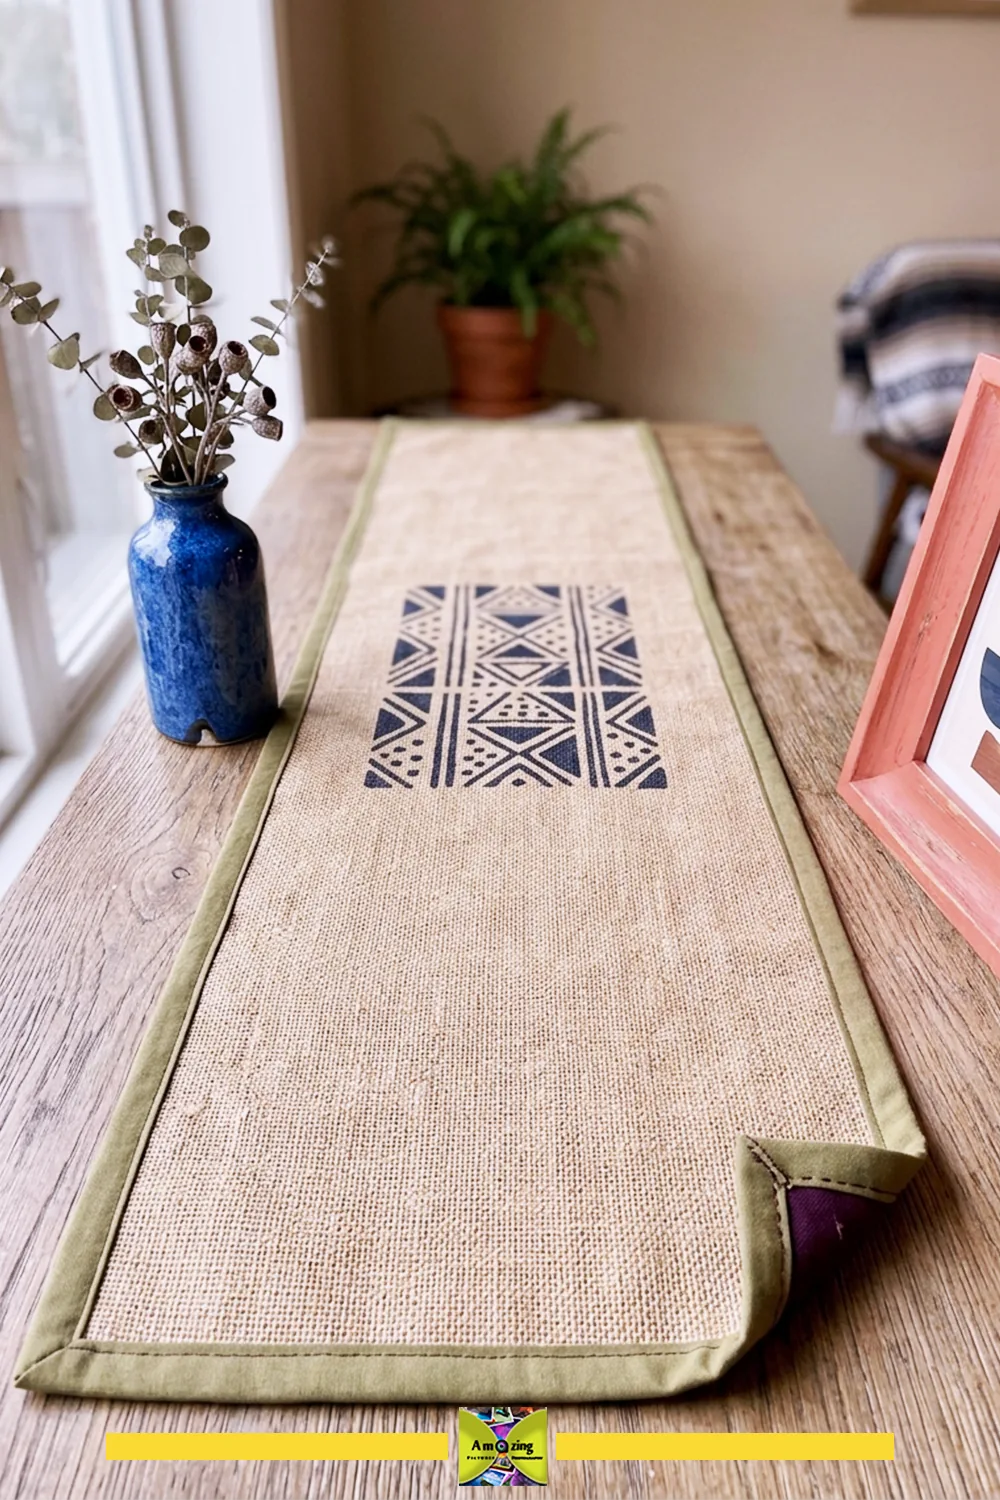
Let the ends lie naturally: Lay the completed runner on a clean, protected flat surface before putting anything on top. If an end curls, check for a tight binding or a backing pulled shorter during sewing; correct the seam rather than weighing the curl down with décor. Keep the underside smooth and check beneath the runner during use for trapped fibers or moisture.
Retire it when. Moisture, mold, staining, shedding, or dye transfer appears.
13. Ventilated Cachepot Sleeve
What you’ll make. A decorative sleeve that hides a plastic plant pot, sized to sit around a separate watertight pot and saucer.
Best for. Dressing up a houseplant without ever letting the sack touch soil or water.
Difficulty. Beginner. Time. About 1.5–2 hours. Planning estimate; allow extra time for material preparation, sample stitching, and fitting.
Materials. One sack panel (plain or lightly printed); light backing or lining; optional ties or a fitted seam; polyester thread.
Tools. Sewing machine or hand-sewing supplies; shears; ruler; clips.
Cut list. One wrap panel sized to the pot’s circumference and height, plus a small hem allowance.
Instructions.
- Measure the outer plant pot (the watertight one) at its widest point and its height.
- Cut and edge-finish a wrap panel that sits loosely around it with a small overlap.
- Fit it over the pot with a simple overlap or short ties; keep the sackcloth off the soil and away from the saucer’s standing water.
- Lift the pot and confirm no sackcloth touches damp soil, fertilizer, irrigation water, or the saucer.
Customize. Keep the print facing outward; use a soft fold rather than a seam so it’s easy to remove for watering.
Practical tip. Always water the plant out of the sleeve, or lift the pot out entirely — never let the sack sit in moisture.
Watch for. A sleeve that traps moisture against the pot, encouraging mold or staining.
Safety note. No direct food-contact or heat-protection claim; keep away from heat and flame.
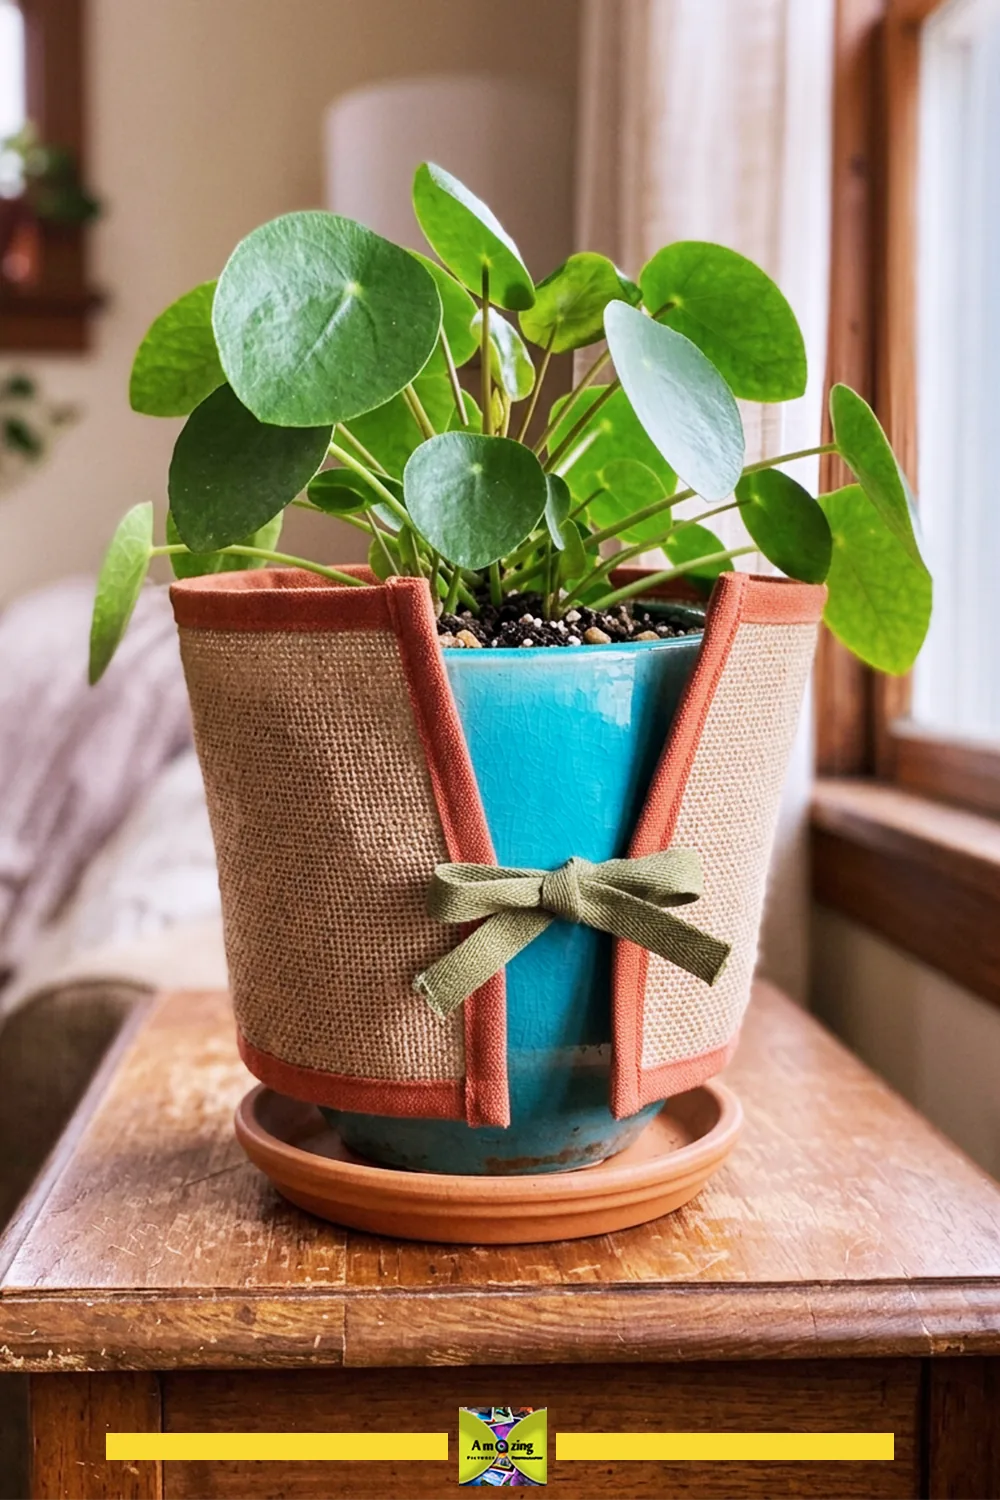
Make removal effortless: Fit the sleeve loosely enough that the pot lifts out without dragging the fabric over the saucer. After watering elsewhere, allow drainage to finish and wipe the pot’s exterior before returning it. Check behind the sleeve during the next watering; if either surface feels damp, keep the sleeve off until everything is dry and reconsider the clearance.
Retire it when. Moisture, mold, staining, shedding, or dye transfer appears.
Light-Duty Household Storage
14. Fitted Sewing-Machine Dust Cover
What you’ll make. A smooth-lined cover sized to your exact machine, used only when the machine is off, unplugged, and cool.
Best for. Keeping surface dust off a stored sewing machine between uses. A strong low-competition project.
Difficulty. Intermediate (fitting). Time. About 2–3 hours. Planning estimate; allow extra time for material preparation, sample stitching, and fitting.
Materials. One sack panel; a smooth lining that won’t shed into the machine; light interfacing (optional); polyester thread.
Tools. Sewing machine; measuring tape; shears; clips; iron.
Cut list. One top/front/back panel, two side panels, and matching lining pieces, all sized to the machine with accessories removed or secured.
Instructions.
- Measure the machine with accessories removed or secured, and note clearance around handles, controls, spool pins, cords, and moving parts.
- Cut outer and lining pieces with full clearance, and edge-finish everything.
- Sew the outer into a cover shape, then the lining, and join them so the lower edges are fully enclosed.
- Test the fit: it should drop on and lift off without catching on any control.
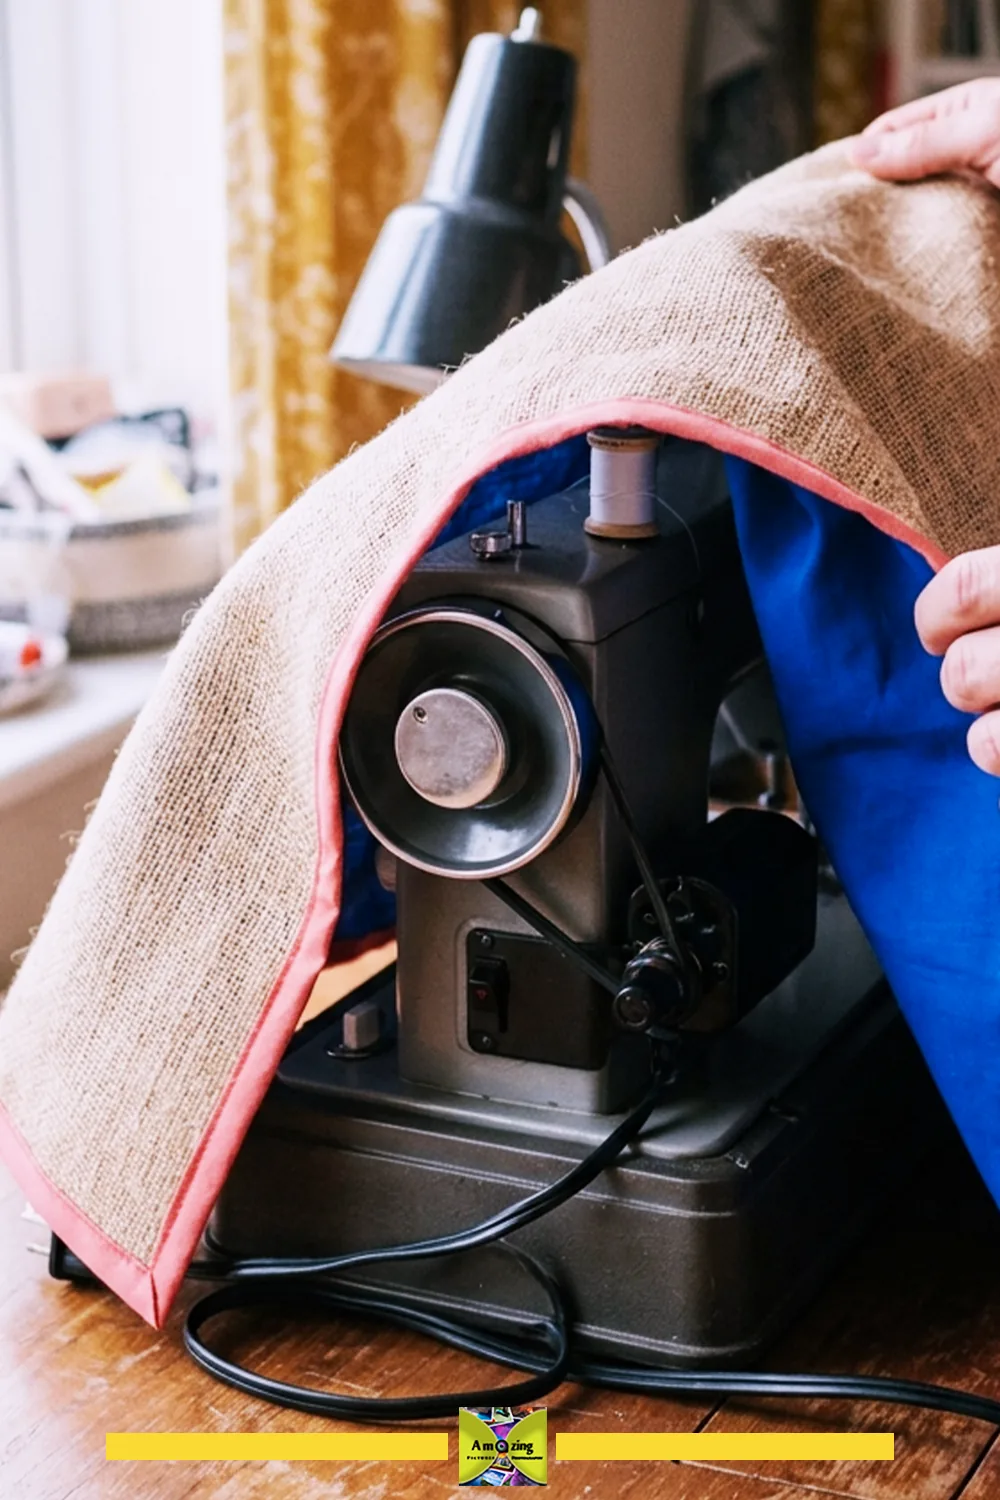
Customize. Add a small side pocket in the lining (not the sack) for the foot pedal or manual; keep the print on the front.
Practical tip. Remove the cover completely before operating the machine — never use it while the machine is running or warm.
Watch for. A lining that sheds fibers near the controls or into the machine.
Safety note. Use only when the machine is switched off, unplugged, stationary, and cool. No claim that it protects against moisture, fire, impact, or internal dust contamination.
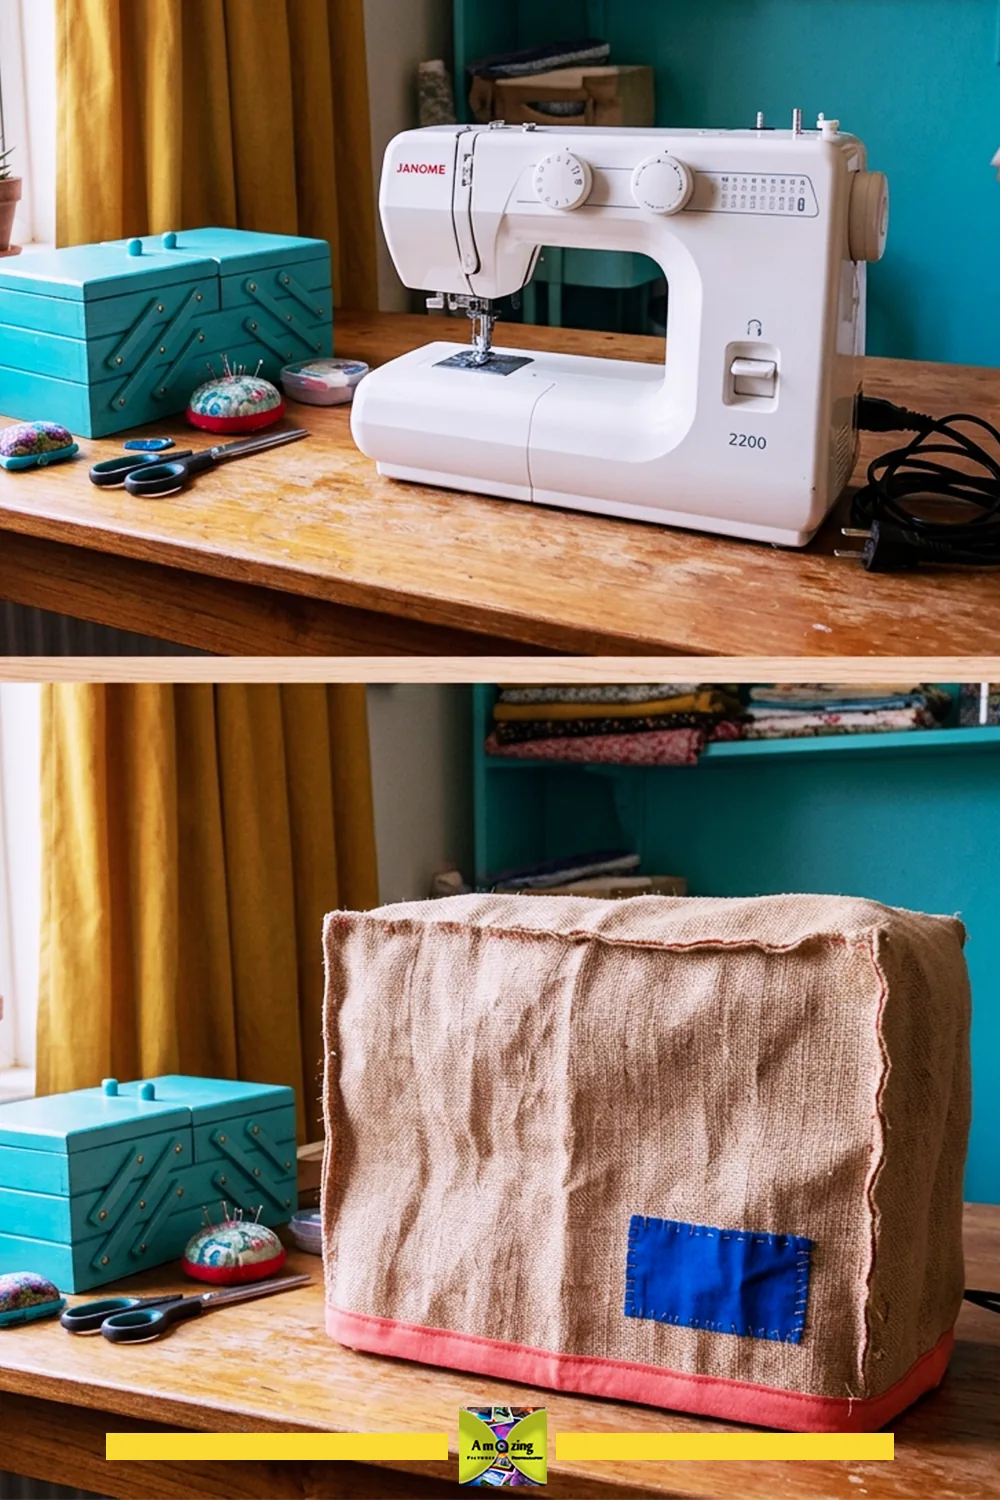
Try every edge of the fit: With the machine off, unplugged, and cool, lower the cover gently and lift it straight off. Check the lining around spool pins, handles, and controls for catches, and inspect the machine surface for loose fibers. Keep accessory pockets light so they do not pull the cover sideways. Remove the cover completely before preparing the machine for use.
Retire it when. The lining tears, fibers shed internally, or the cover catches on controls.
15. Framed Pinboard Surface
What you’ll make. A clean sack panel stretched over a sound cork or fiberboard core, inside a rigid frame with full perimeter capture.
Best for. A low-key bulletin surface for notes, where pins are adult-controlled and the backing is solid.
Difficulty. Beginner-intermediate (mounting). Time. About 2 hours. Planning estimate; allow extra time for material preparation, sample stitching, and fitting.
Materials. One clean sack panel (plain or lightly printed); a sound pin-compatible core (cork or fiberboard); a rigid frame and backing; mounting hardware; adhesive or staples (tested).
Tools. Staple gun or adhesive; frame; level; drill or screwdriver; scissors or utility knife.
Cut list. One sack panel cut larger than the core by the wrap allowance.
Instructions.
- Cut the sack panel to wrap the core with a full edge allowance.
- Stretch it smoothly over the core without forcing a skewed weave, and capture it on all four edges inside the rigid frame.
- Secure the frame to the backing so the sackcloth is fully enclosed.
- Mount through the rigid frame, not through the sackcloth.
- Test pins: long enough for the core, but unable to reach the wall or emerge behind the backing.
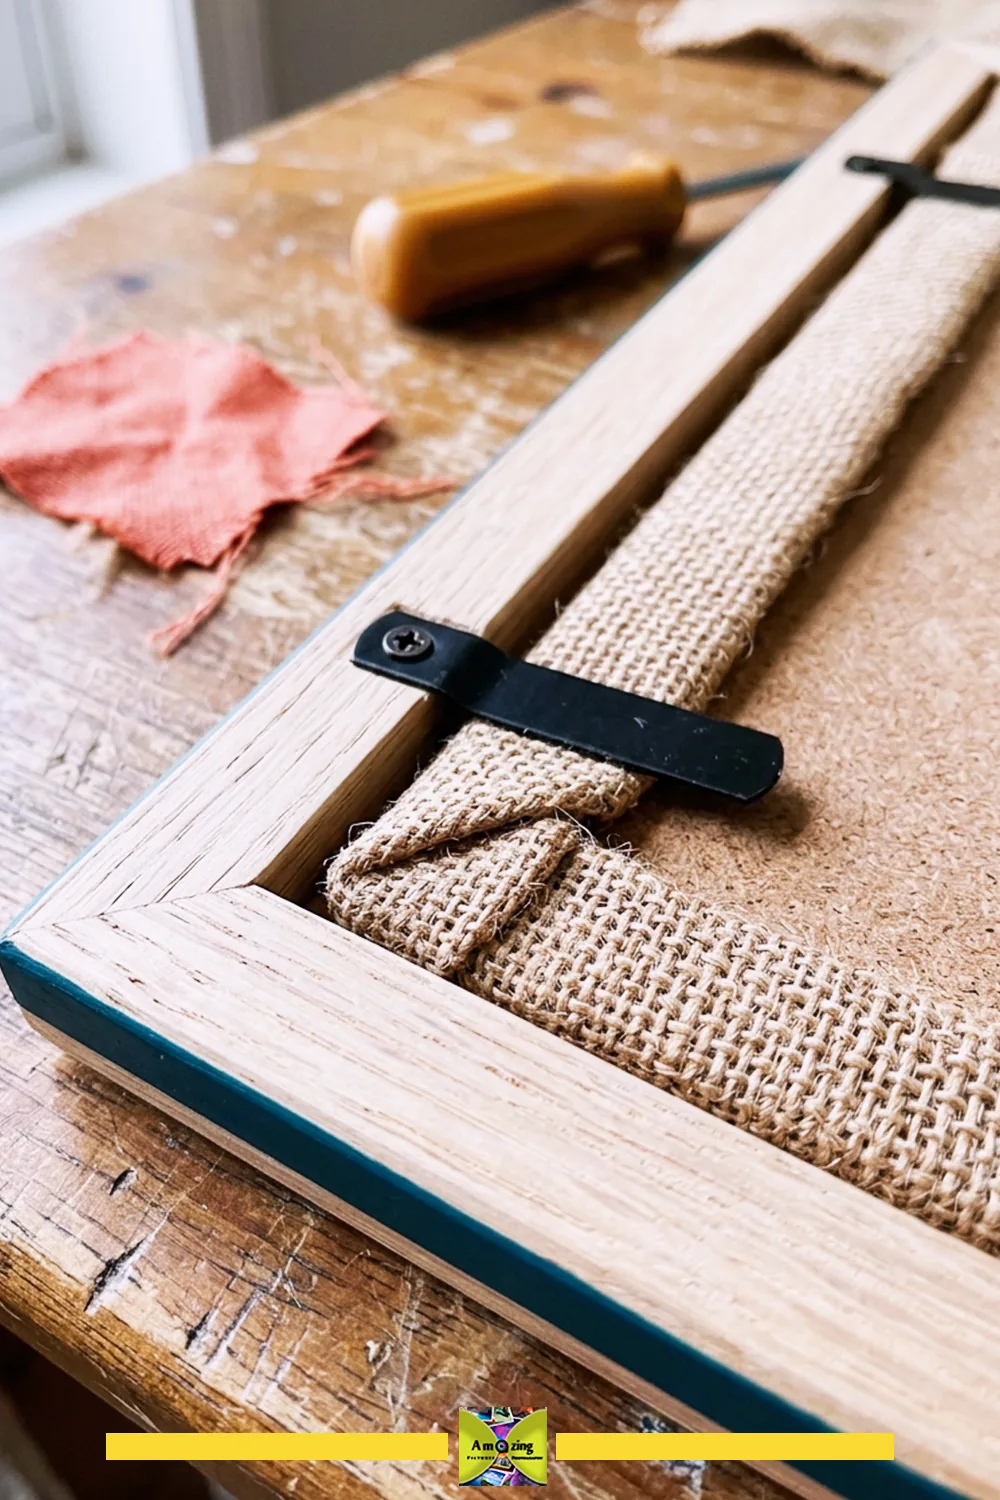
Customize. Keep the sack plain or use one quiet motif in a corner; pair with a pale wood or matte-black frame.
Practical tip. Mount through the rigid frame and keep pins adult-controlled and away from children and pets.
Watch for. Fabric loosening over time or pins falling through if the core is too soft.
Safety note. No heavy objects suspended from pins. Pins must not reach the wall or emerge behind the backing.
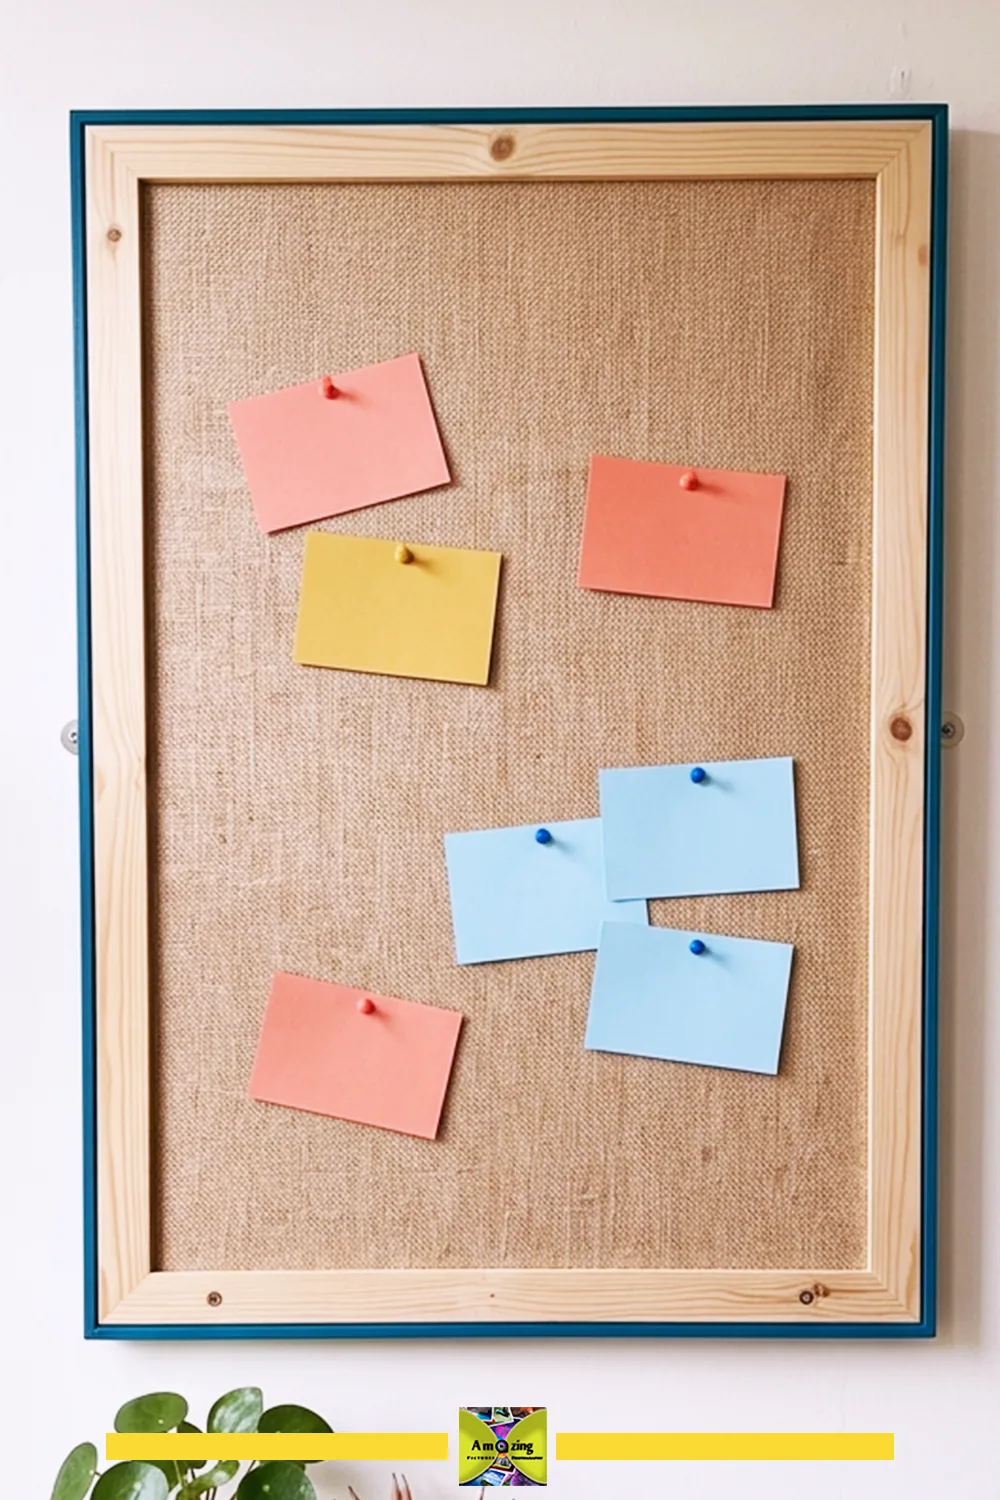
Keep the tension even: Before final assembly, check the fabric against the frame from several angles and adjust opposite edges gradually. The weave should lie flat without visibly stretched openings. After pinning a few paper notes, inspect for local puckering or loose fibers around the pinholes. If tension drops later, remove the board for adjustment rather than adding extra pins to hold the fabric taut.
Retire it when. The fabric loosens, pins fall, the core crumbles, or sharp points become exposed.
Care and Maintenance
Follow the most restrictive care requirement among every component — the sackcloth, lining, thread, stabilizer, paint, adhesive, zipper, cord, hardware, backing, and insert. That means no universal washing, soaking, bleaching, drying, ironing, steaming, disinfecting, or vacuuming instruction applies to everything.
Remove rigid inserts and detachable hardware before cleaning where the design allows, and empty and support a project before moving it. Test ink, fiber, dye, paint, adhesive, and odor transfer before contact with pale fabric, paper, shelves, or finished furniture. Dry every safely cleaned project completely before closing, filling, folding, stacking, or storing it. Store finished pieces in a dry, ventilated indoor location away from pests, direct sunlight, chemicals, and heat.
Check seams, bindings, handles, pocket openings, zippers, channels, rims, mounts, backings, and inserts regularly, and repair early fraying before the weave opens further. Retire anything that develops mold, persistent odor, heavy shedding, ink transfer, brittle yarns, open seams, exposed inserts, failed handles, loose mounts, or damaged closures. Inspect these areas when you empty or put away the project, and follow the care guidance for its actual materials. Condition and use should guide repairs rather than a promised lifespan.
Troubleshooting Common Problems
- No reliable fiber or source information. Treat as unidentified: conservative use, reject if any contamination doubt.
- Chemical, musty, oily, or smoke odor. Isolate and reject unless a professional can verify safety.
- Mold, pests, seeds, droppings, or unknown residue. Reject; do not attempt to wash away contamination.
- Dust dispersing while handling. Stop, move to a ventilated area, and switch to controlled methods; don’t beat or shake indoors.
- Hidden staples or wire appearing during deconstruction. Stop cutting, remove with pliers, and re-check the seam path.
- Ink transferring during a moisture test. Keep the piece dry or spot-clean only; expect the print to be delicate.
- Shrinkage or distortion after cleaning. Reshape while damp (if safe) and never force the weave square; size future cuts larger.
- A wet sack drying unevenly. Support it flat, rotate it, and dry every fold completely before storing.
- Weave refusing to lie square. Don’t force it — cut patterns square to the warp and weft as they actually run.
- Graphics running off-grain. Center the motif visually and accept the weave as it is; the print may not align to grain.
- Original seams unraveling when opened. Cut gradually and stabilize the panel edges immediately.
- Cut edges shedding fast. Stabilize before cutting next time; zigzag, overcast, or bind the current edge now.
- Stabilizer showing through. Use a lighter or removable stabilizer, or back with a woven layer.
- Pins falling through large openings. Use clips or pattern weights, and pin only through denser reinforcement areas.
- Rotary cutter pushing yarns aside. Switch to sharp shears, or stabilize the line and use a fresh blade with firm, even pressure.
- Scissors leaving ragged edges. Sharpen or replace them; cut one layer at a time.
- Layers shifting under the pattern. Use weights or clips and an even-feed/walking foot; don’t pin through open weave.
- Needle deflecting or breaking. Switch to a fresh, correctly sized denim/jeans needle; reduce the layer stack.
- Fabric pulled into the needle plate. Use a stabilizer under the work and start with the needle down.
- Thread nesting beneath the work. Re-thread both top and bobbin, and adjust tension per the manual.
- Stitches disappearing into openings. Lengthen the stitch slightly or add a stabilizer; test on scrap.
- Seams puckering. Reduce tension, lengthen the stitch, and use an even-feed foot.
- Short stitches perforating the weave. Lengthen the stitch and stop restitching the same line.
- Overlock distorting the fabric. Loosen the looper/needle tension balance and test on scrap.
- Fusible interfacing scorching, bubbling, or failing. Lower heat, use a press cloth, or switch to sew-in.
- Adhesive darkening or stiffening. Stop using it structurally; test a different product on scrap.
- Paint bridging or cracking. Thin the application and test flexibility before sewing.
- Lining larger than the outer panel. Recut the lining to match the outer exactly; don’t ease a too-large lining.
- Zipper wavy. Keep both panels the same finished size and reinforce the zipper ends.
- Drawcord channel fraying internally. Enclose the channel edges and finish the cord ends.
- Handles pulling yarns apart. Extend reinforcement into the body; never stitch handles only to the top edge.
- Wall pockets sagging. Make pockets shallower and reinforce the opening; mount through the rigid backing.
- Basket twisting out of square. Recut sides on-grain and reinforce the corners.
- Magazine sleeve peeling at the lower edge. Bind or reinforce the bottom edge; test adhesive first.
- Drawer sleeves binding. Add a small ease allowance so the sleeve slides freely.
- Journal cover resisting spine movement. Add spine clearance and test with the book open before finishing.
- Cushion shedding through the lining. Use a tighter, smoother lining and check for inner-seam gaps.
- Runner scratching or staining furniture. Add full backing and transfer-test after curing.
- Cachepot trapping moisture. Water the plant out of the sleeve and keep the base clear of the saucer.
- Machine cover leaving fibers near controls. Switch to a non-shedding lining and edge-finish everything.
- Pinboard fabric loosening. Re-stretch and re-capture the edges; use a firmer core.
- Projects looking rough, not intentionally rustic. Limit the palette, align the weave, and conceal raw edges and hardware.
A Note on “Eco-Friendly” Claims and Disposal
Use precise language — “reuse,” “repurpose,” “use a clean retired sack,” or “give an existing shipping material another practical use.” Do not automatically call a project zero-waste, sustainable, green, environmentally friendly, recyclable, biodegradable, or compostable. A coffee sack may contain jute, sisal, hemp, cotton, polypropylene, other synthetics, blends, dyes, printing inks, coatings, adhesives, labels, plastic liners, sewing thread, closure cord, staples, wire, paint, interfacing, zippers, and hardware — none of which can be assumed to break down or recycle together.
Local textile, agricultural-packaging, plastic-film, commercial-waste, composting, reuse, and disposal rules vary. Programs may reject contaminated sacks, synthetic woven bags, laminated material, heavily painted fabric, tiny scraps, mixed-material projects, or items containing adhesives and hardware. Before making any acceptance claim, confirm with the manufacturer, importer, roaster, local government, textile-recovery program, composting facility, recycling authority, reuse organization, or waste service. A lined, painted, glued, interfaced, coated, zippered, plastic-containing, or hardware-bearing project is not automatically recyclable, biodegradable, or compostable.
A clean, intact sack may offer more value through authorized commercial reuse, resale, display, donation, or use by another maker. Select projects you actually need, and avoid accumulating dusty sacks or unusable fragments.
Frequently Asked Questions
Lined totes and zippered pouches, drawstring storage sacks, a roll-up art-tool organizer, magazine-file sleeves, a wall-pocket organizer, a desktop supply basket, drawer-bin sleeves, a journal cover, a gift bag, a cushion cover, a console runner, a cachepot sleeve, a sewing-machine dust cover, and a framed pinboard. The full instructions are in this guide.
Get as much history as you can from the source, identify the material, and inspect both faces, seams, folds, and the interior for mold, pests, residue, oil, chemical odor, water damage, and brittle or broken fibers. If you cannot reasonably assess contamination, reject the sack.
Not always. Wash only when the material and condition support it, and always test ink and fiber response on scrap first. Immersion washing can shrink, fray, and distort the weave and blur the print. Many sacks are better dry-cleaned or rejected.
Stabilize before cutting where possible, then use a sound edge finish — a retained selvage, stay-stitching, zigzag, overcasting, a serged edge, binding, or full lining. The right choice depends on the weave and the project.
Often yes, but not with a universal needle. Use a sharp denim/jeans needle sized to the layers, polyester thread, a stitch length and tension tuned on scrap, and an even-feed or walking foot if the weave shifts. Clean the machine afterward.
A smooth woven lining — light cotton for soft bags, a tighter abrasion-resistant lining for pouches and covers — encloses raw fibers and protects contents and furniture. The lining should share the load, not rescue failing sackcloth.
Yes, as long as the sack is clean and dry and the print is stable. Test for ink transfer before contact with pale upholstery, paper, or finished surfaces, and keep the piece away from heat and flame.
It depends. Natural jute can often be composted, but curbside recycling usually does not accept burlap, and sacks with plastic liners, synthetic fibers, coatings, or heavy print may not compost either. Confirm with your local program and the receiving facility before assuming either.
Sources and Further Reading
These sources informed the technique, fiber, safety, sourcing, and disposal guidance in this article.
Sewing and textile technique
- Canvas ETC — How to Sew Burlap Without Fraying
- Sewing Machine Advice — How to Sew Burlap Fabric
- Union Special — heavy-duty overedging machines for jute, burlap, and woven polypropylene
Fiber, safety, and material identity
- University of Maryland Extension — natural vs. treated burlap for garden use
- EnviroTextiles — jute woven fabrics
- Rawganique — untreated hemp/jute burlap and chemical-treatment cautions
Sourcing, reuse, and disposal
- Savor Brands — R+R coffee bag take-back program
- Kona Coffee Farmers Association — burlap bags
- wwrarecycles.org — Bags: Recyclable or Not?
External links open authoritative sources used to verify the guidance above; internal links connect to other Amazingpandph guides.
The project times are planning estimates, and the designs need fitting to your own materials. Use supplier information to identify the sack and its care requirements, follow equipment and product instructions, and check construction choices on matching offcuts. Sample checks can reveal problems with fit, stitching, fraying, or print transfer; they do not establish that an unknown sack is free of contamination or that a finished project has a rated load capacity.
Posted by: Med Houssem · In: Fabric & Textile Crafts