DIY Wooden Measuring Stop for Craft Projects
Make your woodworking easier with this DIY wooden measuring stop. It's perfect for getting consistent, accurate measurements in all your craft projects.
- Difficulty
- Easy
- Time
- 30 minutes
Materials
- Wood board
- Wood strip
- Ruler
- Pencil
- Saw
- Drill
- Wood glue
- Bolt
- Washer
- Nut
- Wooden block
How to make it
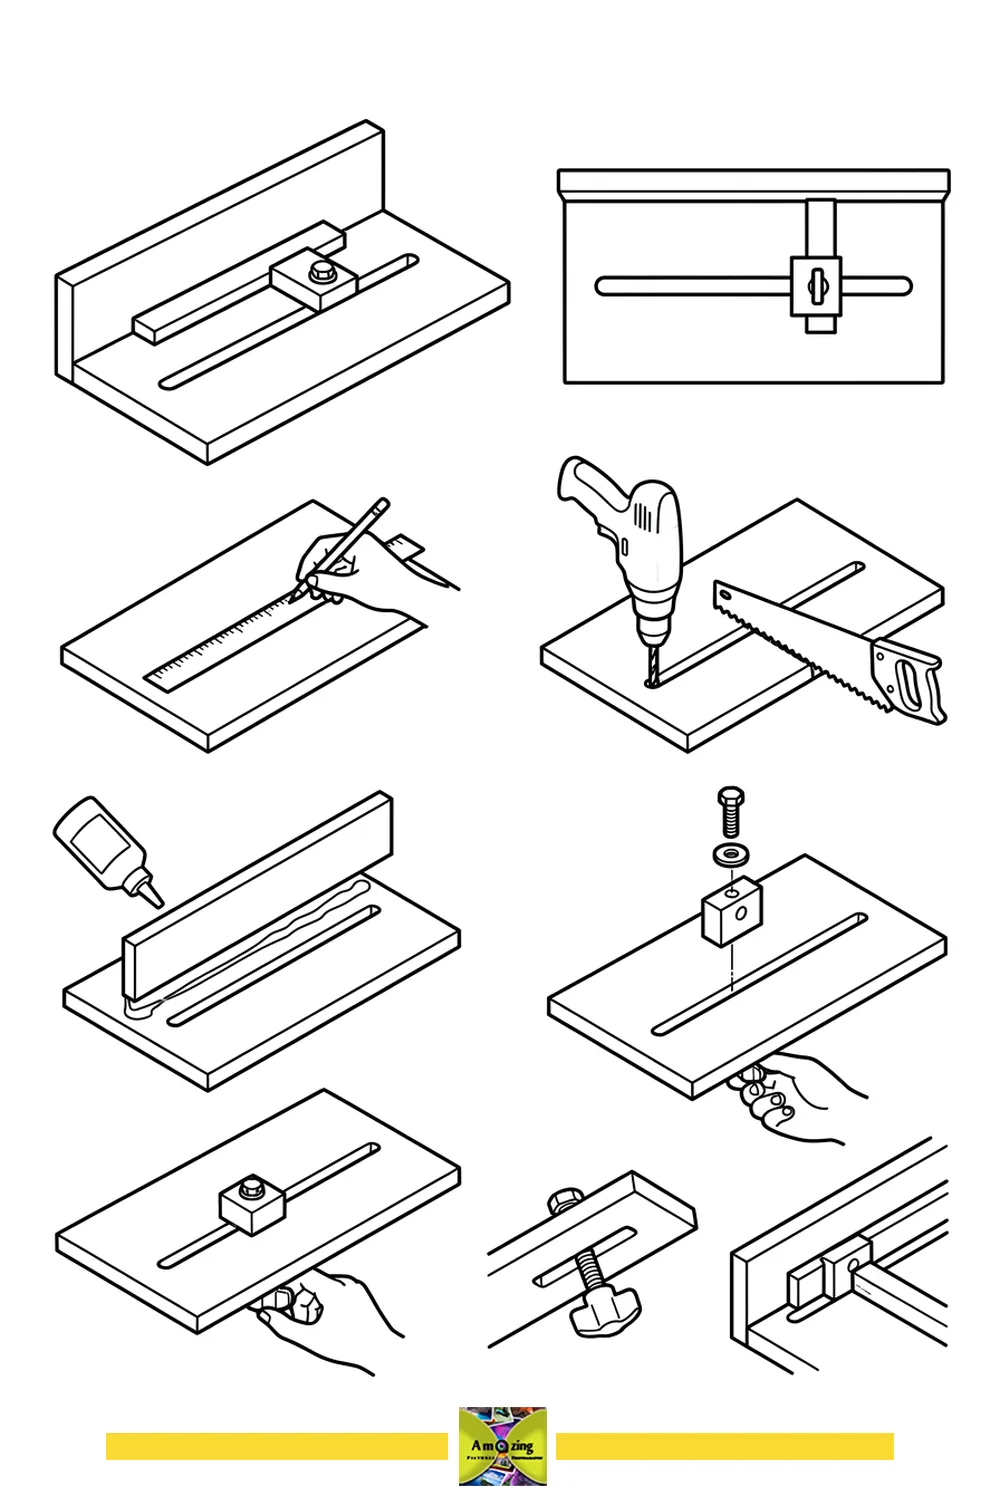
- Mark a straight line on the wood board using a ruler and pencil.
- Cut a slot along the marked line with a saw and drill.
- Glue a wooden strip along one edge of the board.
- Insert a bolt through a wooden block and slot, securing with a washer and nut.
- Tighten the nut to hold the block in place for adjustable measurements.
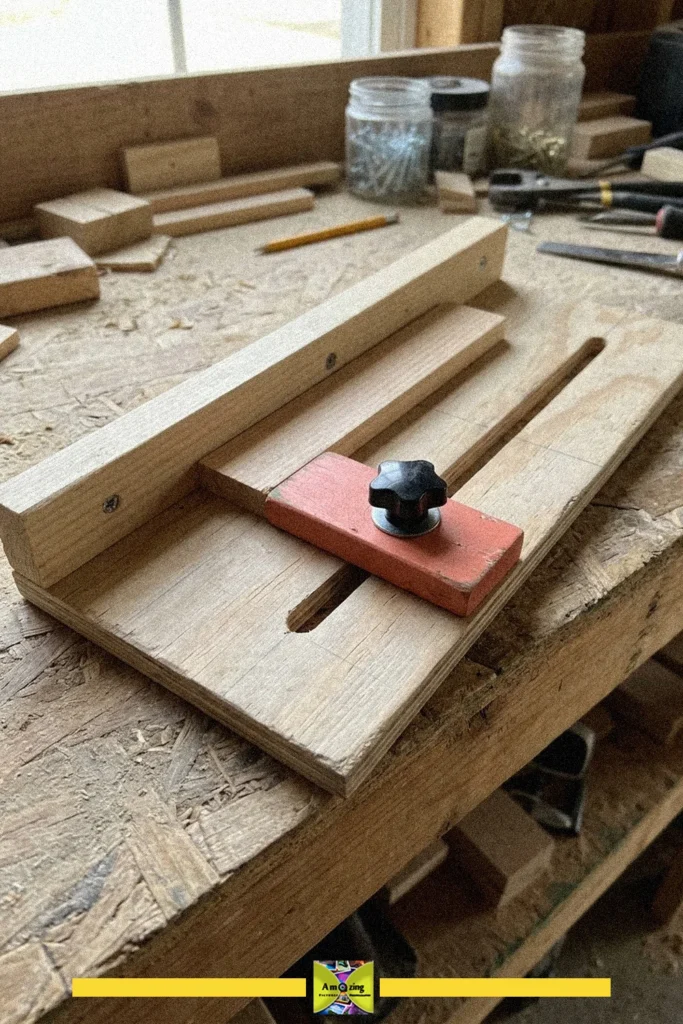
A diy wooden measuring stop is a simple tool that helps you achieve accurate, repeatable measurements for woodworking and craft projects. This homemade stop features an adjustable block that slides along a groove, making it easy to set your desired length.
The sturdy wooden construction and easy-to-adjust knob make it a reliable addition to any workshop. It keeps your measurements consistent, especially when cutting multiple pieces of the same size.
Always check that the knob is securely tightened before use to prevent slipping. Use caution when working with wood and sharp tools to ensure your safety during every project.