How can ordinary building materials be transformed into a work of art to adorn walls? Artist Mohamed Mahmoud provides the answer in this inspiring handmade project. Through a clever combination of wall plaster, PVA glue, and acrylic paint… He repurposes a simple wooden board into the base of an exquisitely elegant 3D floral panel! This work, with its polished finish and rich texture… exudes luxury and distinction, proving that ingenuity and craftsmanship can create beauty from the simplest of materials! Discover the dimensions of this experience with us, step by step!
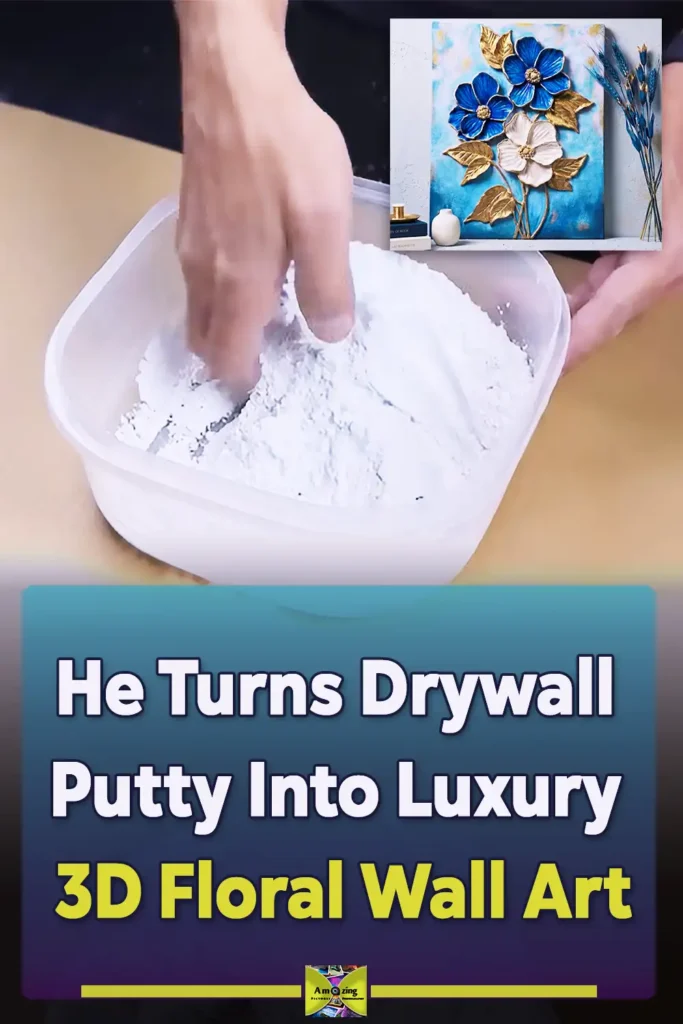
The process begins with a clean white wood panel… which becomes the foundation for the entire raised flower design. Mohamed first sketches a floral composition directly onto the board, mapping out large blossoms, stems, leaves, and circular flower centers… Then comes the real transformation! Drywall putty is mixed with PVA glue until it becomes a clay-like paste, soft enough to shape but firm enough to hold detail… Using his hands and simple tools, first, he rolls the paste into thin strands for stems, forms sculpted leaves with carved vein lines, and builds each flower petal layer by layer. The artwork slowly rises off the surface, turning a flat drawing into a textured flower relief. In the demonstration video below, you will see this amazing technique step by step right before your eyes!
Once the 3D floral design is dry, the piece moves into its most luxurious stage! The background is painted in soft turquoise and blue tones, giving the flowers a rich atmospheric setting… Some petals are painted deep blue, others pearl white, creating contrast and depth. Then Mohamed mixes gold powder with varnish and brushes it over the leaves, stems, flower centers, and raised edges. That metallic gold finish is what makes the artwork feel high-end. It catches the light, defines the texture, and gives the finished drywall putty wall art the look of a custom decor piece you might expect to see in a boutique interior space.
Here is the step-by-step process broken down into a table to make thing more clear:
| Step | What to Do | Materials / Tools | Purpose |
|---|---|---|---|
| 1 | Prepare a clean wood panel as the base. | Wood panel | Creates a sturdy surface for the 3D floral wall art. |
| 2 | Lightly sketch the flower design on the panel. | Pencil, eraser | Maps out the flowers, leaves, stems, and centers before sculpting. |
| 3 | Add drywall putty into a mixing container. | Drywall putty, container | Forms the main sculpting material for the raised texture. |
| 4 | Mix PVA glue into the drywall putty. | PVA glue, palette knife or hand | Makes the putty smoother, stronger, and easier to shape. |
| 5 | Knead the mixture until it becomes clay-like. | Hands or gloves | Creates a workable paste for petals, leaves, and stems. |
| 6 | Add a little dry putty powder if the mixture is too soft. | Drywall putty powder | Firms up the paste so it can hold raised details. |
| 7 | Prepare diluted glue with water. | PVA glue, water, brush | Helps the sculpted putty pieces bond better to the wood panel. |
| 8 | Brush diluted glue over the sketched areas. | Diluted glue, brush | Primes the surface before applying the putty shapes. |
| 9 | Roll thin strands of putty for the stems. | Putty mixture, hands | Creates raised flower stems and outlines. |
| 10 | Place the putty strands along the pencil sketch. | Putty strands, diluted glue | Builds the first raised lines of the floral design. |
| 11 | Shape leaves from the putty mixture. | Putty mixture, fingers, small tool | Creates raised leaf forms. |
| 12 | Carve vein details into the leaves. | Wooden stick, sculpting tool, toothpick | Adds realistic texture and dimension. |
| 13 | Sculpt flower petals one by one. | Putty mixture, fingers | Builds large raised 3D flowers on the panel. |
| 14 | Arrange the petals into flower shapes. | Putty petals, glue mixture | Forms the full floral relief design. |
| 15 | Add small putty beads to the flower centers. | Small putty balls | Creates textured, dimensional flower centers. |
| 16 | Let the sculpted artwork dry completely. | Drying time | Hardens the 3D design before painting. |
| 17 | Paint the background with blue and turquoise tones. | Acrylic paint, brush, sponge | Gives the artwork a soft, artistic backdrop. |
| 18 | Paint the flowers in deep blue and pearl white. | Blue acrylic, pearl white acrylic, brushes | Adds contrast and a luxury floral look. |
| 19 | Mix gold powder with varnish. | Gold powder, varnish, small cup, brush | Creates a metallic gold finish for accents. |
| 20 | Paint leaves, stems, outlines, and centers with the gold mixture. | Gold varnish mixture, detail brush | Highlights the raised texture and gives the art a high-end finish. |
| 21 | Add final shading and highlights. | Acrylic paint, gold mixture, fine brush | Enhances depth, shadows, and realistic dimension. |
| 22 | Seal the finished piece if needed. | Clear varnish | Protects the artwork and adds a polished finish. |
| 23 | Display the finished 3D floral wall art. | Hanging hardware or shelf display | Turns the handmade piece into luxury-style wall decor. |
The comments section below this artwork, became a powerful testament to the fact that art is a universal language that transcends borders! A remarkable display of engagement brought together inspiring feedback from Morocco, Russia, Brazil, and Colombia… All praising the professional execution and clear explanations! In a touching and heartfelt gesture… One follower shared their wish to recover and return to painting, highlighting the positive psychological impact of such digital workshops! Sharing details about the clever materials such as wall plaster, PVA glue, acrylic paint… and the luxurious touch of gold powder and varnish—played a pivotal role in simplifying the process! Transforming what might seem like an intimidating task for beginners into a fun and perfectly achievable DIY project.
Behind this mural artwork lies a clever equation that combines cost-effective materials with a professional finish! Mohammed presents a practical guide, generously sharing his knowledge and demonstrating the patience and precision required to develop fine motor skills… Transforming an ordinary canvas into a sculptural floral relief using paste and gold paint showcases how technical ingenuity can create high-quality, added value from simple materials. For anyone aspiring to create distinctive, high-quality handmade pieces that rival commercially available products, this lesson is an ideal starting point, confirming that true design excellence is the product of proper technique and consistent practice.