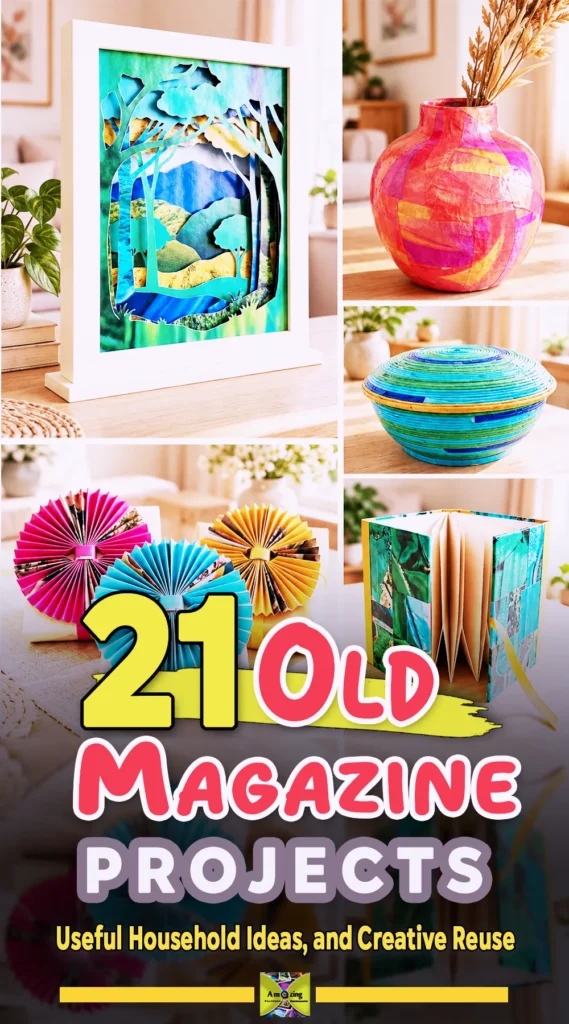
This collection covers 21 old magazine projects that turn ordinary unwanted magazines into paper art, handmade gifts, and useful household items. It also explains how to sort, prepare, and protect pages before you cut, so a collectible or personally important issue does not end up in the scrap bin by mistake.
Most magazines combine coated pages, uncoated text pages, heavy covers, staples, and occasional inserts. Those materials do not all cut, fold, glue, or dry the same way. The preparation steps below tell you which pages to keep, which to reject, and how to test a page before you commit to a full project.
Approximate completion times are estimates. Confirm them on one test piece before you make several items. Where a claim needs firsthand checking, a bracketed note marks the spot.
Before You Cut a Magazine
Check Ownership and Value
Confirm that the magazine belongs to you and that no one else wants it for reading, reference, or resale. A library copy, a borrowed issue, or a magazine someone plans to keep should not be cut. Before any irreversible work, photograph the cover, the issue date, the table of contents, and any unusual inserts.
A small number of old magazines are worth money. Most are not. Ordinary yellow-spined National Geographic issues and most large-circulation titles have little resale value, but early National Geographic issues with their original maps and certain notable covers can sell for more. Check the date, the cover, the condition, and whether the maps and original covers are intact before you cut. A moldy, musty, or cracked copy is usually not worth keeping for resale.
If an issue may be collectible, historically important, autographed, artist-made, or strongly sentimental, set it aside and have a knowledgeable seller, library, or paper conservator assess it first. The American Institute for Conservation lists qualified paper conservators who can advise on a specific item.
Protect Private Information
Subscription labels, mailing addresses, account numbers, names, personal photographs, and handwritten notes can appear anywhere in a magazine. Remove or cover them before the pages enter a project. Tear off or cut away label panels, or black out the information on a page you will not use. Do not rely on a thin paper layer to hide text that will show through after gluing.
Inspect Condition
Look at the covers, page edges, center fold, binding, and any inserts before you touch the pages. Reject magazines that show mold, pests, droppings, dampness, smoke residue, oils, chemicals, brittle paper, unstable ink, loose coatings, sharp fasteners, fragrance samples, or an unexplained odor. A musty smell often signals mold. Do not assume that wiping, spraying, or sealing makes contaminated paper safe.
For moldy or water-damaged material, the Library of Congress advises keeping affected items separate, cool, and dry and consulting a conservator before any treatment. Do not use bleach or household chemicals on paper. If you handle badly affected material at all, wear disposable gloves and a properly fitted respirator rated for mold.
Separate Page Types
Split the magazine into groups: thin text pages, heavier covers, coated or glossy pages, matte pages, inserts, laminated or plastic-coated pieces, metallic finishes, and anything with staples, adhesive labels, or mixed bindings. A page with a plastic film or metallic layer behaves differently from plain coated paper and may not bond or fold the same way. Set those aside for separate testing.
How to Prepare Magazine Pages
Test on expendable pages before you start a project. Check ink transfer by rubbing a dry finger and a damp fingertip across the print. Fold and score a scrap to see whether the coating cracks. Cut, roll, and glue a small sample to confirm the page holds. Moisten a corner to see how the paper reacts, then test your planned adhesive and finish on the same scrap. A page that smears, flakes, or refuses to bond is not right for that technique.
Sort accepted pages by thickness, flexibility, finish, color, motif, typography, orientation, and intended technique. Flatten only sound, dry pages under a broad, even weight. Do not prescribe steam, ironing, spraying, or soaking. Store accepted pages flat, clean, dry, and labeled, away from heat, sunlight, moisture, pests, children, and pets.
Remove staples or bindings only with the correct tool. Use a staple remover or a flat tool that lifts the staple from the fold side, keep your free hand clear of the tool path, and discard loose staples in a lidded container so they cannot reach a child or pet.
Cutting, Scoring, and Tool Safety
Work on a stable cutting mat with a sharp knife or blade. Keep both hands outside the cutting path, use a metal ruler as a straightedge, and make several controlled light passes rather than one hard cut. Retract or cap the blade when you set it down, and dispose of dull blades in a puncture-resistant container.
Score coated paper before you fold it. A scored line, folded with the paper grain, cracks far less than an unscored fold, and dry paper cracks more than paper at moderate humidity. Fold into the score line with the raised bead on the inside. If you are unsure of the grain, test by folding and tearing a scrap in both directions; the smoother fold and straighter tear follow the grain.
Adhesives, Backings, and Finishes
No single glue works on every magazine page. Standard white glue and school glue need a porous surface and can lift or smear on glossy coated stock. A decoupage medium made for nonporous surfaces, an acid-free spray adhesive, or a slow-setting archival paste usually bonds coated pages better. Work in a ventilated space, follow the product directions, and let each coat dry completely.
Materials I tested. On glossy coated magazine stock, ordinary school glue was the weak point every time: it beaded on the surface, wrinkled thin pages as it dried, and let edges lift within a day. Gloss Mod Podge brushed in a thin, even coat held coated pages flat and smooth, and a light mist of repositionable-then-permanent spray adhesive gave the cleanest bond on large single sheets such as the book jacket and drawer panels. Uncoated pages and newsprint-style inserts took plain PVA well, as long as I brushed it thin and pressed the page under a book while it dried. For a protective finish, two thin coats of water-based matte sealer stopped scuffing without yellowing, while a heavy single coat clouded over the darker images. Test every product on a cut-off from the same issue first, because coatings vary from one publication to the next.
| Method | Best For | Risks and Notes |
|---|---|---|
| Dry paper adhesive | Lightweight paper-to-paper joins, envelopes | Low moisture, low warp; weak on coated or heavy stock |
| PVA paper adhesive | Porous paper, bookbinding | Needs a porous surface; can smear ink on glossy pages |
| Double-sided film | Flat collage, clean edges | No drying time; difficult to reposition; film can show on thin paper |
| Decoupage medium | Coated pages, sealing, coils | Dries clear; apply thin coats or paper ripples |
| Spray adhesive | Large sheets, backings | Needs ventilation and masking; overspray is hard to clean |
| Stitched paper joins | Reinforced folds, signatures | Holes weaken thin paper; use a needle and spacing suited to the stock |
| Paper hinges | Movable flaps, folios | Adds a flexible joint; hinge must be wider than the fold |
| Interlocking tabs | Boxes, gift toppers, modular pieces | No glue needed; tabs must be cut to a consistent width |
| Rolled-paper coils | Bowls, bases, beads | Needs even strip width and tension; dry in stages |
| Woven-strip construction | Mats, flat panels | Thin strips tear; keep strips a consistent width |
| Removable rigid backing | Backdrops, drawer liners, mats | Prevents curl; board can warp if the glue is too wet |
| Edge binding | Raw edges, mats, covers | Protects cut edges; adds bulk at the corner |
| No applied finish | Dry, low-wear paper pieces | Cheapest and lightest; no protection from moisture or rub |
Glossy, matte, coated, laminated, photographic, metallic, thin, heavy, and recycled-content pages respond differently to moisture, glue, and folding. A laminated or plastic-coated page will not absorb adhesive the way clay-coated stock does. Test each type before you build.
Make Mixed Pages Look Intentional
Limit most projects to two to five dominant colors. Repeat a tonal gradient or a fixed color sequence instead of placing random pages side by side. Keep strip widths, fold depths, coil sizes, border widths, and edge treatments consistent within one piece. Give each small project one focal point, and alternate busy imagery with quiet solid-color areas.
Use typography deliberately rather than scattering word fragments. Watch how cropping handles faces, logos, copyrighted artwork, and accidental words. Conceal adhesive, align joins, smooth corners, protect raw edges, and finish the reverse side. Photograph gloss, layered edges, woven surfaces, and rolled-paper texture under broad, diffused light.
The 21 Old Magazine Projects
Each project lists what the finished piece looks like, its best use, a difficulty level, an approximate time, materials, tools, numbered steps, customization options, one practical tip, one common mistake, and a safety note. Test the page type and adhesive on a scrap before you begin.
1. Color-Index Inspiration Deck
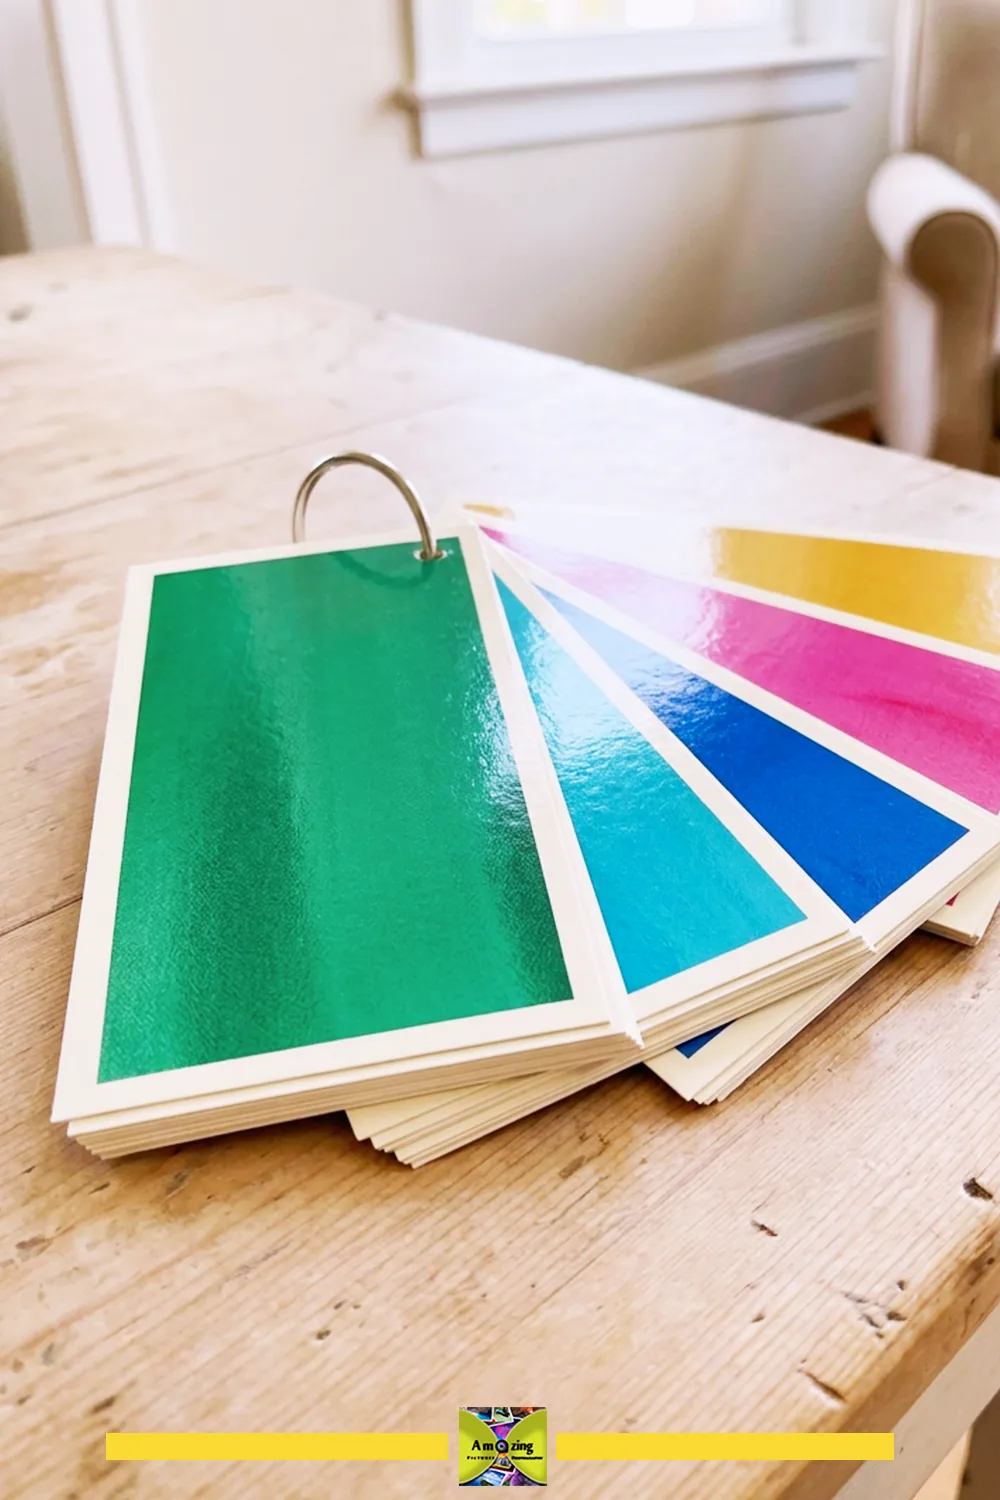
What it looks like: A ring of punched cards, each carrying one coordinated color, motif, or type sample cut from a magazine page.
Best use: Planning palettes, layouts, and mood boards for design, sewing, or decorating.
Difficulty: Easy.
Approximate time: 1–2 hours, depending on card count.
Materials: Magazine pages, cardstock or recycled cereal-box board, a binder ring.
Tools: Cutting mat, craft knife, ruler, single-hole punch, glue.
Steps:
- Choose a limited palette and cut matching color, motif, and type swatches.
- Cut cardstock into cards the same size, with a margin around each swatch.
- Glue one swatch to each card and let it dry under weight.
- Punch a hole in one corner of every card.
- Thread the cards onto a binder ring in a color or topic order.
Customization: Group cards by color, texture, or typography; add divider tabs; use a larger ring for a wall reference.
Practical tip: Trim swatches with a ruler so the edges read as a deliberate sample, not a torn scrap.
Common mistake: Cutting cards of unequal size, which makes the deck look scattered on the ring.
Safety note: Keep the punched ring and small punched discs away from children and pets.
I keep one of these decks on the desk and it gets more use than any digital palette tool, because I can fan the cards out and hold them against real fabric or paint. The decks that work best are the ones I sort tightly: one deck per color family, cut from full-bleed areas of a page with no text or faces showing, so each card reads as pure color. On the first deck I mixed glossy and matte swatches, and the glossy cards looked a shade richer next to their matte neighbors, so I now keep each deck to one paper finish and note the issue and page on the back of every card in case I want to find that shade again.
2. Full-Size Sewing and Craft Pattern Sheets
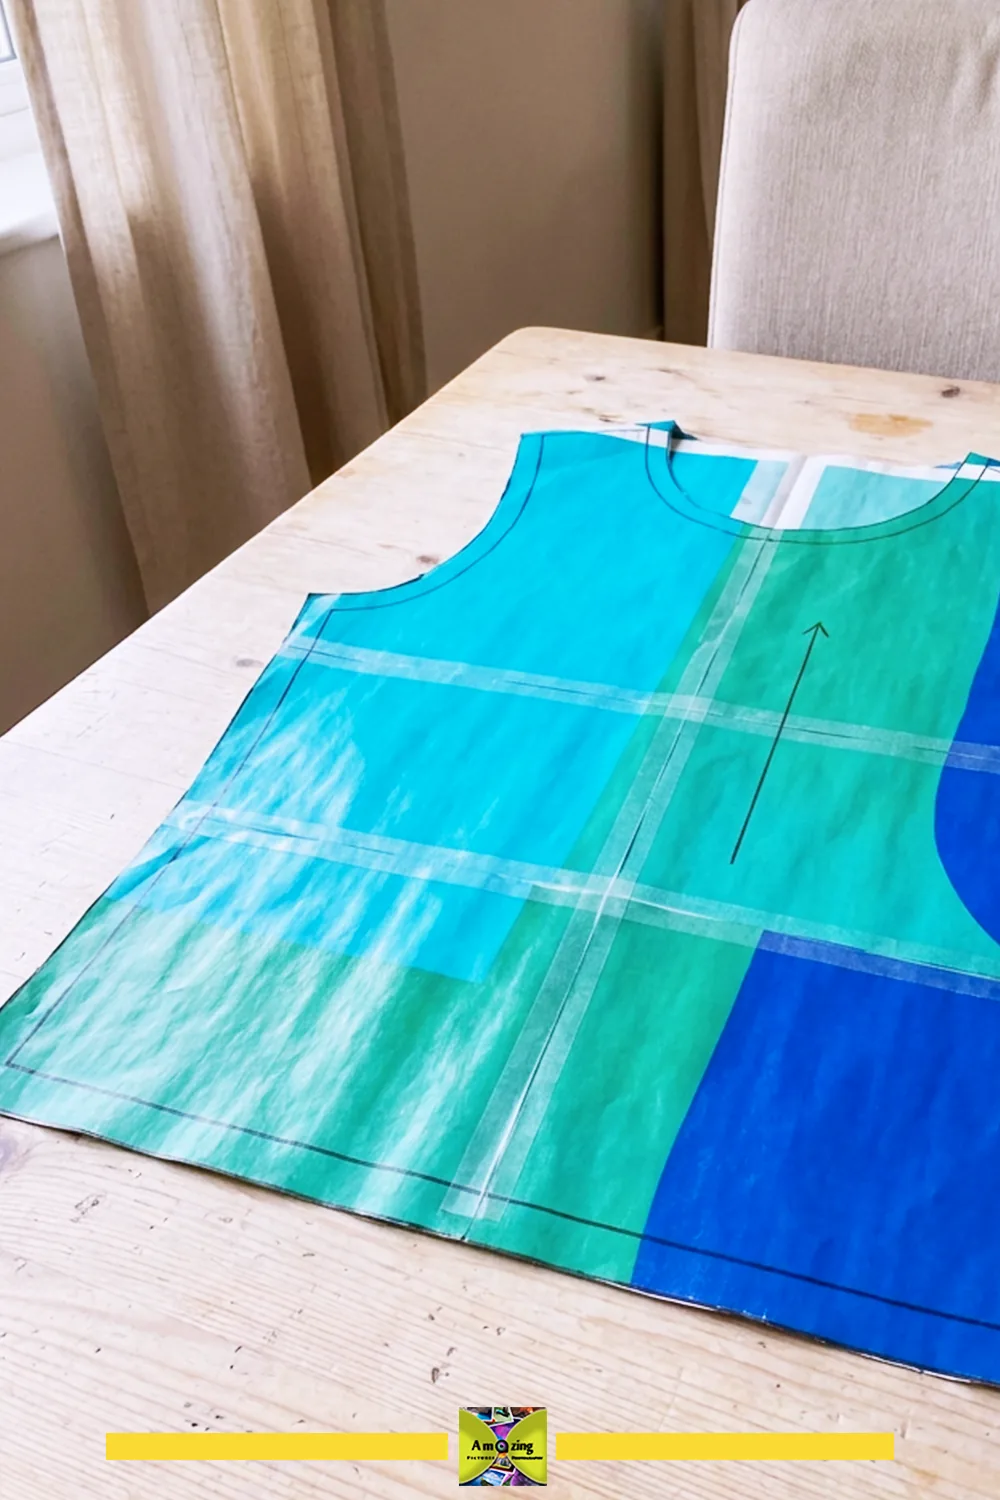
What it looks like: Large pattern sheets assembled from overlapped pages, joined and reinforced, with grain and alignment lines marked on the surface.
Best use: Tracing full-size garment or craft patterns you already own or draft yourself.
Difficulty: Moderate.
Approximate time: 2–4 hours for one multi-page sheet.
Materials: Magazine pages, tape or paper adhesive, removable tape.
Tools: Ruler, cutting mat, craft knife, pencil, straightedge.
Steps:
- Choose clean, uncoated or lightly coated pages large enough to tile into the pattern size.
- Overlap pages by a consistent margin and join the seams with tape on the back, then a thin paper adhesive on the overlap.
- Reinforce long joins with a second strip on the reverse side.
- Draw alignment and grain lines in pencil across the sheet.
- Trace or draw the pattern, then cut only the paper you need.
Customization: Use unprinted sides for a clean tracing surface, or keep the printed side as a visual reference.
Practical tip: Mark the straight grain line on every section before you join, so the printed imagery does not confuse alignment later.
Common mistake: Joining coated pages with a wet glue that ripples the surface and distorts the traced lines.
Safety note: Cut on a mat with the knife path away from your body and your free hand.
3. Reversible Flat-Lay Photography Backdrops
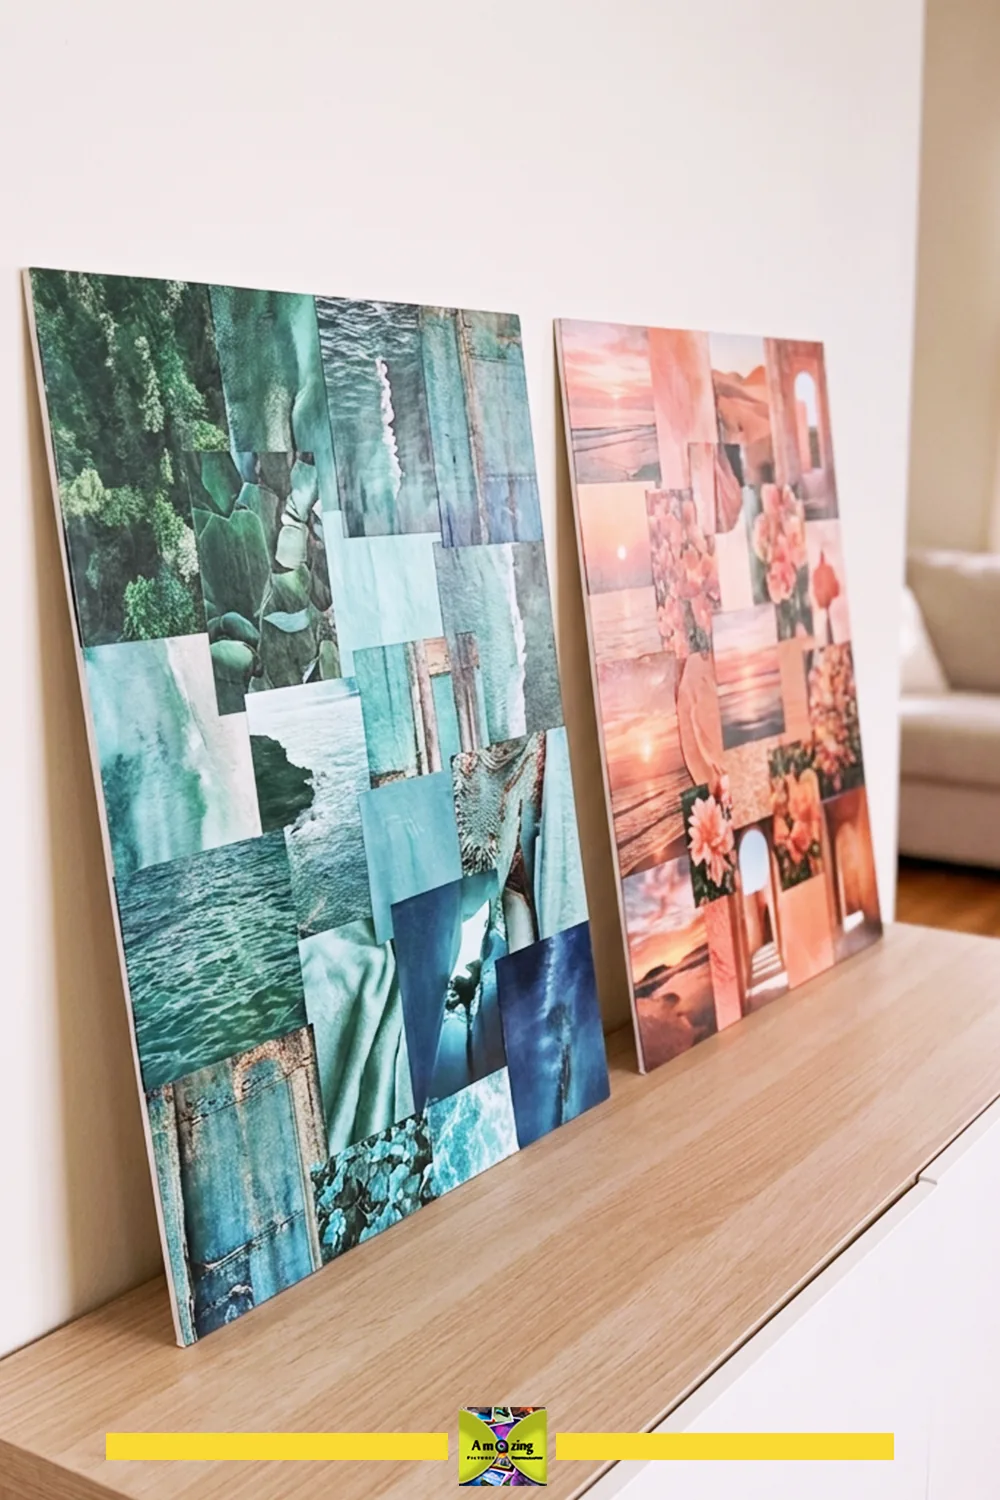
What it looks like: Two rigid boards, each covered on one face with a coordinated page collage and left plain or lightly covered on the reverse.
Best use: Flat-lay backgrounds for product, craft, or food photography.
Difficulty: Moderate.
Approximate time: 2–3 hours per board, plus drying.
Materials: Magazine pages, two rigid boards, spray adhesive or decoupage medium, a protective top coat if desired.
Tools: Masking paper, spray area, brayer or clean cloth, weights.
Steps:
- Plan a low-contrast collage so it does not compete with the subject.
- Mask the reverse and edges of the board before spraying.
- Apply adhesive in a ventilated area and smooth pages with a brayer or cloth from the center outward.
- Let the board dry under weight, then trim the edges clean.
- Seal only if the surface will see light handling; leave it unsealed for the flattest finish.
Customization: Use one solid color family per board, or reverse a subtle pattern for a second look.
Practical tip: Keep the reverse plain so each board gives you two backgrounds with no extra storage.
Common mistake: Choosing busy pages that turn every flat-lay into a busy background and distract from the subject.
Safety note: Use spray adhesive outdoors or in a ventilated space, and keep it away from flame.
4. Boot-Shape Inserts
What it looks like: Firm rolled tubes sized to the shaft of a boot, wrapped in a removable washable fabric sleeve.
Best use: Holding tall boots upright in storage. No moisture-control claim applies.
Difficulty: Easy.
Approximate time: 20–40 minutes per pair.
Materials: Complete unwanted magazines, cotton or other washable fabric, thread or fabric glue.
Tools: Scissors, ruler, needle and thread or fabric glue.
Steps:
- Roll one or two complete magazines into a firm cylinder that fits the boot shaft.
- Wrap the roll in a fabric sleeve with the seam turned inward.
- Close the sleeve ends so the paper stays covered.
- Slide the insert into the boot and check the fit.
- Wash the sleeve separately and reuse it after the paper roll wears out.
Customization: Match the sleeve fabric to the boot color, or add a hanging loop at the top.
Practical tip: Keep the sleeve fully closed so ink cannot transfer from the paper to light-colored boot lining.
Common mistake: Rolling the paper so loosely that the insert flattens and no longer holds the shaft.
Safety note: Use a complete magazine with no loose staples or sharp inserts against the fabric.
5. Messy-Work Surface Liners
What it looks like: A stack of disposable single-use page liners that protect a table during low-risk craft tasks.
Best use: Catching glue drips, dry media, and light craft mess. Not for heat, blades, solvents, or hazardous products.
Difficulty: Easy.
Approximate time: 10–15 minutes.
Materials: Large coated or cover pages, removable tape.
Tools: Scissors or ruler and knife.
Steps:
- Choose coated or cover pages that resist light moisture.
- Tape a few pages flat to the table with removable tape.
- Replace the top sheet after each task.
- Discard soiled sheets in the trash when the coating cannot be cleaned.
Customization: Keep a bound stack at one work station, or cut sheets to fit a tray.
Practical tip: Use only clean, dry pages so the liner does not transfer ink onto the surface it protects.
Common mistake: Treating a page liner as a cutting mat or heat pad, which can damage the table or the page.
Safety note: Never use a paper liner for hot objects, an open flame, sharp cutting, or solvent cleanup.
6. Accordion Correspondence Folio
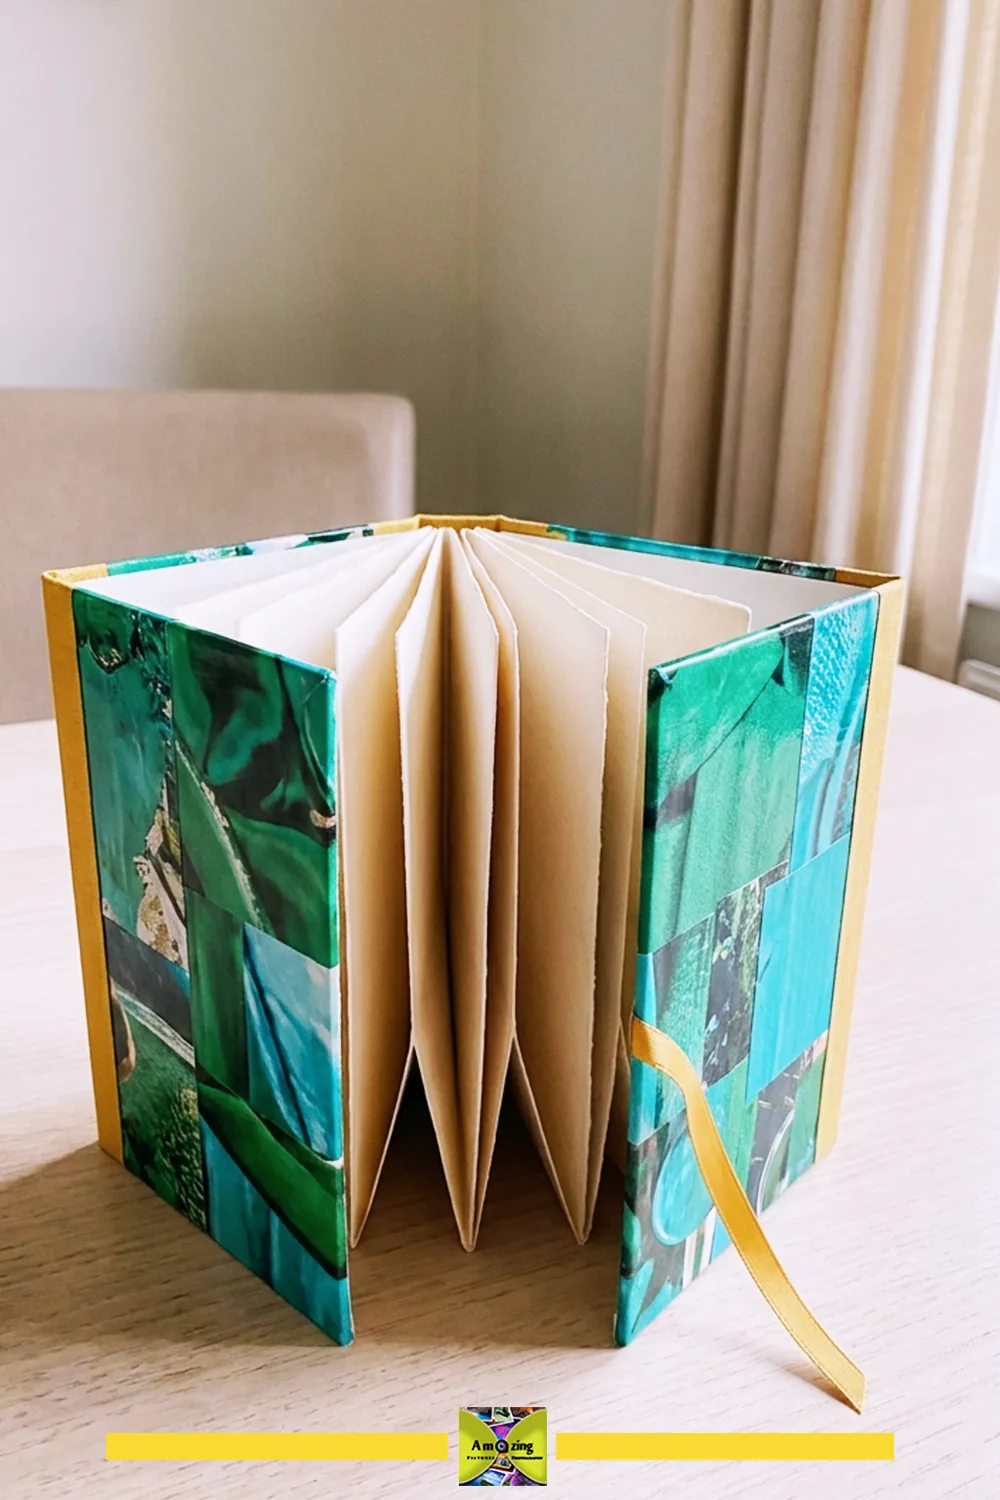
What it looks like: A folded accordion folio with reinforced spine folds and two stiff outer panels, holding a few flat paper pieces.
Best use: Storing flat notes, cards, or small prints in a portable folder.
Difficulty: Moderate.
Approximate time: 1–2 hours.
Materials: Magazine pages or covers, board for the panels, paper adhesive, a ribbon or band.
Tools: Bone folder or dull scoring tool, ruler, knife, cutting mat.
Steps:
- Score each fold line with the grain and fold carefully.
- Reinforce the outer folds with a paper hinge strip.
- Mount the two end panels to stiff board so the folio stands.
- Add a ribbon or band that holds the folio closed without a hard fastener.
- Slip flat contents inside.
Customization: Use a typography panel for the covers, or line the inside with a quiet solid color.
Practical tip: Score every fold before you bend, or coated paper cracks along the spine.
Common mistake: Folding against the grain, which splits the coating at the spine.
Safety note: Use a dull scoring tool and keep the folder closed flat when not in use.
7. Bound Visual Reference Journal
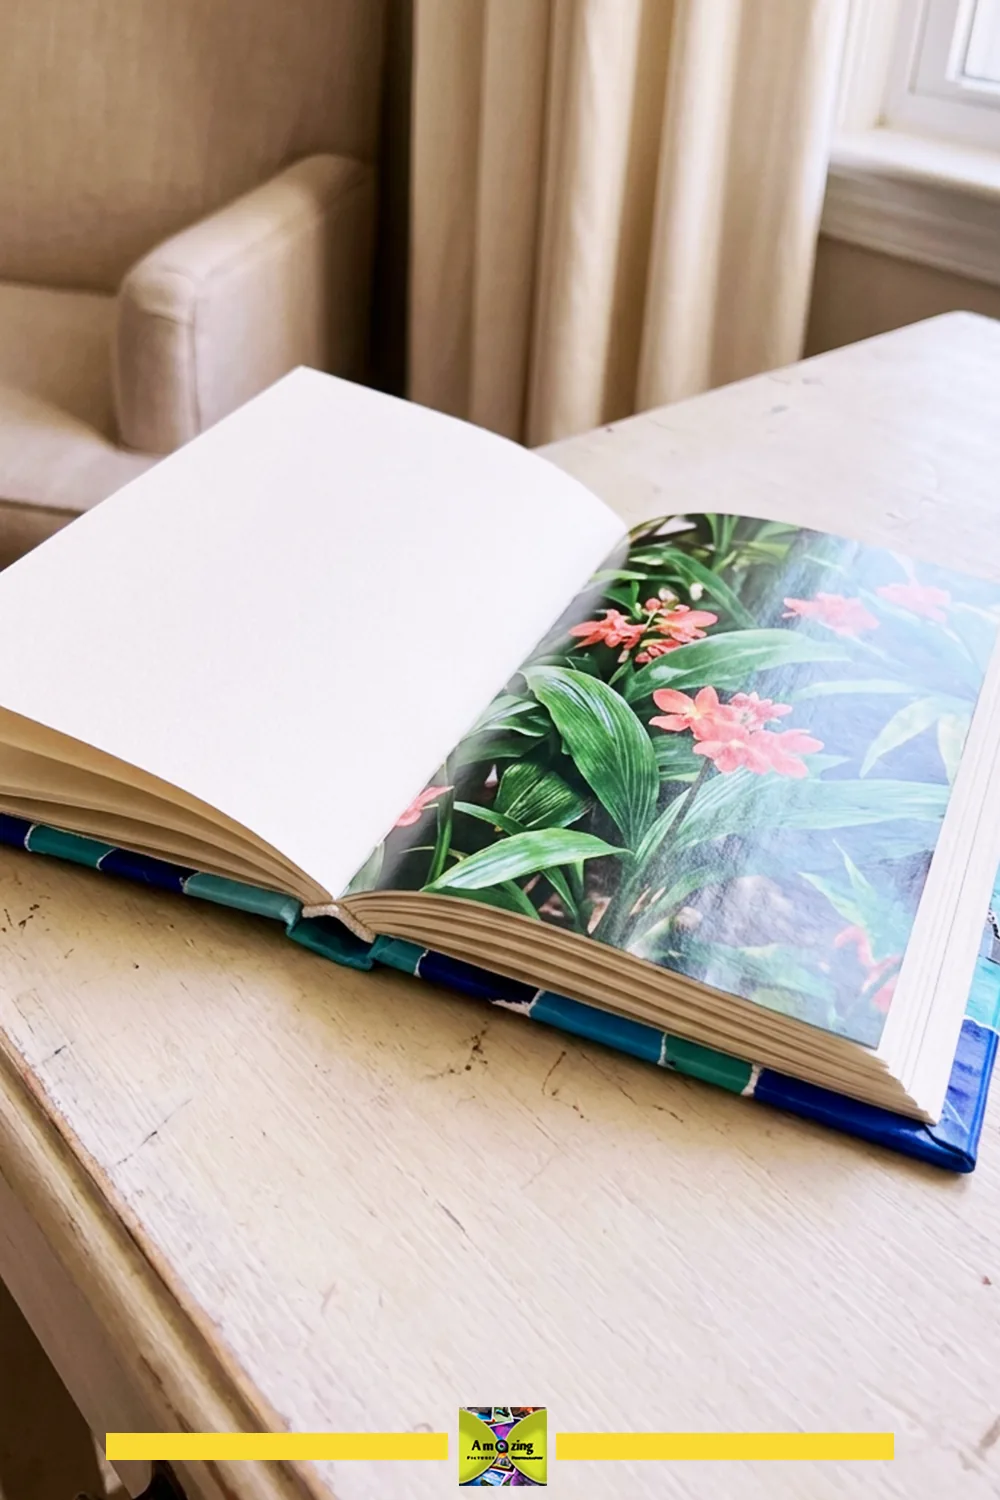
What it looks like: A handmade book that pairs blank writing paper with selected magazine imagery, bound in reinforced signatures under a separate hard cover.
Best use: A personal reference, sketch, or scrap journal.
Difficulty: Advanced.
Approximate time: 3–6 hours.
Materials: Blank paper, magazine pages, linen or strong thread, board for the cover, bookbinding adhesive.
Tools: Awl, needle, ruler, bone folder, cutting mat, knife.
Steps:
- Fold blank pages and chosen magazine pages into equal signatures.
- Punch stitch holes along each fold and sew the signatures with a strong thread.
- Reinforce the spine with a paper or fabric strip.
- Build a separate hard cover from board and attach it to the text block.
- Press the book under weight until the adhesive sets.
Customization: Alternate imagery pages with blank pages, or add section dividers from magazine covers.
Practical tip: Keep the number of folded magazine sheets low in each signature, because coated paper is stiffer and opens less flat than writing paper.
Common mistake: Using wet glue that soaks thin pages and leaves ripples across the imagery.
Safety note: Pierce the fold with an awl on a protected surface, keeping your fingers clear of the point.
8. Removable Collage Book Jacket
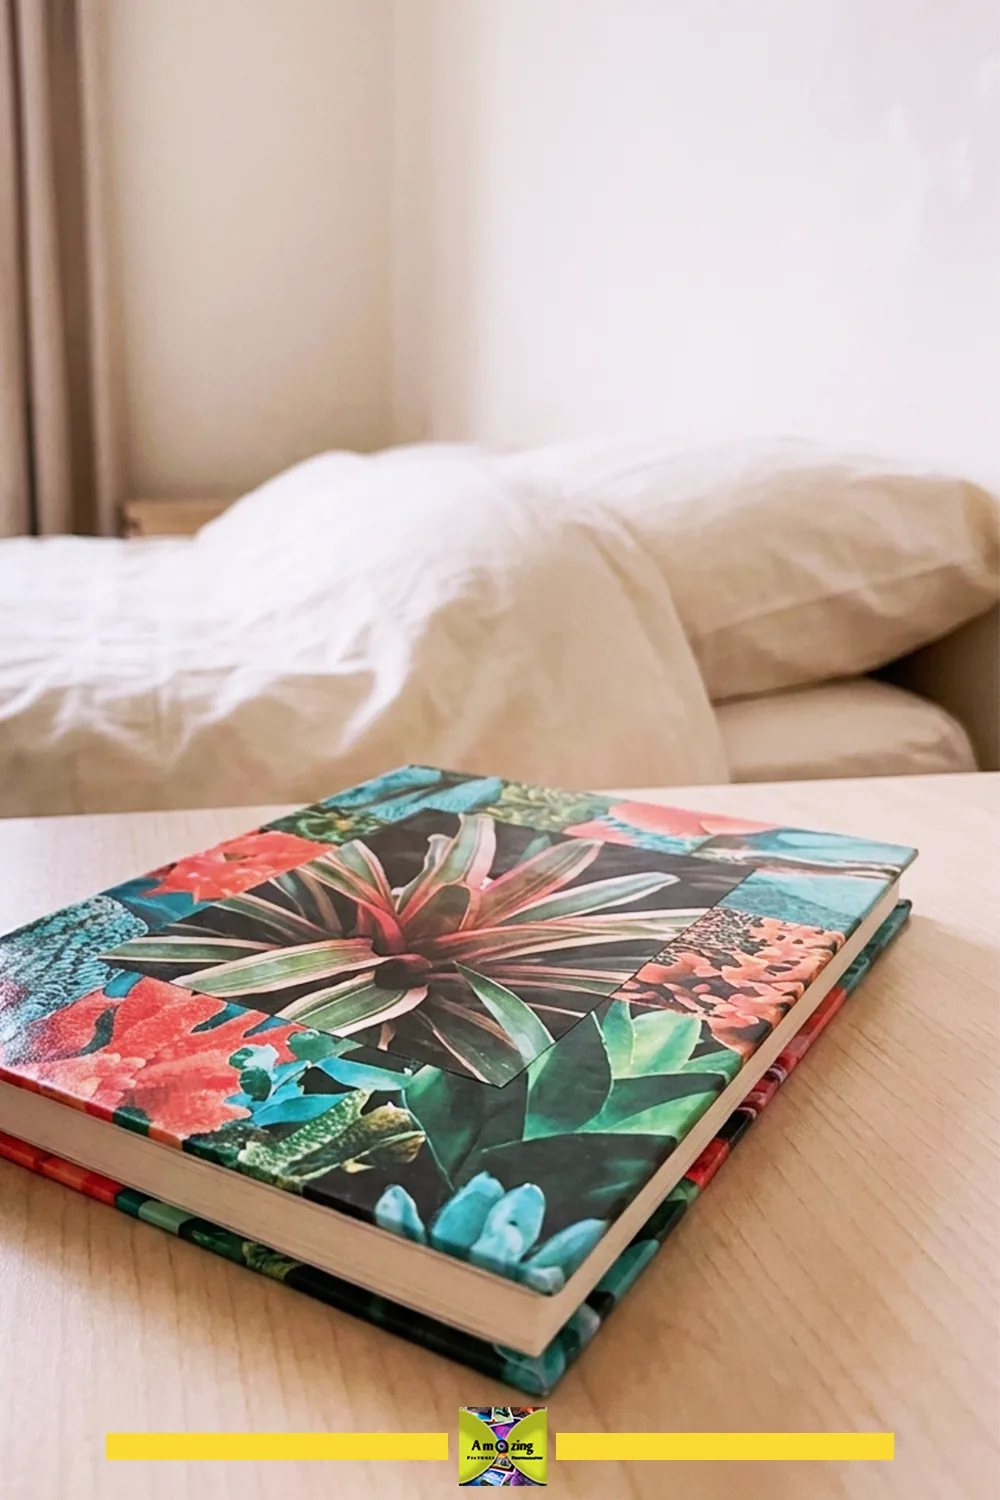
What it looks like: A decorated paper jacket sized to a replaceable notebook, with protected folds that slip on and off.
Best use: Covering an ordinary notebook without gluing it. Not for collectible or borrowed books.
Difficulty: Moderate.
Approximate time: 1–2 hours.
Materials: Magazine covers or pages, clear tape or adhesive, a notebook to size.
Tools: Ruler, bone folder, knife, cutting mat.
Steps:
- Measure the notebook height, width, and spine, then add flaps.
- Cut the jacket from a strong cover or a reinforced page collage.
- Score and fold the spine and flap lines with the grain.
- Reinforce the folds with clear tape on the inside so they do not split.
- Slide the jacket over the notebook and check the fit.
Customization: Collage a focal image on the front, or keep the spine plain for shelf reading.
Practical tip: Size the jacket slightly larger than the cover so the paper does not crease or tear at the edges with use.
Common mistake: Putting a removable jacket on a book whose own cover must stay protected or unmarked.
Safety note: Keep the jacket dry and remove it before the notebook goes into a bag with liquids.
9. Nested Envelope and Liner Set
What it looks like: A set of matching envelopes and inner liners in several card and note sizes, folded from coordinated pages.
Best use: Sending cards and notes by hand, or holding flat keepsakes.
Difficulty: Moderate.
Approximate time: 1–2 hours for a full set.
Materials: Magazine pages, a card template, paper adhesive or double-sided tape.
Tools: Ruler, bone folder, knife or scissors, cutting mat.
Steps:
- Trace or draw an envelope template in the size you need.
- Cut the envelope from a page, then score and fold the flaps.
- Glue or tape the side flaps to the bottom flap.
- Cut a liner slightly smaller than the envelope and slide it inside the folded top.
- Repeat for each size in a matched set.
Customization: Use one typography page for the liners and a solid color for the outside, or reverse the pairing.
Practical tip: Keep the printed side on the outside and the cleaner reverse inside, so the address stays legible.
Common mistake: Cutting envelopes from thin pages that tear when the flap is opened more than once.
Safety note: Score the folds first so the paper does not crack or leave a sharp torn edge.
10. Folded Presentation Box
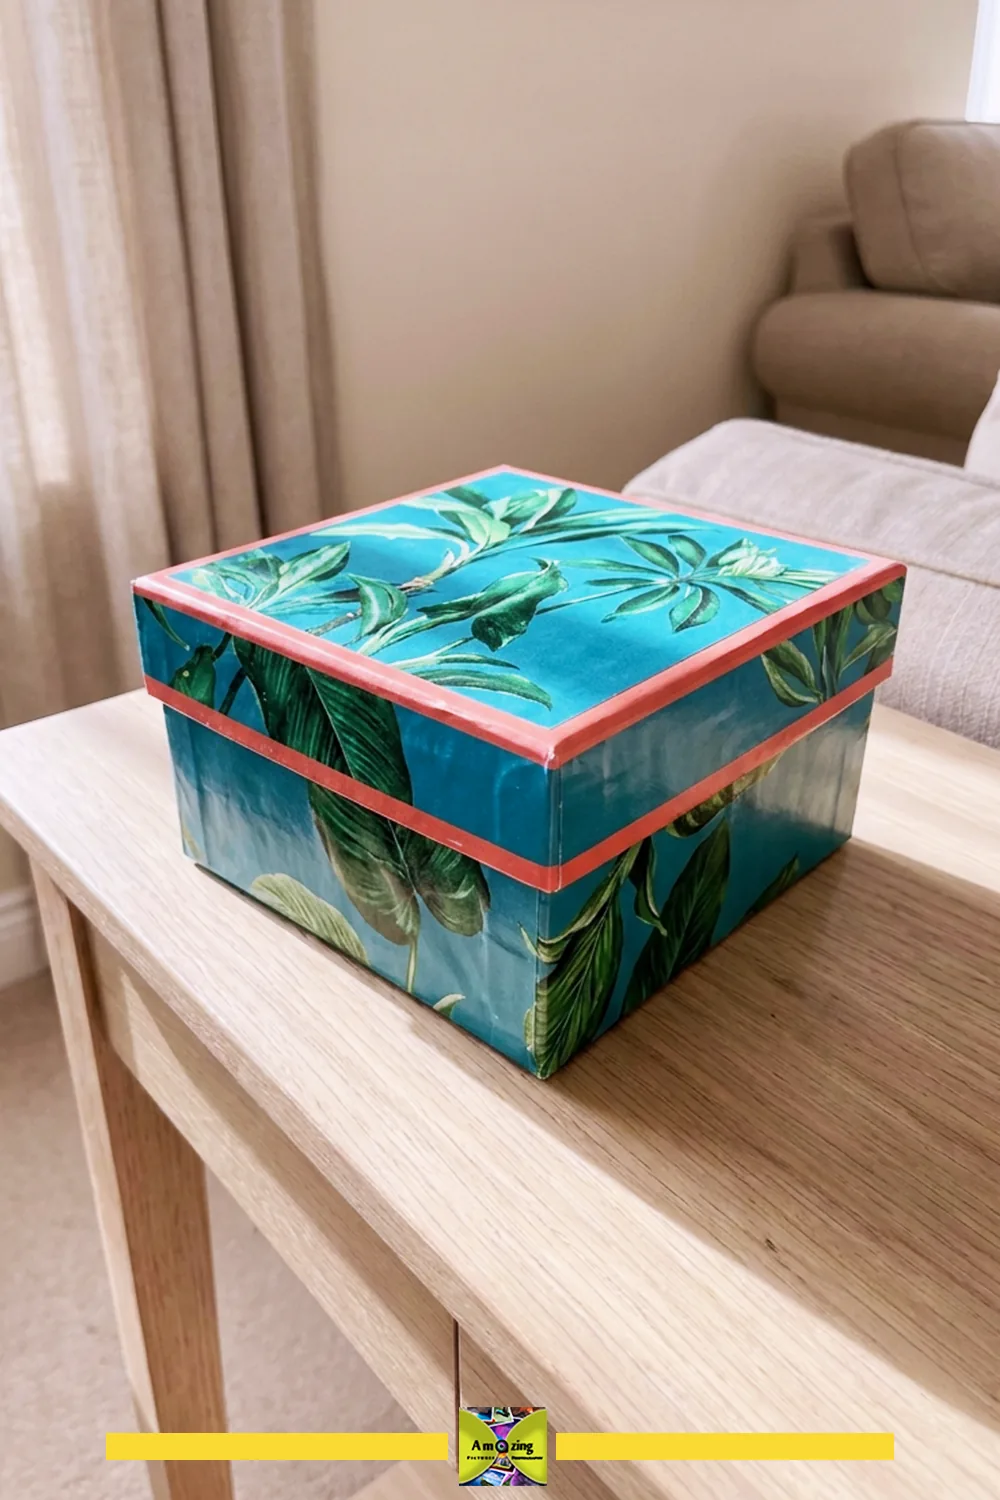
What it looks like: A small folded box with doubled panels and reinforced corners, sized for one lightweight dry gift.
Best use: Presenting a lightweight dry item such as a card, a sachet of seeds, or a small paper gift.
Difficulty: Moderate.
Approximate time: 45–90 minutes.
Materials: Magazine covers or reinforced pages, paper adhesive or double-sided tape, a removable interior support.
Tools: Ruler, bone folder, knife, cutting mat.
Steps:
- Cut the base and lid from doubled panels so the walls hold their shape.
- Score and fold all wall lines, then tape or glue the corners.
- Reinforce each corner on the inside with a small folded tab.
- Add a removable interior support cut to the base so the floor stays flat.
- Fit the lid and check that it opens without strain.
Customization: Use a bold motif on the lid and a plain interior, or line the base with a quiet solid color.
Practical tip: Double every wall panel so a thin magazine page does not buckle under its own folds.
Common mistake: Leaving the lid too tight, which cracks the corner when it is opened.
Safety note: Keep the box away from candles and heat, and load only lightweight dry contents.
11. Sculptural Pleated Gift Topper Set
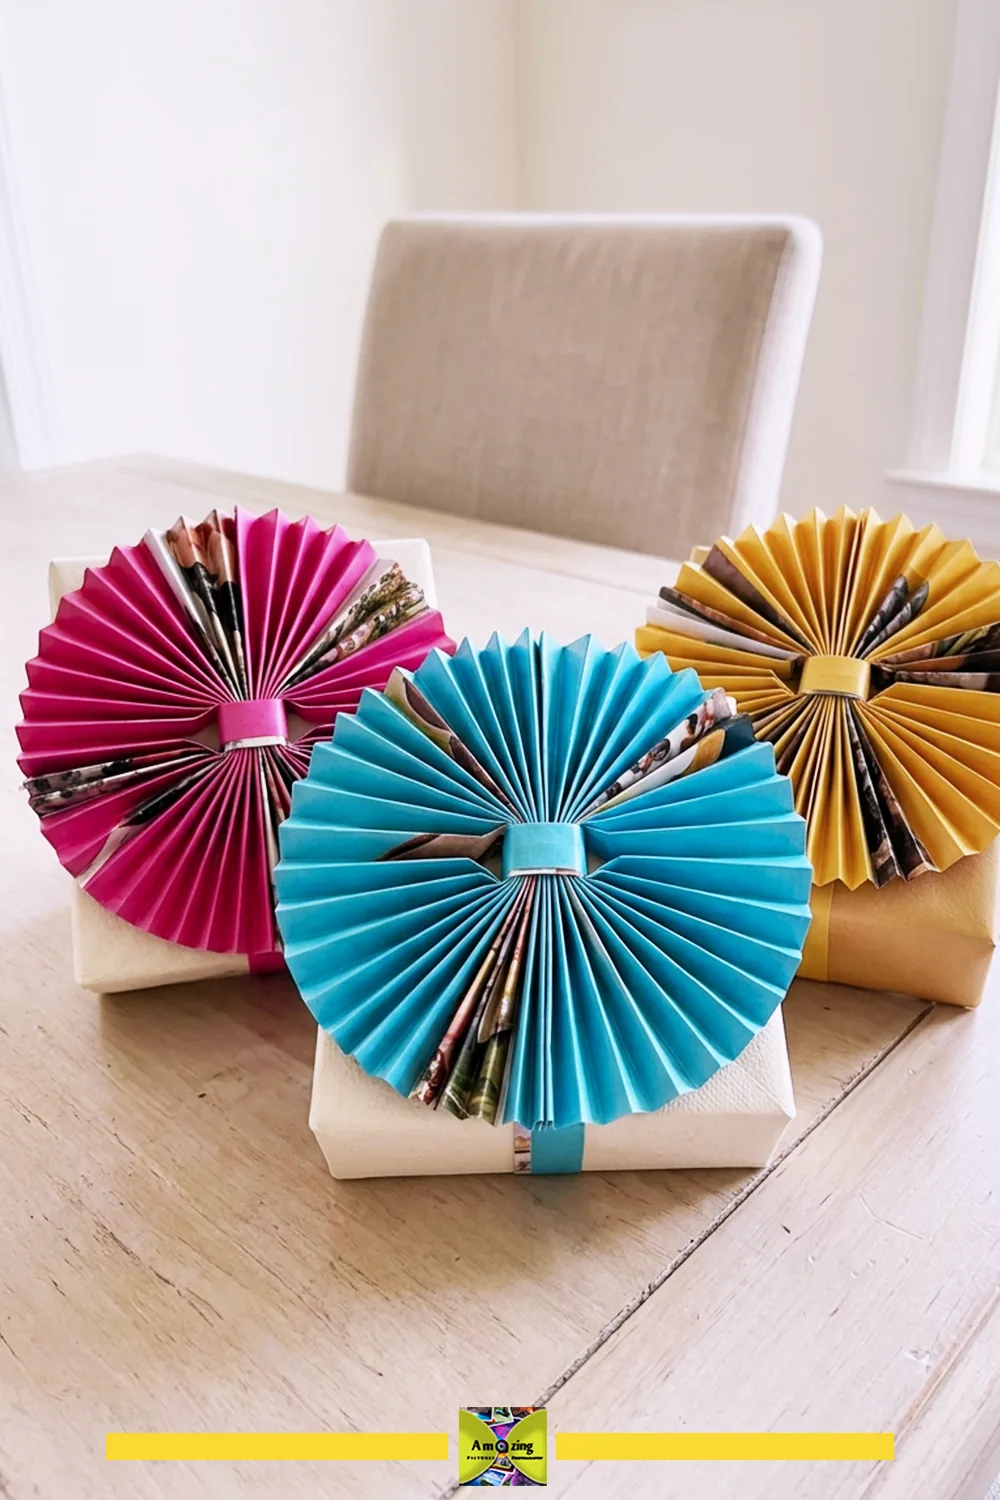
What it looks like: A set of fan-folded paper toppers joined with interlocking tabs and short secured bands.
Best use: Decorating wrapped gifts without loose cords.
Difficulty: Moderate.
Approximate time: 30–60 minutes per set.
Materials: Magazine pages, paper adhesive or tape, short paper bands.
Tools: Ruler, bone folder, knife or scissors.
Steps:
- Cut pages into strips of equal width and score a consistent fan fold along each strip.
- Fold two or three strips and join their ends with interlocking tabs.
- Gather the center and secure it with a short paper band instead of a loose cord.
- Fluff the pleats evenly and trim any uneven edge.
- Attach the topper to the gift with a small adhesive dot or band.
Customization: Vary the pleat depth, combine a gradient of pages, or pair a solid color with a typography strip.
Practical tip: Keep every fold the same depth so the pleats fan evenly and the topper sits level.
Common mistake: Folding coated pages without scoring, which makes the pleats split at the edges.
Safety note: Use secured paper bands, not loose cords or wire, so the topper has no dangling hazard.
12. Woven Desk Mat
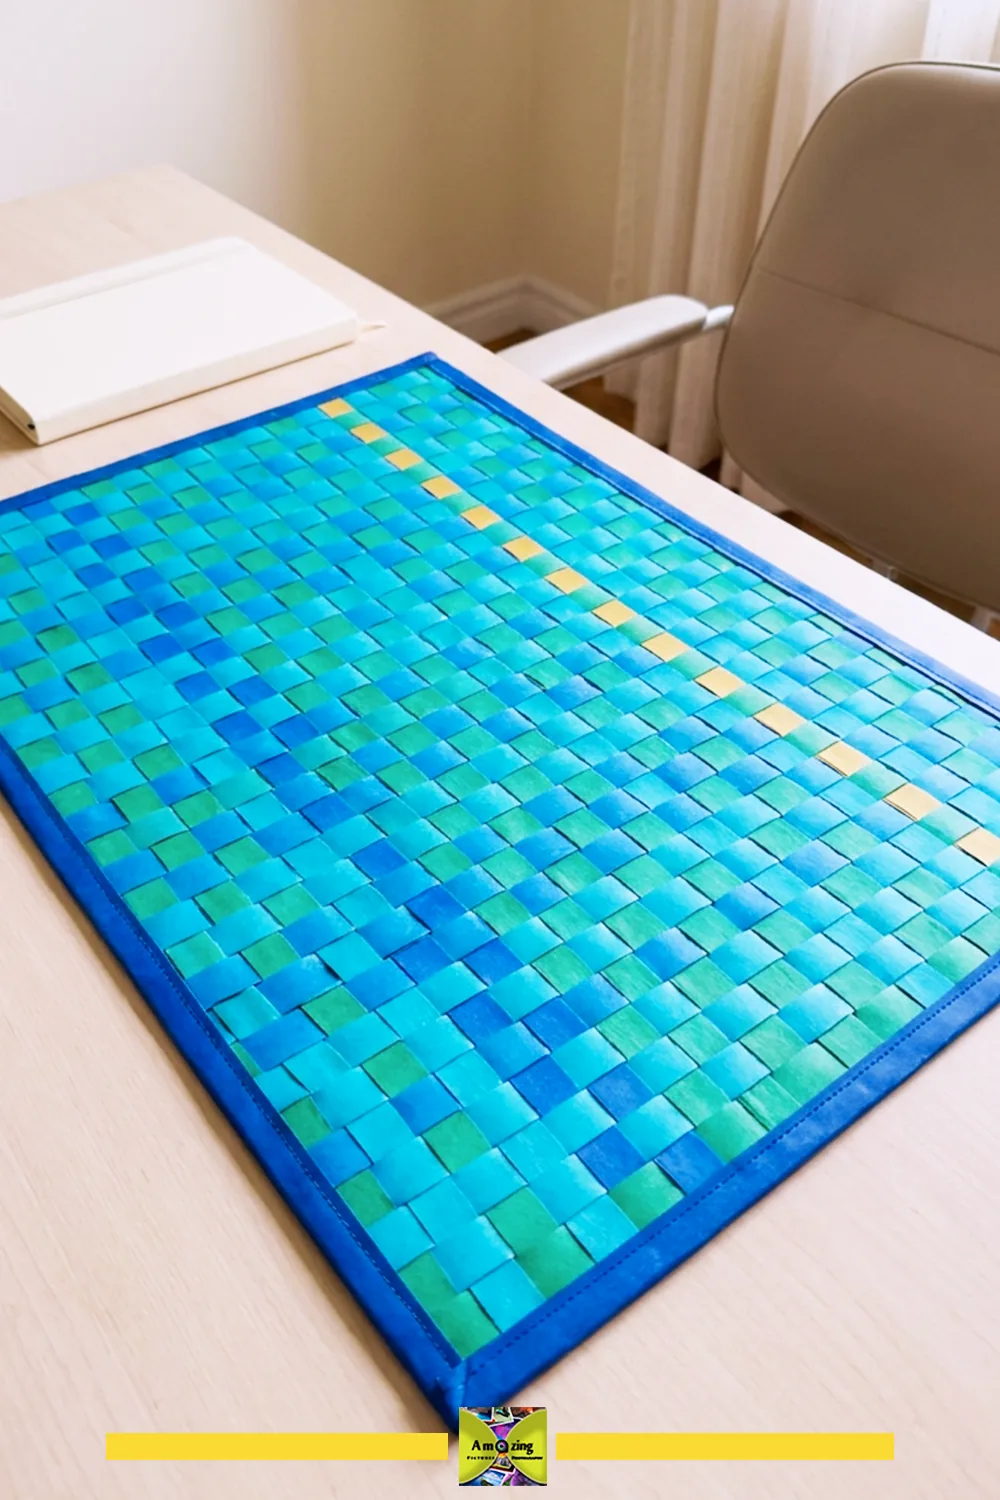
What it looks like: A flat woven panel of magazine strips mounted to a flexible backing, with bound edges.
Best use: A light surface for stationery and writing. Not for hot objects, food, or wet containers.
Difficulty: Advanced.
Approximate time: 3–5 hours.
Materials: Magazine pages, a flexible backing sheet, paper adhesive or double-sided film, edge binding tape.
Tools: Ruler, knife, cutting mat, brayer or cloth.
Steps:
- Cut pages into long strips of one width and fold each strip in half lengthwise for strength.
- Lay a set of warp strips on the backing and weave weft strips over and under.
- Keep the weave tight and square, and tuck or trim the strip ends.
- Adhere the woven panel to the backing and press it flat.
- Bind the outer edges so the strips cannot lift.
Customization: Weave a two-color checker, a gradient, or a single focal band across the mat.
Practical tip: Fold every strip the same width, because uneven strips pull the weave out of square.
Common mistake: Using thin uncoated strips that tear while you tighten the weave.
Safety note: Use the mat for dry stationery only, and keep it away from heat and liquids.
13. Rolled-Paper Lidded Keepsake Bowl
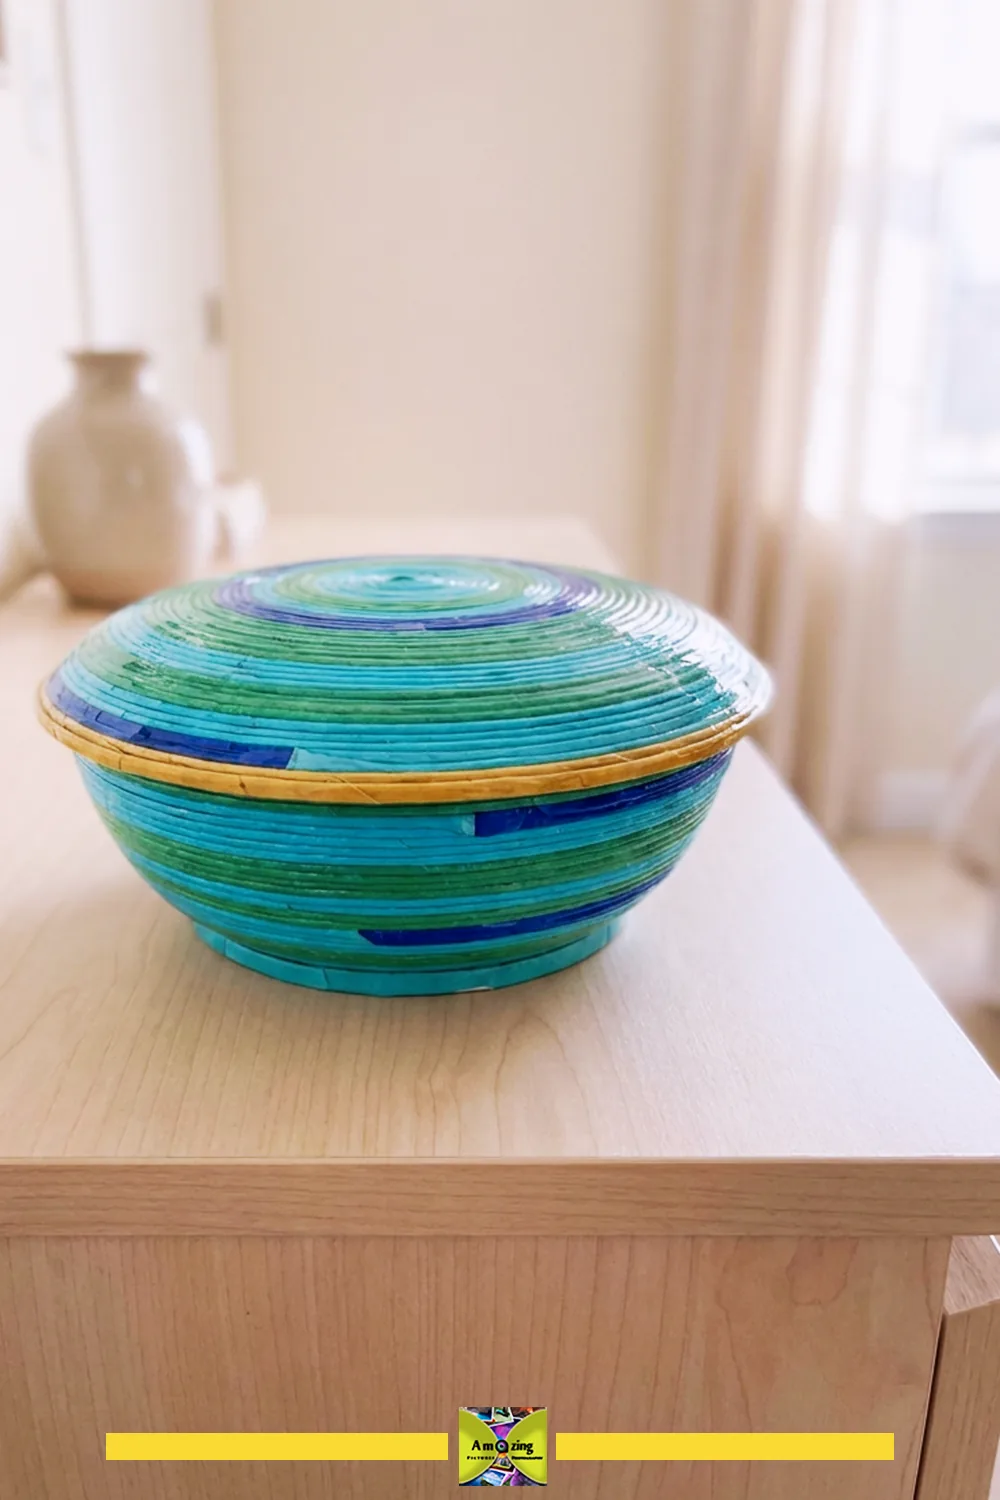
What it looks like: A coiled bowl with a matching lid, built from tightly rolled strips and a reinforced base.
Best use: Holding lightweight dry objects such as paper clips, beads, or spare buttons.
Difficulty: Advanced.
Approximate time: 4–8 hours, with drying in stages.
Materials: Magazine pages, paper adhesive or decoupage medium, a base disc of board.
Tools: Ruler, knife, skewer or dowel, brush, clamps or rubber bands.
Steps:
- Cut pages into strips of one width and roll each tightly, gluing the end down.
- Join strips end to end into a long coil.
- Coil the strip into a flat disc for the base, gluing as you go, and let it dry.
- Build the walls upward, keeping the coil level and the tension even.
- Shape the lid on the same form, then seal inside and out and dry between coats.
Customization: Alternate strip colors for banding, or add a contrasting rim on the lid.
Practical tip: Keep the strip width and the rolling tension consistent, or the coil becomes oval.
Common mistake: Shaping the walls before the base is fully dry, which lets the coil slip.
Safety note: Dry each stage completely and use the bowl only for dry, lightweight items.
What this costs. The pages are free, and one thick issue usually yields enough strips for a small bowl and its lid. The real spend is the adhesive and the sealer, and both are bottles you will draw on for many projects rather than use up on one. The base board can be a scrap of mat board or the back of a cereal-box panel, so this bowl comes in at the cost of the glue and sealer it consumes, which is a small fraction of a bottle.
14. Papier-Mâché Display Vessel
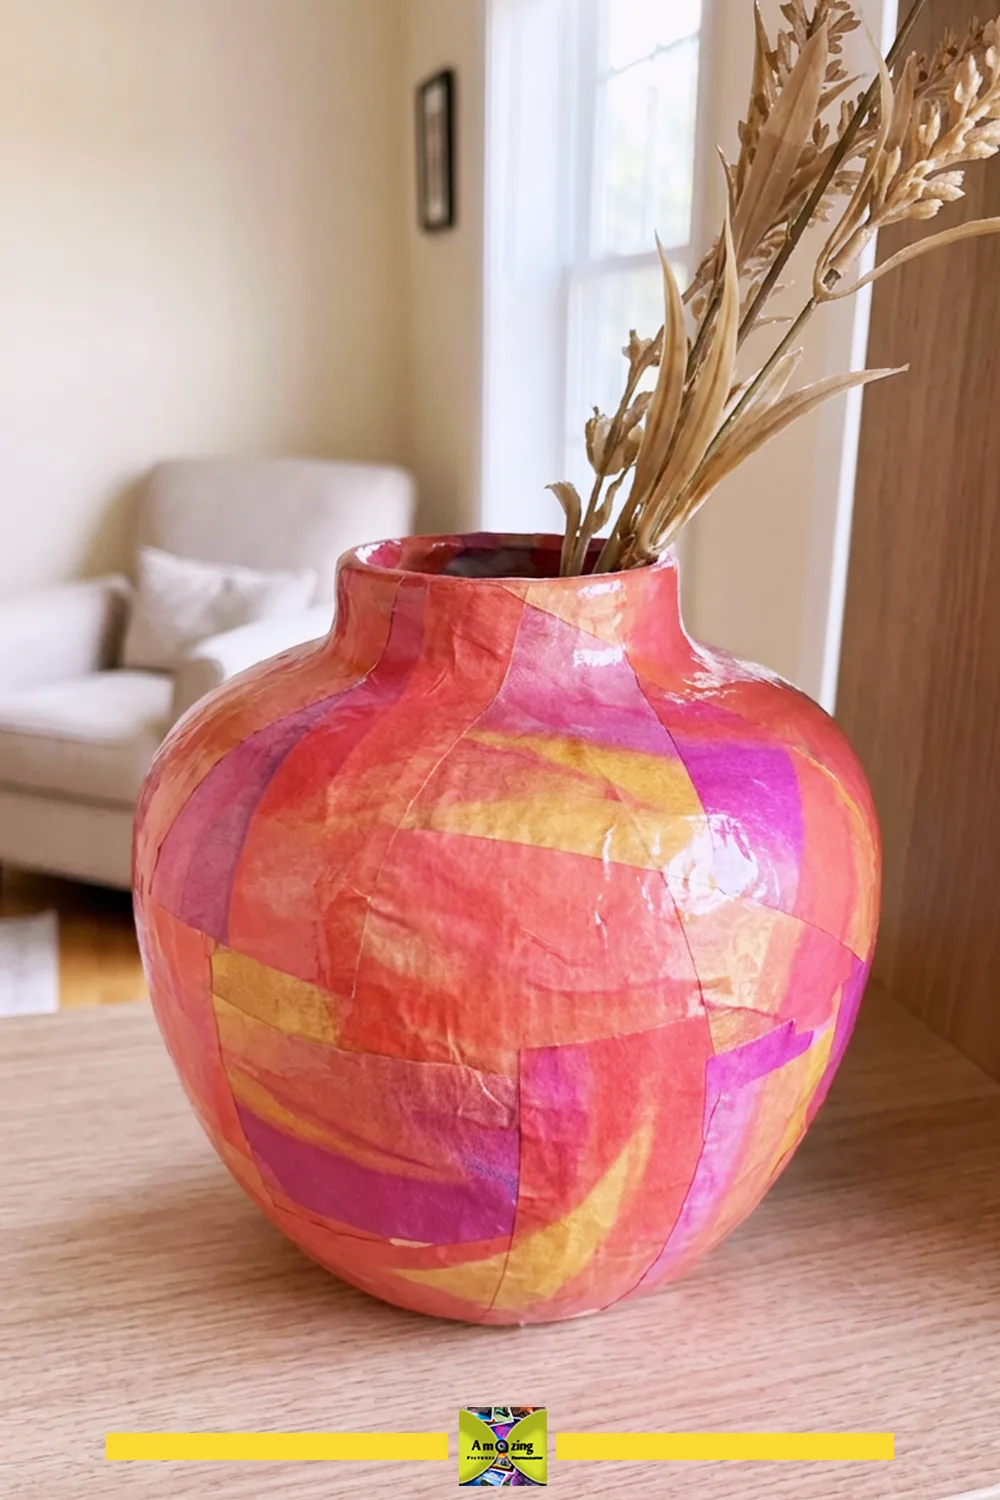
What it looks like: A hollow formed vessel with a smooth layered surface, for dry artificial stems or open shelf display.
Best use: Holding dry artificial stems, or standing empty as a decorative form. No liquid use.
Difficulty: Advanced.
Approximate time: 2–3 days, most of it drying.
Materials: Torn magazine strips, papier-mâché paste, a removable internal form, a release layer.
Tools: Bowl for paste, brush, scissors or a blunt tool, a protected drying area.
Steps:
- Cover the form with a release layer so the paper will not stick.
- Dip torn strips in paste and layer them over the form in alternating directions.
- Build several thin layers and smooth each one.
- Let the vessel dry completely before removing the internal form.
- Seal the inside and outside, then display it dry.
Customization: Use a single color family for the outer layer, or leave torn text edges as a subtle texture.
Practical tip: Dry in a warm, ventilated spot, because trapped moisture inside the form stays damp for days.
Common mistake: Removing the internal form before the layers are fully dry, which lets the vessel sag.
Safety note: Keep the vessel dry and never use it for water, food, or a flame.
15. Folded Geometric Tabletop Sculpture
What it looks like: A freestanding modular sculpture made from repeated folded units joined at concealed points on a stable base.
Best use: A decorative tabletop form.
Difficulty: Advanced.
Approximate time: 3–5 hours.
Materials: Magazine pages or covers, paper adhesive or tape, a stiff base.
Tools: Ruler, bone folder, knife, cutting mat.
Steps:
- Fold a test unit and settle on one repeatable module size.
- Score and fold all units to the same dimensions.
- Join units with concealed tabs so no glue or tape shows on the faces.
- Build outward from a flat base, checking alignment after each row.
- Mount the finished form to a stiff base so it stands without tipping.
Customization: Use a two-color scheme for alternating units, or a gradient that shifts across the form.
Practical tip: Score and fold with the grain, because coated modules crack at the corners when folded against it.
Common mistake: Cutting modules slightly different sizes, so the rows no longer align.
Safety note: Keep the sculpture away from edges and candles, and weigh the base if it is top-heavy.
16. Rolled-Paper Bead Cuff
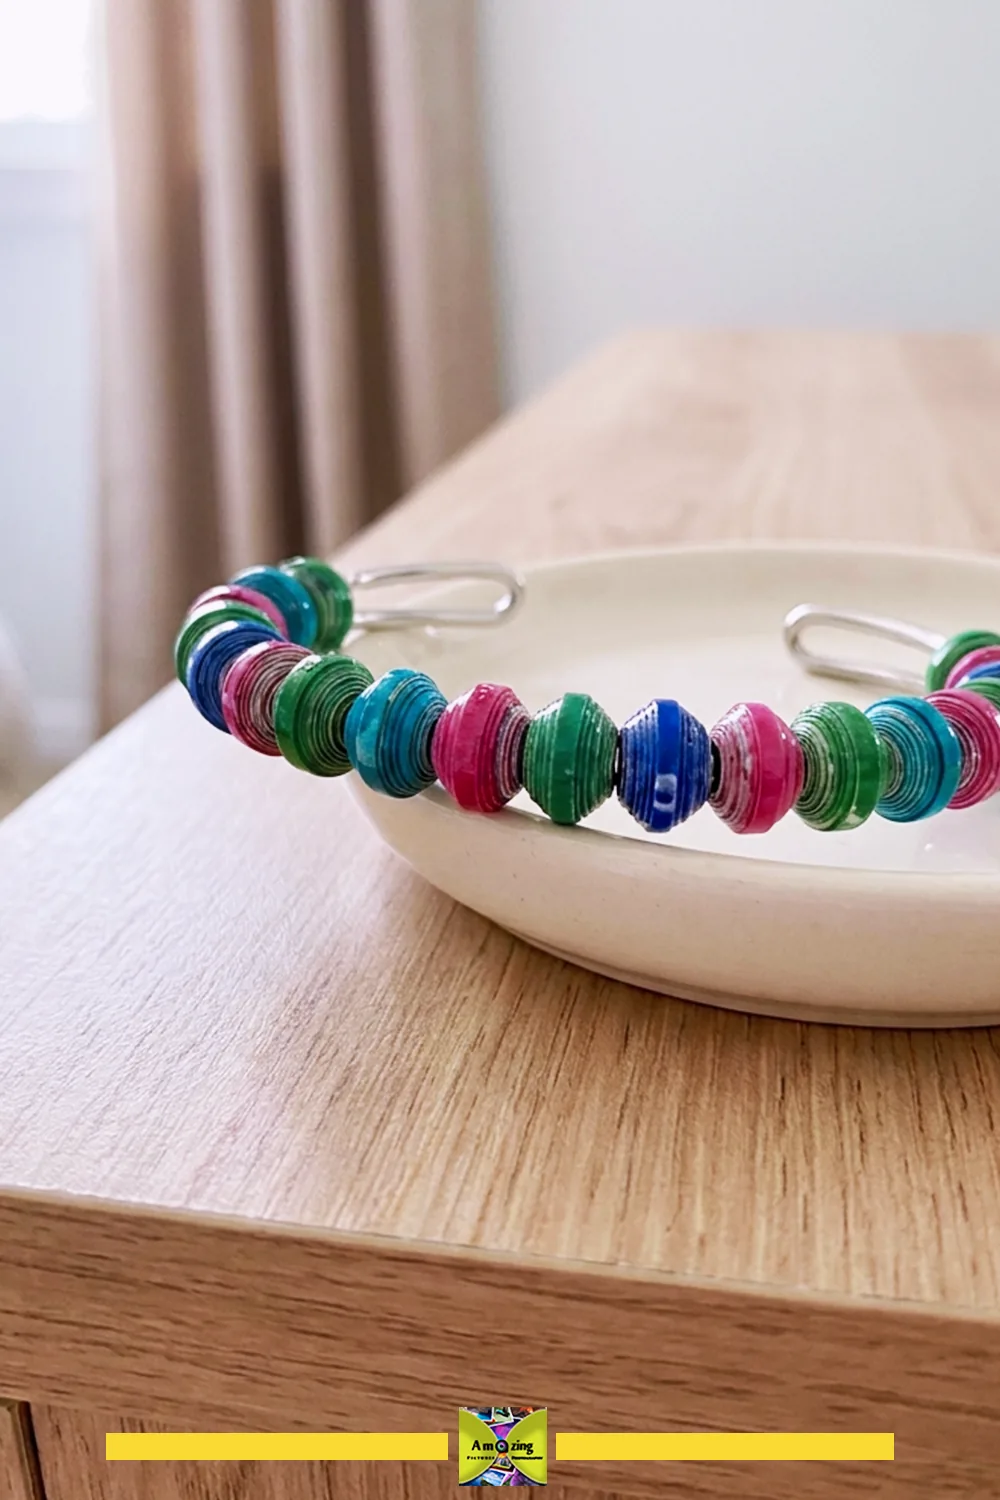
What it looks like: A bracelet of sealed paper beads mounted on a purchased or reclaimed bracelet foundation.
Best use: Light wear as an accent bracelet. Wear it with care and keep it dry.
Difficulty: Moderate.
Approximate time: 2–4 hours, plus sealing.
Materials: Magazine pages, a bracelet foundation, paper adhesive, a clear sealant.
Tools: Ruler, knife, skewer or dowel, brush, a drying rack or pins.
Steps:
- Cut long tapered strips and roll each from the wide end around a skewer.
- Glue the pointed end and slide the bead off to dry.
- Apply two or three thin coats of clear sealant, drying between coats.
- String the beads onto the foundation and secure the ends.
- Check that no bead surface feels rough or transfers color.
Customization: Mix bead widths, use a gradient of page colors, or alternate paper beads with plain spacer beads.
Practical tip: Seal each bead fully, because an unsealed edge can transfer ink or soften in humid weather.
Common mistake: Rolling beads so loosely that they flatten or loosen on the foundation.
Safety note: Keep the cuff away from water and lotions, and check it before wear if the paper shows signs of wear.
17. Paper-Bead Zipper-Pull Set
What it looks like: Small sealed paper beads threaded onto zipper pulls, joined so the paper does not carry a load.
Best use: Marking zippers on ordinary pouches and cases.
Difficulty: Easy.
Approximate time: 30–60 minutes for a set.
Materials: Magazine pages, paper adhesive, a clear sealant, small split rings or cord.
Tools: Ruler, knife, skewer, brush, pliers for the ring.
Steps:
- Cut narrow tapered strips and roll them into small beads.
- Seal each bead with thin coats and dry fully.
- Thread a bead onto a split ring or a short cord loop.
- Attach the ring or loop to the zipper pull.
- Tug gently to confirm the metal ring, not the bead, takes the pull.
Customization: Use a different color per pouch, or a single bead as a minimal marker.
Practical tip: Make the mechanical connection through a metal ring, so the paper bead never bears the pulling force.
Common mistake: Threading the bead directly through the zipper tab, where repeated pulls tear the paper.
Safety note: Keep the beads small and sealed, and keep a worn bead off a pouch a child might chew.
18. Seed-Sharing Packet Sleeves
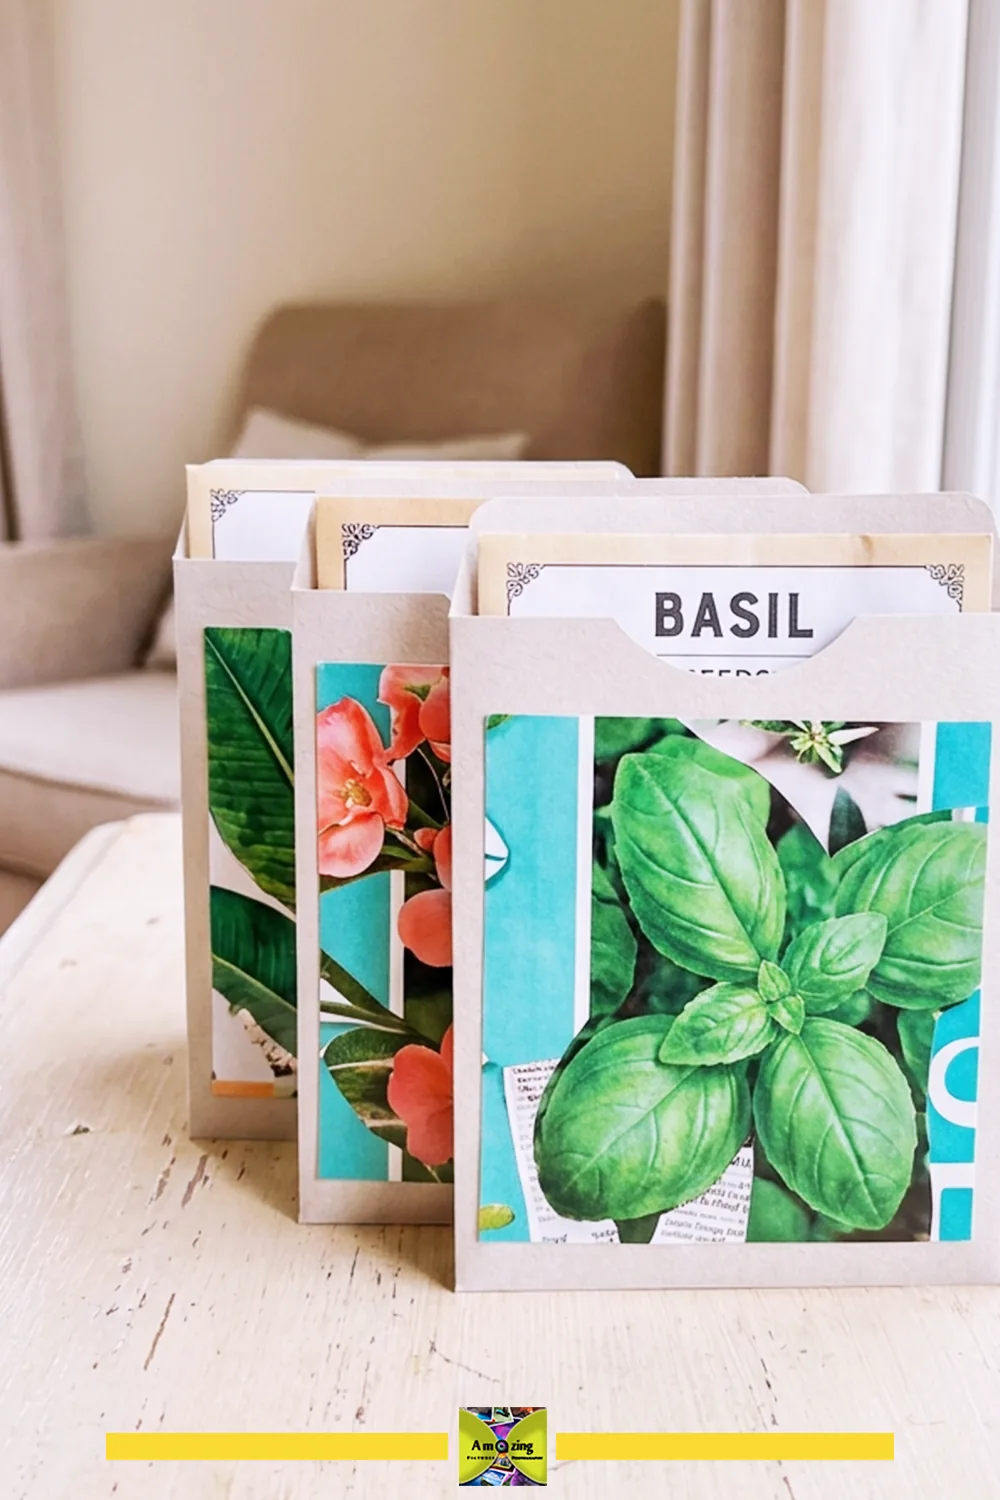
What it looks like: A folded paper sleeve that holds a commercially packaged seed packet, leaving the original label visible.
Best use: Sharing or gifting a store-bought seed packet in a decorative sleeve. No germination or storage claim applies.
Difficulty: Easy.
Approximate time: 20–30 minutes per sleeve.
Materials: Magazine pages or covers, paper adhesive or double-sided tape.
Tools: Ruler, bone folder, knife or scissors.
Steps:
- Measure the seed packet and cut a sleeve with a small margin.
- Score and fold the sleeve around the packet.
- Glue or tape the side edges, leaving the top open.
- Slide the original labeled packet inside so the name and planting details stay readable.
- Add a small note on the outside if the sleeve obscures any instructions.
Customization: Use garden photography or typography pages, or match the sleeve to the crop color.
Practical tip: Keep the original packet intact, because the printed instructions and variety name are the point.
Common mistake: Sealing the packet inside where the label cannot be read without opening the sleeve.
Safety note: Keep seeds in their original sealed packet, and do not claim the sleeve improves germination or storage.
19. Folded Place-Card and Menu-Holder Set
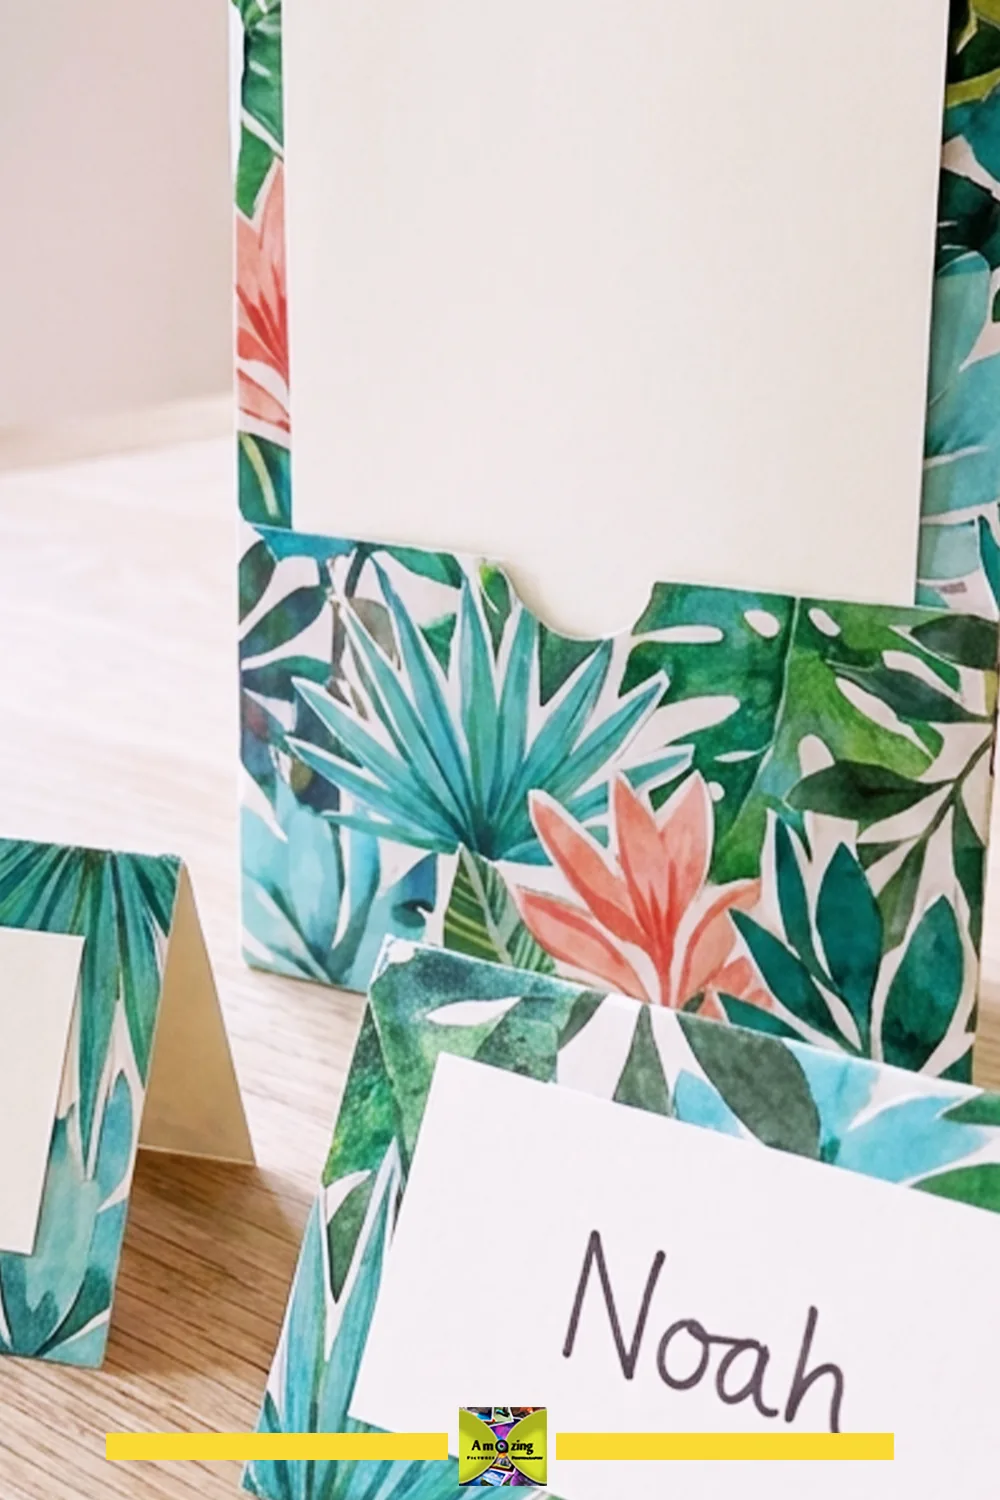
What it looks like: A set of folded place cards and matching menu holders for a dry tabletop.
Best use: Naming seats and holding menus at a dry table, placed away from food, candles, and liquids.
Difficulty: Easy.
Approximate time: 30–60 minutes for a set.
Materials: Magazine pages or covers, cardstock or board, paper adhesive.
Tools: Ruler, bone folder, knife, cutting mat.
Steps:
- Cut cardstock into place-card tents and menu-holder backings.
- Score and fold each tent along the center with the grain.
- Glue a magazine motif to the front face of each card.
- Form a small pocket on each menu holder and slide the menu in.
- Keep the pieces on a dry section of the table.
Customization: Use a single motif repeated across the set, or a color per table for easy seating.
Practical tip: Write names after gluing, so the printed imagery does not crowd the handwriting.
Common mistake: Placing the paper pieces near water glasses or candles, where they stain or scorch.
Safety note: Position the cards and holders away from flames, hot dishes, and spills.
20. Removable Decorative Drawer-Lining Panels
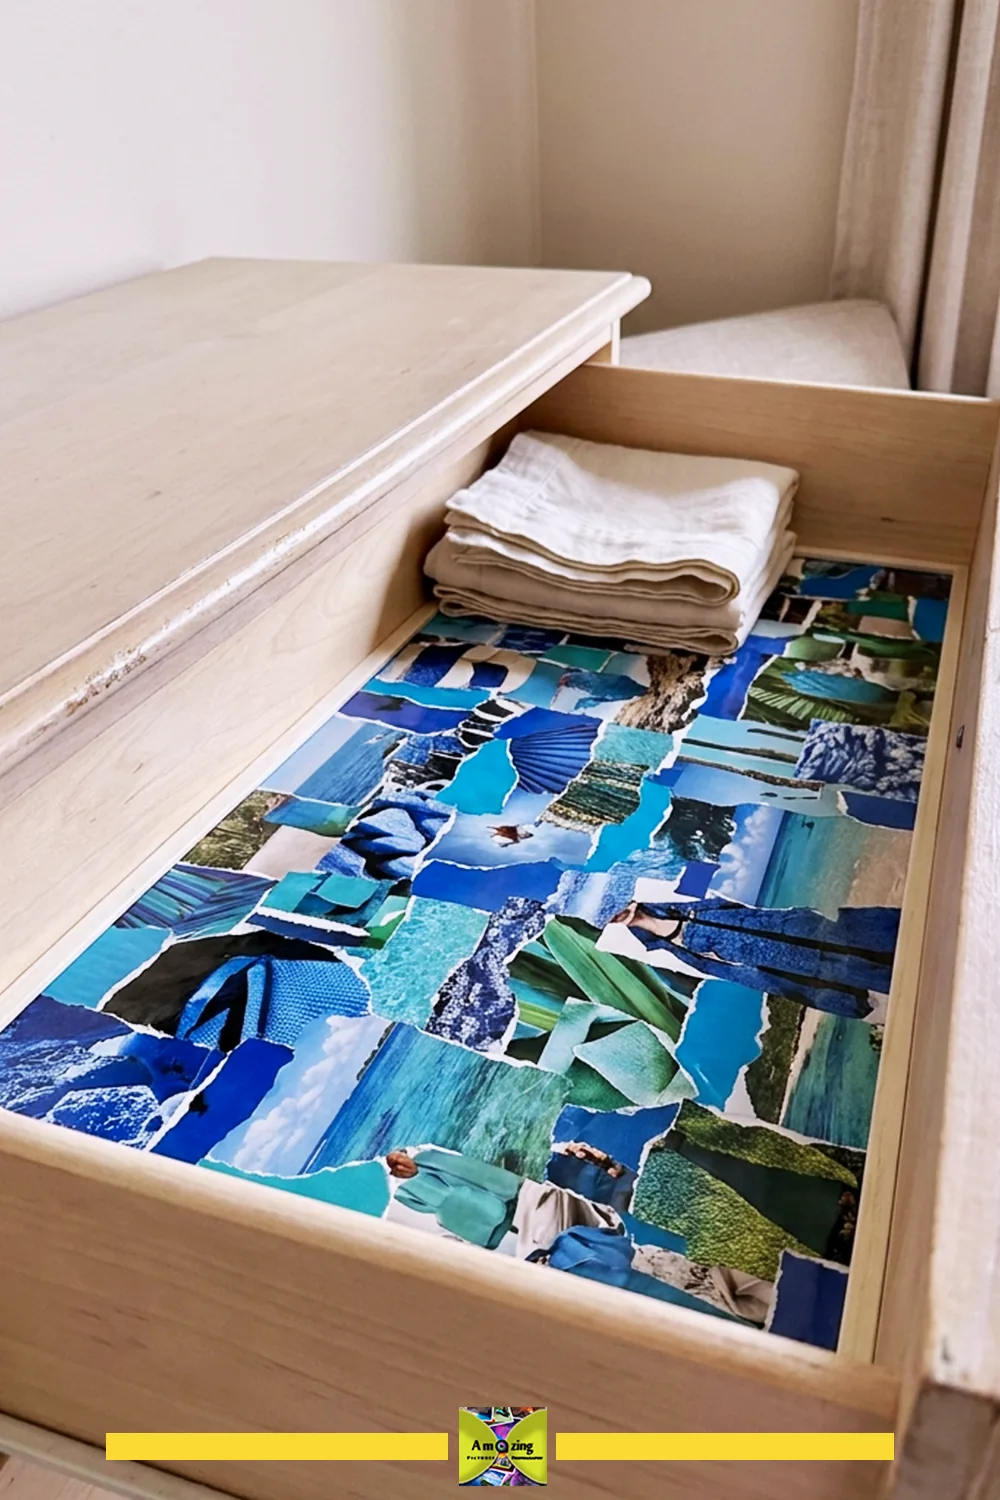
What it looks like: Flat panels of magazine collage mounted to card backing, cut to fit a drawer and left unglued.
Best use: Lining a drawer with a removable panel that does not touch the furniture.
Difficulty: Easy.
Approximate time: 30–60 minutes per drawer.
Materials: Magazine pages, card backing, paper adhesive or spray adhesive.
Tools: Ruler, knife, cutting mat, brayer or cloth.
Steps:
- Measure the drawer base and cut card backing slightly smaller.
- Collage the pages onto the backing, leaving a clean border.
- Press the panel flat under weight until it dries.
- Set the panel in the drawer without gluing it down.
- Lift it out to clean or replace it.
Customization: Use one color family per drawer, or line a set of drawers with a matching sequence.
Practical tip: Back every panel with card, because an unbacked page panel curls at the edges.
Common mistake: Gluing the panel permanently to the drawer, which leaves residue when you want a change.
Safety note: Keep the panel removable and dry, and avoid placing damp objects on it.
21. Layered Tabletop Shadow Scene
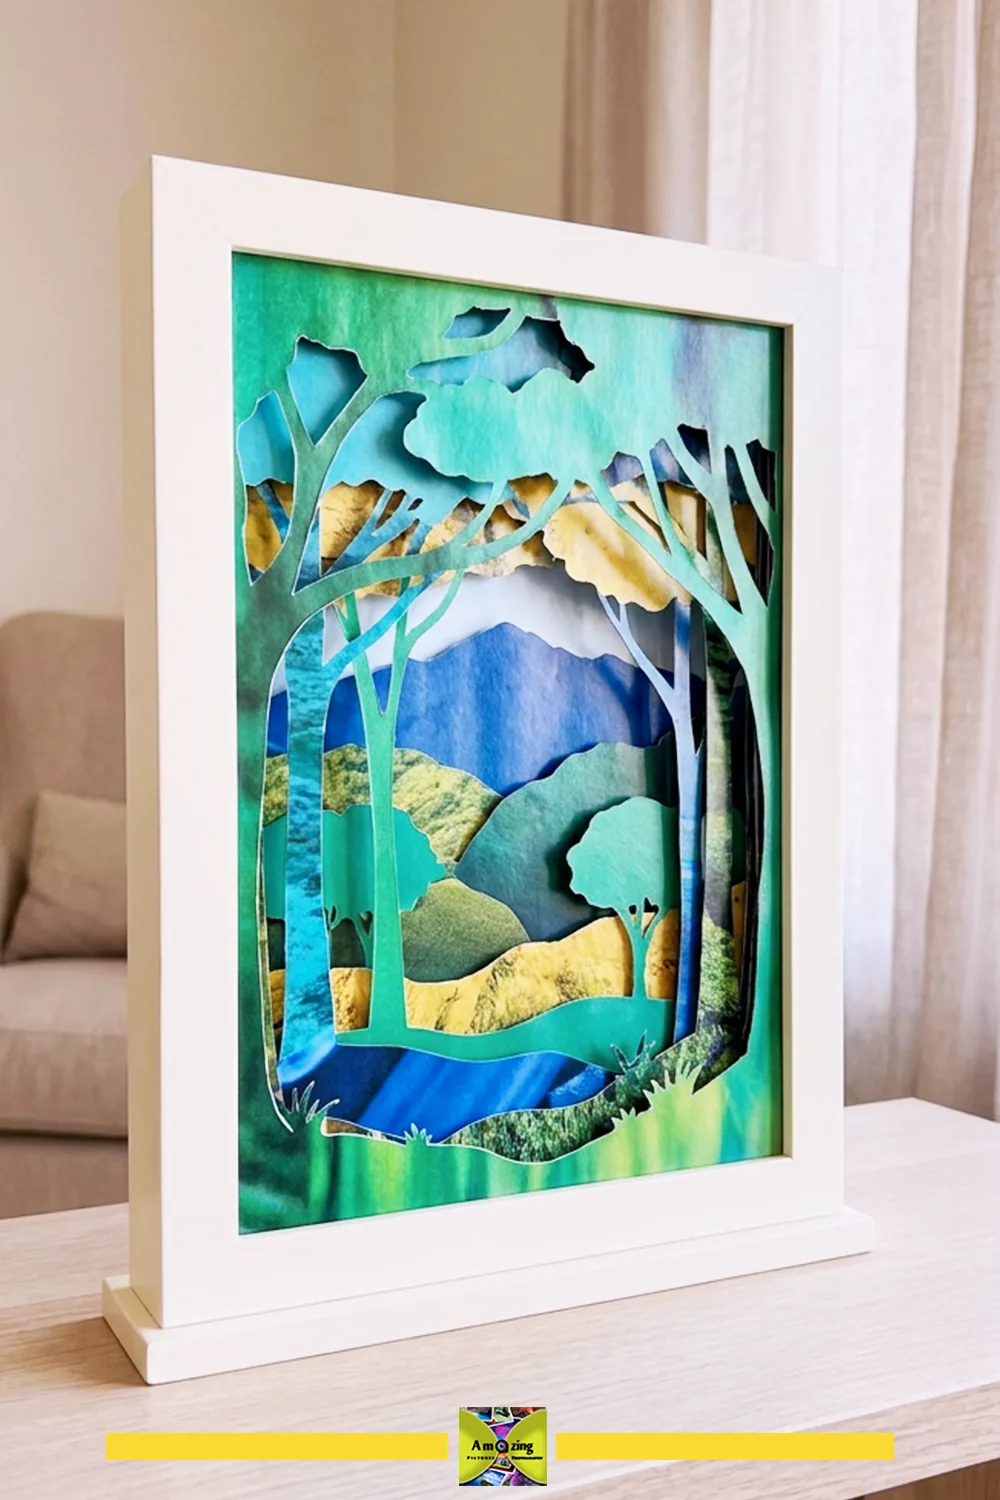
What it looks like: A framed scene of cut paper silhouettes separated by spacers, enclosed and freestanding, with no lighting.
Best use: A decorative tabletop scene that reads in layers. No electrical or lighting part is included.
Difficulty: Advanced.
Approximate time: 3–5 hours.
Materials: Magazine pages or covers, board for the frame and layers, spacers, paper adhesive.
Tools: Ruler, craft knife, cutting mat, glue, weights.
Steps:
- Draw a scene and cut each silhouette as a separate layer.
- Cut a backing, a frame, and small spacers of even thickness.
- Stack the layers with a spacer between each so the scene reads in depth.
- Enclose the stack behind the frame and let the adhesive set.
- Stand the finished scene upright on its base.
Customization: Use one silhouette color against a plain background, or a tonal gradient across the layers.
Practical tip: Keep each spacer the same thickness, because uneven spacers make the layers tilt.
Common mistake: Cutting fine details too thin, so the silhouettes tear while they are handled.
Safety note: Cut each layer on a mat with the knife path away from your body, and leave lighting out of the design.
Troubleshooting Common Problems
You think an issue may be collectible or important. Set it aside and have it assessed before you cut.
Private information shows in your layout. Remove or cover the label or photo before gluing, or choose a different page.
A page has an uncertain coating or a hidden insert. Separate it and test on a scrap, or reject it if you cannot identify the material.
A magazine shows mold, pests, dampness, smoke, chemicals, fragrance, or an odor. Reject it. Do not try to clean it with sprays or sealants.
Glossy pages refuse to bond. Switch to a decoupage medium made for nonporous surfaces or an acid-free spray adhesive, and test first.
Wet adhesive ripples the page or smears the ink. Use less adhesive, a drier method, or a thinner coat and dry under weight.
Coated stock cracks at a fold. Score the fold with the grain and fold into the score, or use a lighter page.
Thin strips tear during weaving. Fold each strip in half lengthwise for strength, or use a slightly heavier page.
Rolled tubes loosen or flatten unevenly. Roll tightly, glue the end fully, and let each strip set before you add the next.
A coil becomes oval or domed. Keep the strip width and tension consistent and dry each stage before shaping.
Modular folded pieces fail to align. Cut every unit from one template and score every fold the same way.
Papier-mâché stays damp inside. Dry in a ventilated space and wait for full drying before removing the form.
A rigid backing warps while drying. Use a drier adhesive, press flat under weight, and let it dry slowly.
A bracelet surface feels rough or transfers color. Add a thin seal coat and dry fully before wear.
A box corner opens under light use. Reinforce the corner with an inner tab and double the wall panels.
Drawer-lining panels curl. Back every panel with card and store it flat when it is not in the drawer.
Boot inserts collapse or transfer ink. Roll the paper firmer and keep the fabric sleeve fully closed.
Mixed imagery looks chaotic. Cut back to two to five colors, one focal point, and repeated spacing.
A finished piece is rejected by local recycling. A glued, coated, reinforced, or mixed-material project may not be accepted. Check with your local recycling authority before you put it in the bin.
Care, Storage, and Disposal of Finished Projects
Keep finished paper pieces dry and away from heat, sunlight, and moisture. Store flat pieces under light weight, and keep three-dimensional pieces on a stable surface where they cannot tip. Clean with a dry, soft cloth only. Retire a piece when the paper cracks, lifts, transfers color, or shows mold, and do not repair contaminated paper.
For disposal, follow your local recycling rules. Clean, dry magazines are widely accepted in mixed paper programs, and the clay coating on most glossy pages washes off during pulping. Remove plastic sleeves, promotional inserts, magnets, samples, and other nonpaper items first. A project that has been glued, laminated, painted, or combined with nonpaper parts may no longer be accepted. Check with your local authority rather than assuming.
If a magazine is clean and still readable, donating it is often better than cutting it. Confirm the receiving organization’s current policy before you deliver.
How to Choose a Project
Start with the page type you have. Use thin uncoated pages for folding, weaving, and papier-mâché. Use coated or glossy pages for collage, beads, envelopes, and coils where the finish adds color. Reserve heavy covers for boxes, book jackets, and bases. Match the project to the quantity of pages you have, the technique you want to practice, the intended use, and your patience for drying time.
If you want a fast, low-supply project, begin with the surface liners, place cards, zipper pulls, or boot inserts. If you want a larger paper-engineering piece, move to the woven mat, coiled bowl, or geometric sculpture. If a project depends on a technique you have not tested, run one small sample before you commit.
For a different material-specific reuse collection, see plastic bottle cap crafts, which applies the same prepare, test, build, and safety approach to a different household material.
Frequently Asked Questions
You can fold envelopes, weave mats, roll beads and bowls, build papier-mâché vessels, collage book jackets and backdrops, and make small gift and desk pieces. Choose a project that fits your page type and the supplies you already have.
Most are not. A few early or notable issues in good condition, such as early National Geographic issues with their original maps, can have resale value. Check the date, cover, condition, and completeness, and have a questionable issue assessed before you cut it.
Remove private information, reject contaminated or damaged pages, separate the page types, and test ink, folding, cutting, rolling, and adhesive on a scrap. Sort accepted pages flat, clean, and dry before you start.
A decoupage medium made for nonporous surfaces, an acid-free spray adhesive, or a slow-setting archival paste usually bonds coated pages better than standard white glue, which needs a porous surface. Test on a scrap first.
Score the fold first, fold with the paper grain, and fold into the score line. Dry paper and coated stock crack more easily, so test a scrap and use a lighter page if the coating still splits.
Yes. Torn strips work well in layers over a removable form. Let each stage dry completely and keep the finished piece for dry use only.
In many programs, yes. The clay coating on most glossy pages washes off during pulping. Remove plastic sleeves, inserts, magnets, and samples, and confirm with your local recycling authority, because a glued or mixed-material project may not be accepted.
Set them aside and treat them as contaminated. A musty smell often signals mold. If you handle badly affected material, wear disposable gloves and a respirator rated for mold, keep the items cool and dry and separate, and consult a paper conservator before any treatment.
Posted by: Med Houssem · In: Cardboard Crafts, DIY, HOW TO