Wondering what to do with old bed sheets? A clean, retired sheet is one of the most useful large fabric panels in your home — but only when its remaining strength matches the project. The center of a fitted sheet can be far more worn than its edges, and a soft sheet that works as a garment cover may be too weak for a loaded hanging organizer.
This guide walks you through the whole decision first: whether a sheet should stay in bedding service, be repaired, donated, repurposed, sent to a textile-recovery program, or discarded. Then it covers inspection, cleaning, fiber and weave identification, fitted-sheet deconstruction, measuring and cutting, tested seams and reinforcement, and 15 fully reproducible projects you can sew from clean retired sheets.
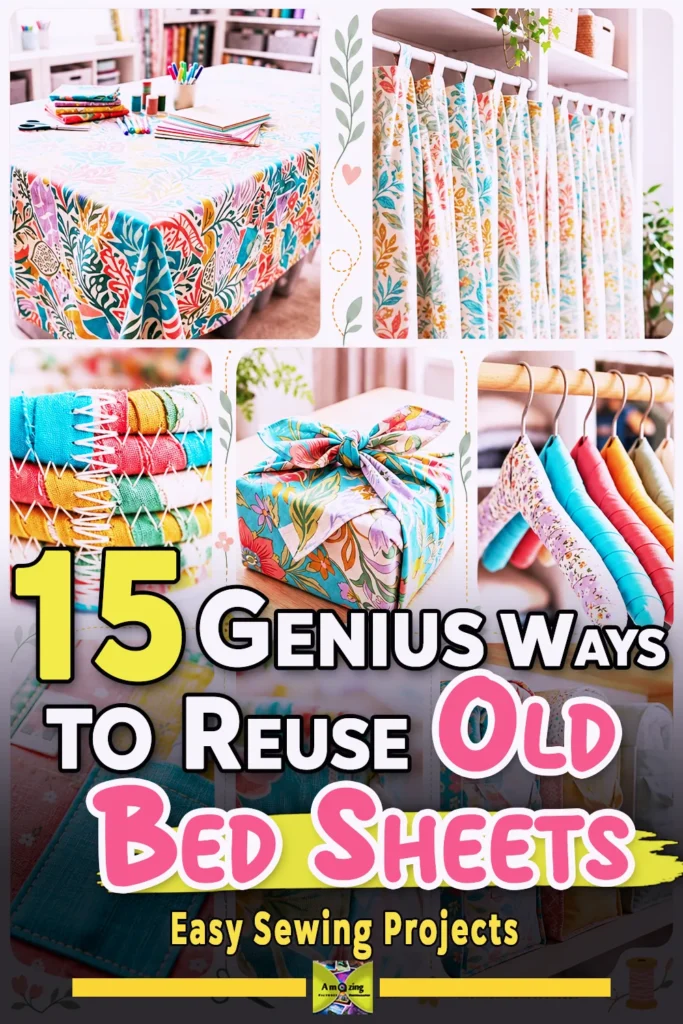
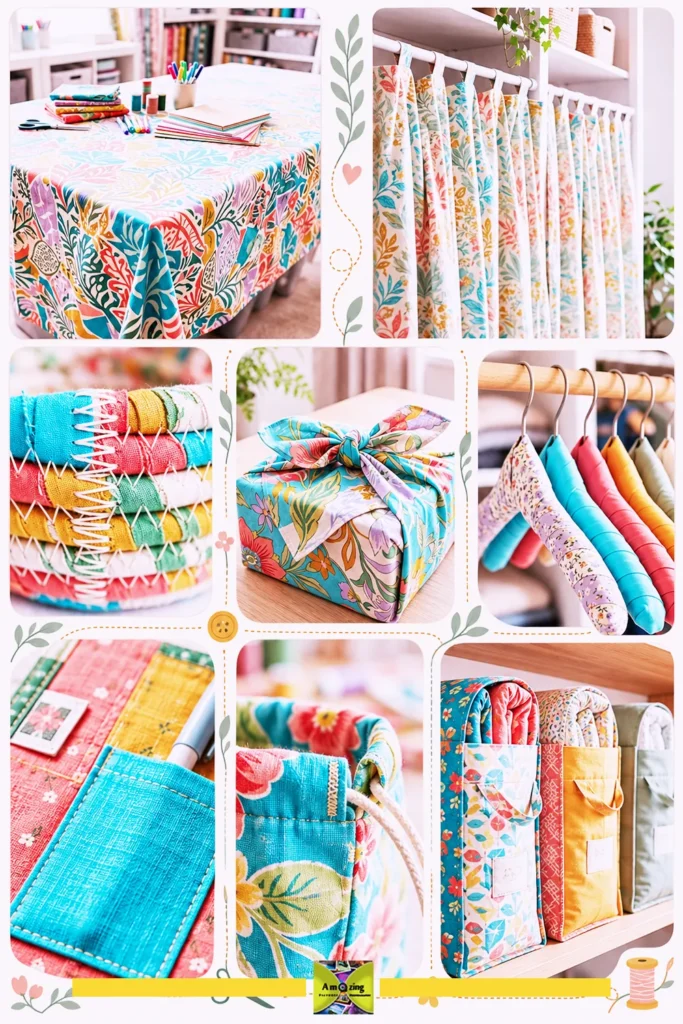
What to Do With Old Bed Sheets: 15 Projects at a Glance
- Closet and textile storage: zippered under-bed linen case, coordinated drawstring shoe bags, breathable garment dust cover, fold-flat storage sacks.
- Sewing and craft organization: lined storage-bin insert, hanging craft-supply pocket panel, bedside organizer, roll-up pattern organizer, home-sewing project mat, fabric-wrapped hangers.
- Reusable gifts: square fabric gift wraps, structured gift bag, coiled fabric-strip desk basket.
- Light-duty household helpers: removable shelf dust curtain, washable craft-table cover.
First, Decide Whether the Sheet Should Stay a Sheet
Before you cut anything, ask whether the sheet still has more value whole. A sound sheet may serve better in bedding service, as a spare for guests, or as a moving or decorating drop cover than as a project. Cutting a usable sheet into scraps is only a good trade when you genuinely need the finished item.
When to keep, repair, or reserve a sheet
- Keep in bedding service: no tears, no failing elastic, no strong odor, and it still fits and feels good.
- Repair for continued use: a small seam opening, a loose hem, or elastic that can be safely replaced while the rest is sound.
- Reserve intact: moving pads, furniture dust covers, decorating drop cloths, or a spare guest sheet.
- Donate: only when clean, dry, and confirmed accepted by the receiving organization.
- Repurpose: when damage or wear means it no longer works as bedding, but large sound areas remain.
A simple decision framework
- Keep in bedding service.
- Repair for continued household use.
- Reserve intact for decorating, moving, or temporary dust protection.
- Donate only when clean and accepted by the receiving organization.
- Use sound areas in a practical project.
- Keep matching offcuts for construction and care tests.
- Offer usable fabric to another maker.
- Use an available textile-recovery program after confirming its rules.
- Dispose of contaminated or degraded material according to local guidance.
Know Your Sheet: Fiber, Weave, and What It Means for Sewing
A sheet is not one material. How it cuts, feeds, frays, stretches, presses, and launders depends on its fiber and construction — and appearance and softness alone cannot tell you what it is. Check the fiber-content label first; under the U.S. Textile Fiber Products Identification Act, bedding must carry a label naming generic fiber names and percentages. A label is a strong clue, not a guarantee, especially on older or thrifted sheets.
- Cotton percale: a plain, one-over-one weave; crisp, matte, breathable, and generally easy to sew. It frays at cut edges, so it needs a finished seam.
- Cotton sateen: a satin weave with more surface sheen and a slightly heavier drape. It can snag more easily and may be slippery under the presser foot.
- Linen: strong but loosely woven; it frays and creases readily and may need gentler pressing.
- Polyester microfiber: tightly woven, light, and often wrinkle-resistant. It is not automatically absorbent and can melt or glaze under a too-hot iron.
- Poly-cotton blends: behave between the two fibers; check the label because a blend may press and shrink differently from pure cotton.
- Flannel: a brushed, napped surface that is warm and thicker. It can pill, shed, stretch, and build bulky seams.
- Jersey knit: a stretchy T-shirt-like knit that curls at cut edges and needs knit-specific needles, stitches, and seam finishes. It behaves very differently from woven sheets — the same way our old sweater crafts guide treats sweater knits differently from woven panels.
- Rayon-derived fibers: can lose strength when wet and may shift or distort; confirm fiber content before assuming they behave like cotton.
What thread count does and does not tell you
Thread count describes how many threads are woven into a square inch — it says nothing reliable about remaining strength, absorbency, breathability, or whether a worn sheet will hold a seam. A high thread count can still have a thin, worn center. Judge a sheet by how the fabric actually feels, stretches, frays, and tears in your own tests, not by the number on the label.
Clean, Inspect, and Sort Before You Cut
Start with sheets retired from your own household, where you know the use and laundering history. Get permission before altering borrowed, inherited, institutional, theatrical, school, rental, hotel, shelter, or family textiles.
Inspection checklist
In bright light, check every sheet for mold, mildew, insects or eggs, pest residue, bodily-fluid stains, chemical residue, smoke, grease, cosmetics, bleach damage, unstable dye, strong or persistent odor, pilling, thinning, worn centers, weak folds, tears, and failing seams. Distinguish a flat sheet from a fitted sheet, pillowcase, duvet cover, mattress protector, waterproof layer, blanket, quilt, or padded bedding — padded, waterproof-backed, electrically heated, medical, pest-exposed, or chemically treated items do not belong in this guide.
Reject contaminated, moldy, pest-exposed, flooded, chemically exposed, or severely degraded material instead of covering it or trying to fragrance it away. Laundering does not automatically make a contaminated textile appropriate for crafting — some stains and residues can transfer, weaken fabric, or pose a health risk.
Laundering, drying, and testing
Follow the sheet’s care label rather than assuming a universal wash. Dry every suitable sheet completely before folding, cutting, or storing. Where the care label allows, test color transfer and shrinkage on an expendable offcut before committing to a project.
Sorting and storing usable fabric
Sort by documented fiber, weave or knit, weight, stretch, opacity, hand, color, pattern, dimensions, care needs, and condition. Separate sound hems and elastic channels from worn center fabric. Store clean fabric folded or rolled in a dry, ventilated place away from pests, direct sunlight, chemicals, children, and pets — and keep only material that matches a realistic planned use.
How to Deconstruct a Fitted Sheet Safely
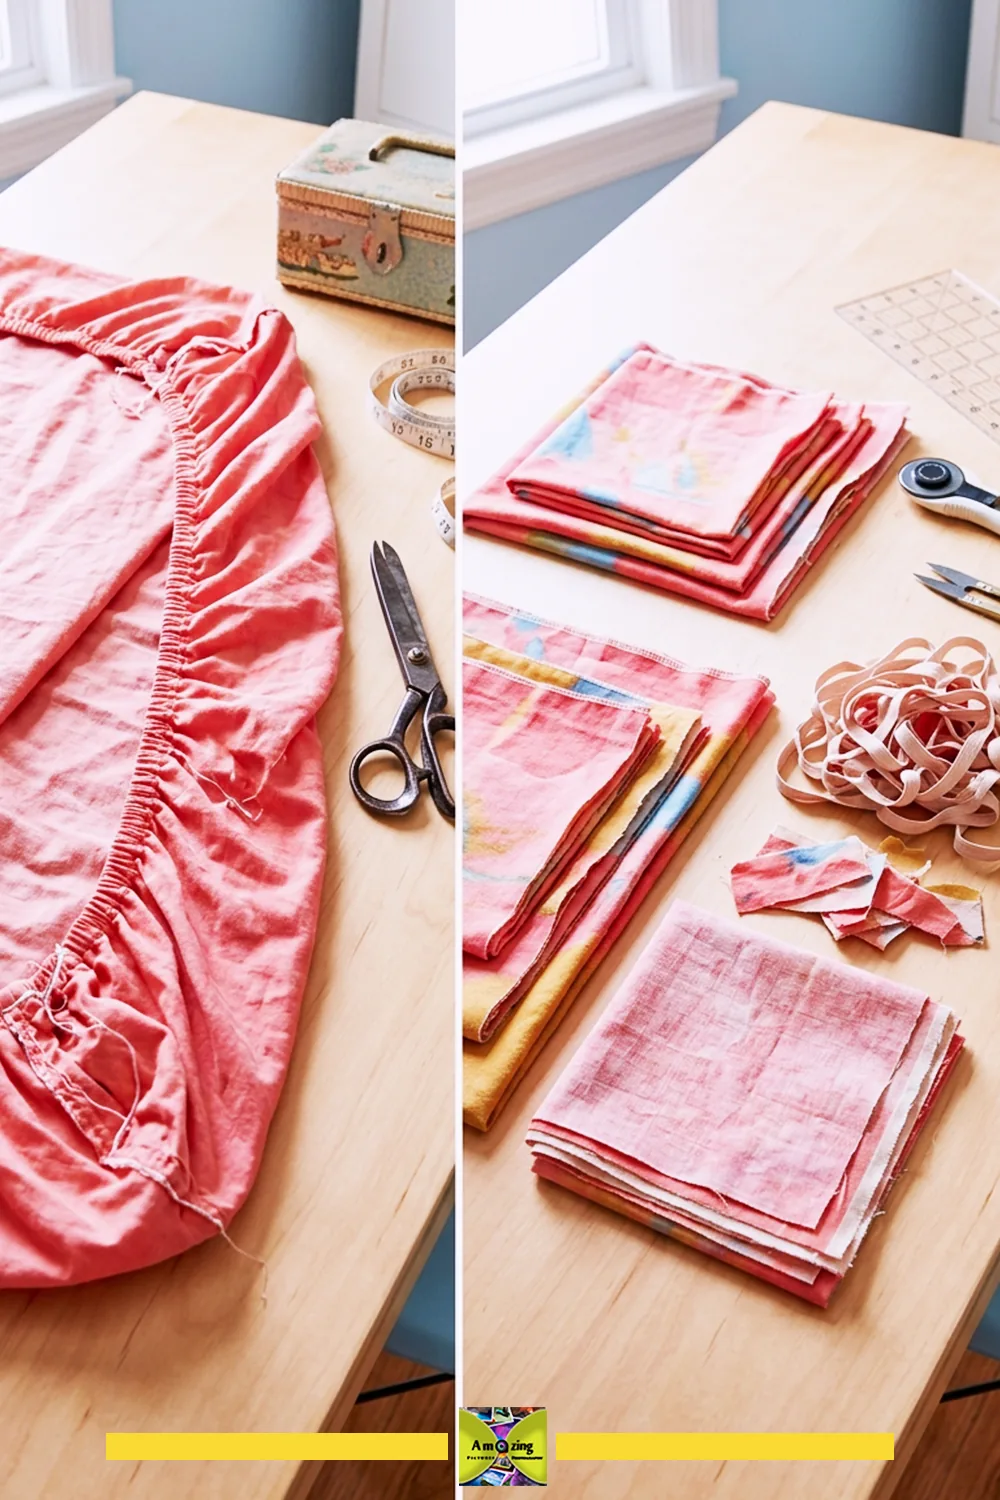
Fitted sheets concentrate wear at the corners and elastic channels, while the center often wears thin from body contact. Before cutting, photograph and measure the fitted sheet, then mark every damaged and weak area on a large, clear work surface.
- Identify whether the elastic is sewn directly to the edge or threaded inside a casing.
- Remove elastic with a seam ripper only when the stitch path is visible, keeping the point directed away from your supporting hand.
- Cut off a damaged elasticized edge only when that preserves more sound fabric than unpicking it.
- Open corner seams carefully; let stretched fabric relax before final measurement.
- Square usable panels without wasting large sound sections.
- Save only elastic that is clean, undamaged, documented, and genuinely resilient — then test it before any low-risk use. Discard brittle, cracked, permanently stretched, or unidentified elastic.
- Label each panel by source and fiber information.
Measuring, Pattern Planning, and Efficient Cutting
Launder and dry suitable fabric before final measurement when its care label supports it. Measure the entire sheet and each sound zone, then establish the lengthwise and crosswise grain on woven fabric — and the greatest stretch direction on knits. Make full-size paper patterns and add seam, hem, casing, closure, and turn-of-cloth allowances based on the actual fabric and project.
- Arrange major pattern pieces before small components.
- Keep loaded panels away from worn sheet centers.
- Use existing sound hems only when they genuinely improve the project.
- Match stripes, checks, floral direction, and repeated motifs; mirror placement on paired bags and hanger covers.
- Use deliberate color blocking when exact matching is impossible.
- Photograph the complete layout before cutting.
- Mark the less visible side with a tested removable tool.
- Use sharp fabric shears for controlled cuts; use a rotary cutter only on a suitable mat with a stable ruler and a safe hand position.
- Cut away from the body, keeping your supporting hand outside the blade path, and cut one manageable layer at a time when fabric shifts or stretches.
Sewing Old Sheet Fabric: Needles, Stitches, and Stabilizers
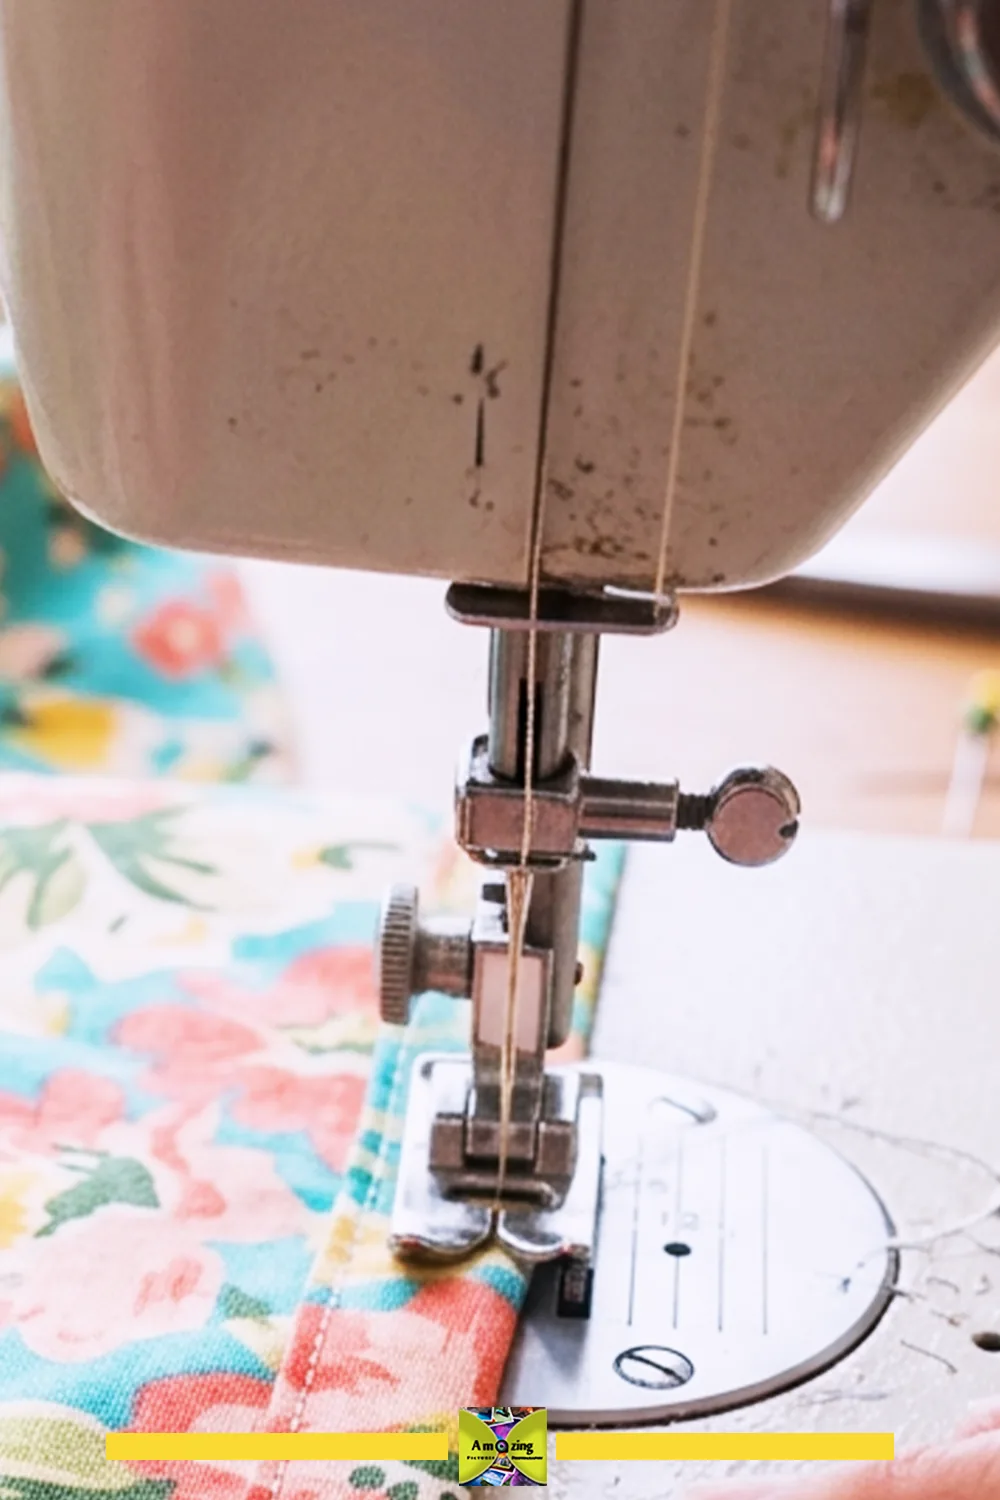
There is no single needle, thread, or setting for every sheet. Match them to the documented fiber, weave or knit, weight, stabilizer, lining, and layer count, then test a complete layered seam on a matching offcut before sewing the real project.
- Use a fine needle (roughly size 65–75, or 80) and short stitches for lightweight woven sheets; use a ballpoint or stretch needle and a stretch stitch for jersey knits.
- Replace bent, blunt, or damaged needles before they cause skipped stitches or snags.
- Choose thread for the fiber, seam function, laundering, and machine guidance; use the same weight in the bobbin unless the manual says otherwise.
- Adjust stitch length, tension, and presser-foot pressure only according to the machine manual and sample results — loosening the upper tension for fine or stretchy fabrics.
- Use an even-feed or walking foot when long layers feed unevenly.
- Stay-stitch or stabilize edges that stretch during construction; grade seam allowances where strength permits.
- Never pull fabric from behind the presser foot, never force a stalled machine, and keep fingers away from the needle.
- Switch equipment off before changing a needle, foot, bobbin, or setup, as directed by its manual.
Seam, Edge, and Stabilization Choices
No single finish is universally best. The table below summarizes the main options; test on an offcut because bulk, stiffness, stretch control, laundering, and reversibility all vary with the actual sheet.
| Option | Suits | Best for | Bulk & finish | Limits & testing |
|---|---|---|---|---|
| Existing sheet hem | Sound hems | Ready-made edges, bag tops | None added | Only reuse if clean and strong; test the original stitch |
| Narrow double-fold hem | Woven sheets | Gift wraps, curtains, cover edges | Low, clean | Test fold width on thick or stretchy fabric |
| Single-fold + overcasting | Most wovens | Interior seams | Low | Overcast first, then sew the seam |
| Zigzag / overcast edge | Fraying wovens, knits | Raw-edge control | Low | Use a three-step zigzag on ravelly edges |
| Serged edge | Most fabrics | Fast seam + finish | Low–medium | Requires a serger; test differential feed |
| Bound edge | Woven sheets | Visible, durable edges | Medium | Press bias binding carefully on synthetics |
| French seam | Light woven sheets | Enclosed seams in bags and covers | Low, neat | Avoid on bulky flannel or thick stacks |
| Flat-felled seam | Medium woven sheets | Strong, self-finished seams | Medium | Needs accurate folding; test on stretchy fabric |
| Turned-and-topstitched | Wovens | Clean visible seams | Low–medium | Topstitch width must be even |
| Fully lined | Any sheet | Encloses all raw edges, hides seams | Higher | Match lining weight and care needs |
| Boxed corners | Wovens | Bases of sacks and bags | Adds shape | Test corner depth against contents |
| Folded / darted corners | Wovens | Soft corners, bin liners | Low | Fold direction must suit the shape |
| Reinforced casing | Wovens | Drawcord channels | Low | Stitch across the casing ends to prevent twisting |
| Woven backing | Light sheets | Hanging panels, organizers | Adds stability | Backing, not the sheet, must carry mounting load |
| Sew-in interfacing | Most wovens | Handles, zippers, stiff spots | Adds stiffness | Test wash shrinkage and stiffness |
| Fusible interfacing | Heat-tolerant wovens | Light stabilization | Adds stiffness | Test heat and adhesion first; can bubble or spot on synthetics |
| Removable rigid insert | Any sheet | Stable bases, bin liners | Adds firmness | Enclose edges; remove before washing |
| Zipper | Stabilized openings | Storage cases, covers | Adds weight | Reinforce ends; test a sample zipper on the fabric |
| Buttons + reinforced loops | Wovens | Closures | Low | Make loops from sound fabric, not thin strips |
| Snaps | Reinforced areas | Light closures | Low | Apply through a stabilized patch |
| Hook-and-loop | Most sheets | Removable closures | Medium | Can catch lint and grab fabric |
| Drawcord channel | Wovens | Bags, sacks | Low | Reinforce and finish cord ends |
| Fabric adhesive | Light positioning only | Temporary hold before stitching | Varies | Never rely on glue alone for loaded, washed, or handled seams |
Do not rely on adhesive alone for a loaded, hanging, washable, folded, or frequently handled seam — stitching beats glue almost everywhere that matters.
Handles, Pockets, Closures, and Reinforcement
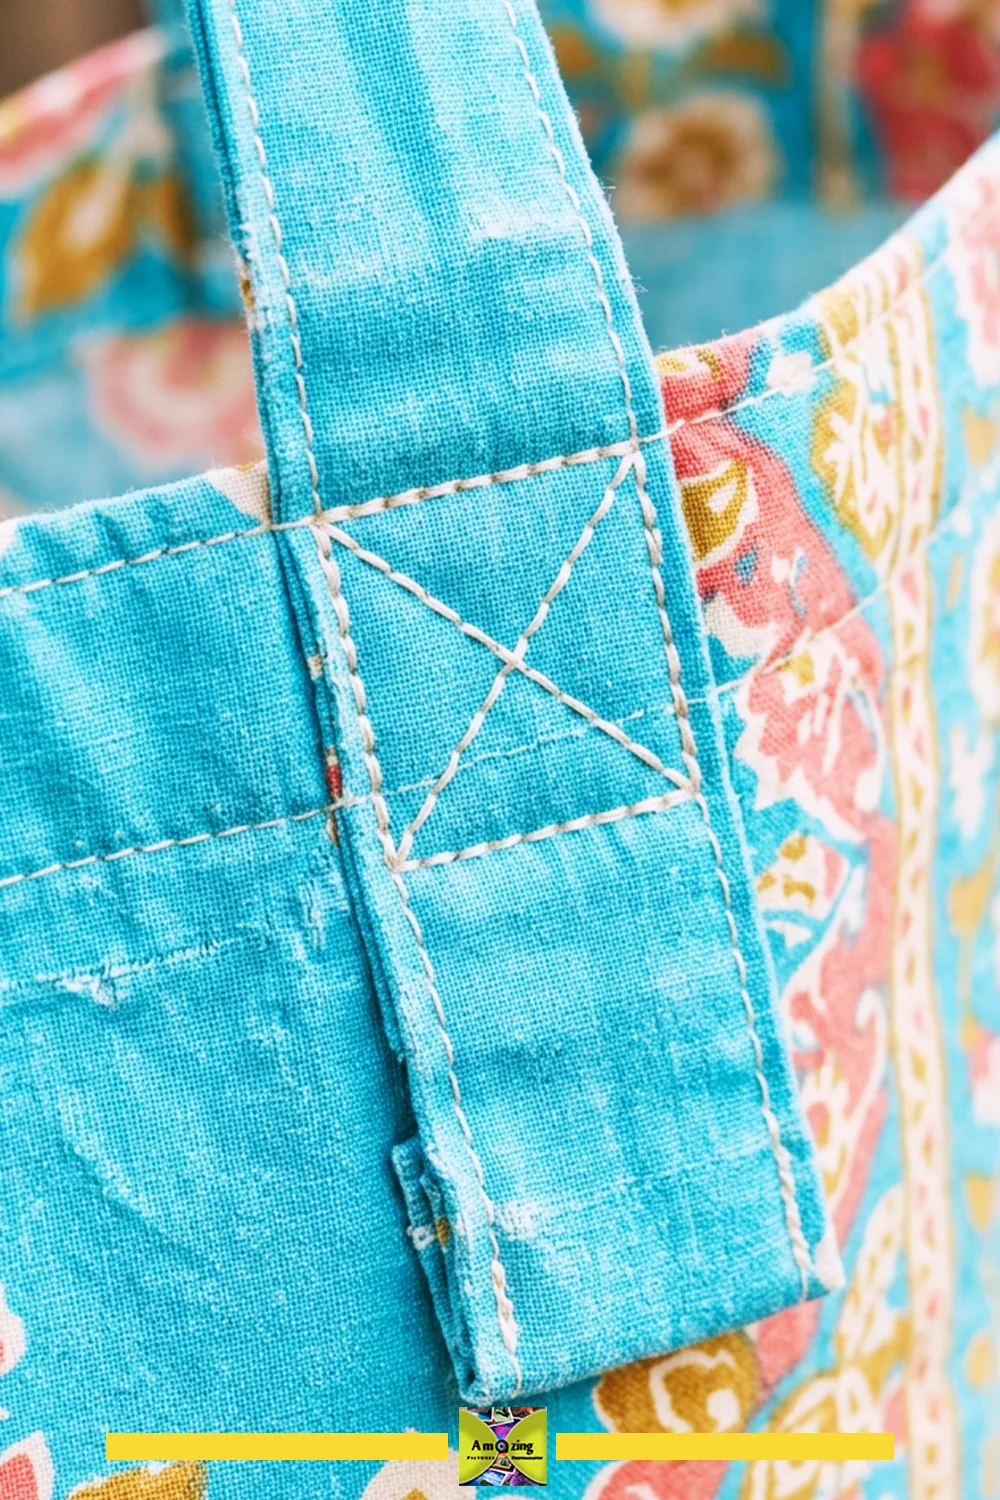
Reinforce handles with sound fabric, suitable tape, or extra structural layers, and extend that reinforcement down into the bag body rather than stitching only at the top edge. Reinforce pocket openings and lower corners, and support hanging panels with a stable backing so the mounting load is carried by the backing, not by worn sheet fabric. Reinforce zipper ends and drawcord channels, enclose raw cord ends, and avoid long accessible loops.
Calculate the completed weight of organizers and their intended contents, and match mounting hardware to the actual wall, door, shelf, or furniture. Use closures that will not tear lightweight fabric, and remove rigid inserts before laundering where intended. Test every bag, pocket, and organizer gradually with lightweight, non-fragile contents, and repair loose stitching before an opening enlarges.
Closet and Textile Storage Projects
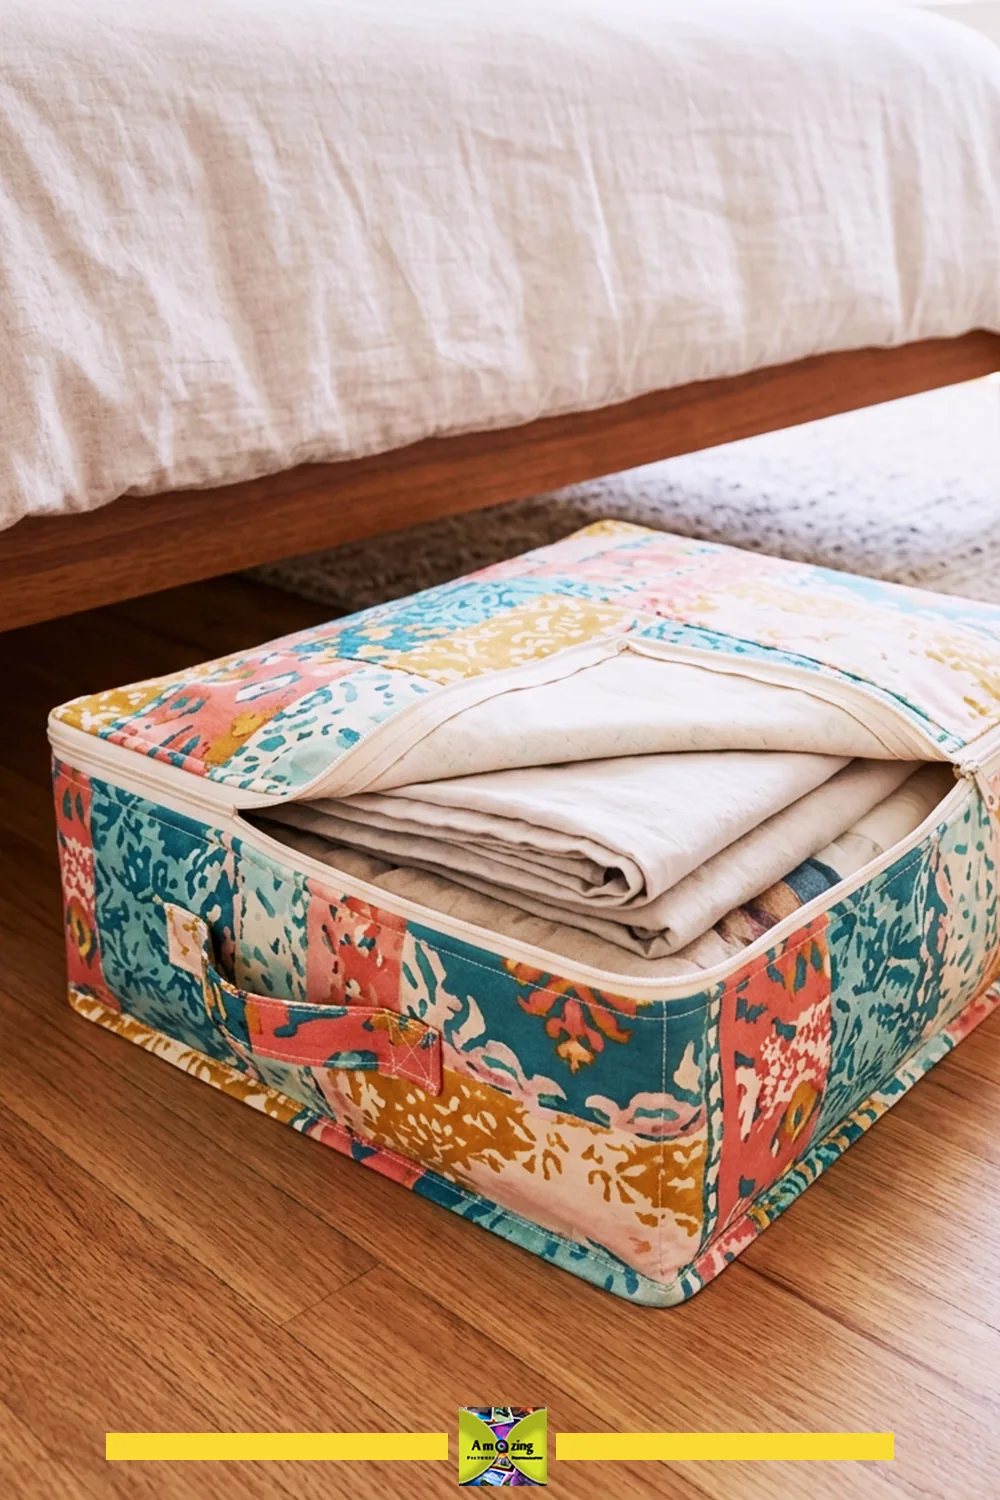
Project 1: Zippered Under-Bed Linen-Storage Case
What it looks like: a shallow rectangular fabric case with a zippered top, a firm base, and neat square corners that slides flat under a bed.
Best use: storing lightweight dry textiles like spare sheets, pillowcases, or off-season throws.
Difficulty: Intermediate. Approximate time: 2–4 hours.
Suitable sheet: sound cotton percale or a poly-cotton blend, medium weight, with no thin center. Avoid: flannel, jersey, microfiber, or any sheet with worn centers — do not substitute without testing.
Materials
- Large sound sheet panel
- A matching zipper
- Lightweight sew-in interfacing for the zipper strip
- A smooth-edged rigid base insert
- Matching thread
Tools
- Sewing machine with a zipper foot
- Fabric shears
- Pins or clips
- Measuring tape
- Iron and press cloth
Steps
- Measure the space and the largest textile you plan to store, then draft a base panel and four side panels on paper with seam allowances.
- Mark and cut the pieces from sound areas, avoiding worn centers and stains.
- Interface the zipper strip and test a sample zipper on an offcut.
- Sew the side panels together at the corners, then attach the base.
- Install the zipper across the top opening, reinforcing both ends.
- Turn, press, and dry-fit the rigid base insert, then enclose its edges.
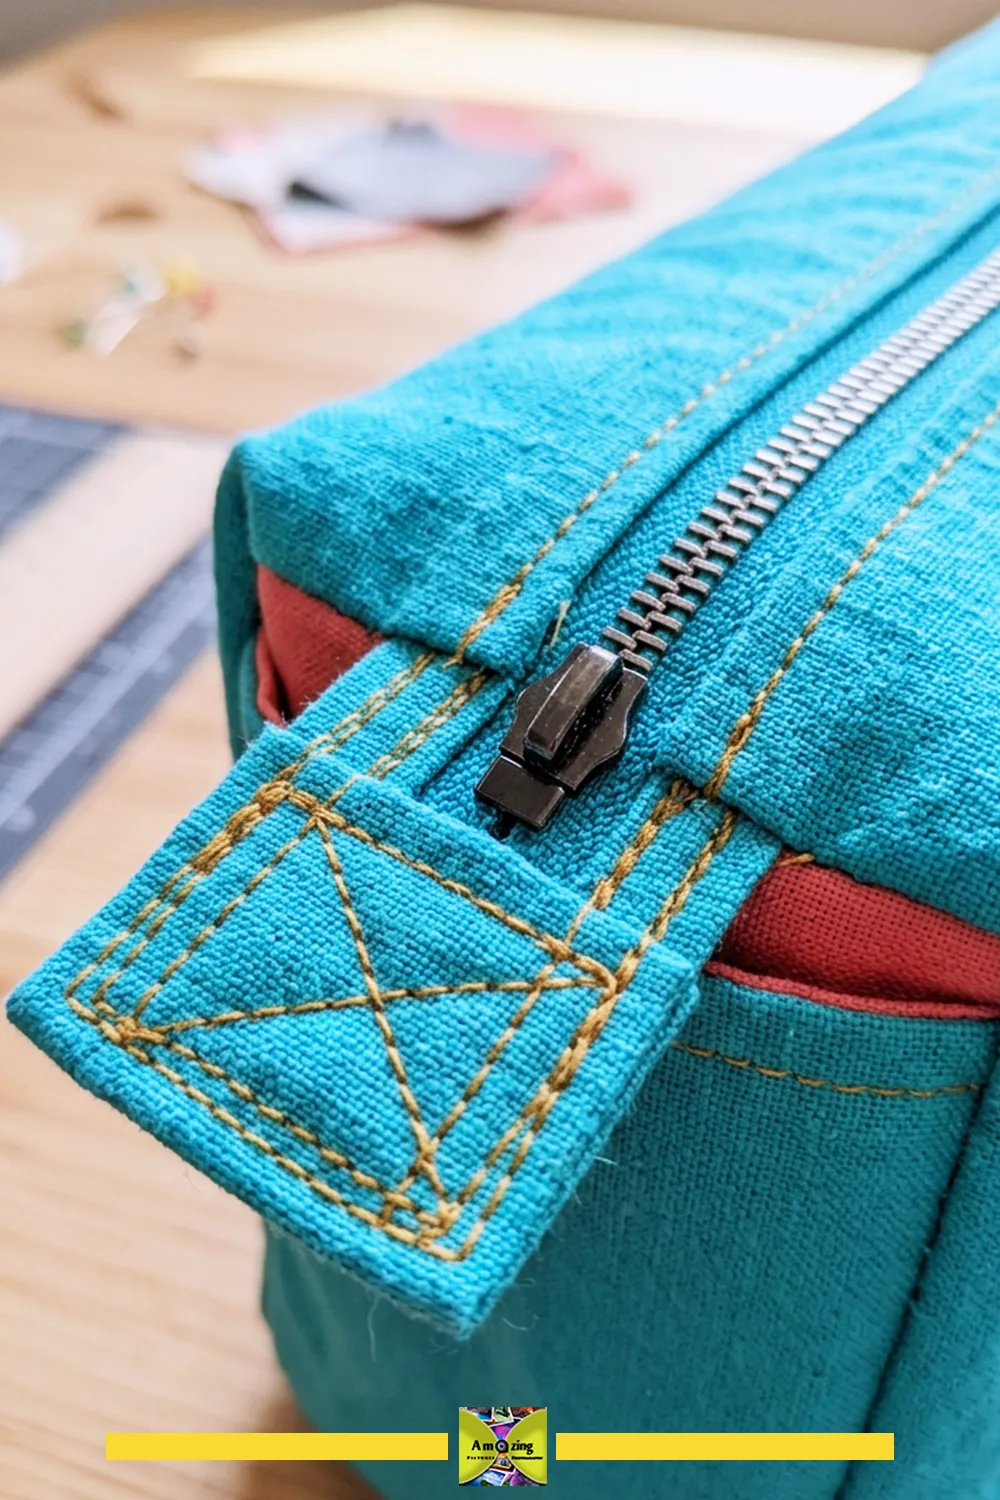
Practical tip: sew the zipper before closing the final seam so you can press it flat.
Common mistake: skipping reinforcement at the zipper ends, which is where the case first fails.
Safety note: keep contents lightweight and dry — this is not moisture-, pest-, dust-proof, or archival storage.
Reinforcement: stitch across each zipper end and box the corners. Contents and limits: lightweight dry textiles only; no food, medicine, liquids, loose blades, or breakables. Tests: zipper pull, seam, and corner checks with the real contents. Care: remove the base insert and close the zipper before laundering. Retire when: the zipper ends open, seams split, or the base insert becomes exposed.
Before cutting the full case, sew a small zipper sample using the same sheet, interfacing, and thread. Old sheet fabric can look strong until the zipper tape adds tension, so a five-minute sample can save a much larger panel. Cost note: Reusing the sheet keeps the fabric cost at zero if you already own it, but the zipper, interfacing, and base insert can still add up. Check those small purchases first so the storage case remains worth making.
Project 2: Coordinated Drawstring Shoe and Accessory Bags
What it looks like: a set of soft drawstring bags with enclosed seams, a reinforced channel, and finished cord ends, sized to shoes or accessories.
Best use: separating shoes, chargers, cords, or travel accessories inside a suitcase.
Difficulty: Beginner. Approximate time: 1–2 hours per bag.
Suitable sheet: sound woven cotton. Avoid: jersey or very worn sheets.
Materials
- Woven sheet panels
- Cotton cord
- Matching thread
Tools
- Sewing machine
- Fabric shears
- Pins
- A safety pin or bodkin for threading cord
Steps
- Cut two equal panels with seam and hem allowances.
- Finish the top edges, then sew the sides and bottom with enclosed seams.
- Fold and stitch the drawcord channel, stitching across the ends to prevent twisting.
- Thread the cord and finish or enclose its ends.
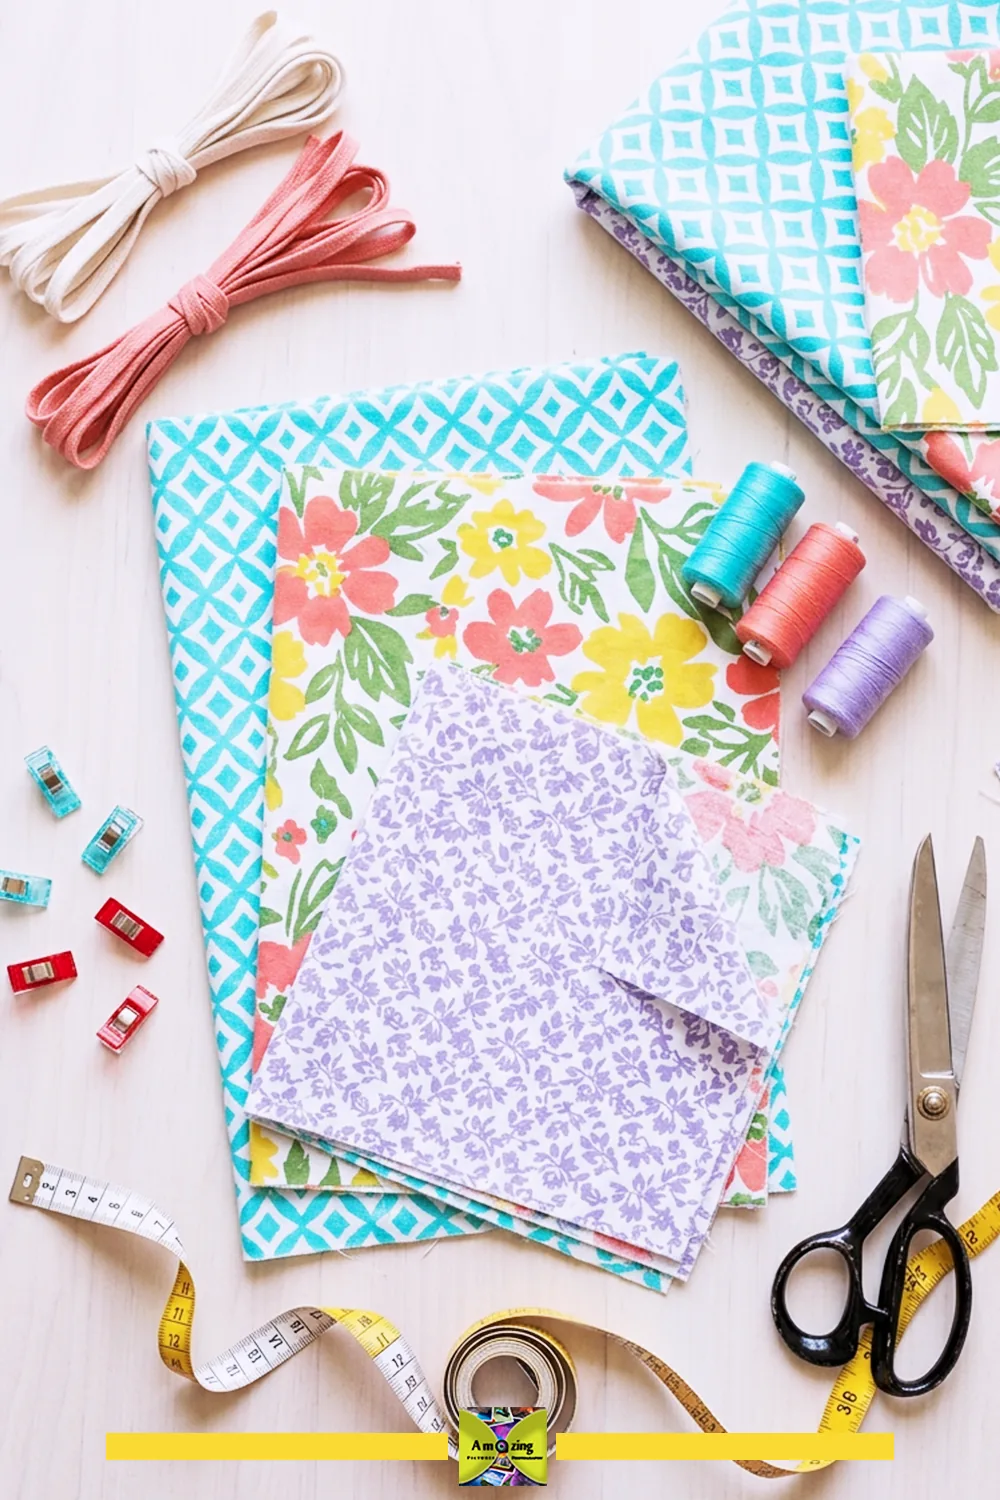
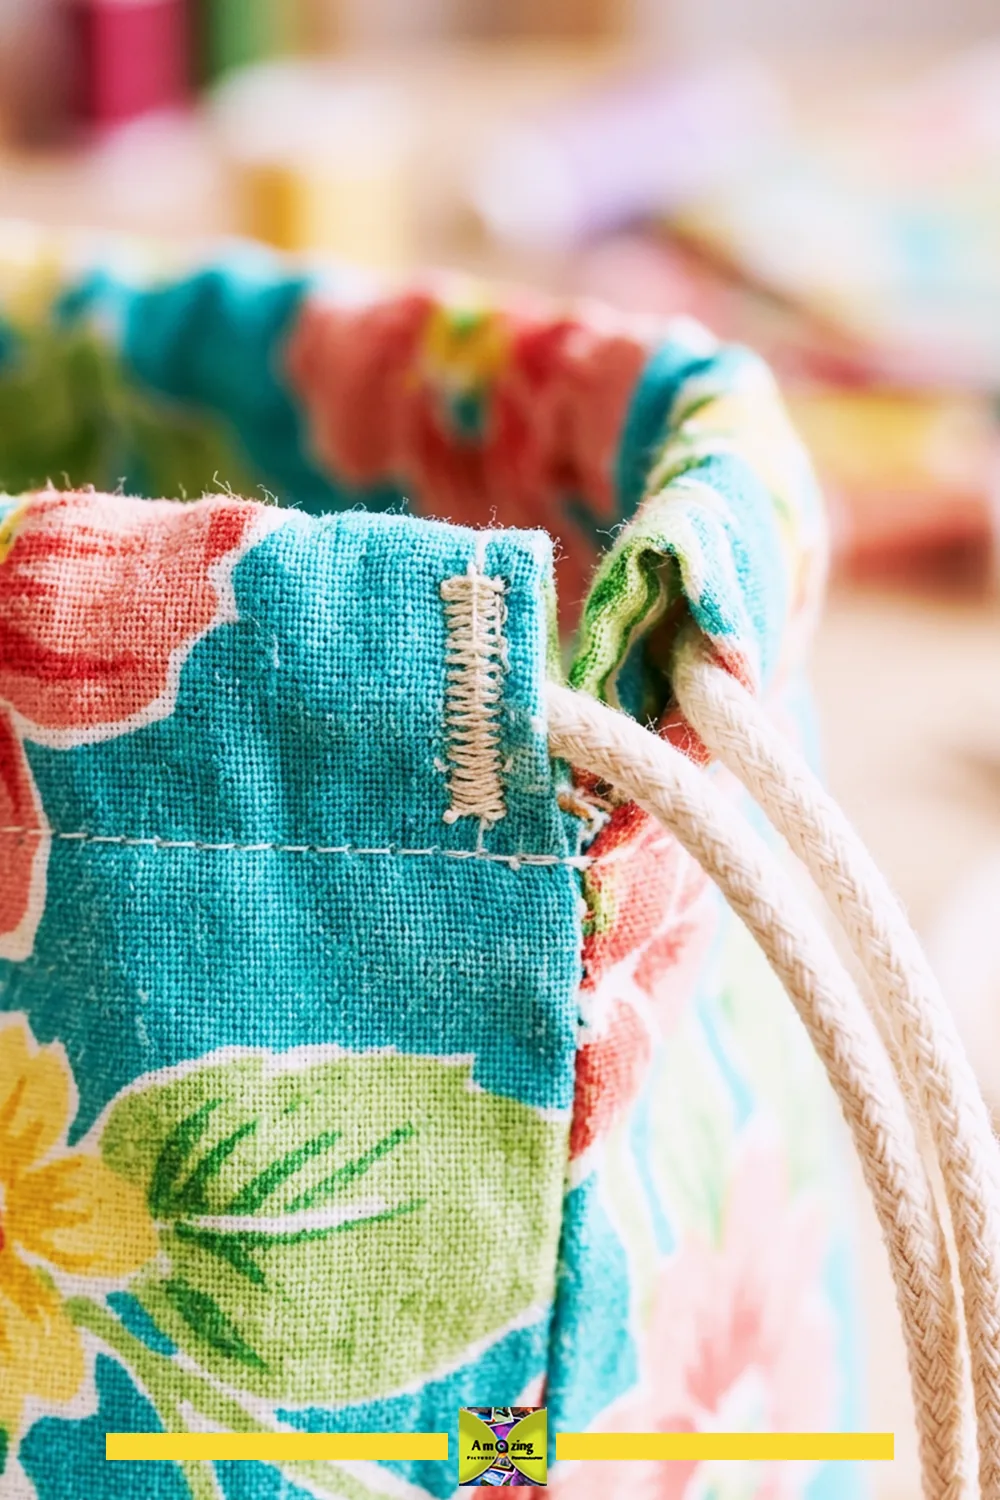
Customization: mirror prints on paired bags, add a small label window, or use a contrasting cord.
Practical tip: press the channel flat before stitching so the cord slides smoothly.
Common mistake: leaving raw cord ends that fray, or a channel too narrow for the cord.
Safety note: keep cords short and finished; long accessible loops are a snag and choking hazard.
Reinforcement: bar-tack the channel openings. Contents and limits: lightweight items; not for heavy groceries or laundry. Care: close bags and secure cords before washing. Retire when: the channel tears or the drawcord frays.
Project 3: Breathable Garment Dust Cover
What it looks like: a full-length fabric cover that hangs over one garment on its hanger, with an enclosed top opening.
Best use: shielding a specific garment from dust in a closet; breathable, not sealed.
Difficulty: Beginner to intermediate. Approximate time: 1–2 hours.
Suitable sheet: sound woven cotton. Avoid: microfiber or treated fabric, and do not claim moth protection.
Materials
- Woven panel
- Matching thread
Tools
- Sewing machine
- Fabric shears
- Pins
- Measuring tape
Steps
- Measure the garment and hanger, then draft a front and back panel slightly wider than the garment.
- Cut and finish the side and bottom edges.
- Sew the shoulders and leave an enclosed opening sized to the hook.
- Turn and press; test the hanger slides in without catching.
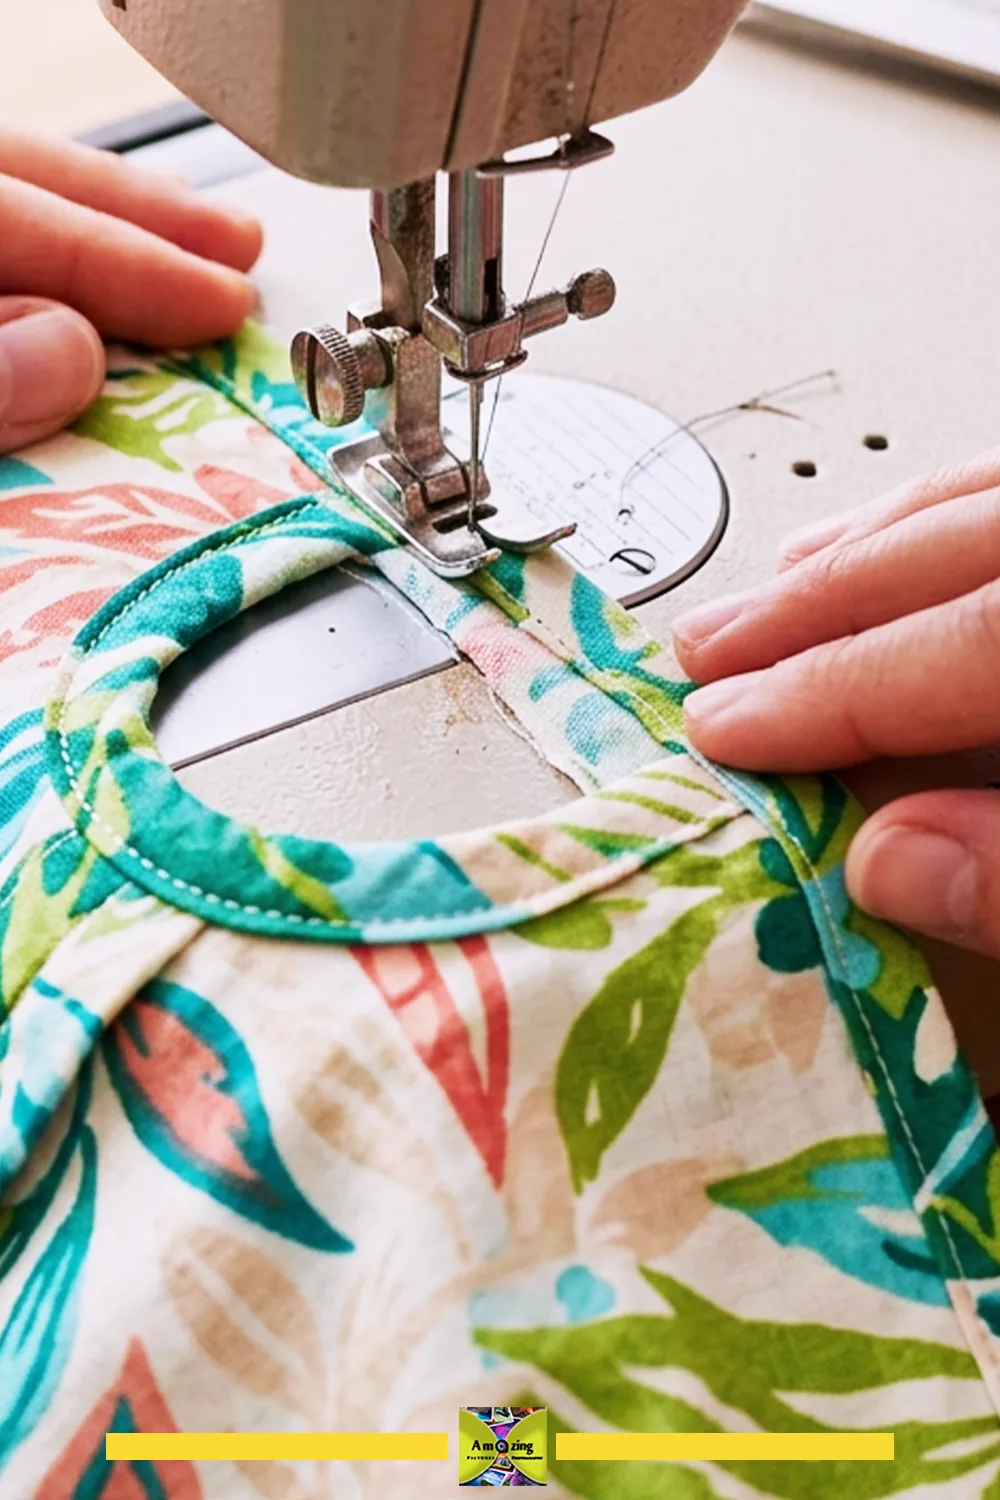
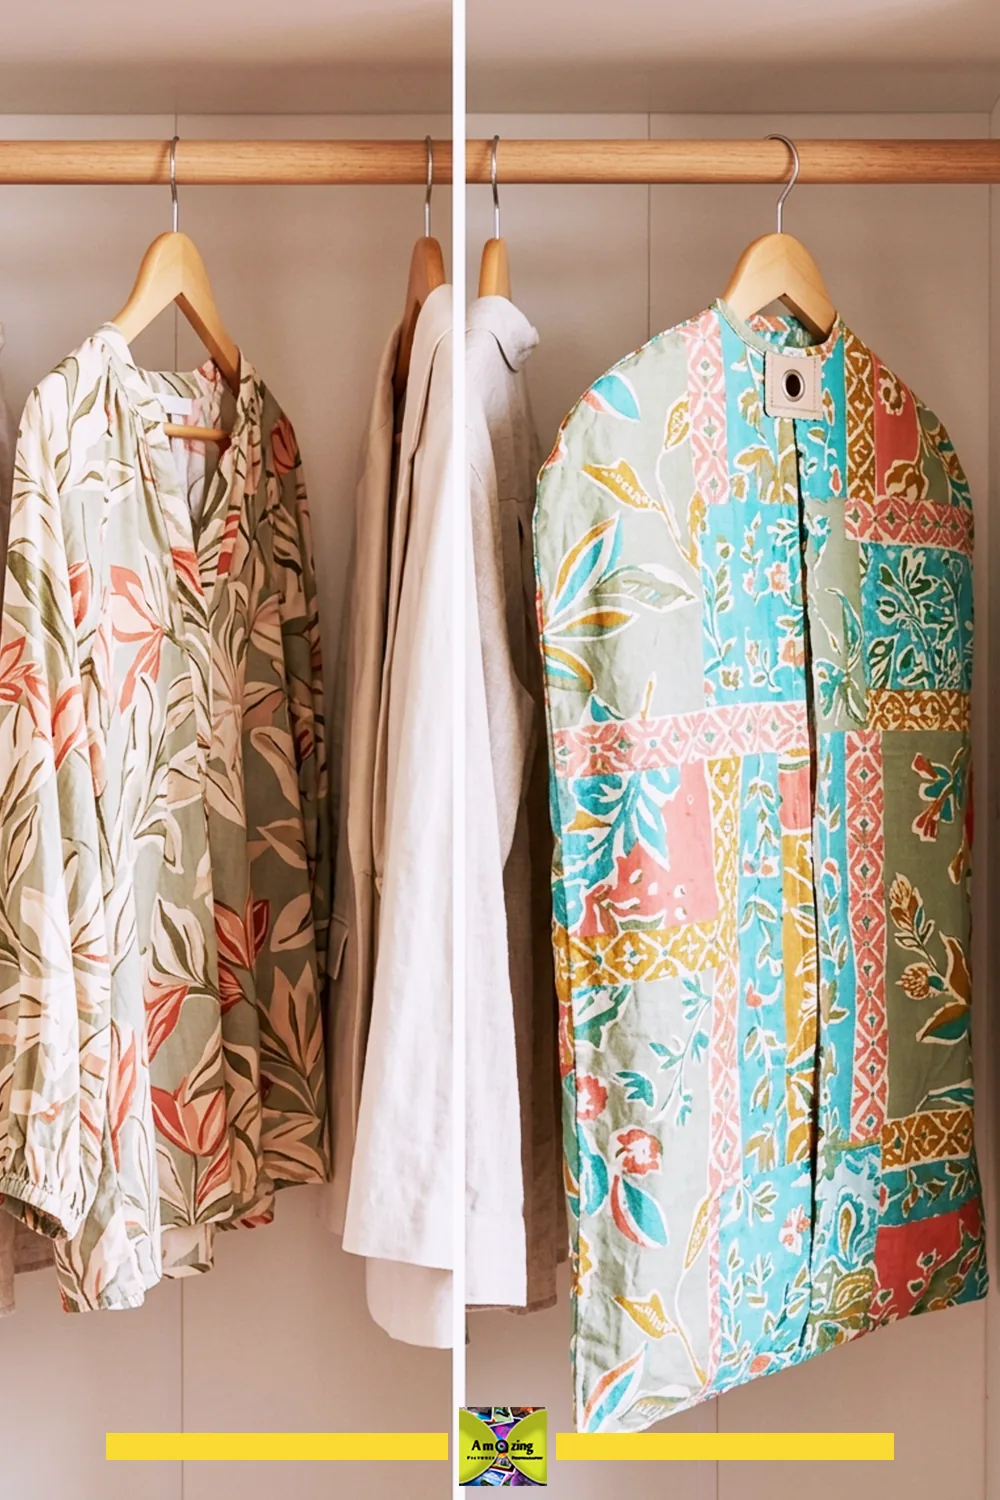
Customization: a side seam or center-front opening, a small label pocket, or a contrast trim.
Practical tip: cut the opening generously so the hook never snags the seam.
Common mistake: making the cover too snug, so it pulls the garment or catches the hanger.
Safety note: this is a dust shield only — it makes no moth-protection or protective-storage claim.
Reinforcement: finish the top opening and shoulder seams. Contents and limits: lightweight garments only. Care: remove the cover from the hanger before laundering. Retire when: seams open or the fabric snags the garment.
Project 4: Fold-Flat Seasonal-Textile Storage Sacks
What it looks like: a simple sack with boxed or flat corners, a label pocket, and a closure that suits lightweight contents.
Best use: storing off-season throws, blankets, or pillows on a shelf so they stack flat.
Difficulty: Beginner. Approximate time: 1–1.5 hours.
Suitable sheet: sound woven cotton. Avoid: thin, worn, or stretchy sheet.
Materials
- Woven panels
- A label pocket
- Drawcord or snap closure
Tools
- Sewing machine
- Fabric shears
- Pins
- Iron
Steps
- Measure the intended textiles and draft a sack with hem and closure allowances.
- Cut panels and box or fold the corners.
- Add a clear or fabric label pocket.
- Attach the closure, reinforcing the channel or snap area.
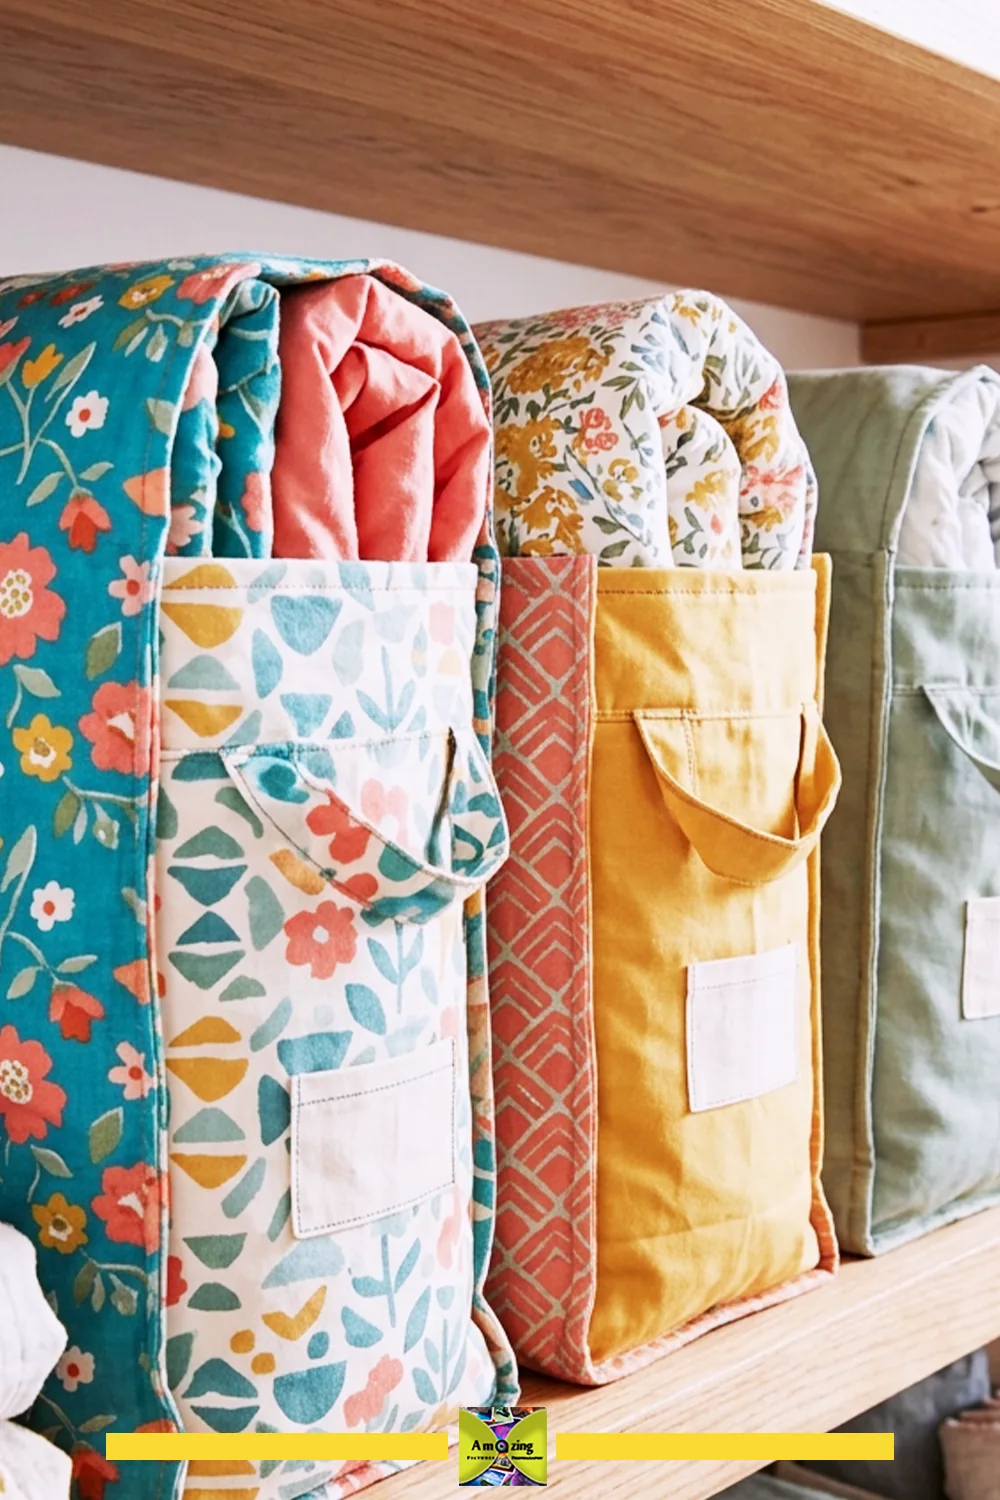
Customization: a transparent label window, a drawcord, or a fold-over flap.
Practical tip: label every sack before filling it so you never have to reopen a stack.
Common mistake: making the sack too small for the folded item, so contents strain the seams.
Safety note: keep contents lightweight and dry; this is not dust- or pest-proof storage.
Reinforcement: bar-tack the channel and label pocket corners. Contents and limits: lightweight dry textiles only. Care: empty and close before laundering. Retire when: seams or closure strain.
Material note: Sew the chosen closure and seam on a doubled offcut first. Open and close it several times, then tug gently at the surrounding fabric; if the stitches distort the sheet, reinforce that area before assembling the sack.
Sewing and Craft Organization Projects
Project 5: Lined Fabric Storage-Bin Insert
What it looks like: a removable fabric liner that fits an existing rigid basket or box and lifts out for cleaning, without carrying any load itself.
Best use: protecting a basket’s contents and making an existing bin washable.
Difficulty: Intermediate. Approximate time: 1.5–3 hours.
Suitable sheet: woven cotton, medium weight. Avoid: stretchy or heavily worn sheet.
Materials
- Woven panel
- Coordinated lining
Tools
- Sewing machine
- Fabric shears
- Pins
- Measuring tape
Steps
- Measure the interior of the basket and draft a liner with darts or boxed corners.
- Cut outer and lining panels.
- Sew the outer and lining separately, then join at the top, enclosing raw edges.
- Fold the top edge over the basket rim or add corner ties so the liner stays put.
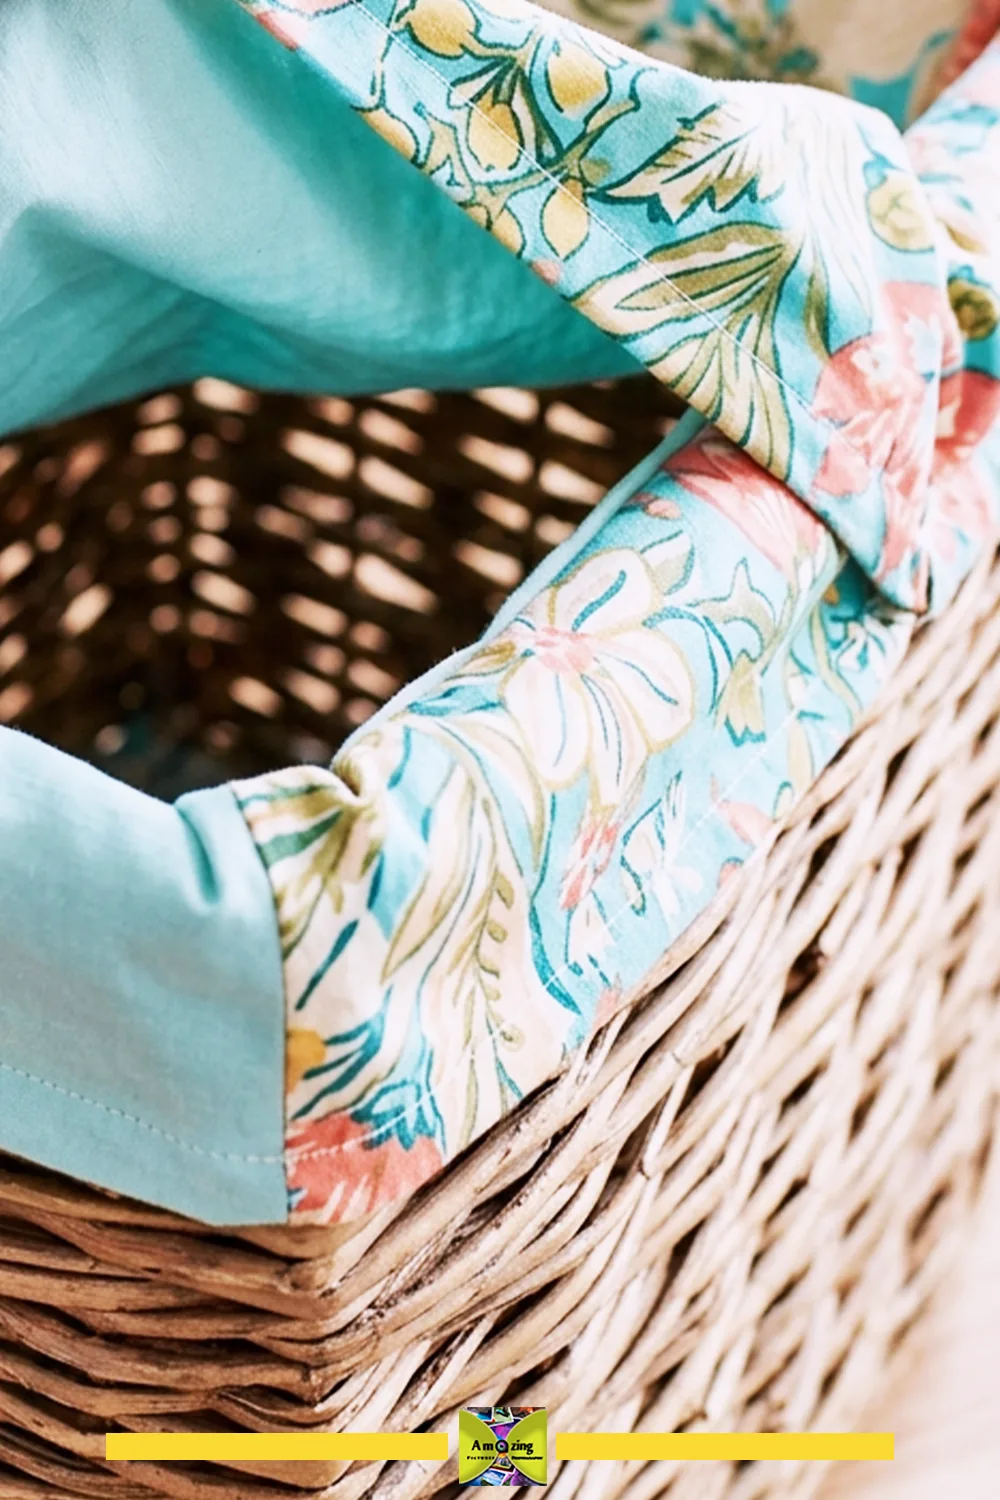
Customization: a fold-over rim, corner ties, or a coordinating lining in a shared neutral.
Practical tip: cut the liner slightly loose rather than tight so it does not strain at the corners.
Common mistake: making the liner structural — it should lift out, never carry the basket’s weight.
Safety note: this liner carries no load and provides no padding or waterproofing.
Reinforcement: finished top edge and boxed corners. Contents and limits: lightweight, non-sharp contents in an existing rigid bin. Care: remove and wash separately. Retire when: the liner collapses, tears, or no longer sits in the bin.
Author tip: Fit the liner inside the basket before finishing the top edge. A little ease at each corner usually sits better than a perfectly tight fit, especially after the first wash.
Project 6: Hanging Craft-Supply Pocket Panel
What it looks like: a flat hanging panel of shallow pockets with a stable backing, reinforced openings, and secure mounting.
Best use: keeping lightweight craft supplies visible and off the work surface.
Difficulty: Intermediate. Approximate time: 2–4 hours.
Suitable sheet: sound woven cotton for pockets, with a stable woven backing. Avoid: stretchy or thin sheet as the backing.
Materials
- Pocket panels
- A stable backing fabric
- Mounting hardware
Tools
- Sewing machine
- Fabric shears
- Pins
- Ruler
- Mounting tools
Steps
- Measure the door or wall and calculate the completed weight with the intended contents.
- Cut the backing from a stable fabric and the pockets from the sheet.
- Reinforce and hem each pocket opening, then sew pockets to the backing in balanced rows.
- Attach secure mounting hardware through the backing, never through the sheet alone.
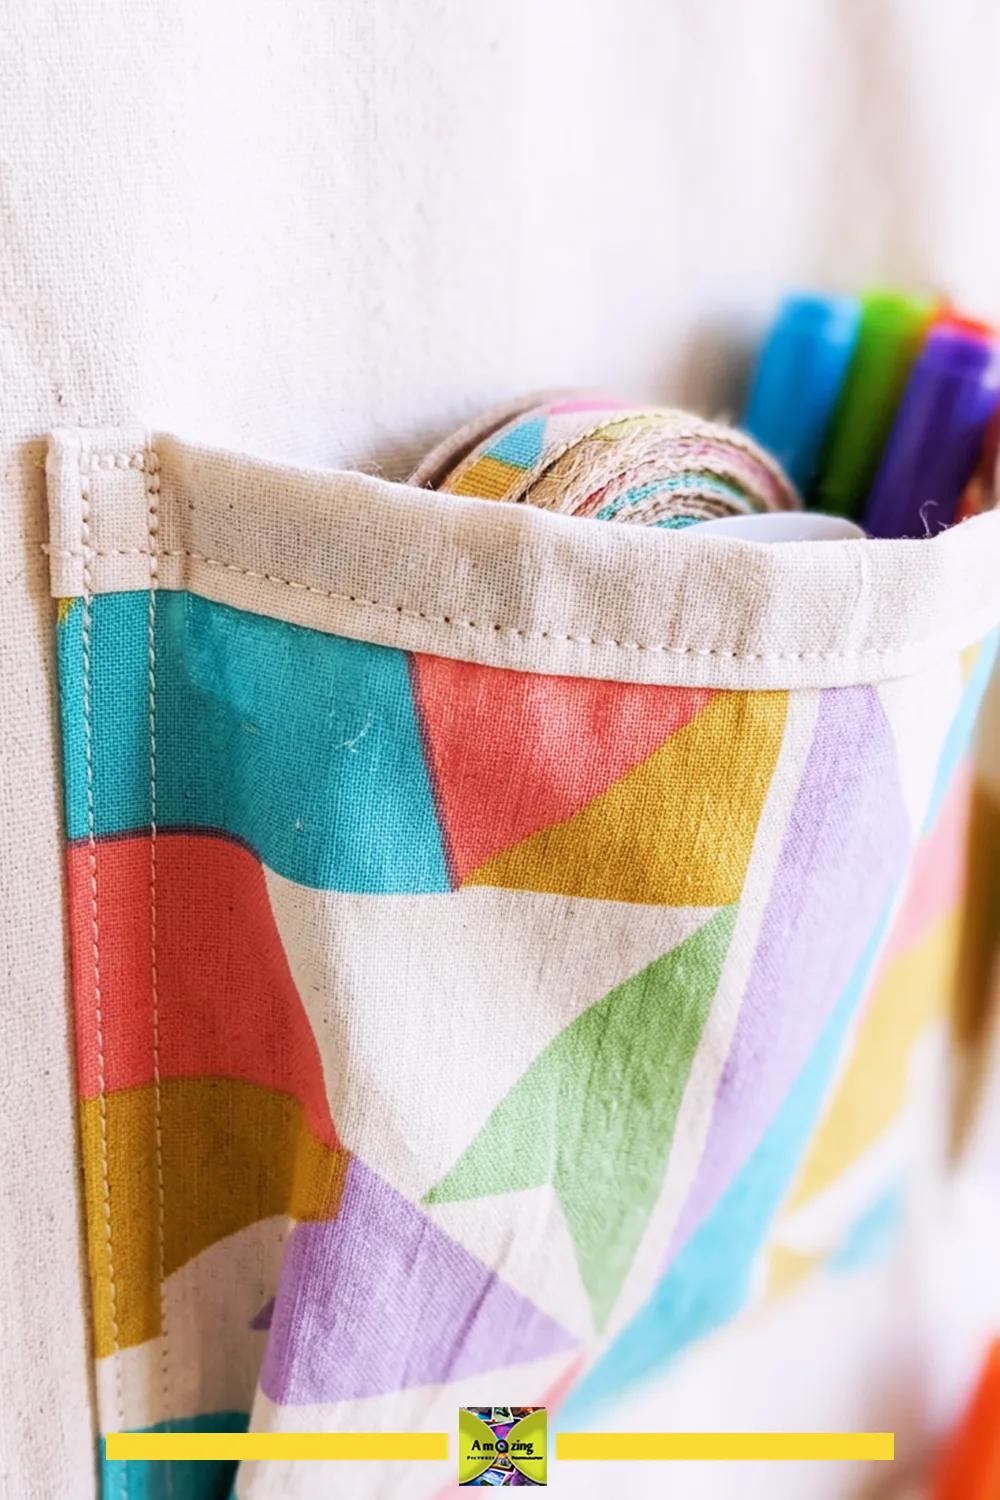
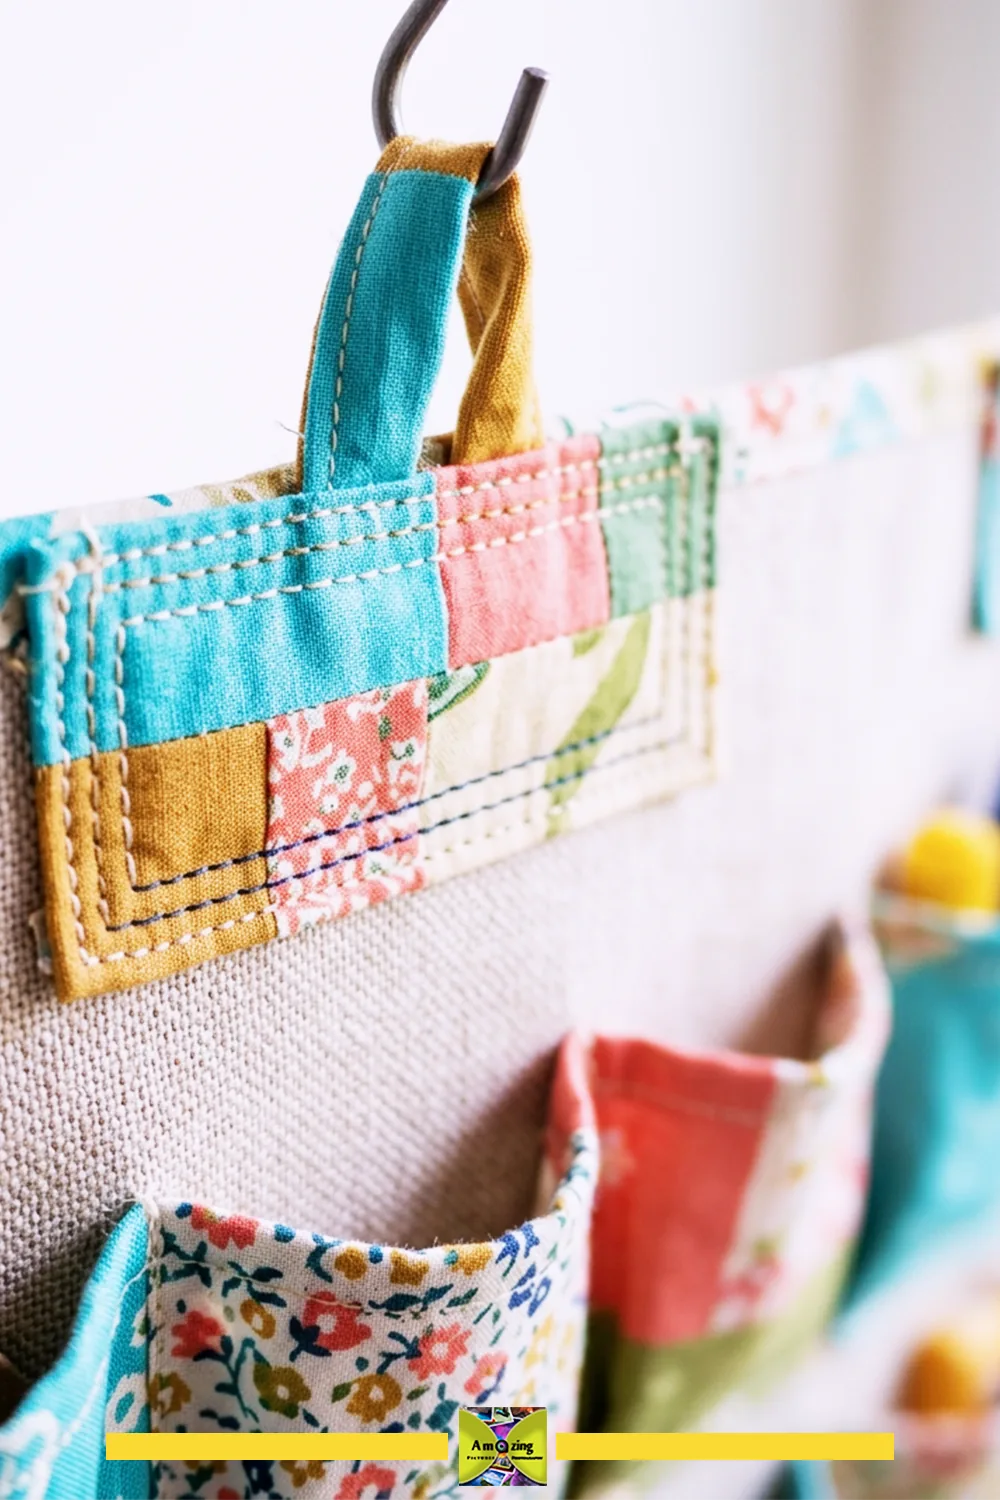
Customization: graded pocket depths, a limited two-to-five color palette, or a fold-over flap.
Practical tip: test the panel flat before mounting, and keep pockets shallow so they do not bow.
Common mistake: mounting through worn sheet fabric, which sags and tears.
Safety note: keep contents lightweight and non-fragile, and never block doors, vents, outlets, or walking paths.
Reinforcement: backing carries the load; reinforce pocket openings and mounting points. Contents and limits: lightweight, non-fragile items only; no sharp tools, heavy electronics, or powered cords. Care: empty pockets before laundering. Retire when: the panel slips, stretches, bows, or tears.
Project 7: Bedside Organizer
What it looks like: a broad under-mattress panel with balanced shallow pockets that tuck between the mattress and bed frame.
Best use: holding a book, glasses, or a phone at the bedside without a nightstand.
Difficulty: Intermediate. Approximate time: 2–4 hours.
Suitable sheet: sound woven cotton, medium weight. Avoid: thin or stretchy sheet for the under-mattress panel.
Materials
- A broad woven panel
- Pocket fabric
Tools
- Sewing machine
- Fabric shears
- Pins
- Ruler
Steps
- Measure the mattress edge and decide the panel depth that will stay tucked.
- Cut a broad panel from the strongest section and pockets from sound areas.
- Hem and reinforce pocket openings, then attach pockets in balanced rows.
- Test the tucked panel stays put with light contents before loading it.
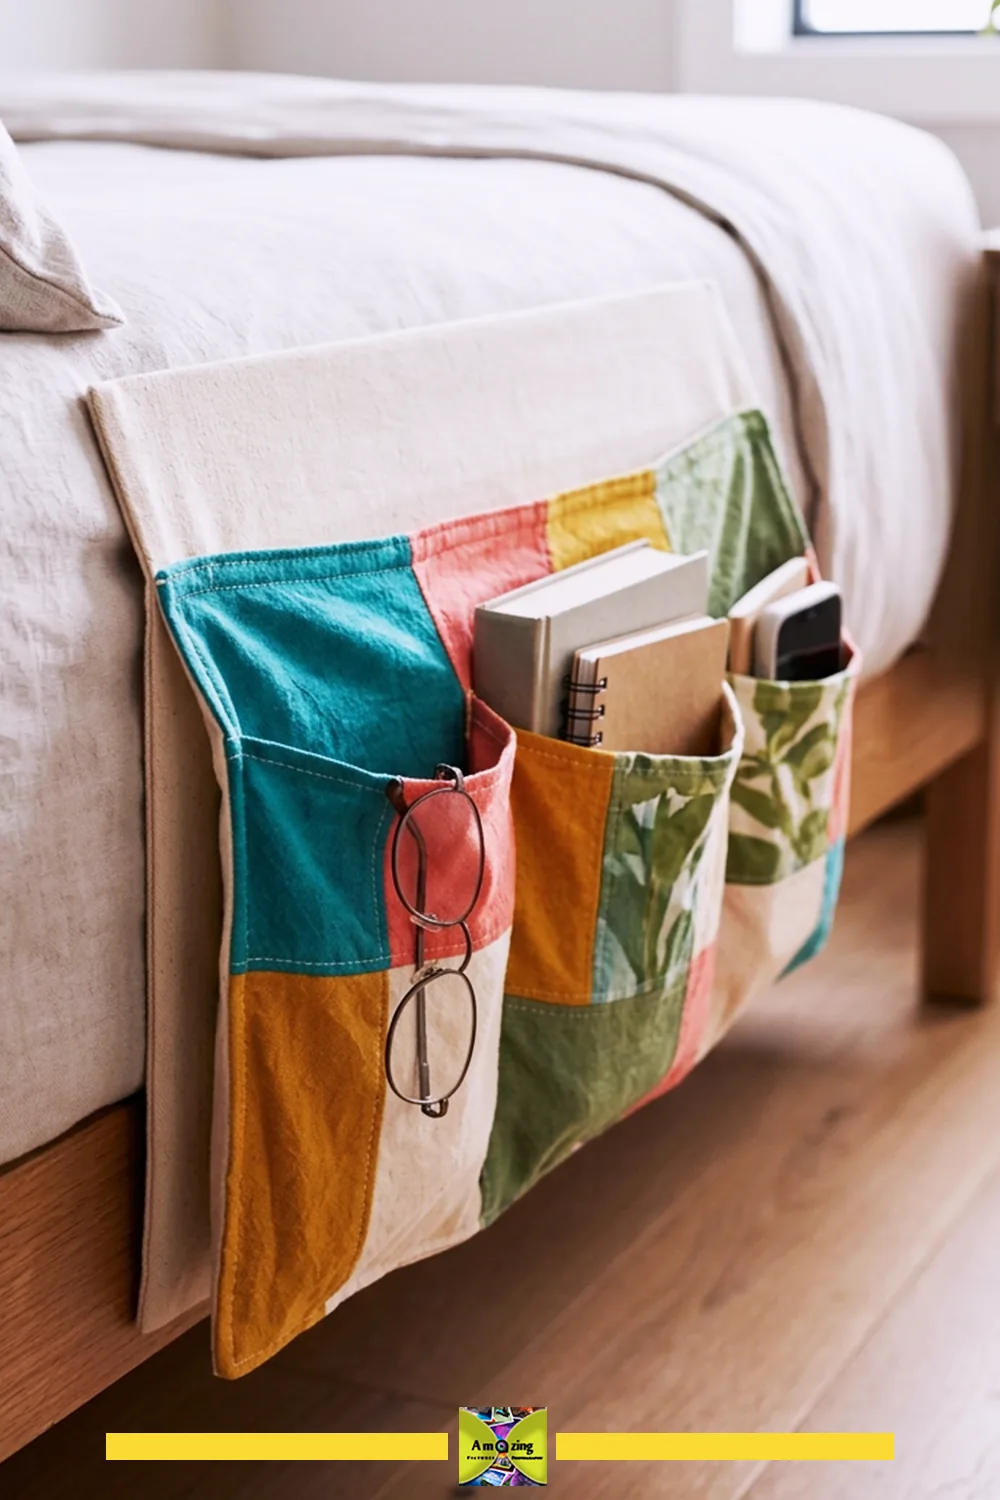
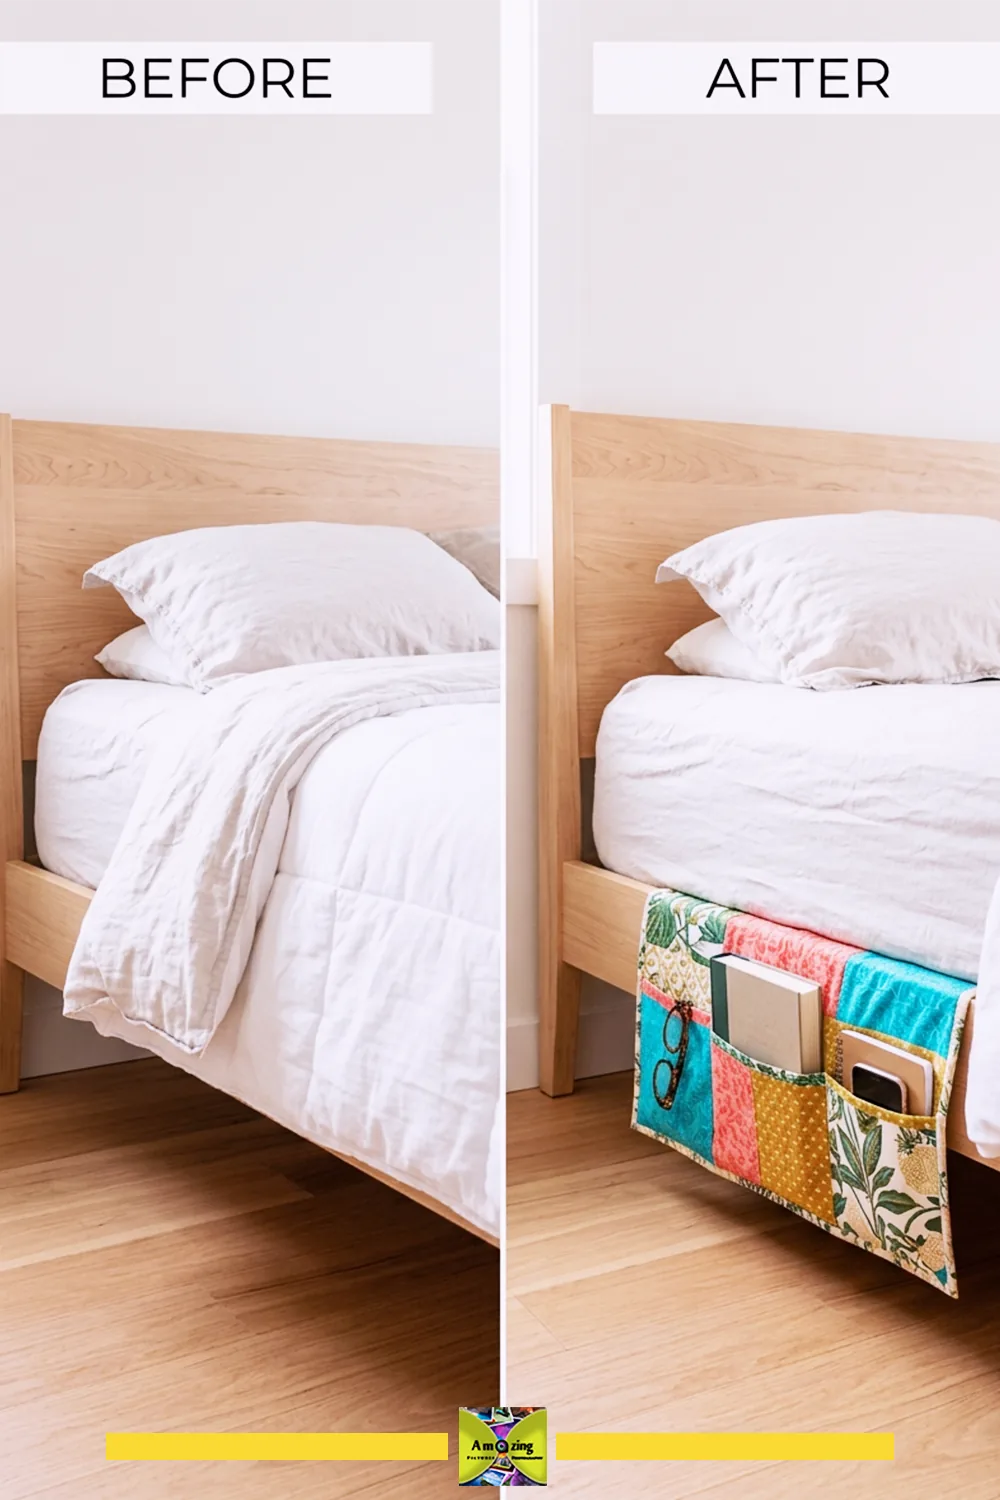
Customization: a phone pocket, a pen slot, or a small label row.
Practical tip: make the under-mattress panel larger than you think you need so it does not slide out.
Common mistake: storing medicine, drinks, hot items, or heavy electronics in the pockets.
Safety note: no medicine, liquids, hot items, or heavy electronics; do not obstruct bed mechanisms or charging cords.
Reinforcement: reinforce pocket openings and the tucked edge. Contents and limits: lightweight, non-fragile items only. Care: empty before laundering. Retire when: it slides, stretches, bows, or tears.
Project 8: Roll-Up Pattern and Template Organizer
What it looks like: a wide roll with deep channels for paper patterns or stencils, a protective flap, and a separate closure.
Best use: storing and protecting flat paper patterns and templates without creasing them.
Difficulty: Beginner. Approximate time: 1–2 hours.
Suitable sheet: smooth woven cotton. Avoid: fuzzy flannel that sheds onto paper.
Materials
- A wide woven panel
- A tie or closure
Tools
- Sewing machine
- Fabric shears
- Pins
- Ruler
Steps
- Measure your largest pattern and draft channels wide enough for it.
- Hem the panel, then stitch the channels with smooth interior seams.
- Add a protective flap and a separate closure that does not crush the paper.
Customization: labeled channels, a flap, or a wide ribbon tie.
Practical tip: keep channels loose so patterns slide in without bending.
Common mistake: a tight closure that creases the patterns.
Safety note: no exposed rotary cutters, loose blades, or uncapped marking tools in the channels.
Reinforcement: finish channel seams smoothly. Contents and limits: paper patterns and flat stencils only. Care: empty before laundering. Retire when: channels tear or the closure stops holding.
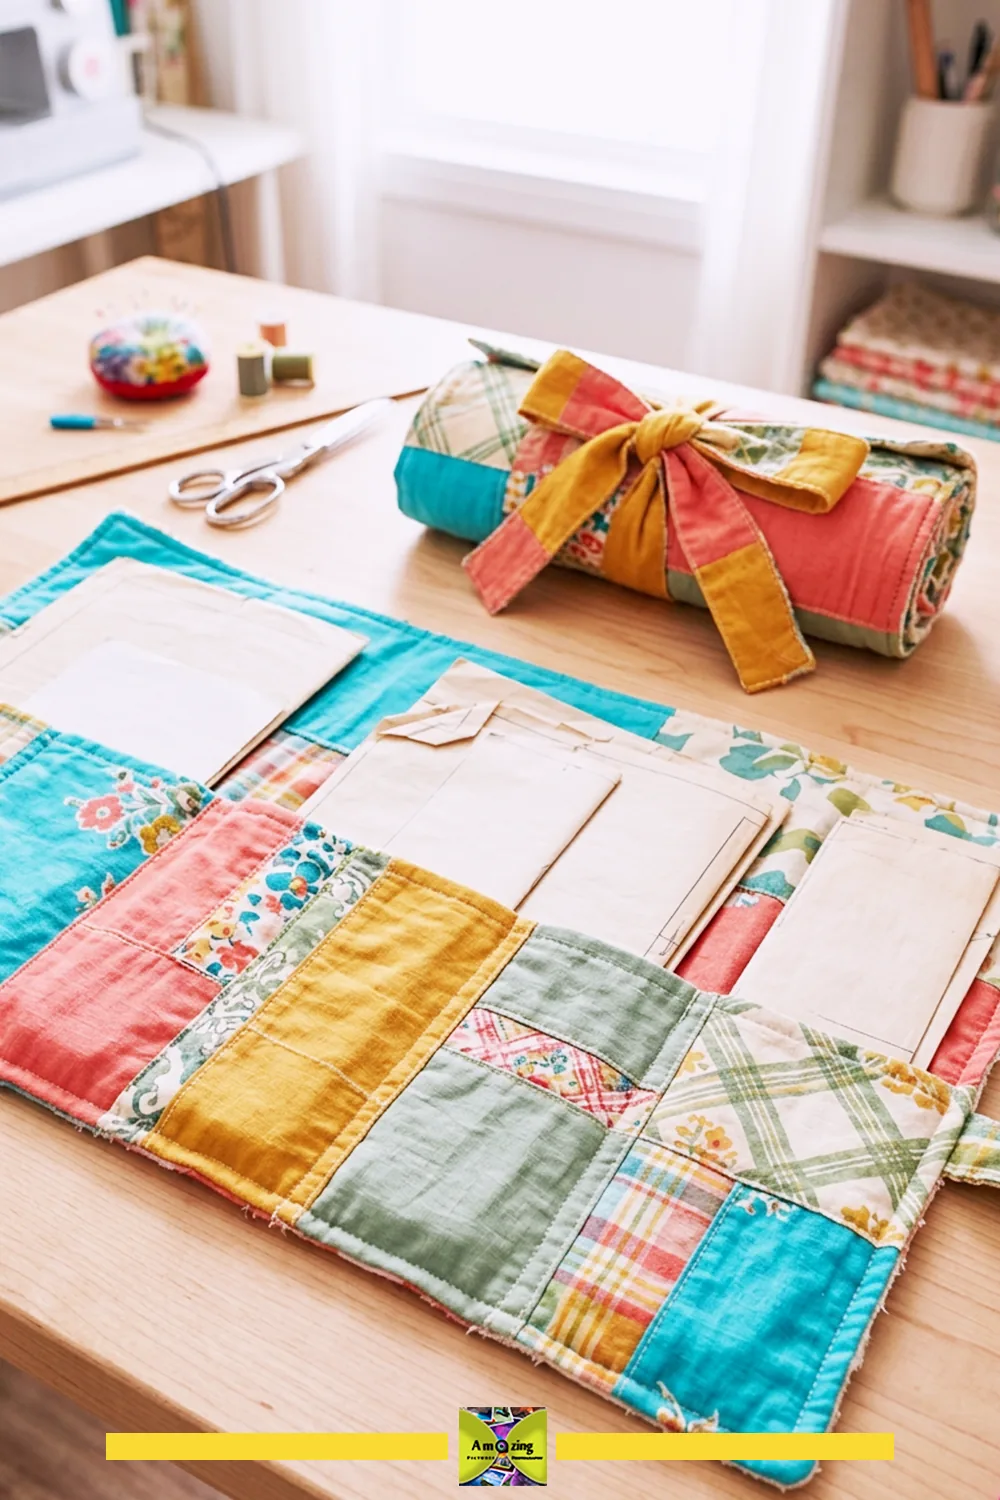
Project 9: Home-Sewing Project Mat
What it looks like: a smooth work mat with measured tool pockets along one edge.
Best use: keeping small sewing tools at hand while working on a separate suitable surface.
Difficulty: Intermediate. Approximate time: 2–3 hours.
Suitable sheet: smooth woven cotton. Avoid: anything that claims heat, cut, or chemical protection — this mat provides none.
Materials
- A smooth woven panel
- Pocket fabric
Tools
- Sewing machine
- Fabric shears
- Pins
- Ruler
Steps
- Decide the mat size and the tools that will live in the pockets.
- Hem the mat edges and cut pockets to fit each tool.
- Sew the pockets with smooth, reinforced openings.
- Use the mat only on a separate cutting, pressing, or painting surface as needed.
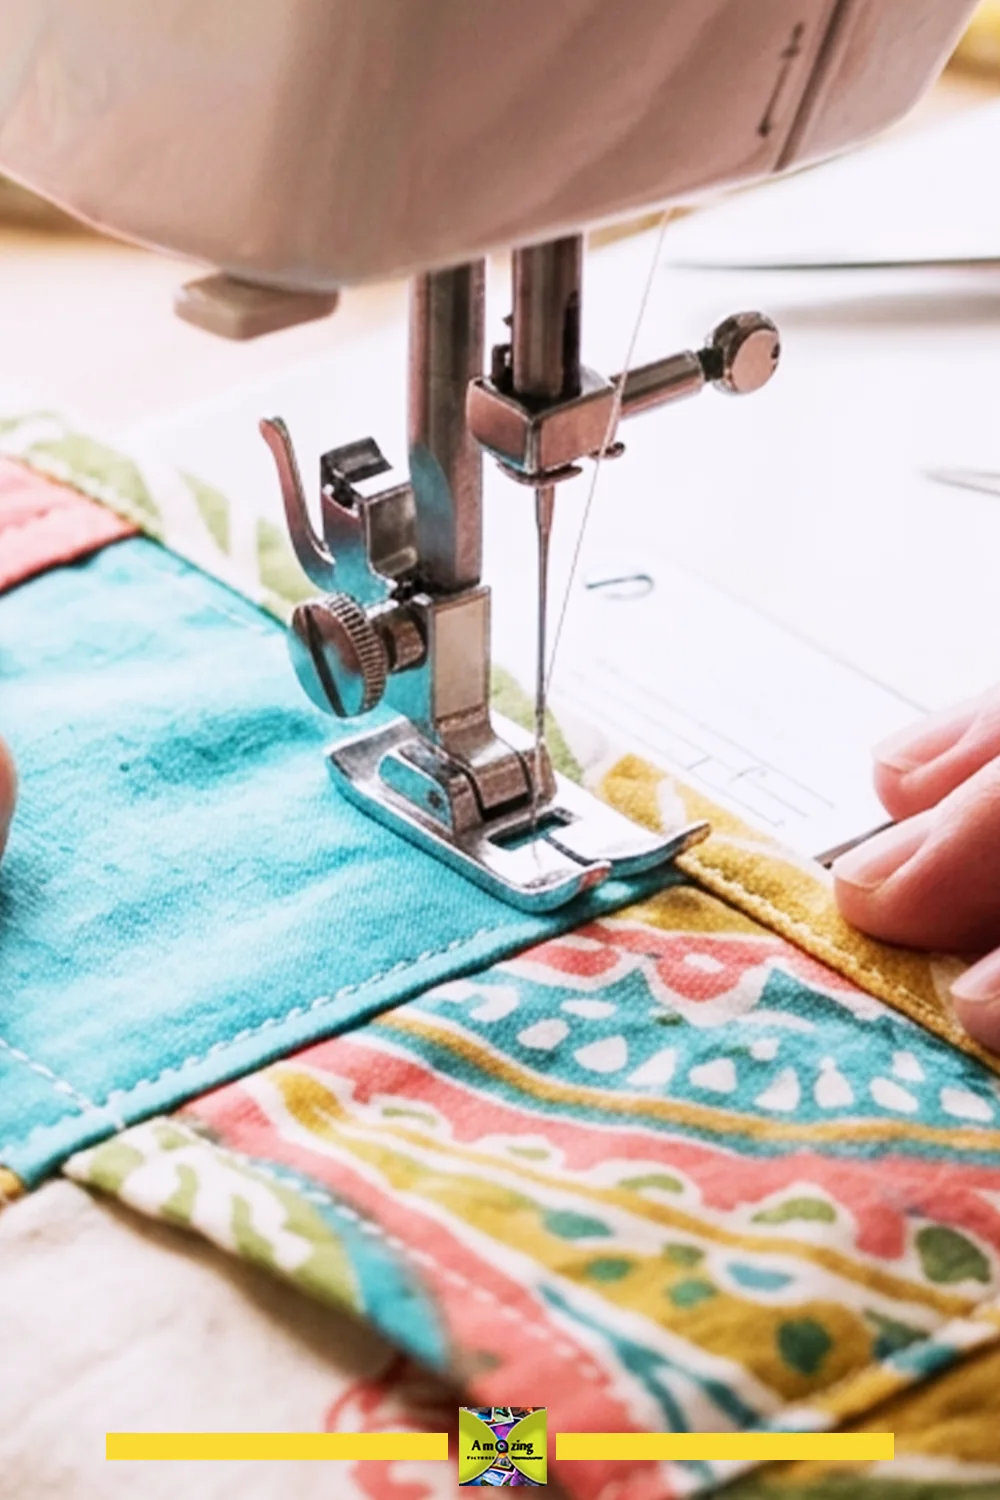
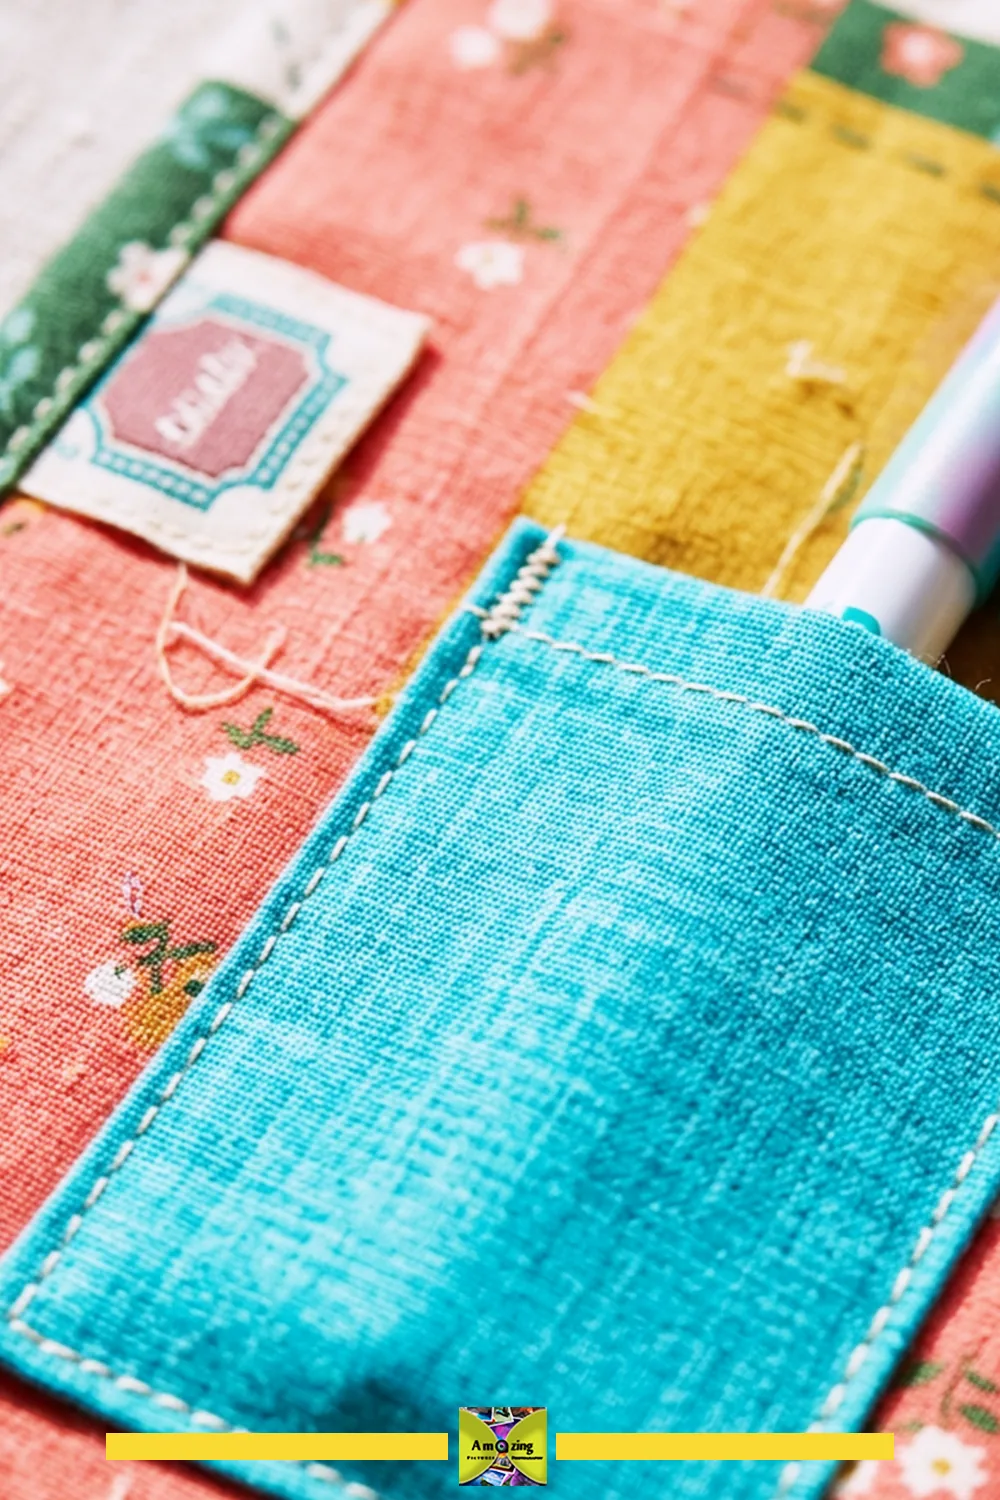
Customization: a measuring grid stenciled in tested fabric paint, or graded pocket depths.
Practical tip: test any fabric paint on an offcut and heat-set only if the fiber allows.
Common mistake: treating the mat as a cutting board or ironing surface.
Safety note: this mat does not protect against blades, heat, solvents, paint, or punctures.
Reinforcement: reinforced pocket openings. Contents and limits: tools with capped or sheathed points only. Care: empty pockets before laundering. Retire when: pockets tear or the surface becomes stained or saturated.
Project 10: Fabric-Wrapped Clothes-Hanger Set
What it looks like: a set of hangers with smoothly enclosed padding and even shoulder shaping, wrapped in a coordinated fabric.
Best use: giving lightweight garments a soft, non-slip shoulder in a tidy matched set.
Difficulty: Beginner. Approximate time: 30–60 minutes per set.
Suitable sheet: woven cotton strips cut on grain or a slight bias. Avoid: thick flannel that adds bulk at the hook.
Materials
- Fabric strips
- A thin smooth padding
- Matching thread
Tools
- Sewing machine or hand needle
- Fabric shears
- Pins
Steps
- Trace each hanger and cut padding and fabric to fit with a small allowance.
- Wrap the hanger from one shoulder, enclosing the padding smoothly.
- Stitch or hand-finish the ends so they cannot unravel or shift.
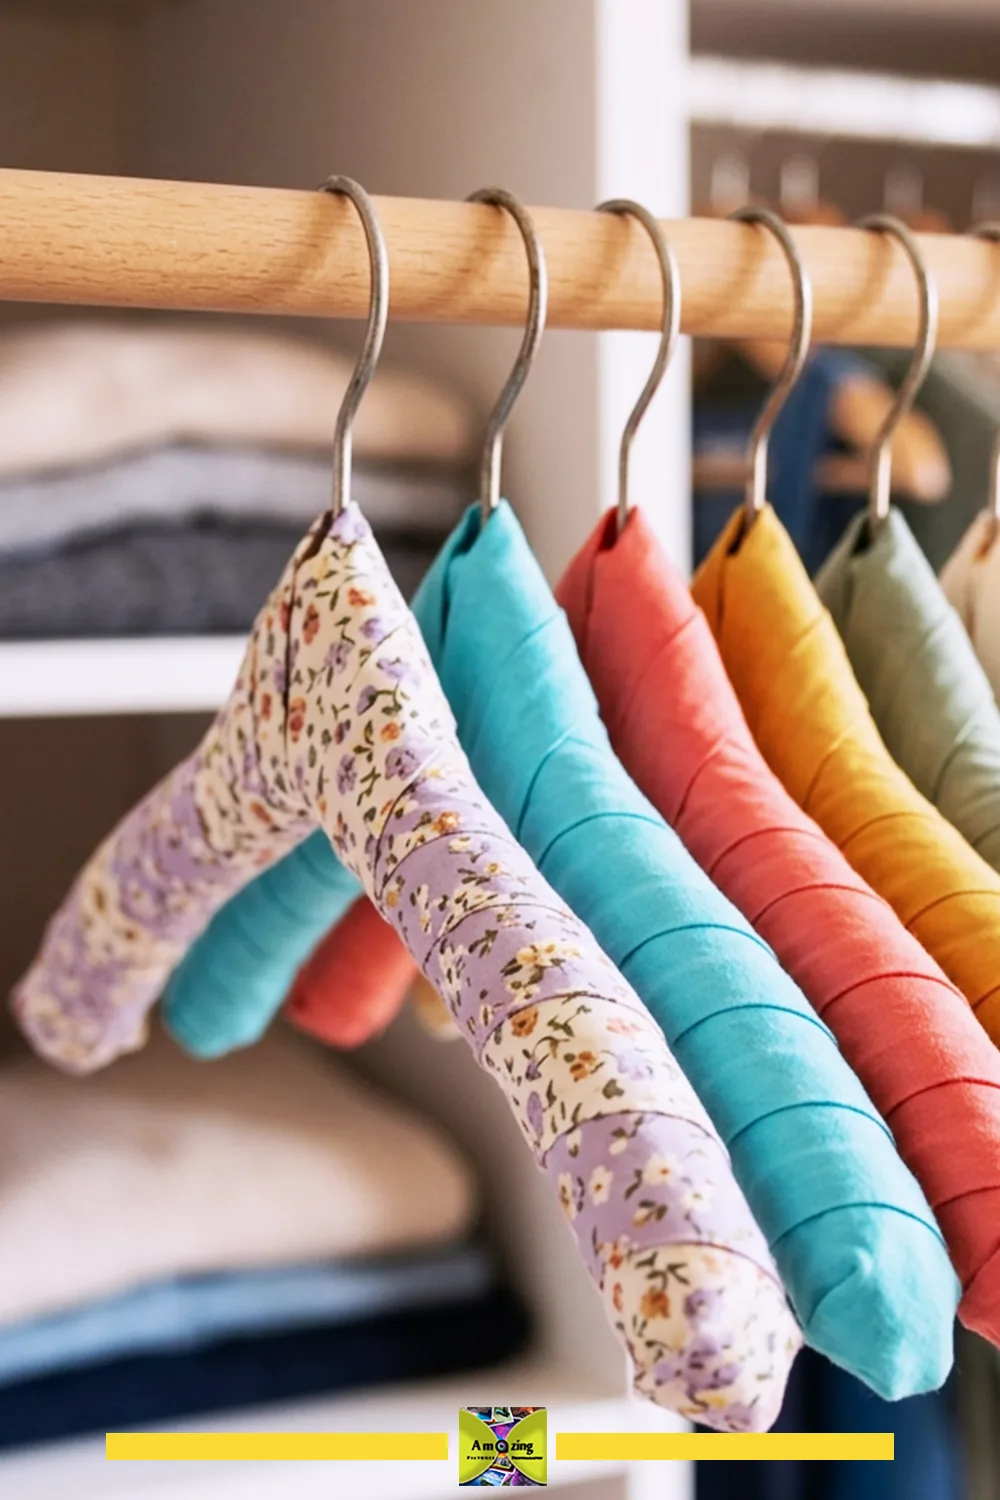
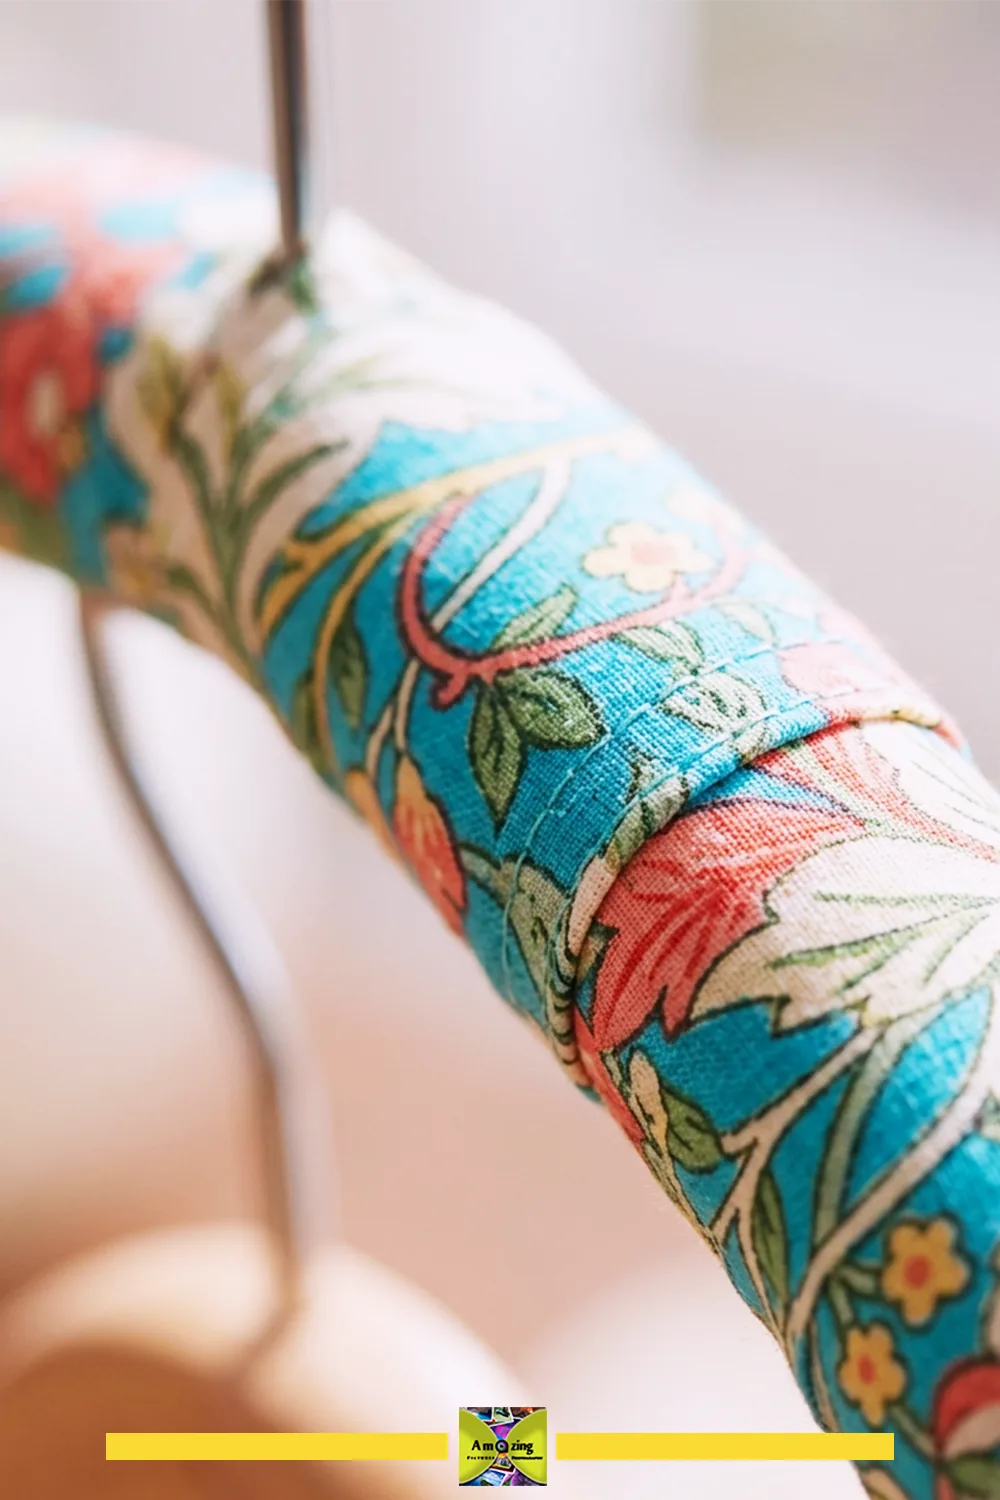
Customization: a single accent color across the set, or a printed fabric with a solid trim.
Practical tip: keep the wrap snug but smooth so it does not bunch at the shoulder.
Common mistake: wrapping too loosely so the padding shifts and catches fabric.
Safety note: use only for lightweight garments unless the underlying hanger is independently rated for more.
Reinforcement: secure the wrap ends. Contents and limits: lightweight garments only. Care: spot-clean or re-wrap rather than washing a covered hanger. Retire when: padding shifts or the wrap loosens.
Reusable Gift Projects
Project 11: Reusable Square Gift Wraps (Furoshiki)
What it looks like: hemmed fabric squares used to wrap gifts without tape or permanent closures, in a traditional furoshiki style.
Best use: wrapping gifts that can be tied with a neat square knot and reused by the recipient.
Difficulty: Beginner. Approximate time: 30–60 minutes.
Suitable sheet: non-stretch woven cotton with a clean double-fold hem. Avoid: stretchy or very thick sheets that will not knot neatly.
Materials
- Woven panels cut square
Tools
- Sewing machine
- Fabric shears
- Iron
- Ruler
Steps
- Cut true squares sized to the intended objects (roughly three times the item’s diagonal).
- Press and sew a clean double-fold hem on every side.
- Learn one or two wrapping methods — the basic errand wrap and the bottle wrap — and tie with a square knot.
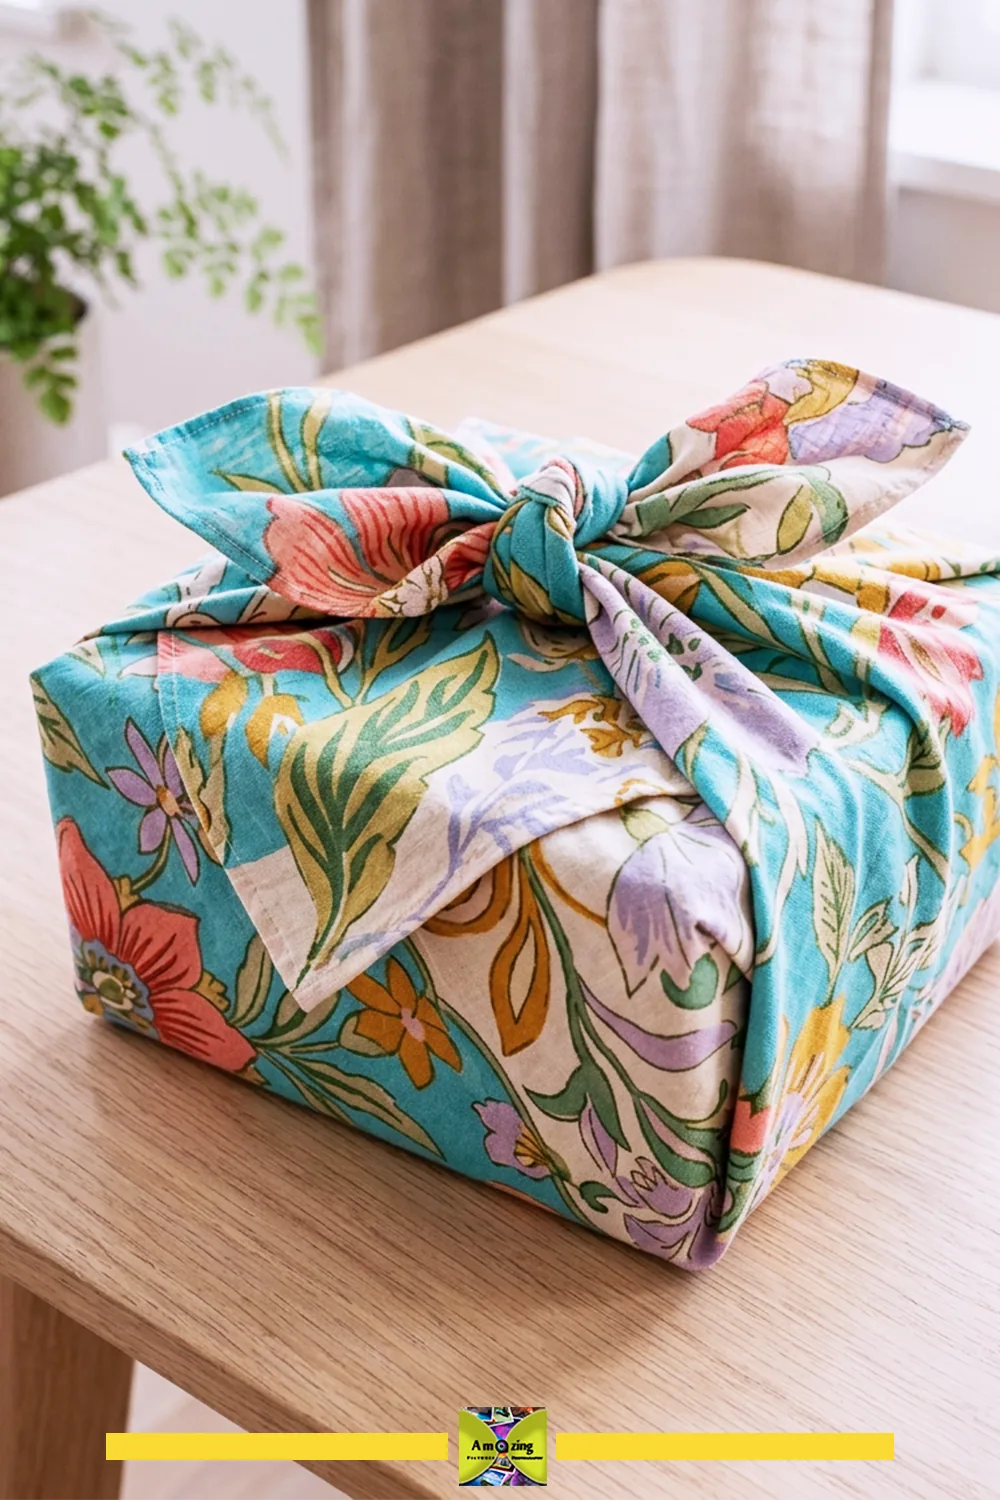
Customization: a floral print paired with a solid reverse, or a folded pocket for a card.
Practical tip: use a grippier cotton rather than a slippery synthetic so the knot holds.
Common mistake: wrapping hot, wet, sharp, leaking, or unpackaged food.
Safety note: no use around hot, wet, sharp, leaking, or unpackaged food items.
Reinforcement: enclosed hems. Contents and limits: dry, clean, non-sharp gifts. Care: press flat and refold between uses. Retire when: hems fray or the fabric thins.
Project 12: Structured Reusable Fabric Gift Bag
What it looks like: a fabric gift bag with reinforced handles and a stable base, sized to a specific gift.
Best use: presenting a dry, lightweight gift in a bag the recipient can reuse.
Difficulty: Intermediate. Approximate time: 1.5–3 hours.
Suitable sheet: sound woven cotton. Avoid: worn or stretchy sheet for the handles or base.
Materials
- Woven panels
- Handle reinforcement
- An optional smooth base insert
Tools
- Sewing machine
- Fabric shears
- Pins
- Ruler
- Iron
Steps
- Measure the gift and draft the bag with a boxed base.
- Cut panels and reinforce the handle area with sound fabric or tape.
- Sew the bag body, box the corners, and attach handles extending into the body.
- Optionally add a smooth enclosed base insert.
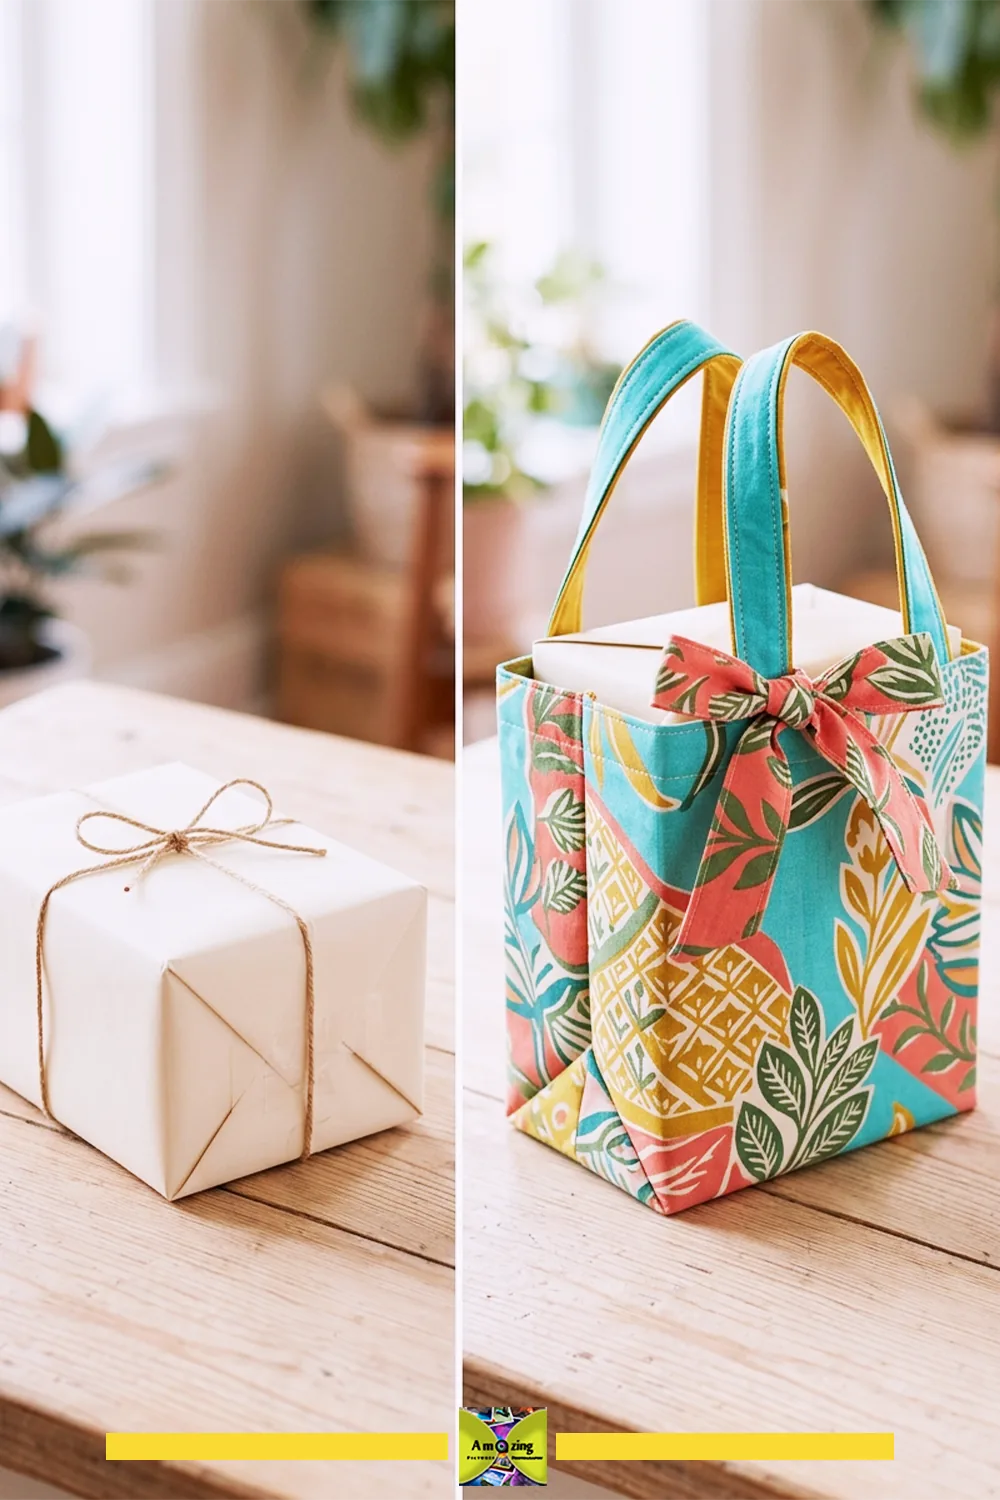
Customization: a contrasting lining, a label tag, or coordinated handles.
Practical tip: extend the handle reinforcement well down into the bag so the top edge does not tear.
Common mistake: stitching handles only at the top edge, where they pull free.
Safety note: lightweight, dry contents only — not a grocery or heavy-carry bag.
Reinforcement: handle attachment points and base corners. Contents and limits: lightweight, dry gifts. Care: remove any insert before laundering. Retire when: handles stretch or the base distorts.
Cost note: The sheet fabric may be free from your own linen cupboard, while handle reinforcement and a base insert are the main extras. Keep those additions simple unless the gift itself calls for a more structured bag.
Project 13: Coiled Fabric-Strip Desk Basket
What it looks like: a firm coiled basket made by wrapping fabric strips around a cord core and stitching the coils together.
Best use: a small desk basket for pens, clips, or other lightweight dry items.
Difficulty: Intermediate to advanced. Approximate time: 3–6 hours.
Suitable sheet: woven cotton cut into strips. Avoid: thick flannel or stretchy jersey, which wrap and stitch unevenly.
Materials
- Fabric strips
- A cord core such as cotton clothesline
- Strong thread
Tools
- Sewing machine with zigzag capability
- Fabric shears or rotary cutter and mat
- Clips
Steps
- Cut fabric into long strips, then wrap them around the cord core at a shallow angle, overlapping as you go.
- Coil the wrapped cord into a flat spiral to form the base, securing with clips.
- Sew adjacent coils together with a wide zigzag so the stitch catches both sides.
- Build the sides by tilting the coil upward and continuing to stitch.
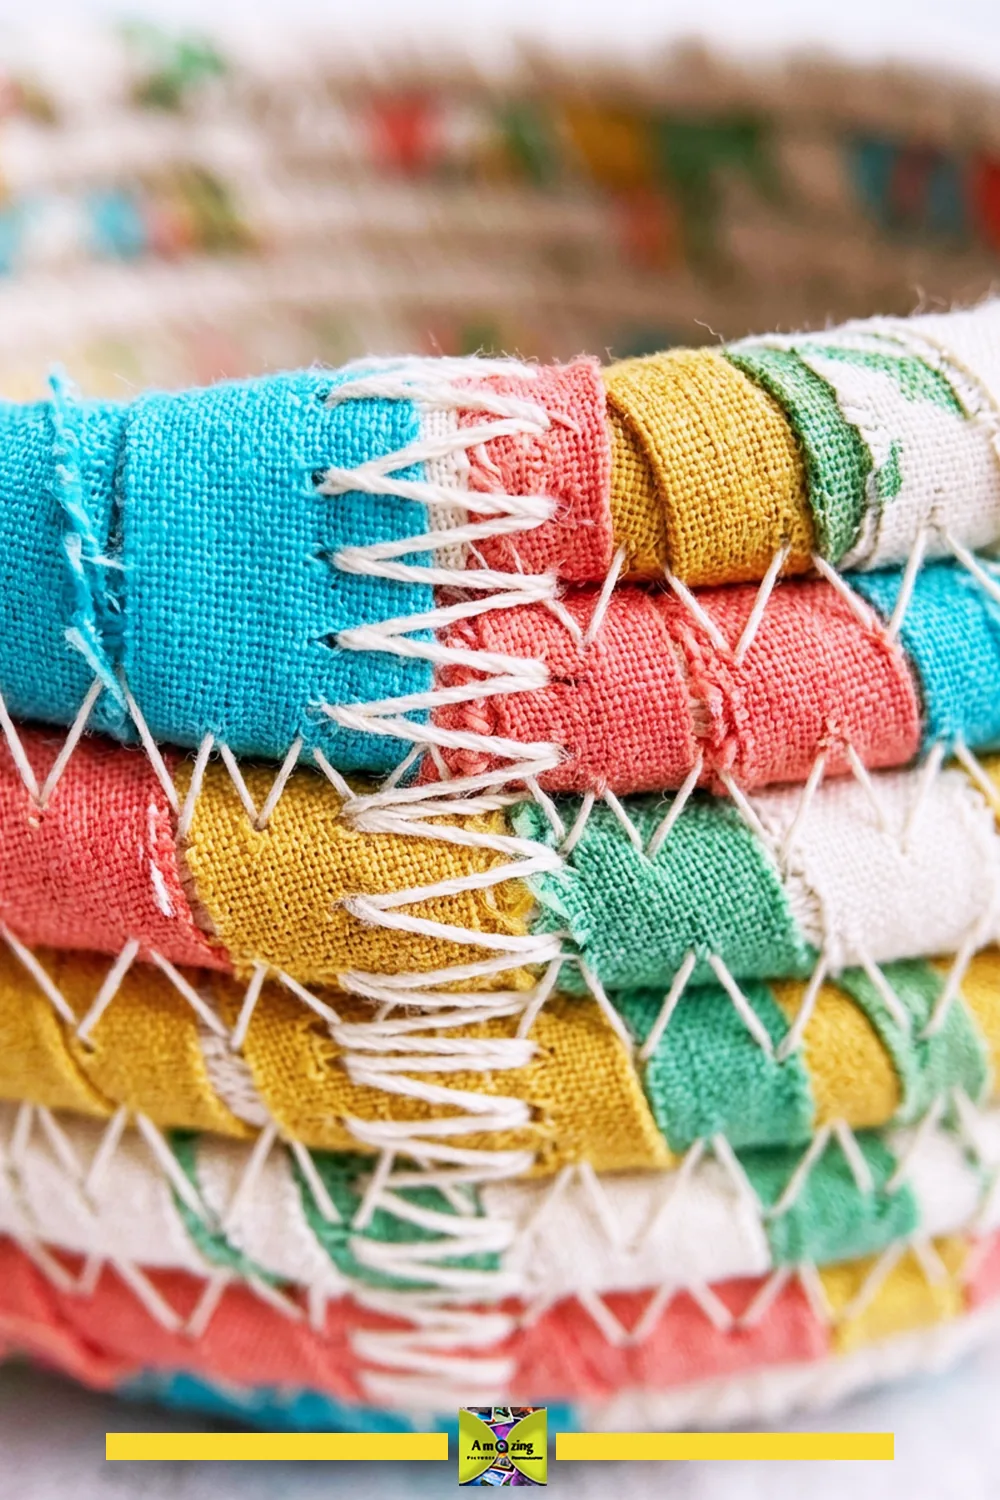
Customization: alternate two strip colors, or finish the top edge with a wrapped, tucked cord end.
Practical tip: keep the coil tight and even so the zigzag always catches both coils.
Common mistake: loose joins that separate into gaps once the basket is handled.
Safety note: this basket is for holding lightweight dry items, not for carrying.
Reinforcement: fully secured coil joins and a broad stable base. Contents and limits: lightweight, dry desk items only. Care: spot-clean; do not machine-wash a coiled basket. Retire when: coils separate, stitching breaks, or the base distorts.
Light-Duty Household Helper Projects
Project 14: Removable Open-Shelf Dust Curtain
What it looks like: a short fabric curtain with a proper header that hangs across an open shelf on a tension rod or removable hardware.
Best use: hiding shelf contents and reducing dust on open shelving, without drilling.
Difficulty: Beginner to intermediate. Approximate time: 1–2 hours.
Suitable sheet: woven cotton that hangs smoothly. Avoid: stretchy jersey that sags unevenly.
Materials
- A woven panel
- Mounting hardware such as a tension rod
Tools
- Sewing machine
- Fabric shears
- Pins
- Iron
- Measuring tape
Steps
- Measure the shelf opening and decide the finished width and length.
- Hem the panel and create a header (a rod pocket or clips) with even gathers.
- Mount with hardware selected for the actual shelf and substrate — independent of the fabric.
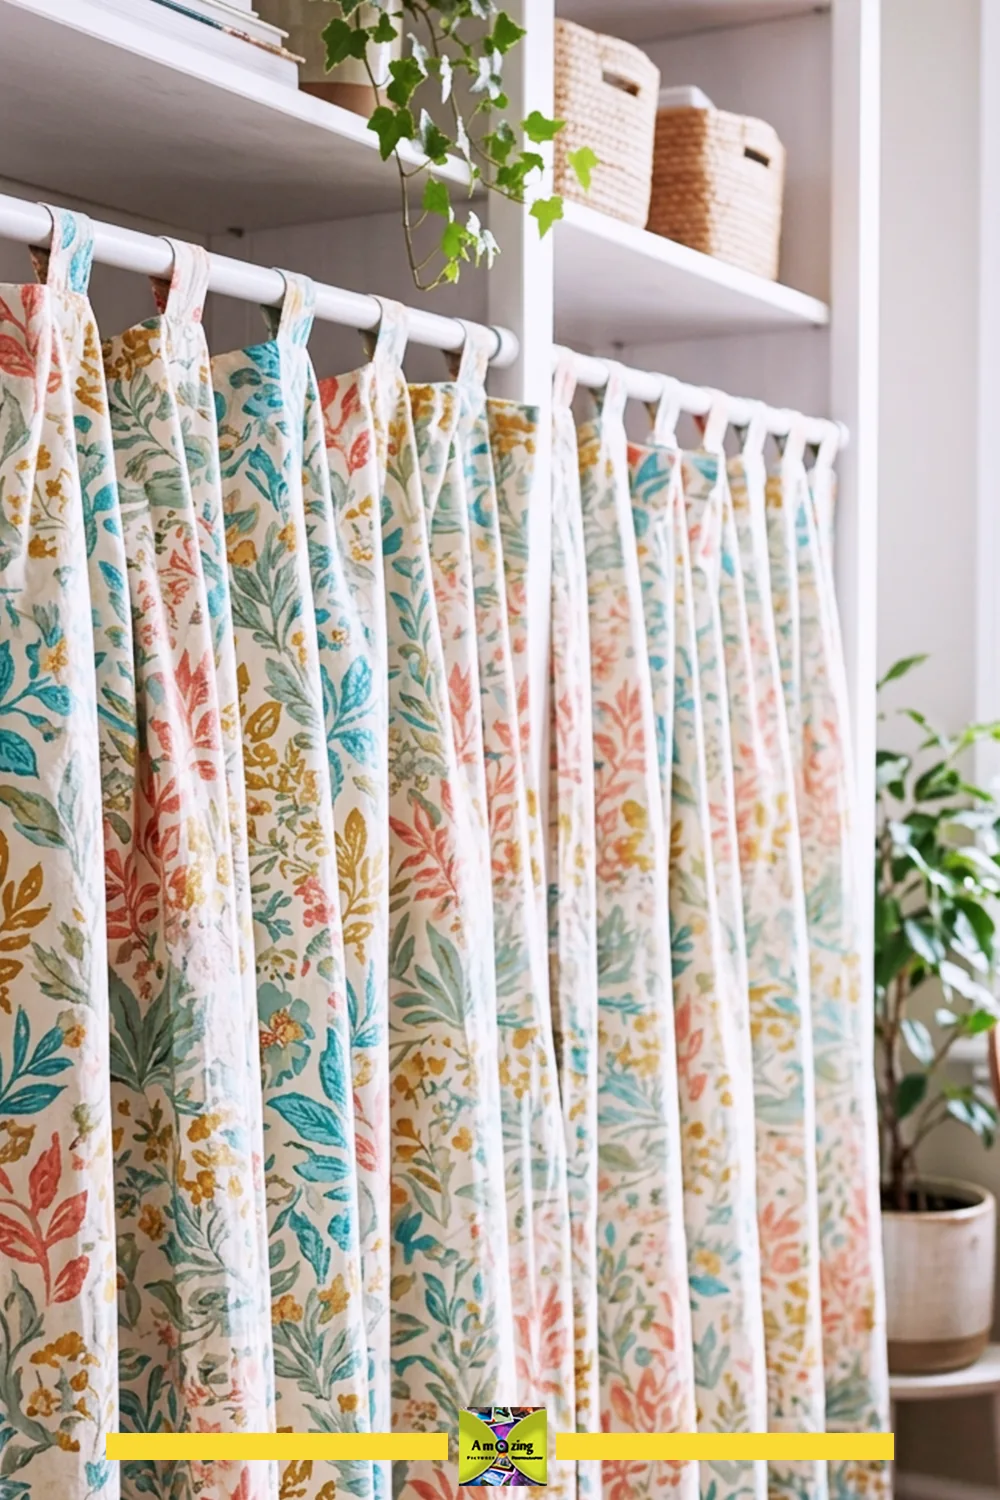
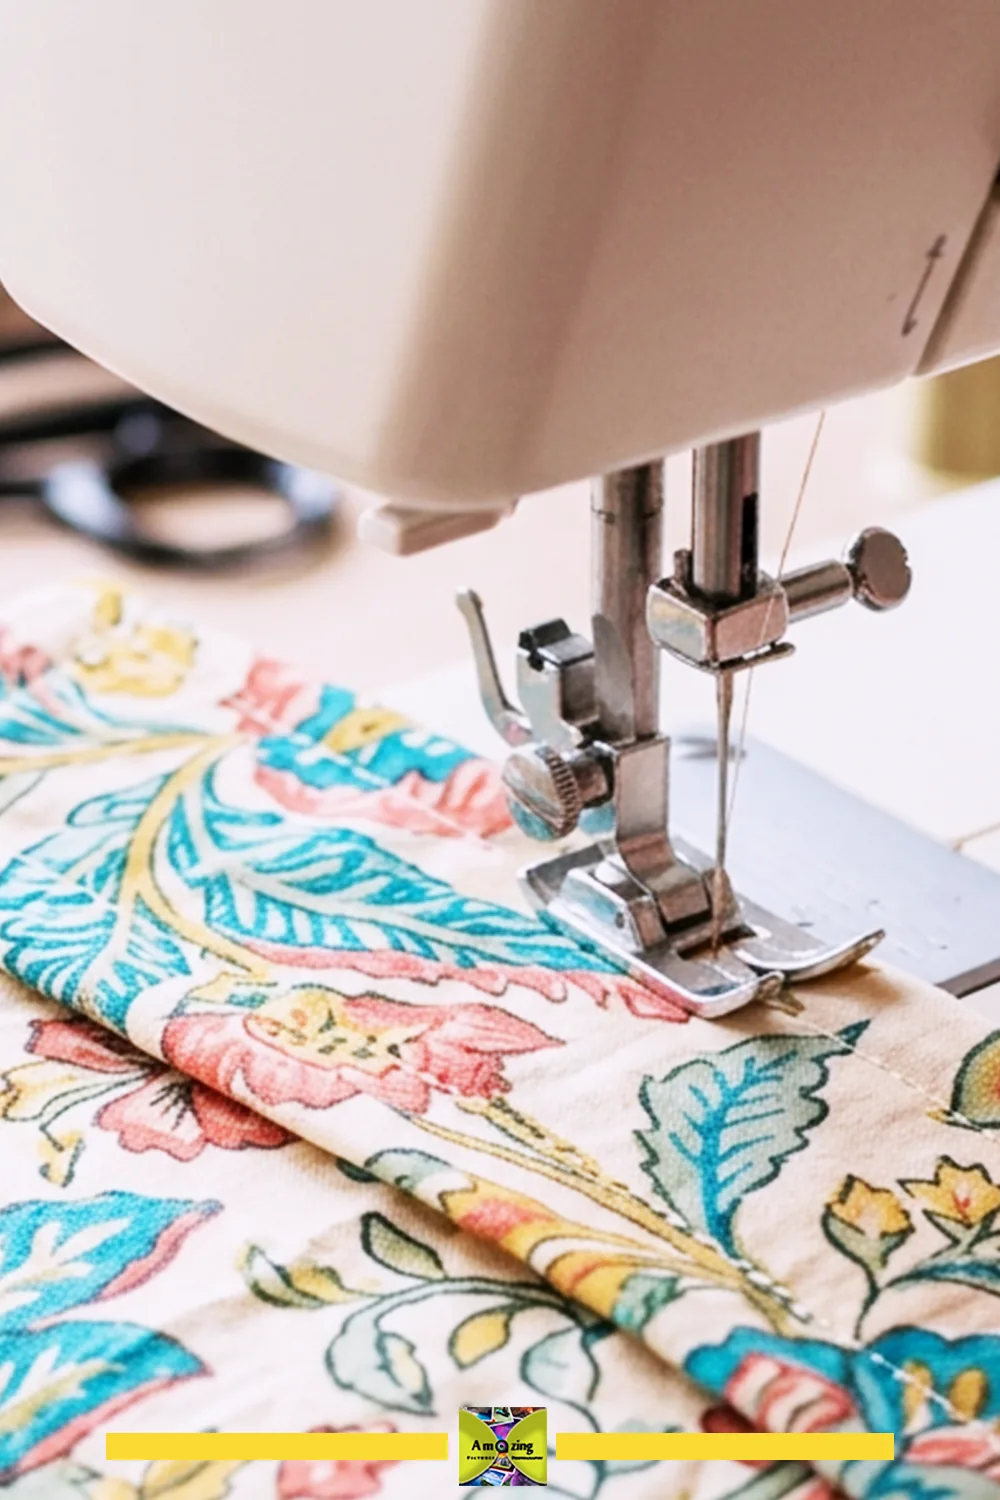
Customization: a rod pocket, clip rings, or a subtle print that ties the room together.
Practical tip: pre-wash and press the panel so the curtain hangs straight and does not shrink after hanging.
Common mistake: mounting hardware rated for a different surface, or leaving long loose loops.
Safety note: mount with hardware suited to the substrate, and keep cords and loops short and out of reach.
Reinforcement: a proper header and even hem. Contents and limits: none — decorative dust reduction only. Care: remove from the rod before laundering. Retire when: it catches, hangs unevenly, or the header tears.
Project 15: Washable Craft-Table Cover
What it looks like: a fitted or draped fabric cover with secured hems and optional corner pockets, sized to a specific table.
Best use: giving a craft table a washable, presentable surface for dry, low-risk work.
Difficulty: Beginner. Approximate time: 1–2 hours.
Suitable sheet: a large sound woven panel. Avoid: anything you would rely on to stop spills or blades.
Materials
- A large woven panel
Tools
- Sewing machine
- Fabric shears
- Pins
- Iron
- Measuring tape
Steps
- Measure the table and draft a cover with enough drop to stay in place.
- Hem every edge and add optional corner pockets that do not create trip hazards.
- Use it only for dry, low-risk work; clean spills immediately according to the product and the furniture maker’s guidance.
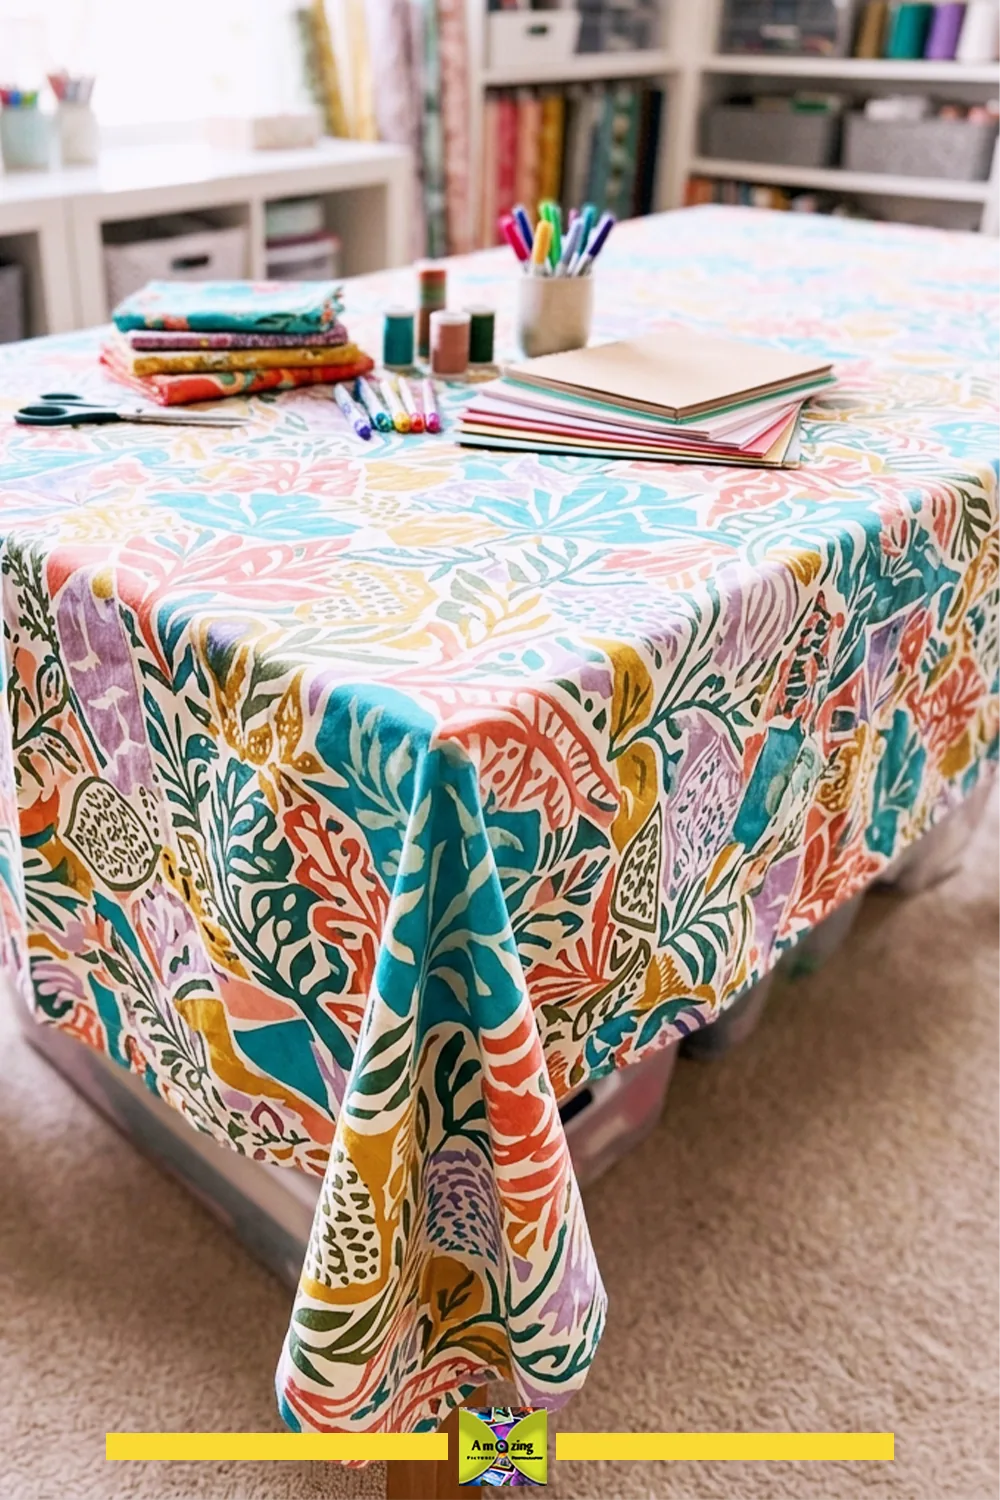
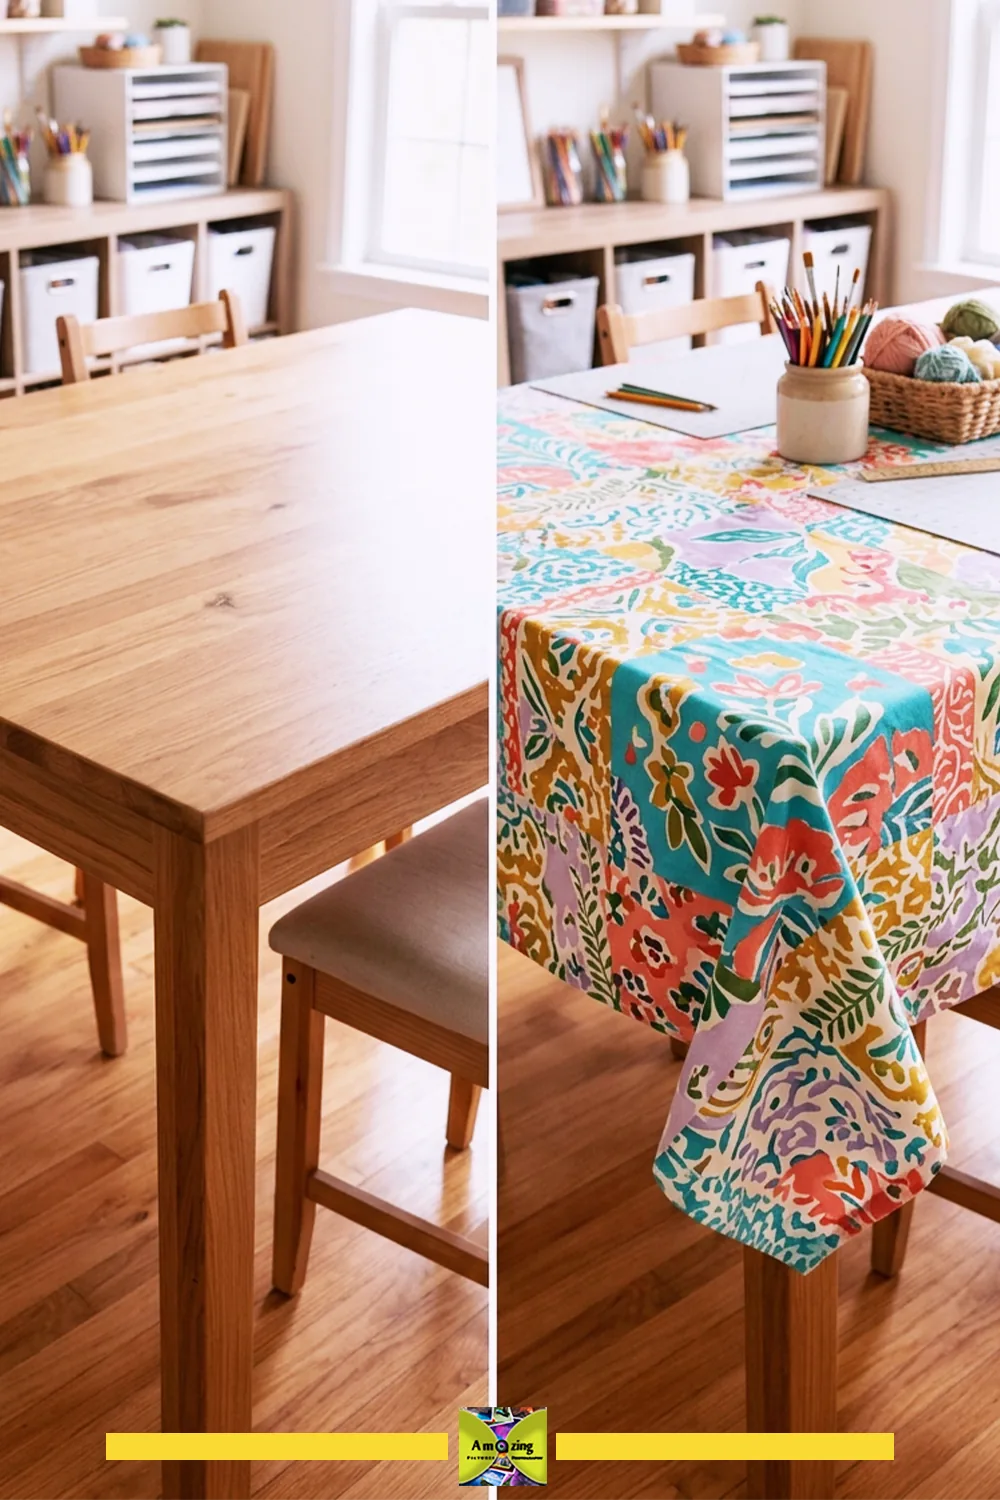
Customization: corner pockets, a contrast trim, or a hem weighted just enough to drape.
Practical tip: pre-wash and pre-shrink the panel so the cover still fits after laundering.
Common mistake: treating the cover as waterproof, cut-resistant, or heat-resistant.
Safety note: no claim of waterproofing, chemical containment, cut resistance, heat resistance, or full furniture protection; use a separate rated barrier for paint, solvents, blades, heat, or heavy wet work.
Reinforcement: secured hems. Contents and limits: dry, low-risk craft work only. Care: remove and wash after dry work. Retire when: it becomes saturated, contaminated, moldy, torn, or slippery.
Make Old Sheets Look Deliberate
Mismatched old sheets can look like a thrift-store pile — or a coordinated set. Limit each project to roughly two to five colors, and group fabrics by weight, weave, stretch, and care needs before matching patterns. Pair one bold floral or geometric print with quieter solids, and choose a shared undertone. Repeat one neutral lining across several projects, align stripes and motifs, and mirror placement on paired bags and hanger covers. When exact matching is impossible, use measured color blocking.
Keep hems, seam allowances, and topstitching consistent, and coordinate zippers, cords, thread, labels, snaps, and visible hardware. Conceal stabilizers, reinforcement, raw seams, and insert edges. Avoid excessive fringe, beads, glitter, lettering, and unrelated trim, and use existing decorative hems only when they are sound and fit the design. Photograph large panels in controlled folds rather than an untidy pile, and show weave, pilling, weak areas, seams, reinforcement, and clean finishes in close-up.
Pressing, Fabric Paint, and Finishing
Check fiber and care labels before using an iron or steamer, and test heat, steam, pressure, and a press cloth on an offcut. Polyester, microfiber, rayon-derived fibers, elastic, fused treatments, prints, and unknown fabrics can scorch, melt, glaze, distort, or transfer. Press rather than drag the iron across stretchy fabric, let fabric and stabilizers cool before moving them, and keep hot equipment stable and away from children, pets, cords, and loose textiles. Switch off and unplug equipment after use.
Test fabric paint, block-printing ink, markers, spray products, and decorative coatings before recommending them, and match paint to the documented fiber and intended laundering. Follow ventilation, curing, and heat-setting instructions exactly, and avoid heat setting when the fabric, elastic, thread, or stabilizer cannot tolerate it. Paint can stiffen fabric, reduce flexibility, transfer, crack, alter care, and affect textile-recovery acceptance — and no unsupported water-repellent, stain-resistant, flame-resistant, or protective coating claim is warranted.
Material note: Test any paint, adhesive, ink, or finish on an expendable offcut from the same sheet. Let it cure fully, flex the fabric, and launder the sample according to the care label before using the product on the finished project.
Care and Maintenance
Follow the most restrictive care requirement among the sheet, lining, stabilizer, thread, zipper, cord, closure, paint, hardware, and rigid insert — never a universal wash, bleach, dry, iron, or disinfect instruction. Remove rigid inserts and detachable hardware before laundering where designed, test dye transfer before contact with pale clothing, paper, upholstery, or finished furniture, and empty pockets and close fasteners before laundering. Dry completely before closing, folding, filling, or storing.
Check seams, handles, pocket openings, casings, zippers, mounting points, and inserts regularly, and repair loose stitching and early fraying promptly. Retire a project that develops mold, persistent odor, dye transfer, severe thinning, open seams, exposed inserts, failed handles, brittle elastic, or loose hardware. Mark every cleaning interval and durability statement for authoritative or firsthand confirmation.
Troubleshooting Old Sheet Fabric
Common problems and material-specific fixes:
- No readable label: test a small offcut for fraying, stretch, pressing, and laundering behavior rather than guessing the fiber.
- Unknown stain or odor: treat cautiously; if it will not fully clean or dry odor-free, reject the sheet.
- Mold or pest evidence: discard or route to a program that accepts it, rather than cutting around it.
- Dye transfer during testing: retire the sheet for projects where it could touch pale surfaces or clothing.
- Fitted sheet smaller than expected after elastic removal: let the fabric relax, then re-measure before choosing a project.
- Worn center tearing during layout: shift pattern pieces to the edges and sound corners.
- Grain hard to identify: pull gently along the length and width to find the stable direction on wovens and the stretch direction on knits.
- Jersey curling at cut edges: stay-stitch or stabilize edges before assembling.
- Flannel shedding or pilling: keep it out of projects where lint matters, and use a wider seam allowance.
- Microfiber slipping: use clips or pattern weights and a walking foot if available.
- Linen or percale fraying: finish edges soon after cutting.
- Marking tool bleeding or not disappearing: test on an offcut; switch to a removable tool that behaves.
- Rotary cutter pushing fabric: check the blade, slow down, and hold the ruler firmly.
- Long edges wavy: avoid stretching while sewing; let the feed dogs move the fabric.
- Mixed fabrics stretching differently: sort by weight and stretch before combining.
- Skipped stitches: check for a blunt or wrong needle type.
- Fabric pulled into the plate: start slightly in from the edge and use a fine needle.
- Thread nesting beneath: rethread the top and bobbin, then retest tension.
- Puckering seams: loosen upper tension and shorten the stitch slightly.
- Stretch seams popping: use a stretch stitch or a second row on the seam.
- Fusible interfacing bubbling or not adhering: test heat and adhesive on an offcut first.
- Handles tearing at the attachment: extend reinforcement into the bag body.
- Hanging pockets bowing: lighten the contents and reinforce the openings.
- Coiled basket rows separating: tighten the coil and re-stitch the join.
- Dye or coating transferring to furniture: remove the project and test before reuse.
Safety When Reusing Bed Sheets
Select clean material from a known source, and reject moldy, pest-exposed, flooded, chemically contaminated, heavily stained, or bodily-fluid-contaminated sheets. Wash suitable material according to reliable care guidance and dry it completely. Use a stable cutting mat and a well-lit work area, and handle seam rippers, scissors, rotary cutters, and punches with the blade pointed away from your body and your hands outside the blade path. Lock, store, and dispose of blades safely.
Keep fingers away from the sewing-machine needle, switch equipment off before changing a needle, foot, bobbin, or setup as the manual directs, and never force stitching through bulky layers. Use a suitable thimble for hand sewing. Press at a material-specific temperature, and never use open-flame fiber tests, burning, heated cutting, or melting to identify fabric. Follow label instructions for adhesives, paints, sprays, and cleaners, and keep textiles, lint, cleaners, paint, and adhesives away from heat, sparks, and flame.
Keep needles, pins, cord, elastic, zipper parts, snaps, buttons, and offcuts away from children and pets, and avoid long accessible loops and unverified choking hazards. Avoid direct food contact and unsupported heat-resistant, medical, protective, child-safe, pet-safe, nonslip, waterproof, structural, or load-bearing claims. Retire a project as soon as fabric, seams, handles, mounts, closures, or inserts begin to fail.
Donation, Recycling, and When to Let Go
This guide is about reuse — giving an existing textile another practical use — not about making something “zero-waste” or “sustainable.” Bed sheets may contain cotton, linen, polyester, nylon, rayon-derived fibers, elastane, blends, dyes, printing inks, optical brighteners, fabric treatments, sewing thread, elastic, labels, adhesives, paint, interfacing, zippers, and hardware. None of that disappears when you cut the sheet.
Donation, resale, textile-collection, specialty-recovery, composting, and disposal options vary by location, and programs may reject stained, torn, moldy, wet, cut, painted, mixed-fiber, elastic-bearing, or contaminated material. Confirm current rules with the manufacturer, local government, textile-recovery program, charity, composting service, or waste authority before claiming anything is accepted — and do not claim a painted, glued, lined, interfaced, zippered, elasticated, or hardware-bearing project remains recyclable or compostable.
Many textile-recovery programs accept clean, dry sheets even when stained or torn, but never place textiles in a curbside recycling bin. A clean, usable sheet may provide more value through continued use, repair, donation, moving protection, or theater and school reuse than through cutting — so choose projects you genuinely need and avoid accumulating unusable scraps.
Frequently asked questions
Clean, sound woven sheets work well for drawstring bags, storage sacks, garment dust covers, reusable gift wrap, storage-bin liners, fabric-wrapped hangers, shelf curtains, and craft-table covers. Choose projects that match the sheet’s remaining strength and the wear of the area you cut from.
Inspect it in bright light for mold, mildew, insects, pest residue, bodily-fluid stains, chemical residue, smoke, strong odor, unstable dye, thinning, pilling, tears, and failing elastic. If it is contaminated, moldy, pest-exposed, flooded, or severely degraded, reject it rather than cutting around it.
Yes, when the care label allows it. Wash according to the sheet’s care instructions and dry it completely before cutting or storing. Laundering does not automatically make a contaminated textile safe to craft with.
Reusable gift wraps, drawstring bags, garment dust covers, and fabric-wrapped hangers are good first projects. They use simple straight seams and hems and do not require zippers, heavy reinforcement, or complex construction.
Photograph and measure the sheet, mark worn and damaged areas, then remove the elastic with a seam ripper or cut off a damaged elasticized edge. Open the corner seams, let the fabric relax, and square the usable panels without wasting large sound sections.
Often yes. Many textile-recovery programs accept clean, dry sheets even when stained or torn, but they reject wet, moldy, or hazardous-contaminated material, and rules vary by location. Confirm current acceptance rules with the receiving program, and never place textiles in a curbside recycling bin.
Start With One Sheet and One Real Need
You do not need a full stack of projects to make this worthwhile. Pick the one item you would actually use — a drawstring bag, a bedside organizer, a lined bin insert — inspect and clean a suitable sheet, test your seams on an offcut, and make it. The best answer to what to do with old bed sheets is the one that fits your home, your skill level, and the real condition of the fabric in your hands.
If you enjoyed working through a material-specific upcycling guide like this one, our plastic bottle cap crafts guide applies the same rigorous, project-by-project approach to a very different material.
Sources
- Federal Trade Commission — Textile Fiber Products Identification Act (16 CFR Part 303), ftc.gov
- Federal Trade Commission — Clothing and Textiles business guidance, ftc.gov
- Massachusetts DEP — “Used Textiles: A Valuable Resource” fact sheet, mass.gov
- King County (WA) — Accepted textiles / Threadcycle, kingcounty.gov
- U.S. Army Public Health Command — post-mold household goods evaluation and cleaning fact sheet (mold and mildew on textiles)
- Oregon Health Authority / DHS — flood salvage guidance for contaminated textiles
- ISEAI — “Keep or Toss 101: Dealing with Belongings Following Mold Exposure”
- Sewing-machine manuals (Janome, Bernina) — needle, thread, and stitch selection for lightweight woven and knit fabrics
- The Company Store, Amerisleep, Saatva — percale, sateen, microfiber, flannel, and jersey sheet properties