A T-shirt can be too worn to wear and still hold useful jersey. The collar is stretched, the underarms are thin, or a small stain sits in plain view, yet the back panel, sleeves, and much of the front remain clean and intact. Read the fabric before you cut: how much stretch it has, how well it recovers, and whether it is thick enough for the project you have in mind. The condition of the fabric decides what the shirt can become.
Work through these steps once before choosing any project. Set aside the fabric you actually have, and match the project to it.
- Consider wear, repair, or donation first. If the shirt is still presentable, wearing it, repairing it, or passing it along may serve you better than cutting it. Textile donation and recovery rules vary, so confirm acceptance with the receiving organization. A university clothing-reuse resource on refashioning explains how to evaluate a garment before it becomes craft fabric (LSU AgCenter clothing refashion guide).
- Confirm ownership and set aside keepsakes. Cut only shirts you are free to alter. Put any garment with real sentimental value to one side before the scissors come out.
- Read the fiber and care labels. Ordinary cotton jersey, cotton blends, elastane blends, rib knit, and performance fabrics all behave differently under a needle. The label tells you the fiber content and washing limits.
- Reject damaged or contaminated fabric. Set aside shirts with mold, pests, chemical contamination, persistent unexplained odor, degraded fibers, or unsuitable coatings.
- Wash and dry according to the label. There is no single universal wash temperature. Use the garment’s own care label, and measure after the shirt has been washed and dried the way you will launder the finished item.
- Inspect the weak points. Check thinning underarms, weakened shoulders, stretched necklines, holes, print damage, and distorted seams.
- Measure the usable panels. Lay the shirt flat and note the width and length of each sound section, excluding the damaged areas.
- Find the greatest stretch, recovery, grain, and curl. Most jersey stretches most across the body. Note which direction recovers quickly and which direction the cut edge rolls toward.
- Sort before you match. Group fabric by thickness, stretch, care compatibility, and color. Match fabrics by behavior before you match them by color.
- Keep useful hems and sound sections, and store offcuts dry. A preserved hem can become a finished edge later. Keep clean offcuts in a dry place so they are ready for smaller projects.
Jersey Basics: Stretch, Needles, Stitches, and Seams
Jersey is a knit, not a woven fabric. It stretches, it recovers, and its cut edges curl. Those three behaviors change how you choose a needle, a stitch, and a seam finish. Sweater knits and T-shirt jersey are not the same material: a fine cotton jersey behaves differently from a loose, bulky sweater knit, and the cutting and sewing decisions differ. If you are working from sweater fabric instead, see the separate guide to old sweater crafts.
Needle Choice
Use a ball-point needle for ordinary jersey. The rounded tip slides between the knit loops instead of piercing them, which reduces skipped stitches and small holes. Schmetz sells this as a jersey needle, and the manufacturer’s chart ties the needle size to the fabric weight (Schmetz jersey ball-point needles). For highly elastic fabric with a large elastane share, a stretch needle may sew cleaner. Check your sewing-machine manual and the needle manufacturer’s size guide for the exact size for your fabric, because the right number depends on the shirt’s weight.
Stitch Choice
A straight stitch can pop the first time a seam is pulled, because the thread cannot give as the fabric stretches. Use a narrow zigzag, a stretch stitch, or an overlock stitch where the seam must move with the body. A straight stitch is fine only for seams that will not be stretched, such as a hem on a non-stretch edge or a braided join that stays still.
Do not pull the fabric through the machine. Pulling stretches the seam as it forms, which leaves a wavy, distorted edge that will not recover. Let the feed dogs move the fabric, and support the weight of larger pieces so the machine is not dragging them.
Seam Finishes and Stabilizing
Not every knit can be left with raw edges. A fine jersey that is cut across the stretch direction curls and may unravel at a high-stress seam. A serged or zigzagged edge stays flat. Knits do not ravel the way wovens do, but a stressed seam still needs a secure finish. When a project calls for it, stabilize edges with a compatible knit interfacing or stay tape, following the manufacturer’s instructions for pressing and care.
Test a Cut-Off Before You Sew
Cut a small piece from a hidden part of the shirt and run it through the machine first. Watch for skipped stitches, puckering, and poor recovery. Check whether the dye transfers to a damp white cloth, and wash the test piece the way you will wash the finished item. This test tells you whether to change the needle, the stitch, the thread, or the layout before you commit to a full seam.
Keep a scrap of each tested shirt pinned to an index card with the needle, stitch width and length, and thread written on it. After years of sewing old tees, the setup that works most often for me is a 75/11 stretch needle, a narrow zigzag at about 0.5 mm wide and 2.5 mm long, and ordinary all-purpose polyester thread. The exceptions are thin, slubby tri-blend shirts, which skip stitches until I switch to a ballpoint needle and lengthen the stitch slightly. Once a card exists for a fabric, the next project from a similar shirt starts with a seam that already works.
Wearable Refashions
These six projects turn sound shirt panels into clothing that fits an adult body. Each one depends on the shirt being large enough to cut the needed pieces with the stretch running the right way.
1. Bound-Neckline Tank Top
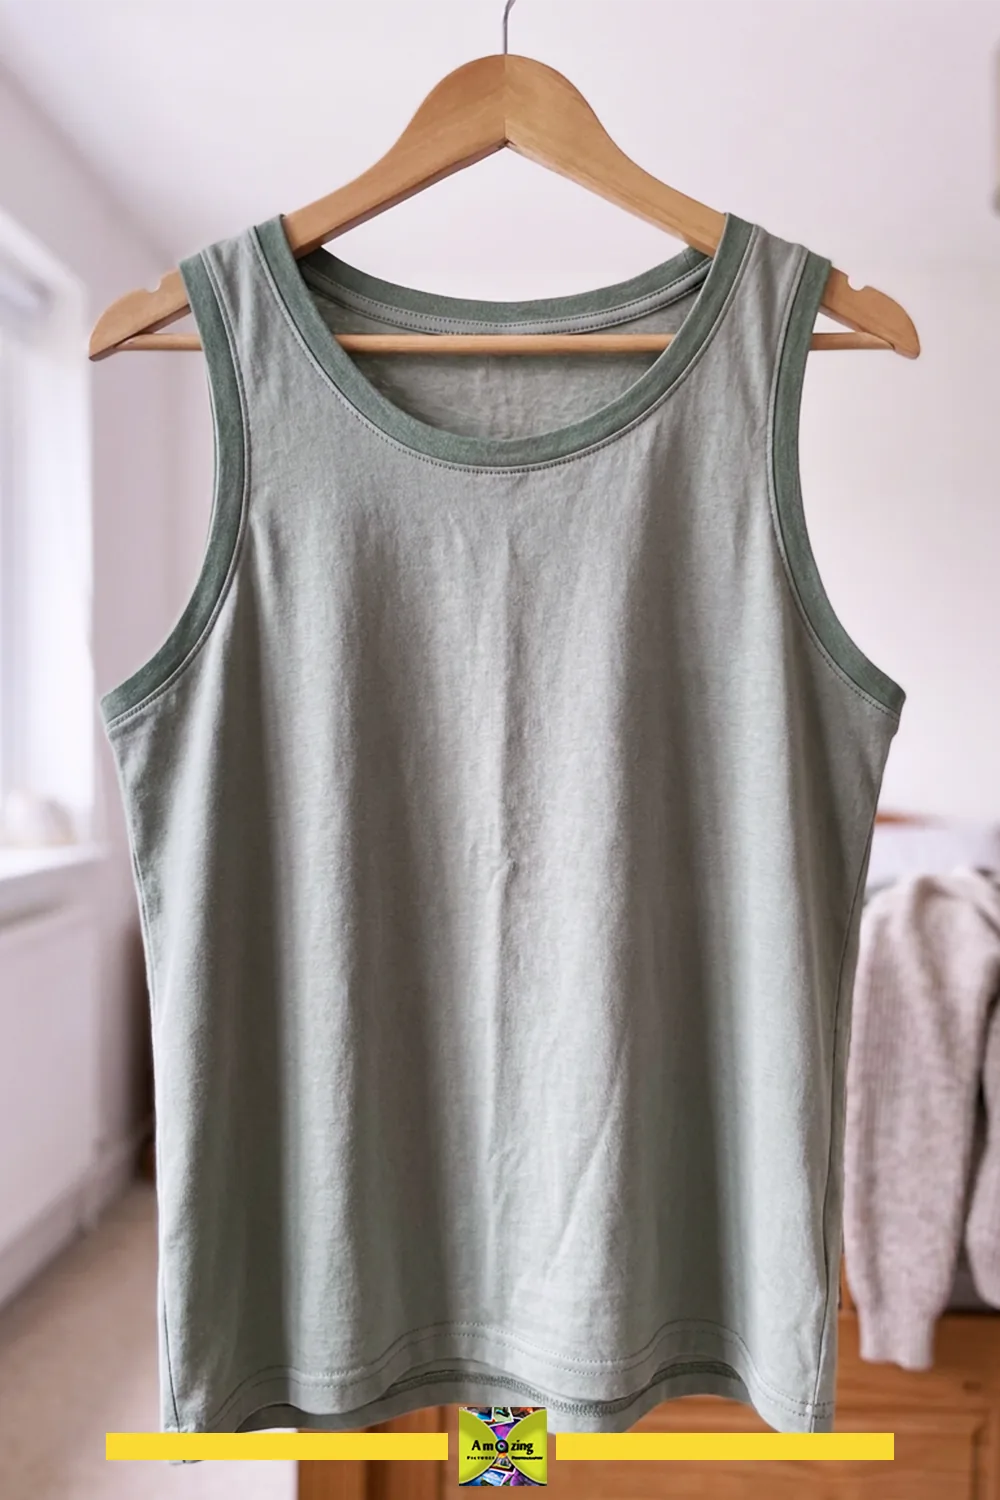
What it looks like: A sleeveless top with clean armholes and a bound neckline cut from one oversized shirt.
Best use: Warm-weather layering under a cardigan or jacket.
Difficulty: Intermediate.
Approximate time: 1 to 2 hours, plus a fitting stage (an estimate; confirm with your own practice).
Materials: One oversized T-shirt with sound body panels; enough leftover jersey for the neck and armhole binding.
Tools: Fabric shears, tape measure, chalk or a washable marker, pins, sewing machine with a ball-point needle, iron.
Steps:
- Put the shirt on inside out and mark the shoulder line, side seams, and the lowest point of coverage you want at the neck and under the arm.
- Plan the armholes before cutting. A bound tank needs a higher, smaller armhole than a casual muscle shirt, because the binding must lie flat without gaping.
- Mark the new neckline and armholes on the shirt while it is still whole, leaving seam allowance.
- Cut the neckline first, then try the shirt on again and adjust before touching the armholes.
- Cut the armholes and try the shirt on once more. Check that the front and back give full coverage and that the binding has something to grip.
- Cut binding strips across the greatest stretch, at least as long as the opening.
- Sew the neck binding, then the armhole bindings, with a narrow zigzag or stretch stitch, stretching the binding slightly as you go.
- Press the seams flat and try the shirt on. The binding should sit against the skin without puckering or gaping.
Customization: A deeper back scoop, a slightly wider binding in a contrast color, or a shorter hem. Keep the front and back balanced.
Practical tip: Leave the original bottom hem in place. It is already finished and saves you a hem.
Common mistake: Cutting the armholes too low and discovering the binding has nothing to hold and gaps at the underarm.
Safety note: Cut away from your body and keep the blades closed when you are not cutting. Remove every pin before you put the top on.
2. Lounge Shorts From Large Shirts
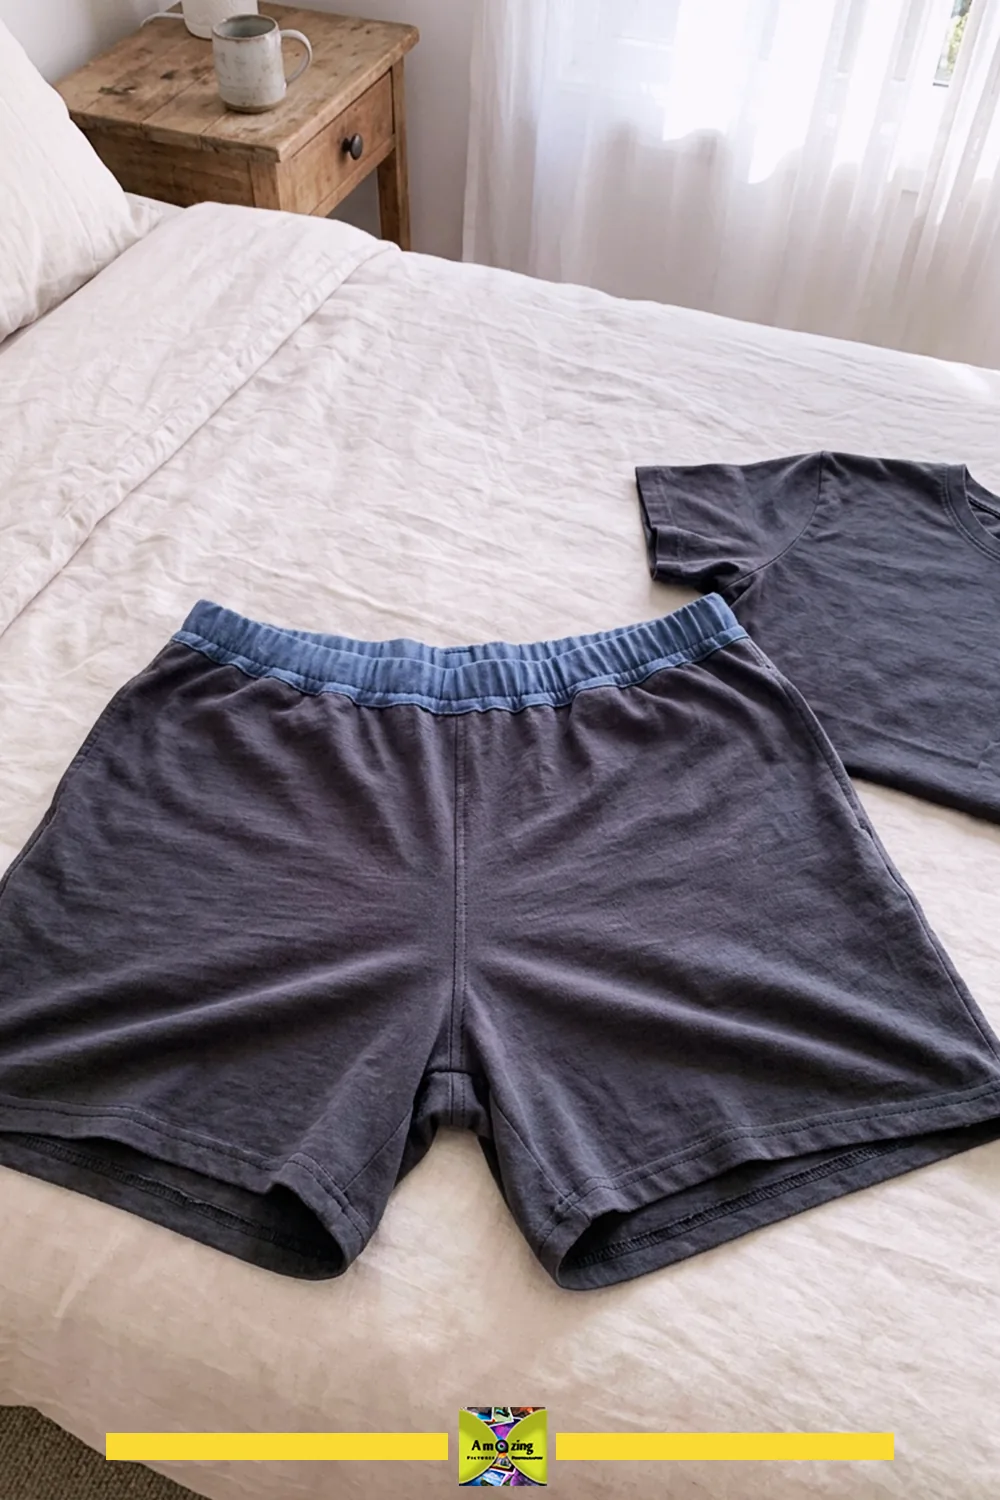
What it looks like: Pull-on shorts with a soft waistband and finished legs, cut from the widest panels of large shirts.
Best use: Sleepwear or relaxing at home in cool weather.
Difficulty: Intermediate.
Approximate time: 2 to 3 hours (an estimate; confirm with your own practice).
Materials: Two or more large T-shirts with matching stretch; elastic for the waistband cut to your measurement.
Tools: A knit-shorts pattern in your size, or the materials to trace an existing pair; fabric shears, pins, chalk, tape measure, sewing machine with a ball-point needle, safety pin.
Steps:
- Choose an adult knit-shorts pattern in your size, or trace a pair of shorts that fit. Do not enlarge a child-sized pattern by guesswork, because the rise and crotch curve change with size.
- Lay the pattern pieces so the greatest stretch runs around the body, not down the leg.
- Cut the front and back pieces from the largest sound panels, keeping the hem lines level.
- Sew the inner leg seams, then the crotch seam, with a stretch stitch.
- Make a casing at the waist and thread the elastic, or attach a wide elastic band folded over the top edge.
- Hem the legs, or keep an original shirt hem as the finished edge.
- Try the shorts on and check the rise, the crotch, and that you can sit and bend without the seams pulling.
Customization: A contrast waistband from a second shirt, side panels in a different color, or a slightly longer leg. Keep the stretch direction consistent across every panel.
Practical tip: Match the two shirts by stretch and weight before you match them by color.
Common mistake: Ignoring the rise. A pair cut from a too-short panel will sit too low and pull when you move.
Safety note: Test the elastic for comfort before you sew the waistband closed, and remove the safety pin once the elastic is threaded through.
3. Two-Shirt Swing Dress
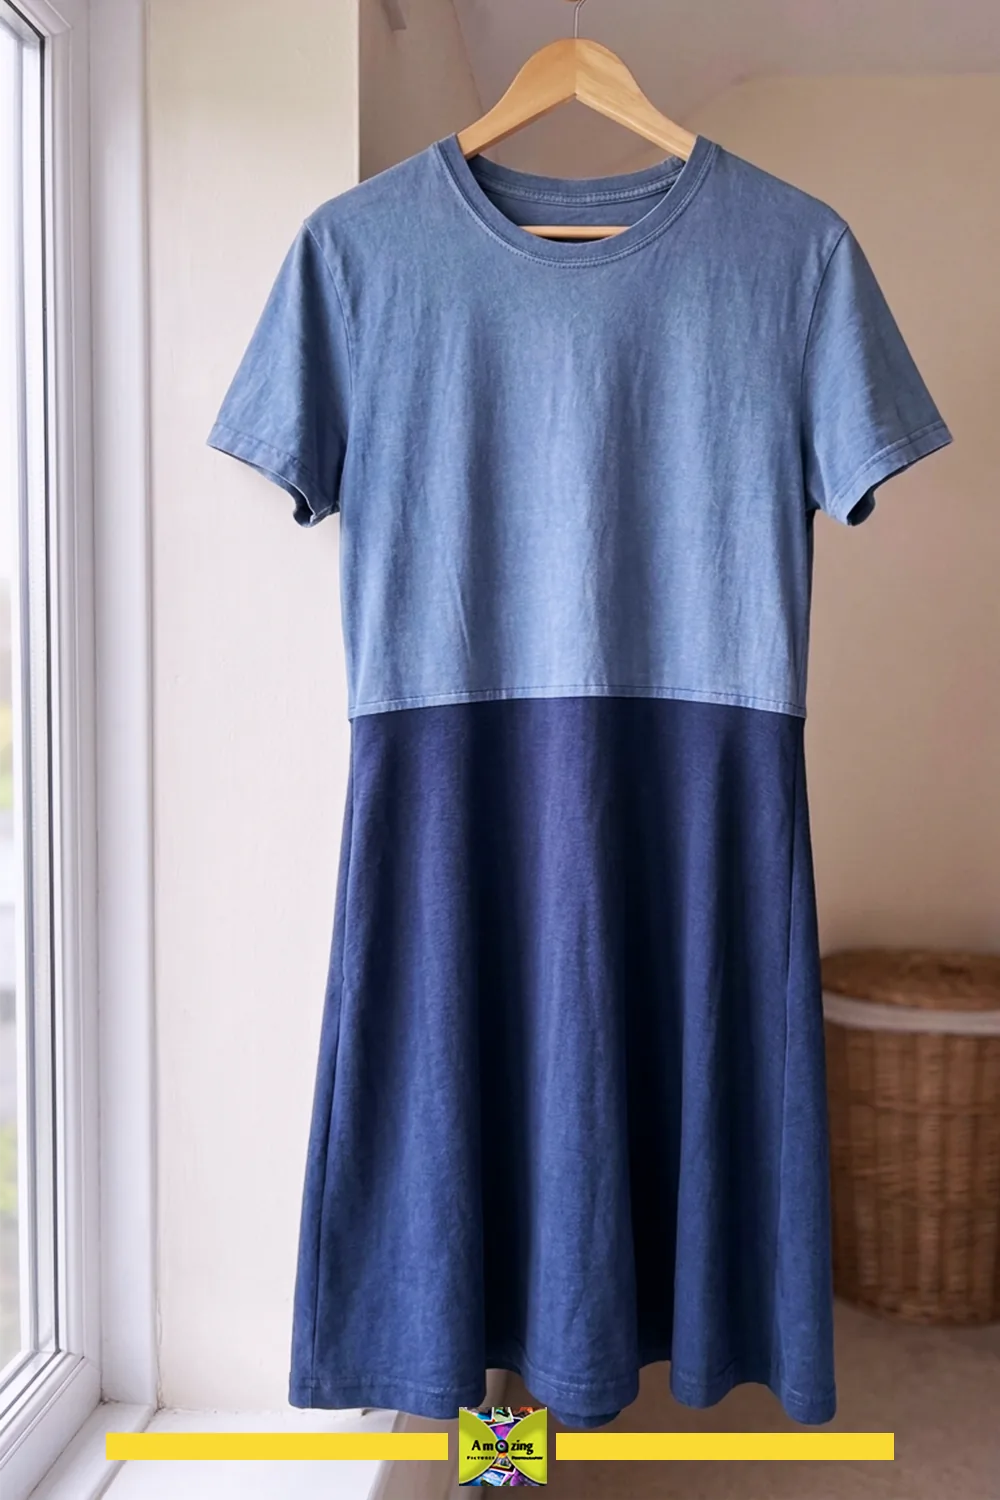
What it looks like: A casual dress made from two matched shirts joined at the waist, keeping the original hems and necklines where they help.
Best use: A loose everyday dress for warm weather.
Difficulty: Intermediate.
Approximate time: 2 to 4 hours (an estimate; confirm with your own practice).
Materials: Two T-shirts with compatible stretch and weight; thread to match.
Tools: Fabric shears, pins, chalk, tape measure, sewing machine with a ball-point needle, iron.
Steps:
- Measure from your shoulder to your natural waist, then from your waist to the length you want the skirt to fall.
- Use the top shirt as the bodice, keeping its neckline and shoulders. Cut it to just below the waist with seam allowance.
- Use the lower shirt as the skirt. The width of the lower panel at the waist must meet the width of the bodice, so a wider shirt works better.
- Match the stretch direction on both panels and align the side seams and center front before you pin.
- Sew the waist seam with a stretch stitch, easing the skirt to the bodice if the widths differ.
- Try the dress on. Check that the waist sits where you want it and that the lower section hangs without pulling the bodice.
- Press the waist seam and finish any raw edge you did not keep from the original hems.
Customization: A contrast waist band, or a longer skirt from a larger shirt. Keep old graphics away from the waist seam so they do not sit across the midsection.
Practical tip: The lower section carries more weight, so pick the heavier, more stable shirt for the skirt.
Common mistake: Joining two shirts with different stretch, which makes the waist seam twist and the skirt sag.
Safety note: Pin along the seam, not across the direction you will sew, and remove the pins as you reach them.
4. Pull-On Panel Skirt
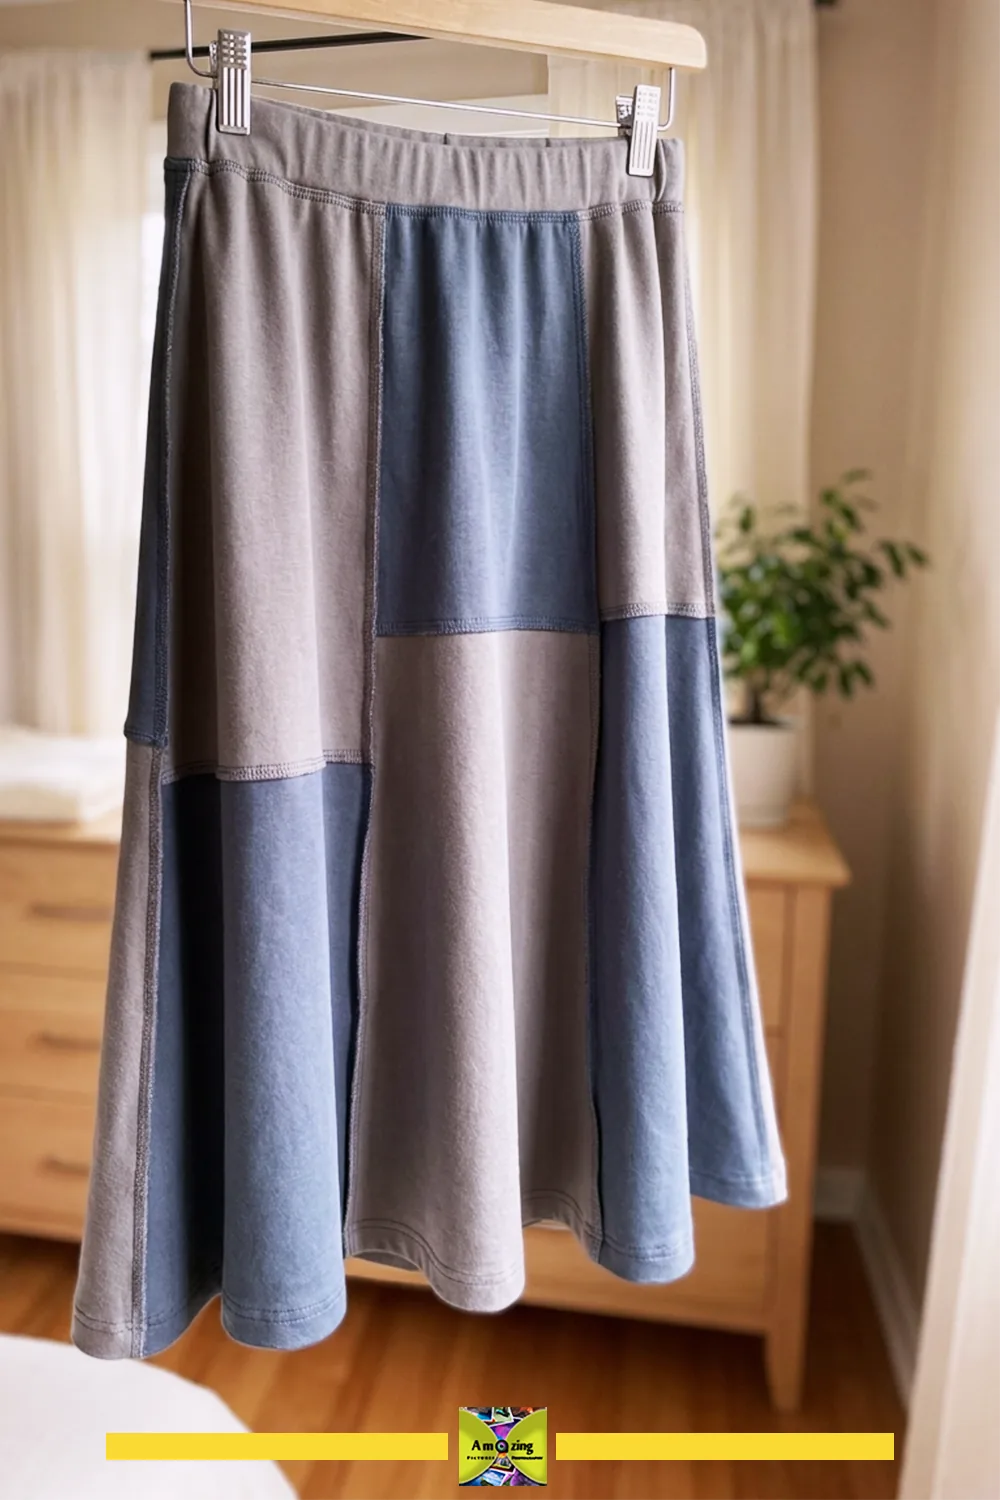
What it looks like: A knee-length pull-on skirt with a soft elastic waistband, cut from the widest body panels.
Best use: A comfortable everyday skirt.
Difficulty: Beginner to intermediate.
Approximate time: 1 to 2 hours (an estimate; confirm with your own practice).
Materials: Two or three large shirts with matching stretch; elastic for the waist.
Tools: Fabric shears, pins, chalk, tape measure, sewing machine with a ball-point needle, safety pin.
Steps:
- Measure your hip at its widest point and decide the finished length. The skirt must clear the hips with room to pull on.
- Lay the panels so the stretch runs around the body, and cut them wider than the hip measurement plus seam allowance.
- Sew the side seams with a stretch stitch.
- Fold the top edge over the elastic and sew a casing, or attach the elastic directly to the top edge.
- Hem the bottom, or keep an original shirt hem.
- Try the skirt on and check hip clearance, length, and that the fabric is not see-through when stretched.
Customization: A slightly tapered shape, a contrast waistband, or a single front panel with plain side panels.
Practical tip: Hold the skirt up to the light before you sew, so you catch a thin or printed panel that would be too sheer when stretched.
Common mistake: Treating this as “cut a shirt and add elastic” without checking hip clearance, which leaves a skirt that will not pull over the hips.
Safety note: Remove the safety pin as soon as the elastic is threaded, and keep the elastic relaxed enough to breathe.
5. Stabilized Open-Front Cardigan
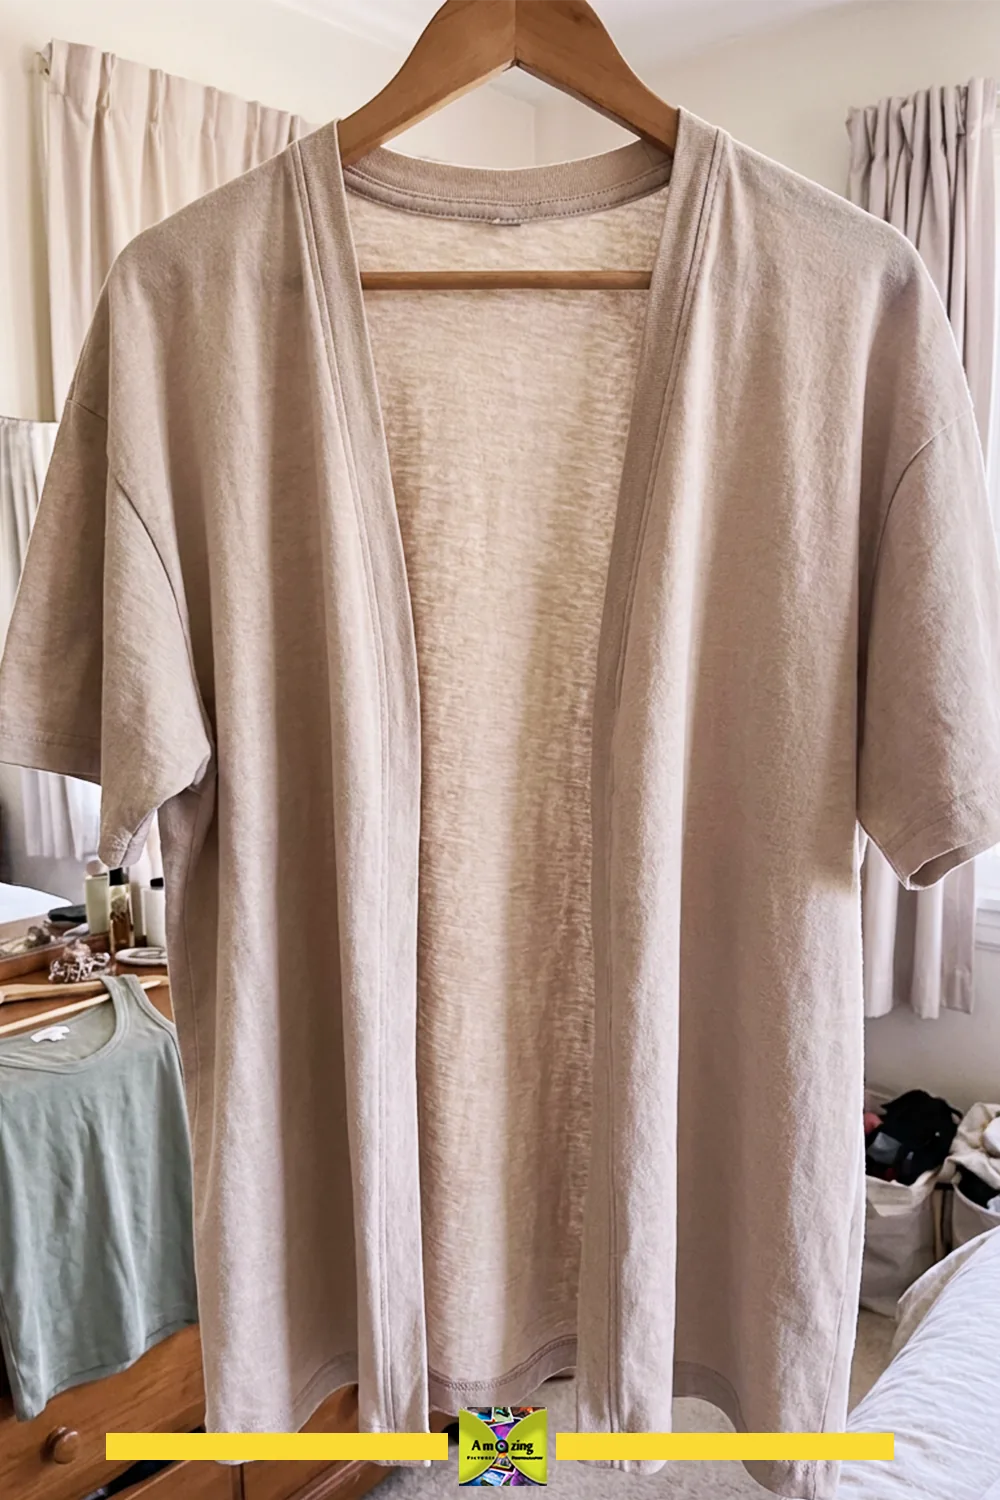
What it looks like: A lightweight open-front layer cut down the center of a shirt, with finished front edges and neckline.
Best use: A light layer over a tank top or dress.
Difficulty: Intermediate.
Approximate time: 1 to 2 hours (an estimate; confirm with your own practice).
Materials: One large shirt with sound front and back panels; compatible knit stay tape or interfacing for the front edges.
Tools: Fabric shears, pins, chalk, tape measure, sewing machine with a ball-point needle, iron.
Steps:
- Lay the shirt flat and mark a straight line down the exact center front, from the neckline to the hem.
- Cut along the line. An unfinished center cut is not a finished garment, so plan the front edge now.
- Press the cut edges and stabilize them with knit stay tape or a light knit interfacing so they do not curl or stretch out of shape.
- Fold the stabilized edges under and topstitch with a stretch stitch, or bind them with jersey strips.
- Finish the neckline and the hem with the same method so the whole edge reads as one design.
- Try the cardigan on and check that the front edges hang straight without curling.
Customization: A narrow contrast binding along the front, or a shorter, cropped length. Keep the front edges even on both sides.
Practical tip: Stabilize the front edges before you fold them under, or the jersey will ripple and stretch as you topstitch.
Common mistake: Leaving the raw center cut unfinished and expecting it to behave like a woven garment, which leaves a curling, gaping front.
Safety note: Press the interfacing with the iron set for the fabric, and test the heat on a scrap first.
6. Fitted Jersey Briefs
What it looks like: A close-fitting undergarment with a properly designed gusset and enclosed elastic edges.
Best use: A personal, machine-washable undergarment.
Difficulty: Intermediate to advanced.
Approximate time: 2 to 3 hours, plus a fitting stage (an estimate; confirm with your own practice).
Materials: Clean, sound jersey with good recovery; compatible underwear elastic; an adult briefs pattern in your size.
Tools: Fabric shears, pins, chalk, tape measure, sewing machine with a ball-point needle or stretch needle, iron.
Steps:
- Start from a properly fitted adult briefs pattern, or trace a pair that fits well, keeping every seam allowance.
- Choose jersey with strong recovery. A worn, baggy panel will not hold its shape at the leg openings.
- Cut the pieces with the greatest stretch running around the body, and add a gusset in a breathable knit.
- Sew the side seams and the crotch, then the gusset, with a stretch stitch.
- Attach elastic to the waist and leg openings so it is enclosed by fabric, with no exposed edge against the skin.
- Try the briefs on and check the fit at the waist, the legs, and the crotch. Make a test pair before cutting into several shirts.
Customization: A higher or lower rise, or a contrast elastic. Use unprinted fabric where it sits against the skin.
Practical tip: Test one pair and wash it before cutting a whole set, so you can adjust the fit and the seam finish.
Common mistake: Skipping the gusset or using fabric with weak recovery, which leaves leg openings that stretch out and gape.
Safety note: Use clean fabric, keep every seam smooth against the skin, and stop wearing the pair if any seam or elastic causes irritation.
Accessories to Wear and Use
These seven projects use smaller, sound pieces of jersey. They range from a few minutes of work to an afternoon, and most of them travel well as small, washable items.
7. Flat-Braid Accent Belt
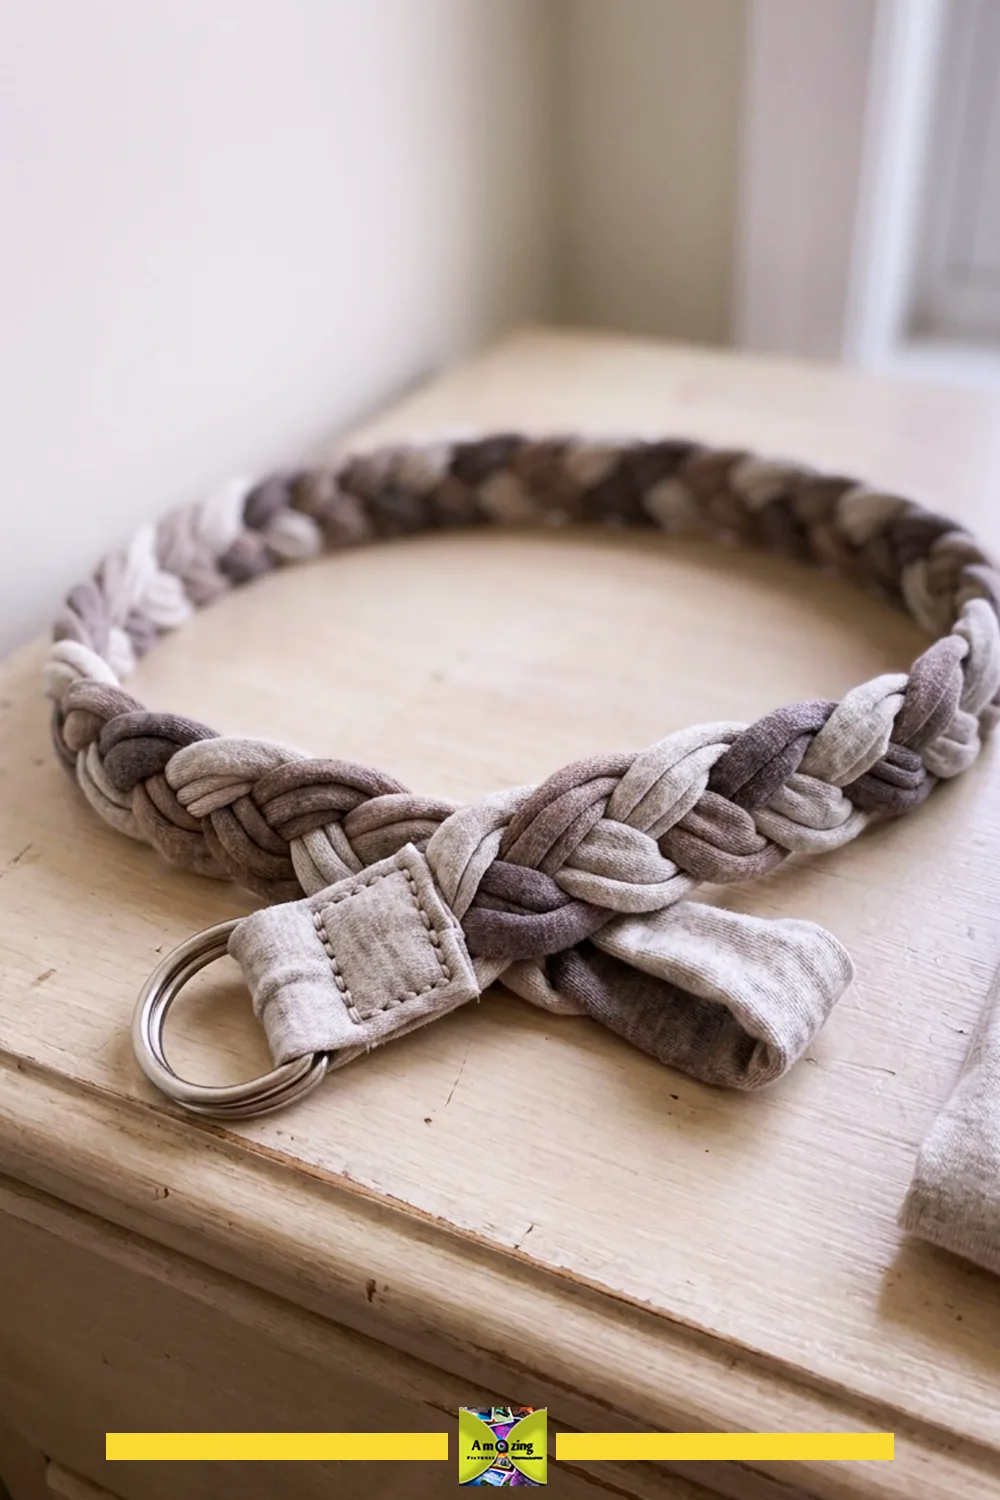
What it looks like: A flat braided belt with stitched ends and a secure closure, made from long jersey strips.
Best use: A soft accent to define the waist of a dress or tunic. This is an accessory, not a carrying strap or restraint.
Difficulty: Beginner.
Approximate time: 30 to 60 minutes (an estimate; confirm with your own practice).
Materials: Sound jersey strips long enough for your waist plus a knot allowance; two D-rings or a sewn button loop for the closure.
Tools: Fabric shears or a rotary cutter, pins, sewing machine with a ball-point needle.
Steps:
- Cut three long strips from sound jersey, each longer than your finished belt length, because braiding shortens the work.
- Anchor the three strips together at one end and braid them flat, keeping the tension even.
- Braid a little past your target length, then measure it around your waist while the strips are still loose.
- Stitch both ends securely so the braid cannot pull apart.
- Attach the D-rings at one end, or sew a button and button loop.
- Try the belt on and check the length. A belt that pulls the braid apart is too tight.
Customization: Three tonal shades for a subtle gradient, or a wider braid with five strands. Keep the tension even so the braid lies flat.
Practical tip: Braid longer than you need and trim to fit, because you can shorten a braid but you cannot lengthen it cleanly.
Common mistake: Uneven tension, which leaves one strand bulging and the belt twisting instead of lying flat.
Safety note: Do not use the belt to carry weight or as a restraint. Stitch the ends down firmly so the closure cannot slip.
8. Unweighted Jersey Sleep Mask
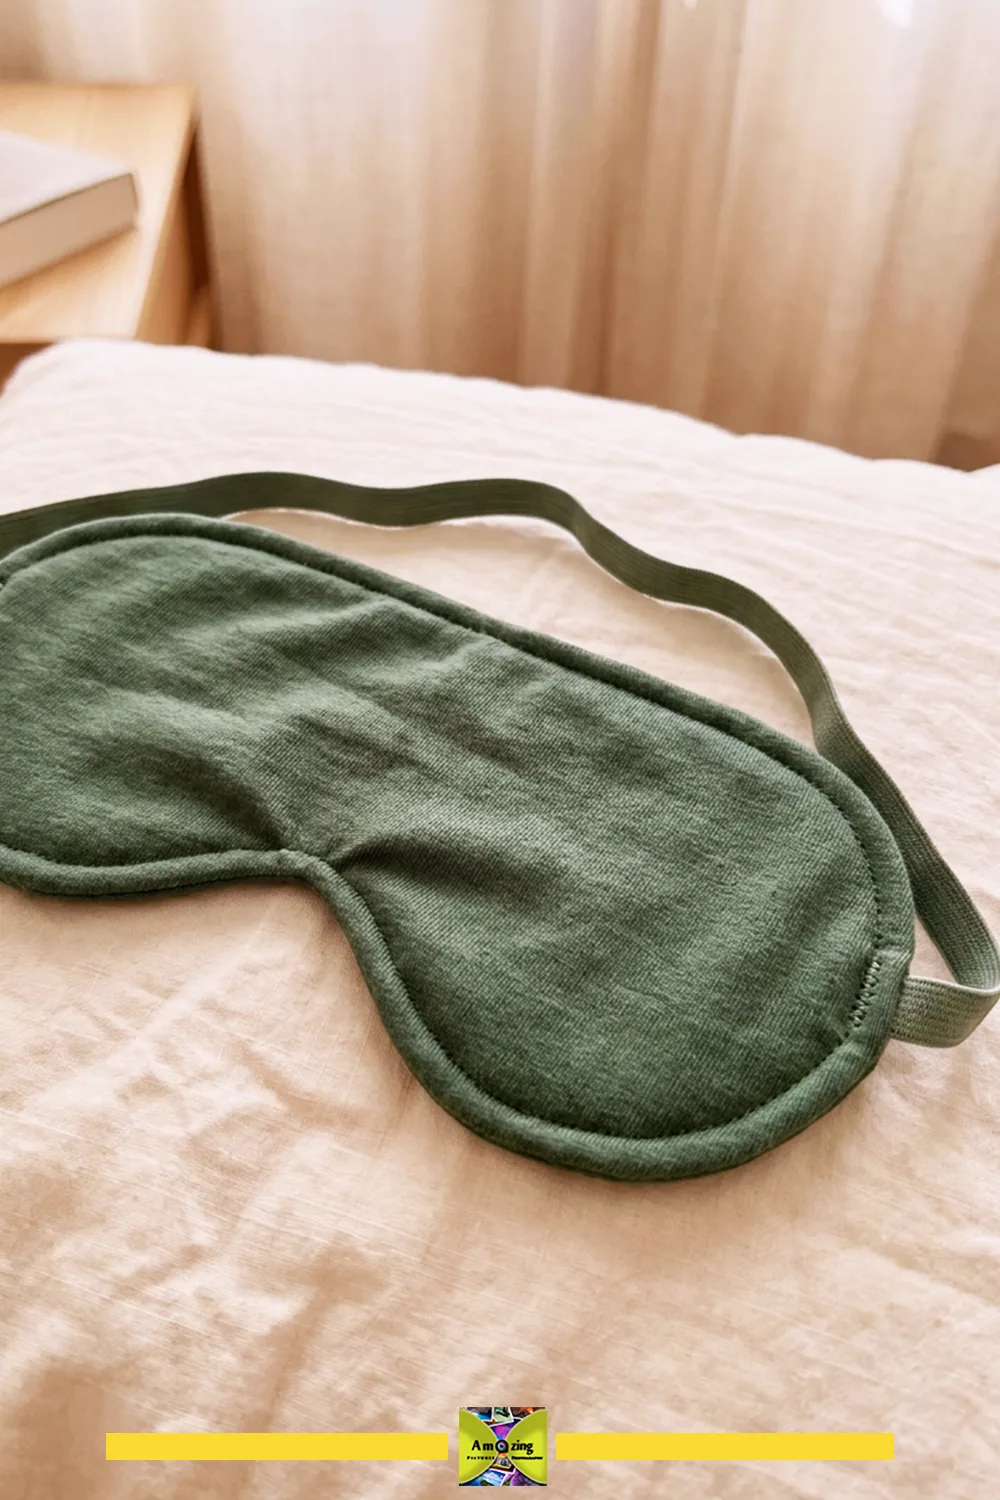
What it looks like: A soft, shaped eye mask with an opaque inner layer and a comfortable elastic strap.
Best use: Blocking light at rest. It makes no medical or sleep-quality claims.
Difficulty: Beginner.
Approximate time: 30 to 45 minutes (an estimate; confirm with your own practice).
Materials: Clean, soft jersey; an opaque inner layer; narrow soft elastic.
Tools: Fabric shears, pins, a mask template, sewing machine with a ball-point needle.
Steps:
- Cut two mask shapes from the jersey and one from the opaque inner layer, using a template sized to your face.
- Layer the jersey with the inner layer in the middle so no seam edge sits against the eye.
- Sew around the mask, leaving a gap, then turn it right side out and close the gap.
- Attach the elastic at both sides, long enough to hold the mask without pressing on the eyes or pulling at the ears.
- Try the mask on and adjust the elastic so the mask rests lightly.
Customization: A contoured nose notch, or a wider band for a softer fit. Use unprinted jersey where it touches the skin.
Practical tip: Fit the elastic to the back of your head, not your eyes, so the mask blocks light without pressure.
Common mistake: Making the elastic too short, which presses the mask into the eyes and makes it uncomfortable.
Safety note: Keep every seam smooth against the skin, and stop using the mask if it causes any irritation. Remove it from a child’s reach.
9. Lightweight Stretch Beanie
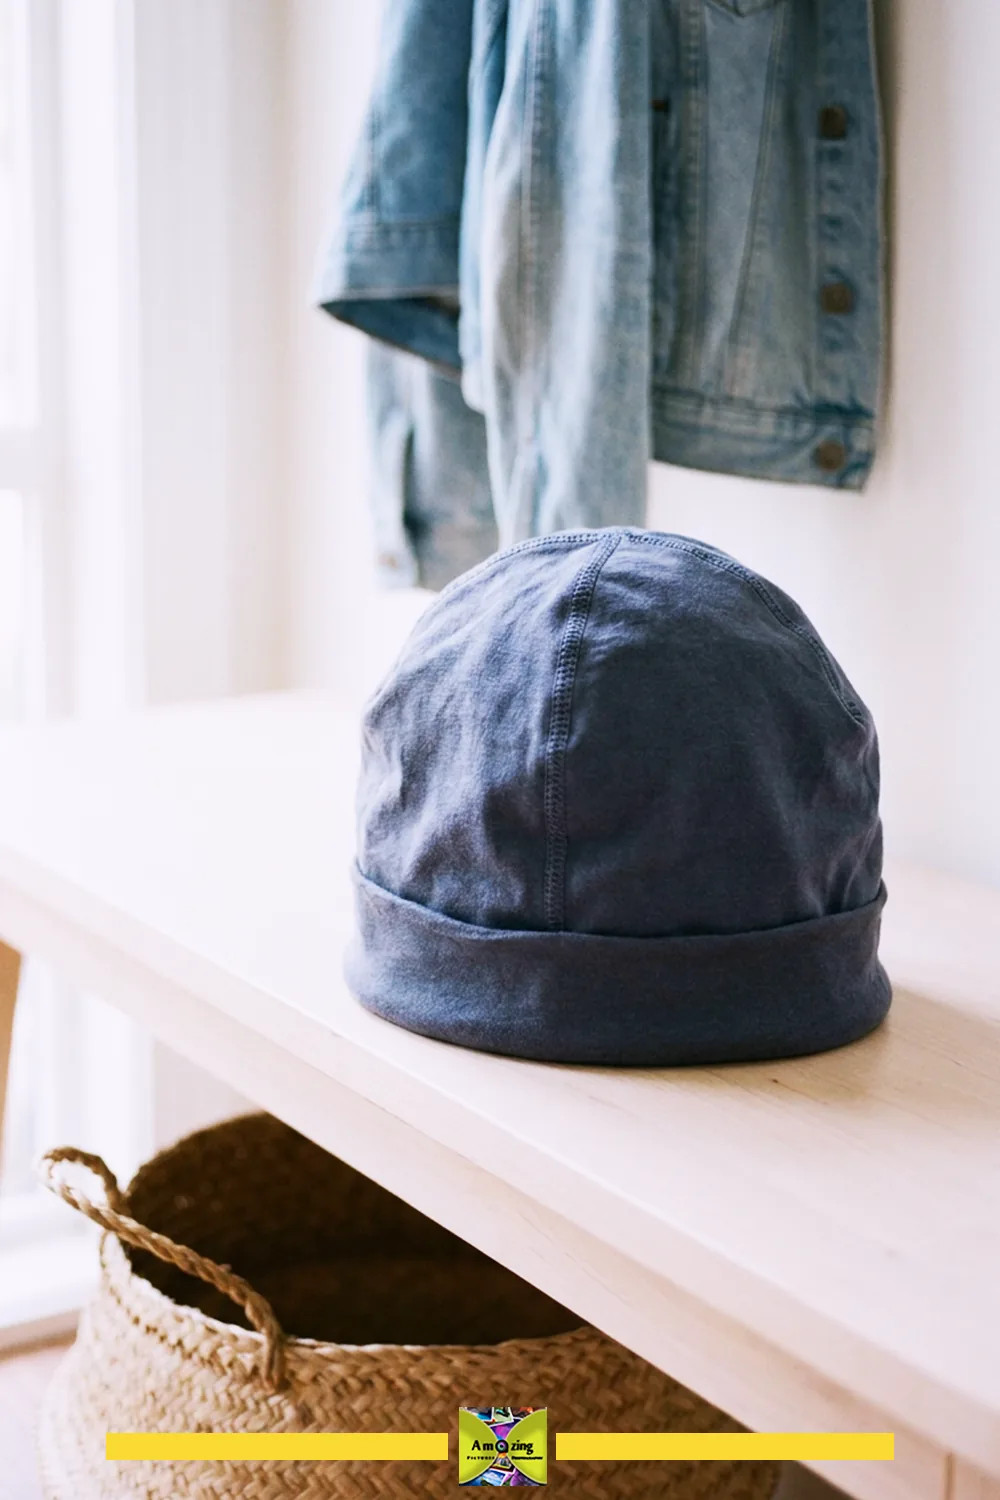
What it looks like: A close-fitting beanie with a shaped crown and a soft lower edge.
Best use: A light covering in cool, not cold, weather. Thin jersey is not winter insulation, and this is not protective headwear.
Difficulty: Beginner to intermediate.
Approximate time: 45 to 90 minutes (an estimate; confirm with your own practice).
Materials: Jersey with strong stretch and recovery; matching thread.
Tools: Fabric shears, pins, tape measure, sewing machine with a ball-point needle.
Steps:
- Measure your head around the widest part and from your brow to the crown.
- Cut a band and a crown from the jersey, with the greatest stretch running around the head.
- Sew the side seam, then shape the crown by sewing the top edges together or gathering the center.
- Fold the lower edge into a band that sits snugly without binding.
- Try the beanie on and check the seam placement, the crown height, and that the band does not squeeze.
Customization: A folded cuff, a second layer for a slightly warmer double band, or a contrast crown. Keep seams off the top of the head where they would show.
Practical tip: Test the recovery of the band fabric, because a band that has lost its stretch will slip off or leave marks.
Common mistake: Assuming thin jersey insulates. It blocks little wind or cold, so treat the beanie as a light layer only.
Safety note: Keep the band relaxed enough to slide off easily, and do not leave a too-tight hat on a sleeping child.
10. Absorbent Hair-Drying Wrap
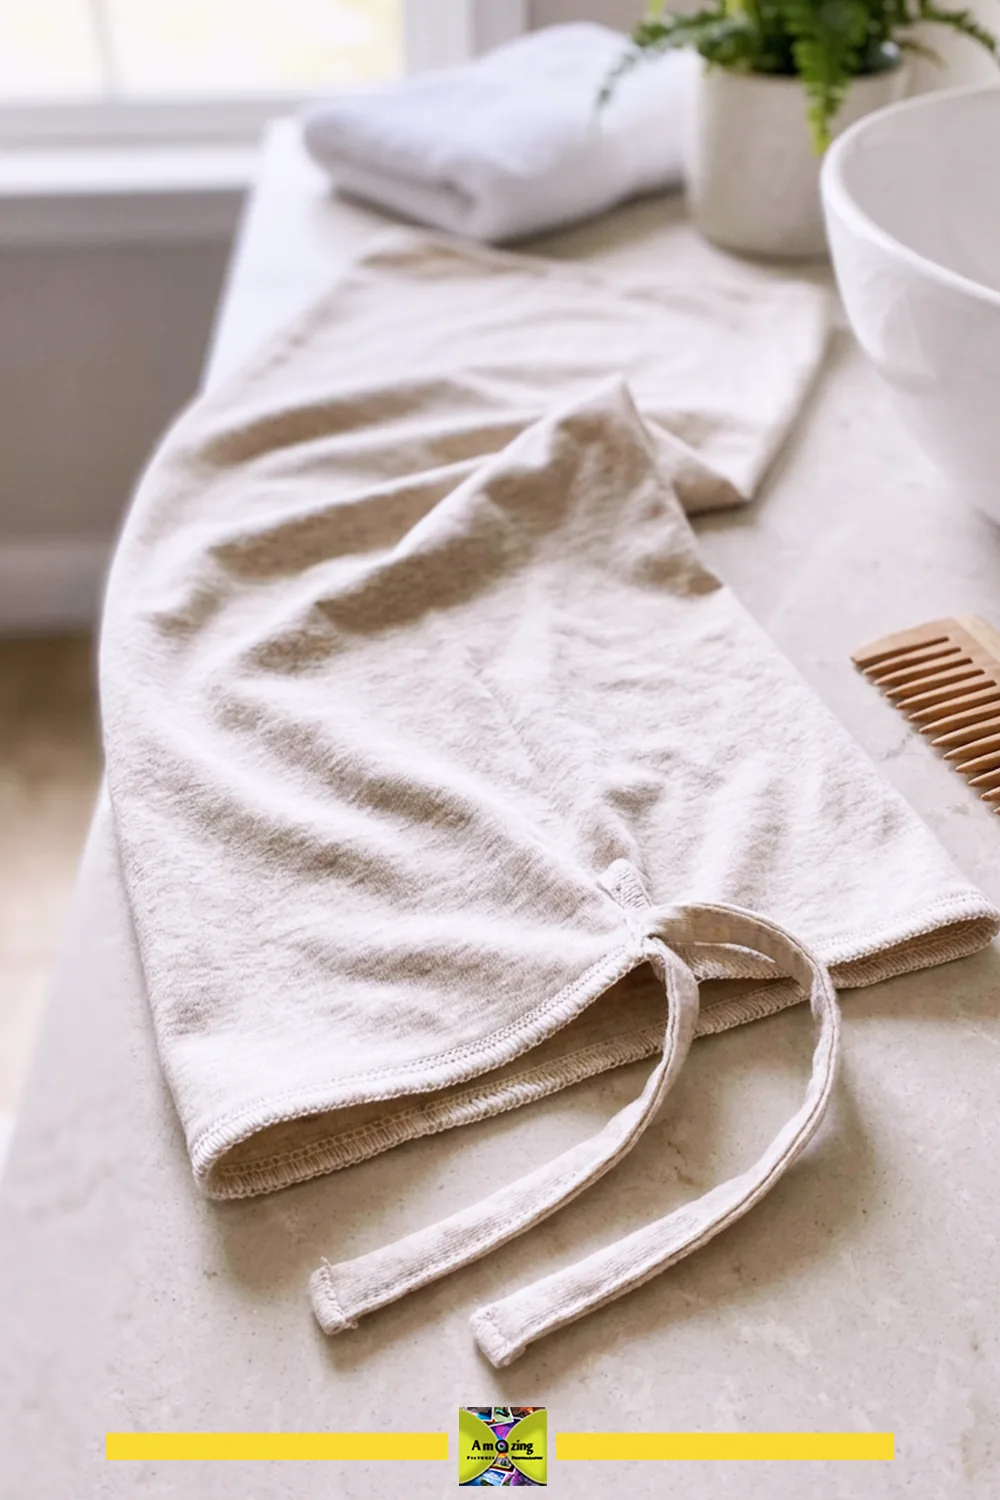
What it looks like: A fitted wrap with a simple closure, made from a clean, absorbent shirt.
Best use: Holding wet hair off the face and neck after a shower. It makes no promise of reduced breakage or identical results for every hair type.
Difficulty: Beginner to intermediate.
Approximate time: 45 to 60 minutes (an estimate; confirm with your own practice).
Materials: One clean, absorbent cotton shirt; a small loop of elastic or a soft tie for the closure.
Tools: Fabric shears, pins, tape measure, sewing machine with a ball-point needle.
Steps:
- Choose a plain, absorbent cotton shirt. Keep printed sections and bulky seams away from the part that will touch the hair.
- Cut a rectangle long enough to wrap around your head and overlap at the front.
- Fold or layer the fabric so the wrap has some absorbency without being bulky.
- Sew a small elastic loop or a soft tie at one front corner, and a matching closure at the other.
- Hem the edges and check that no seam or print presses against the hairline.
Customization: A longer tail that twists up at the crown, or a two-layer version with a plain inner side.
Practical tip: Keep the seams on the outside where they will not catch on hair.
Common mistake: Leaving a printed or plastisol section against the hair, which can feel rough and leave marks.
Safety note: Wrap loosely enough to remove with one hand, and keep the closure soft so it cannot catch hair.
11. Turned-Tube Scrunchie
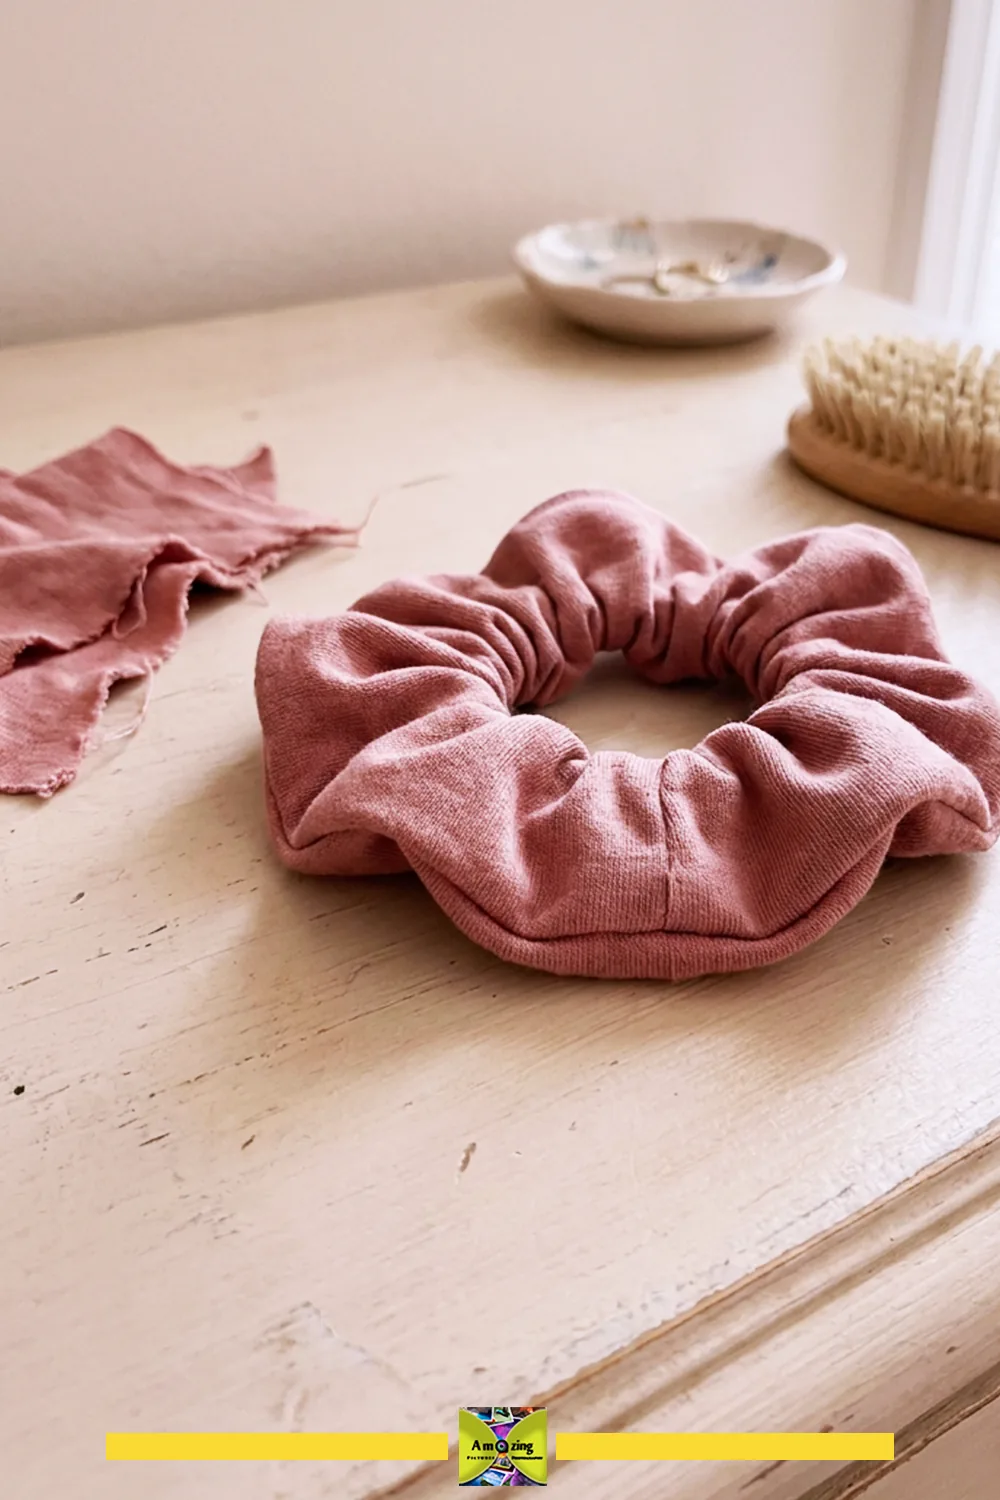
What it looks like: A fabric tube enclosing elastic, joined into a smooth loop.
Best use: A soft hair tie that holds a ponytail without metal.
Difficulty: Beginner.
Approximate time: 15 to 30 minutes (an estimate; confirm with your own practice).
Materials: A sound strip of jersey; a short length of hair elastic.
Tools: Fabric shears, pins, a safety pin, sewing machine with a ball-point needle.
Steps:
- Cut a jersey strip about twice as long as you want the scrunchie to be, because the tube must be longer than the elastic inside it.
- Fold the strip in half lengthwise with the right sides together and sew the long edge into a tube.
- Turn the tube right side out. Jersey curls as you cut and turn, so work slowly and keep the seam on the inside.
- Thread the elastic through the tube with the safety pin.
- Overlap and stitch the elastic ends firmly, then close the tube ends so the join is smooth.
Customization: A wider, fuller scrunchie from a longer strip, or a two-tone tube. Color and size changes are the same project, not separate ones.
Practical tip: Leave the elastic slightly longer than feels necessary, because a too-short elastic pulls the fabric tight and is uncomfortable.
Common mistake: Cutting the strip too short, so the tube cannot gather around the elastic and the join pulls open.
Safety note: Do not pull the scrunchie tight against the scalp, and remove the safety pin before you wear it.
12. Looped Jersey Necklace
What it looks like: A necklace made of stitched jersey loops as the visible design, with no purchased beads.
Best use: A soft, lightweight accessory for adults and teens.
Difficulty: Beginner.
Approximate time: 45 to 90 minutes (an estimate; confirm with your own practice).
Materials: Sound jersey strips in a limited palette; matching thread.
Tools: Fabric shears, pins, sewing machine with a ball-point needle, hand-sewing needle.
Steps:
- Cut the strips into even lengths and stitch each into a soft loop.
- Lay the loops out to plan the order and length, using a limited palette so the necklace reads as one piece.
- Join the loops with hand stitching, or stitch them onto a short fabric base strip.
- Stitch the joining area firmly so no loop can pull free.
- Try the necklace on and check that it sits comfortably and lifts off over the head.
Customization: Graduated loop sizes, a tonal gradient, or one contrast loop at the front. Keep the join area hidden against the back of the neck.
Practical tip: Reinforce the join with two passes of stitching, because every loop pulls against this one point.
Common mistake: Making the necklace too long, so it swings into the way, or too short to lift off easily.
Safety note: Wear it away from machinery and moving parts, and keep it out of the reach of young children, because a loop can be a strangulation or entanglement risk.
13. Smooth Rag-Curler Set
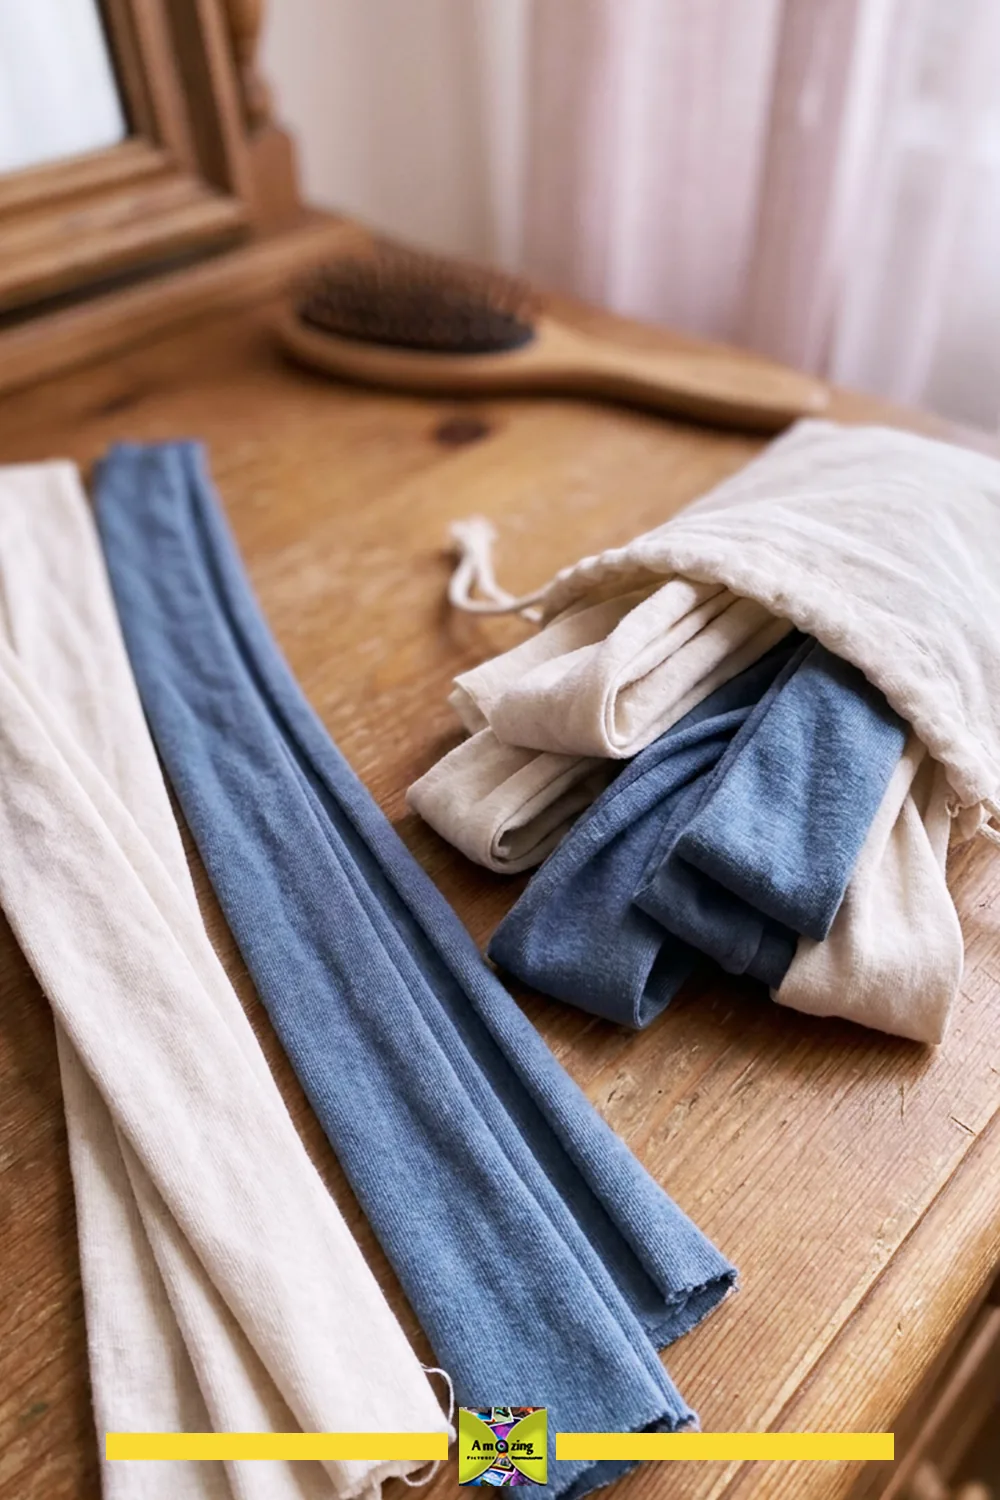
What it looks like: A set of clean, smooth fabric strips sized for the intended hair length, kept together for storage.
Best use: A hair-setting method that uses fabric strips instead of heated tools. It is not a health treatment and does not guarantee a styling result.
A museum explanation and demonstration covers the basic fabric-curler method (rag curlers demonstration). Sizing the strips to your hair and the washing routine are part of this guide, not claims taken from that source.
Difficulty: Beginner.
Approximate time: 20 to 30 minutes to make the set (an estimate; confirm with your own practice).
Materials: Clean, smooth jersey; a small storage bag or a tie to keep the set together.
Tools: Fabric shears, a ruler.
Steps:
- Cut clean, smooth strips sized to the hair length you want to set. Longer hair needs longer strips.
- Trim the strips so the edges are smooth and free of loose threads that could snag.
- To use one, wind a small section of damp hair around the strip, then tie or fold the strip to hold it in place.
- Place and remove the strips gently, without pulling the hair tight.
- Wash the strips after use and store them together so the set stays complete.
Customization: A few longer and a few shorter strips for different sections, or a wider strip for larger curls. This is one project with several strips, not several projects.
Practical tip: Practice on one section first, because the amount of tension that holds the strip without pulling takes a try to find.
Common mistake: Winding the strip too tightly, which pulls at the roots and is uncomfortable to remove.
Safety note: Do not sleep in tightly wound strips if they pull, and keep the strips away from heat and open flame.
Home Makes and Household Helpers
These five projects put larger panels and longer strips to work around the house.
14. Flat-Braid Indoor Accent Rug
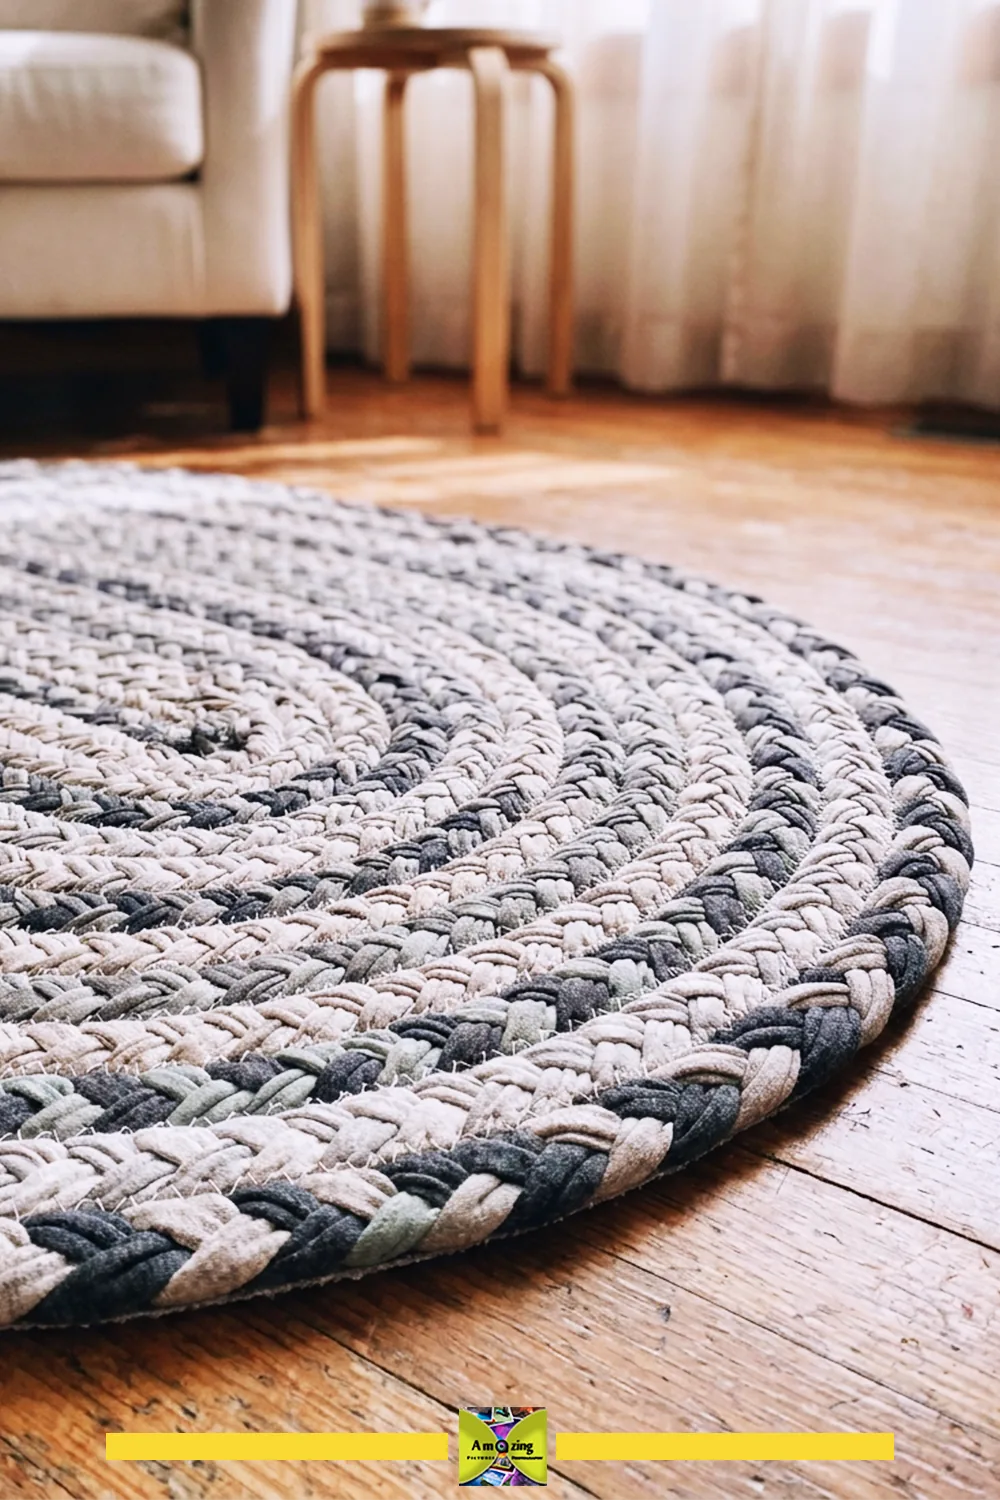
What it looks like: A low-profile braided rug with a planned palette and a securely joined, finished edge.
Best use: A soft accent on a dry, level indoor floor, away from stairs and wet areas.
Difficulty: Intermediate to advanced.
Approximate time: Several sessions, because the rug grows strip by strip (an estimate; confirm with your own practice).
Materials: Several compatible shirts in a planned palette; strong thread or yarn for joining; a floor-compatible nonslip backing or pad.
Tools: Fabric shears or a rotary cutter, a large needle, pins, a measuring tape.
Steps:
- Plan the palette first. A limited set of shades reads as one rug, while too many colors look accidental.
- Cut the shirts into long strips of even width, using the same width for every strip in a braid.
- Braid a short test length and measure it, so you know how many strips the finished size will need.
- Braid long lengths, then join them by coiling the braid and stitching each round to the one beside it.
- Keep the work flat as you join, so the rug does not cup into a bowl.
- Finish the edge cleanly and tuck or stitch the last braid end.
- Place the rug on a dry, level floor with a floor-compatible nonslip pad, and check that the edges lie flat and do not lift.
Customization: A round or oval rug, a tonal gradient from light to dark, or a single contrast round at the outer edge.
Practical tip: Join the rounds loosely enough to lie flat, because a rug stitched too tightly cups at the center and will not flatten.
Common mistake: Using mixed strip widths in one braid, which makes the rug bulge and the edge uneven.
Safety note: Keep the rug off stairs and wet areas, and out of any spot where a lifted edge could become a trip hazard. Confirm the nonslip pad is compatible with your floor finish.
15. Washable Jersey Dusting Mitt
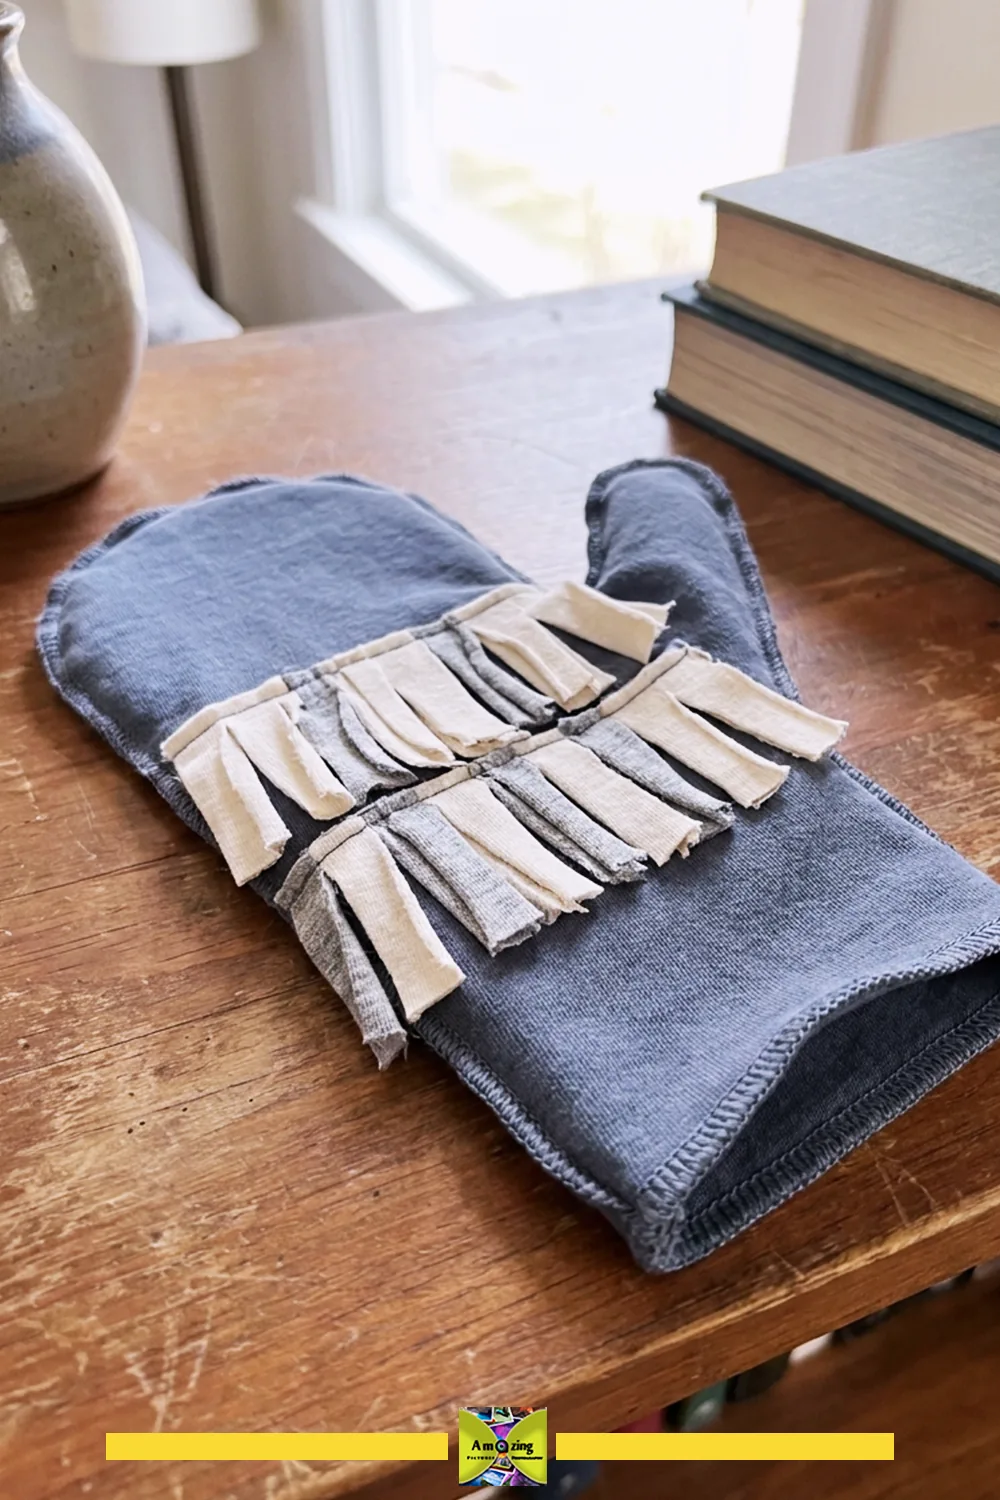
What it looks like: A hand-shaped mitt with short, securely attached jersey fringe for dry dusting.
Best use: Ordinary dry furniture dusting. This is not a floor pad, and it is not for screens or delicate finishes.
Difficulty: Beginner.
Approximate time: 30 to 60 minutes (an estimate; confirm with your own practice).
Materials: A sound jersey panel for the mitt; short jersey strips for the fringe.
Tools: Fabric shears, pins, a hand outline for the mitt shape, sewing machine with a ball-point needle.
Steps:
- Trace around your hand, leaving extra room for the seams and enough ease to slip the mitt on.
- Cut two mitt shapes and stitch them together around the edge, leaving the wrist open.
- Cut short fringe strips and stitch them to the palm side in rows, working from the fingertips back.
- Turn the mitt right side out and check that the fringe is attached at the base of every strip.
- Dry-dust a small area and confirm the fringe holds as it passes over surfaces.
Customization: A longer cuff, or fringe on both sides of the mitt. Keep the fringe short so it does not catch on hardware.
Practical tip: Stitch each fringe row down twice, because dry dusting pulls at the strips as they pass over raised edges.
Common mistake: Using the mitt on a screen, a valued finish, or a surface whose care instructions rule out this fabric.
Safety note: Dust only dry surfaces, and follow the care instructions of the item you are dusting. Wash the mitt before its first use on furniture.
16. Layered Reusable Face Cloths
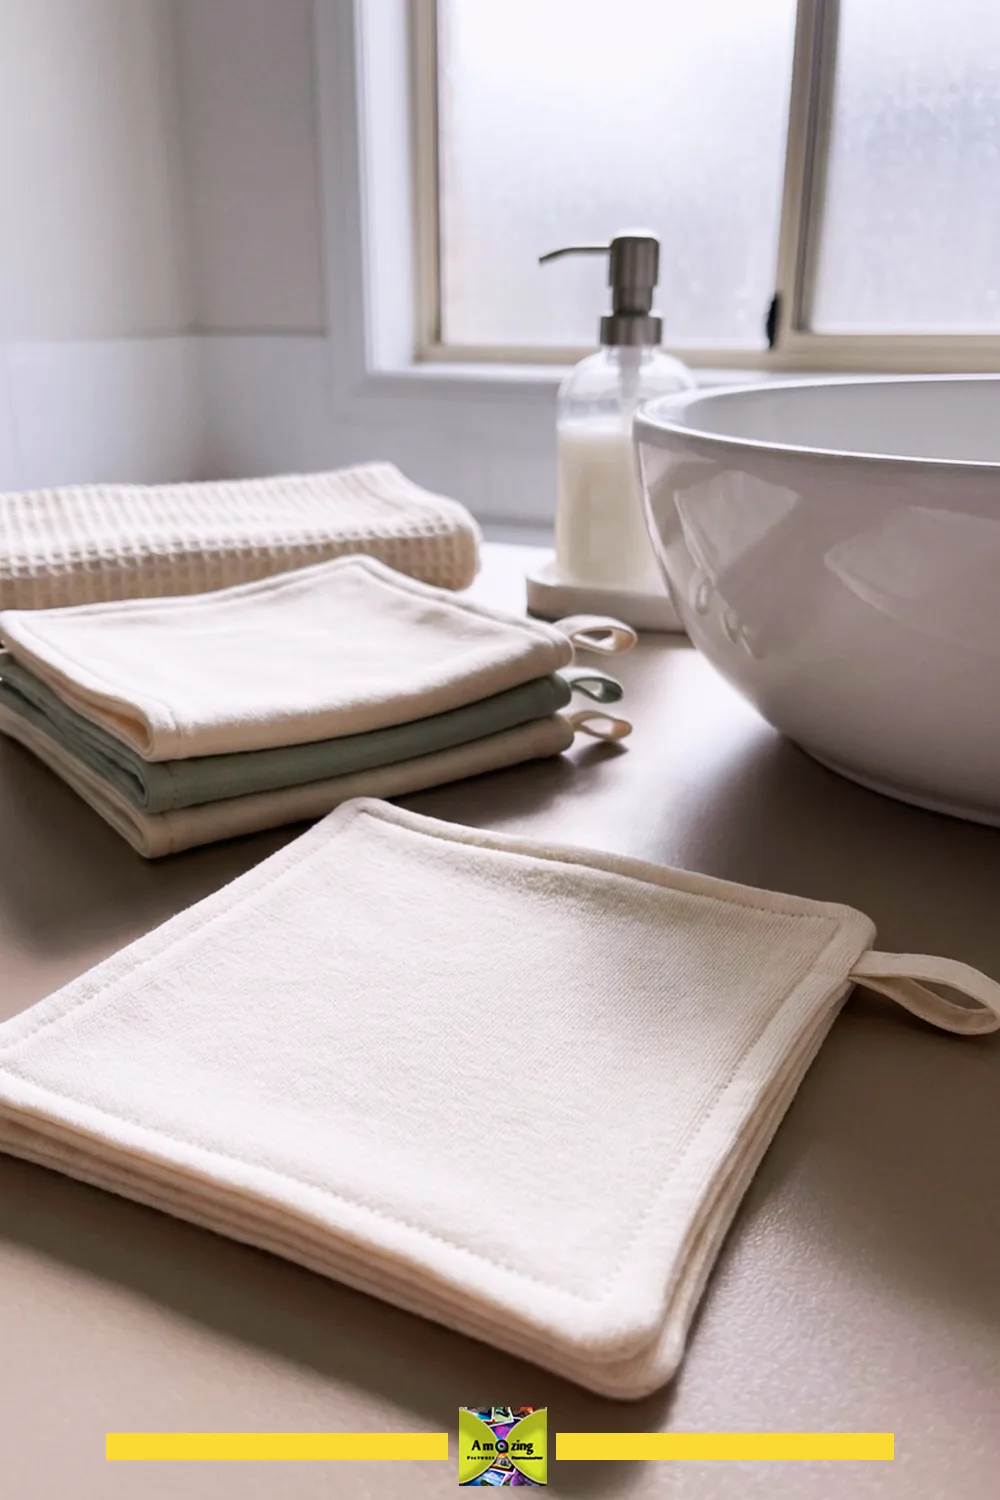
What it looks like: A set of simple, washable, multilayer cloths with finished edges.
Best use: Ordinary personal care and washing. These make no exfoliation, antibacterial, allergy-safe, or sensitive-skin guarantees.
Difficulty: Beginner.
Approximate time: 15 to 30 minutes per cloth (an estimate; confirm with your own practice).
Materials: Suitable unprinted cotton jersey, cut into squares.
Tools: Fabric shears or a rotary cutter and mat, pins, sewing machine with a ball-point needle.
Steps:
- Cut matching squares from clean, unprinted jersey.
- Stack two or three layers and sew around the edge with a zigzag, or turn and topstitch for a cleaner edge.
- Keep the stitching close enough that the layers stay together through washing.
- Wash the cloths before first use and hang them where they dry fully between uses.
Customization: A hanging loop in one corner, or a slightly larger size for the face and a smaller one for hands. Do not add a printed layer where it touches the face.
Practical tip: Use the plainest, softest panels for these, because smooth, unprinted jersey sits best against skin.
Common mistake: Assuming jersey is lint-free or antibacterial. Wash and dry the cloths normally, and replace any that shed or hold odor.
Safety note: Use a clean cloth each time where hygiene matters, and stop using a cloth that frays or irritates the skin.
17. Full-Front Craft Apron
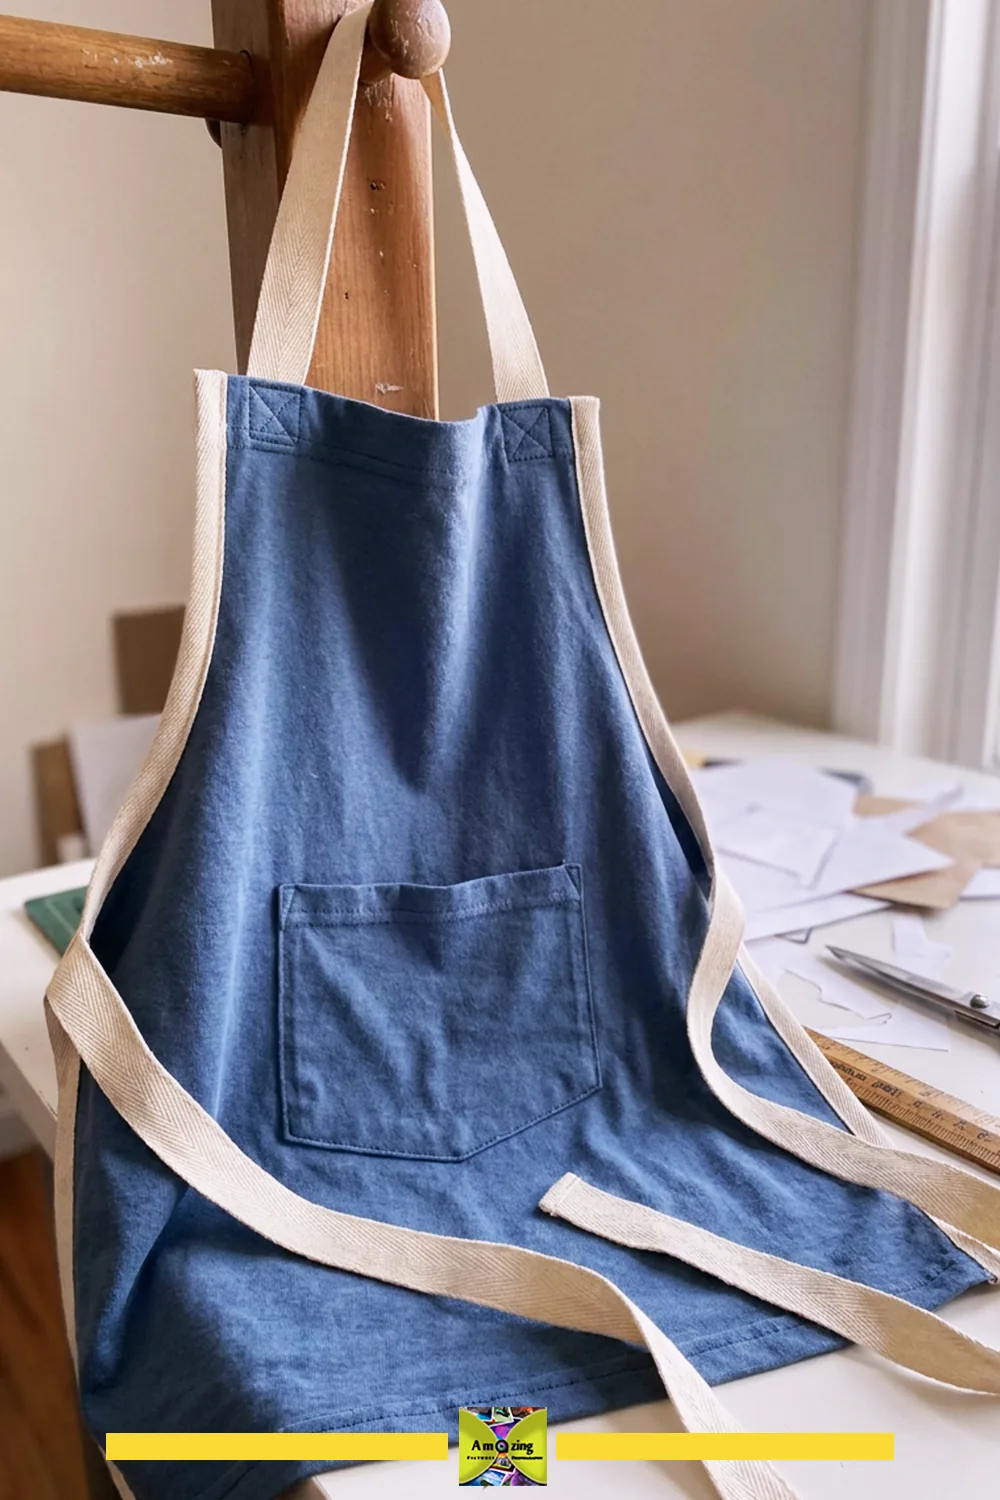
What it looks like: An apron that keeps one large front panel and adds durable ties.
Best use: Ordinary dry crafts and light mess. It makes no heat, chemical, or protective-equipment claims.
Difficulty: Beginner to intermediate.
Approximate time: 45 to 90 minutes (an estimate; confirm with your own practice).
Materials: One large shirt with a sound front panel; jersey or twill tape for the ties.
Tools: Fabric shears, pins, tape measure, sewing machine with a ball-point needle.
Steps:
- Lay the shirt flat and cut the front free as one large panel, keeping the hem as the bottom edge.
- Trim the top and sides to a tidy apron shape, leaving room for a finished edge.
- Hem the top and sides, or bind them with jersey strips.
- Make a neck strap and waist ties from strong strips or twill tape, and stitch them firmly at the corners.
- Try the apron on and check that the panel hangs at the right height and the ties reach comfortably.
Customization: A pocket cut from a sleeve, or a wider panel that wraps the hips. Keep the ties long enough to knot easily.
Practical tip: Reinforce the tie attachment with a small square of stitching, because the ties carry the whole apron.
Common mistake: Using thin, stretched jersey for the ties, which frays and lets the apron sag.
Safety note: This apron is for dry, light-mess crafts only. Do not use it near heat, flames, or chemicals.
18. Fitted Reusable Mop Pad
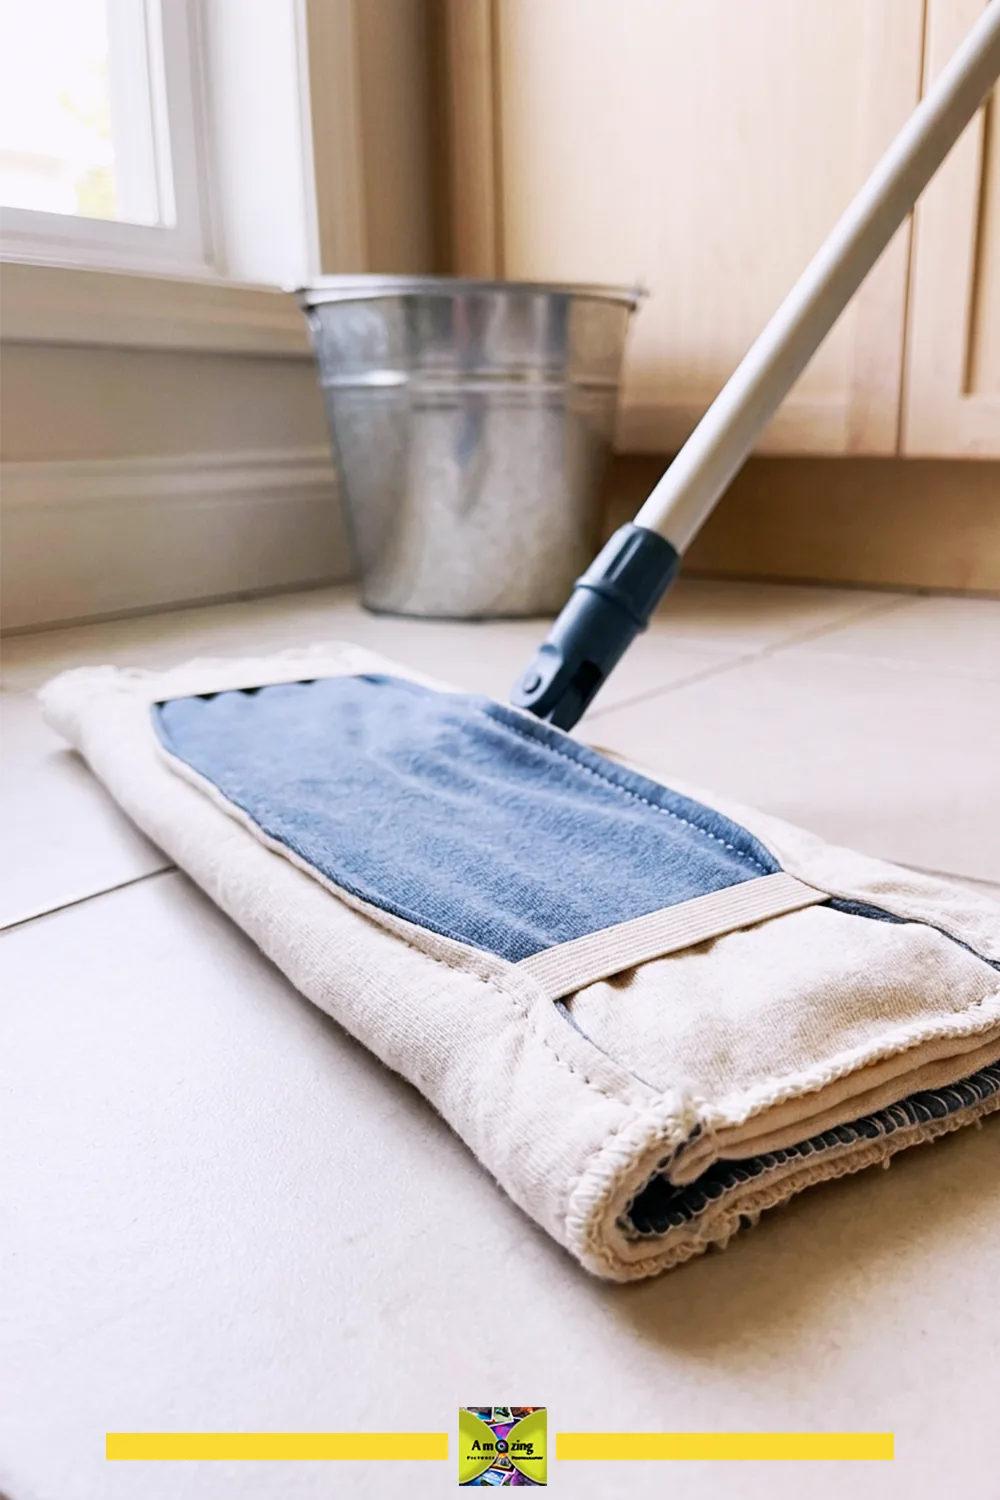
What it looks like: A fitted pad shaped to one specific mop head, with enough layers to hold water.
Best use: A washable pad for a non-powered mop, following the floor and mop maker’s guidance. It does not claim universal compatibility.
Difficulty: Intermediate.
Approximate time: 1 to 2 hours (an estimate; confirm with your own practice).
Materials: Several absorbent jersey layers; a fastening that fits your mop head, such as elastic or ties.
Tools: Fabric shears, pins, the mop head as a template, sewing machine with a ball-point needle.
Steps:
- Measure the mop head and trace its shape onto the fabric, adding room for the fastening and for wet stretch.
- One towel mop-pad method suggests T-shirt jersey as a substitute fabric (towel mop-pad method). This jersey version is a material adaptation, so it needs its own thickness, attachment, and wet-stretch checks.
- Layer two or three absorbent panels and sew them together around the edge.
- Add a fastening that holds the pad to the mop head, and dry-fit it before use.
- Wet the pad and check that it does not stretch off the mop head or twist while you mop.
- Launder the pad after use and dry it completely before storing, so it does not hold moisture.
Customization: A second color for the top layer so you can tell the working side from the clean side. Keep the pad matched to the one mop head it was built for.
Practical tip: Test the pad wet before you trust it, because jersey can stretch more when soaked than it did dry.
Common mistake: Assuming the pad fits every mop. A pad built for one head will not hold another shape.
Safety note: Follow the floor and mop maker’s guidance, and dry the pad fully between uses to avoid moisture sitting against the mop head.
How to Make Mixed Shirts Look Intentional
A pile of unrelated shirts can turn into a messy result fast. A few simple choices make the finished item read as designed rather than assembled from leftovers.
- Limit the palette. Two or three shades that sit near each other on the color wheel look planned. Ten unrelated colors do not.
- Repeat a stripe width. If one panel has a wide stripe and another a fine one, they fight. Match the stripe scale, or keep one panel plain.
- Use a tonal gradient. Light to dark across a braided belt or rug reads as deliberate, even from mixed shirts.
- Keep symmetry. Match the panels on the left and right of a garment so one side is not noticeably heavier or busier.
- Add one contrast point. A single darker binding or waistband ties the piece together without competing with it.
- Place old graphics carefully. Keep a printed panel away from seams and away from intimate or high-stretch areas, where it would distort or draw the eye.
- Finish cleanly. A pressed seam and a tidy edge do more for a mixed-fabric project than any decoration.
Troubleshooting Common Jersey Problems
Most jersey problems trace back to a needle, a stitch, a layout, or a fabric choice. Fix the cause instead of hiding the symptom.
- Cut edges curl. Jersey curls toward the right side along the crosswise grain. Bind, hem, or topstitch the edge, and do not leave a raw edge on a garment that must lie flat.
- Skipped stitches. Usually a blunt or wrong-point needle. Change to a fresh ball-point or stretch needle, and re-test.
- Popped seams. A straight stitch on a stretched seam. Switch to a narrow zigzag or stretch stitch and resew.
- Stretched hems and necklines. Fabric that has lost its recovery will not hold an edge. Cut that section out rather than trimming over it.
- Insufficient recovery. If a panel does not spring back after you stretch it, it is too worn for fitted items. Save it for a loose project.
- Twisted waistbands. The elastic turned inside the casing, or the panels were cut on different grains. Cut every panel on the same grain and pin the elastic before closing.
- Bulky joins. Too many layers meeting at one point. Trim the seam allowances and press the join open before the next seam.
- Uneven braids. Inconsistent strip width or tension. Cut even strips and keep a steady pull, or unbraid and start that section again.
- Rug cupping. The rounds were stitched too tightly. Loosen the join on the outer rounds and press the rug flat.
- Elastic discomfort. The elastic is too short or too wide. Fit it to the body part, not the guess, and test before closing.
- Transparent panels. A thin or light-colored jersey that shows through when stretched. Add a lining layer or choose a heavier shirt.
- Lint shedding. Some cotton jersey sheds on first washes. Wash the finished item alone the first time and clear the lint before use.
- Dye transfer. Test a damp white cloth on a scrap before mixing colors, and wash dark pieces separately the first time.
- Slow drying. Layered or braided items hold water. Hang them where air can move through, and do not fold them away damp.
When a fix would mean changing the needle, the stitch, the layout, or the fabric, make that change early. Do not cover a weakened panel with trim and expect it to hold.
Safety When Working With Old T-Shirts
Keep these cautions close while you cut, sew, press, and use the finished items.
- Sharp tools. Cut away from your hand, keep fabric-shears blades closed when not in use, and store rotary cutters with the guard closed.
- Pins and needles. Remove every pin before a garment touches the body, and keep loose pins off the floor and away from children and pets.
- The machine. Keep your fingers clear of the needle, and unplug or switch off the machine when you change a needle or presser foot.
- Pressing. Set the iron for the fiber on the care label, and test the heat on a scrap before pressing the project.
- Loose cords and small closures. Keep drawstrings, ties, and small closures away from young children.
Do not cut toward the hand. Do not burn fabric to finish holes or edges. Do not modify plastic with an open flame. Do not heat unidentified materials indoors. Do not use power tools unsafely. Do not use fabric for food contact without verifying it is safe for that use. Do not ignore choking hazards, and do not load any project beyond what a soft fabric accessory is meant to hold.
This collection contains no infant products, pet toys, protective clothing, electrical accessories, or heat-resistant kitchen items. For anything that touches the skin, use clean fabric, keep seams smooth, and stop using the item if it irritates.
Wash and dry each finished item according to the most restrictive component in it, such as elastic or interfacing. Retire anything with failed seams, a persistent odor, severe shedding, color transfer, or weakened fabric.
Start With the Fabric You Have
Match the project to the shirts in front of you. A beginner with one sound oversized shirt can make the tank top, the sleep mask, or the scrunchie. A stack of large, matching shirts suits the skirt, the shorts, or the rug. Save fitted items like the briefs and the beanie for fabric with strong recovery, and keep the mop pad, face cloths, and dusting mitt for the softest, most absorbent panels. For more upcycling projects from a different household material, see the guide to plastic bottle cap crafts.
Keep a short project log: the shirt it came from, how the fabric behaved under the needle and in the wash, and one change for next time. Mine shows a clear pattern. The scrunchies and face cloths worked on the first try from almost any shirt, while the beanie and briefs took a second version, because a heavy cotton shirt that felt stretchy on the table relaxed after one wash and lost its grip. On the second round I cut both a little smaller and used a shirt with visible spandex recovery, and they held their shape. Write the change down while it is fresh; you will not remember it three shirts later.
Frequently Asked Questions
Shirts with sound panels, working stretch, and good recovery are the best starting point. Prefer clean cotton or cotton-blend jersey with no mold, pests, strong odor, or degraded fibers. Set aside shirts with thinning underarms, stretched necklines, or large holes unless you are cutting around the damage. Match fabrics by stretch and weight before you match them by color.
Hand sewing works for small, low-stress items such as a scrunchie, a sleep mask, or a braided belt with hand-stitched ends. A braided rug can be joined by hand, though it is slow. Projects that need a secure, repeatedly washed seam, such as briefs or lounge shorts, are more reliable with a machine stitch.
Pull the fabric gently in each direction. Most jersey stretches most across the body. To test recovery, stretch a section and let go, then watch whether it springs back. Fabric that stays stretched has lost its recovery and suits loose projects rather than fitted ones.
Use a ball-point or jersey needle for ordinary knit fabric, and consider a stretch needle for fabric with a large elastane share. The exact size depends on the fabric weight, so check your sewing-machine manual and the needle manufacturer’s chart. Sew stretch seams with a narrow zigzag or stretch stitch, and reserve a straight stitch for seams that do not need to stretch.
Jersey is knitted in loops, and a cut edge rolls toward the right side of the fabric, usually along the crosswise grain. That is normal, not a defect. Hem, bind, or topstitch the edge to keep it flat.
You can, when the fabrics behave the same way. Match them by stretch, weight, and care before you match them by color. Two shirts with different recovery will pull a seam crooked, so test a scrap first.
The number depends on the finished size and your strip width. Braid a short test length and measure it, then work out how many strips the full rug needs. There is no fixed count that works for every rug size.
Small, unusable scraps can become dust cloths or stuffing if they are clean. Textile donation and recovery rules vary, so confirm acceptance with the receiving organization. Do not assume blended, printed, glued, or elastic-containing scraps can be composted or recycled.
Materials I tested. For the fitted projects, the most reliable results came from midweight cotton-spandex jersey taken from a well-kept shirt, sewn with a 75/11 stretch needle and a narrow zigzag, with polyester thread in the needle. For the briefs, 1/4-inch knit elastic applied with a three-step zigzag stayed comfortable through repeated washes, while braided elastic narrowed and rolled at the leg openings. Lightweight 100 percent cotton jersey worked for the beanie only when cut with extra negative ease, and it still relaxed more than the blended fabric. Treat these as starting points: test your own shirt on a cut-off, because two shirts with the same label can behave very differently.
What this costs. Most of these projects cost nothing beyond shirts that were already headed for the rag bag, plus thread and needles you likely own. The only real purchases are for a few specific makes: a small card of knit elastic for the briefs, skirt, and shorts, a short length of knit interfacing or stay tape for the cardigan, and a piece of nonslip backing if you want the rug to stay put on a hard floor. Each of those is a modest one-time buy that covers several projects, so the running cost of the collection stays close to zero.