Why Everyday Materials Make the Best Summer Craft Supplies
Walk through any craft store in July and the summer displays can make you feel like you need fifty dollars’ worth of specialty supplies before you can make anything worth keeping. Seashell-shaped resin molds. Preserved eucalyptus bundles. Premium acrylic paint sets in this season’s exact shade of terracotta.
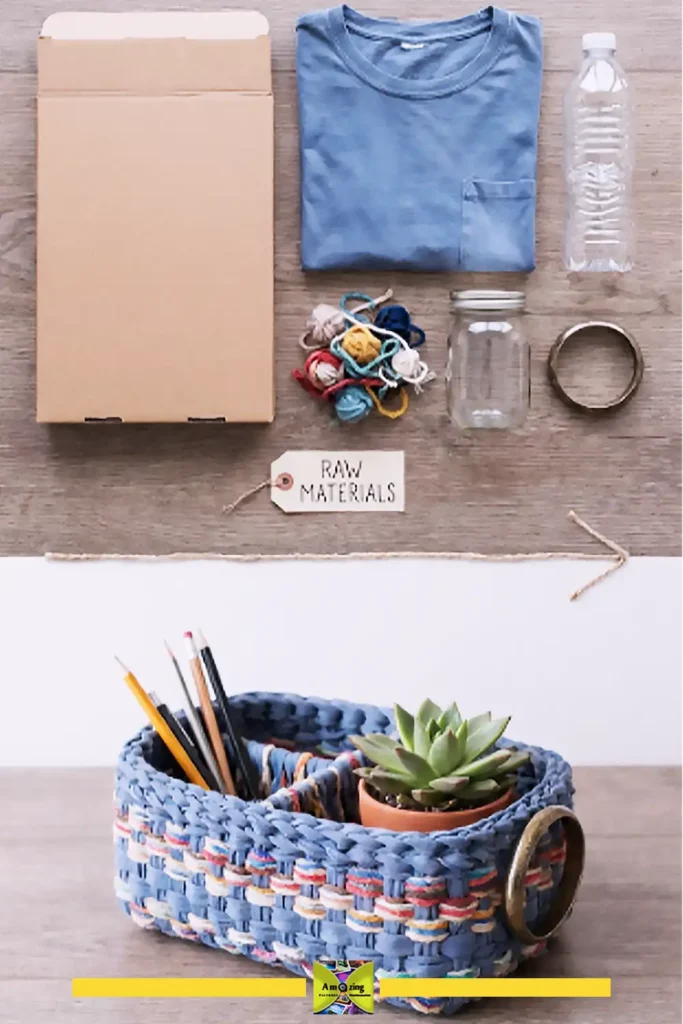
But some of the most interesting summer crafts start with things that never appear on a shelf tag: the cardboard box from your last online order, the glass jar sitting in your recycling bin, the old T-shirt you almost donated last weekend, the single bangle left behind when its matching set broke three summers ago.
This article is about turning those overlooked household materials into aesthetic summer crafts… The kind you actually want to display on a wall, set on a summer table, photograph for Pinterest, or give to someone as a handmade gift… The projects here are designed for DIY lovers, crafty adults, teens, and anyone who wants their summer decor to feel fresh and intentional without buying a cart full of new supplies!
Each project uses materials you probably already have or can easily collect: cardboard, plastic bottles, yarn, old clothes, fabric scraps, glass jars, old bangles, and pieces from furniture that’s seen better days… The difference between a craft that looks like a rainy-day kids’ project and one that looks like something you’d pin to a summer mood board usually comes down to three things: color choice, clean finishing, and thoughtful display. This article covers all three.
The project that changed how I think about this was the Cardboard Coastal Sunburst Mirror Frame. I made it expecting a throwaway result, hung it up as a placeholder, and it’s still on the wall two years later. Nobody who’s seen it has guessed what it’s made from.
Summer Color Palettes That Make Recycled Crafts Look Beautiful
Before you pick up scissors or a paintbrush, decide on a color direction. The single biggest difference between a craft that looks thrown together and one that looks intentionally designed is whether the colors feel coordinated. When you’re working with recycled materials that started out in different colors — a blue plastic bottle, beige cardboard, red fabric scraps — choosing a palette first prevents the finished piece from looking like a mismatched collection of leftovers. If the softer end of this range appeals to you, our cottage-style decorating ideas lean into the same relaxed, natural feel.
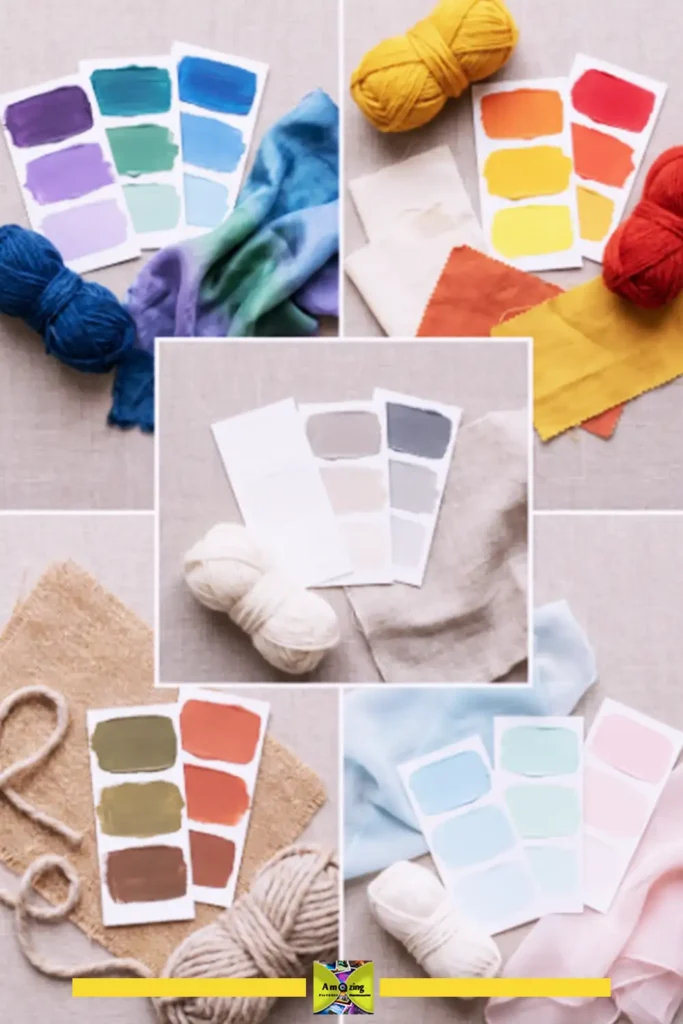
Here are five summer palettes that work well with everyday materials. Pick one for a single project, or carry one palette across several projects if you’re planning to display them together.
Coastal
Soft blue, sea-glass green, sandy beige, and warm white. This palette works beautifully with yarn, painted cardboard, fabric scraps, and glass. It’s light, calm, and easy to match — most blue and white fabric scraps or pale blue plastic bottles already fit. Add natural rope or twine for texture.
Mediterranean
Cobalt blue, terracotta, lemon yellow, olive green, and white. Stronger and warmer than coastal, this palette turns simple painted cardboard or fabric into something that recalls Greek islands and Spanish courtyards. Terracotta-colored acrylic paint over corrugated cardboard creates a surprisingly convincing warm clay effect.
Boho
Cream, tan, terracotta, muted peach, and natural fiber tones. This palette relies on texture as much as color. Unbleached cotton, raw wood, undyed rope, and wool in oatmeal and sand tones do most of the work. A single muted accent — dusty rose, faded turquoise, or mustard — adds interest without breaking the neutral foundation.
Botanical and Cottagecore
Sage green, cream, muted yellow, soft pink, and dusty rose. Inspired by summer gardens, pressed flowers, and soft English-countryside light. This palette works well with painted cardboard, fabric scraps from old floral dresses or shirts, and yarn in plant-inspired tones. Dried flowers and pressed leaves make natural additions.
Retro Summer
Orange, turquoise, pink, yellow, and mint. High-energy and playful without looking juvenile when used in clean shapes and simple patterns. A little of this palette goes a long way — use it on one accent piece or combine it with white for balance.
Basic Tools You’ll Need for These Projects
Most of the projects in this article use tools you probably already own. You won’t need every tool for every project, but having these basics on hand will cover nearly everything:
- Scissors — A sharp pair for paper and fabric, plus an older pair for cutting plastic bottles and cardboard
- Craft knife and cutting mat — For clean cuts on cardboard and plastic; a metal ruler helps guide straight lines
- Pencil and ruler — For marking measurements and tracing shapes
- Acrylic paint and paintbrushes — A basic set of acrylic craft paint covers every project. Flat brushes for coverage, small round brushes for detail
- PVA craft glue (white school glue) — For cardboard, paper, and porous materials
- Hot glue gun — For quick bonding on mixed materials; use with care — the glue and the metal tip get hot enough to burn skin
- Sandpaper — Medium-grit (120–150) for smoothing cut cardboard edges and preparing wood surfaces
- Needle and thread — Basic hand-sewing supplies for fabric projects; no sewing machine required
- Measuring tape — For fabric projects and wall-placement planning
- Protective gloves — Cotton or light work gloves for handling cut plastic edges and during sanding
None of these are specialty items. If you’re missing something, a craft knife with extra blades and a cutting mat are the two purchases most worth making — they’ll improve the finished look of cardboard and plastic projects more than any other single tool.
How to Prepare Reused Materials Before You Start
Taking fifteen minutes to properly clean and prepare your materials makes the difference between a craft that looks polished and one that looks like trash. Here’s how to handle each material before you start making. Some reused items barely need prep at all — our tin can craft comes together in minutes once the can is clean.
Plastic Bottles
Wash bottles thoroughly with warm soapy water. Remove labels by soaking in warm water, then scrub off any remaining adhesive with a little cooking oil or rubbing alcohol on a cloth. Rinse and dry completely — wet plastic won’t take paint. When you cut plastic bottles, the edges will be sharp. Run a piece of fine sandpaper or a nail file along every cut edge to dull it before handling further. Keep fingers clear of the blade path when cutting, and work on a stable surface.
Old Clothes and Fabric Scraps
Wash and fully dry every piece of fabric before cutting — even if it looks clean. Old clothing can hold dust, skin oils, and forgotten stains that show up under paint or glue. Once washed and dried, iron the fabric if you need flat, clean cuts for bunting or garlands. For T-shirt yarn, skip the iron — the stretched, curled-edge look is part of the texture.
Cardboard
Choose dry, clean cardboard without grease stains, water damage, or heavy creasing through the area you plan to use. Corrugated cardboard with the top layer removed exposes the ridged inner layer, which creates great texture for flower centers and sunburst rays. Remove any tape, labels, or staples. Cut with a sharp craft knife rather than scissors for cleaner edges. If you plan to paint large flat areas, a thin coat of white acrylic or gesso primer stops the cardboard from absorbing too much paint and warping.
Glass Jars and Bottles
Soak in warm soapy water to remove labels. For stubborn adhesive, rubbing alcohol, nail polish remover (acetone), or a paste of baking soda and cooking oil usually works. Dry completely. If you plan to paint the glass, wipe it down with rubbing alcohol first to remove any remaining oils from your hands — this helps paint adhere.
Old Bangles
Wipe bangles clean with a damp cloth and mild soap. If they have loose decorative stones, gems, or metal pieces, remove anything that wiggles before wrapping or gluing. Rough plastic or wooden bangles can be lightly sanded to help paint or glue grip the surface. Keep matched pairs together — you may want symmetry for wreaths or wall hangings.
Old Furniture Pieces
This is the category that needs the most attention. For drawers, cabinet doors, or furniture panels:
- Remove hardware (handles, hinges, knobs) and set aside — you may want to reuse them.
- Wipe down all surfaces with a damp cloth and mild cleaner. Let dry.
- Inspect for damage: loose joints, protruding nails, splintered wood, or signs of mold. Stabilize anything structural before decorating.
- Important safety note about old paint: Homes built before 1978 may have been painted with lead-based paint, and furniture from the same era could have been painted with it too. If the furniture piece you’re working with was painted before 1978 and you plan to sand or scrape the existing paint, test it first with an EPA-recognized lead test kit. Do not dry-sand old painted surfaces unless you have confirmed they are lead-free. The U.S. EPA recommends wet sanding or wet scraping as safer alternatives, along with containing the work area, wearing an N-100 respirator, and cleaning up with a HEPA vacuum and wet wiping. For more information, visit epa.gov/lead or call the EPA Lead Hotline at 1-800-424-LEAD. If you’re unsure, work with the existing surface rather than sanding it — paint over it, cover it with fabric or paper, or seal it with a clear coat.
Tested materials: For label adhesive I reach for Goo Gone first and fall back to isopropyl alcohol on the stubborn ones. For general cleaning before painting, warm water with a little Dawn dish soap has been enough for every surface in this article.
Aesthetic Cardboard Summer Crafts
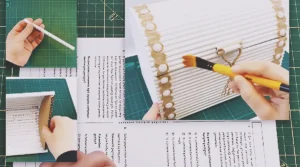
Cardboard gets underestimated. People see a shipping box and think “recycling bin,” not “wall art.” But corrugated cardboard has built-in texture, cuts cleanly with a sharp blade, takes paint well, and costs nothing. These three projects use it in ways that don’t read as cardboard at all once they’re finished. If you want to see how far the material can go, our guide to cardboard furniture that looks expensive shows what’s possible with careful finishing.
1. Layered Cardboard Summer Flower Wall Art
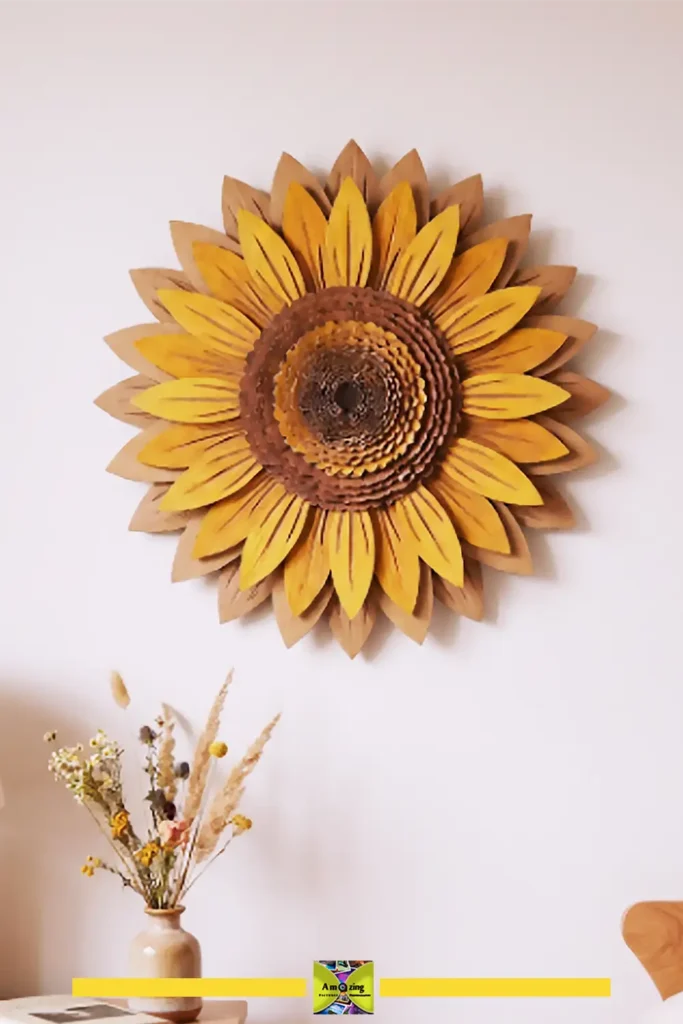
What it looks like: Oversized dimensional flower blooms — think sunflowers, daisies, or abstract Mediterranean blossoms — mounted directly on the wall or arranged in a simple frame. The corrugated texture adds a subtle ridged detail that reads as intentional rather than recycled. For a completely different take on the same idea, see how one maker creates luxury floral wall art from an unexpected material.
Best aesthetic style: Mediterranean, botanical, or cottagecore
Difficulty: Beginner to intermediate
Approximate time: 1.5 to 2.5 hours plus drying time
Materials:
- Corrugated cardboard (a clean shipping box works well)
- Acrylic paint in your chosen palette
- PVA glue or hot glue
- Pencil
- Optional: rope, twine, or fabric scraps for flower centers
Tools:
- Craft knife
- Cutting mat
- Metal ruler
- Scissors
- Paintbrushes (flat brush for coverage, small round brush for detail)
- Petal template (trace a single petal shape onto scrap cardboard first)
Steps:
- Sketch or trace a petal shape onto a piece of scrap cardboard and cut it out to use as your template. For a sunflower or daisy, make the petal roughly 4 to 5 inches long and 2 inches wide at the center, tapering to a soft point. For a Mediterranean-style abstract flower, try a wider, rounder petal about 5 inches long.
- Trace the petal shape onto your main cardboard and cut out 10 to 14 petals per flower. Vary the size slightly — cut a few petals about half an inch shorter for the inner layer. Use a sharp craft knife on a cutting mat for clean edges. If the edges look rough, smooth them with a light pass of sandpaper.
- Paint every petal. For a sunflower, use warm golden-yellow with a slightly deeper yellow or light brown at the base of each petal. For a Mediterranean look, try terracotta petals with cream tips. Paint the edges as well as the faces — visible raw cardboard edges make the piece look unfinished. Let dry completely.
- Cut a circle from cardboard for the flower center, about 4 to 5 inches across. Paint it dark brown, mustard, cream, or — for a textured alternative — glue coiled rope or twine to the surface in a spiral until the circle is covered.
- Arrange the larger petals in a circle, overlapping them slightly at the base. Glue each petal to the flower center with hot glue or strong PVA glue. Once the outer ring is secure, glue the shorter petals on top, offset so they peek between the outer petals.
- Let the glue fully set. Mount on the wall with adhesive strips or small nails. A group of three flowers in different sizes and coordinating colors makes a stronger visual statement than a single bloom.
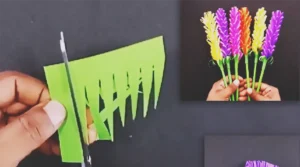
Customization ideas: Add painted leaves cut from cardboard in sage green or olive. For a boho variation, replace the cardboard center with a small macramé circle made from yarn or twine. For a tropical look, shape the petals longer and narrower, paint them in hot pink or coral, and add a bright yellow center. To mix in a delicate paper element, our paper lavender stems add height and softness alongside the cardboard blooms.
Recommended summer color palette: Warm yellow, cream, and terracotta for Mediterranean; golden yellow and chocolate brown for sunflower; coral, peach, and cream for a softer botanical look.
Display suggestion: Above a bed, in an entryway, or as part of a summer gallery wall. These flowers are lightweight and hang easily with removable adhesive strips — ideal for renters.
Practical tip: If your cardboard has printing on one side, use that side as the back or paint it with two coats. A thin primer coat of white or cream paint before your final color blocks the printing from showing through.
Common mistake to avoid: Cutting petals freehand without a template. Even slight size differences between petals become obvious once they’re arranged in a circle. Trace the template every time.
2. Cardboard Coastal Sunburst Mirror Frame
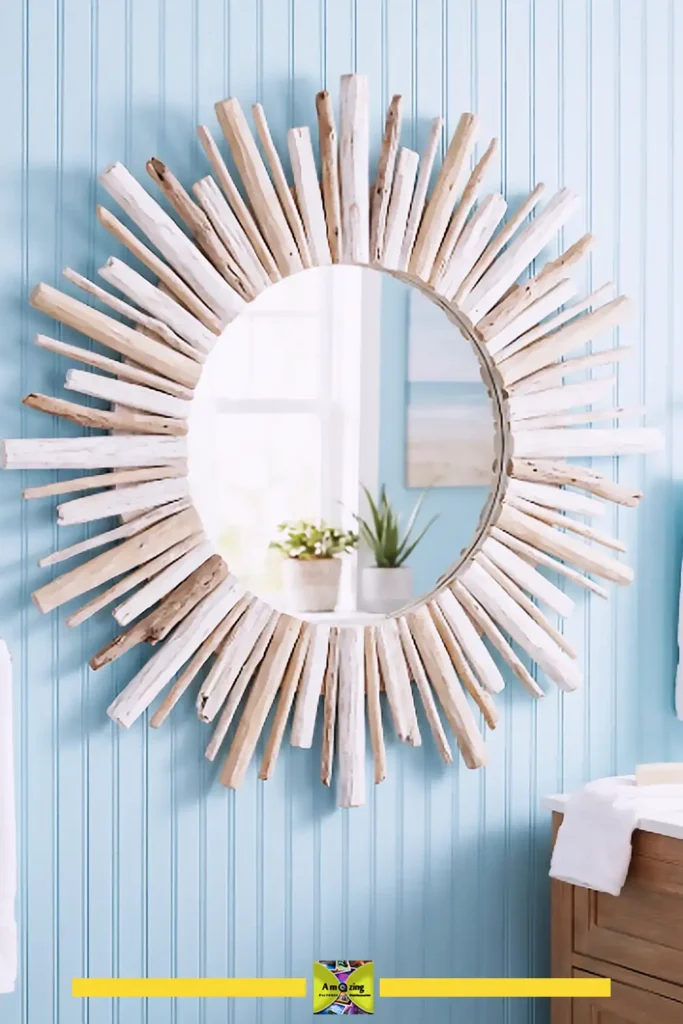
What it looks like: A round mirror surrounded by narrow painted cardboard rays that radiate outward like a stylized sun. Finished in warm white, sandy beige, pale blue, or terracotta, it reads as coastal or Mediterranean decor — not as something made from a box.
Best aesthetic style: Coastal, Mediterranean, or boho
Difficulty: Intermediate
Approximate time: 2 to 3 hours plus drying time
Materials:
- Corrugated cardboard
- A small round mirror (4 to 8 inches across; inexpensive craft mirrors work well)
- Acrylic paint
- PVA glue or hot glue
- Strong adhesive suitable for glass and cardboard (check the label — many multi-surface craft glues work for both)
- Pencil and ruler
Tools:
- Craft knife and cutting mat
- Metal ruler
- Paintbrushes
- Compass or circular object for tracing
Steps:
- Decide how large you want the finished piece. A good starting point: a 6-inch mirror surrounded by rays that extend 6 to 8 inches outward, making the total diameter roughly 18 to 22 inches.
- Cut a cardboard backing circle about 2 inches larger than your mirror. Cut a second identical circle. Glue them together for a sturdy base.
- Mark the center of the backing circle and trace the mirror outline there, but don’t glue the mirror on yet — you need to paint behind it first.
- Cut 24 to 36 narrow cardboard strips for the rays, each about 1 inch wide. For a varied sunburst, cut three different lengths: long (8 inches), medium (6 inches), and short (4 inches). For a more uniform look, cut them all the same length. Use the metal ruler and craft knife for straight, clean strips.
- Lightly sand the cut edges of every strip so they’re smooth and even.
- Paint every ray. Try this coastal pattern: paint every second ray warm white and the remaining rays pale sandy beige. Or, for a Mediterranean look, alternate terracotta and cream. Paint the edges as well. Let dry.
- Paint the backing circle in a matching or slightly darker shade so no raw cardboard shows between the rays.
- Arrange the rays around the backing circle, placing the longest rays first at even intervals, then filling in with medium and short rays. Glue each ray at its base so it points outward. Work in a pattern — placing alternating colors creates the cleanest look.
- Once the glue is fully set, glue the mirror onto the center of the backing circle. Use adhesive rated for glass and cardboard. Let cure according to the adhesive instructions before hanging.
- Attach a picture-hanging hook or D-ring to the back. Because the cardboard is lightweight, adhesive wall strips also work.
Customization ideas: Paint the rays in an ombré gradient — darker at the center fading to lighter at the tips. Add thin rope or twine wrapped around the base of each ray where it meets the mirror for a more textured coastal look. For a boho version, wrap every third ray in cream yarn instead of painting it.
Recommended summer color palette: Warm white and sandy beige for coastal; terracotta and cream for Mediterranean; all cream with natural rope accents for boho.
Display suggestion: Bathroom wall, entryway, above a mantel, or in a sunroom where it can catch and reflect natural light.
Practical tip: Lay out the full sunburst pattern on your work surface before gluing anything. Adjust the spacing until it looks balanced. Photograph the arrangement with your phone so you can reference it while gluing.
Common mistake to avoid: Gluing the mirror on before the rays are fully set. The weight of the mirror can shift damp glue, and repositioning is much harder once the mirror is attached.
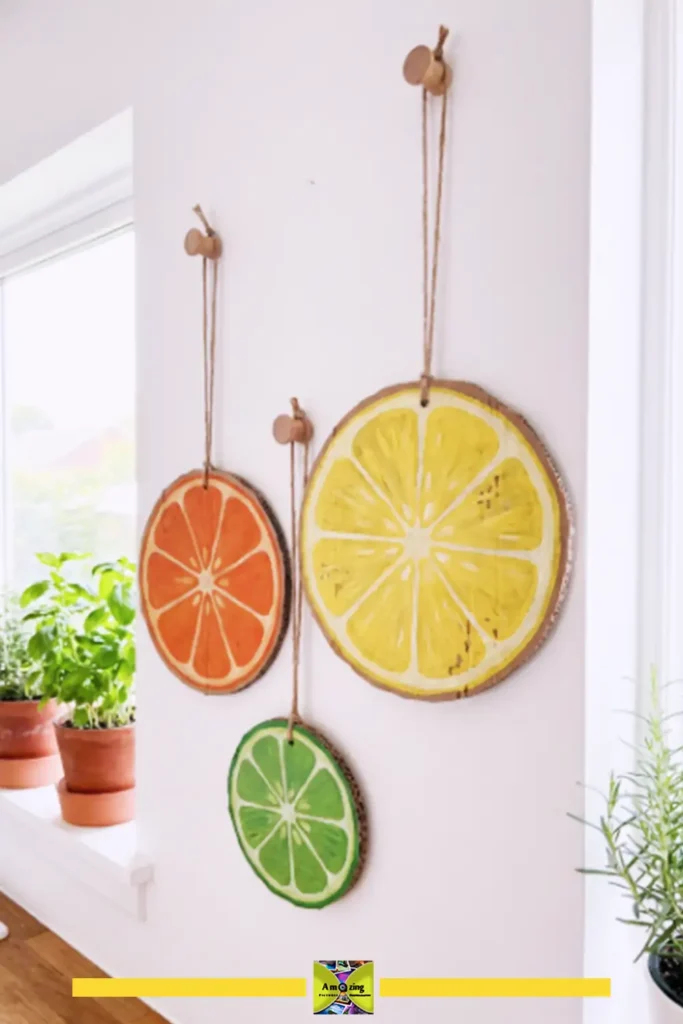
3. Cardboard Citrus Slice Wall Decor
What it looks like: Oversized lemon, orange, lime, or grapefruit slices — flat circular wall decorations with painted rinds, segmented interiors, and dimensional details. Bright and cheerful without being childish, they work especially well in kitchens, on patios, or in breakfast nooks.
Best aesthetic style: Retro summer, Mediterranean, or tropical
Difficulty: Beginner
Approximate time: 1 to 1.5 hours per slice plus drying time
Materials:
- Corrugated cardboard
- Acrylic paint in citrus colors
- PVA glue
- Pencil
- Optional: thin rope or twine for hanging loops; white yarn for pith texture
Tools:
- Craft knife and cutting mat
- Compass or large circular object for tracing
- Ruler
- Paintbrushes
Steps:
- Trace a large circle onto cardboard using a dinner plate or compass — 10 to 14 inches across makes a good statement piece.
- Cut out the circle with a craft knife. Smooth the edge with sandpaper.
- Paint the outer ring (the rind) in the appropriate color: bright yellow for lemon, orange for orange, lime green for lime, pinkish-yellow for grapefruit. The rind should be about ¾ to 1 inch wide.
- For the interior segments: lightly pencil in wedge-shaped sections radiating from the center, like pizza slices. Paint alternating sections in slightly different shades — for a lemon, paint every second wedge pale yellow and the remaining wedges a slightly brighter yellow. For an orange, alternate between light orange and a slightly deeper orange. This subtle variation gives the slice depth.
- For the pith (the white part between the rind and the fruit): paint a thin cream or white line between the rind and the segments, and thin cream lines radiating from the center between the wedges.
- Optional texture detail: glue short pieces of cream or white yarn along the pith lines while the paint is still slightly tacky, or paint the pith areas with a little extra paint and press a toothpick into it to create a subtle ridged texture.
- Attach a small loop of twine or rope to the back with hot glue for hanging. Let everything dry completely before putting it on the wall.
Customization ideas: Make a set of three different citrus slices in varying sizes. Add a few green cardboard leaves attached at the edge. For a retro look, paint the background of each segment in alternating pastel versions of the citrus color rather than realistic shades. For a tropical variation, cut a pineapple shape instead of a circle.
Recommended summer color palette: Lemon yellow paired with pale cream; orange paired with warm coral; lime green with soft white; or a three-piece set mixing all three fruits.
Display suggestion: Kitchen wall, patio wall, breakfast nook, or as summer party decor. Group three different citrus slices at staggered heights for the most visual impact.
Practical tip: If the cardboard warps slightly from the paint moisture, place the piece under a heavy book overnight once the paint is dry to the touch. It will flatten out.
Common mistake to avoid: Skipping the subtle color variation between segments. A single flat color across the entire interior makes the slice look like a solid circle rather than a citrus cross-section.
Aesthetic Plastic Bottle Summer Crafts
Clear plastic bottles have one big advantage over most recycled materials: they catch and transmit light. Used well, they can look almost like glass, especially in window applications. The key is clean cutting, smooth edges, and a light touch with color — too much paint and they read as plastic again. For more ways to reuse them, browse our full collection of plastic bottle craft ideas.
4. Plastic Bottle Botanical Suncatcher
What it looks like: A hanging arrangement of leaf and flower shapes cut from clear plastic bottles, lightly tinted with translucent color and suspended from a branch or wooden dowel. When sunlight hits them, they glow softly and cast faint colored shadows. Hung in a window, the effect is delicate and botanical, closer to pressed-glass art than to a plastic-bottle craft. The cutting and painting technique here is similar to our plastic bottle butterfly decorations, if you’d like more practice with it first.
Best aesthetic style: Botanical, coastal, or cottagecore
Difficulty: Intermediate (requires careful cutting)
Approximate time: 1.5 to 2.5 hours
Materials:
- 2 to 3 large clear plastic bottles (smooth-sided water or soda bottles work best — avoid heavily textured or ribbed bottles)
- Acrylic paint in translucent summer colors, or permanent markers in leaf-green and flower tones
- Clear-drying glue (such as Mod Podge or clear craft glue)
- Thin string, fishing line, or clear thread for hanging
- A small branch, wooden dowel, or bamboo stick about 12 to 18 inches long
- Optional: a few small pressed or dried flowers, small beads
Tools:
- Craft knife and cutting mat
- Scissors
- Fine sandpaper or nail file
- Small paintbrush
- Hole punch (a standard single-hole paper punch works on thin plastic)
Steps:
- Wash and dry the bottles, remove all labels, and clean off any adhesive residue. The plastic needs to be completely clean and dry.
- Cut the top and bottom off each bottle so you’re left with a clear cylinder. Cut the cylinder open lengthwise to create a flat sheet of plastic. Place it under a heavy book for 10–15 minutes if it curls.
- Draw leaf and simple flower shapes onto the flat plastic with a pencil. Leaves should be roughly 3 to 5 inches long. Flowers can be simple five-petal shapes, about 3 to 4 inches across. Include a small tab or extended section at the top of each shape where you’ll punch a hole for hanging.
- Cut out each shape with scissors or a craft knife. The cut edges will be sharp. Sand every edge with fine sandpaper or a nail file until smooth to the touch. This step is worth the time — it makes the pieces safer to handle and gives them a softer, more finished look. Consider wearing light gloves during this step.
- Lightly color each shape. The goal is a translucent wash, not opaque coverage. Dilute acrylic paint with a little water (roughly one part paint to two parts water) and brush a thin layer onto each piece, or use permanent markers to add soft color. Leaf-green and pale yellow-green for leaves; pale pink, lavender, or warm white for flowers. Let the color dry — it will look more subtle once dry than it does wet.
- If you want to add pressed flowers, brush a thin layer of clear-drying glue onto a leaf or petal, press a small dried flower or leaf onto it, and seal with another thin layer of glue on top. Let dry completely.
- Punch a small hole near the top of each shape. Thread a length of fishing line or thin string through each hole, varying the lengths so the pieces hang at different heights. Tie each piece to the branch or dowel.
- Tie a longer piece of string to each end of the branch for hanging. Position in a window that gets good light.
Customization ideas: Add small beads between the hanging pieces for extra sparkle. Create a coastal version with pale blue and sea-glass green shapes. For a more colorful piece, use alcohol-based markers in two or three shades on each leaf for a gradient effect.
Recommended summer color palette: Translucent leaf green, pale yellow-green, soft petal pink, lavender, and clear (uncolored pieces mixed in for contrast).
Display suggestion: Kitchen window, bathroom window, balcony door, or any window that gets direct morning or afternoon light.
Practical tip: Hold each plastic shape up to a window before adding color to check for scratches, label residue, or cloudiness. Use the clearest pieces for the largest, most visible shapes.
Common mistake to avoid: Over-painting. Heavy opaque paint on plastic looks thick and plastic-like. The translucency is what makes the suncatcher work — when in doubt, use less color.
Cost note: If you’re using bottles from your recycling and paint you already own, this project costs nothing. The only likely purchases are clear-drying glue and fishing line or thin string, and a found branch works just as well as a bought dowel.
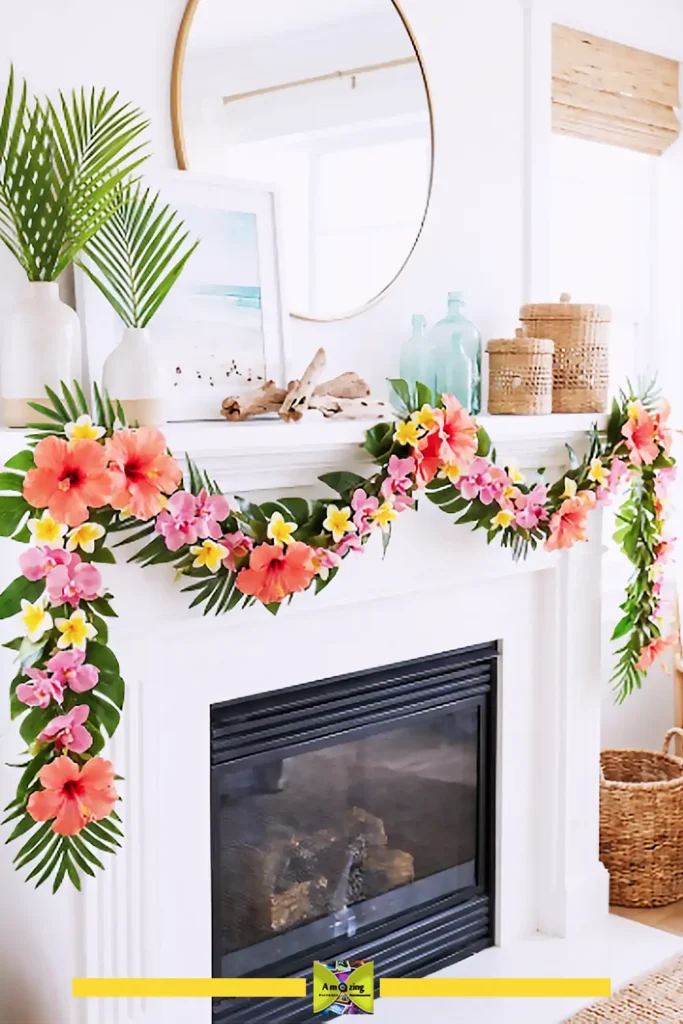
5. Plastic Bottle Tropical Flower Garland
What it looks like: A string of dimensional tropical flowers in coordinated summer colors — hibiscus-inspired blooms, stylized plumeria shapes, or abstract layered petals — draped across a wall, window frame, mantel, or patio railing. When painted in a deliberate palette, the garland reads as intentional summer decor rather than a recycling project.
Best aesthetic style: Tropical, retro summer, or Mediterranean
Difficulty: Intermediate
Approximate time: 2 to 3 hours
Materials:
- 3 to 5 clean plastic bottles
- Acrylic paint in 2 to 3 coordinated flower colors plus a center color (yellow, white, or dark contrast)
- String, twine, or thin ribbon for stringing the garland
- Hot glue or strong craft glue
Tools:
- Craft knife and cutting mat
- Scissors
- Fine sandpaper or nail file
- Paintbrushes
- Hole punch
Steps:
- Prepare the bottles: wash, remove labels, clean off adhesive, and dry completely.
- Cut each bottle to separate the bottom section (the curved base) and the smooth middle section. The bottle bases, with their natural petal-like curves, make great flower centers or small flowers. The smooth middle plastic makes good flat petals.
- For flat petals: cut the middle section into a flat sheet as described in the suncatcher project. Draw petal shapes — roughly 3 to 4 inches long and 2 inches wide, with a slightly pointed or rounded tip depending on the flower style you want. Cut out 5 to 6 petals per flower. Sand all edges smooth.
- For bottle-base flowers: cut around the base of the bottle about 2 inches up from the bottom. The natural scalloped shape of many bottle bases already suggests petals. Trim and smooth the cut edge, then make small cuts between the natural scallops to separate the petals slightly. Sand thoroughly.
- Paint all petals on both sides. For a tropical hibiscus look, use coral pink or bright orange petals with a yellow center. For a plumeria-inspired flower, use white petals with pale yellow centers. For a Mediterranean look, paint petals in terracotta with cream centers. Let dry completely.
- Assemble each flower: layer the petals in a circle, overlapping slightly, and glue at the center. For bottle-base flowers, the shape is already set — just paint the center in a contrasting color. Add a small painted circle or a bead at the very center for the flower’s eye.
- Punch a small hole near the top edge of each flower (or at two points on opposite sides if you want them to hang facing forward). Thread your string or twine through the holes. Space the flowers 6 to 10 inches apart along the string.
- Hang the finished garland. Tie small loops at each end for easy mounting on hooks or nails.
Customization ideas: Alternate flower types along the garland — large hibiscus-style blooms with smaller bottle-base flowers between them. Mix in a few unpainted clear flowers for a lighter look. Add painted cardboard leaves between the flowers for more greenery.
Recommended summer color palette: Coral, bright pink, and yellow for tropical; terracotta, cream, and olive green for Mediterranean; turquoise, orange, and white for retro summer.
Display suggestion: Draped across a mantel, along a window frame, across a headboard, on a covered patio wall, or above a doorway.
Practical tip: Before cutting all your petals, make one test flower to check the size and proportion. A flower that looks right in your hand may look too small once it’s part of a garland hung at ceiling height.
Common mistake to avoid: Making the petals too small. Oversized flowers (5 to 7 inches across) read as intentional decor; small flowers (2 to 3 inches) can look like scattered plastic bits on a string.
Summer Crafts Using Wool and Yarn
Yarn and wool scraps are among the most forgiving materials in this article. They need no special preparation beyond detangling, and the soft texture reads as warm and intentional even when the technique is simple. Leftover yarn from old projects, thrifted skeins, and unraveled sweater wool all work.
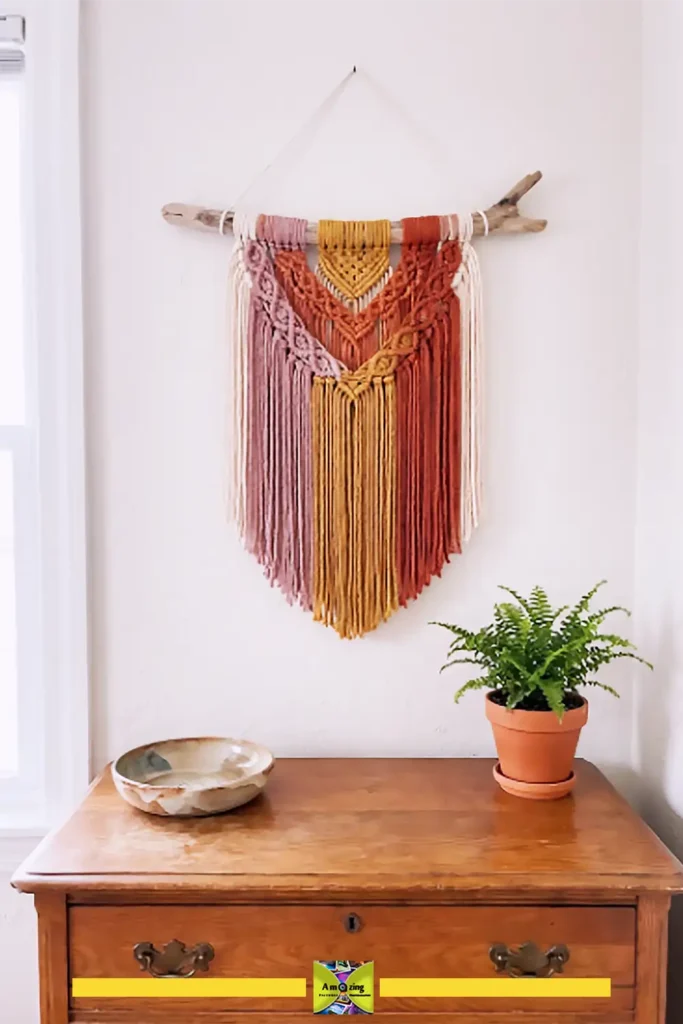
6. Boho Summer Yarn Wall Hanging
What it looks like: A lightweight wall hanging with flowing strands of yarn in sunset, coastal, or botanical colors, suspended from a natural branch or wooden dowel. Tassels, simple knots, and varying strand lengths create movement and texture. The overall effect is soft, textural, and relaxed — a summer interpretation of the heavier macramé and woven wall hangings that dominate fall and winter decor. The knotting is the same family of technique used in our macramé basket from recycled materials.
Best aesthetic style: Boho, coastal, or botanical
Difficulty: Beginner
Approximate time: 1 to 2 hours
Materials:
- Yarn or wool in 3 to 5 coordinating colors (leftover partial skeins work perfectly)
- A straight branch, wooden dowel, or bamboo stick about 12 to 20 inches long
- A longer piece of yarn or twine for the hanging cord
Tools:
- Scissors
- Measuring tape or ruler
- Optional: a large-tooth comb for smoothing fringes
Steps:
- Select your color palette. For a sunset-inspired hanging, combine cream, peach, dusty pink, and warm terracotta. For coastal: cream, soft blue, sea-glass green, and sandy beige. For botanical: sage green, cream, butter yellow, and soft pink.
- Cut your yarn into strands. A good rule: decide how long you want the finished hanging to be (say, 24 inches from the branch to the longest point), double that length (48 inches), and add 4 extra inches for the knot (52 inches total). This accounts for the strand being folded in half and knotted onto the branch. Cut at least 80 to 100 strands total, distributed across your colors. For the fullest look, cut closer to 150 strands.
- Prepare your branch or dowel. If using a found branch, brush off any loose bark and make sure it’s dry. If you want a cleaner look, lightly sand the branch or paint the dowel in a neutral color.
- Attach each strand using a simple lark’s head knot: fold the strand in half, place the loop over the front of the branch, reach through the loop from behind, and pull the two loose ends through the loop. Pull gently to tighten. Work across the branch from left to right, varying the colors as you go.
- Once all strands are attached, decide on your bottom shape. A V-shape (longest in the center, tapering up at the sides) is the most common and flattering. A straight-across cut creates a more modern look. A diagonal cut feels more organic and boho. Trim carefully with sharp scissors.
- Optional: create tassels. Gather 6 to 8 strands of a single color, tie them together about 1 inch from the top with a separate piece of yarn, and trim the bottoms evenly. Attach these tassels at intervals along the bottom edge or at the ends of the branch.
- Tie a hanging cord to each end of the branch and hang on a wall hook or nail.
Customization ideas: Add wooden beads threaded onto a few strands before knotting. Weave a few thin strips of lightweight fabric through the yarn for a mixed-texture look. For a coastal variation, incorporate thin rope or jute twine strands among the yarn.
Recommended summer color palette: Sunset (cream, peach, coral, terracotta); coastal (cream, soft blue, sage, sand); botanical (sage, cream, dusty rose, butter yellow).
Display suggestion: Above a bed as a lightweight alternative to a headboard, on an empty wall that needs texture, in an entryway, or layered with other wall decor on a gallery wall.
Practical tip: If your yarn colors look too bright or harsh next to each other, pull out the one that’s causing the clash and replace it with cream or a muted version of the same color. In yarn wall hangings, neutral space does as much visual work as the accent colors.
Common mistake to avoid: Cutting strands too short. A wall hanging that barely reaches 12 inches below the branch looks stubby. Aim for at least 18 to 24 inches of visible length below the branch.
7. Yarn-Wrapped Summer Vase or Bottle
What it looks like: An empty glass bottle or jar transformed into a textured, warm-looking vase by wrapping it with yarn, twine, or a mix of both. Small fabric accents, beads, or a few sprigs of dried flowers tucked into the wrapping add detail. With dried or fresh summer flowers inside, it works as a centerpiece, shelf accent, or gift. Prefer to keep the glass on show? Here’s how to turn a glass bottle into a vase without wrapping it at all.
Best aesthetic style: Boho, coastal, cottagecore, or Mediterranean
Difficulty: Beginner
Approximate time: 45 minutes to 1 hour
Materials:
- A clean glass bottle or jar with an interesting shape (wine bottles, olive oil bottles, large mason jars, and tall soda bottles all work well)
- Yarn, twine, or wool in 1 to 3 colors
- Hot glue or strong PVA glue
- Optional: small fabric scraps, thin ribbon, wooden beads, or a few dried flowers for embellishment
Tools:
- Scissors
Steps:
- Start with a completely clean, dry bottle. If you plan to use the vase for fresh flowers with water, keep the inside clean and wrap only the outside.
- Decide on your wrapping pattern. Options include: tight horizontal wrapping from bottom to top (cleanest and easiest), color-blocked sections (bottom third in cream, middle third in terracotta, top third in cream), or spaced bands of color with the glass showing between them for a lighter look.
- Apply a small dot of glue near the base of the bottle. Press the end of your first yarn color into the glue and hold for a few seconds until it grips.
- Begin wrapping. Keep each wrap snug against the previous one so no glass shows through, unless you’re deliberately spacing the wraps. For a tight wrap, add a small dot of glue every 6 to 8 wraps on the back side of the bottle to keep everything secure.
- When you want to switch colors, cut the first yarn leaving about a 1-inch tail. Glue the tail down, then glue the start of the new color over it so the transition is hidden. Continue wrapping.
- When you reach the top, cut the yarn, glue the end securely to the back, and hold until set.
- Add embellishments if desired: tie a thin strip of fabric or ribbon in a small bow around the neck, glue a single wooden bead at the front center, or tuck a few dried flower stems or a small sprig of lavender under a wrapped section.
- Fill with dried flowers, fresh summer blooms, or leave empty as a decorative object. Dried bunny tail grass, lavender, baby’s breath, and eucalyptus all look beautiful with yarn-wrapped vases.
Customization ideas: Wrap the entire bottle in natural jute twine for a coastal look. Use chunky wool in cream for a cozy cottagecore vase. Alternate thin stripes of two colors for a more graphic, modern look. Wrap only the bottom half of the bottle and leave the top half clear glass for a two-texture finish.
Recommended summer color palette: Cream, tan, and terracotta for boho; soft blue and cream for coastal; sage green and cream for botanical; butter yellow and cream for cottagecore.
Display suggestion: Dining table centerpiece, mantel, shelf, bedside table, or grouped in a set of three with different yarn colors and bottle shapes.
Practical tip: Glass bottles with a slight taper or curve are easier to wrap neatly than perfectly straight cylinders. Hunt your recycling bin for bottles with some shape to them — old vinegar bottles, syrup bottles, and specialty soda bottles often have the best silhouettes.
Common mistake to avoid: Using too little glue. The yarn needs to be secure at the top, bottom, and color transitions, or it will slide and gap over time.
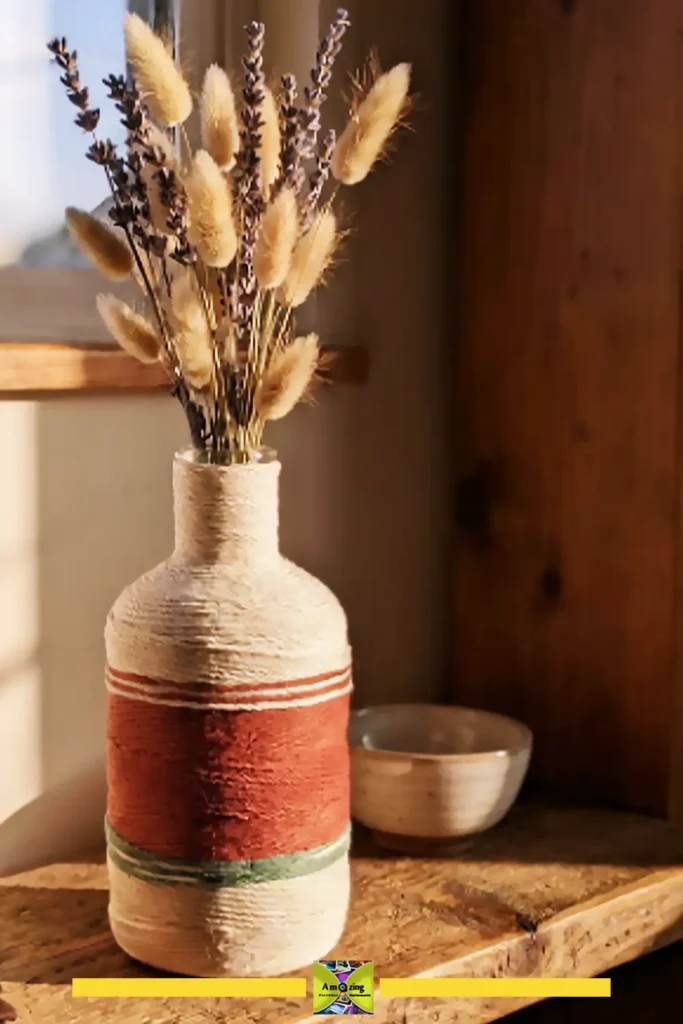
Tested materials: The vase pictured uses Lion Brand 24/7 Cotton in Ecru, Terracotta, and Succulent. I liked the smoother cotton texture for this one because it sat snugly around the bottle without getting fuzzy, and it was much easier to keep the rows close together without little gaps showing through.
Creative Summer Crafts Using Old Bangles
Old bangles sit in drawers for years — one from a broken set, another that no longer fits, a few in colors that stopped being your style. Their rigid circular shape makes them natural frames for miniature woven pieces, wrapped wreaths, and small hanging decorations.
8. Bangle Mini Woven Wall Hanging
What it looks like: A single bangle transformed into a small circular woven or wrapped wall decoration. Yarn, thin fabric strips, or embroidery thread creates the woven surface inside the bangle, with tassels, beads, or fringe hanging from the bottom edge. Hung individually or in a group, these read as miniature textile art pieces.
Best aesthetic style: Boho, coastal, or botanical
Difficulty: Beginner to intermediate
Approximate time: 45 minutes to 1 hour per bangle
Materials:
- 1 to 3 old bangles (wooden, plastic, or metal all work; larger bangles with a diameter of 2.5 inches or more are easiest to work with)
- Yarn, thin cotton thread, embroidery floss, or thin fabric strips in 2 to 4 colors
- Optional: small beads, a few feathers, or a thin strip of ribbon for hanging
Tools:
- Scissors
- Tapestry needle or large-eye needle
- Optional: hot glue for securing loose ends
Steps:
- Clean the bangle and remove any loose decorative pieces. If the bangle is very smooth or glossy, a light pass with sandpaper gives yarn and thread a better grip.
- Create the warp (the vertical threads that form the weaving base): cut a long piece of yarn or thread. Tie one end to the bangle with a tight double knot. Stretch the thread straight across the center of the bangle to the opposite side, wrap it around the bangle once, and stretch it back across to create another warp line. Continue until you have 10 to 18 warp threads evenly spaced across the bangle, like spokes on a wheel, all meeting near the center. Tie off the end securely.
- Begin weaving: thread a separate piece of yarn onto your needle. Starting at the center where all the warp threads cross, weave over and under each warp thread in a spiral, working outward toward the bangle edge. Push each row of weaving snugly toward the center as you go.
- Switch colors as desired — change yarn by tying the new piece to the old one at the back of the weaving and trimming the excess. A simple pattern of 3 to 4 color bands looks clean and intentional.
- When the weaving reaches the bangle edge, tie off the final thread securely on the back. Trim any loose ends.
- Add hanging elements: cut 5 to 8 short strands of yarn (about 6 to 8 inches each). Fold each strand in half and attach it to the bottom curve of the bangle using a lark’s head knot, just as you would on the larger wall hanging. Trim the fringe evenly or in a V-shape. Add a bead to the end of a few fringe strands if you like.
- Attach a small hanging loop of yarn or ribbon to the top of the bangle.
Customization ideas: Instead of weaving, wrap the entire bangle tightly in one color of yarn and attach long fringe to the bottom half only. Create a set of three bangles in different sizes, all using the same color palette, and hang them in a vertical row. For a coastal version, weave in thin stripes of blue and cream and add small shell beads to the fringe.
Recommended summer color palette: Cream, tan, and peach for boho; cream, soft blue, and sand for coastal; sage, cream, and dusty rose for botanical.
Display suggestion: Hang a single bangle as a small wall accent in a narrow space (between windows, next to a mirror, or in a hallway). Group three to five in a vertical or clustered arrangement for more impact.
Practical tip: Metal or plastic bangles with a groove or channel around the outside edge naturally grip yarn and thread, making them easier to work with than completely smooth bangles. If your bangle is very smooth, wrap it first in a single layer of yarn before adding the warp threads.
Common mistake to avoid: Pulling the warp threads so tight that the bangle warps or the threads snap. The warp should be taut but not guitar-string tight.
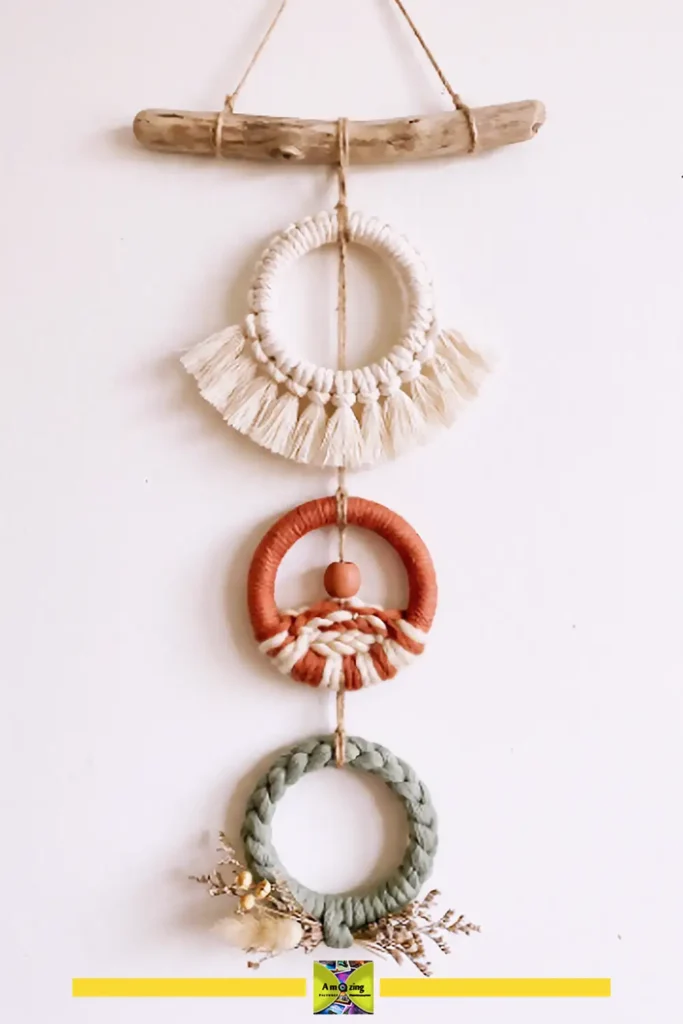
9. Bangle Botanical Summer Wreath Trio
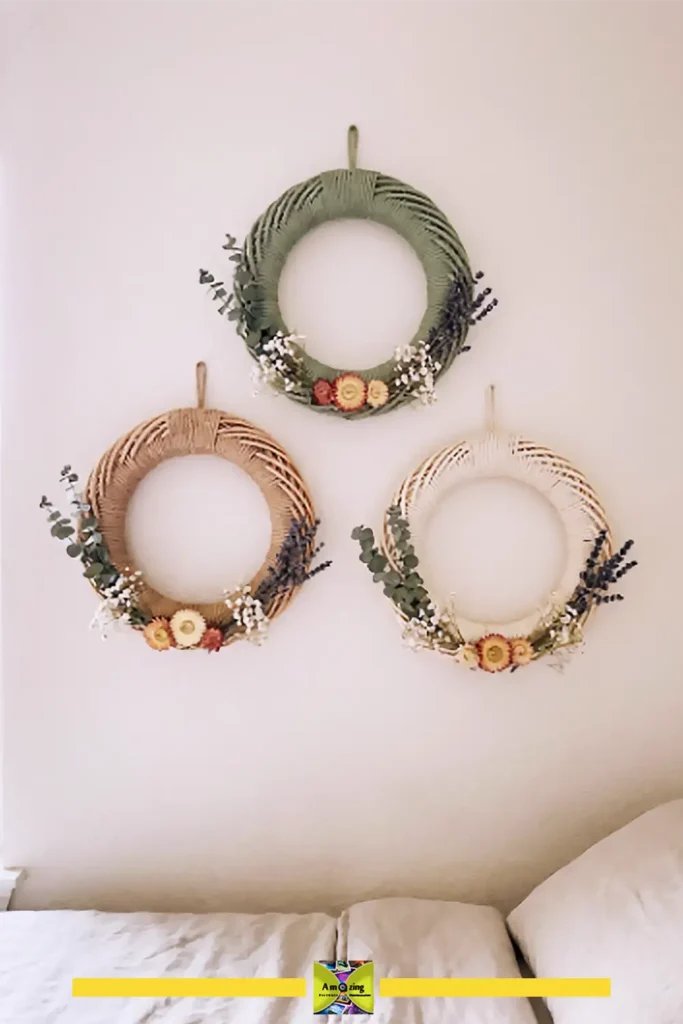
What it looks like: Three old bangles, each wrapped in a different shade of yarn or twine and decorated with small dried or artificial flowers, leaves, or greenery, hung together as a coordinated set. The finished trio reads as a delicate summer interpretation of a wreath — lighter, smaller, and more colorful than a traditional door wreath.
Best aesthetic style: Botanical, cottagecore, or boho
Difficulty: Beginner
Approximate time: 1 to 1.5 hours for the set of three
Materials:
- 3 old bangles of similar or varied sizes
- Yarn, twine, or embroidery floss in 3 coordinating colors
- Small dried or artificial flowers, leaves, and greenery sprigs
- Hot glue
- Thin ribbon or yarn for hanging loops
Tools:
- Scissors
- Hot glue gun
Steps:
- Wrap each bangle completely in yarn or twine. Start by gluing the end of the yarn to the inside of the bangle, then wrap tightly around the entire ring, pushing each wrap against the previous one so the original bangle surface is completely covered. Glue the end on the inside of the bangle when finished. Wrap all three bangles, each in a different but coordinating color.
- Plan your botanical arrangement on each bangle. Small dried flowers like baby’s breath, statice, lavender, or small strawflowers work well. Artificial flowers should be small-scale — tiny daisies, miniature roses, or small greenery sprigs. The decoration typically looks best clustered on the bottom third to half of each bangle rather than spread evenly around the entire ring.
- Glue the botanicals in place with hot glue, layering a few pieces of greenery first, then the flowers on top. Keep the arrangement relatively flat against the bangle so it hangs neatly.
- Attach a hanging loop of ribbon or yarn to the top back of each bangle.
- Hang the three wreaths together — in a vertical row, a tight triangle grouping, or horizontally across a small wall space.
Customization ideas: Use all-natural dried materials in neutral tones for a cottagecore look. For a coastal version, skip the flowers and decorate with small shells, starfish, or pieces of sea glass glued along the bottom curve. For a boho look, add a few small feathers and wooden beads alongside the flowers.
Recommended summer color palette: Sage green bangle with lavender and cream flowers; cream bangle with dusty pink and yellow flowers; tan bangle with white and soft green flowers.
Display suggestion: Gallery wall, above a vanity, in a bathroom with natural light, or as part of a larger summer decor arrangement on a mantel or shelf.
Practical tip: If you don’t have enough dried flowers, cut small leaf shapes from green fabric scraps or green-painted cardboard and use those as filler greenery. The yarn wrapping already provides texture, so the botanical additions can be quite minimal and still look intentional.
Common mistake to avoid: Overloading the bangle with too many flowers. Negative space — sections of the wrapped bangle showing through — keeps the wreath looking light and summer-appropriate rather than heavy and cluttered.
Aesthetic Crafts Made From Old Clothes and Fabric Scraps
Old T-shirts, jeans, shirts, dresses, and fabric scraps are some of the most versatile materials in this article. They’re soft, don’t require painting, and already carry color. The key to making fabric crafts look aesthetic rather than makeshift is choosing a deliberate color palette from the fabrics you have and cutting clean, even shapes.
10. Old T-Shirt Boho Wall Hanging
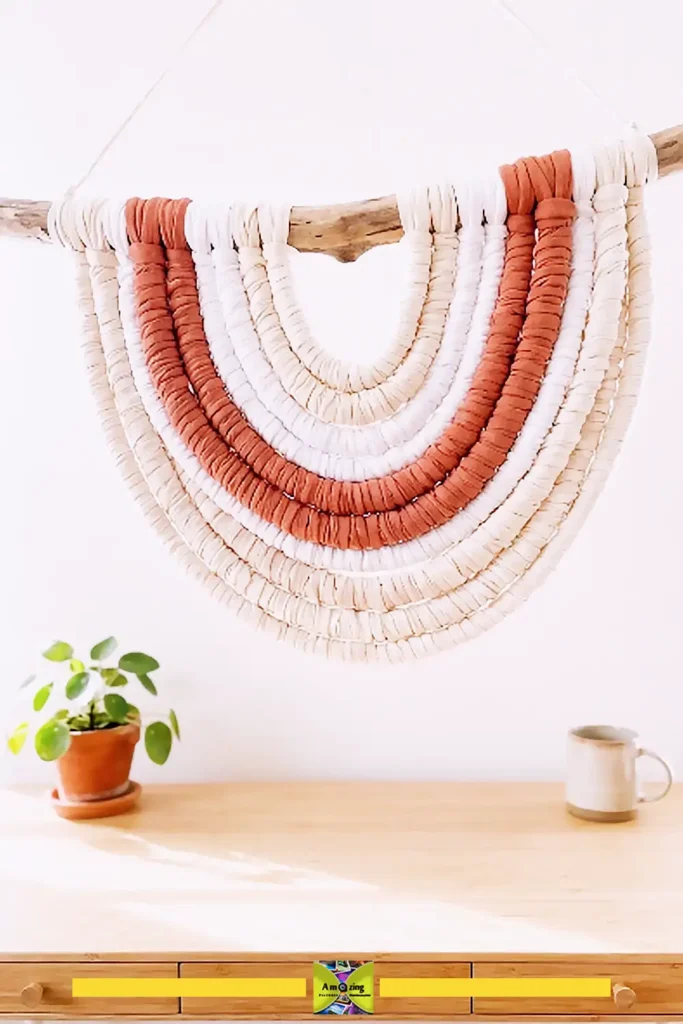
What it looks like: A soft, textural wall hanging made from old T-shirt fabric cut into strips and knotted, braided, or looped onto a branch or dowel. The fabric is thicker and softer than yarn, so the finished piece has more weight and a casual, relaxed drape. It works well in bedrooms, dorms, and relaxed living spaces.
Best aesthetic style: Boho, coastal, or botanical
Difficulty: Beginner
Approximate time: 1 to 1.5 hours
Materials:
- 2 to 4 clean old T-shirts in coordinating colors (solid colors work better than prints for this project; cream, white, light blue, sage, peach, tan, and terracotta are all good choices)
- A branch, wooden dowel, or piece of driftwood about 16 to 24 inches long
- Twine or strong yarn for the hanging cord
Tools:
- Sharp scissors (fabric scissors if you have them)
- Ruler or measuring tape
Steps:
- Wash and dry all T-shirts. Cut off the hems, sleeves, and any printed areas. You’ll work with the body fabric only.
- Cut the T-shirt body into strips. For a loopy, knotted look, cut strips about 1 inch wide and 18 to 24 inches long (they’ll be folded in half for knotting, so finished strands will be 9 to 12 inches). For a longer hanging, cut strips 30 to 40 inches long. Cut across the shirt horizontally to create continuous loops, then snip each loop open to make a straight strip.
- Once cut, stretch each fabric strip gently — the edges will curl inward, creating a rounded, yarn-like strand. This is one of the things that makes T-shirt fabric look intentional in wall hangings rather than like cut-up clothing.
- Attach the strips to the branch using the same lark’s head knot used in the yarn wall hanging: fold each strip in half, place the loop over the front of the branch, pull the two loose ends through the loop, and tighten.
- Vary the colors across the branch. For a balanced look, distribute each color evenly. For a gradient look, group colors from light to dark across the branch.
- Trim the bottom. A straight cut creates a clean, modern look. A shallow V-shape works well for boho style. Leave some strips slightly longer than others for a relaxed, organic feel.
- Optional: braid a few sections. Take three adjacent strips and braid them together for 6 to 8 inches, then tie off the braid with a thin strip of fabric. Two or three braided sections add texture without making the piece feel fussy.
- Attach a hanging cord to each end of the branch.
Customization ideas: Mix T-shirt fabric strips with a few strands of chunky yarn for texture contrast. Add large wooden beads to a few strips before knotting. Use one accent-color T-shirt (terracotta or dusty blue) sparingly among mostly cream and white strips for a subtle pop of color.
Recommended summer color palette: Cream, white, and tan with touches of terracotta (boho); white, soft blue, and sand (coastal); cream, sage, and dusty rose (botanical).
Display suggestion: Bedroom wall, above a desk, in a dorm room, or on a covered porch. The fabric is soft enough that this piece also works well in spaces where you want to soften hard surfaces or absorb a little sound.
Practical tip: Jersey (T-shirt) fabric rolls into soft, rounded strands when stretched — this is what you want. Woven shirt fabric doesn’t curl the same way and tends to fray. Stick to T-shirt material or other knit fabrics for the best result.
Common mistake to avoid: Leaving the hem or collar sections in your strips. The thicker, doubled-over hem fabric doesn’t curl or drape the same way as the body fabric, and it stands out awkwardly in the finished piece.
Cost note: This is one of the cheapest projects in the article. If you’re using shirts you already have, a branch from the garden, and twine from the drawer, it costs nothing at all. Scissors are the only tool you need.
11. Denim Pocket Hanging Organizer
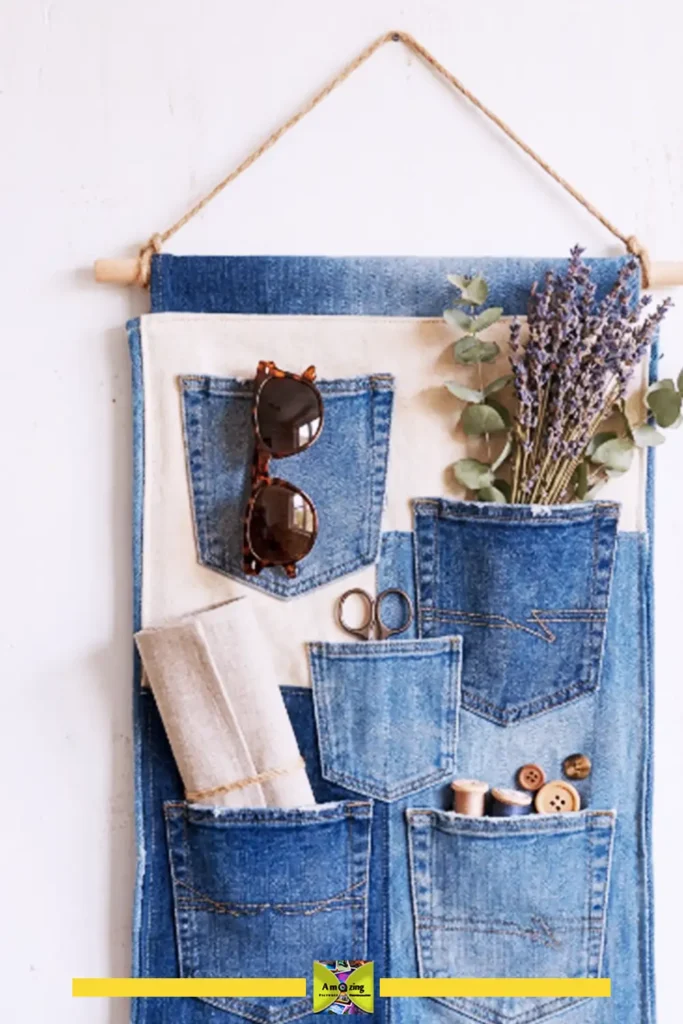
What it looks like: A practical but attractive wall organizer made from the back pockets of old jeans, mounted on a fabric or denim backing and hung from a wooden dowel. The varied washes of denim and the existing pocket stitching give it texture and character. It holds craft supplies, dried flowers, mail, sunglasses, small notebooks, or summer accessories — useful and decorative at the same time.
Best aesthetic style: Boho, natural rustic, or coastal
Difficulty: Beginner to intermediate
Approximate time: 1.5 to 2.5 hours
Materials:
- 2 to 3 pairs of old jeans (different washes create visual interest) or any pants with back pockets
- A sturdy piece of fabric for the backing — denim from a jeans leg, canvas, drop cloth, or a piece of an old curtain, roughly 16 × 24 inches
- A wooden dowel, branch, or old wooden hanger about 16 to 18 inches long — slightly wider than your backing fabric
- String, twine, or ribbon for hanging
- Optional: fabric glue (for a no-sew version) or needle and thread; small decorative trim, lace, or ribbon
Tools:
- Sharp scissors or rotary cutter
- Ruler or measuring tape
- Pins or fabric clips
- Sewing needle and thread OR fabric glue OR hot glue
- Iron (optional, for flattening)
Steps:
- Cut the back pockets out of the jeans, leaving about a ½-inch border of denim around the stitched edge of each pocket. This border makes the pocket easier to attach and keeps the original stitching intact. Aim for 3 to 5 pockets total.
- Prepare the backing fabric. Cut it to your desired size — about 16 inches wide by 24 inches tall works well for 4 to 5 pockets. Fold the top edge over about 1.5 inches and sew or glue it down to create a channel (a sleeve) for the dowel to slide through. If you’re using glue, let it dry completely before inserting the dowel.
- Lay the backing fabric flat and arrange the pockets on it. Move them around until you’re happy with the layout. A staggered arrangement (pockets not perfectly aligned in rows) tends to look more interesting than a strict grid. Leave at least 1.5 inches between pockets so items placed inside don’t overlap.
- Attach each pocket. For a sewn organizer: pin the pocket in place and hand-sew along the sides and bottom with a simple running stitch or backstitch, leaving the top open. Use a denim needle if you have one. For a no-sew version: apply fabric glue or hot glue along the sides and bottom of each pocket, press firmly onto the backing, and let dry completely. Fabric glue generally holds up better than hot glue for this application.
- Add any decorative trim. Stitch or glue a strip of ribbon, lace, or thin fabric along the top edge. Leave the pockets themselves mostly unembellished — the original pocket stitching and varied denim washes already provide plenty of visual detail.
- Slide the dowel through the channel at the top. Tie a piece of string or twine to each end of the dowel for hanging. If the dowel is too long, trim it with a small saw and sand the cut ends.
- Hang on a wall hook or nail. Fill the pockets.
Customization ideas: Add small fabric labels or hand-painted tags to identify what goes in each pocket. Embroider a simple flower or leaf motif on one or two pockets. For a coastal version, use light-wash denim and add a strip of blue-and-white striped fabric as trim. For a boho version, mix denim with one or two pockets cut from corduroy or canvas pants.
Recommended summer color palette: Indigo, light-wash blue, and natural cotton; or mixed denim washes with cream trim.
Display suggestion: Craft room, entryway, beside a desk, in a bathroom for toiletries, or on a bedroom wall for small accessories. Also works on the back of a door.
Practical tip: Don’t worry about the denim looking too worn. Faded areas, slight fraying, and varied washes all contribute to the character of the finished piece — that’s part of the appeal of working with old jeans.
Common mistake to avoid: Cutting the pockets too close to the stitching. That ½-inch border of extra fabric around the pocket gives you something to glue or sew through without damaging the original pocket seams.
12. Fabric Scrap Summer Tassel Garland
What it looks like: A soft, colorful garland made from fabric strips tied into tassel-like bundles and strung along twine or ribbon. Unlike paper bunting, the fabric version has weight, movement, and texture. Hung across a window, mantel, headboard, or doorway, it adds a summery, celebratory feel without reading as party-store decor. If you like working with fabric flowers, our handmade ribbon flowers pair beautifully with this garland, and for a paper alternative try our paper flower garland.
Best aesthetic style: Boho, retro summer, botanical, or cottagecore
Difficulty: Beginner
Approximate time: 1 to 2 hours
Materials:
- Fabric scraps from old clothes, leftover sewing projects, or thrifted fabric — lightweight cotton, linen, gauze, and shirt fabric all work well. Avoid heavy denim or thick canvas for this project.
- Sturdy twine, cotton rope, or ribbon for the garland base, about 4 to 6 feet long
- Optional: a few beads for accents
Tools:
- Sharp scissors or rotary cutter and cutting mat
- Ruler
Steps:
- Choose a color palette from your fabric scraps. Pull out pieces that coordinate. For a summer garland, avoid heavy dark fabrics — stick to light, bright, or soft colors. Cream, pale blue, sage green, dusty pink, butter yellow, soft coral, and white all work well together.
- Cut fabric into strips roughly 1 inch wide and 10 to 14 inches long. The exact length depends on how long you want your tassels to hang — strips folded in half will hang at roughly half their cut length. For a 6-foot garland with tassels spaced every 3 to 4 inches, you’ll need about 20 to 30 tassel bundles, each made of 3 to 5 fabric strips. That’s roughly 60 to 150 strips total, depending on how full you want it.
- Group the strips into bundles of 3 to 5 pieces, mixing colors within each bundle. Each bundle will become one tassel.
- Take one bundle and fold it in half. Place the folded loop over the twine, reach through the loop from behind, and pull the loose ends through — the same lark’s head knot you’d use for yarn. Pull gently to tighten. The fabric should be snug on the twine but not so tight that you can’t adjust its position.
- Continue adding tassel bundles along the twine, spacing them 3 to 4 inches apart. Vary the color combinations — some bundles might be all one color, others might mix two or three. Leave about 8 to 10 inches of bare twine at each end for hanging.
- Once all bundles are attached, trim any uneven ends. You can cut all tassels to the same length for a clean look, or leave them slightly uneven for a more relaxed, organic feel.
- Optional: thread a bead onto a few individual strips within some bundles before knotting.
Customization ideas: Alternate single-color bundles with mixed-color bundles in a deliberate pattern. Use fabrics with small-scale prints (tiny florals, thin stripes, small dots) mixed with solids — the pattern adds interest without overwhelming the garland. For a more tailored look, cut the bottom of each tassel into a point instead of leaving it straight.
Recommended summer color palette: Cream, sage green, dusty pink, and butter yellow for cottagecore; turquoise, coral, yellow, and white for retro summer; all cream and white with a few sage accents for a minimalist botanical look.
Display suggestion: Across a mantel, along a window frame, above a bed, on a covered porch, across a bookshelf front, or as summer party decor.
Practical tip: If you’re short on fabric in your target palette, cut a few strips from an old white or cream T-shirt or pillowcase. Cream and white act as visual spacers and make the colored strips look more intentional.
Common mistake to avoid: Using fabric that’s too thick or stiff. Lightweight fabrics drape and hang better — heavy canvas, denim, or upholstery-weight fabric will stick out awkwardly rather than hanging softly.
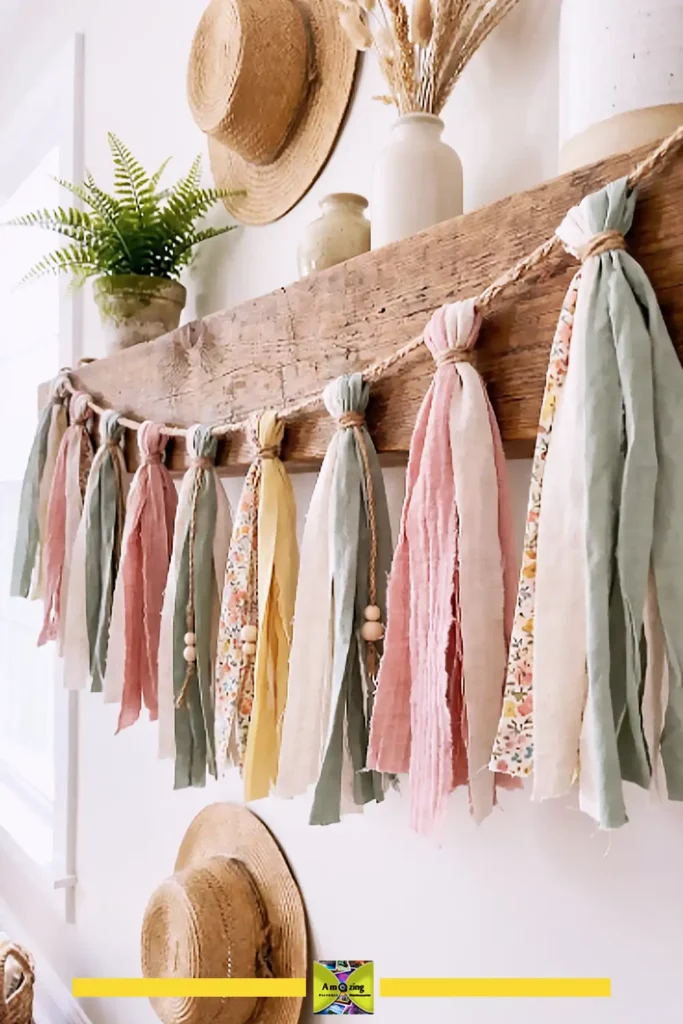
Tested materials: The fabrics that draped best for me were lightweight cotton, linen, and soft gauze. Thick canvas was the one I’d skip next time. It felt too stiff and made the tassels stick out instead of falling into that soft, relaxed shape I wanted.
Summer DIY Projects Using Old Furniture Pieces
Old furniture projects require the most preparation but also produce the most dramatic transformations. A drawer that was headed for the dump becomes a wall shelf. A cabinet door with peeling paint becomes botanical wall art. These are the projects people stop and ask about. If you enjoy this kind of upcycling, our furniture makeover project walks through a full transformation start to finish.
13. Upcycled Drawer Summer Display Shelf
What it looks like: A wooden drawer removed from an old dresser, desk, or cabinet, cleaned up and transformed into a wall-mounted display shelf. Painted in a fresh summer color and possibly lined with wallpaper, fabric, or painted pattern at the back, it becomes a shallow shadow-box shelf perfect for displaying small plants, dried flowers, shells, candles, or miniature summer collectibles.
Best aesthetic style: Cottagecore, coastal, Mediterranean, or botanical
Difficulty: Intermediate
Approximate time: 2.5 to 4 hours plus drying time (spread across a day or weekend)
Materials:
- An old wooden drawer — any size works, but shallow drawers (3 to 6 inches deep) make the best display shelves
- Acrylic paint or chalk paint
- Optional: wallpaper remnant, fabric, or decorative paper for the back panel; contact paper for an easy-clean surface
- Two D-ring picture hangers or a heavy-duty sawtooth hanger
- Short screws appropriate for the drawer thickness
Tools:
- Screwdriver (to remove the drawer pull if needed)
- Sandpaper (medium grit, 120–150)
- Damp cloth
- Paintbrush or small foam roller
- Drill with small drill bit (for pilot holes when installing hanging hardware)
- Measuring tape
- Level
Safety note before starting: Review the safety guidance in the Material Preparation section about old paint and potential lead exposure. If the drawer was painted before 1978, test for lead before sanding. If you’re unsure of the drawer’s age, work with the existing surface rather than sanding it — clean it, paint over it, and avoid creating dust.
Steps:
- Remove the drawer pull, handle, or knob. Set it aside — you may reuse it or replace it with something that fits your summer aesthetic.
- Clean the drawer thoroughly with a damp cloth and mild cleaner. Remove any loose dirt, dust, cobwebs, or sticky residue. Let it dry completely.
- If the drawer is made of raw or previously unpainted wood and you’d like a smooth finish, sand it lightly with medium-grit sandpaper. Wipe away all sanding dust with a damp cloth. If you’re working with a painted drawer and have confirmed the paint is lead-free, sand to rough up the surface so new paint adheres. If you’re uncertain about the paint, skip sanding and clean well instead.
- Paint the drawer. For a cottagecore look, try soft sage green, butter yellow, or dusty rose. For coastal, use warm white, pale blue, or sandy beige. For Mediterranean, use cobalt blue or terracotta. Apply two coats for even coverage, letting each coat dry fully. Paint the inside as well as the outside — the inside will be visible when the shelf is hung.
- Optional: line the back interior panel. Cut a piece of wallpaper, fabric, or decorative paper to fit the back of the drawer. Attach with glue or double-sided tape. A small floral print, a soft stripe, or a solid color that contrasts with the outer paint adds a finished detail that shows when the shelf is viewed from the front. This step gives the shelf a more expensive, boutique look.
- Attach hanging hardware to the back. Use two D-ring hangers, one near each top corner, screwed into the drawer sides or the top edge of the back panel. For heavier drawers, screw into the sides rather than the back panel. Make sure the screws are short enough that they won’t poke through to the front. Test that the hardware is secure.
- Mark the wall, install appropriate wall anchors for the weight of the drawer, and hang. Use a level to make sure it’s straight.
- Style the shelf. Small potted plants (real or good-quality faux), a few shells in a tiny dish, a small vase with dried flowers, a candle, a mini framed print — anything small and summery works. Don’t overcrowd; a few well-spaced objects look better than a shelf stuffed full.
Customization ideas: Paint the outside one color and the inside a contrasting shade. Add small wooden dividers inside to create separate display cubbies. Attach small adhesive hooks to the bottom of the drawer to hang lightweight items. For a coastal version, line the back with a piece of blue-and-white striped fabric and display shells and sea glass. For a botanical version, paint the drawer sage green, line it with floral paper, and fill it with small plants and botanical prints.
Recommended summer color palette: Sage green with cream interior (botanical); warm white with pale blue interior (coastal); butter yellow with white interior (cottagecore); terracotta with cream interior (Mediterranean).
Display suggestion: Entryway for keys and sunglasses, bathroom for small toiletries, bedroom for jewelry and small accessories, living room for a curated collection of small objects, kitchen for dried herbs and small spice jars.
Practical tip: Test-fit your intended display objects in the drawer before hanging it. A shelf that looks great empty can feel too shallow or too deep once you actually put things in it. About 3 to 5 inches of depth is ideal for most small display objects.
Common mistake to avoid: Hanging the drawer with hardware that’s too weak. Even a small wooden drawer can be heavier than it looks, especially once filled with objects. Use hardware rated for the drawer’s weight plus whatever you’ll put inside it.
Tested materials: The drawer shown is painted in Annie Sloan Chalk Paint in Coolabah Green, two coats. I skipped primer because the existing finish was clean and stable, and I didn’t have any noticeable staining or old color bleeding through.
Cost note: The main costs for this project are paint and hanging hardware. The drawer itself can come from an old dresser, desk, cabinet, thrifted furniture, or another piece you already have, while wallpaper, fabric, or decorative paper scraps can be used for the backing.
14. Old Cabinet Door Painted Botanical Wall Art
What it looks like: A flat cabinet door panel transformed into a painted canvas for botanical, floral, coastal, or Mediterranean-inspired artwork. The wood surface takes paint differently than paper or canvas, giving the finished piece a slightly aged, substantial feel. Hung on a wall, it reads as intentional art rather than a repurposed piece of furniture.
Best aesthetic style: Botanical, Mediterranean, coastal, or cottagecore
Difficulty: Intermediate to advanced (depends on painting complexity)
Approximate time: 3 to 5 hours plus drying time
Materials:
- A flat-panel or minimal-detail cabinet door (flat doors without heavy raised molding are easier to paint on; Shaker-style doors with a flat center panel also work well)
- Acrylic paint in your chosen palette
- Primer (white or light-colored acrylic primer or gesso, especially if the door has a dark existing finish)
- Optional: clear matte or satin sealant spray
Tools:
- Screwdriver (to remove hinges or hardware)
- Sandpaper (medium and fine grit) — only if the existing paint is confirmed lead-free or the door is unfinished wood
- Damp cloth
- Paintbrushes in several sizes, including a fine brush for detail
- Pencil for sketching the design
- Picture-hanging hardware rated for the door’s weight
Safety note: Review the full lead-paint safety guidance at the start of this section before sanding any painted cabinet door. If you’re uncertain about the door’s paint history, work with the existing surface rather than sanding it.
Steps:
- Remove all hardware from the door — hinges, knobs, handles. Fill any hardware holes with wood filler if they’ll be visible in your final design. Let the filler dry and sand smooth only if the surface is confirmed safe.
- Clean the door thoroughly. If the existing surface is glossy and you’ve confirmed it’s safe to sand, lightly scuff it with fine-grit sandpaper so the primer grips better. Wipe away all dust with a damp cloth. If you’re not sanding due to paint uncertainty, clean well and apply a bonding primer designed to adhere to glossy surfaces without sanding.
- Apply primer to the front and edges of the door. This gives you a clean, uniform surface to paint on and blocks any existing color or wood tone from showing through. One or two coats, depending on coverage. Let dry completely.
- Sketch your design lightly in pencil. For a botanical look: large-scale leaves, ferns, or summer flowers (sunflowers, lavender stems, olive branches). For a coastal look: abstract wave lines, a simple seascape, or a large shell. For Mediterranean: a lemon branch, olive sprig, or simple terracotta-toned abstract shapes. If freehand drawing feels intimidating, trace a projected image or use a simple design made of basic shapes — a series of overlapping leaves in different greens, for example, is forgiving and looks sophisticated.
- Paint your design. Work from background to foreground — paint large areas of background color first, then mid-ground shapes, then foreground details. Let each layer dry before adding the next so colors stay clean and edges stay sharp. For a botanical piece: paint the background a soft cream or pale color, then add large green leaves in two or three shades of sage and olive, then paint flower details in dusty rose, pale yellow, or white.
- Once the paint is fully dry, decide whether to seal the piece. A matte or satin clear sealant spray protects the paint and gives the surface a uniform sheen, but it’s optional — especially for a piece hung indoors. If you do seal it, spray in a well-ventilated area and follow the product instructions.
- Attach hanging hardware to the back. A cabinet door is heavier than a canvas, so use hardware rated for the door’s weight. Install two D-rings, one on each side near the top, or use a heavy-duty sawtooth hanger for smaller doors.
- Hang securely, using wall anchors appropriate for the weight.
Customization ideas: If painting a full botanical scene feels too ambitious, paint the entire door a single summer color (sage green, terracotta, or soft blue) and use a stencil to add a repeating leaf or flower pattern in white or cream. This is much faster and still produces a strong visual result. For a coastal look, paint horizontal stripes in two shades of blue with white between them. For a cottagecore look, paint a simple wildflower meadow — loose, forgiving shapes in mixed pastels over a cream background.
Recommended summer color palette: Sage green, olive, cream, dusty rose, and pale yellow (botanical); cobalt blue, terracotta, lemon yellow, and white (Mediterranean); soft blue, sea-glass green, sand, and white (coastal).
Display suggestion: Living room, dining room, entryway, above a bed, or propped on a mantel or console table rather than hung. A large cabinet door can act as a statement piece on an otherwise empty wall.
Practical tip: If the cabinet door has a recessed center panel, treat the panel as a natural frame for your design. Paint the raised border one color and the recessed panel a contrasting color, then add your painted design inside the panel.
Common mistake to avoid: Skipping the primer. Old cabinet doors often have dark wood tones or existing paint colors that will show through light summer paint colors. Primer is not optional if you want clean, true color.
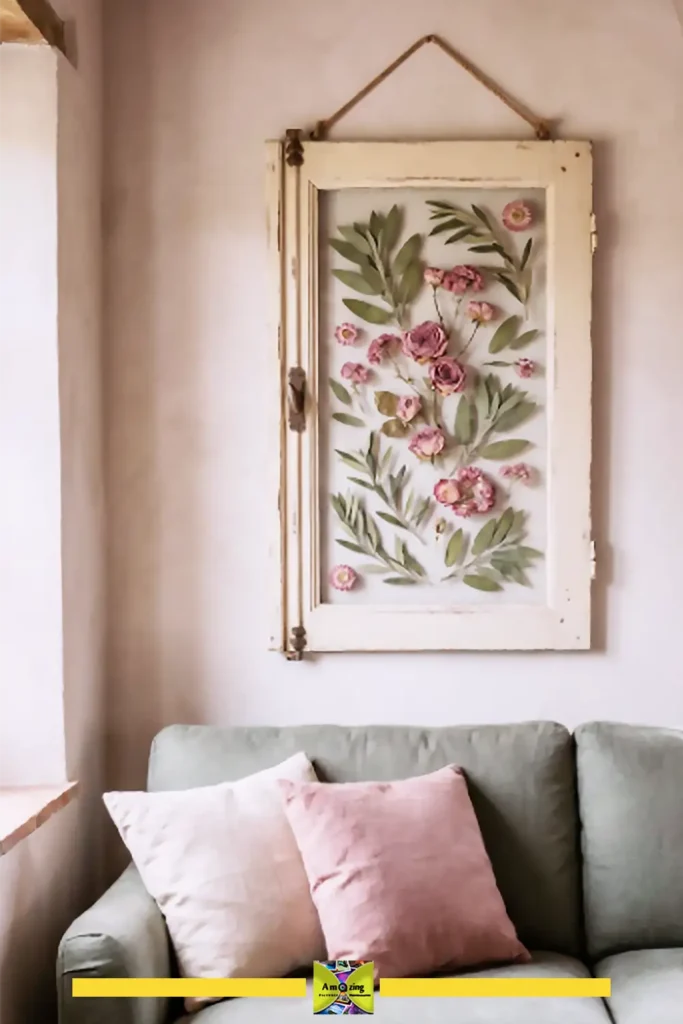
Tested materials: Painted in FolkArt Matte Acrylic Paint in Wicker White, Italian Sage, Thicket, Crushed Coral, and Daffodil Yellow. The old stained oak surface needed a second primer pass before the lighter colors looked clean and even, which is worth knowing before you mix your quantities.
Cost note: The main materials you may need to buy are primer, acrylic paint, and picture-hanging hardware. The cabinet door can be salvaged from old furniture or a renovation project, and leftover paint or sealant from other DIY projects can keep the material list even shorter.
Mixed-Material Summer Decor Ideas
The best summer spaces often mix materials — cardboard, fabric, yarn, wood, and glass — in a way that feels collected rather than manufactured. These two projects pull multiple recycled materials together. For more in this vein, see our larger roundup of recycled wall decor ideas and this clever take on newspaper wall decor.
15. Recycled Summer Gallery Wall
What it looks like: A curated arrangement of small-scale summer decorations made from different recycled materials, hung together in a cohesive gallery-wall layout. The individual pieces might include a mini bangle wall hanging, a small cardboard sunburst, a yarn-wrapped mini hoop, a painted cardboard citrus slice, a fabric scrap mini banner, and a decorated jar lid — all in a shared color palette so the collection reads as intentional rather than random. For more on arranging pieces into a balanced layout, our Pinterest-inspired wall makeover covers small-room gallery walls in detail.
Best aesthetic style: Any — the shared color palette determines the aesthetic
Difficulty: Intermediate (managing layout and balance across multiple pieces)
Approximate time: 4 to 6 hours total (spread across several crafting sessions)
Materials:
- A mix of small-scale crafts from earlier in this article or new mini versions: mini bangle wall hanging, small cardboard sunburst or flower (6 to 8 inches across), yarn-wrapped embroidery hoop, small painted citrus slice (8 inches), fabric scrap mini banner (12 to 18 inches long), decorated mason jar lid or bottle cap display piece
- Coordinated paint, yarn, fabric, and finishing supplies — use ONE color palette across all pieces
Tools:
- Picture-hanging hardware appropriate for each piece
- Measuring tape
- Level
- Pencil for marking wall placement
- Painter’s tape for planning layout before committing to nails
Steps:
- Choose your color palette first. This is the step that makes a mixed-material gallery wall work. Pick three to five colors and use only those across every piece. Example: cream, sage green, terracotta, and sand. Every piece uses some combination of those colors.
- Create 5 to 8 small coordinating pieces. Don’t try to make them all in one day — spread the crafting across a few sessions. Each piece should take 30 minutes to an hour. Aim for variety: include at least one textile piece (fabric or yarn), one painted cardboard piece, one wood or natural piece, and one piece with a circular element.
- Before hanging anything, arrange the pieces on the floor in front of the wall. Move them around until the layout feels balanced. A good gallery wall typically has: the largest or strongest piece slightly off-center, smaller pieces clustered around it, consistent spacing (2 to 4 inches) between pieces, and the overall arrangement roughly centered at eye level (about 57 to 60 inches from the floor to the center of the grouping).
- Trace each piece onto kraft paper or newspaper and cut out the shapes. Tape these paper templates to the wall with painter’s tape. Adjust until you’re happy with the layout. This extra step prevents unnecessary nail holes.
- Mark the hanging point on each template, install hardware through the paper, remove the templates, and hang each piece. Use a level.
- Step back and check. Adjust if needed. The beauty of a gallery wall made from recycled materials is that nothing is too precious — if a piece doesn’t work, swap it out or make another.
Customization ideas: The gallery wall could have a theme: all botanical pieces, all coastal pieces, all circular motifs, all textile-based pieces. Or it could tell a color story: cream and sand as the main colors with sage and terracotta as sparingly used accents.
Display suggestion: Living room feature wall, hallway, above a sofa or console table, staircase wall, bedroom, or home office.
Practical tip: Paint all the cardboard pieces in one session and all the fabric pieces in another. Batching by material type is more efficient than finishing one piece completely before starting the next.
Common mistake to avoid: Using different color palettes across the pieces and hoping they’ll “just work together.” They won’t. The shared palette is what makes this read as a gallery wall rather than a random collection.
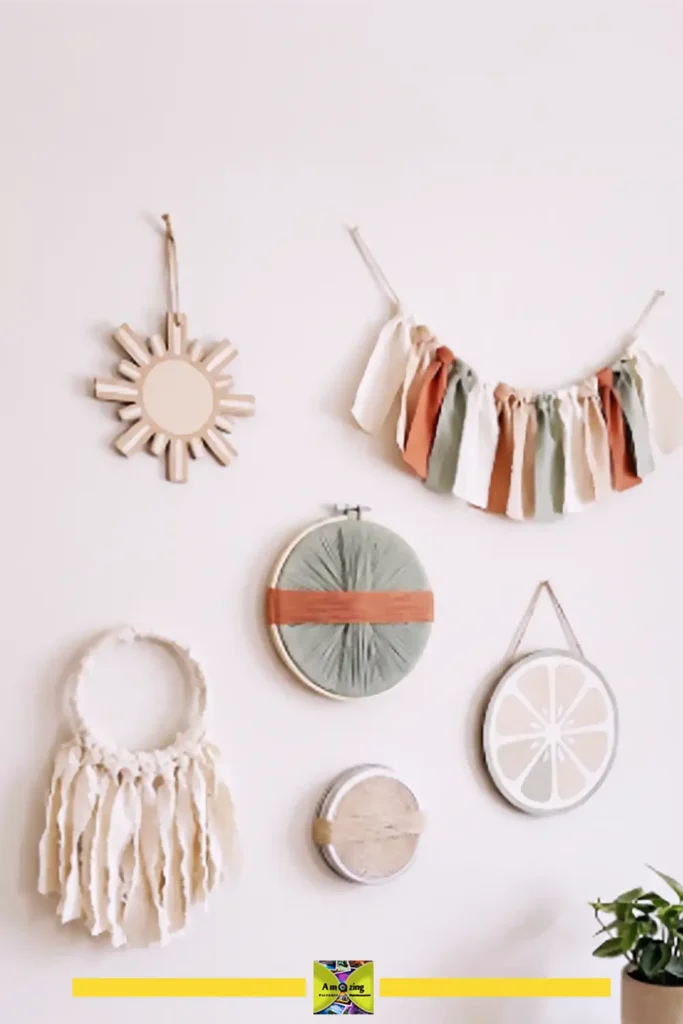
16. Mixed-Material Mediterranean Wall Hanging
What it looks like: A decorative hanging that combines several recycled materials into one cohesive piece. Picture a horizontal wooden dowel or branch from which several elements hang at varying heights: a painted cardboard medallion or sunburst shape, a few yarn tassels, thin fabric strips, a small bangle with thread wrapping, and strung wooden or painted cardboard beads. The overall effect is textural, warm, and distinctly Mediterranean — cobalt blue, terracotta, cream, and natural wood tones.
Best aesthetic style: Mediterranean, boho, or coastal
Difficulty: Intermediate
Approximate time: 2 to 3 hours
Materials:
- A wooden dowel, branch, or piece of driftwood, about 18 to 24 inches long
- Cardboard for painted shapes (circles, diamonds, or simplified leaf forms)
- Yarn or wool in 2 to 3 colors
- Thin fabric strips from old clothing
- 1 or 2 old bangles
- Twine or thin rope for stringing elements
- Wooden beads, or beads made from rolled and glued paper or cardboard strips
- Acrylic paint in your Mediterranean palette
Tools:
- Craft knife and cutting mat
- Scissors
- Paintbrushes
- Hot glue
- Ruler
Steps:
- Choose a Mediterranean palette: cobalt blue, terracotta, cream, natural wood, and one accent (olive green or lemon yellow).
- Create 5 to 7 hanging elements:
- Paint a cardboard circle (5 to 7 inches across) in terracotta with a cream pattern painted on it — simple stripes, dots, or a geometric motif. Punch a hole at the top.
- Paint a smaller cardboard diamond or simplified leaf shape (4 to 5 inches) in cobalt blue with a cream edge. Punch a hole.
- Make 2 to 3 yarn tassels in cream and terracotta, each about 6 to 8 inches long.
- Wrap one bangle tightly in cream yarn and leave one section unwrapped so the original bangle material peeks through. Attach a hanging cord.
- Cut 3 to 4 thin fabric strips in terracotta or cream, about 12 to 14 inches long. Knot them together at the top.
- Cut several lengths of twine in varying lengths (8, 12, 16, 20 inches). Attach one element to the end of each piece of twine by tying through the punched hole or around the tassel bundle.
- Tie the other end of each twine length to the dowel, spacing the elements across the dowel so they hang at different heights. The heaviest or largest element should hang closest to the center.
- Add a few strung wooden beads to some of the twine lengths above the hanging elements for extra detail.
- Tie a hanging cord to each end of the dowel. Hang and adjust the spacing until the arrangement feels balanced.
Customization ideas: For a coastal version, swap the palette to soft blue, sea-glass green, and white, and use driftwood for the dowel. For a boho version, use cream, tan, and peach with more textile elements and fewer painted pieces.
Recommended summer color palette: Cobalt blue, terracotta, cream, olive green, natural wood.
Display suggestion: Entryway, above a console table, on a blank living room wall, or as part of a summer room refresh.
Practical tip: Lay the entire piece out flat on a table or the floor before tying anything permanently. Adjust the spacing and element order until the balance feels right. Take a phone photo to reference while assembling.
Common mistake to avoid: Hanging every element at the same height. Varied hanging lengths create the visual rhythm that makes a multi-element wall hanging interesting.
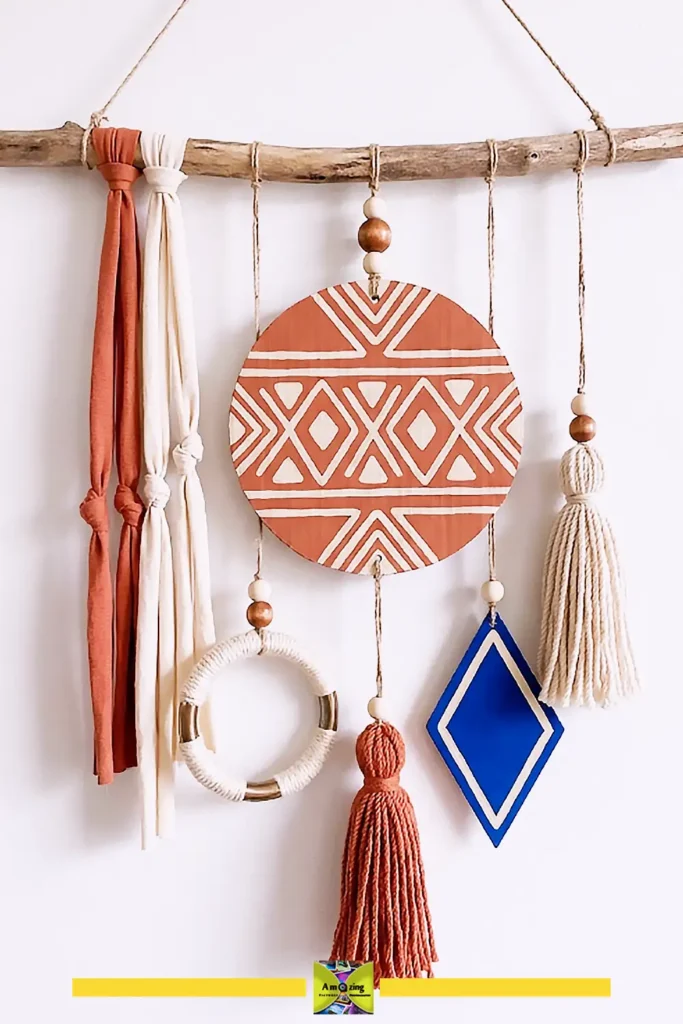
How to Make DIY Crafts Look More Expensive and Cohesive
The difference between a craft that reads as “recycled” and one that reads as “intentionally designed” usually comes down to a handful of choices. Here are the ones that matter most:
Pick a palette and stick to it. This is the single most important rule in this entire article. When every element in a project or room shares a color family, the materials fade into the background and the overall look takes over. Three to five colors maximum per project.
Finish your edges. Raw, fuzzy cardboard edges, frayed fabric ends, sharp plastic cuts — all of them signal “unfinished.” Take the time to sand cardboard edges, trim loose fabric threads, file plastic edges smooth, and paint the sides and backs of pieces that will be visible.
Use primer on cardboard. A thin coat of white or light-colored paint before your final color makes the difference between a piece that reads as painted cardboard and one that reads as a painted surface. It also prevents warping and blocks printed text or logos from showing through.
Limit the number of materials in any single piece. A project made from cardboard, fabric, yarn, beads, buttons, shells, and bottle caps all at once looks chaotic. Two or three materials per project is usually the sweet spot. Let one material be the star.
Display things properly. A beautiful craft hung crookedly or propped in a corner looks like an afterthought. Use a level. Install proper hardware. Style the area around the piece with a little breathing room.
Don’t over-embellish. The impulse to add “just one more thing” — a bead here, a ribbon there, another coat of glitter — is strong. The most polished projects often stop just before they feel busy. When you think you might be done, step back for an hour and look again with fresh eyes.
Where to Display Your Summer Crafts
A finished craft without a home ends up in a closet. Here’s where each type of project tends to work best:
- Wall hangings (yarn, T-shirt, Mediterranean): Above beds, in entryways, on empty hallway walls, above desks, in dorm rooms, on covered porches
- Framed or framed-effect pieces (sunburst mirror, botanical cabinet door, citrus slices): Bathrooms, kitchens, breakfast nooks, living room walls, sunrooms
- Shelf and surface pieces (yarn-wrapped vases, drawer shelves): Mantels, console tables, bedside tables, bathroom shelves, dining tables, windowsills
- Garlands and bunting (fabric tassel garland, tropical flower garland): Mantels, window frames, headboards, doorways, covered patio beams, party setups
- Small hanging pieces (bangle wall hangings, bangle wreaths): Gallery walls, narrow wall spaces, bathroom walls, above vanities, in clusters
- Functional decor (denim pocket organizer): Craft rooms, entryways, beside desks, bathroom walls, inside closet doors
One placement that worked better than I expected: the Boho Summer Yarn Wall Hanging above my bed. I thought it might feel a little too busy at first, but the soft yarn, gentle colors, and longer strands actually made the whole room feel warmer, calmer, and a lot more finished.
Common Mistakes That Make Recycled Crafts Look Messy
These are the errors that separate “I made this from trash” from “wait, that was made from trash?”:
Skipping material preparation. Dirty bottles, dusty cardboard, wrinkled fabric — all of it shows in the finished piece. Clean and prep everything before starting.
Using too many colors in one project. Even a beautiful design looks chaotic in six competing colors. Limit yourself to three to five.
Leaving edges raw. Unpainted cardboard edges, un-sanded plastic cuts, and frayed fabric ends are the fastest way to make a craft look unfinished.
Using dull scissors or blades. Clean cuts make clean crafts. Replace craft-knife blades when they start to drag, and sharpen or replace scissors that chew rather than cut.
Rushing the glue. Hot glue cools fast and PVA glue takes time to bond. If pieces shift while the glue is still setting, the finished piece looks sloppy. Wait the full drying time before handling.
Over-painting plastic. Heavy opaque paint on clear plastic looks thick and artificial. For suncatchers and translucent effects, thin the paint or use markers for a lighter touch.
Skipping primer on dark or printed cardboard. The printing on a shipping box will show through a single coat of light paint. Prime first.
Hanging pieces without a level. A crooked piece on a wall looks accidental, not relaxed. Use a level — it takes 30 seconds.
Frequently Asked Questions
What are easy aesthetic summer crafts for adults?
The most beginner-friendly projects in this article are the Boho Summer Yarn Wall Hanging, Yarn-Wrapped Summer Vase, Fabric Scrap Summer Tassel Garland, and Cardboard Citrus Slice Wall Decor. All four require no special skills beyond cutting, painting, and basic knotting, and each can be completed in under two hours. The yarn wall hanging is the most forgiving — there’s almost no way to do it wrong, and the soft texture of yarn reads as intentional even with imperfect technique.
What summer crafts can I make with things I already have at home?
This entire article is built around that question. Cardboard shipping boxes become flower wall art, sunburst mirrors, and citrus decor. Empty plastic bottles become botanical suncatchers and tropical flower garlands. Old T-shirts become boho wall hangings. Glass jars become yarn-wrapped vases. Old bangles become mini wall hangings and wreaths. Fabric scraps become tassel garlands. Old jeans pockets become wall organizers. And old furniture drawers and cabinet doors become display shelves and painted wall art. The only supplies you’re likely to need from outside the home are paint, glue, and basic tools — most of which you may already own.
How can I make recycled crafts look expensive and intentional?
Five things make the biggest difference: (1) choose a deliberate color palette of 3–5 colors and use it consistently, (2) finish every edge — sand cardboard, file plastic, trim fabric, (3) use primer on cardboard before painting, (4) limit each project to 2–3 materials, and (5) display finished pieces with care — use a level, leave breathing room around the piece, and style the surrounding area simply. The full guidance is in the “How to Make DIY Crafts Look More Expensive and Cohesive” section above.
What summer crafts can I make from cardboard besides kids’ projects?
The three cardboard projects in this article — Layered Cardboard Summer Flower Wall Art, Cardboard Coastal Sunburst Mirror Frame, and Cardboard Citrus Slice Wall Decor — are all designed specifically for adult and teen makers. The difference comes from clean cutting (craft knife rather than scissors), primer and careful painting, layered construction, and display as proper wall decor rather than as temporary crafts. Oversized scale also helps — a 14-inch cardboard citrus slice reads as intentional decor; a 4-inch one reads as a kids’ activity.
How do I reuse plastic bottles for adult-looking summer decor?
The key is treating plastic as a material with its own useful properties — specifically, translucency and the ability to catch light — rather than as a substitute for something else. The Botanical Suncatcher uses thin, clean sections of clear plastic, lightly tinted so they stay translucent. The Tropical Flower Garland uses the curved bases of bottles and clean-cut petals painted in a coordinated palette. In both cases, the projects lean into what plastic can do (transmit light, hold curved shapes) rather than trying to hide the material.
What can I make from old clothes without sewing?
The Old T-Shirt Boho Wall Hanging and the Fabric Scrap Summer Tassel Garland are both completely no-sew. Both use simple lark’s head knots to attach fabric strips to a branch or twine — no needle, thread, or machine required. The Denim Pocket Hanging Organizer can be made with fabric glue instead of sewing, though hand-stitching does produce a more durable result. In all cases, washing and drying the fabric before cutting is the most important prep step.
What can I do with old bangles besides wearing them?
Old bangles can become mini wall hangings (by weaving yarn, thread, or thin fabric across the circle), small botanical wreaths (by wrapping in yarn and adding dried flowers), or elements within larger wall hangings (by wrapping and hanging them as part of a mixed-material piece). They can also be used as curtain tiebacks, strung into garlands, or glued in stacks to make small decorative bowls or pen holders. The Bangle Mini Woven Wall Hanging and Bangle Botanical Summer Wreath Trio projects in this article cover the two most visually impactful options.
How can I safely reuse old furniture for summer decor projects?
Start by determining whether the piece might contain lead-based paint. Furniture painted before 1978 may have lead paint, and dry sanding lead paint creates hazardous dust. If you’re unsure, test with an EPA-recognized lead test kit, or work with the existing surface rather than sanding — clean it, paint over it, and avoid creating dust. For all furniture projects: clean thoroughly, inspect for damage (loose joints, nails, splinters, mold), and use hanging hardware rated for the piece’s full weight. The U.S. EPA’s “Lead-Safe Renovations for DIYers” guide at epa.gov/lead provides detailed safety recommendations. The full safety guidance is in the Material Preparation section above.
Your Summer Craft Inspiration Starts Here
The 16 projects in this article share a single idea: you can make beautiful summer decor from things already in your home. An old cardboard box isn’t just packaging — it’s a stack of potential wall art. An old T-shirt isn’t just clothing you stopped wearing — it’s soft, draping fabric in a color someone already chose carefully. A drawer from a discarded dresser isn’t just furniture debris — it’s a display shelf waiting for a coat of paint.
The crafts that get kept, displayed, photographed, and pinned are the ones that feel considered. A color palette chosen before the first cut. An edge that’s been sanded smooth. A piece hung at the right height with a level. These small choices compound into a finished project that reads as intentional design rather than a recycling experiment.
Pick one project that matches the materials you already have and the summer look you want to create. Start there. The rest can wait.
If you’re starting from zero, I’d make the Old T-Shirt Boho Wall Hanging first. It’s quick, really forgiving if your cuts or knots aren’t perfect, and you can turn a couple of shirts you already have into something that actually looks good on the wall in about an afternoon.
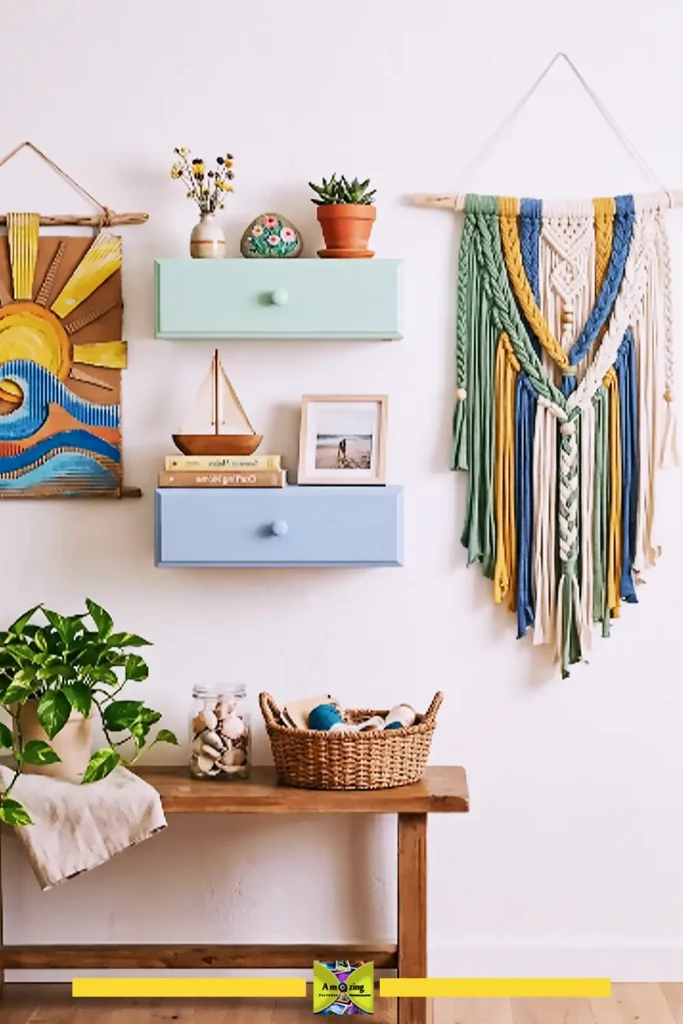
Posted by: Med Houssem · In: Decoration, DIY, Upcycling