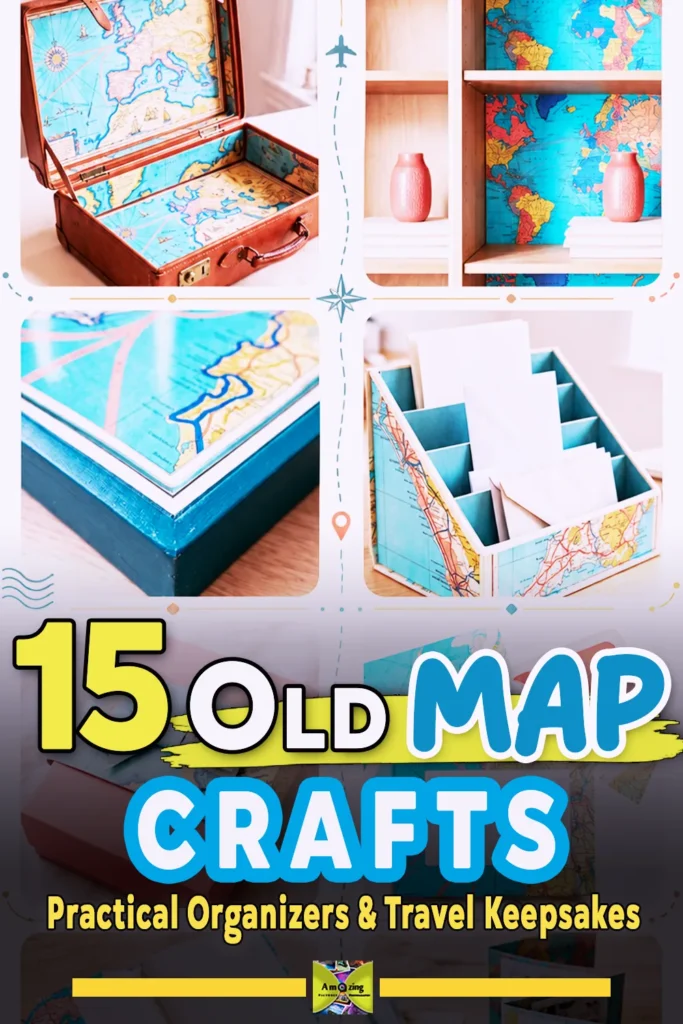
Old map crafts give clean, obsolete road maps a second useful life — and they do it without a trip to the craft store. A folded map you no longer use for navigation can become a fitted journal cover, a lined document wallet, a covered keepsake box, or a reversible drawer liner, built mostly from paper, board, and adhesive you probably already have.
But map paper is not ordinary craft paper. A folded road map is lightweight and creased at predictable intervals; an atlas page is heavier and may be coated; a tourist brochure is glossy; a waterproof trail map is plastic. They respond differently to moisture, scoring, adhesives, and finishes — and treating them as interchangeable is exactly how wrinkles, ink smears, lifted edges, and failed bonds happen.
This guide covers the whole process in order: deciding whether a map should stay intact, checking ownership and privacy, identifying the paper, inspecting and preparing it, flattening and cutting safely, choosing adhesives and finishes, and building 15 complete projects. If a map is meaningful to you or your family, start with the first section and take your time.
Start With the Map, Not the Craft: A Decision Guide First
An older map is not automatically disposable. Before you reach for scissors, decide whether this particular sheet still has navigational, educational, historic, financial, family, or sentimental value. Preservation, donation, digitization, or intact storage may be worth more than any craft.
Is this map still useful intact?
Run through these questions in order:
- Is it still needed for navigation or emergency planning? A current road map, evacuation route, trail map, or emergency-resource map is a safety item. Cutting it can remove a useful resource.
- Does it have educational or research value? A school, library, local-history group, or family researcher may want it whole.
- Does it have family or sentimental significance? A map marked with a late relative’s route, a honeymoon destination, or a childhood hometown may mean more intact — photographed and stored properly — than divided among several casual projects.
- Could it be resold, donated, or preserved? Some maps are worth more as intact objects than as craft material.
- Is it genuinely obsolete, common, damaged, and unwanted? Only when the answer is a clear yes should you move it to the craft pile.
Confirm ownership and permission before you cut
Never cut a map that belongs to someone else, is borrowed, or may carry family significance without explicit permission. This includes maps from an inherited collection, a deceased relative, a workplace, a school, a library, a club, or a theater. When in doubt, ask first. A map you cut cannot be uncut.
Spot a map that may be worth preserving, donating, or selling
Check the publication date, publisher, edition, scale, condition, cartographer, and any markings, and note whether the map is easily replaced. Be cautious with anything rare, signed, artist-made, limited edition, professionally surveyed, or historically significant — including nautical, aviation, land-title, survey, government-record, and emergency maps. If value is uncertain, consult a qualified map dealer, librarian, archivist, curator, or conservator before altering the item. An intact map may have far more value through navigation, education, donation, resale, research, or preservation than through crafting.
Photograph and document before any irreversible change
Before a single cut, photograph or scan the complete map — front and back, the publisher and date block, the scale, the fold pattern, and any annotations — where lawful and appropriate. Record why a particular location matters without inventing a story. This documentation is what lets a craft project double as a respectful keepsake, and it is the only way to keep the information after the sheet is gone.
Review personal information before you build or publish
Look over every visible mark before you cut or photograph. Home addresses, marked or recurring routes, handwritten names, phone numbers, account or membership details, and reservation information should not appear in a finished project or in any published photograph. Crop, cover, reverse, or exclude those areas from the project entirely. Owning a physical map also does not by itself grant permission to reproduce its artwork — confirm usage rights before reproducing a map, distributing a template, or publishing a high-resolution scan. Maps are copyrightable visual works, and fair use is decided case-by-case on all the circumstances rather than by a bright-line rule (see the U.S. Copyright Office fair-use FAQ and its Visual Arts guidance). When a project needs downloadable map imagery, use original public-domain or properly licensed sources only.
Know Your Map Paper Before You Cut
Appearance alone cannot confirm a map’s fiber, coating, ink, age, value, or recycling acceptance. Identify the material as best you can, then treat unknown paper conservatively.
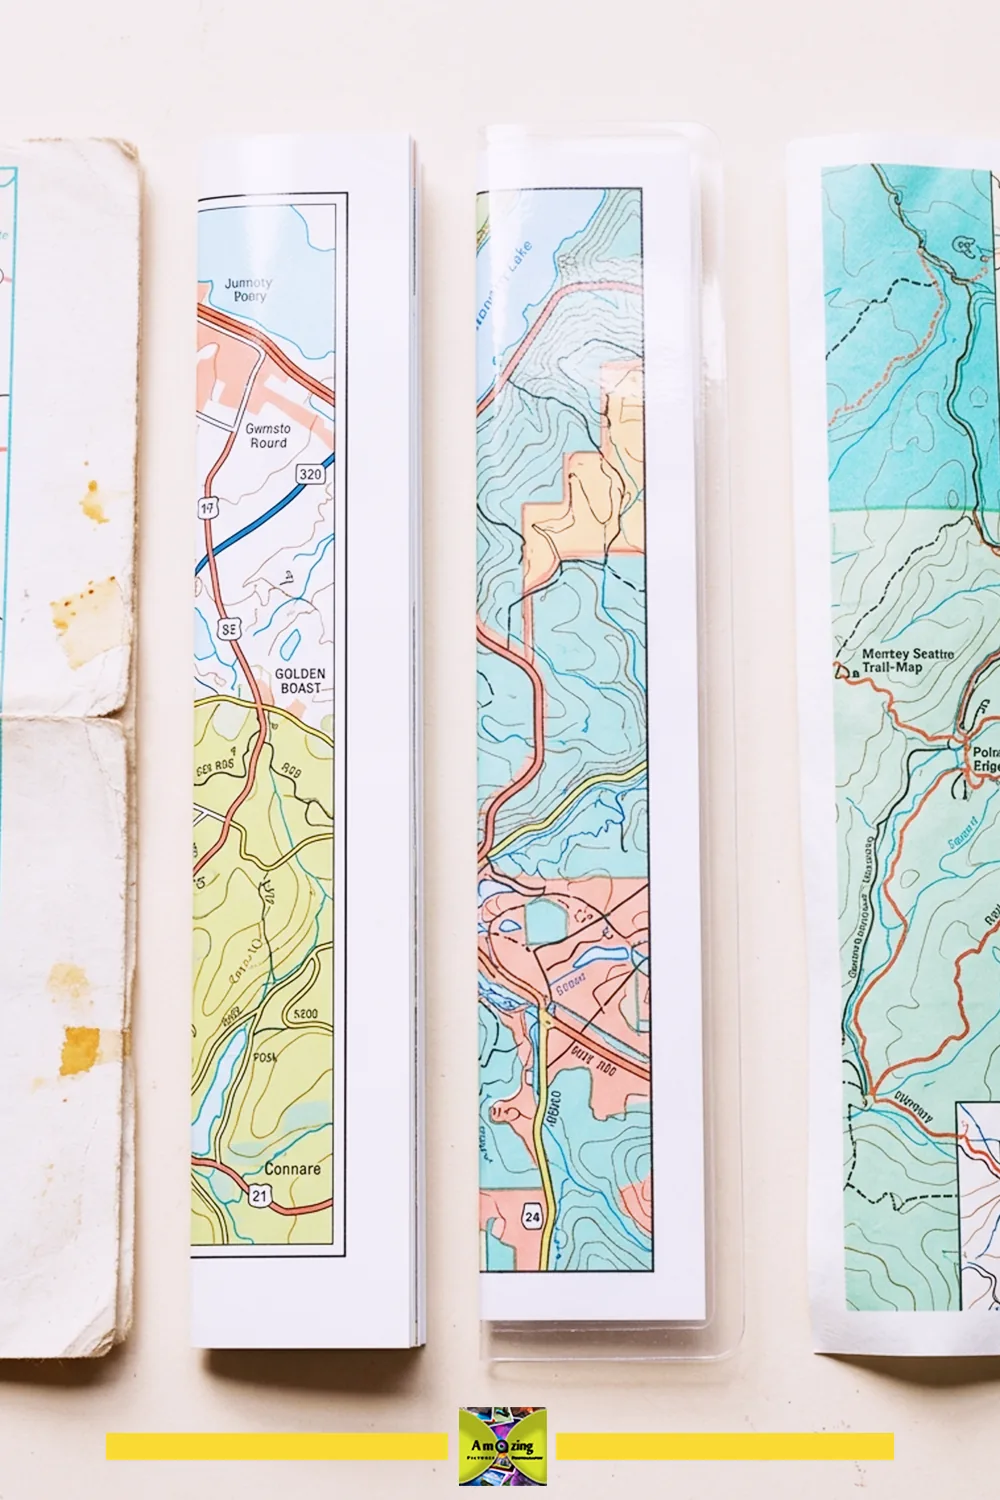
Folded road maps, atlas pages, transit maps, and tourist brochures are not interchangeable
- Folded road maps are usually lightweight and creased at regular intervals, with weak fibers at the fold intersections. They tear easily along the creases and cockle readily under moisture.
- Atlas pages are often heavier and may be coated, so they handle moisture and scoring differently from a thin road map.
- Transit diagrams and tourist maps are frequently printed on coated or glossy stock that resists water-based adhesive.
- Trail and recreation maps may be synthetic or treated for water resistance.
- Home printouts are ordinary copy paper with its own weight, grain, and ink — usually the most forgiving, but not identical to any printed map.
Machine and cross directions affect folding, curling, and tearing: paper folds cleanest with the grain and resists folding across it. Repeated factory folds become weak, especially where two creases cross. Old paper can turn brittle even when it looks clean, and moisture makes paper expand unevenly — which is why one-sided wetting causes cockling, curling, and board warping.
Coated, laminated, fabric-backed, and synthetic maps behave differently
- Heavily coated paper may resist water-based adhesive and can be damaged by scoring that would only crease uncoated paper.
- Laminated maps cannot be treated like plain paper; the plastic film changes cutting, folding, and adhesive needs entirely.
- Synthetic waterproof maps may require completely different adhesives and cutting methods than fiber-based paper.
- Fabric-backed maps combine paper and cloth, so they flex, fray, and absorb differently.
Some inks smear, dissolve, offset, fade, or change color beneath an adhesive or finish. Pressure-sensitive tape can stain paper and leave unstable residue, and dark printing or fold lines may remain visible through thin overlapping layers.
Inspect for mold, pests, contamination, and damage
Under bright light, check every map for mold or mildew (visible growth, staining, or a persistent musty odor), pest damage, flood or sewage exposure, chemical or fuel residue, grease, heavy smoke residue, adhesive, pressure-sensitive tape, labels, staples, pins, clips, brittle fibers, fading, ink transfer, delamination, and torn folds.
Reject unsafe or badly degraded paper rather than hiding it
Do not conceal contaminated or seriously degraded material inside a project. A map with mold, pests, flood or sewage exposure, unidentified chemical contamination, or badly degraded fiber should not become part of something you will handle or keep in your home. Keep mold-suspect material isolated and seek appropriate professional guidance — the NEDCC’s guidance on moldy books and paper stresses that active mold should not be cleaned by a layperson, and that brittle or fragile paper can be harmed by inexpert cleaning (NEDCC 7.2, Surface Cleaning of Paper). Remove staples, pins, and clips with suitable tools while supporting fragile paper, and avoid aggressive tape removal from valuable or brittle maps — difficult old repairs belong with a conservator when preservation matters.
Sort, measure, and keep expendable offcuts for tests
Clean ordinary sound maps only with a dry, material-appropriate method supported by reliable guidance — avoid soaking, household sprays, disinfectants, bleach, oils, solvents, abrasive erasers, and universal stain-removal recipes. Sort your craft candidates by paper type, thickness, coating, color, scale, fold pattern, geographic theme, dimensions, and condition. Measure usable area after excluding damage, personal data, tape, failed folds, and unwanted advertising panels. Store intact maps flat in suitable folders, or loosely rolled around an appropriate support where the format requires it, and keep prepared pieces flat, clean, dry, labeled, and out of direct sunlight.
Flattening, Folding, and Scoring Old Map Paper
Flatten sound maps gently (and know when to stop)
There is no single flattening method that works for every map. For sound, recently folded paper, let it rest open on a clean flat surface, then place it between clean smooth boards under light, distributed weight with protective interleaving between the map and the weights. Avoid concentrated weights that emboss or polish the paper, and avoid direct ironing, uncontrolled steaming, soaking, or spraying. Valuable, brittle, coated, laminated, mold-affected, or unknown maps may require professional advice — flattening is a routine conservation treatment, not a household iron job (NEDCC, About Paper Conservation).
Work with original folds instead of forcing them flat
When flattening would cause damage, keep the original folds and position strong fold lines as intentional panel divisions in your layout. This often looks better than a half-flattened map, and it avoids cracking brittle paper. Reinforce a weak fold with a reversible or conservation-informed approach only when the construction genuinely requires it — and never describe an ordinary craft repair as archival conservation. Check the sheet periodically and stop if opening or pressing begins to damage a crease. Allow the paper’s condition, rather than a fixed timetable, to guide the next step.
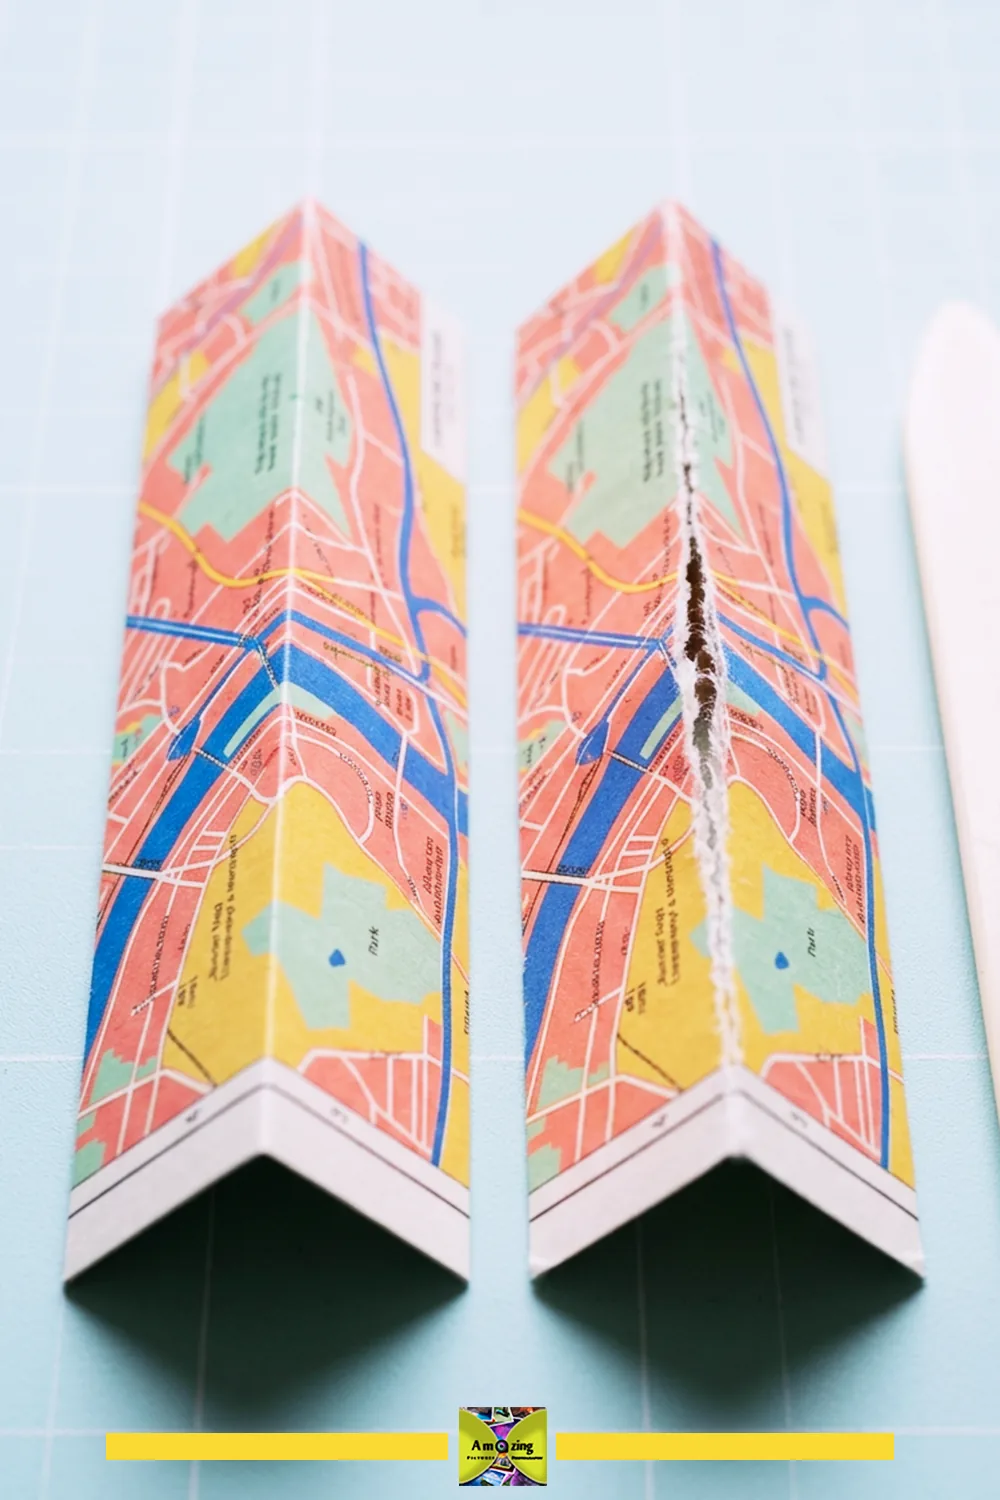
Folding and scoring without cutting through the paper
Hand folding is enough for light paper; a scoring board, bone folder, blunt scoring tool, or straightedge can improve a fold on heavier stock. Choose the scoring method for the paper’s thickness and coating, score the correct side for the intended fold, and test the pressure so the tool compresses rather than cuts. Fold with the grain where you can, support weak factory folds, and avoid repeated flexing at brittle or coated creases. Make relief cuts only where the construction genuinely requires them, and burnish without polishing, tearing, or transferring ink. Keep fingers clear of sharp scoring and cutting tools.
Measuring, Layout, and Cutting
Make a full-size template before you cut anything
Measure the substrate first — the journal, box, file, drawer, clipboard, tray, bag, or cabinet opening — then make a full-size template from expendable paper. Universal dimensions are not useful here: map size, paper weight, original folds, and intended contents all change the design. Check the full-size template against the actual object before transferring any measurements to the map. Account for wrapped edges, corners, overlap, hinge movement, folds, and closure clearance before cutting.
Choose a focal point and check for sensitive text
Decide whether a named location, route, coastline, grid, typography, or color block will be the focal point, and orient the map so the interesting geography lands where you want it. Check every layout for personal information, and keep weak original fold intersections away from high-stress corners and closures. Align map grids and borders consistently across multiple panels, match neighboring geography only when enough suitable paper remains, and use controlled patchwork when continuous matching is impossible. Mark the reverse with a tested pencil or removable method, number adjoining pieces, and photograph the complete dry layout before cutting.
Safe cutting with scissors, craft knife, and cutting mat
Use sharp scissors for simple cuts. Use a craft knife only on a proper cutting mat with a stable ruler and controlled hand placement, cut away from your body, and keep your supporting hand outside the blade path. Make several controlled passes instead of forcing a dull blade, and replace, store, and discard blades safely. Support small pieces flat rather than holding them in the hand while cutting or punching, and preserve the largest useful offcuts before cutting small accents.
Adhesives for Thin Map Paper: A Comparison
No single adhesive is universally best. Choose for the actual map paper, the substrate, and how much moisture the paper can tolerate, then test on an expendable offcut of the same combination.
Adhesive comparison table
| Adhesive | Suitable maps & substrates | Repositioning | Drying / curing | Reversibility | Main risks | Testing needs |
|---|---|---|---|---|---|---|
| Wheat-starch paste | Uncoated paper on paper/board; gentle, reversible | Good while wet | Slow, under weight | High (water-reversible) | Cockling if too wet; spoils once mixed | Offcut test |
| Methylcellulose | Uncoated paper; slower, reversible work | Good while wet | Slow | High | Low tack early; cockling | Offcut test |
| PVA adhesive | Paper to paper/board; strong, flexible | Limited | Moderate; set under weight | Low | Stains, stiffens; can warp board | Offcut + board test |
| Tacky craft glue | Light paper to paper, small joints | Limited | Moderate | Low | Show-through on thin paper | Offcut test |
| Decoupage medium | Porous paper on many surfaces | Some while wet | Moderate | Low | Can move ink; darken thin paper | Ink + offcut test |
| Glue stick | Light, flat, low-stress panels | Some | Fast | Low–medium | Releases at corners over time | Corner pull test |
| Double-sided adhesive film | Dry, clean, flat panels | Low | Immediate | Low | Bubbles; unforgiving placement | Offcut test |
| Repositionable mounting | Removable liners, backing panels | High | Immediate | High (removable) | Low hold; may lift | Removal test |
| Spray adhesive | Large flat panels (ventilated) | Low | Fast | Low | Overspray, uneven bond, fumes | Label + overspray test |
| Contact adhesive | Compatible non-paper substrates only | None | Fast | Low | Solvents, fumes, instant grab | Compatibility test |
| Bookbinding tape / paper hinge | Folds, spines, panel joins | Low | Moderate | Medium | Bulk at folds | Flex test |
| Dry corner mounts | Displayed flat pieces | High | Immediate | High | Paper can slip | Fit test |
| Removable liner / backing panel | Drawers, cabinets, cases | High | None | High | Liner shifts or binds | Fit test |
| Mechanical capture (trim/panel) | Under transparent panels, trays | High | None | High | Needs smooth enclosed edges | Fit test |
For reversible, conservation-minded work, wheat-starch paste and methylcellulose are the traditional choices precisely because they are water-reversible and do not yellow or stain paper; PVA is strong and flexible but not easily reversible (see the University of Virginia Library’s adhesive overview).
A wrinkle-reduction workflow that works
- Make an expendable paper-and-substrate sample.
- Confirm ink stability before any moisture-based adhesive or coating.
- Prepare a flat, clean, compatible substrate.
- Cut the map with the required edge allowance.
- Dry-fit and mark alignment points.
- Apply an even adhesive layer using the product’s instructions.
- Place the map from one controlled edge or center reference.
- Smooth with a clean barrier and suitable tool without overworking wet paper.
- Clean excess adhesive according to product guidance.
- Press or weight the assembly between suitable protective layers when appropriate.
- Allow complete drying.
- Inspect for bubbles, lifted edges, stains, distortion, and ink changes before finishing.
Why one adhesive is never universally best
A thick wet layer wrinkles thin map paper, while insufficient coverage creates bubbles and dry pockets. Excessive burnishing stretches wet paper or damages printing, and coated or synthetic maps may resist paper adhesives entirely. Spray and contact products require exact label compliance, ventilation, and overspray control. Adhesive cannot repair mold, deep contamination, extreme brittleness, or major delamination, and every adhesive must dry or cure fully before trimming, folding, closing, loading, or touching finished furniture. Reversible mounting is preferable for valuable, rented, historic, or uncertain surfaces.
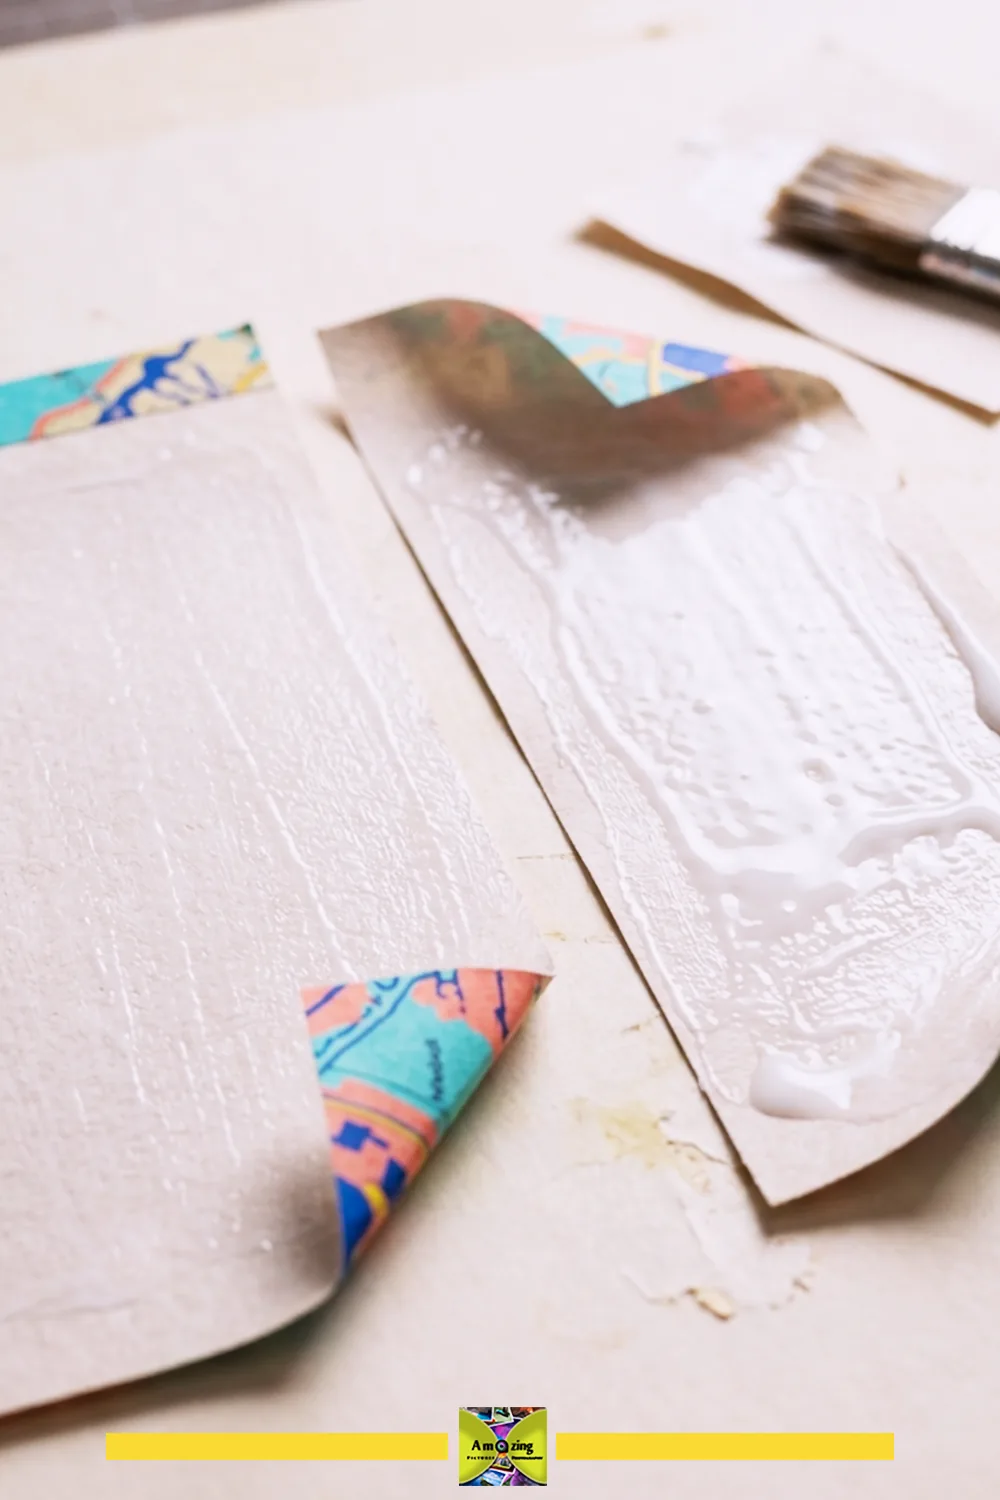
Start with a sample: Use an offcut from the actual map and a scrap of the same backing, including its existing coating. Label the sample with the adhesive and follow the product’s application and cure instructions. Check the dry result in side light for wrinkles, dark patches, bubbles, or lifting. If the project folds, include a fold in the sample and check it again after opening and closing.
Backings, Edges, Corners, and Finishes
Backing choices and why board matters
Reclaimed book board and sound paperboard make good rigid backings; corrugated board works only where its texture will not telegraph through thin map paper. Thin wood panels, existing boxes and clipboards, and case interiors are each their own material with their own moisture response. Reject damp, moldy, oily, crushed, or delaminated backing, and remember that sharp board edges can cut through paper, raw corrugated texture can show through, and a backing may warp if moisture is applied unevenly. Removable rigid inserts and backing boards are preferable when cleaning requirements differ from the finished surface.
Edges and corners that survive handling
Folded paper hems, wrapped edges, mitered paper corners, overlapped corners, and paper or fabric edge binding each protect exposed map edges differently. Poorly planned corners create excessive bulk, and exposed map edges lift under repeated handling. Plan corners on the paper template first, and conceal reinforcement and raw board edges so they do not become snag points.
Finishes and protective layers: a comparison
| Finish | Suitable for | Change to paper | Ink risk | Drying / curing | Repair / reversibility | Durability limits |
|---|---|---|---|---|---|---|
| No applied finish | Low-touch, dry projects | None | None | None | High | Stains if handled wet |
| Removable clear cover sheet | Clipboards, boards | None to paper | None | None | High (removable) | Cover can scratch |
| Rigid transparent panel | Trays, backed displays | None to paper | None | None | High | Needs enclosed smooth edges |
| Decoupage topcoat | Light-use covered boxes, files | Darkens, stiffens, may cloud | Can move ink | Moderate | Low | Not waterproof |
| Water-based clear finish | Protected panels only | Darkens, changes sheen | Can move ink | Moderate | Low | Brush marks, bubbles |
| Acrylic spray | Flat panels (ventilated) | Changes sheen, stiffness | Test first | Moderate | Low | Overspray, uneven coat |
| Wax (compatible only) | Rare, specific surfaces | Subtle sheen | Test first | Fast | Medium | Not protective |
| Edge-only sealing | Wrapped edges, corners | Local | Local | Fast | Medium | Does not protect face |
| Protective lining (not coating) | Boxes, wallets, cases | None to face | None | None | High | Lining, not a seal |
When to leave the map uncoated
Not every project needs a coating. A coating can make thin paper darker, translucent, stiff, glossy, cloudy, or uneven; wet finishes can move ink and reopen adhesive bonds; and folded items need flexibility that a rigid film may not provide. Dry-to-touch does not mean fully cured, and a clear finish does not make a project waterproof, washable, archival, food-safe, heat-resistant, or suitable outdoors.
How to Make Mixed Maps Look Intentional
- Limit each project or coordinated set to roughly two to five dominant colors.
- Group maps by paper type and coating before matching color, so glossy and matte sheets don’t fight each other.
- Choose one geographic theme — coastal routes, mountain regions, city grids, or state highways.
- Select one meaningful location as the focal point.
- Repeat map scale across adjoining panels where possible, and align grids, borders, coastlines, or roads across edges.
- Use measured patchwork when continuous geography cannot be matched.
- Pair detailed maps with plain neutral borders and linings, and keep border widths equal.
- Repeat panel dimensions and create light-to-dark or warm-to-cool arrangements.
- Coordinate backing boards, closures, bag handles, labels, and visible hardware.
- Conceal reinforcement and raw board edges, and keep original typography readable when it adds to the design.
- Avoid excessive lettering, glitter, beads, faux distressing, and unrelated travel embellishments.
- Photograph against matte backgrounds in raking light, and show folds, paper thickness, wrapped corners, clean joins, and protective layers in close-up.
Travel and Memory Projects
1. Fitted Travel-Journal Jacket
What it looks like: A removable cover fitted to one specific journal, with a selected destination visible on the front, stabilized panels, and enough spine clearance to open flat.
Best use: Protecting and personalizing a favorite travel journal without gluing to it.
Difficulty: Intermediate.
Approximate time: About 2–3 hours — estimated hands-on time, plus any drying or curing required by the products used.
Map and layout: Use a clean, uncoated section large enough to wrap the closed journal plus turn-ins, ideally a reusable map or a lawful reproduction of a meaningful location. Position the destination on the front cover and keep original fold intersections off the spine.
Materials: a map section sized to the cover, medium-weight card or reclaimed book board for the panels, a smooth paper lining, and a tested paper adhesive.
Tools: ruler, pencil, scissors or craft knife, cutting mat, bone folder, adhesive brush or sponge, and weights.
- Measure your specific journal — width, height, and spine — and make a paper pattern with allowances for the cover to fold around it. Check the pattern with the journal both open and closed before cutting the map.
- Cut two board panels and a spine strip, leaving a small spine gap so the journal opens flat.
- Cut the map to cover the outer face with a wrap allowance, and dry-fit the destination on the front.
- Test the adhesive on a map offcut, then attach the map to the boards and wrap the edges cleanly.
- Line the inside with smooth paper, then slide the journal in and test that it opens fully without binding.
Customization: destination selection, map scale, border width, lining color, a pocket for loose notes, an elastic or ribbon closure.
Practical tip: Add a little extra spine width and test with the journal open, not just closed — a tight spine binds immediately.
Common mistake: Cutting the map without a wrap allowance, so the cover edges expose raw board.
Safety note: A decorative and protective jacket, not a structural or load-bearing case; review the front for addresses or marked routes before photographing.
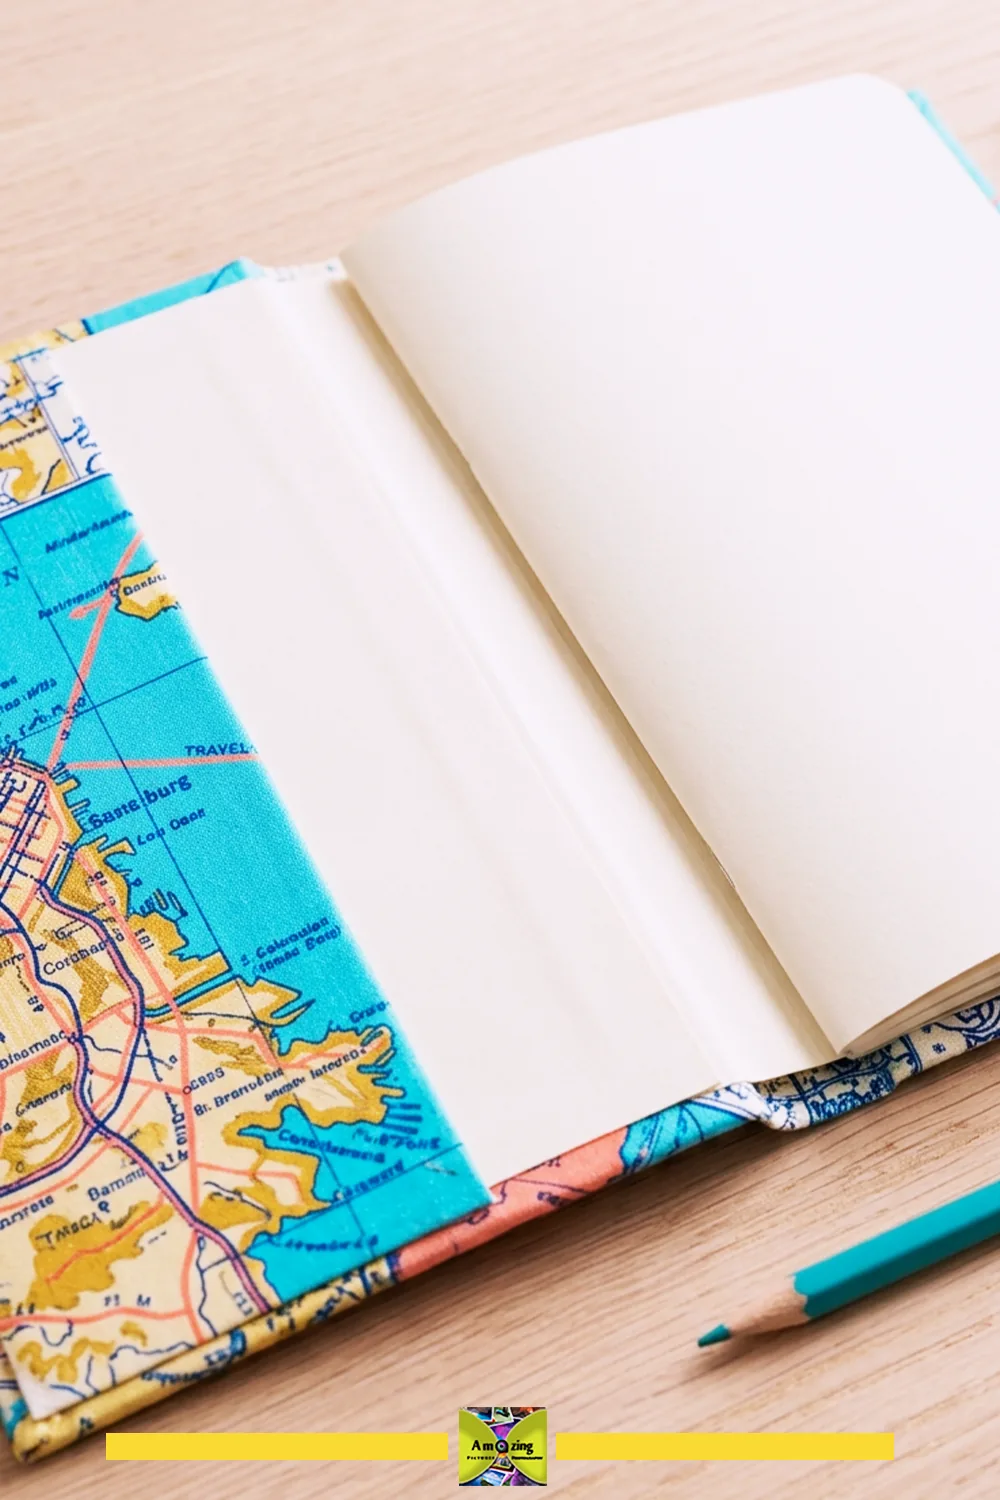
Try it on before gluing: Fit the paper pattern around the journal with both covers tucked into their flaps. Open it to the middle, then near the front and back. If the pattern pulls tight at the spine or the covers creep out of the flaps, adjust the fit now. Keep your chosen destination clear of the turn-ins so it stays visible on the finished front.
2. Accordion Travel-Memory Folio
What it looks like: A fold-out folio with map-covered panels and pockets for copies of ordinary mementos — ticket stubs, postcards, or printed notes.
Best use: Storing copies of travel keepsakes in a compact, fold-flat display.
Difficulty: Beginner to intermediate.
Approximate time: About 2–4 hours — estimated hands-on time, plus any drying or curing required by the products used.
Map and layout: Use matching or coordinated map sections for the panels, one meaningful location per panel, with fold lines run along existing map creases where possible. Use copies, not originals, of any irreplaceable memento.
Materials: map sections for the covers, plain paper or card for the inner pages, a light backing or lining, adhesive, and a low-profile closure.
Tools: ruler, pencil, scissors or craft knife, cutting mat, bone folder, and weights.
- Decide the number of panels and the finished folded size, then make a paper pattern. Fold the pattern and fill the sample pockets before settling on the panel size.
- Cut the inner pages and the map covers, keeping folds on the grain and away from panel joins.
- Add pockets sized to the copies you will store, and reinforce the folds.
- Assemble the panels into an accordion and attach a light closure.
- Test that the folio opens, closes, and holds copies without tearing.
Customization: panel count, location per panel, pocket layout, closure style, lining color.
Practical tip: Make pockets a little larger than the largest item, and store copies rather than irreplaceable originals.
Common mistake: Claiming archival storage. Ordinary map paper and craft adhesive are not conservation-grade, and the folio should not hold unique documents.
Safety note: No archival-storage claim; remove the folio from use if dye, adhesive, or rough edges transfer to contents.
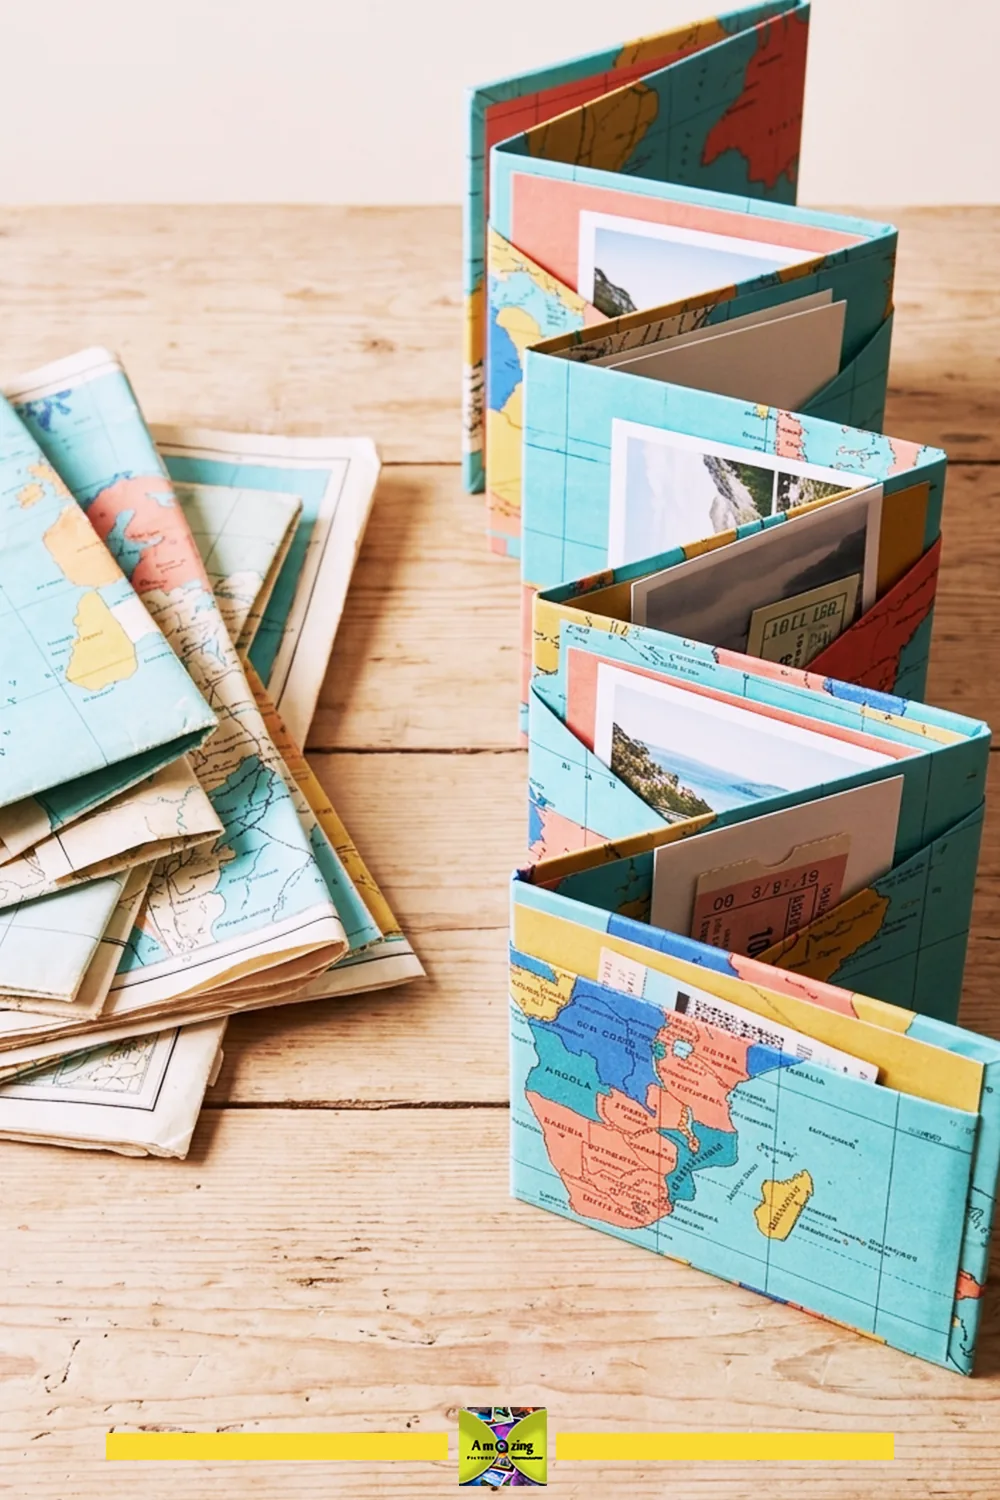
Leave room for your fingers: Build a sample pocket around the largest keepsake copy, including its thickness. Once the side seams are folded, check that the item slides in easily and that enough remains visible to grip. Fill every pocket before testing the accordion closure; an empty folio can fold neatly yet become too bulky once loaded.
3. Map-Lined Document Wallet
What it looks like: A flat wallet with map-faced outer panels and a smooth interior, a stable backing, and a secure low-profile closure.
Best use: Holding lightweight paper references — copies of itineraries, letters, or receipts — not identity documents or cash.
Difficulty: Intermediate.
Approximate time: About 2–3 hours — estimated hands-on time, plus any drying or curing required by the products used.
Map and layout: Use a sound, uncoated map section sized to the wallet’s front and back, with a stable backing behind the paper so the wallet keeps its shape. A lawful reproduction is fine if the original is meaningful or fragile.
Materials: a map section, stable paperboard or card for the backing, a smooth interior lining, a low-profile closure (a paper tab, button-and-loop, or tested hook-and-loop), and adhesive.
Tools: ruler, pencil, scissors or craft knife, cutting mat, bone folder, and weights.
- Measure the largest document you will store and make a full-size pattern with a fold allowance. Check the pattern around a small stack of the papers you expect to carry.
- Cut the backing, map facing, and lining; keep the map’s focal point centered on the front.
- Attach the map to the backing with a tested adhesive and wrap the edges.
- Line the interior, reinforce the fold, and add the closure so it closes squarely.
- Test with lightweight paper references and check that the wallet closes flat.
Customization: location selection, closure style, interior pocket, border width, backing color.
Practical tip: Reinforce the fold with a paper hinge or bookbinding tape, since it flexes every time the wallet opens.
Common mistake: Storing unique documents, cash, or identity papers before the wallet is genuinely tested — and before you know the lining will not transfer.
Safety note: No storage of identity documents, cash, or valuable originals until tested; retire it if the closure fails or the interior transfers dye.
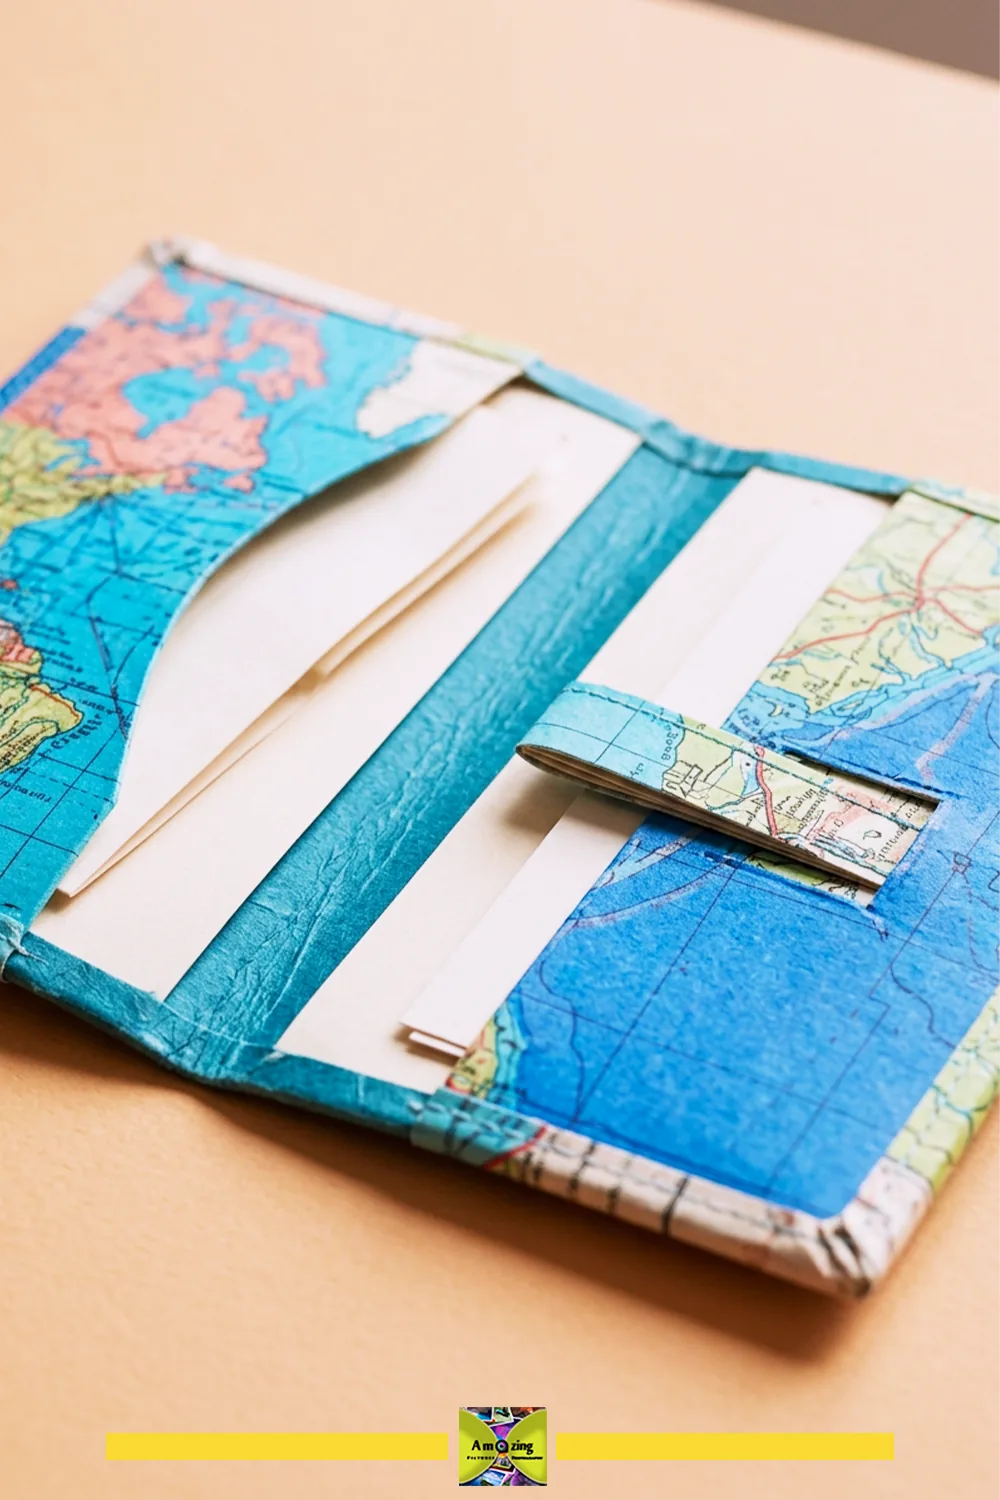
Check the hinge as a unit: Make a short sample using the backing, map facing, lining, and hinge material together. Keep rigid board edges clear of the bend and follow the adhesive or tape maker’s instructions. After curing, open and close the sample gently. A hinge that lifts, cracks, or pulls the panels out of line needs adjusting before you build the wallet.
Gift and Wrapping Projects
4. Coordinated Correspondence-Envelope Set
What it looks like: A matching set of envelopes folded from clean map sections, each with an opaque address panel.
Best use: Handmade, personal mailing envelopes for letters or cards.
Difficulty: Intermediate.
Approximate time: About 1–2 hours for a set — estimated hands-on time, plus any drying or curing required by the products used.
Map and layout: Use clean, uncoated map sections large enough for the chosen envelope template, with the busy print kept off the address area. An opaque address panel — a plain paper label or applied block — keeps the address legible over map text.
Materials: map sections, an envelope template sized to your contents, an opaque address panel or label, and a tested adhesive.
Tools: ruler, pencil, scissors, bone folder, and adhesive brush.
- Choose an envelope template based on the actual contents, then confirm the finished piece meets postal size and shape rules. Check the finished sample with its intended contents before making the rest of the set.
- Trace the template onto the map, keeping the address area free of busy print.
- Cut and fold, reinforcing the flap fold, and apply an opaque address panel.
- Adhere the side flaps and bottom flap, and let the adhesive dry completely.
- Verify the envelope is rectangular and within the mailable size range before mailing.
Customization: envelope size, map section, address-panel style, a coordinating liner inside the flap.
Practical tip: In the U.S., a mailable letter-size piece must be rectangular and at least 3.5 × 5 inches, with an aspect ratio between 1.3 and 2.5 to avoid a nonmachinable surcharge — check current USPS mailability standards and handmade-envelope guidance before mailing.
Common mistake: Making a square or oddly shaped envelope and assuming it will mail at the standard letter rate.
Safety note: No food or liquid contents; keep the address legible, and confirm postage and shape requirements before sending.
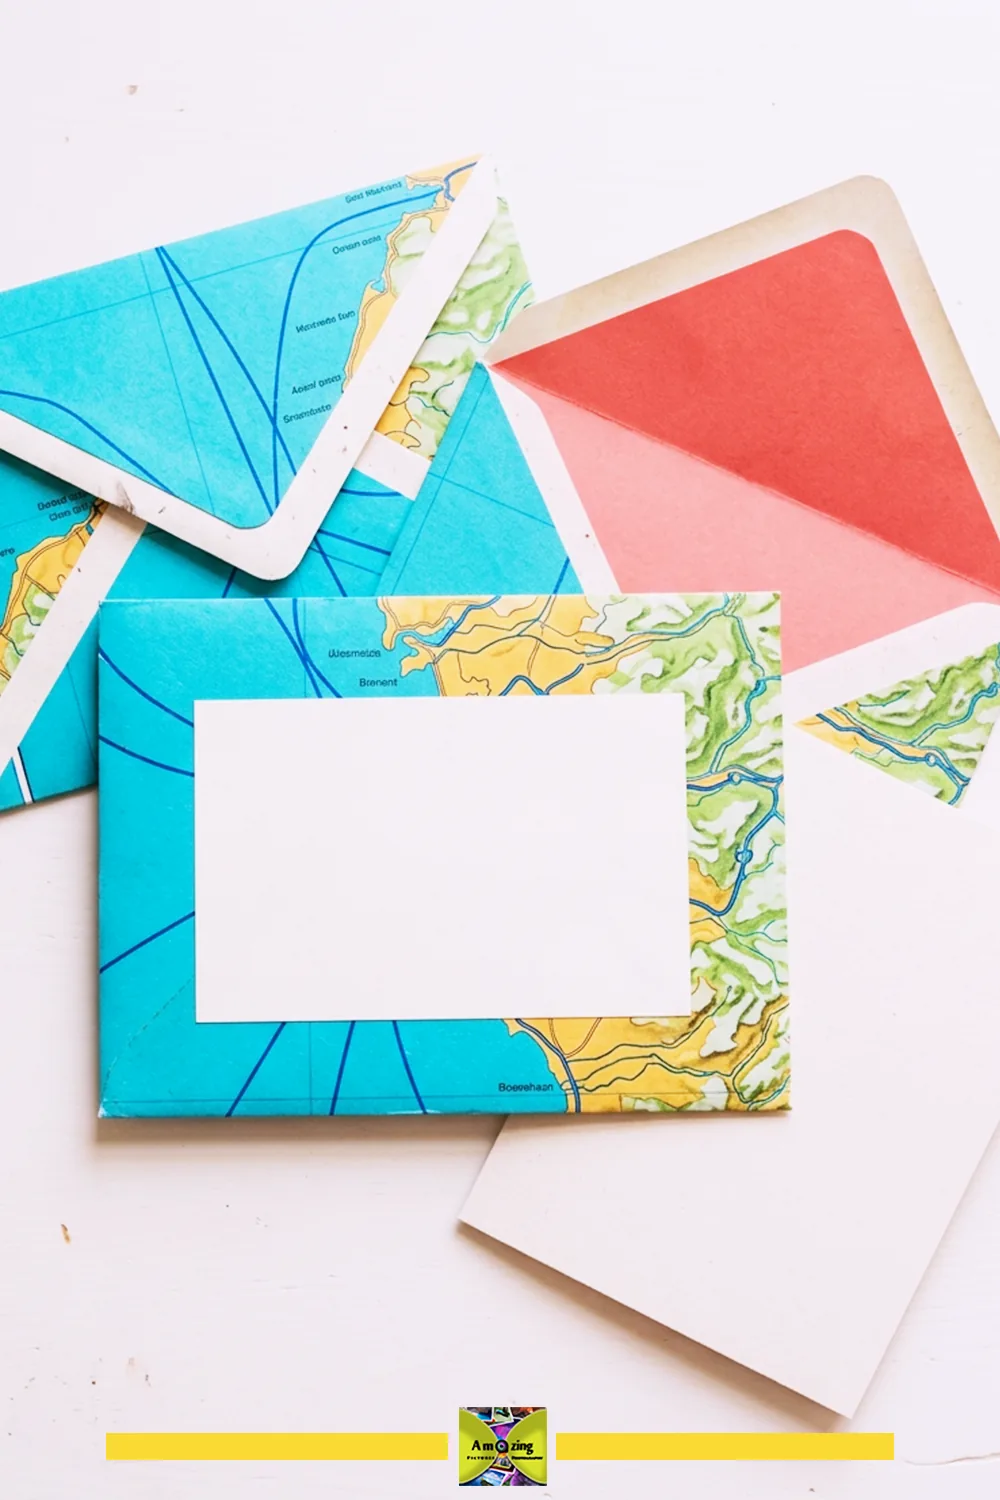
Before making a whole set: Finish one envelope and fill it with the letter or card you plan to send. Check that the seams stay flat, the address panel is opaque, and the flap closes without forcing it. Have the completed sample checked for postage and processing requirements before copying the design for the rest of the batch.
5. Reinforced Map Gift Bag
What it looks like: A sound reclaimed paper bag covered or paneled with map paper, with folded top edges and a stable base.
Best use: Presenting a lightweight, dry gift in a personalized bag.
Difficulty: Beginner to intermediate.
Approximate time: About 1–2 hours — estimated hands-on time, plus any drying or curing required by the products used.
Map and layout: Build around a sound existing bag rather than constructing one from scratch. Use a clean map section sized to the bag’s face, with the focal point centered and no sensitive text showing.
Materials: a sound reclaimed paper bag, a map section, a light backing if the bag is thin, a tested adhesive, and reinforcement for the base and top edge.
Tools: ruler, pencil, scissors, bone folder, adhesive brush, and weights.
- Confirm the bag is sound, then measure its faces. Measure with the bag open so the gussets and base folds remain free.
- Cut map panels to each face and dry-fit the focal point.
- Test the adhesive, then apply the map and fold the top edges down cleanly.
- Reinforce the base and the top edge so the bag holds its shape.
- Test with a lightweight, dry item and check that the handles stay secure.
Customization: map section, panel arrangement, top-edge finish, a plain tag or label.
Practical tip: Keep contents light and dry, and retire the bag when folds tear or handles loosen.
Common mistake: Loading food, liquids, sharp objects, medicine, or heavy breakables into a paper bag that was never built for them.
Safety note: No food, liquid, sharp, or heavy contents; the handle is not a safety restraint, and a loose handle means the bag should be retired.
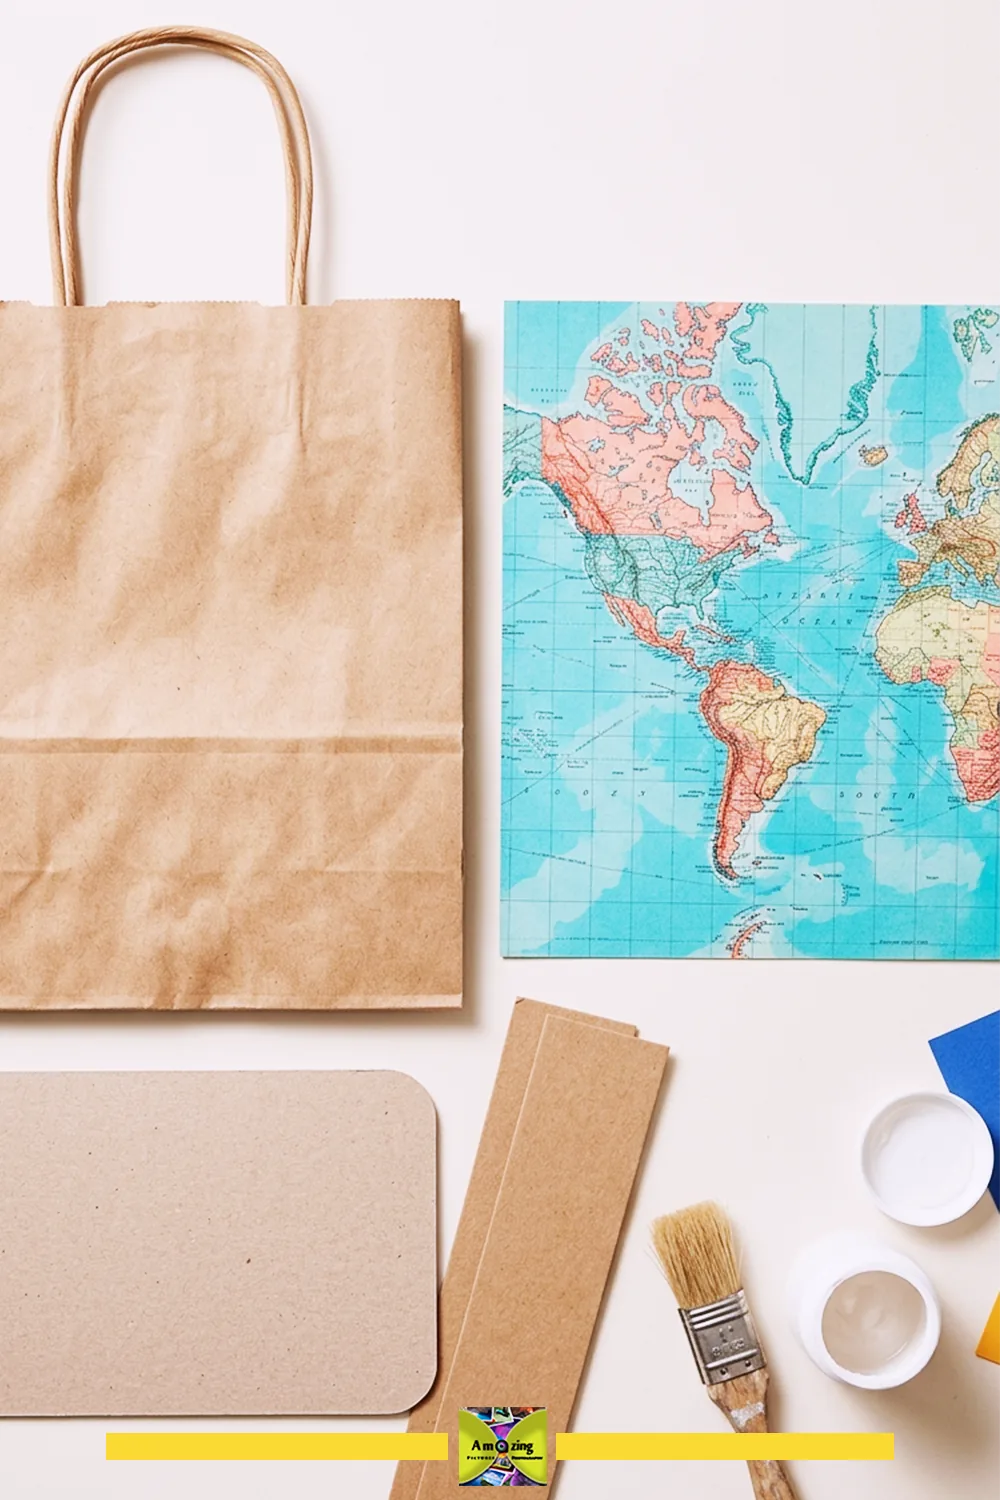
Give the base a better fit: Cut a smooth card insert to sit flat inside the bag, then round its corners so they do not press into the paper walls. It should drop into place without stretching the gussets. Keep the bag’s original folds free to move, and support the bottom when carrying the gift; an insert helps the shape but does not establish a weight rating.
6. Reusable Map Gift Bands and Flat Paper Bows
What it looks like: Flat paper bands and bows sized to an actual box, removable without damaging either the map or the package.
Best use: Decorating a gift box with a reusable, non-elastic wrap.
Difficulty: Beginner.
Approximate time: About 30 minutes–1 hour per band — estimated hands-on time, plus any drying or curing required by the products used.
Map and layout: Use narrow, clean map strips for the band and a small section for the bow, with a meaningful location placed on the visible face.
Materials: map strips, a light backing if the paper is thin, and a low-stress adhesive or paper fastener for the bow.
Tools: ruler, pencil, scissors, bone folder.
- Measure the actual box and cut a band long enough to wrap with a little overlap. Try the paper band around the closed box before cutting the map strip.
- Fold the band so the edges are clean and reinforce it if the paper is thin.
- Make a flat bow from a small section, enclosing any decorative parts securely.
- Attach the bow to the band so both remove without tearing.
- Test removal and reuse, and check that no small part can detach.
Customization: band width, bow style, location placement, color, a plain tag.
Practical tip: Use a soft overlap and a paper closure rather than tight elastic, so the band slides off without damaging the map or the package.
Common mistake: Adding small detachable parts that could come loose around young children or pets.
Safety note: No small detachable parts where young children or pets can reach them; no elastic unless its behavior is tested.
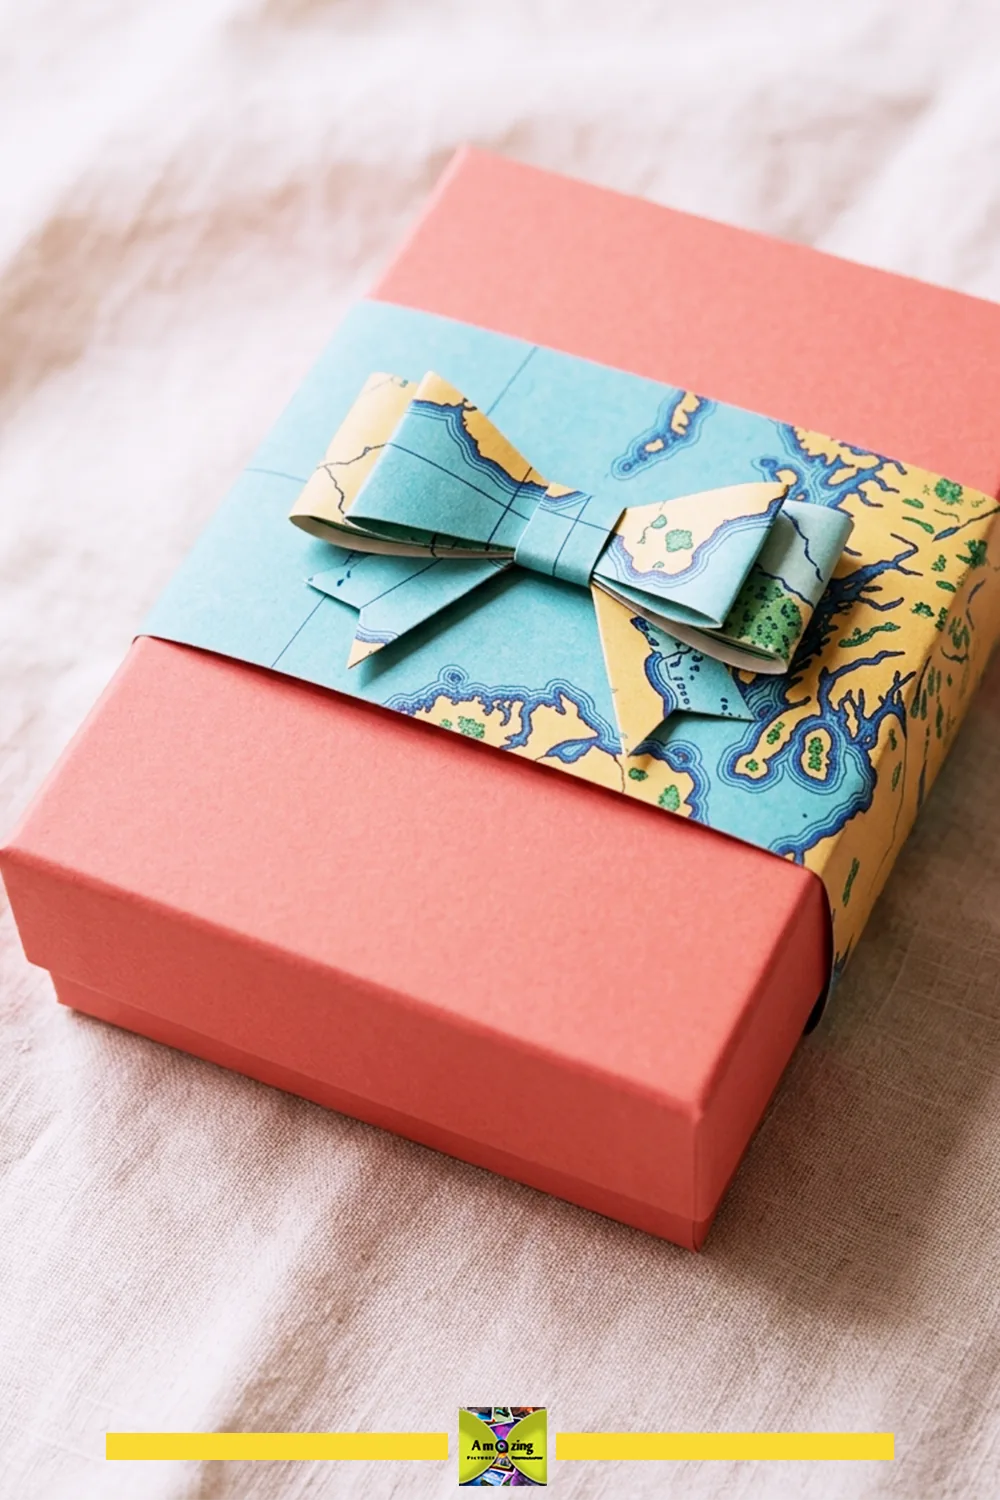
Keep the closure simple: Fit the band around the closed gift box, then join the overlap to itself at the back so it forms a removable sleeve. Leave enough ease to slide it off without pulling at the bow. Attach the bow to the band only, and check that the sleeve comes away cleanly before presenting the gift.
Desk and Paper Organization
7. Map-Covered Keepsake Box
What it looks like: A sound existing box covered with map paper, with aligned corners, wrapped edges, and a clean removable interior liner.
Best use: Storing lightweight keepsakes in a personalized, decorative box.
Difficulty: Intermediate.
Approximate time: About 2–4 hours — estimated hands-on time, plus any drying or curing required by the products used.
Map and layout: Choose a sound existing box and measure every face, then select a clean map section with the focal point on the lid. Align the map’s borders with the box edges for a polished look.
Materials: a sound box, a map section, a tested adhesive, and a removable interior liner (plain paper or card).
Tools: ruler, pencil, scissors or craft knife, cutting mat, bone folder, adhesive brush, and weights.
- Confirm the box is sound, then measure each face and make a full-size pattern. Dry-fit the lid with a sample of the covering at the rim to check clearance.
- Cut map panels for each face with a wrap allowance, and dry-fit the focal point.
- Test the adhesive on an offcut, then apply the map and wrap the edges cleanly, aligning corners.
- Line the interior with a removable liner so no raw edge touches the contents.
- Let the adhesive cure fully before use, and check that no edge lifts.
Customization: lid focal point, corner treatment, liner color, edge finish, a label or date block kept visible.
Practical tip: Cut each panel slightly oversized, then trim after smoothing so the motif sits exactly where you want it.
Common mistake: Skipping the adhesive test, so it bleeds through thin map paper or lifts at the corners.
Safety note: No archival-storage claim; keep contents lightweight and dry, and let the adhesive cure completely before contact with keepsakes.
If you enjoy the covered-box idea and want to go further into building a box from waste paper, our separate guide on how to turn waste paper into a treasure chest walks through a more involved paper-box construction.
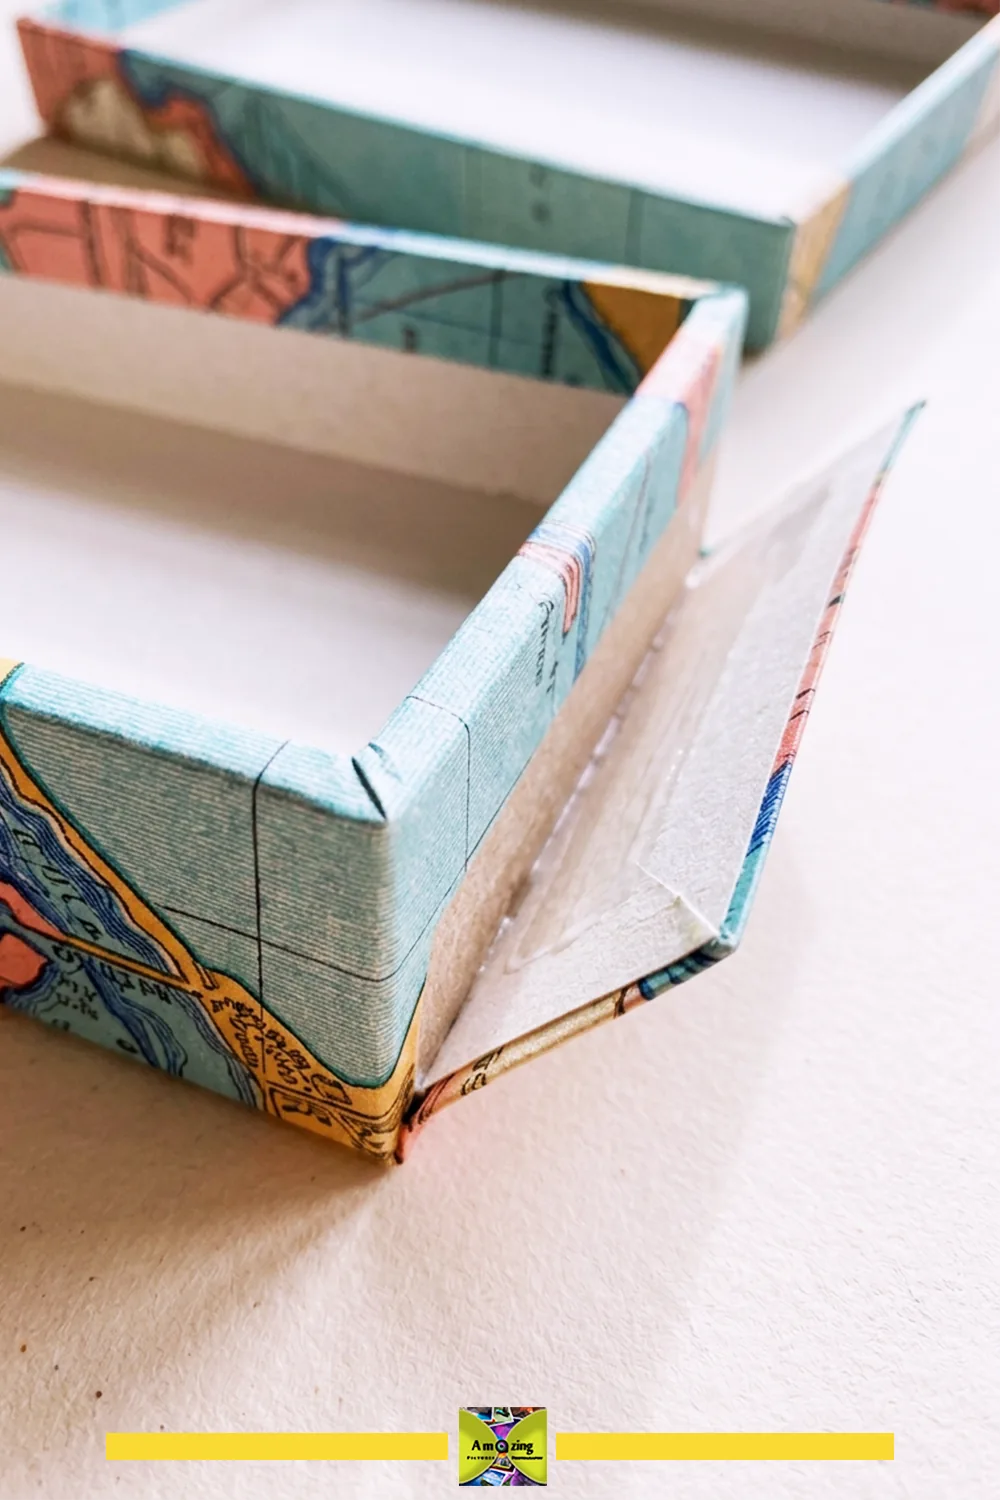
Test a wrapped corner: A flat adhesive sample will not show how the map behaves around a box edge. Wrap an expendable strip around a scrap with similar thickness and surface finish, using the planned corner fold. Once cured, look for ink changes, lifting, and a bulky seam. Dry-fit the lid with the covering thickness included before committing to all the panels.
8. Map-Faced Magazine or Paper File
What it looks like: A rigid reclaimed file body faced with map paper, with fully adhered panels and protected edges.
Best use: Holding magazines or lightweight papers upright on a shelf or desk.
Difficulty: Intermediate.
Approximate time: About 1–2 hours — estimated hands-on time, plus any drying or curing required by the products used.
Map and layout: Use a rigid reclaimed file body as the substrate, and select a clean map section with the focal point on the visible front face. A lawful reproduction works well here if the original is fragile.
Materials: a rigid reclaimed file body, a map section, a tested adhesive, and edge protection (paper hem or tape).
Tools: ruler, pencil, scissors or craft knife, cutting mat, bone folder, adhesive brush.
- Confirm the file body is sound and measure each face. Mark the front, back, and each side on the paper patterns before cutting.
- Cut the map to cover the faces with a wrap allowance, and dry-fit.
- Apply a tested adhesive evenly, attach the map, and wrap the edges.
- Protect the top and side edges so they do not lift or snag.
- Let it dry fully, then load lightweight dry papers and check that it stays upright.
Customization: focal point, border, edge protection, a plain label.
Practical tip: Fully adhere the panels rather than tacking them, since a magazine file flexes every time you pull a paper out.
Common mistake: Overloading the file so it tips, or claiming it protects against moisture or damage.
Safety note: Lightweight dry contents only; retire it if the backing warps or the edges expose sharp board.
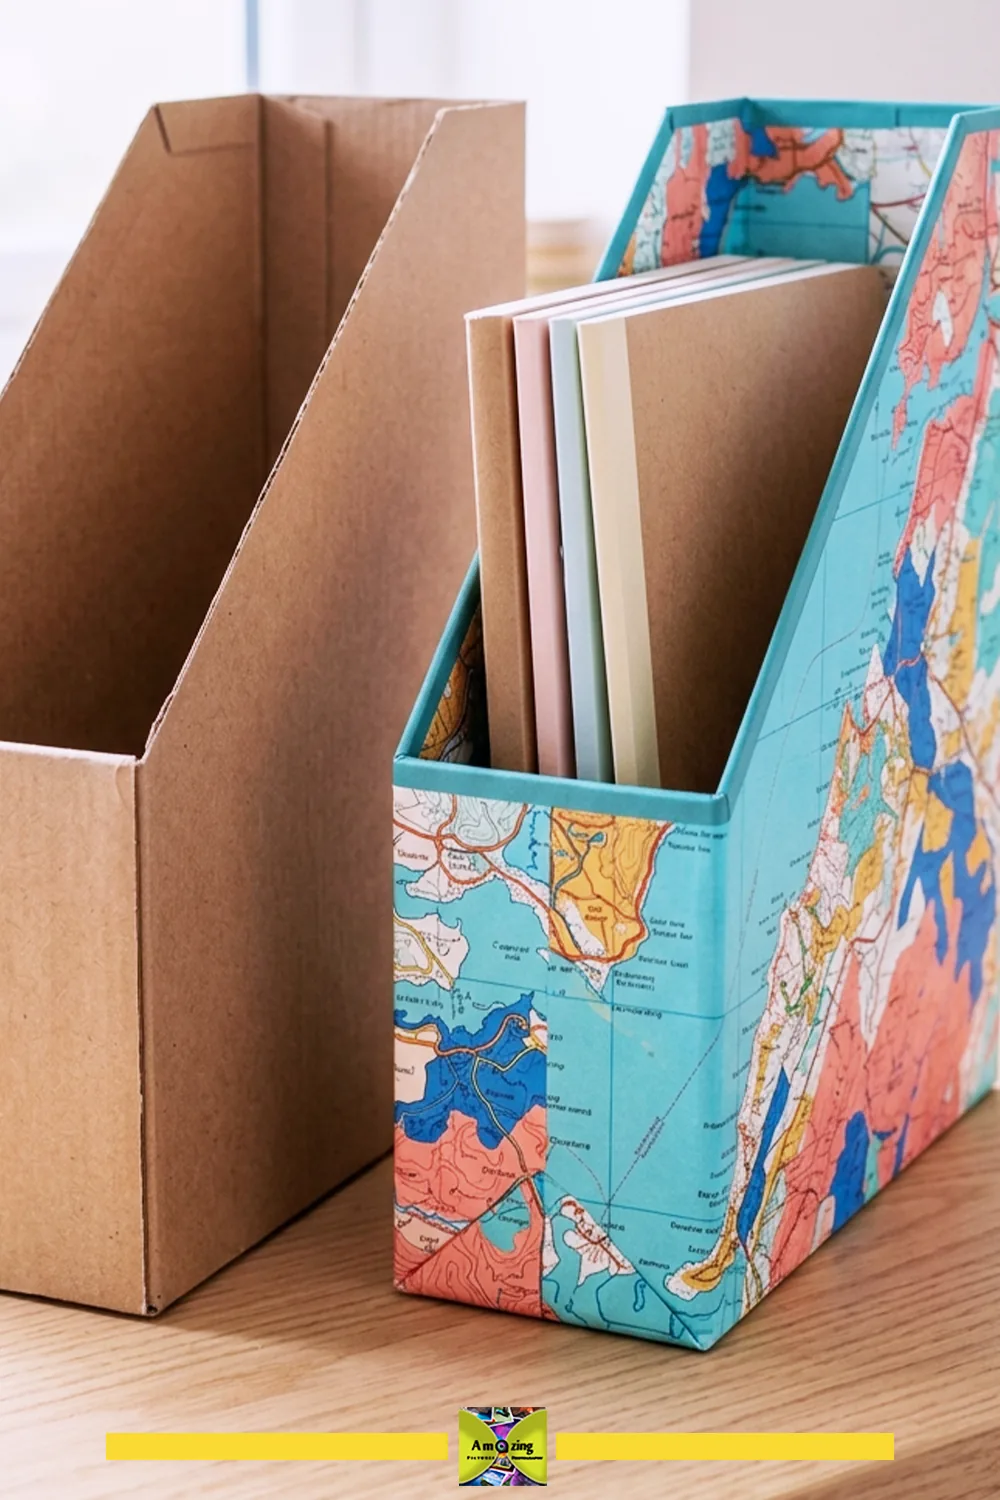
Protect the part you grab: Notice where your fingers land when you pull the file from a shelf. Keep a map seam away from that spot, and carry the edge covering over the rim onto the inside face. Smooth down every overlap, let it dry, then slide a sheet of scrap paper past the rim to check for catches.
9. Map-Covered Clipboard or Project Board
What it looks like: A clipboard or project board faced with map paper, with the working surface protected beneath a suitable transparent layer.
Best use: A personalized writing or display surface kept protected under a clear cover.
Difficulty: Beginner to intermediate.
Approximate time: About 1–2 hours — estimated hands-on time, plus any drying or curing required by the products used.
Map and layout: Use a clean, flat map section sized to the board, with the focal point clear of the clip. The clear cover — not the map — is the surface that gets used, so the map itself stays protected.
Materials: a clipboard or flat board, a map section, a tested adhesive, and a removable clear cover sheet or transparent panel.
Tools: ruler, pencil, scissors or craft knife, cutting mat, bone folder, adhesive brush.
- Measure the board and make a paper pattern. Check the pattern beneath the clip and around the board’s corners.
- Cut the map to fit with a small allowance, and dry-fit the focal point.
- Attach the map with a tested adhesive and let it dry fully.
- Place the removable transparent cover over the map so the surface is protected.
- Test that the cover lies flat and can be removed for cleaning.
Customization: location selection, border, cover style, a plain label area.
Practical tip: Make the transparent cover removable so the board and the map can be cleaned separately.
Common mistake: Calling it a cutting mat. A map-covered board is not a cutting surface, and a craft knife will score right through it.
Safety note: No cutting-mat or heat-protection claim; the clear cover — not the map — is the working surface.
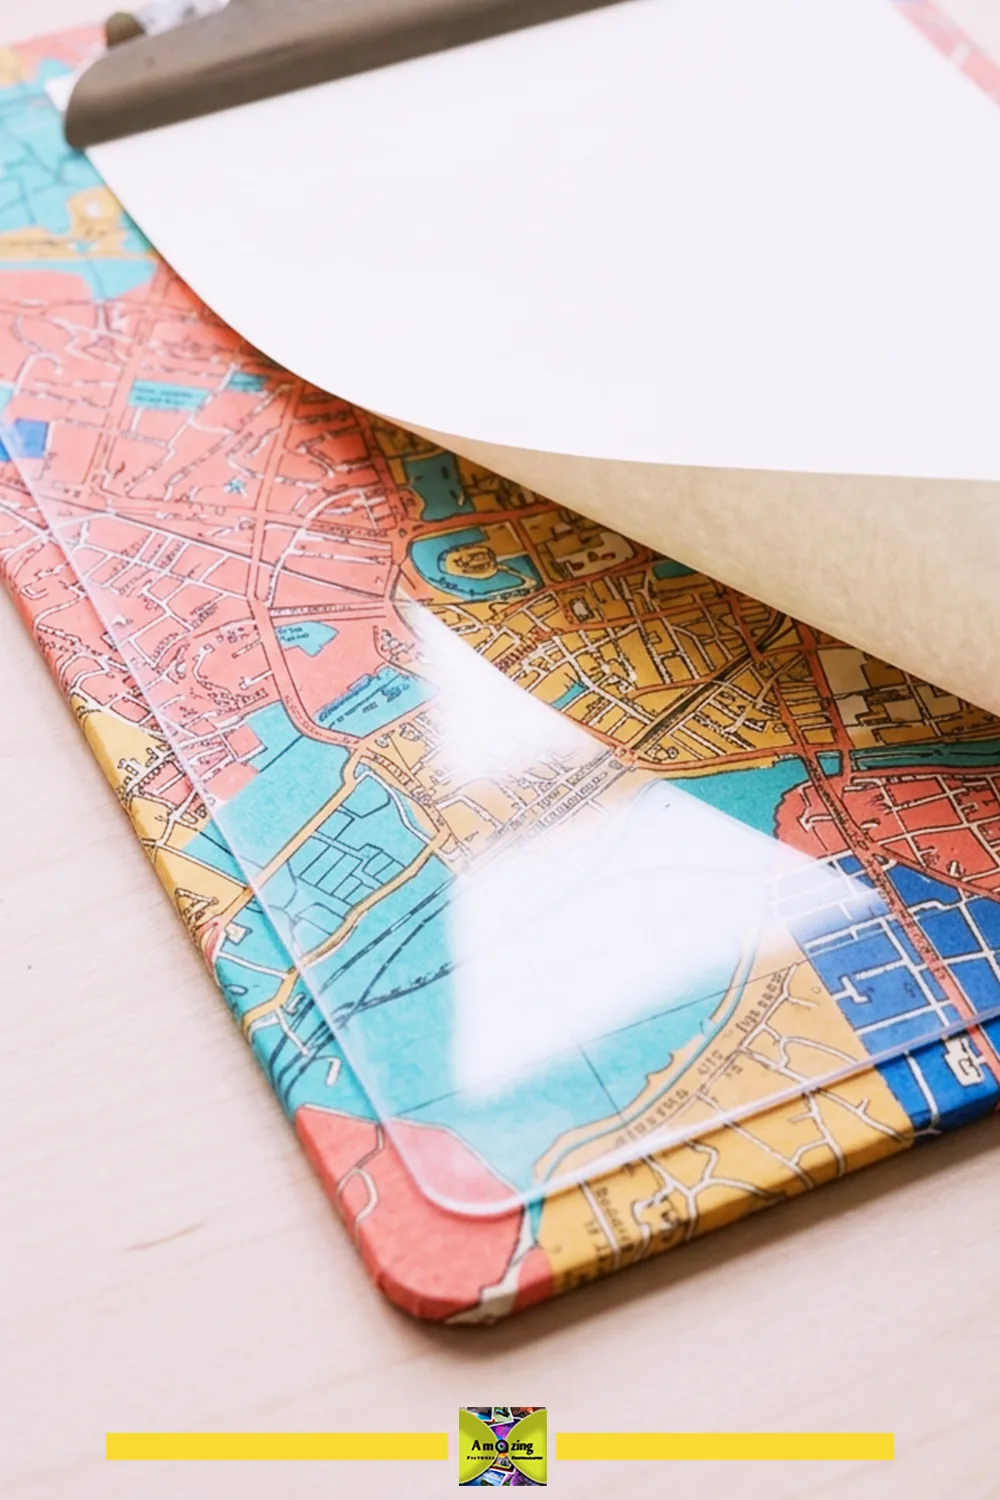
Check it with a pen: Choose a smooth, flexible clear cover that fits beneath the clipboard clip without stopping it from closing. With the map assembly fully dry, place a sheet of writing paper on top and try a few lines. If the cover shifts, wrinkles, or dents noticeably, adjust the fit or choose a more suitable sheet before relying on it as a writing surface.
10. Structured Desktop Letter Caddy
What it looks like: A small upright caddy made from map-covered reclaimed board, with a broad base and reinforced dividers.
Best use: Sorting lightweight paper mail and notes on a desk.
Difficulty: Intermediate to advanced.
Approximate time: About 3–5 hours — estimated hands-on time, plus any drying or curing required by the products used.
Map and layout: Use coordinated map sections for the outside and divider faces, with borders aligned and the busiest print kept off the dividers so the interior reads clearly.
Materials: reclaimed board for the body and dividers, map sections, a tested adhesive, and edge reinforcement.
Tools: ruler, pencil, craft knife, cutting mat, bone folder, adhesive brush, and weights.
- Decide the finished size and make full-size patterns for the base, back, sides, and dividers. Arrange the paper patterns around your usual mail before cutting the board.
- Cut the board pieces, keeping the base broad enough that the caddy will not tip.
- Cover the faces with map paper and wrap the edges before assembly.
- Assemble and reinforce the dividers so they stand straight without bowing.
- Let it cure fully, then load lightweight paper and check that it stays upright.
Customization: divider count, location selection, border color, base footprint, a plain label slot.
Practical tip: Cut the dividers slightly taller than the paper they hold and reinforce their tops, since a bowing divider is the first thing to fail.
Common mistake: Making the base too narrow, so the caddy tips forward once the dividers are loaded.
Safety note: Lightweight dry paper only; retire it if dividers loosen or corners expose sharp board edges.
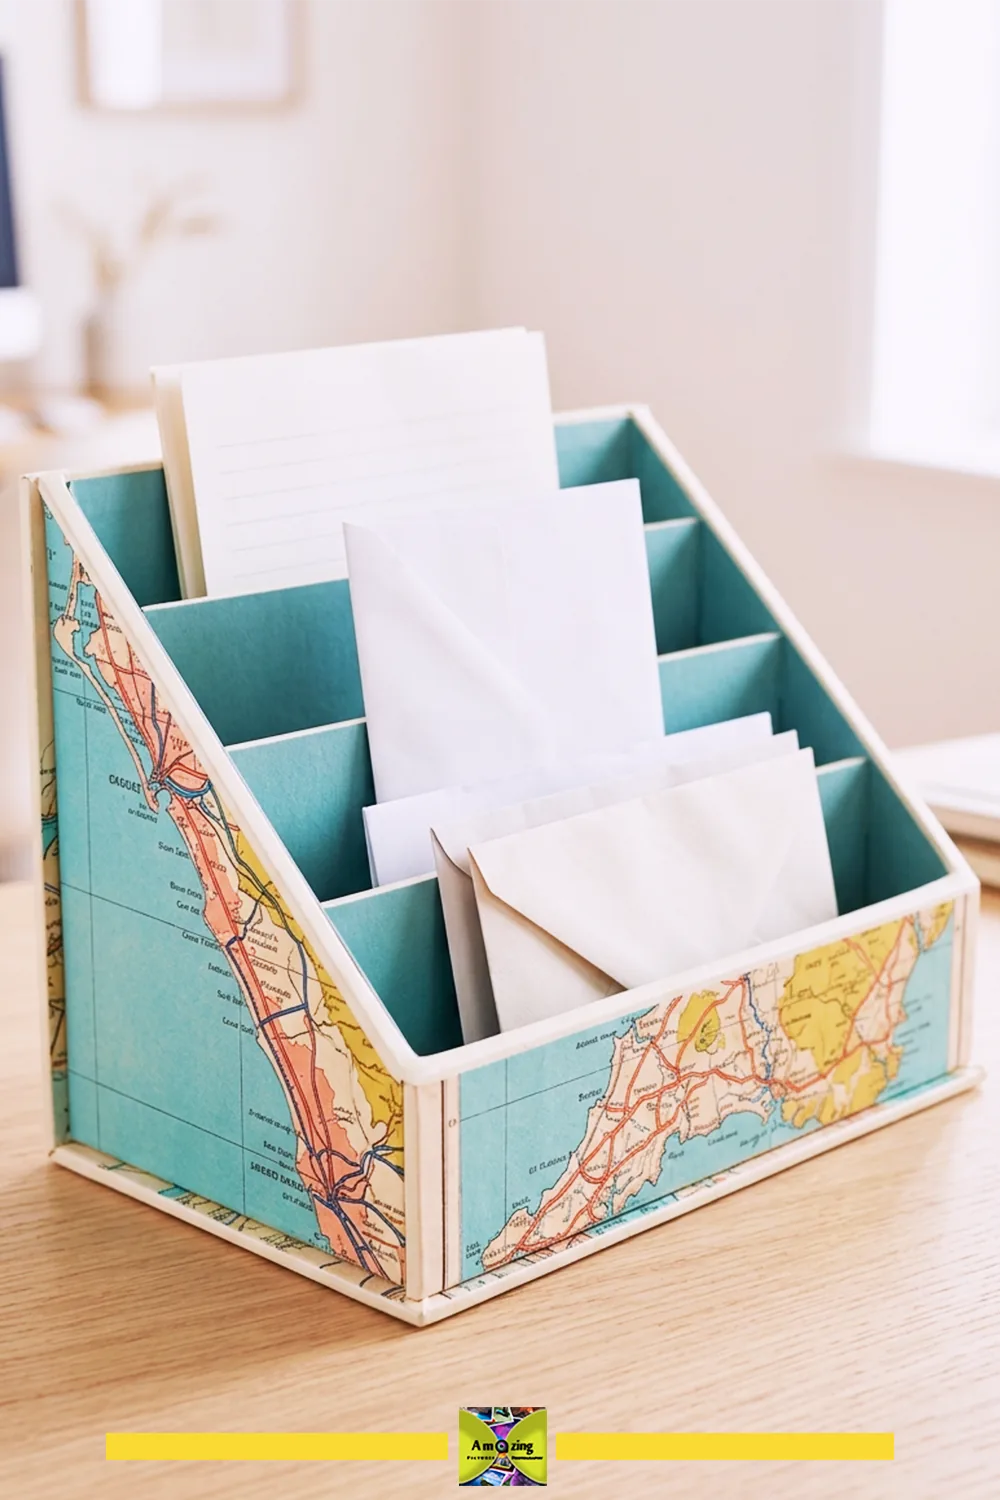
Support the divider joins: Dry-fit the caddy with the kinds of envelopes you normally receive. Where a divider meets the base or side wall, a folded card tab can provide a wider gluing area than the thin board edge alone. Keep the tabs out of the paper path, cover their exposed edges, and check the cured assembly for movement with only a few sheets in each compartment.
11. Map-Covered Lidded Index-Card Box
What it looks like: A small lidded box covered in map paper, sized for ordinary index cards or recipe references.
Best use: Storing ordinary paper notes — index cards or recipe references — not food or valuables.
Difficulty: Intermediate.
Approximate time: About 1–2 hours — estimated hands-on time, plus any drying or curing required by the products used.
Map and layout: Use a sound existing box and a clean map section with the focal point on the lid, plus a smooth removable interior liner so cards slide in and out without catching.
Materials: a sound lidded box, a map section, a tested adhesive, and a removable paper liner.
Tools: ruler, pencil, scissors or craft knife, cutting mat, bone folder, adhesive brush.
- Confirm the box and lid are sound, then measure each face. Check that the covered lid will clear the rim and the tallest card divider.
- Cut the map to cover the box and lid with a wrap allowance, dry-fitting the focal point.
- Apply a tested adhesive, attach the map, and wrap the edges cleanly.
- Line the interior with a smooth removable liner.
- Let it cure, then test that cards slide in and out without catching.
Customization: lid focal point, liner color, corner treatment, a plain label.
Practical tip: Keep the liner smooth and removable so cards never catch on a raw wrapped edge.
Common mistake: Claiming food-contact or preservation suitability. This box holds ordinary paper notes only.
Safety note: No food-contact or archival claim; retire it if the finish stays tacky or edges transfer to contents.
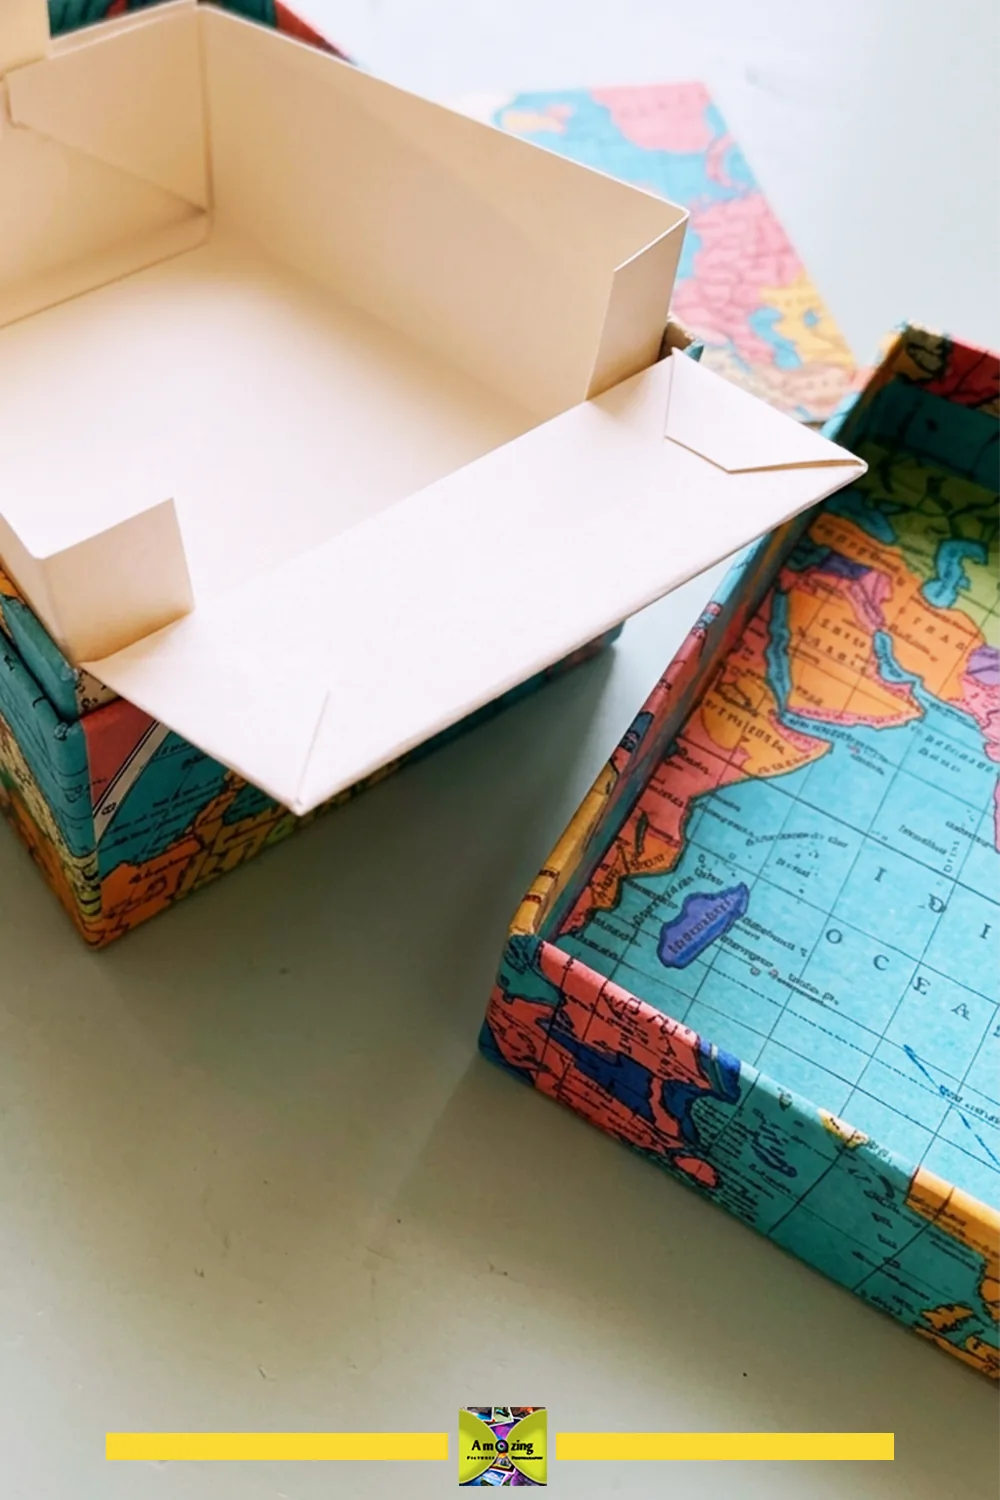
Make the liner removable in practice: Fold a paper mock-up inside the box and trim it until it lifts out without snagging. Keep overlapping corners away from the path of the cards, and try the lid with your tallest divider tab in place. A small folded pull tab at the back makes the finished liner easier to remove without tugging on the map covering.
Reversible Home Accents
12. Removable Drawer-Liner Panels
What it looks like: Map paper mounted to a reversible backing board that sits inside a drawer without being glued to it.
Best use: Adding a personal, removable liner to a drawer without touching the furniture.
Difficulty: Beginner.
Approximate time: About 30 minutes–1 hour per panel — estimated hands-on time, plus any drying or curing required by the products used.
Map and layout: Use a clean, flat map section sized to the drawer interior, mounted to a thin reversible backing board cut from the actual opening. A lawful reproduction is ideal here so the original map is preserved.
Materials: a map section, thin reversible backing board, a tested adhesive, and protective edge tape if needed.
Tools: ruler, pencil, scissors or craft knife, cutting mat, bone folder, adhesive brush.
- Measure the inside base of the drawer and make a template from the exact opening. Try the template at every corner and around any projecting hardware.
- Cut the backing board slightly smaller than the opening so it clears the drawer sides.
- Attach the map with a tested adhesive, wrap or protect the edges, and let it cure fully.
- Lay the panel in place without gluing it to the furniture.
- Confirm the drawer opens and closes freely and that the panel stays put.
Customization: location selection, border, backing thickness, edge finish.
Practical tip: Keep the panel removable — never apply adhesive directly to valuable, rented, historic, unknown, or delicate furniture.
Common mistake: Sizing the panel too tight so it binds the drawer, or too loose so it slides and bunches.
Safety note: Dry indoor use only; remove the panel if moisture, mold, bubbling, staining, abrasion, or pest activity appears, and test for dye transfer before leaving it against furniture.
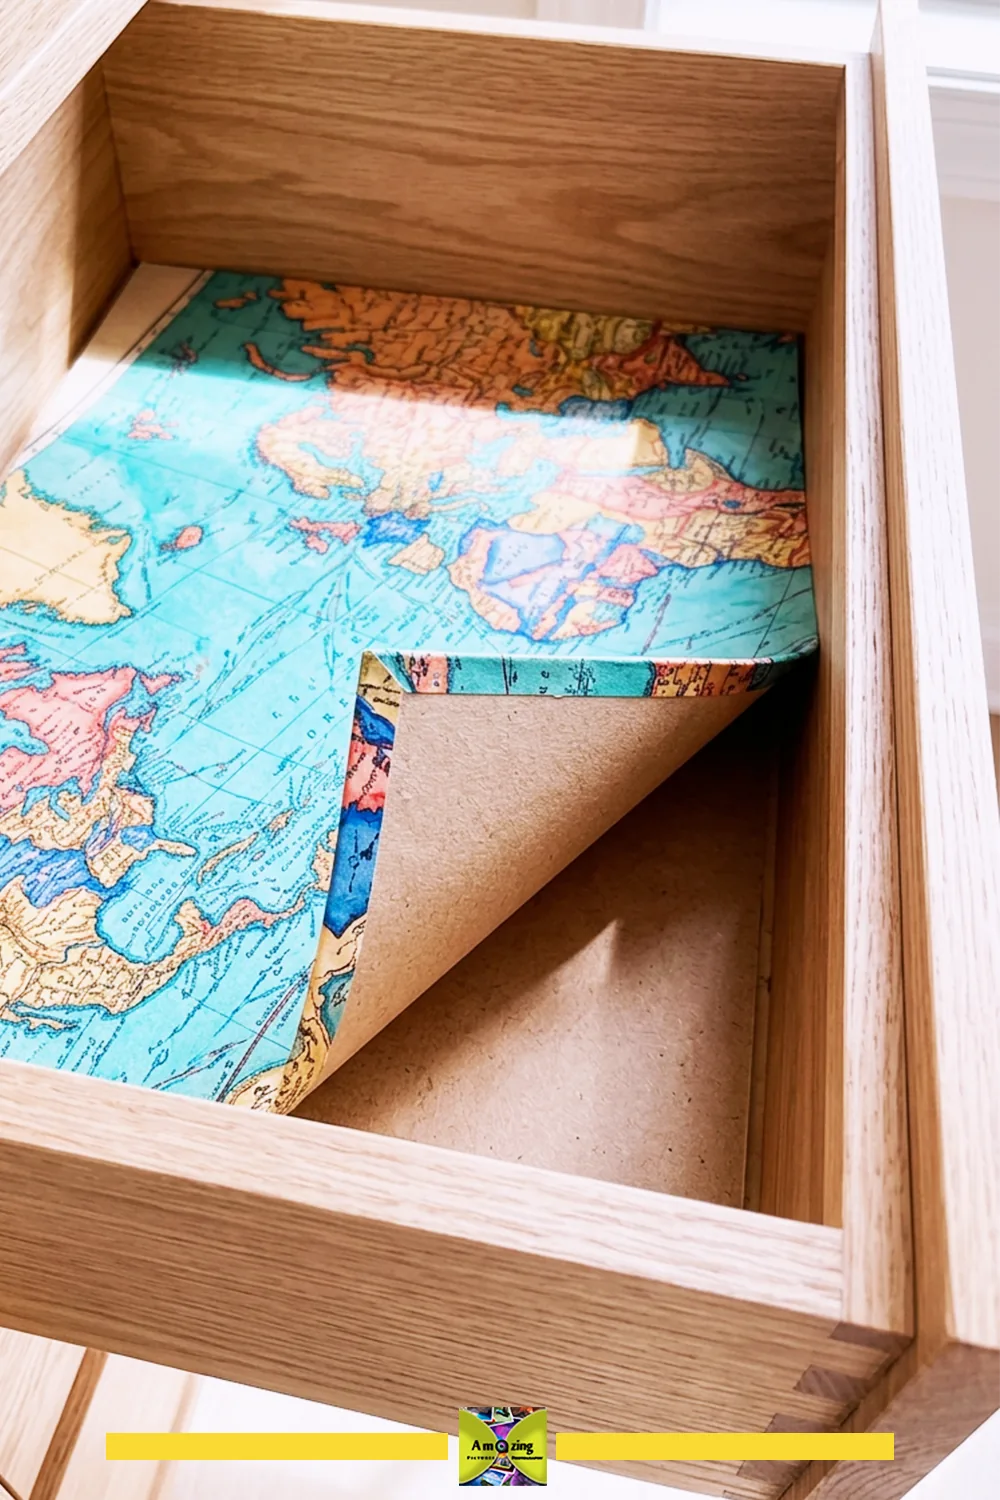
Check both sides of the panel: Try the map and adhesive on a sample of the chosen backing before covering the full drawer insert. After the specified cure time, lay it on a flat surface and check for curl or rocking. Keep the furniture-facing side smooth, clean, and free of exposed adhesive. Do the final fit check after wrapping the edges, since those extra layers reduce clearance.
13. Under-Glass Decorative Tray Insert
What it looks like: A measured map composition fitted beneath a separate rigid transparent panel in a tray.
Best use: Lining the base of a glass-topped tray for decoration, kept away from direct food contact.
Difficulty: Beginner to intermediate.
Approximate time: About 1–2 hours — estimated hands-on time, plus any drying or curing required by the products used.
Map and layout: Use a flat map composition sized to the inside base of the tray, with the busiest print in the center where it will be seen through the glass.
Materials: a map section, a light flat backing, and — if needed — a low-stress adhesive; the transparent panel comes with the tray.
Tools: ruler, pencil, scissors or craft knife, cutting mat, bone folder.
- Measure the inside base of the tray and make a template. Check the template beneath the transparent panel before cutting the map.
- Cut the map to fit and lay it flat on a light backing.
- Place the composition beneath the separate rigid transparent panel.
- Confirm the panel sits flat and the insert stays clean and dry.
- Keep the map away from direct food contact at all times.
Customization: composition, location selection, border, backing color.
Practical tip: Keep the map sealed beneath the panel — the rigid glass, not the map, is the cleanable surface.
Common mistake: Placing the map in direct food contact or claiming it protects against heat or spills.
Safety note: Decorative only, with no direct food contact; the transparent panel is the surface that can be cleaned.
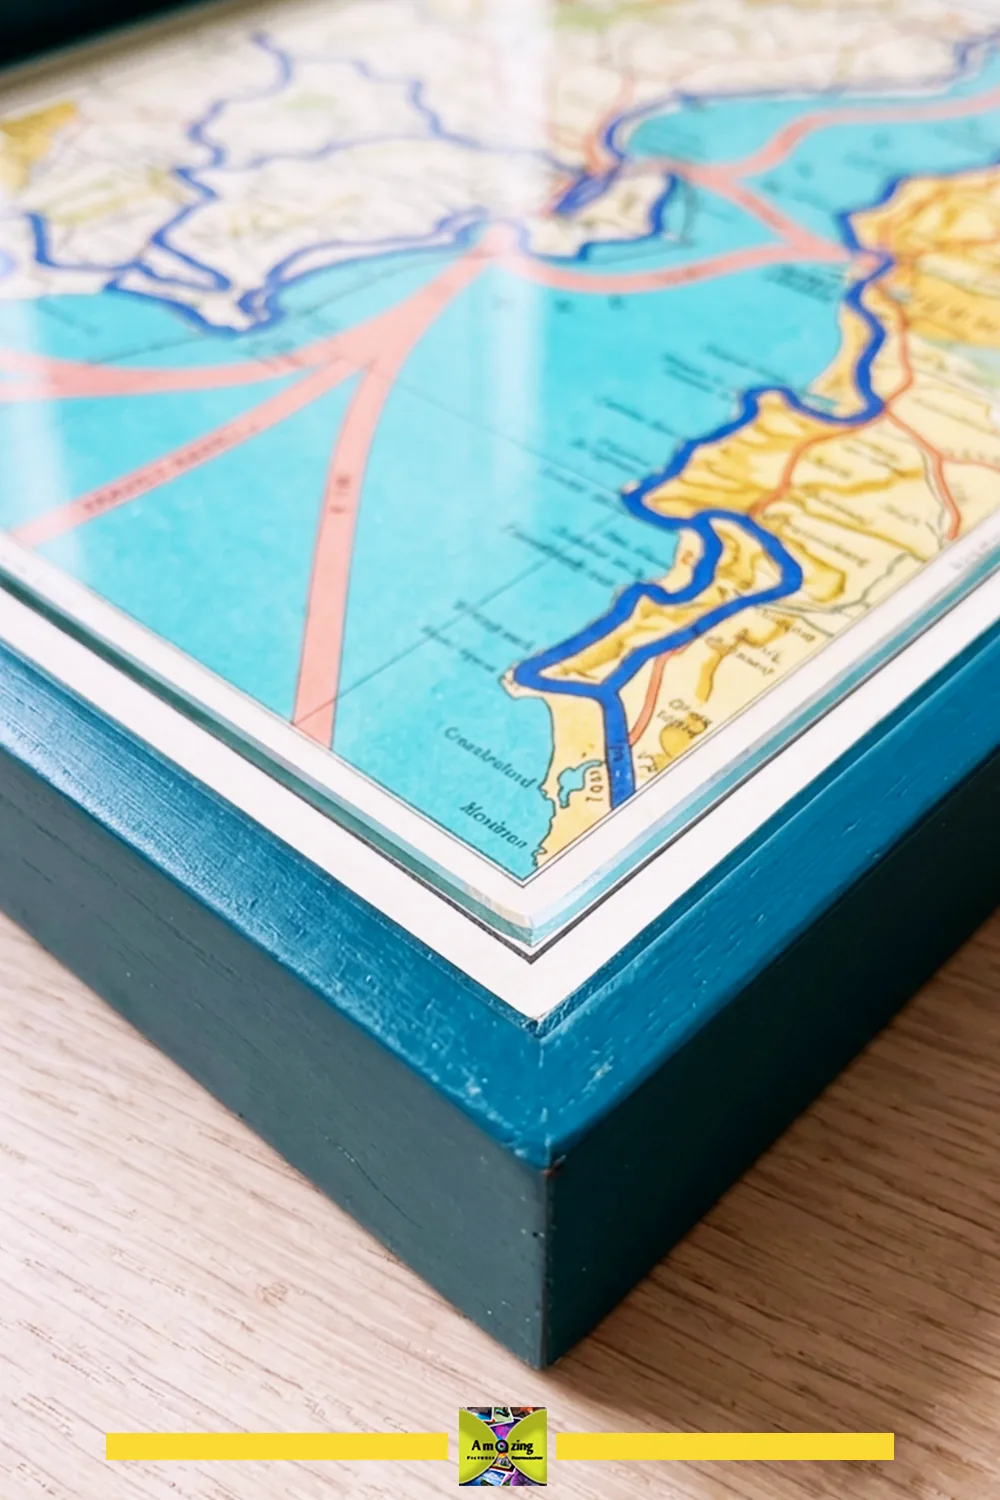
Frame the view first: Cut a paper window the size of the tray’s visible recess and move it over the map before cutting. Keep an interesting coastline or place name away from areas usually covered by objects. Check the arrangement beneath the actual transparent panel, since its rim can hide more of the design than expected. Keep the insert removable and dry; a fitted panel is not necessarily a watertight seal.
14. Removable Map Backing Panel for a Bookcase
What it looks like: A fitted map-backed board that stands at the back of an open bookcase or display cabinet without being attached to it.
Best use: Adding color and a travel theme behind books or displayed objects, reversibly.
Difficulty: Beginner.
Approximate time: About 1–2 hours — estimated hands-on time, plus any drying or curing required by the products used.
Map and layout: Use a large, clean map or several coordinated sections mounted to a fitted board cut from the actual opening. A lawful reproduction of a large-scale map often works better than an original here.
Materials: map section(s), a fitted backing board, a tested adhesive, and edge protection.
Tools: ruler, pencil, craft knife, cutting mat, bone folder, adhesive brush.
- Measure the back opening of the bookcase and make a template. Test the template around shelf pins, trim, and hinges before cutting the backing.
- Cut the backing board slightly smaller than the opening so it clears shelves and supports.
- Attach the map with a tested adhesive and protect the edges.
- Let it cure fully, then stand the panel in place without attaching it to the furniture.
- Confirm it does not block shelf supports, hinges, or air gaps.
Customization: location selection, panel arrangement, border, a plain matte edge.
Practical tip: Make the panel removable and leave small clearance gaps so it never binds against shelf supports or traps moisture.
Common mistake: Gluing the panel directly to the bookcase, or sizing it so tightly that it bows.
Safety note: No adhesive on valuable, rented, or historic furniture; dry indoor use only, and remove the panel if it bows or traps moisture.
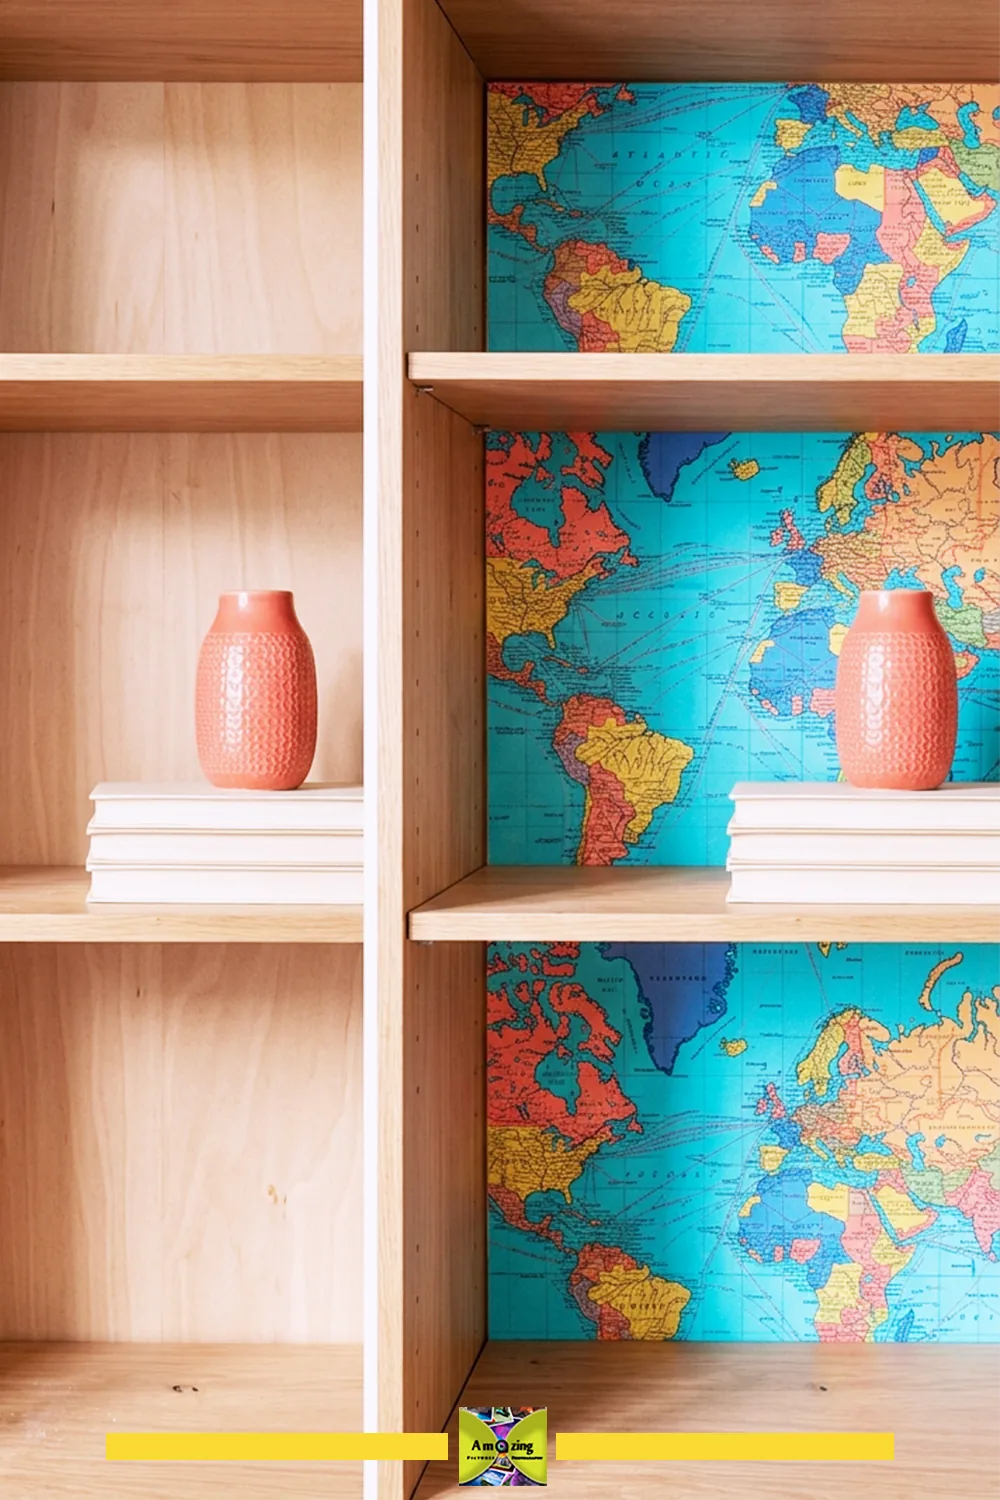
Fit one opening at a time: Measure each shelf opening separately, even when they look identical, and check the width at the top and bottom. Try a plain card template around shelf pins, hinges, and trim before decorating the backing. Several smaller panels can be easier to insert and remove than one large sheet. Each should sit flat without wedging or leaning forward.
15. Map-Lined Vintage Suitcase or Storage Case
What it looks like: A vintage suitcase or storage case with a removable map lining system for dry craft supplies.
Best use: Organizing dry craft supplies in a case without permanently altering it.
Difficulty: Intermediate.
Approximate time: About 2–4 hours — estimated hands-on time, plus any drying or curing required by the products used.
Map and layout: Use clean, dry map sections mounted to removable panels or liners cut from the case’s interior, keeping the focal point visible on the lid interior. Do not attempt to restore or “fix” the case itself.
Materials: map sections, thin removable backing panels or paper, a tested adhesive, and edge protection.
Tools: ruler, pencil, scissors or craft knife, cutting mat, bone folder, adhesive brush.
- Confirm the case is clean and dry, then measure the interior panels. Try each template in place with the case both open and closed.
- Cut removable backing panels from the actual interior and cover them with map paper.
- Protect the edges and let the adhesive cure fully.
- Lay the liners in place without gluing them to the case.
- Test with dry supplies and check that nothing traps odor or moisture.
Customization: location selection, panel arrangement, liner fit, a plain label.
Practical tip: Keep the lining removable so the case and the map panels can be aired and cleaned separately.
Common mistake: Claiming restoration or archival protection. A map lining is decorative, and it does not restore a damaged or musty case.
Safety note: No restoration or archival claim; dry craft supplies only, and remove the lining if it traps odor or moisture.
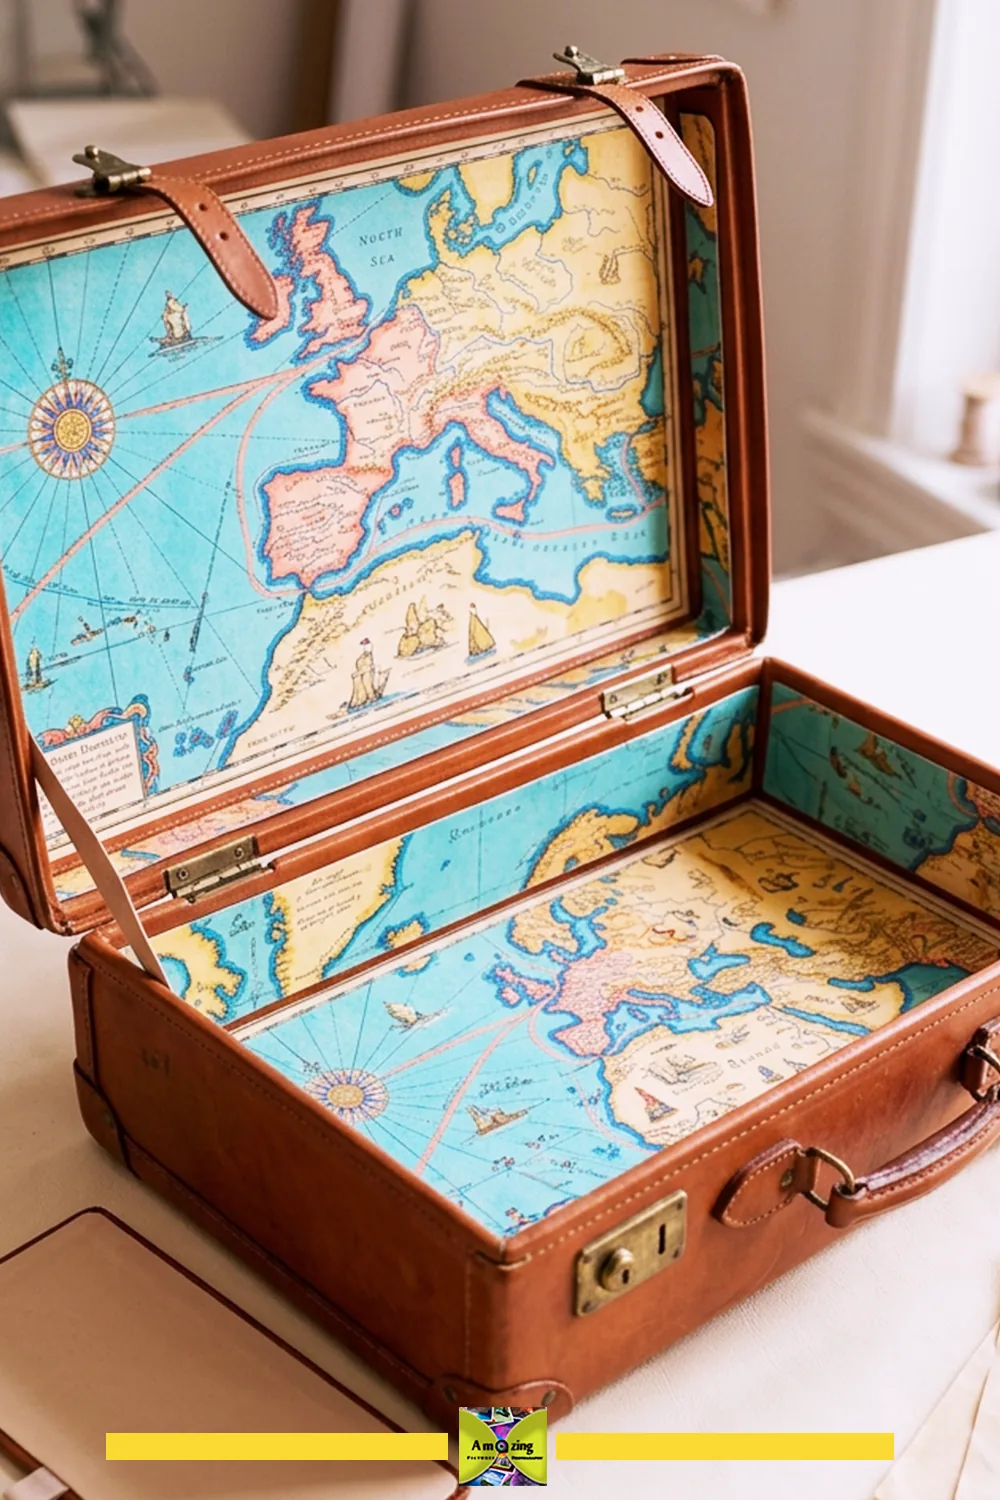
Work around the hardware: Use separate paper templates for the case base, lid, and side sections. Mark hinges, straps, and rounded corners, then test the case closed with the plain liners in place. Keep the finished panels clear of moving parts and give each one an accessible edge or pull tab. A lining that needs force to remove is too tight.
Troubleshooting Common Old Map Craft Problems
- A map proves valuable or significant after work has begun: stop before further cutting and run it back through the decision guide.
- Unclear copyright or reproduction rights: use an original public-domain or properly licensed source, or get permission, rather than reproducing the artwork.
- Personal information appears in the selected area: crop, cover, reverse, or exclude that area from the project and every photograph.
- The map material is unknown: treat it conservatively and test any adhesive, finish, or cleaning on an expendable section first.
- Mold, musty odor, or pest evidence: isolate the material and seek professional guidance rather than cleaning it yourself.
- Old tape refuses to release: do not pull it off valuable or brittle paper; leave it for a conservator when preservation matters.
- A folded map tears at an intersection: place weak fold intersections away from corners and closures, and reinforce only where justified.
- Brittle paper cracks when opened: stop opening it; brittle paper belongs with a professional, not in a home flattening project.
- A map refuses to lie flat: use gentle rest under broad weight with interleaving, and accept that some creases remain.
- A map curls again after weight is removed: the paper may be responding to humidity; store it flat between protective layers.
- Ink transfers during a moisture test: stop; the map is not stable beneath wet adhesive or finish.
- Scissors produce a ragged edge: use sharp scissors and support the paper; change tools if the paper frays.
- A craft knife tears rather than cuts: replace the blade and make several controlled passes on a proper mat.
- A scored line cuts through coated paper: reduce pressure and switch to a gentler scoring method for the coating.
- Folded corners become bulky: plan mitered or overlapped corners on the paper template and trim without cutting the face.
- Thin paper becomes translucent over adhesive: use less adhesive and a denser backing, or switch to a dry-mount method.
- Adhesive dries before placement: work in smaller sections or use a slower-setting adhesive for that paper.
- Wet adhesive causes wrinkles or expansion: use a thinner, more even layer and weight the assembly while it dries.
- Bubbles form beneath a mounted map: improve coverage and smooth from one edge before the adhesive skins over.
- Grid lines drift at adjoining panels: align and number panels during a photographed dry layout before gluing.
- Paper shrinks and exposes the substrate: allow the adhesive to reach the paper’s final dimension before trimming.
- Map edges lift after drying: wrap or protect edges, and check the adhesive’s hold on that substrate.
- PVA warps a board: apply moisture evenly, weight the assembly, or switch to a drier method.
- A glue stick releases at the corners: use a stronger adhesive or add corner reinforcement for high-stress areas.
- Spray adhesive creates overspray or uneven bonding: follow the label, work ventilated, mask the area, and apply in light passes.
- Decoupage medium smears ink: confirm ink stability on an offcut, and switch to a drier adhesive if it moves.
- A clear finish becomes cloudy, streaked, bubbly, or tacky: apply thin coats in the right conditions, and re-test on an offcut.
- A bag handle pulls against weak paper: reinforce the handle attachment and keep contents light.
- An envelope flap cracks: fold with the grain and reinforce the flap fold before repeated use.
- A document wallet fails to close squarely: re-check the fold allowance and hinge so the halves line up.
- A magazine file tips: widen the base and keep contents light.
- A letter-caddy divider bows: reinforce the divider top and reduce how much it is asked to hold.
- A removable liner binds a drawer: trim the panel to a slightly smaller size with clearance on every side.
- A tray panel shifts beneath its transparent cover: size it to the recess so it cannot slide.
- A bookcase backing bows: use a stiffer board and leave clearance gaps so it never wedges.
- A suitcase lining traps odor or moisture: make it removable, air it out, and remove it at the first sign of damp.
- Dye or finish transfers to furniture or paper contents: test on a matching inconspicuous area before use, and stop using it if transfer appears.
- Finished projects look chaotic rather than coordinated: apply the color, repetition, and alignment rules above.
Care, Maintenance, and When to Retire a Project
Finished map projects follow the most restrictive limit among the map paper, backing, adhesive, finish, and closure. There is no universal cleaning, coating, or storage instruction. Keep projects dry and out of direct sunlight, dampness, pests, and crushing. Remove rigid inserts and liners before cleaning where the design permits, and test for dye, odor, adhesive, and coating transfer before contact with pale paper, books, furniture, or valuables. Retire any project that develops mold, a persistent odor, dye transfer, brittle paper, severe abrasion, exposed board, or failing closures. Check edges, folds, and closures during ordinary use, and follow the relevant product instructions for any cleanable protective cover. Replace worn parts rather than relying on a fixed lifespan.
Safety When Repurposing Old Maps
- Review ownership, value, copyright, and privacy before cutting or publishing.
- Select clean, ordinary, structurally sound maps, and reject moldy, flooded, chemically exposed, heavily soiled, brittle, or unidentified material.
- Assess staples, pins, clips, and tape safely, and remove them with suitable tools while supporting fragile paper.
- Work on stable cutting mats in a well-lit area, cut away from your body, and keep hands outside every blade and punch path.
- Use scissors, craft knives, rotary cutters, scoring tools, rulers, and punches safely, and retract, cap, store, and dispose of blades safely.
- Avoid direct ironing, uncontrolled steaming, open flame, burning, and heated shaping.
- Ventilate and follow label instructions exactly for adhesives, sprays, coatings, and cleaners, and keep paper, dust, solvents, adhesives, and coatings away from heat, sparks, and flame.
- Keep blades, staples, clips, pins, punches, and small components away from children and pets.
- Secure small pieces flat before cutting or punching, and never hold a small component in the hand while cutting, drilling, or setting hardware.
- Avoid direct food contact and unsupported archival, waterproof, heat-resistant, electrical, child-safe, structural, navigational, or load-bearing claims.
- Retire a project when its paper, backing, adhesive, finish, closure, or hardware begins to fail.
Recycling Old Maps: What You Can Actually Claim
Use precise language here: “reuse,” “repurpose,” “use an obsolete map,” or “give existing paper another practical use.” Do not automatically call a project zero-waste, sustainable, green, recyclable, biodegradable, compostable, or plastic-free. Maps may include virgin or recycled fiber, synthetic fiber, plastic film, lamination, clay coatings, inks, varnishes, adhesives, pressure-sensitive tape, staples, labels, fabric backing, and waterproof treatments.
Plain, uncoated paper maps are often accepted where mixed paper is recycled, while laminated, plastic-coated, and synthetic maps generally are not — one recycler’s guide lists plain paper maps as accepted and laminated or plastic-coated paper as rejected (Millennium Recycling, Types of Paper). Programs may also reject moldy material, wet paper, small scraps, pressure-sensitive adhesive, paint, clear finishes, attached board, metal, and mixed-material projects. Confirm acceptance with the map publisher, paper manufacturer, local government, recycling authority, or waste service before making any claim — and do not assume a glued, coated, laminated, board-mounted, fabric-backed, or mixed-material project remains recyclable.
Above all, remember that an intact useful map may have greater value through navigation, education, donation, resale, research, or preservation than through crafting. Make the projects you actually need rather than cutting every map available.
Frequently asked questions
Practical organizers, keepsakes, gift pieces, and home accents: journal covers, travel-memory folios, document wallets, envelopes, gift bags and bands, keepsake boxes, magazine files, clipboards, letter caddies, index-card boxes, drawer-liner panels, tray inserts, bookcase backings, and suitcase linings. Choose projects that keep the map a meaningful part of the finished object.
Check whether it is still useful for navigation or emergency planning, and whether it has family, local-history, educational, research, or collectible value. Note the publication date, publisher, edition, scale, condition, and any annotations. If value is uncertain, photograph or scan it where lawful and consult a map dealer, librarian, archivist, or conservator before cutting.
There is no blanket rule. Maps are copyrightable visual works, fair use is decided case-by-case on all the circumstances, and personal use is not automatically fair use. Owning a physical map does not by itself grant the right to reproduce its artwork. When in doubt, get permission or use an original public-domain or properly licensed source.
Let sound, recently folded paper rest open on a clean flat surface, then place it between clean smooth boards under light distributed weight with protective interleaving. Do not iron, steam, soak, or spray unknown maps. Valuable, brittle, coated, laminated, mold-affected, or unknown maps should go to a professional conservator.
There is no single best adhesive. Wheat-starch paste and methylcellulose are reversible and gentle, PVA is strong but less reversible, and glue sticks, double-sided film, and spray adhesives each suit different jobs. Test on an expendable offcut of the same paper and substrate before committing.
Confirm ink stability first, apply a thin even layer of the adhesive the product calls for, place the map from one controlled edge, smooth with a clean barrier without overworking wet paper, and press the assembly flat between protective layers until fully dry. A thick, wet coat on thin paper is the usual cause of cockling.
Not automatically. A coating can darken, stiffen, cloud, or move ink on thin map paper, and it does not make a project waterproof, washable, or archival. Choose a finish only when the project genuinely benefits, and test it on an offcut first.
Plain, uncoated paper maps are often accepted where mixed paper is recycled, but laminated, plastic-coated, and synthetic maps generally are not. Glued, coated, board-mounted, or mixed-material projects should not be assumed recyclable. Confirm acceptance with your local program before claiming anything.
Final Thoughts: Keep What Matters, Craft What’s Left
The best old map crafts begin with restraint. Preserve the maps that still have navigational, historic, or sentimental value, and save the scissors for the clean, common, genuinely obsolete sheets that are ready for a second job. Start with one small, forgiving project — a gift band or a drawer-liner panel — test your adhesive and finish on offcuts, and let the map’s own geography and typography do the visual work. Reclaimed map paper is thin, creased, and finicky in places, but treated with respect it becomes polished, personal, and genuinely useful.
If this material-specific method appeals to you, the same inspect-then-test-then-build approach carries over to other reuse collections — see our guide to plastic bottle cap crafts for a parallel take on a very different material.
Posted by: Med Houssem · In: Cardboard Crafts, Upcycling