A discontinued showroom sample is an odd thing to own. It is dense, beautifully finished on every edge, often more interesting than anything you could buy by the yard, and completely useless for covering a chair. Sample books get retired, showrooms change collections, and a box of these rectangles ends up in a sewing room with no obvious next step.
The internet will tell you to make a tote bag. That works, but it skips almost everything that decides whether the finished object is worth keeping: whether the fabric is clean, whether the metal is out, whether there is enough usable area after the label hole and the glue mark are excluded, whether your machine can actually sew the seam, and whether the thing you made will still be holding together in a year.
This guide covers all of it, then gives you 15 projects that suit the real dimensions of upholstery scraps — plus the honest limits of each one.
Master Maker’s Calibration & Verification Note
Over two decades of designing and sewing with showroom sample books have taught me one cardinal rule: upholstery textiles vary wildly in density, backing, and hand—even across swatches from the same collection. While all measurements, needle selections, thread weights, and working times in this guide have been bench-tested and calibrated for real workshop projects, always treat them as reliable baselines. Run a quick 30-second test seam on a throwaway corner of your specific remnant to verify machine tension, turn-of-cloth, and press tolerance before making your final cuts.
What this guide assumes — and what it will not claim
The three kinds of upholstery material you might be holding. They are not interchangeable, and the differences decide what you can safely make.
- Clean, unused offcuts from your own upholstery or slipcover project. You know where they came from, what they are, and what has touched them.
- Legitimately released discontinued samples from a sample book, memo card, or showroom clearance. Clean, but usually modified — stapled, glued, labelled, punched, or heat-finished — and often stripped of the collection information that made them useful.
- Fabric removed from furniture. Different category entirely. Even when it looks pristine, its history is unknown: pest treatment, cigarette smoke, pets, spills, flooding, cleaning products, and foam degradation are all invisible on a swatch.
This guide builds projects from the first two. The third is not a crafting material until you can establish its history, and usually you cannot.
What “clean and unused” actually means. Unused describes the fabric’s service life, not its condition as a sewing material. A sample that has hung on a showroom ring for six years is unused and also faded on the exposed fold, crushed where the grommet sat, and stained where the adhesive label was. Clean means free of mold, mildew, pest activity, chemical residue, smoke, grease, bodily fluids, and persistent odour — and that has to be confirmed by inspecting it, not by assuming it. Vacuuming lint off a sample does not make it clean.
A note on performance ratings, recycling, and what a finished craft can promise. Upholstery fabrics are often sold with abrasion data — typically a Wyzenbeek double-rub figure tested under ASTM D4157, or a Martindale cycle count on fabrics sourced to European specifications. These are useful for identifying a fabric that was built to take wear. They are not a prediction of how your sewn object will behave. The rating describes the flat, supported, uncut face fabric in its intended application, and the Association for Contract Textiles has noted that abrasion results vary widely between tests on the same fabric, that Wyzenbeek and Martindale results are not convertible, and that rub counts above 100,000 have not been shown to extend service life. Once a sample is cut, folded, seamed, punched, backed, combined with a different lining, and loaded with objects, the original number describes almost nothing. Treat it as a hint about quality, never as a warranty.
The two tests are not the same test. Wyzenbeek uses a linear back-and-forth motion with a cotton duck abradant; Martindale uses a figure-of-eight motion with a worsted wool abradant. There is no reliable formula for converting one to the other.
And on recycling: a finished object made from a coated, backed, glued, stapled sample is a mixed-material assembly. It is not automatically recyclable anywhere, and no one can promise it will be accepted.
Save, donate, repurpose, or discard: a decision framework
Before a single project, decide what each piece is actually for. Working through these questions in order prevents the two most common outcomes: a box of unusable fragments and a bin bag of material you regret cutting.
1. Does it belong with the furniture? If you upholstered or bought a piece recently and have offcuts, keep a labelled amount sufficient to re-cover at least one seat cushion, arm panel, or the area a pet or child is most likely to damage. Store it with the furniture’s fiber and care information. Matching a discontinued fabric later is close to impossible; a labelled remnant is worth more than any project you could sew from it.
2. Is it worth more intact? An uncut, labelled, unused sample from a current or recently discontinued collection has value as a design reference, a resale item, or a repair match for someone else’s furniture. Cutting a pristine labelled sample into a coaster destroys that value permanently. If a sample is large, clean, and fully labelled, consider keeping it whole.
3. Should it go to another maker? Local creative-reuse centres, community sewing groups, school textiles departments, theatre wardrobe departments, and quilting groups regularly want clean upholstery samples and offcuts. A quilter making a heavy patchwork throw wants exactly the rectangles you find too small. This is often the highest-value destination for material you will not use.
4. Does it become a project? Yes when four things are true: the piece is clean and its history is known, the usable area suits a project you actually need, the fabric’s behaviour is compatible with your machine, and the finished object has a safe, realistic use.
5. Should it be let go entirely? Small, frayed, unlabelled, mismatched fragments that no project will consume are clutter with a textile label on it. Keeping only realistically useful offcuts is not wasteful — it is what makes the useful ones findable.
Contaminated, treated, or unidentified material — isolate and ask. If a piece has mold or mildew, pest damage, smoke or chemical odour, water staining, grease, or a history you cannot establish, isolate it from your working material and do not cut it. If you need a disposal answer, your local waste authority or a textile-recovery service is the source — not a craft blog and not this article. Guidance on mold and water-damaged textiles is genuinely specific: CDC guidance treats porous items that stayed wet for more than 24 to 48 hours as likely mold-affected, and directs that soft materials which cannot be washed and thoroughly dried be discarded rather than salvaged.
Where upholstery scraps and sample books come from
Clean offcuts from your own project
The best material in your sewing room. You know the fiber content, the collection, the colourway, whether it has been treated, and everything it has been exposed to. Label it the day you finish the furniture, not six months later. A strip of masking tape with the pattern name, fiber content, and date takes ten seconds and makes the offcut usable indefinitely.
Discontinued samples — and why permission comes first
Sample books are expensive, and they are not free material. They are usually owned by the manufacturer, the fabric representative, the retailer, or the designer who ordered them — and in many cases the book is expected back. Retired sample books are released constantly, but released means released by the owner, not found.
Ask directly. Interior designers, upholstery shops, furniture retailers, and fabric showrooms cycle through books regularly and are often glad to pass them on rather than store them. The right question is not “can I have these?” but:
- Does this book need to be returned to the manufacturer, representative, or supplier?
- Is it formally discontinued, or is it still an active selling tool?
- If I take it, is there a date or an event it needs to come back for?
Taking samples from an active showroom display is not sourcing. It is removal of someone else’s selling material, and it is the reason some showrooms stopped releasing retired books to the public at all.
What to record before you take anything apart
A sample book is also a reference document. Before disassembly, photograph:
- The cover and any collection name, brand, or manufacturer mark
- Every page or ring label showing pattern name and colourway
- Any fiber content statement, care guidance, or cleaning code
- Abrasion, flammability, or performance documentation
- The date, and the name of whoever released the material to you
These photographs cost nothing and are often the only surviving record once the staples and headers are gone. Fiber content matters because you cannot determine it by looking, and it determines how the fabric reacts to heat, water, and abrasion. Cleaning codes you may encounter on upholstery are W (water-based cleaners), S (solvent only), WS (either), and X (vacuum only) — worth photographing even though they describe the fabric as installed on furniture.
One regulatory detail worth knowing: under the U.S. Textile Fiber Products Identification Act, outer coverings of furniture are exempt from the labeling requirements — but that exemption is lost if a fiber-content claim is made anywhere on a label or in advertising. Practically, this means a sample carrying fiber information may have it because someone chose to state it, and a sample without it may simply be exempt. The absence of a fiber label is not evidence that the fabric has no meaningful composition. Separately, the FTC’s Care Labeling Rule applies to wearing apparel and certain piece goods, not to upholstered furniture or upholstery fabric — so many samples genuinely have no care instruction at all, and no amount of searching will produce one.
The other sources
Estate sales, upholstery shop clearouts, theatre and film set sales, hotel refurbishment liquidations, and creative-reuse centres all move this material. So do donation programs run by design-industry groups and textile-recovery organisations that collect surplus showroom samples. Availability, accepted materials, fees, and whether they take sample books vary by organisation and change over time — confirm current acceptance directly with the organisation before you plan around it.
Inspecting upholstery fabric before it enters your sewing room
The eight reasons to reject a piece outright
Do not cut these. Not for a test, not for a small project, not “just the good corner.”
- Mold or mildew — visible growth, dark spotting, or a musty smell that survives airing
- Pest damage or evidence — holes in clusters, frass, casing, or live activity
- Water damage — tide lines, staining, or a history of flooding
- Smoke or chemical odour — including the sweet or solvent smell some treatments leave
- Grease or oily residue — including transfer marks from machinery
- Bodily-fluid contamination — from any source, including pets
- Severe degradation — brittle backing that cracks when flexed, delamination, coating that has crazed or turned tacky
- Unknown history on fabric removed from furniture — if you cannot establish where it has been, it is not a crafting material
None of these is fixable at home, and hiding a rejected piece inside a finished project is how a sewing room grows a contamination problem.
Condition problems you can work around
Fading, crushed pile, pulled yarns, small holes, stable fraying, and a limited usable area are all design constraints rather than disqualifications. The trick is to plan around them before cutting, not after:
- Fading goes under a flap, inside a lining, or into the smallest panel
- Crushed pile becomes the back of an object or gets cut away
- Pulled yarns get stabilised with a small patch of fusible interfacing from the reverse before cutting
- Small holes are positioned inside a seam allowance — but only if enough sound fabric remains that the seam itself is not compromised
Finding hidden staples, grommets, pins, and cardboard
Assume every sample contains metal until you have personally checked it and put it in the reject bin. Common finds: staples through the header, staples through the fabric itself, grommets and eyelets from ring-bound books, wire clips, plastic hangers and spines, self-adhesive label backing, and cardboard or chipboard headers that conceal more staples under the glue.
Why a magnet is not proof. A magnet will locate many ferrous staples, which makes it a useful first pass. It will not reliably find stainless or aluminium grommets, brass eyelets, plastic clips, or a staple buried under a dense glue layer. Passing a magnet over a sample proves nothing except that the magnet found nothing. The only reliable confirmation is a full visual and tactile inspection of both faces, plus a bend-and-look test along every fold and seam line.
Removing sample-book hardware safely
Work on a stable surface, in good light, with the material flat. Eye protection is worth wearing for this step — staple legs and grommet fragments do travel.
- Photograph the labels and covers first.
- Remove any outer binding. Books are commonly held by long screws, heavy staples, or a glued spine. A screwdriver for leverage and the claw of a small hammer for staples are the usual tools; a dedicated upholstery staple remover is faster and safer if you have one.
- Work the fabric away from the header rather than pulling the header off the fabric. The goal is to preserve fiber, not to win.
- Remove staples individually with pliers, gripping the crown and rolling it out rather than levering upward. Rolling minimises the hole left behind.
- Cut around anything you cannot free cleanly. If a staple is welded to the fabric by adhesive or has torn through, cut a margin around it and discard that piece. Never sew over a staple you could not remove, even a fraction of one inside a seam allowance — this is the single most common way to break a needle, damage a machine’s timing, and send metal fragments into the bobbin area.
- Sweep the work surface and the floor for fragments before moving on. Do this after every session, not just at the end.
Removing paper labels, adhesive, and cardboard headers
There is no method that is safe for every sample, because the adhesive, the fiber, and any coating can each be damaged by a different approach. Work from the least invasive option outward, and test each one on a corner you were going to cut away anyway.
Option 1 — mechanical, always start here. Trim the label away with sharp shears or a rotary cutter, or peel it back slowly with the fabric supported flat. Many labels release cleanly with no chemistry at all.
Option 2 — design around it. If the label is permanently bonded, leaves a visible mark, or sits in a position where removal would weaken the fabric, leave it and plan the project so the label lands inside a seam allowance, behind a lining, or on an interior surface. A permanently adhered label is not a failure.
Option 3 — heat, with real caution. Some makers report that a dry iron over the backing for 10–20 seconds softens the adhesive enough to peel the paper away. This applies heat to two unknowns at once — the fiber and the adhesive — and it is exactly the wrong move for coated fabrics, faux leather, backed textiles, pile fabrics, and any synthetic you have not identified. Test on an offcut, use a press cloth, start low, and stop immediately if the surface changes.
Option 4 — water or solvent, only with information. Soaking, alcohol, and citrus-based adhesive removers all circulate as solutions. Each can cause shrinkage, dye bleeding, ring marks, coating damage, or adhesive migration deeper into the weave, and water can activate a water-soluble adhesive rather than release it. Do not soak a sample unless you know its fiber content and have tested the same operation on an offcut. Ventilate whenever you use any solvent-based product, and keep those products away from heat and flame.
Cleaning decisions you should not make for the reader
There is no universal washing temperature, detergent, bleach, or drying method for upholstery scraps, and any guide that offers one is guessing. Care requirements depend on fiber content, coating, backing, adhesive, and any finish that was applied to the face — and for many samples, that documentation does not exist.
The honest sequence is: look for documented care guidance, follow it if it exists, and if it does not, default to the least aggressive treatment and spot-test everything. Damp-wiping a small area with a barely damp white cloth, then letting it air dry completely, tells you more than any general rule. Test for colour transfer, shrinkage, and surface change on an offcut every time. And remember the CDC threshold for water damage: material that stays wet is the material that grows mold.

Sorting, measuring, and building a swatch inventory
Sort by behaviour, not by looks
A colour-coordinated pile of samples that fray, press, and stretch at completely different rates is not a usable stash. Sort into these groups first, then arrange by colour within each group:
- Weight and thickness — a light drapery weight and a heavy jacquard do not belong in the same seam
- Weave structure — tight plain weaves, twills, and canvas behave differently from loose basket weaves and tapestries
- Stretch — most woven upholstery has little or none; some backed knits do, and mixing the two creates a seam that will not lie flat
- Pile and nap — velvet, velour, chenille, and corduroy all show direction
- Backing and coating — latex, acrylic, foam, adhesive, and knit backings each change needle choice, pressing, and edge finishing
- Fray rate — cut a small test notch in a corner and see how fast it travels
- Condition — sound, sound with damage, and reject
- Usable dimensions — measured, not estimated
Measuring usable area after labels, holes, and damage
This is the step that decides which projects are available to you, and it is almost always skipped. Measure the sound, continuous, undamaged area that remains after excluding:
- Label holes and staple holes
- Glue residue and adhesive shadows
- Faded fold lines from the sample ring
- Crushed or flattened pile
- Damaged or frayed edges
- Areas with unstable dye or delamination risk
- Any motif you need intact for the design
Write the real number on the piece. “About 11 × 7 inches usable” (28 × 18 cm) is a working material. “A decent-sized sample” is not.
Recording what you know and flagging what you do not
Use the back of the fabric or a pinned paper tag, with a soft marking tool you have tested for show-through and removability. Record: collection, pattern name, colourway, fiber content if documented, backing or finish if known, source, date acquired, usable dimensions, and pile direction. Where the information is unknown, write “unknown” rather than a guess. An honest “unknown” tells you to test before pressing. A confident wrong guess tells you nothing and can ruin the piece.
How different upholstery fabrics behave under the needle
Upholstery fabric is not one material. It is a category that includes fabrics with almost nothing in common except weight and a marketing position. These differences decide how you cut, stitch, press, and finish.
Weave structures and what they do at a cut edge
- Plain weaves and canvas/duck — tight, stable, straightforward to cut and seam. Generally the easiest upholstery fabrics for a home machine. Cut edges fray but usually travel slowly.
- Basket weaves — interlace two or more yarns per pass. Looser and more prone to distortion and edge fraying than a plain weave of similar weight.
- Twills — diagonal float structure, dense and durable, generally well-behaved. Can be thick at a folded corner.
- Jacquards and tapestry-style fabrics — complex patterned weaves with many floats. Beautiful and structurally dense, which means bulky seams, thick corners, and a real risk of needle deflection. Grade seam allowances aggressively.
- Chenille — a pile yarn with short fibers protruding all around. Soft, heavy, and prone to shedding and pulling at cut edges. Every edge needs securing before the piece is handled much.
- Velvet and velour — cut pile with a strong nap. Shows direction, crushes under pressure, and demands special pressing support. Cut pile also hides pins and clips extremely well, which is a safety issue as much as a construction one.
- Corduroy — cut pile in ridges. Directional, crushes, and can shift at the seam line as the pile layers compress.
- Faux suede — usually a synthetic microfiber with a nap. Presses poorly, holds marks, and behaves more like a nonwoven than a weave.
- Faux leather and coated textiles — non-woven or knit base with a polymer face. Every needle hole is permanent, the surface sticks to a metal presser foot, and the face can mark from clips left in place.
- Outdoor-rated fabrics — often solution-dyed acrylic or polyester with a treatment. Resistant as a fabric; that resistance does not transfer to a sewn object with seams, lining, and hardware.
Why fiber content cannot be judged by appearance
Two samples can look identical and behave nothing alike. Cotton shrinks, takes heat well, and frays steadily. Linen is stronger wet than dry but creases hard and frays aggressively. Polyester resists abrasion and moisture but can melt, glaze, or glaze-permanently under an iron. Acrylic is soft and heat-sensitive. Nylon is very strong and very heat-sensitive. Rayon-derived fibers can be weak when wet and unstable in dimension. Wool presses beautifully with steam and can felt or shrink with heat and agitation. Blends combine all of these unpredictably.
There is no reliable visual, tactile, or burn test a home maker should be performing. Burning fiber is a genuine fire hazard and an uncontrolled chemical exposure, and smell-based identification is unreliable at best. If you do not have fiber documentation and you cannot obtain it from the manufacturer, treat the fabric as heat-sensitive and moisture-sensitive, test on an offcut, and choose a project that tolerates uncertainty.
Coatings, backings, and hidden layers
What you feel on the front tells you very little about the back. A sample that reads as a clean woven wool may carry a latex backing, an acrylic back-coating, a foam laminate, an adhesive layer, or a knitted backing. Each of those changes:
- What needle will penetrate without dragging
- Whether the fabric can be pressed at all
- Whether water, solvent, or heat will delaminate it
- How it behaves at a cut edge
- Whether it can be folded sharply
Always look at the back before you plan a project. If the reverse is coated, shiny, rubbery, foamy, or tacky, research the specific product before applying heat or moisture, and test everything on an offcut.
Pile, nap, and direction
Pile fabrics change shade depending on which way the surface faces the light. Two velvet panels cut in opposite directions and sewn side by side will look like two different colours, even from the same sample. On a single small sample, this is not always avoidable — so it becomes a design decision. Either keep every pile piece running the same direction, or commit to alternating direction deliberately as a visible striped effect. What you must not do is alternate by accident.
Mark pile direction on the back of every pile piece with an arrow as soon as it is measured.
Fabrics that were never meant for a home sewing machine
Some upholstery fabrics are specified for professional fabrication — heavy coatings, thick foam-backed textiles, dense multi-layer jacquards, and materials designed for a walking-foot industrial machine with a compound feed. A home machine can often handle the same fabric in a single layer or a simple two-layer seam, and will refuse a folded, lined, interfaced, hardware-reinforced stack.
There is no shame in this. Redesign to reduce the stack — eliminate the lining, use a bound edge instead of a turned one, replace a boxed corner with a dart, split the project into two simpler pieces — or have the heavy construction done professionally. Forcing a domestic machine through a stack it cannot feed is how needles break, timing goes out, and fingers get hurt.
Pattern planning and cutting without waste
Match the project to the sample, not the other way round
This is the core discipline with sample-based sewing, and it is the opposite of how most sewing works. You do not choose a project and then buy the fabric. You inventory the samples you have, and you choose a project whose pattern pieces fit inside the usable areas you actually measured.
A sample book page contains a set of rectangles. That is the constraint. Within it:
- The largest sound pieces become the primary panels
- Medium pieces become pockets, flaps, and linings
- Small pieces become pocket dividers, tabs, binding strips, and reinforcement patches
- Pieces with holes or labels become anything where the hole falls outside the finished object or inside a seam
Making paper patterns and arranging them first
Cut full-size paper patterns — newspaper, pattern paper, or plain newsprint is fine — and arrange them on the sample before anything is cut. Photograph the arrangement. This costs two minutes and prevents the single most expensive mistake in this whole category: cutting a panel in the wrong orientation on the one sample that would have worked.
Include the seam allowance and a turn-of-cloth allowance in the paper pattern itself, sized to your actual fabric thickness rather than to a standard. Thick fabric consumes more length when folded around a corner or over a seam; on a heavy jacquard that can be a visible 1/8 inch (3 mm) per fold, and it compounds at a corner — fold a scrap around a scrap of your chosen lining or stabilizer and measure the gap to determine the exact millimetric offset needed for your build.
Pattern matching across panels
Where a project has two joined panels:
- Stripes and checks — match at the seam line, and decide before cutting which part of the repeat sits at the seam
- Large motifs — decide which motif is centred on which panel, and make sure both panels can accommodate it
- Geometric patterns — match the strongest line, not every line
- Pile — every pile panel runs the same direction unless the alternation is deliberate
- Paired items — mirror the placement so a left and right piece read as a pair rather than as two unrelated panels
When exact matching is impossible — which, with samples, it often is — do not force it. Switch to controlled colour blocking: deliberate, repeated, consistent blocks in a fixed sequence. A colour-blocked object reads as designed. A badly matched object reads as a mistake. There is more on this in the aesthetic section.
Marking
Mark on the less visible side with a tool you have tested on an offcut for show-through and removability. Chalk, removable fabric marker, and tailor’s tacks all behave differently on coated, piled, and dark fabrics. Test before you mark a visible surface. Never use a permanent marker on a project.
Cutting
- Sharp fabric shears for anything with pile, coating, or a delicate finish
- A rotary cutter, ruler, and cutting mat only with a stable, fully supported cutting surface and a hand position that keeps the supporting hand behind the blade path
- Cut away from your body, always
- One manageable layer at a time when thickness, pile, or a coating reduces accuracy
- Clips instead of pins wherever pins distort the fabric, disappear into pile, or leave permanent holes — which covers coated, piled, and heavy fabrics
- Containing loose fibers as you cut; a lint roller and a damp cloth are more useful than compressed air, which spreads fine fiber and dust through the room and into your lungs
Machine setup for heavy fabric
Needles: type first, size second
Needle type matters more than size, and the wrong type either damages the fabric or breaks.
- Universal needles are a compromise point, suitable for general woven work. Available well into the heavy sizes, including 100/16 for heavyweight fabric and bag-making and 110/18 for extra-heavyweight fabric such as upholstery.
- Jeans/denim needles have a modified medium ball point and a reinforced blade, designed to penetrate thick, dense wovens with less deflection. They are available up to 110/18 and are a strong general choice for canvas, twill, and densely woven upholstery.
- Leather needles have a cutting point. On genuine leather and heavy non-wovens that is exactly what you want. On woven and knitted textiles it is the wrong tool — the cutting point severs the weave and creates a line of weakness along every stitch. If a tutorial tells you to use a leather needle on upholstery fabric generally, that advice is wrong for anything woven. For thin faux leather and faux suede, a sharp Microtex-style needle is the more common recommendation.
- Microtex / sharp needles are for fine faux leather, faux suede, and tightly woven fabrics where a clean penetration matters.
- Needle system matters on industrial machines. Upholstery work on a walking-foot industrial machine typically uses the DPx17 / 135×17 round-shank system, which is not interchangeable with the flat-shank 130/705 H needles a domestic machine uses. Buying the wrong system is a common and entirely avoidable waste.
Size guidance: heavier fabric, more layers, and denser weave all call for a larger needle. Replace bent, blunt, or damaged needles immediately — a dull needle on dense fabric generates heat, skips stitches, and pulls the weave. Change the needle at the start of a heavy project rather than partway through.
Thread: matching the thread to the job
For upholstery-weight sewing, the two common heavy-duty families are bonded polyester and bonded nylon, both resin-coated to reduce friction and resist abrasion.
- Bonded polyester is the usual choice where sunlight and moisture are factors — it resists UV and moisture better and does not go brittle in the sun.
- Bonded nylon is the usual choice for indoor, abrasion-heavy work — stronger, but it degrades with prolonged UV exposure.
Common weights run from about Tex 70 (often labelled #69 or V69), a general-purpose upholstery weight, through Tex 90 and V92 / Tex 105 for heavier work, upward from there. A 3.5 mm stitch length is commonly recommended for stable upholstery seams.
The practical catch: a domestic machine may not tension a heavy thread reliably, and many home machines cannot use the largest sizes at all. Heavy thread also needs a needle with a large enough eye to carry it. Before committing to a heavy thread for a whole project, wind a bobbin, thread the machine, and sew a test seam on the actual layered stack. If the machine will not tension it, move to a good-quality all-purpose polyester thread sized for the fabric and rely on construction — reinforcement, doubled seams, bar tacks — rather than on thread diameter. Thread that puckers the work is not stronger; it is just puckered.
Stitch length, tension, and presser-foot pressure
Longer stitches suit heavy fabric: they put fewer perforations into a dense weave and reduce the risk of tearing along a seam line. Shorter stitches on heavy fabric produce a perforated line that can give way.
Adjustments are machine-specific, and the machine’s own manual outranks any general recommendation — including the ones in this article. Common adjustments for heavy work include lengthening the stitch, reducing presser-foot pressure where the machine allows it so the layers are not compressed unevenly, and checking upper tension on a test seam rather than by eye.
Test every setting change on a layered offcut that duplicates the real seam: the same fabric, the same number of layers, the same interfacing, the same lining. A setting that works on two layers of canvas tells you nothing about six layers of canvas, interfacing, and lining at a corner.
When a walking foot earns its place
A walking foot — also called an even-feed foot — moves the upper layers along with the feed dogs instead of letting the presser foot drag across them. On upholstery scraps it is genuinely useful when:
- Layers are thick, or of different weights
- One layer is coated, slippery, or pile
- Patterned pieces must stay aligned through a long seam
- Stripes or checks must match at the end of a seam
Note that a walking foot typically sews straight and zigzag stitches only, which covers most construction work. On some coated surfaces it can also leave marks — test it on an offcut before running it across a visible panel.
Getting over a bulky seam without breaking a needle
Bulky seams break needles because the presser foot tips up as it climbs, lifting the feed dogs off the fabric and letting the needle deflect. The fix is to keep the foot level, not to push harder.
- Reduce the bulk first. Grade the seam allowances — trim each layer progressively narrower so the layers stack in a taper instead of a ridge. Trim interfacing out of seam allowances where the structure allows it.
- Use a hump jumper. A small wedge placed under the back of the presser foot just before the needle reaches the thick section keeps the foot level and keeps the feed dogs engaged. Slide it along and remove it once you are past. Do not improvise this with a button, a sewing gauge, or any hard loose object — those can break and fly.
- Start away from the corner. Begin the seam on flat fabric and sew toward the bulk rather than starting inside it.
- Hand-walk the difficult section. Turn the handwheel stitch by stitch through a thick intersection.
- Never force the fabric and never pull it from behind the presser foot. Both bend needles, and pulling from behind deflects the needle into the throat plate.
- Compress heavy seams if the fabric allows it. A tailor’s clapper or a light tap with a tailor’s hammer on a reinforced woven seam can flatten fibers. This is not appropriate for coatings, pile, or delicate surfaces.
- If a needle does break, stop, unplug the machine, and find every fragment — including any that landed in the bobbin area — before sewing again.
When your machine is not the right tool
If a test stack skips stitches, stalls, deflects the needle, or produces a wobbly seam no matter what you adjust, the machine is telling you the design is wrong, not that you need to push harder. Reduce the stack, change the construction, or have the piece sewn professionally. Domestic machines are not designed for every upholstery assembly, and no project in this guide requires one that is.
Edge finishes, seams, structure, and closures compared
There is no universally best method. The right finish depends on the fabric, the project, whether it will be handled or washed, and whether you can afford the bulk.
Quick comparison table
| Method | Works best on | Bulk added | Reversible? | Main limitation |
|---|---|---|---|---|
| Existing finished sample edge | Samples with a heat-sealed, serged, or woven-edge finish | None | Yes | Finish may be damaged by wear or cleaning |
| Narrow double-fold hem | Light-to-mid wovens, straight edges | Low | Yes | Hard to fold neatly on thick or coated fabric |
| Single-fold hem + overcast | Mid-to-heavy wovens | Low | Yes | Raw edge still needs securing |
| Zigzag / overcast | Most wovens; good on loose weaves | Very low | Yes | Visible; not a fine finish on a face surface |
| Serged | Wovens that fit under the serger | Very low | Yes | Not all heavy fabrics fit or feed reliably |
| Bias binding | Curved edges, thick fabrics, visible accents | Medium | Yes | Bias binding on thick fabric adds real bulk at the join |
| Straight-grain binding | Straight edges, thick fabrics | Medium | Yes | Does not flex around curves |
| Turned and topstitched | Mid-to-heavy wovens, visible edges | Medium | Yes | Requires accurate turning; adds a visible stitch line |
| Fully lined | Anything needing a clean interior | Medium-high | Difficult | Multiplies the stack at every seam |
| French seam | Light-to-mid wovens only | Medium | No | Too bulky for heavy fabric — do not use here |
| Flat-felled / lapped | Mid-weight wovens, stress seams | Medium | No | Difficult to keep even on thick or piled fabric |
| Boxed corner | Trays, pouches, bins | High at corners | No | Corner stack can defeat a domestic machine |
| Dart / folded corner | Thick fabrics where a boxed corner is impossible | Lower than boxed | No | Changes the shape; less capacity |
| Interfacing | Almost anything, weight-matched | Varies | Usually no | Fusible types can damage the face |
| Sew-in stabilizer | Coated, heat-sensitive, pile fabrics | Varies | Yes | Needs basting to stay put |
| Removable rigid insert | Trays, sheaths, slings, mats | High | Yes | Must be fully enclosed, no sharp edges |
| Zipper | Pouches, cases | Medium | Difficult | Ends must be reinforced and concealed |
| Buttons + reinforced loop | Closures on mid-heavy fabric | Low | Yes | Loop must be reinforced or it stretches |
| Snap through reinforcement | Cases, rolls, small flaps | Low | No | Pulls through unreinforced fabric |
| Hook-and-loop | Light closures, dry use only | Low | No | Abrades other fabric; degrades with lint and washing |
| Rivets / grommets | Mounting points, hanging panels | Low | No | Requires manufacturer guidance for the fabric and use |
| Fabric adhesive | Light-duty, dry, non-loaded, non-washed | None | No | Not structural; can stiffen, discolour, or fail |
Hand-finished and bound edges
Existing finished sample edges. Many samples arrive with a heat-sealed, serged, or woven-edge finish. This is a genuine advantage — use it as the top edge of a pouch, the opening of a pocket, or the visible edge of a panel, and you have saved yourself a finishing step on fabric that resists folding. Inspect it first: a heat-sealed edge can become brittle, and a serged edge can be loose. Do not assume the original finish will survive cleaning or heavy handling.
Narrow double-fold hem. The default clean finish for straight edges on light-to-mid wovens. Tools: iron, measuring gauge, pins or clips. Low bulk, reversible, invisible from the front. On heavy or coated fabric, folding twice creates a ridge that shows through and can distort the panel — use binding instead.
Single-fold hem with overcast edge. A good compromise on mid-to-heavy wovens where a double fold is too bulky. The raw edge is overcast or zigzagged, then folded once and topstitched. Reversible, low bulk, and visibly a working finish rather than a couture one.
Bias binding. The go-to finish for curved edges and thick fabrics, and the most reliable way to finish a heavy raw edge cleanly. Cut or buy bias binding, wrap the raw edge, and stitch through all layers. Watch for bulk where binding joins itself, and be aware that on very thick fabric the binding itself becomes the thickest part of the seam.
Straight-grain binding. Use on straight edges where a bias cut would waste fabric — which, with samples, is often the deciding factor. Does not flex around curves.
Machine-overcast edges
Zigzag or overcast. The lowest-bulk way to stabilise a fraying edge, and the most accessible if you do not own a serger. Suitable for most wovens. Visibly a utility finish, so keep it inside or on the reverse.
Serged. Faster and neater than zigzag where the fabric feeds reliably. Heavy, coated, and piled fabrics can defeat a domestic serger, and serged edges are not appropriate where the edge will be visible.
Enclosed construction
Turned and topstitched. Sew, turn, press, and topstitch to close. Creates a clean, professional edge and works on most mid-to-heavy wovens. Requires accurate turning and adds a visible topstitch line, which is usually an asset — a consistent topstitch is one of the strongest tools for making mismatched samples read as a set.
Fully lined. The cleanest interior and the best choice for anything holding small items, glasses, or jewellery. Every seam carries double the layers, so it must be planned around rather than added on.
French seams. Only where fabric bulk genuinely permits — light-to-mid wovens. On upholstery-weight fabric the folded seam becomes a hard ridge. Not recommended for any project in this collection.
Flat-felled or lapped seams. Strong, durable, and excellent for stress seams on mid-weight wovens. Difficult to keep even on thick or piled fabric, and visible from both sides.
Shaping: boxed corners, darts, folded corners
Boxed corners create a flat-bottomed, three-dimensional shape — the standard for trays and pouches with depth. The cost is a corner stack of four to six layers plus interfacing, which is the most demanding thing you will ask a domestic machine to do. Plan the corner, test the corner, and be ready to switch to a dart if it fails.
Darts and folded corners achieve a similar shape with less stacking. Less capacity, and a different silhouette, but far more likely to sew cleanly on thick fabric. On a heavy jacquard or a foam-backed sample, a dart is often the right answer.
Structure: interfacing, stabilizer, rigid inserts
Interfacing gives a panel body so it holds a shape rather than collapsing. Weight-match it to the fabric — a heavy interfacing on a drapery-weight sample turns it into cardboard. Fusible interfacing carries real risk on unknown upholstery fabric: heat plus adhesive plus a coating can produce show-through, a damaged face, or a bond that fails later. Do not fuse anything until you have tested the exact combination on an offcut.
Sew-in stabilizer is the safer choice for coated, heat-sensitive, and pile fabrics because it never touches the iron. It needs basting or careful pinning or clipping to stay in position during construction.
Removable rigid inserts are how trays, sheaths, slings, and desk mats hold their shape without making the object un-washable. They must be fully enclosed, with no sharp edges and no possibility of working their way out. Where cleaning requirements differ between the outer fabric and the insert, removable is the only sensible design.
Closures and set hardware
Zippers. Reinforce both ends with a bar tack or a short row of narrow zigzag before the zipper is installed, not after. A zipper that pulls out at the end takes the surrounding fabric with it. Conceal or enclose the zipper ends so no sharp metal is exposed on the finished object — particularly on anything that will sit against a hand, a face, or a bag interior.
Buttons and reinforced loops. The button is rarely the failure point; the loop is. Reinforce the loop with interfacing or a doubled layer, and use a bar tack rather than a plain seam to anchor it.
Snaps through reinforced areas. A snap set into a single layer of upholstery fabric will eventually pull through under repeated opening. Add a small patch of interfacing or a doubled fabric square at each snap location before setting it.
Hook-and-loop. Convenient, low-profile, and dry-use only on a project like this. It abrades anything it touches, collects lint and fiber, and degrades with washing. Do not use it as the only closure on anything holding sharp items.
Rivets, grommets, and other set hardware. Only where the manufacturer’s guidance supports the fabric weight and the intended use, and only with the correct setting tool. An undersized or badly set grommet tears out under load. Set hardware on a stable surface with the work secured — never hold a small fabric piece in your hand while punching, drilling, or hammer-setting hardware.
Fabric adhesive — and where it stops being enough
Fabric adhesive is appropriate for light-duty, dry, non-loaded, non-washed applications: tacking a flap in place before stitching, securing an interior pocket that will also be stitched, holding a hem while you sew it.
It is not appropriate as the only attachment for anything that will be loaded, hung, folded repeatedly, handled, or washed. Adhesive alone is not a seam. It also stiffens the fabric, can discolour through a light face fabric, and can fail gradually in a way that is easy to miss until the object drops its contents.
Linings, stabilizers, and reinforcement
Choosing a lining that suits the contents
The lining touches your belongings, so it decides whether the project is pleasant to use.
- Glasses and jewellery — a smooth, tight-weave lining that does not shed fiber. Cotton batiste, fine cotton, or a smooth synthetic lining. Do not claim scratch protection or anti-tarnish performance; a soft lining reduces contact, and that is all anyone can honestly promise.
- Sewing tools and needles — a lining that will not be punctured easily, ideally a tightly woven cotton over a reinforced area where needles are stored.
- Desk and dry storage — any firm woven lining works; choose one that does not transfer dye.
- Anything dyed dark — test the lining against the outer fabric for colour transfer before construction, especially where the outer fabric is a saturated colour and the lining is light.
Fusible or sew-in — decide after testing
Fusible interfacing is convenient and works well on stable, heat-tolerant wovens. It is a risk on everything else. Before fusing anything: check the fabric’s fiber information, check the interfacing’s instructions, test the exact combination on an offcut, look for adhesive show-through from the front, check whether the face has changed texture or colour, and let the piece cool completely before judging the bond. Adhesive show-through is usually permanent.
Sew-in stabilizer adds a step and solves several problems at once: no heat, no adhesive, no show-through risk, and removability. On coated, backed, piled, or unidentified fabric, start there.
Supporting anything that hangs or holds
Two rules for anything that hangs on a wall, a door, or a piece of furniture:
1. Calculate the completed weight before you mount it, not after. Weigh the empty object, estimate the contents you actually intend to put in it, and add them. Then compare that number against what the mounting point is rated for. A pocket panel that holds two hundred grams of pens is a very different proposition from one that holds a kilogram of tools.
2. Give the fabric a reason not to sag. Hanging panels need a stable backing — a firmly woven canvas, duck, or interfaced panel — with pockets attached to it, not fabric hanging free. Pocket openings need reinforcement at the top edge. Mounting points need reinforcement too: a grommet set into a single layer of fabric will elongate or tear out.
Keep contents lightweight, dry, and non-fragile. Hanging organizers are not for drinks, hot objects, sharp tools, heavy electronics, valuable breakables, or medication.
Rigid inserts without sharp edges
For trays, sheaths, slings, and desk mats, a rigid insert is what stops the object from collapsing. Cut the insert with rounded corners, sand or tape any cut edge, and enclose it completely in fabric with no route for it to work loose. Choose a material that tolerates the moisture it will realistically meet — a desk mat sees damp mugs nearby, a scissors sheath does not. Make the insert removable wherever the cleaning needs of the outer fabric differ from the insert’s tolerance.
Matching hardware weight to project weight
Oversized hardware distorts small samples: a heavy zipper pulls a light panel out of shape, and a large grommet in a small hanging tab tears the tab. Match hardware to the scale of the piece, and remember that lighter hardware on a small object usually looks more considered than heavy hardware does.
Pressing and finishing upholstery scraps
Before the iron comes out
Check three things: the fiber information you have, the care or cleaning guidance you have, and whether the back is coated, backed, or unknown. If any of those is unknown, treat the fabric as heat-sensitive until an offcut proves otherwise.
Then test: temperature, steam, pressure, and your press cloth, on a scrap of the actual fabric with the actual layers you intend to press. Press cloths are not optional on upholstery samples — they protect the face from shine, glaze, and direct heat, and they contain any adhesive transfer.
What heat does to each family
- Synthetics — polyester, nylon, and acrylic can melt, glaze, shine permanently, or shrink. Use the lowest effective temperature, ideally no steam, and lift rather than press.
- Coatings, backings, and adhesives — can delaminate, blister, transfer to the iron, or turn tacky. Do not press a coated surface directly. On unknown coatings, do not press at all until an offcut test proves it safe.
- Faux leather and faux suede — press from the back only, at low temperature, with a press cloth, or not at all.
- Velvet and chenille — flat pressing crushes the pile permanently. The usual approach is to support the pile: press from the reverse over a thick towel or a needle board, use steam rather than pressure, and never rest the iron on the face. Test this on an offcut before applying it to a finished panel, because pile fabrics vary enormously in how much they recover.
- Wool and wool blends — take steam and shaping well, but heat plus moisture plus movement can shrink or felt them.
- Cotton and linen — the most heat-tolerant of the common upholstery fibers, and still capable of scorching, shining, and shrinking.
Pressing seams without crushing texture
Press the seam as sewn, then press it open or to one side, using the tip of the iron and a press cloth rather than the flat of the soleplate. Let the fabric cool completely before moving it — a hot seam that gets handled immediately will distort, and a fusible that is moved while warm will bond unevenly or come away. A tailor’s clapper is useful on heavy woven seams; skip it on coatings and pile.
Finishing, curing, and cooling
Any added fabric protector, sealant, or adhesive finish changes the fabric: its hand, its appearance, its flexibility, and its future cleanability. If you use one, follow the manufacturer’s ventilation and curing instructions exactly, allow the full curing time before the object contacts anything, and test on an offcut for colour change and stiffness first. A coating applied to a sample also changes what can be done with that sample later — including whether it can be cleaned or donated.
Switch off and unplug the iron and any other equipment after use, following the manufacturer’s instructions. Keep the iron away from loose fibers, adhesives, solvents, and cords, and never leave it where a child or a pet can reach it.
Desk and home organization projects
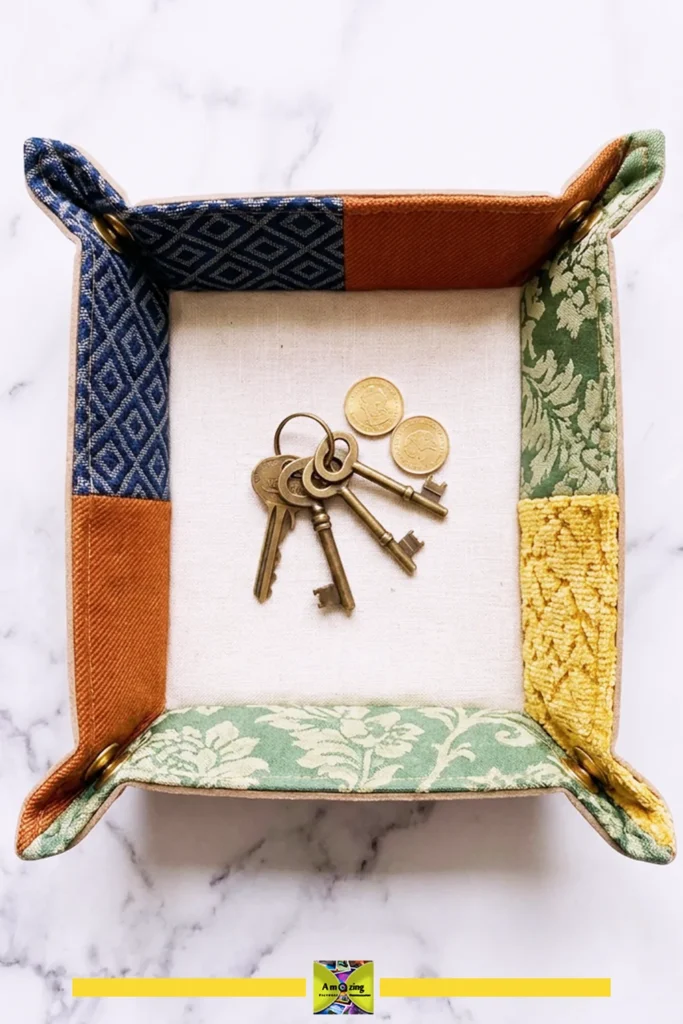
1. Coordinated Swatch Fold-Flat Catchall Tray
What it looks like. A shallow, open tray with softly structured sides that stand up on their own and fold flat for storage. Four outer panels of coordinated samples form the sides, with a matching or contrasting lining and a removable rigid base that gives the whole thing a flat floor.
Best use. Keys, coins, hair ties, sewing notions, paper clips, and dry desk supplies on a console, nightstand, or entry table. Ideal for using up four samples of similar weight that are too small for anything else.
Difficulty. Intermediate. The construction is simple; the corner stack is not.
Approximate time. 2–3 hours, excluding fabric preparation
Materials
- Four outer panels of coordinated upholstery samples, each cut to your pattern (sized to match your specific swatch dimensions)
- Lining fabric: 1 piece per outer panel, plus 1 base panel
- Fusible or sew-in interfacing for the outer panels, weight-matched (test first)
- Rigid base insert: bookbinder’s board, heavy chipboard, or a rigid plastic sheet, cut to the base dimension
- Four snaps or a pair of ribbon ties to hold the folded shape
- Coordinating all-purpose or heavy-duty polyester thread
Tools
- Paper pattern material, ruler, chalk or removable marker
- Fabric shears, rotary cutter, mat
- Sewing machine with a fresh needle suited to the fabric
- Clips (not pins, on thick or coated samples)
- Iron and press cloth
- Awl or hole punch and snap-setting tool if using snaps
Instructions
- Measure your four samples and decide the finished tray dimension that fits inside the smallest one with seam allowance and turn-of-cloth to spare. Draw a full-size paper pattern and check it against every sample before cutting.
- Cut four outer panels, four lining panels, and one lining base panel. Cut the rigid insert to the base dimension, minus a small allowance so it slides in and out easily. Round the insert’s corners and smooth any cut edge.
- Interface the outer panels if your test shows the fabric needs body. A tray made from drapery-weight samples will collapse; a tray made from heavy jacquard may not need interfacing at all.
- Sew each outer panel to its lining panel, right sides together, along the top edge only. Turn, press carefully within the fabric’s tolerance, and topstitch the top edge. This gives every side a clean finished upper edge.
- Join the four side panels into a ring, sewing outer-to-outer and lining-to-lining. Grade the seam allowances hard at each join — this is where the bulk will fight you.
- Sew the lining base to the lining ring, then the outer base to nothing yet. Turn the ring right side out through the base opening.
- Sew the outer base to the outer ring, leaving a gap for turning. Turn the tray right side out through the gap, then close the gap by hand or machine.
- Insert the rigid base into the tray floor through the closure. It should sit flat and fully enclosed.
- Mark and set snaps at the four corners, or attach ribbon ties, so the sides can be held up in use and released to fold flat. Reinforce each snap location with a small interfacing patch before setting it.
- Test the tray on the surface it will actually live on. If it rocks, check the insert for flatness before blaming the sewing.
Customization. Alternate two colourways around the ring for a checkerboard effect. Use a contrasting lining as a deliberate interior surprise. Replace snaps with a single wrap tie in matching binding. Cut all four panels from one large sample if you have it and let a single motif run continuously around the tray. Add a small leather or faux-leather tab to the base for lifting the insert out.
Practical tip. Set the tray up on a scrap of the intended surface while it is still unsewn and loaded with the actual contents. A tray sized by eye is almost always too shallow for what it ends up holding.
Common mistake. Skipping the removable base because the fabric feels stiff enough on its own. Stiff upholstery fabric flexes under a load and the tray develops a permanent dip in the middle. The insert is what makes it a tray rather than a fabric dish.
Safety note. All cut edges of the rigid insert must be enclosed or smoothed. This object sits on finished furniture and gets handled constantly, so a sharp insert corner will eventually find a hand. Dry use only — this is a decorative storage object, with no food-contact or heat-protection role.
Material fit and construction notes
- Suitable fabrics: Mid-weight wovens with similar thickness — cotton duck, twill, mid-weight jacquard, linen blends. Very heavy or coated samples make the corners unsewable.
- Minimum practical sample size: Each side panel plus seam allowance and turn-of-cloth; typically around 6 × 6 in (15 × 15 cm) usable per side. (sized to your final drafted template)
- Do not substitute without testing: Coated, foam-backed, or adhesive-backed samples — they will not hold a crisp fold and may mark permanently where folded.
- Adapting to your swatches: If your four samples differ in size, make the tray rectangular and use the smallest sample to set the short dimension.
- Match panels for: Thickness above all. A tray with one thick panel and three thin ones will not sit level.
- Direction: Match pile direction on all four sides, or alternate it deliberately all the way around.
- Structure: Interfacing optional and fabric-dependent; rigid insert required and removable.
- Seam and edge finish: Topstitched upper edges, graded seams at the corners, base closed by hand or machine.
- Test first: Interfacing adhesion if used, snap setting on a doubled scrap, and a full corner stack on the machine.
- Closure reinforcement: Interfacing patch behind every snap before setting.
- Intended contents and limits: Lightweight dry items only. Not for liquids, food, hot objects, or anything that could scratch through a seam.
- Cleaning and storage: Remove the insert, spot-clean or hand-wash the fabric only if documented care allows, dry completely, then replace the insert. Store folded flat.
- Repair or retire if: The insert becomes exposed, the snaps pull through, the base panels delaminate, or the tray stops sitting flat.
Maker’s Workshop Note: When installing metal snaps at the four corners, test your snap-setter on a four-layer fabric scrap first. Upholstery samples with latex backing or dense jacquard weaves can be too thick for standard light-duty pronged snaps. I rely on heavy-duty Line 20 post-style snaps, or sew handsome leather tabs with horn buttons if the corner sandwich exceeds 1/4 inch (6 mm) in thickness.
2. Measured Armchair or Sofa-Arm Organizer
What it looks like. A fabric panel that drapes over an arm, with a flat section that tucks under the seat cushion to hold it in place and balanced pockets on the outer face. Made from two or three coordinated samples with a firmly woven backing panel.
Best use. Keeping a remote, reading glasses, a notepad, and a pen near a chair without cluttering the side table. Best for lighter-weight samples — the object has to hang without pulling itself off the arm.
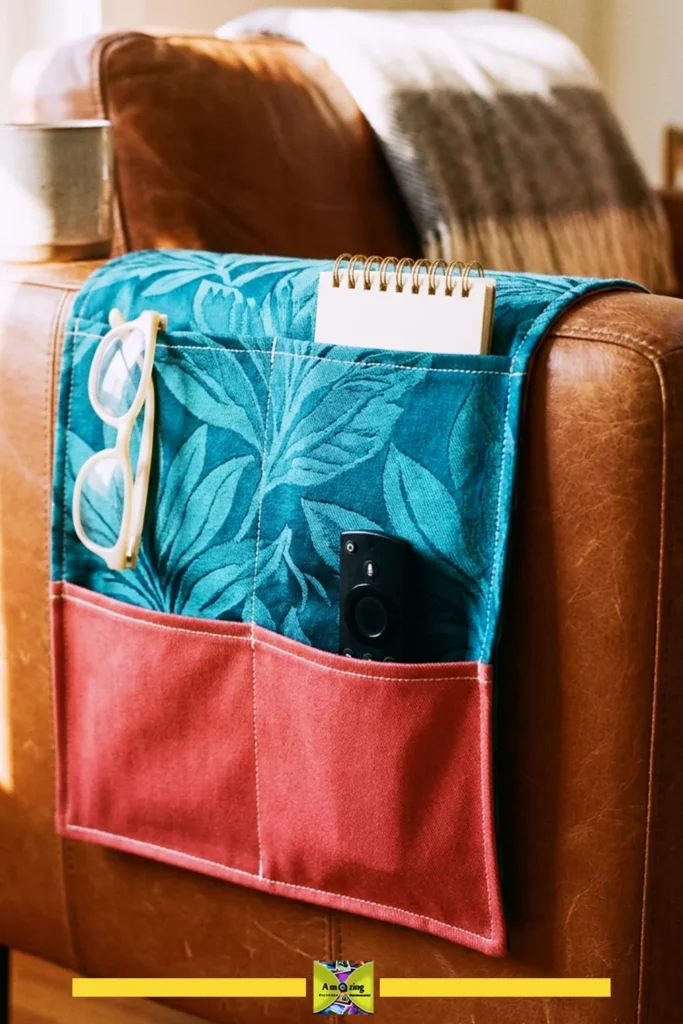
Difficulty. Intermediate. The sewing is straightforward; the fitting and load planning are the real work.
Approximate time. 3–4 hours including measuring and fitting
Materials
- Two to three coordinated samples for the pocket panel
- One firmly woven panel for the body and the under-seat section — canvas, duck, or interfaced upholstery fabric
- Lining or facing for the underside
- Interfacing or sew-in stabilizer for pocket edges
- Bar-tack thread or heavy-duty polyester thread
Tools
- Tape measure, paper for a fitting template
- Fabric shears, rotary cutter, mat
- Sewing machine, fresh needle suited to the fabric
- Clips
- Iron and press cloth
Instructions
- Measure the actual furniture. You need the arm width front to back, the arm’s drop on both sides, and the distance from the arm’s inner edge to the seat’s centre so the under-seat panel reaches far enough to be held. Measure with the cushion in place and with it lifted, and write both numbers down.
- Make a paper template of the drape and test-fit it on the furniture before cutting fabric. Adjust until it hangs straight and does not interfere with anything that moves.
- Cut the body panel, the under-seat panel, and the pocket panel from your samples. Join pocket and body pieces only where the panel needs to be wider than one sample.
- Interface or reinforce the top edge of every pocket before attaching anything. This is the edge that takes all the wear.
- Position the pockets on the body panel and check the balance visually — pockets that sit level on the table often look uneven once the piece is draped over an arm. Pin or clip, then photograph the arrangement before sewing.
- Sew the pocket divisions, then bar tack or reinforce each pocket’s top corners and the base of every division.
- Join the body panel to the under-seat panel, reinforcing the fold line where the organizer bends over the arm’s inner edge.
- Sew the lining or facing to the underside, right sides together, leaving a turning gap. Turn, press within the fabric’s tolerance, and close the gap.
- Fit the organizer onto the furniture with no contents. Adjust if it slides, twists, or sits unevenly. Only then load it — gradually, starting with the lightest items you intend to store.
- Check clearances with the furniture in every position it uses: reclined, folded, extended. Nothing may contact a mechanism, hinge, vent, control, cord, or moving part.
Customization. Use one bold motif for the pocket panel and quiet solids for the body. Add a narrow binding in a third sample colour along the pocket tops. Size pockets for specific objects rather than generically — a glasses pocket and a pen slot are more useful than three identical ones. Mirror the pocket arrangement on a second organizer for a matched pair of chairs.
Practical tip. Weight is the design constraint, not size. Weigh the finished organizer empty, add the items you genuinely plan to keep in it, and keep the total comfortably below what the under-seat panel can hold in place through everyday use. Weigh your finished organizer fully loaded to ensure your furniture arm can support it securely.
Common mistake. Making the pockets deep and generous because they look better in a photograph. Deep pockets invite heavy contents, and heavy contents pull the panel off the arm or stretch the under-seat section until the whole thing slips forward.
Safety note. Lightweight, dry, non-fragile items only. Do not store medication, drinks, hot objects, sharp tools, heavy electronics, or valuable breakables. Never obstruct a reclining mechanism, hinge, vent, control, cord, or any moving part — a panel that blocks a mechanism can damage the furniture or the object in it.
Material fit and construction notes
- Suitable fabrics: Mid-weight wovens with limited stretch. Very heavy or stiff samples will not drape and will hang badly.
- Minimum practical sample size: Pocket panel pieces typically need around 8 × 6 in (20 × 15 cm) usable each. (verified against your paper pattern)
- Do not substitute without testing: Coated and adhesive-backed samples — they crease permanently at the fold over the arm and cannot be pressed flat again.
- Adapting to your swatches: Build the pocket panel from several small pieces joined with a deliberate colour-block layout if no single sample is large enough.
- Match panels for: Thickness and stretch. Stretch in the under-seat panel will let the whole organizer creep.
- Direction: Keep pile direction consistent across the visible face.
- Structure: Stable backing required for the body; reinforced pocket top edges mandatory.
- Seam and edge finish: Turned-and-topstitched edges, bar tacks at every pocket corner and division base.
- Test first: The full pocket-edge stack on the machine, and the finished drape on the actual furniture.
- Closure reinforcement: No closure needed; reinforcement goes into pocket corners and the fold line.
- Intended contents and limits: Lightweight dry items only. Calculate the loaded weight before use.
- Cleaning and storage: Remove contents, spot-clean per documented care, dry completely, store flat rather than folded along the same line every time.
- Repair or retire if: Seams open, the panel slips, the fold line weakens, pockets sag, or the under-seat section stops gripping.
Maker’s Workshop Note: The number one complaint with sofa caddies is that they slip onto the carpet the moment you drop a heavy remote or tablet inside. To permanently anchor the caddy, sew a slim casing into the anchor tail and insert a 1/2-inch wooden dowel wrapped in non-slip rubber shelf liner before tucking it deep between the seat cushion and armrest.
3. Hanging Craft-Supply Pocket Panel
What it looks like. A flat, backed fabric panel with a row or grid of reinforced pockets, hung on a wall or the back of a door. Each pocket holds one category of supply — brushes, markers, small tools, ribbon — so the contents are visible at a glance.
Best use. Craft rooms, sewing rooms, and small rentals where wall space is the only space. Also useful as a portable roll-up for a class or a group sewing session.
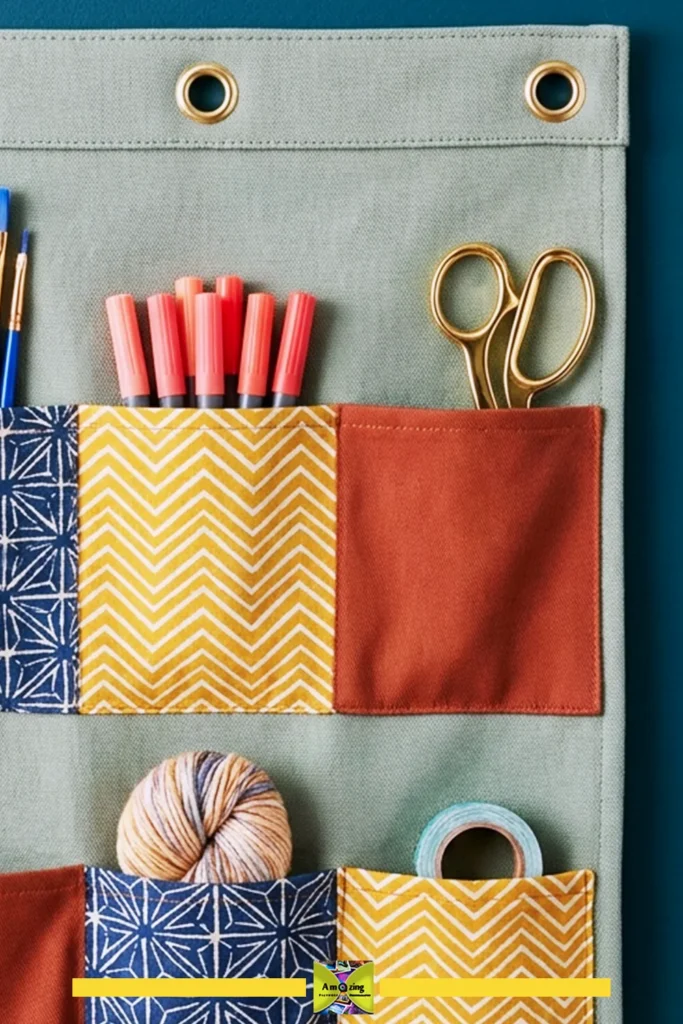
Difficulty. Beginner to intermediate. Good first project with upholstery samples, provided the backing is right.
Approximate time. 2–3 hours
Materials
- Sample pieces for the pocket faces — as many as you have, provided they share a weight
- One firmly woven backing panel: canvas, duck, or interfaced upholstery fabric, sized to the finished panel
- Binding or a lining strip for the top edge
- Small grommets, a hanging sleeve, or a wooden dowel and cord for mounting plus the appropriate wall or door mounting hardware
- Heavy-duty polyester thread
Tools
- Tape measure, straightedge, paper for layout
- Fabric shears, rotary cutter, mat
- Sewing machine, fresh needle
- Grommet setter or punch if using grommets
- Clips, iron, press cloth
- A scale, for the loaded weight check
Instructions
- Decide the finished panel size from the wall or door space you actually have, not from the fabric. Record the height and the width, and confirm there is a mounting point you can use — a stud, a door top, an over-door bracket, or a rated adhesive hook.
- Cut the backing panel. Interface it if the fabric needs more body; a hanging panel must not curl at the edges or bow across the middle.
- Lay out the pockets on the backing before sewing anything. Use actual objects — a marker, a brush, a ruler — to set the pocket widths. Photograph the layout.
- Cut pocket pieces to the layout, adding seam and turn allowances to each.
- Finish the top edge of every pocket before attaching it. This edge takes the entire wear load of the project.
- Sew the pockets to the backing along the bottom and sides, then sew the vertical divisions. Bar tack the top corners of every pocket and the top of every division.
- Finish the panel’s outer edges with binding or a turned-and-topstitched hem.
- Reinforce the top edge of the panel itself — this is where the entire loaded weight pulls. Add a doubled layer or an interfacing strip across the full width.
- Attach the mounting hardware — grommets set through the reinforced top edge, or a hanging sleeve for a dowel. Test each grommet by loading the panel and watching for elongation at the hole.
- Mount the panel empty. Add contents gradually, starting with the heaviest items at the bottom, and recheck the mounting point after each addition.
Customization. Assign one fabric to each supply category so the panel is self-organizing. Add a flap that folds down over the pockets for dusty environments or travel. Include one deep pocket sized for a cutting mat or ruler. Make a smaller version as a portable roll-up with a tie closure and no grommets at all.
Practical tip. Hanging panels fail at the top edge and the mounting points, not in the middle. Every gram of reinforcement you can put into that top band is worth more than any reinforcement anywhere else on the project.
Common mistake. Underestimating the finished weight. Fill the panel as you intend to use it, weigh it, and confirm the mounting hardware is rated for at least that much — including a margin for the fact that you will add more later. Test the loaded weight on your hanging hardware before permanent mounting.
Safety note. Lightweight, dry, non-fragile contents only. No sharp tools stored blade-up, no glass, no electronics, no medication, and no liquids. Mount into structure that can carry the load — an over-door bracket or a stud-mounted screw, not an adhesive strip on a textured or painted surface. Never hang above a crib, bed, or anywhere a child or pet could pull it down.
Material fit and construction notes
- Suitable fabrics: Mid-weight to heavy wovens for the backing; mid-weight samples for the pockets. A woven, low-stretch backing is essential.
- Minimum practical sample size: Pocket pieces typically 5 × 5 in (13 × 13 cm) usable or larger, depending on the tool they hold. (verified against your paper pattern)
- Do not substitute without testing: Stretchy backed samples for the backing panel; the panel will bow under load.
- Adapting to your swatches: Mix pocket sizes deliberately. You are designing for the objects, so let the objects set the dimensions and cut the pockets to match whatever samples you have.
- Match panels for: Stretch and thickness. A pocket that is thinner than its neighbours will sag differently.
- Direction: Keep pile direction consistent; on a wall-hung panel it is very visible from below.
- Structure: Interfaced or firmly woven backing required; reinforced top band mandatory.
- Seam and edge finish: Bound or turned-and-topstitched outer edges; finished pocket top edges; bar tacks throughout.
- Test first: Grommet setting through the reinforced top band, and the loaded weight against the mounting hardware rating.
- Closure reinforcement: N/A — reinforcement concentrated at pocket tops, divisions, and mounting points.
- Intended contents and limits: Lightweight, dry, non-fragile. Weigh before mounting.
- Cleaning and storage: Remove contents before cleaning; spot-clean only within documented guidance; dry fully before reloading.
- Repair or retire if: Grommets elongate, the top band stretches, the backing bows, pockets sag or open, or the mounting loosens.
Maker’s Workshop Note: Heavy dressmaking shears and metal rulers exert continuous downward leverage on the upper pocket corners. A simple backstitch will pull out over time. Always stitch a neat reinforced triangle or tight horizontal bar-tack across the top 1/4 inch of each divider, reinforced on the wrong side with a 1-inch square of cotton twill tape.
4. Desktop Mail-and-Notebook Sling
What it looks like. A low, open-topped sling with two upright sides and a wide, flat base, holding file folders, mail, and a notebook at a slight backward lean. The base is deliberately broad relative to the height so it cannot tip forward.
Best use. A desk, entry console, or kitchen counter where mail and notebooks pile up. One of the least-covered projects for heavy samples, and one of the most genuinely useful.
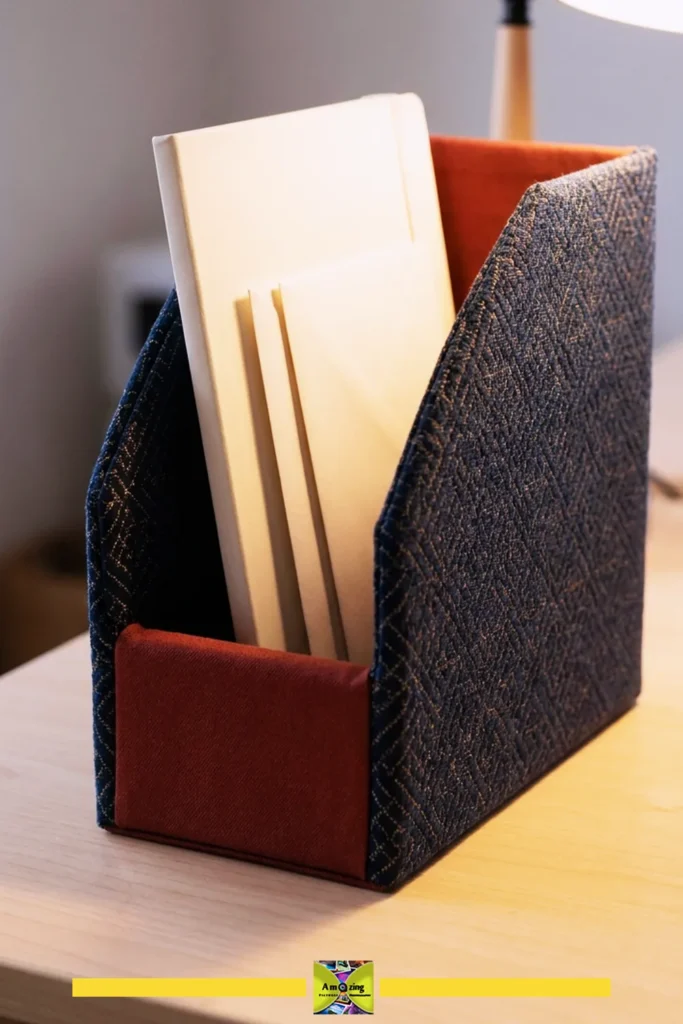
Difficulty. Intermediate. Mostly straight seams, but the rigid base and the standing structure take care.
Approximate time. 2–4 hours
Materials
- Two or more heavy samples for the sides and front — this project suits the heaviest pieces you have
- One mid-weight sample or lining fabric for the interior
- Rigid base insert: bookbinder’s board, heavy chipboard, or a rigid plastic sheet
- Interfacing as needed to stiffen the sides (test first)
- Heavy-duty polyester thread
Tools
- Ruler, paper for a side profile template
- Fabric shears, rotary cutter, mat
- Sewing machine with a heavy needle
- Clips
- Iron and press cloth
- A scale, for the loaded weight check
Instructions
- Decide the internal dimensions from what will actually go in it — the height and width of the folders, mail, or notebooks you are storing. Add a small allowance so contents slide out easily.
- Draw a side profile template on paper: a wide flat base, a slight backward lean, and a low front lip. Cut it out and stand it on the desk with a book leaning against it to check stability before cutting fabric.
- Cut two side panels from the template, a front panel, a back panel, and a base panel. Cut the rigid insert to the base.
- Interface the side and back panels if a test shows the fabric alone will not stand. The back panel carries the lean, so it needs the most body.
- Sew the front and back panels to the base panel, then attach the sides. Grade every seam allowance and clip or notch the curves.
- Reinforce the bottom corners and the base-to-side joins with a second row of stitching or a bar tack — these take the entire load.
- Line the interior, or bind the top edges, finishing every raw edge so nothing inside can snag paper or fabric.
- Insert the rigid base into its compartment, fully enclosed, with smoothed edges.
- Stand the sling up empty. If it leans or rocks, check the base insert for flatness and the side panels for equal length before adjusting anything else.
- Load it with the intended contents and test the tip point deliberately: push gently at the front with a full load and confirm it does not go over.
Customization. Cut both sides from a single large motif sample and let it read across the profile. Add a low front pocket for pens or a phone. Use a deliberately contrasting lining so the interior is bright when the sling is empty. Make a shallower version for recipe books or tablets.
Practical tip. The anti-tip property comes from the base being wide relative to the height and from the contents sitting low. If you make the sling taller for looks, widen the base by at least the same proportion or it will go over the first time someone reaches past it.
Common mistake. Making it tall and narrow because that looks more elegant on a desk. A tall sling with folders in it is a tipping hazard the moment it is knocked. Keep the centre of gravity low, and test the tip point with the real contents before you consider it finished.
Safety note. Not a load-bearing object and not a step, seat, or support. Keep the loaded weight modest, keep the base flat on the surface, and do not place it where it can be knocked off an edge onto a person or a pet. Dry use, no food or drink.
Material fit and construction notes
- Suitable fabrics: Heavy, low-stretch wovens with some body — dense jacquard, canvas, heavy twill, faux leather if you have tested it. This is the best project in the collection for your heaviest samples.
- Minimum practical sample size: Side panels typically need around 10 × 8 in (25 × 20 cm) usable each. (verified against your paper pattern)
- Do not substitute without testing: Light drapery-weight samples — they will not stand and will not protect the contents. Coated samples that crease permanently at the base fold.
- Adapting to your swatches: If the sides come from two different samples, keep the front and back from a third or from a solid, so the mismatch reads as intentional paneling.
- Match panels for: Thickness and stiffness. Unequal side panels produce a sling that leans.
- Direction: Match pile direction on both side panels — they face the same way and any difference is obvious.
- Structure: Rigid base insert required; back panel interfacing usually needed for the lean.
- Seam and edge finish: Graded seams, bound or lined interior, reinforced base joins.
- Test first: The base-to-side seam stack on the machine, and the tip point with a full load.
- Closure reinforcement: N/A.
- Intended contents and limits: Paper, folders, notebooks, and light desk items. No liquids, no heavy equipment, no breakables on the top of the stack.
- Cleaning and storage: Remove the insert, spot-clean per documented care, dry fully, replace the insert. Store empty rather than loaded long-term.
- Repair or retire if: It starts to rock or lean, the base insert warps or becomes exposed, the base seams open, or it tips more easily than it did.
Maker’s Workshop Note: Contrast is key here—pair a bold textured jacquard exterior with a smooth, tightly woven twill or linen lining so envelopes glide in without snagging. When pressing the curved base, press over a tailor’s ham or rolled towel rather than a flat board so the cradle retains its smooth, ergonomic drape.
Portable sewing and craft accessories
5. Hand-Sewing Needle Book and Notions Wallet
What it looks like. A fabric wallet that opens flat, with a felt or flannel needle page on one side and a small notions pocket on the other. Needles are held in the page, closures keep the wallet shut, and sharp and non-sharp supplies are kept apart.
Best use. A sewing kit, a travel kit, or a gift for someone who sews. Uses small samples that are too small for anything else, and turns them into something genuinely useful.
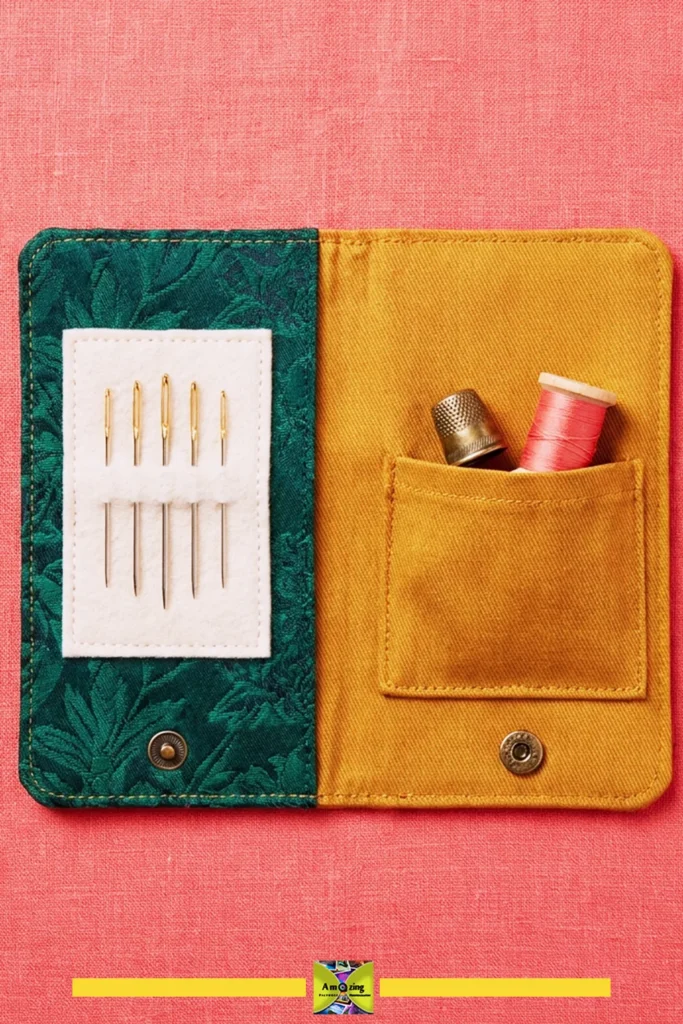
Difficulty. Beginner. The best first project in this collection for a beginner with good samples.
Approximate time. 1.5–2.5 hours
Materials
- Two coordinated samples for the outer cover, each at least the finished size plus seam allowance
- One sample or firm cotton for the inner spine or pocket panel
- Wool felt or cotton flannel for the needle page
- Light fusible or sew-in interfacing for the cover (test first)
- A closure: a snap set through reinforcement, a button with a reinforced loop, or a wrap tie
- Cotton or all-purpose polyester thread
Tools
- Ruler, chalk or removable marker
- Fabric shears or rotary cutter and mat
- Sewing machine with a fresh needle suited to the fabric
- Hand-sewing needle, thimble
- Clips, iron, press cloth
- Snap setter if using a snap
Instructions
- Decide the finished size from the longest item you want to store — a hand-sewing needle, a small pair of snips, a thimble. Add an allowance for the fold.
- Cut the outer cover pieces, lining pieces, and the felt needle page to that size. Cut interfacing if your test shows the cover needs body; on heavy upholstery samples it usually does not.
- Reinforce the fold line down the centre of the cover with a strip of interfacing or a line of stay-stitching on each side. This is where every wallet eventually fails.
- Sew the outer cover to the lining, right sides together, leaving a turning gap. Turn, press within the fabric’s tolerance, and close the gap.
- Topstitch around the cover, then topstitch the centre fold line. This converts the fold into a hinge rather than a crease.
- Sew the felt needle page in place along its inner edge only, so it lies flat and can be lifted. Leave the outer edge free.
- Sew the notions pocket to the opposite side, reinforcing the pocket’s top edge before attaching it.
- Mark and set the closure through the reinforced areas. If using a snap, add an interfacing patch at both halves first, and test the snap on a doubled scrap before setting it on the finished wallet.
- Load it. Put needles into the felt page first, then confirm the wallet closes without the needle points contacting anything. Needle points must never touch the closure, the outer cover, or the pocket contents.
- Check that nothing sharp can escape. Shake the closed wallet gently over a tray. If anything moves toward the opening, add a needle-page flap or a second closure before you use it.
Customization. Use a bold-motif sample for the outer and a plain one for the inner. Add a small scissors pocket to the non-needle side. Include a page for pins with a covered safety-pin strip. Make a matched set for a gift — a needle book, a matching scissors sheath, and a pattern-weight pair using the same palette.
Practical tip. Use a wool felt needle page rather than a cotton one. Wool felt grips needles, so they stay where you put them and do not work their way out in a bag, which is both a usability issue and a safety one.
Common mistake. Making the wallet too thick. Every extra layer of upholstery fabric, felt, and interfacing makes the fold harder to close and pushes the closure further from the fabric it has to hold. Build it with fewer layers and a firmer cover rather than more layers and a strained snap.
Safety note. This object holds needles, and it lives in bags, drawers, and hands. Reinforce the closure area, keep points fully contained within the felt page, keep sharp and non-sharp items separated, and take it out of use immediately if the closure fails or a needle can escape. Store it closed and out of reach of children and pets.
Material fit and construction notes
- Suitable fabrics: Mid-weight wovens with a tight weave that will not release fiber into a needle page. Good use for small, sound samples of any mid-weight fabric.
- Minimum practical sample size: Two cover panels around 5 × 7 in (13 × 18 cm) usable each, plus seam allowance. (verified against your paper pattern)
- Do not substitute without testing: Fraying loose weaves for the cover, and coated or adhesive-backed samples anywhere a needle will touch. A coated face will shed coating onto the felt.
- Adapting to your swatches: Piece the cover from two or three small samples with a deliberate split. The fold line is a natural break, so a mismatched cover reads as designed if the split is deliberate.
- Match panels for: Thickness at the fold. A cover that is thick on one side and thin on the other will not close flat.
- Direction: Keep pile direction consistent across the cover, and make sure pile faces inward at the fold so the wallet is not bulky when closed.
- Structure: Light interfacing at the fold line for reinforcement; felt page for the needles.
- Seam and edge finish: Turned, pressed, and topstitched; enclosed seams throughout with no exposed raw edges.
- Test first: The closure on a doubled scrap, and the finished wallet’s fold under a full needle load.
- Closure reinforcement: Interfacing patch behind both snap halves, or a doubled layer behind a button loop.
- Intended contents and limits: Hand-sewing needles, pins with protectors, a thimble, small snips, a few buttons. Nothing sharp and uncontained.
- Cleaning and storage: Empty it completely before cleaning. Spot-clean only, dry fully, and never store it closed while damp.
- Repair or retire if: The fold line frays or splits, the closure no longer holds, the felt page loses its grip, or a needle can be shaken free.
Maker’s Workshop Note: Always use 100% natural wool felt for your internal needle leaves rather than acrylic craft felt. The natural lanolin in sheep’s wool guards fine steel needles and pins against rust. For the outer cover, choose a flat, tightly woven sample rather than a loose slub or boucle to prevent scissor tips from catching.
6. Sized Scissors Sheath with Rigid Insert
What it looks like. A fitted sleeve that fully encloses one specific pair of closed scissors, with a rigid puncture-resistant insert between the blades and the fabric, a secure closure, and no exposed blade tips.
Best use. Protecting a good pair of sewing shears in a drawer, a bag, or a project box. One of the least-covered projects anywhere for heavy fabric scraps, and one of the most practical.
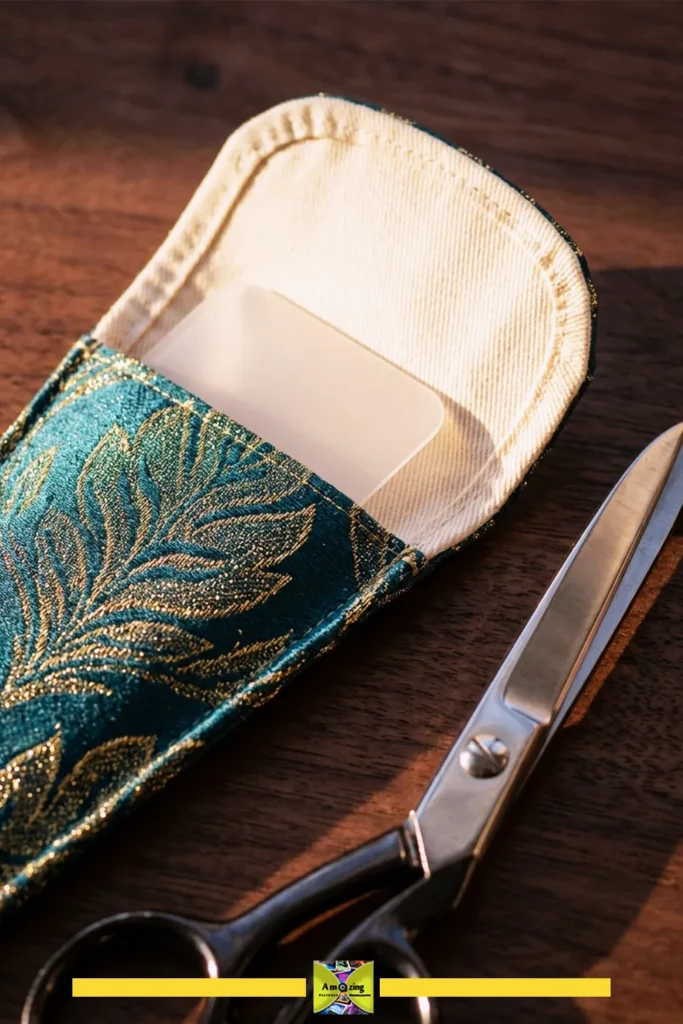
Difficulty. Beginner to intermediate. The sewing is simple; the fit and the insert are the whole job.
Approximate time. 1–2 hours
Materials
- Two samples for the outer and inner faces, or one sample lined with firm cotton
- One rigid puncture-resistant insert sheet, sized to the blades — a rigid plastic sheet is a common choice; the material must be suited to the specific tool using 0.8mm high-density polyethylene or flexible cutting mat plastic
- A closure: a snap set through reinforcement, a wrap tie, or a hook-and-loop flap on dry-use only
- Heavy-duty polyester thread
Tools
- Ruler, chalk or removable marker, paper for a template
- Fabric shears for cutting the fabric; a separate tool for cutting the insert
- Sewing machine with a heavy needle
- Clips
- Iron and press cloth
- Snap setter if used
- Fine file or fine-grit sandpaper for smoothing insert edges
Instructions
- Close the scissors. Measure the closed length, the maximum width across the blades and handles, and the thickness of the blade stack at its thickest point. Record all three.
- Draw a full-size paper template of the closed scissors, then add a small clearance all round so the tool goes in and out without forcing. Test-fit the paper template around the actual scissors before cutting any fabric.
- Cut the outer and inner fabric panels from the template, plus seam allowance. Cut the rigid insert from the same template minus the clearance, so it sits inside the fabric layers.
- Smooth every edge of the insert with a fine file or sandpaper. An insert edge is a cut hazard until it has been dressed, and it will also abrade the fabric from the inside.
- Assemble the layers: inner fabric, insert, outer fabric, with the insert fully enclosed and no route for it to shift to one end. If the insert could migrate, secure it with a line of stitching above and below it or a fabric pocket that holds it in place.
- Sew around the sheath, leaving a turning gap or constructing it as a lined tube. Clip the curves, turn, and press within the fabric’s tolerance.
- Reinforce the opening — the whole point of a sheath is that the tool does not come out by accident and does not cut through on the way in. Add a doubled layer or interfacing at the mouth.
- Attach the closure through a reinforced area. Test it closed with the scissors inside, and test it again after ten open-and-close cycles.
- Check for exposed blade tips. With the scissors fully seated, no point may touch fabric, closure, or the sheath’s end. If a tip sits against a single fabric layer, extend the insert or shorten the sheath’s usable depth.
- Store it away from children and pets, and check periodically that the insert has not cracked, shifted, or become exposed at any edge.
Customization. Use a bold sample for the outer and a quiet one for the inner face. Add a small hanging loop at the closed-handle end so the sheath can hang on a peg. Make a matched pair for shears and a rotary cutter — but only if the rotary cutter’s own guard is intact; a sheath is not a substitute for a blade guard.
Practical tip. Size the sheath to one specific pair of scissors, not to “scissors.” A sheath that fits everything fits nothing properly, and a loose sheath lets the blades move, which is exactly the situation the insert exists to prevent.
Common mistake. Omitting the rigid insert and relying on thick fabric alone. Fabric does not resist a blade point. A sheath without an insert is a pouch that a sharp pair of shears will eventually go through, usually at a corner where the fabric is thinnest.
Safety note. This project protects a blade, it does not make the tool safe to handle carelessly. The insert must be fully enclosed with no exposed edges, the closure must be secure, and no blade tip may be exposed. Never claim that fabric alone prevents puncture. Keep the finished sheath away from children and pets, and replace the insert immediately if it cracks, shifts, or becomes exposed. Cut the insert on a stable surface — never hold it in your hand.
Material fit and construction notes
- Suitable fabrics: Firm mid-weight to heavy wovens with a tight weave — canvas, heavy twill, dense jacquard. Good use for substantial samples that can take a doubled construction.
- Minimum practical sample size: Two panels around 9 × 4 in (23 × 10 cm) usable each for a typical pair of dressmaking shears. (tailored to your shears’ exact blade profile)
- Do not substitute without testing: Loose weaves and stretchy backed samples — a blade point will find the weak spot. Coated samples that crack along a fold line.
- Adapting to your swatches: The sheath is narrow, so almost any sound sample large enough for one panel works. It is an excellent use for long, narrow offcut strips.
- Match panels for: Thickness, so the sheath is not lopsided in the hand.
- Direction: Pile direction matters only aesthetically here; keep it consistent if the sheath will be visible.
- Structure: Rigid puncture-resistant insert mandatory. Additional reinforcement at the mouth.
- Seam and edge finish: Enclosed construction with clipped curves, turned and pressed, reinforced opening.
- Test first: The closure on a reinforced scrap, and a deliberate fit test with the actual scissors before the closure goes on.
- Closure reinforcement: Interfacing patch behind the closure on both faces.
- Intended contents and limits: One specific closed pair of scissors. Nothing else, and nothing sharp that is not covered.
- Cleaning and storage: Remove the tool and the insert before cleaning. Spot-clean only, dry completely. Store dry, closed, and out of reach of children and pets.
- Repair or retire if: The insert cracks, shifts, or shows through the fabric; the closure loosens; a blade tip reaches a single layer; or the sheath develops a cut or a worn spot anywhere.
Maker’s Workshop Note: Never trust fabric alone to stop the razor point of industrial shears. I cut an internal guard from a semi-rigid plastic placemat or flexible 0.8mm cutting mat, rounding off the tip and edges with fine sandpaper, and sandwich it between the upholstery shell and the lining. It provides bulletproof puncture resistance.
7. Coordinated Sewing-Pattern Weight Set
What it looks like. Four to six flat, fabric-covered weights that sit on a paper pattern and hold it down on a cutting mat. Coordinated covers in the same palette, a smooth flat base, and a small loop or tab for lifting them.
Best use. Holding pattern paper and fabric in place instead of pins, particularly on coated, piled, or delicate fabric. An excellent use for very small, dense samples that have no other project available to them.
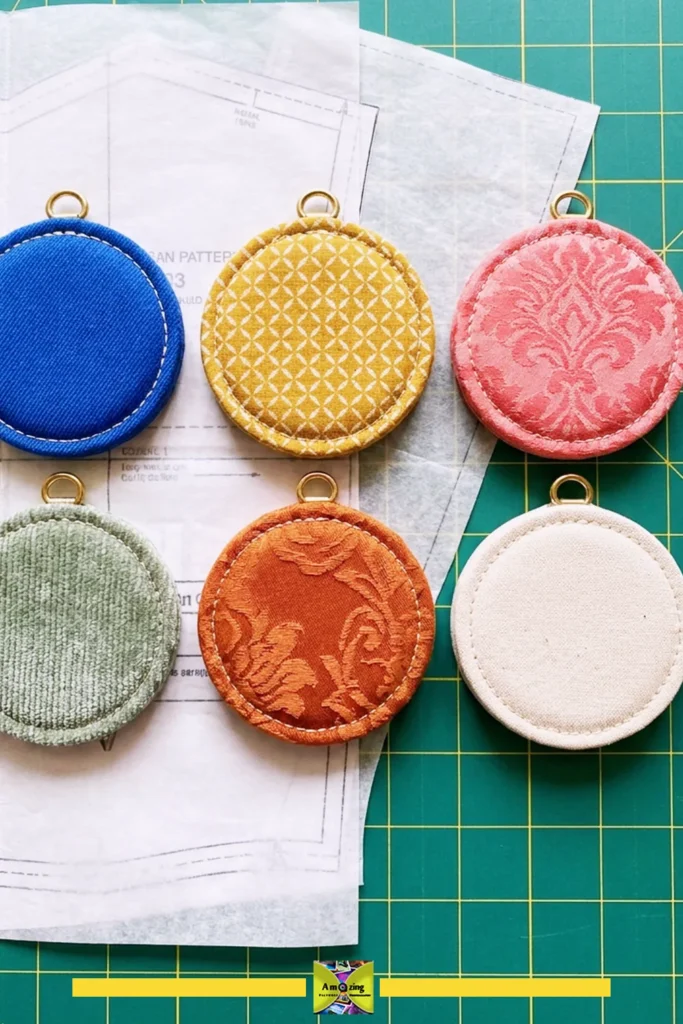
Difficulty. Beginner. The simplest project in the collection, and one where the material choice and filler choice are the entire exercise.
Approximate time. 1.5–2.5 hours for a set of six
Materials
- Small samples or sample offcuts for the covers — six pieces at least the cover size
- Filler: a researched, clean, fully enclosed weighting material. Flat steel washers of a known, uniform type, or a solid steel bar cut to length, are the most controllable options. Do not use loose lead, unidentified metal, sharp hardware, food ingredients attractive to pests, or dusty material. (using zinc-plated steel washers or washed, dried aquarium pea gravel)
- A tight-weave inner pouch fabric for containment — this is the first layer of double containment
- Thread suitable for the fabric and for a seam that will take repeated handling
Tools
- Ruler, chalk or removable marker
- Fabric shears or rotary cutter and mat
- Sewing machine with a needle suited to the layers
- Clips
- Iron and press cloth
- A kitchen scale, for weighing the finished weights
- A permanent marker for labelling weights (only after measuring)
Instructions
- Choose the finished size from the pattern you most often work with and from the weight you want in the hand. A larger weight spreads the load over more pattern; a smaller one is more manoeuvrable. Test a mock-up in card before cutting fabric.
- Cut two cover panels per weight from your samples, plus two slightly smaller inner pouch panels from the tight-weave inner fabric.
- Sew the inner pouch first, as a small fully enclosed bag, and insert the filler through a gap. Sew the gap closed completely with a doubled seam. This inner pouch is the containment layer and it must be closed before it goes anywhere near the outer cover.
- Check the seam by holding the pouch over a tray and shaking it. If anything can escape the inner pouch, redo it. Do not proceed.
- Sew the outer cover around the sealed inner pouch, again fully enclosing it. Turn through a gap, then close the gap.
- Topstitch around the outer cover, close to the edge, so the weight cannot migrate to one corner and the cover cannot open.
- Add a small loop or tab at one end for lifting. Bar tack the loop.
- Weigh each finished weight on the scale and label it with the measured number only — never with an estimated one. Weigh each piece on a digital kitchen scale and label accordingly.
- Test the set on a real pattern with real fabric. If a weight slides on a coated fabric, that fabric may need a different approach; if it slides on paper, check that the base is genuinely flat.
- Store the set together in a small fabric pouch or a boxed tray, away from children and pets.
Customization. Use one fabric per weight for a graded set, or alternate two fabrics. Print or stitch the weight value on a small label tab. Make a shallow fabric tray from a matching sample to store the set — that is a natural pairing with the catchall tray project. Cut the covers from the same sample and let a single motif repeat across the set.
Practical tip. Make the base genuinely flat. A weight that has any rounded bulge on its underside will rock on the cutting mat and let the pattern shift, which defeats the entire purpose. Press the base flat before the final seam, and check it on a hard flat surface.
Common mistake. Choosing the filler by convenience rather than by research. Loose metal, sharp-edged hardware, or food material inside a weighted object that lives on a cutting table is a genuine hazard — it can leak, attract pests, or pierce the cover. Choose a clean, identified material, contain it twice, and close both layers properly.
Safety note. The filler must be fully enclosed inside a sealed inner pouch and then inside a sealed outer cover — double containment, not one layer. No loose lead, no unidentified metal, no sharp hardware, no food ingredients, no dusty material. Label weights only after actually weighing them. If any filler escapes, stop using that weight immediately, find and contain the spill completely, and rebuild the weight with a new inner pouch. Keep weights away from children and pets and store them contained.
Material fit and construction notes
- Suitable fabrics: Firm, tight-weave wovens with low stretch and enough abrasion resistance to survive constant handling on a cutting mat. Excellent use for small, dense samples.
- Minimum practical sample size: Two cover panels around 4 × 4 in (10 × 10 cm) usable each for a mid-size weight. (verified against your paper pattern)
- Do not substitute without testing: Loose weaves that will abrade through on a mat, and light drapery-weight samples that will not survive handling.
- Adapting to your swatches: This is the ideal project for a set of mismatched small squares. A deliberately varied set, unified by a repeated size and a repeated topstitch, looks intentional.
- Match panels for: Thickness. Weights of different thicknesses feel inconsistent and stack badly.
- Direction: Keep pile direction consistent across a set if any samples are piled.
- Structure: Double containment mandatory. No interfacing needed unless the cover fabric is very light.
- Seam and edge finish: Enclosed on all sides, topstitched, with a reinforced lifting loop.
- Test first: The containment pouch seam before assembly, and the finished weight on the actual cutting surface.
- Closure reinforcement: No closure; reinforcement goes into the lifting loop and the outer seam.
- Intended contents and limits: Holding pattern paper and light fabric in place. Not a paperweight for anything heavy, not a doorstop, not a toy.
- Cleaning and storage: Wipe the outer cover only. Never immerse a filled weight. Dry completely before storage. Store the set contained, away from children and pets.
- Repair or retire if: Any filler leaks, the outer cover abrades or splits, the topstitch breaks, or the weight develops a bulge or a rocking base.
Maker’s Workshop Note: Avoid dried rice or beans—they absorb ambient humidity and harbor pantry pests. My favorite shop solution is stacking five 1.5-inch zinc-plated steel fender washers inside each pouch, or filling a sealed muslin inner bag with washed aquarium pea gravel. Aim for exactly 150 to 180 grams per weight for ideal pattern tissue stability.
8. Upholstery-Sample Reference Folio
What it looks like. A fabric-bound folio or ring binder that holds your remaining samples with their information intact — pattern name, fiber content, source, date, preparation notes, stitch tests, and finish samples. Each page is a fabric panel with a labelled card.
Best use. Preserving the information you photographed during disassembly, and turning a pile of loose samples into a usable design reference you will actually consult before the next project.
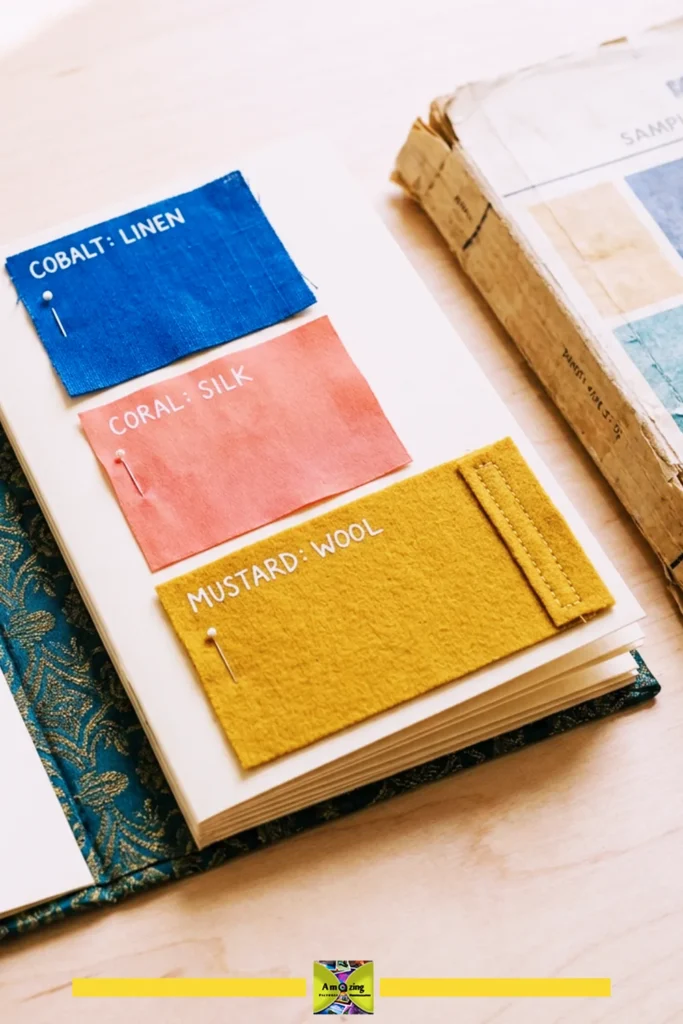
Difficulty. Beginner. Ideal as the first project you make from a new sample book, because it organises everything the later projects depend on.
Approximate time. 2–4 hours depending on how many samples you document
Materials
- One or two larger samples for the folio cover
- Firm card or cardstock for the sample pages
- A binding system: ring binder and page protectors, binder rings and punched cards, or roofing bolts and card, depending on your preference
- Adhesive for attaching samples to cards — a removable double-sided tape or a stitched attachment is preferable to a permanent glue test archival double-sided tape on a corner offcut first
- Cotton or all-purpose thread for the cover
Tools
- Ruler, craft knife on a cutting mat, or a hole punch
- Fabric shears
- Sewing machine for the cover
- Fine marker or printer for the labels
- Clips, iron, press cloth
Instructions
- Decide your page format first — a standard ring binder with page protectors is the simplest and the most expandable. Cut card pages to fit inside the protectors.
- For each sample you keep, cut a piece to a consistent size and attach it to a card. A consistent size across the whole folio is what makes it read as a reference rather than a scrap pile.
- Record on each card: pattern name, collection, colourway, fiber content if documented, backing or coating if known, source and date acquired, usable dimensions, pile direction if applicable, and any preparation notes. Write “unknown” where the information is unknown rather than leaving it blank — an explicit unknown is a reminder to test.
- Attach a stitch test to the back of each card: a short line of machine stitching on the actual layered construction you used, with the needle size, thread, and stitch length noted. This is the single most useful thing in the folio.
- Attach a finish sample where relevant — a bound edge, a turned edge, or a serged edge in that fabric — so you can see how the finish behaves before you commit to it on a project.
- Make the cover from your two largest samples, lined and reinforced at the spine, with the same folded-hinge construction you would use for a wallet.
- Assemble the folio, and add a contents page listing what is inside, plus a page for samples you have set aside as “test first” or “do not press.”
- Store it flat and dry, away from direct sunlight, and add to it as you work. Cross-reference it against the original photographs you took before disassembly — keep those with the folio, not on a phone you will replace.
Customization. Use one fabric for the cover and its own offcut as the first sample page. Add a pocket at the back for loose thread samples and needle packets. Colour-code the cards by fiber family or by weight. Make a smaller travel version for shopping trips.
Practical tip. Include the stitch test, not just the swatch. A swatch tells you what a fabric looks like. A stitch test on the actual layered stack tells you whether your machine will sew it — which is the question you will actually have next time.
Common mistake. Cutting every sample to an identical small size and losing the large ones. The folio is a reference, not a use — keep the largest sound pieces whole in flat storage and document them on a card, rather than trimming them down to fit a page format.
Safety note. This folio contains needles or pins if you use them to attach samples. Use a stitched or taped attachment rather than pins where you can, and if pins are unavoidable, use ones with protected points and keep the folio away from children and pets. Ventilate when using any adhesive, and keep adhesives away from heat and flame.
Material fit and construction notes
- Suitable fabrics: Any sound sample, at any size. The folio is the one project in this collection that accepts everything, which makes it the natural home for the pieces no other project can use.
- Minimum practical sample size: Cover panels around 9 × 12 in (23 × 30 cm) usable each, or pieced from smaller samples. Sample cards can hold pieces as small as 2 × 2 in (5 × 5 cm). (adjusted to your binder ring spacing)
- Do not substitute without testing: Only the adhesives need testing. The folio itself tolerates almost any fabric.
- Adapting to your swatches: Piece the cover from as many small samples as you like. A visibly pieced cover suits the object.
- Match panels for: Cover thickness at the spine, so the folio closes evenly.
- Direction: Group cards by pile direction so you can compare like with like.
- Structure: Firm card pages; reinforced spine on the cover.
- Seam and edge finish: Turned and topstitched cover; punched or bound cards.
- Test first: Any adhesive on an offcut, for colour change, bleed-through, and removability.
- Closure reinforcement: N/A unless you add a wrap tie or elastic closure — reinforce it if you do.
- Intended contents and limits: Documentation, samples, stitch tests, and finish samples. Not a storage solution for material you intend to sew with — that stays flat in the stash.
- Cleaning and storage: Keep dry and out of direct sunlight. Do not wash. Dust the cover with a dry cloth.
- Repair or retire if: Pages tear, the binding fails, or samples become detached and mixed up. Rebuild the affected pages rather than letting the record degrade.
Maker’s Workshop Note: This project is a game-changer for organizing your studio scraps. When mounting swatches inside the folio, leave 1 inch of raw cut edge unglued and unstitched at the bottom. This allows you to examine the weave structure, check fray resistance, and feel both faces whenever you plan future projects.
Protective cases and rolls for small items
9. Structured Zippered Swatch Project Pouch
What it looks like. A lined, zippered pouch with a structured body, assembled from two to four coordinated samples with a visible colour-block or pattern-matched layout. Corners are either boxed for depth or left flat, depending on how much fabric you have and how well the corners sew.
Best use. Notions, sewing tools, charging cables, art supplies, or a small project-in-progress. The workhorse of scrap upholstery sewing.
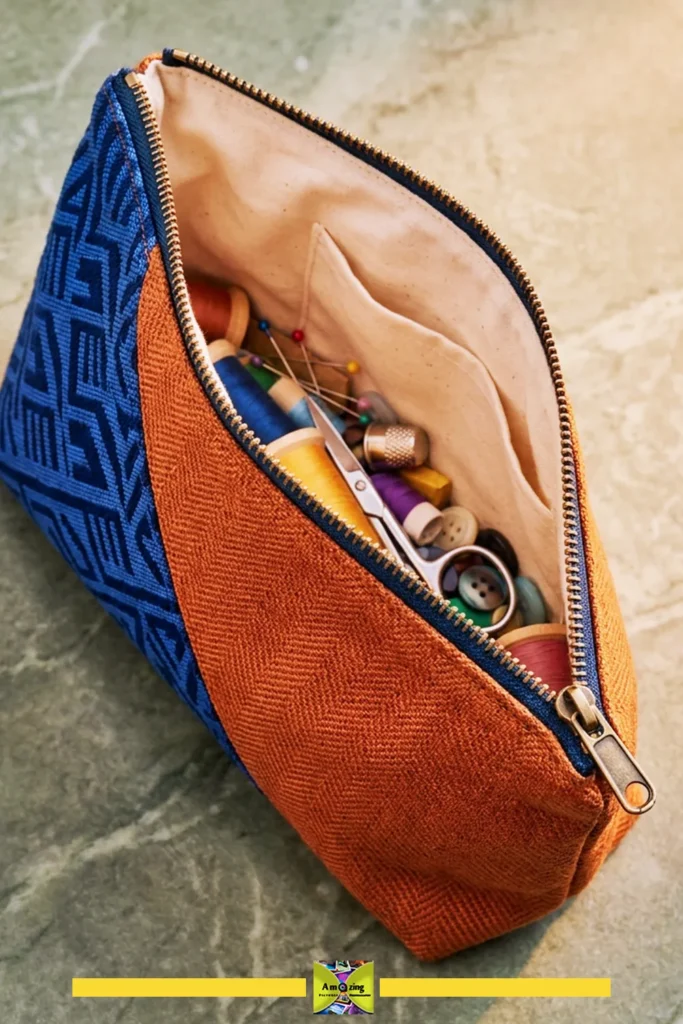
Difficulty. Intermediate.
Approximate time. 2–3 hours
Materials
- Two to four coordinated samples for the exterior panels
- Lining fabric — a smooth, firm cotton or a light woven
- One zipper, length chosen to suit your panel width using a #4.5 or #5 nylon coil zipper sized 1–2 inches wider than the pouch width
- Interfacing, weight-matched, if the exterior needs body (test first)
- All-purpose or heavy-duty polyester thread
Tools
- Ruler, chalk or removable marker, paper for a panel template
- Zipper foot
- Fabric shears or rotary cutter and mat
- Sewing machine with a fresh needle suited to the fabric
- Clips
- Iron and press cloth
- Seam ripper (for the inevitable adjustment)
Instructions
- Choose the zipper first, then size the pouch to it — this is the opposite of how most people work, and it is why so many scrap pouches end up with a zipper that does not fit the opening. The finished pouch width should match the zipper’s usable tape length.
- Cut exterior panels from your samples, adding seam allowance. If two samples make up the front, decide the split line and check that the pattern or colour break falls where you want it. Photograph the layout.
- Cut matching lining panels, and interface the exterior if testing shows it needs structure. A pouch made from mid-weight wovens usually does not; a pouch made from drapery weight does.
- Install the zipper between the exterior panels and the lining using the standard sandwich method: exterior face up, zipper face down, lining face down. Sew, flip, press away from the zipper, and topstitch.
- Bar tack both ends of the zipper with a short, dense row of narrow zigzag or a bar tack before you sew the side seams. This is the step that stops the zipper pulling out under load.
- Open the zipper halfway. With the pouch right sides together, sew the side seams and the bottom, joining exterior to exterior and lining to lining, and leaving a turning gap in the lining.
- Decide boxed or flat corners. Box by measuring a square at each bottom corner equal to the depth you want, sewing across it, and trimming. If the corner stack defeats the machine on a test, switch to a dart or leave the corners flat — a flat pouch that sews cleanly beats a boxed one with a broken needle and a skipped seam.
- Turn the pouch through the lining gap, push out the corners carefully with a blunt tool, and press within the fabric’s tolerance.
- Close the lining gap by hand or machine, then topstitch around the pouch if the design calls for it.
- Test the zipper. Open and close it ten times empty, then ten times with the pouch loaded. Check that the zipper ends are enclosed or protected, no sharp metal is exposed inside, and the tape does not pucker.
Customization. Split the front panel diagonally rather than vertically for a more designed look. Use a contrasting lining as an interior accent. Add a small exterior slip pocket for a frequently used tool. Make a nested set in three sizes from one coordinated sample group, using the same lining throughout so they read as a family.
Practical tip. Start and finish the side seams away from the bulky zipper ends, and hand-walk the machine through them. Starting directly on top of a zipper end plus seam allowance plus lining is where most skipped stitches and broken needles happen.
Common mistake. Not bar tacking the zipper ends. The zipper is the single most stressed component of the pouch, and an untacked zipper end will eventually pull out of the seam, taking the surrounding fabric with it. It takes ten seconds and prevents the most common failure in this entire project category.
Safety note. Enclose or protect both zipper ends so no sharp metal is exposed inside the pouch. No claim that a soft pouch protects contents from crushing or impact — it does not. The pouch holds light tools and notions, not valuables that need physical protection.
Material fit and construction notes
- Suitable fabrics: Mid-weight wovens with limited stretch and moderate thickness. Coated and faux leather samples work well here if you test them, because a pouch shows off a smooth surface.
- Minimum practical sample size: Two exterior panels around 9 × 6 in (23 × 15 cm) usable each for a mid-size pouch. (sized to accommodate zipper seam allowances)
- Do not substitute without testing: Coated and faux-leather samples — they hold permanent needle holes, so you cannot unpick a misplaced zipper seam. Test the whole construction on offcuts first.
- Adapting to your swatches: If a single sample is too small for one panel, split the front into two or three colour-blocked pieces and keep the back from one sample so the pouch still has a solid side.
- Match panels for: Thickness. Unequal thickness at the zipper seam produces a wavy zipper, which is the most visible failure this project has.
- Direction: Match pile direction across the front panels, and keep the pile running downward or upward consistently across the finished pouch.
- Structure: Interface only if testing shows it is needed. Use a firm, smooth lining for the interior.
- Seam and edge finish: Enclosed lining, graded seams, bar tacked zipper ends, boxed or darted corners.
- Test first: The zipper seam stack including lining, and the boxed corner if you plan to use one.
- Closure reinforcement: Bar tacks at both zipper ends, plus a short bar tack at each end of the topstitching.
- Intended contents and limits: Notions, cables, small tools, art supplies. Nothing fragile, nothing valuable that needs impact protection, no liquids.
- Cleaning and storage: Remove contents and close the zipper before cleaning. Spot-clean within documented care. Dry fully before closing and storing. Do not store damp.
- Repair or retire if: The zipper pulls out or becomes wavy, the lining gap opens, corners fray, the coating cracks near a seam, or the pouch stops closing cleanly.
Maker’s Workshop Note: When boxing the bottom corners, upholstery seams can create an immovable lump of fabric that causes home sewing machines to skip stitches. Grade your seam allowances generously: trim inner foam or fleece flush against the seam, and stagger the outer fabric allowances by 1/8 inch to distribute bulk.
10. Jewelry Travel Roll with Smooth Lining
What it looks like. A fabric roll that opens flat into separate compartments for rings, earrings, and a short necklace, then rolls up and closes with a tie or a snap. The interior is a smooth, tight-weave lining that will not shed onto the contents.
Best use. Taking a small amount of jewelry on a trip, and keeping it from tangling in a bag. A good use for two or three mid-weight samples with a bold exterior and a plain interior.
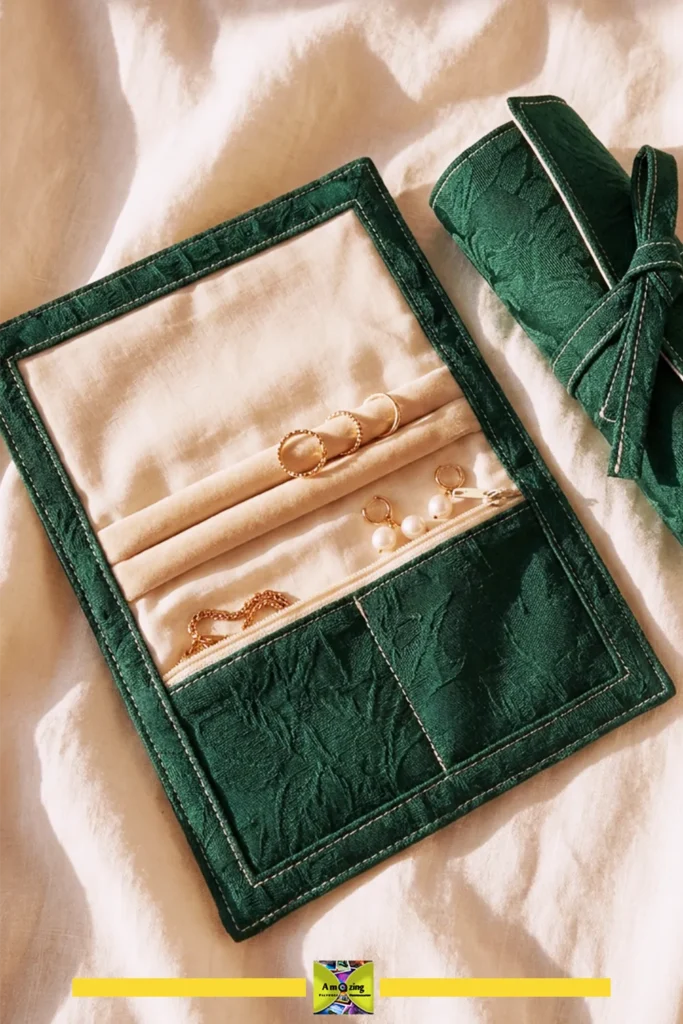
Difficulty. Intermediate. The compartment layout is the design work; the sewing is manageable.
Approximate time. 2–3 hours
Materials
- One or two samples for the exterior
- Smooth lining fabric — a tight-weave cotton, batiste, or smooth synthetic lining
- A firm interfacing or sew-in stabilizer for the roll body (test first)
- Ribbon, cord, or a narrow strip of binding for the tie, or a snap set through reinforcement
- All-purpose polyester thread
Tools
- Ruler, chalk or removable marker, paper for a layout
- Fabric shears or rotary cutter and mat
- Sewing machine with a needle suited to the fabric
- Hand-sewing needle, thimble
- Clips, iron, press cloth
- Snap setter if used
Instructions
- Lay out the actual jewelry you intend to store on a sheet of paper and draw the compartments around it. Sizes come from the rings, the earrings, and the chain length — not from a standard pattern.
- Add the flap, the roll-up allowance, and the tie placement to the paper layout, then test-roll the paper to confirm it closes the way you want before cutting fabric.
- Cut the exterior and lining panels from the layout. Cut the interfacing if testing shows the roll needs body; a roll that is too stiff will not roll tightly, so test the hand-feel before committing.
- Sew the interior compartments to the lining panel: the small ring band, the earring section, and the necklace pocket. Reinforce the top edge of each compartment before attaching it, and bar tack each division.
- Attach the tie ribbon or reinforce and set the snap at this stage, before the roll is closed up — it is far easier to do flat.
- Sew the exterior to the lining, right sides together, leaving a turning gap. Turn, press within the fabric’s tolerance, and close the gap.
- Topstitch around the roll’s edge. A consistent topstitch is what makes a mixed-sample roll read as a made object.
- Roll it up with the jewelry inside. Check that the closure holds, that the compartments keep items separated, and that no item can work its way out of an open end.
- Check the closure position again with the roll loaded — a tie placed for an empty roll is often in the wrong place once it is full.
- Inspect the interior for anything abrasive: a rough seam, a stray thread, or a hard closure part that could contact the contents. Fix any you find before using the roll.
Customization. Use a bold-motif sample for the exterior and a quiet one for the interior. Add a small removable pouch for a bracelet. Use a two-tone tie in a contrasting binding for a visible accent. Make a larger version for sewing notions or art supplies.
Practical tip. Test the tie or snap position with the roll full, not empty. Most rolls that come undone in a suitcase were closed with a tie placed to fit an empty roll.
Common mistake. Choosing a loose-weave or fuzzy lining because it feels soft. A lining that sheds fiber onto jewelry, or that catches on earring posts, makes the roll unpleasant to use. Choose a smooth, tight weave, and test it against the actual contents before you cut the final panels.
Safety note. Do not make any anti-tarnish, scratch-prevention, or protection claim for this project. A soft lining reduces contact; it does not prevent tarnish, scratching, or damage. Do not store high-value or heirloom pieces in a handmade roll until you have genuinely tested it. Keep the closure parts positioned so they cannot contact the contents, and keep the roll away from children and pets.
Material fit and construction notes
- Suitable fabrics: Mid-weight wovens with a smooth hand for the exterior. Avoid loose weaves and heavy pile near the lining.
- Minimum practical sample size: Exterior panels around 12 × 9 in (30 × 23 cm) usable for a mid-size roll, or pieced. (measured to fit your folded roll layout)
- Do not substitute without testing: Chenille and heavy pile samples for the interior-facing fabric — they shed and catch. Coated samples where a snap will be set.
- Adapting to your swatches: Piece the exterior from two or three samples with a deliberate diagonal or horizontal split, and keep the interior plain so the busy exterior has a rest.
- Match panels for: Thickness, especially along the roll’s closure edge.
- Direction: Match pile direction on the exterior panels so the roll does not change colour when it is rolled.
- Structure: Light interfacing optional depending on hand-feel; smooth lining required.
- Seam and edge finish: Enclosed construction, turned and pressed, topstitched edge, reinforced compartment tops.
- Test first: Interfacing hand-feel before fusing, and the closure position with the roll loaded.
- Closure reinforcement: Reinforced tie anchor or an interfacing patch behind a snap.
- Intended contents and limits: Small jewelry and small accessories. No anti-tarnish or protection claim. Not for high-value pieces without genuine testing.
- Cleaning and storage: Empty before cleaning. Spot-clean within documented care only. Dry fully before rolling and storing. Store rolled, not flattened under weight.
- Repair or retire if: The closure fails, a compartment opens, the lining develops a rough spot or traps grit, or the exterior abrades through.
Maker’s Workshop Note: While the upholstery exterior offers rugged travel protection, make sure the interior lining is silk habotai, cotton velvet, or ultra-suede. Rough upholstery fibers can scratch polished silver or snag fine prong settings. Fill the padded ring bar with dense wool roving rather than loose polyfill for firm, secure ring retention.
11. Dry Brush and Pencil Roll with Protective Flap
What it looks like. A fabric roll with pockets of varying widths for brushes and pencils, a flap that folds over the tips, and a closure that does not press on the tools. Rolls up compactly and ties shut.
Best use. Storing and carrying art brushes, pencils, markers, and small drafting tools with the tips protected.
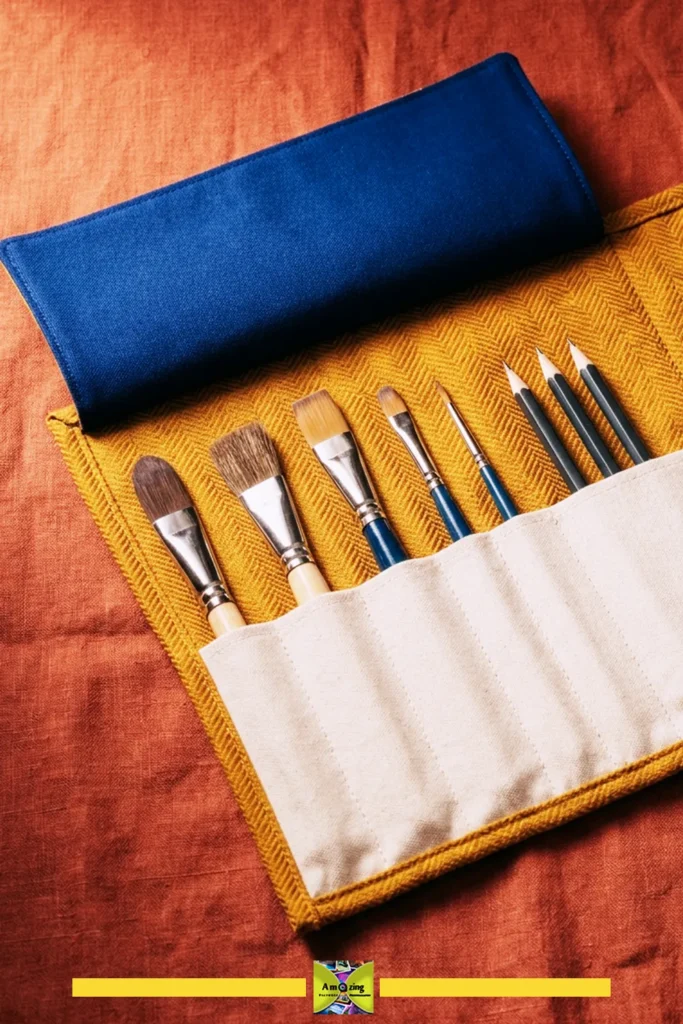
Difficulty. Beginner to intermediate.
Approximate time. 2–3 hours
Materials
- One or two samples for the exterior
- A mid-weight woven for the interior pocket panel
- Lining fabric for the back panel
- A ribbon, cord, or binding strip for the tie, or a snap set through reinforcement
- All-purpose polyester thread
Tools
- Ruler, pencil, paper for the layout
- Fabric shears or rotary cutter and mat
- Sewing machine with a needle suited to the fabric
- Clips
- Iron and press cloth
- Hand-sewing needle for closing any gap
Instructions
- Measure every tool you intend to store: length, and the diameter at its widest point. Group them by size — wide brushes, medium brushes, pencils, and thin tools.
- Draw the pocket layout on paper. Pocket widths come from the tool diameters. Add the flap depth to cover the longest tip, plus the roll-up allowance, plus the tie position. Test-roll the paper.
- Cut the exterior, pocket panel, and lining panel from the layout. The pocket panel usually comes from a mid-weight woven rather than a heavy sample, because it needs to fold between tools.
- Reinforce the pocket panel’s top edge, then topstitch it before attaching it to the exterior.
- Position the pocket panel on the exterior and sew the vertical divisions. Bar tack the top of each division — these take the wear every time a tool is inserted.
- Sew the flap to the pocket panel’s top, or fold and finish the flap as part of the panel, so the flap can cover the tool tips completely.
- Sew the exterior to the lining, right sides together, leaving a turning gap. Turn, press within the fabric’s tolerance, and close the gap.
- Attach the tie or the reinforced snap, checking the position with the roll loaded rather than empty.
- Load the roll with the actual tools. Confirm the flap covers the tips, the closure does not press on the bristles, and no tool can slide out of an open end.
- Roll it and check that the widest brush does not create a lump that strains the closure. Adjust pocket spacing if it does.
Customization. Size the pockets to your own tool set rather than to a standard. Use a bold sample for the exterior and a plain one for the pockets so the tools read clearly. Add a small flap pocket for a sharpener or an eraser. Add a shallow pocket at the end for a small rag or a palette knife.
Practical tip. This roll is for dry brushes only. Never roll a brush that has been in water, solvent, or wet paint — moisture trapped against fabric in a closed roll damages both the brush and the fabric, and can transfer pigment permanently. Let everything dry completely before it goes in.
Common mistake. Using a tight elastic band across the pocket to hold tools. Elastic presses on bristles, deforms brush shapes over time, and loses tension. Sized fabric pockets with a protective flap hold tools better and do not damage them.
Safety note. Dry use only. Nothing wet, nothing solvent-laden, nothing that has been in contact with paint or medium until it is fully dry. If you store a craft knife or blade in the roll, it must have its own guard and its own closed pocket — a fabric roll is not a blade cover.
Material fit and construction notes
- Suitable fabrics: Mid-weight wovens for the exterior; a firmer, tighter woven for the pocket panel so pockets hold their shape. Good use for medium samples with a strong motif.
- Minimum practical sample size: Exterior panels around 14 × 10 in (36 × 25 cm) usable for a mid-size roll, or pieced. (proportioned to the longest tool in your set)
- Do not substitute without testing: Stretchy backed samples for the pocket panel — the pockets will stretch and lose their grip on the tools.
- Adapting to your swatches: Piece the exterior from two or three samples; the flap is a natural place for a contrasting panel.
- Match panels for: Thickness along the flap edge, so it folds cleanly over the tools.
- Direction: Match pile direction on the visible exterior; on the pocket panel it matters less but consistency still looks better.
- Structure: Reinforced and topstitched pocket top edge; no rigid insert needed.
- Seam and edge finish: Enclosed construction, turned and pressed, bar tacks at each pocket division.
- Test first: The pocket-panel stack on the machine, and the closure position with the roll loaded.
- Closure reinforcement: Reinforced tie anchor or an interfacing patch behind a snap.
- Intended contents and limits: Dry brushes, pencils, markers, and small tools. Nothing wet, nothing with an exposed blade, nothing heavier than the flap can cover.
- Cleaning and storage: Empty before cleaning. Spot-clean within documented care, and never wash with tools inside. Dry fully before rolling. Store rolled, with the flap closed.
- Repair or retire if: Pockets stretch or split, bar tacks pull out, the flap stops covering the tips, the closure fails, or the exterior abrades through.
Maker’s Workshop Note: Don’t sew all your tool slots at uniform widths. Measure your actual gear: allow 1.75 inches for flat wash brushes and palette knives, and 0.875 to 1 inch for graphite pencils and micron pens. Grade the top protective flap by 1/4 inch longer on the brush head side to safeguard delicate natural bristles.
12. Lined Eyeglass Case with Reinforced Opening
What it looks like. A slim, softly structured sleeve with a smooth interior lining, a reinforced mouth, and a closure placed away from the lens area. Made from one or two samples with a clean, simple shape.
Best use. Keeping everyday glasses or sunglasses from being scratched by keys in a bag. A good use for a single strong sample.
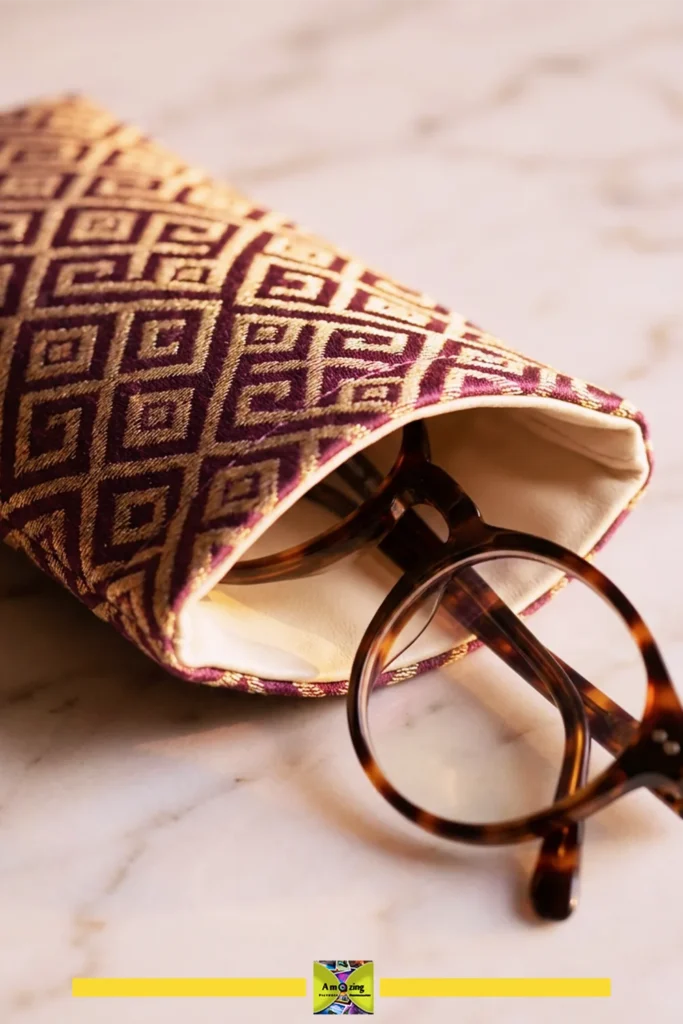
Difficulty. Beginner.
Approximate time. 1–1.5 hours
Materials
- One or two samples for the exterior
- Smooth, tight-weave lining fabric — no loose weave, no shedding
- Light interfacing for the exterior if needed (test first)
- A closure: a snap set through reinforcement, a flap with a hook-and-loop tab on dry use only, or a simple overlap
- All-purpose polyester thread
Tools
- Ruler, chalk or removable marker, paper for a template
- Fabric shears or rotary cutter and mat
- Sewing machine with a needle suited to the fabric
- Clips
- Iron and press cloth
- Snap setter if used
- The actual glasses, for fit testing
Instructions
- Trace the folded glasses onto paper and add a small clearance all round plus the flap. Test-fit the paper template around the actual glasses before cutting fabric — a case that is too tight is worse than one that is slightly loose.
- Cut the exterior and lining panels from the template, plus interfacing if a test shows the exterior needs body.
- Sew the exterior to the lining, right sides together, along the top opening edge. Turn and press within the fabric’s tolerance, then topstitch the opening.
- Fold the case right sides together and sew the side and bottom seams, joining exterior to exterior and lining to lining, leaving a turning gap in the lining.
- Trim and grade the seam allowances, clip the curves at the bottom corners.
- Turn through the gap, push the corners out gently with a blunt tool, and press.
- Close the lining gap by hand for the cleanest finish.
- Reinforce the opening: run a second line of stitching, or add a narrow interfacing strip, along the mouth on both sides. This is where the case wears out first.
- Attach the closure, positioned so it cannot contact the lenses — at the flap end, not across the middle of the case. Reinforce both halves with an interfacing patch before setting.
- Fit-test with the actual glasses. Insert them, close the case, and confirm nothing presses on the frame or the lenses, and that the glasses can be removed without forcing.
Customization. Use one strong sample and a contrasting lining. Add a small loop for a carabiner or a bag strap, bar tacked. Make a matching case for a phone or a small notebook from the same palette. Add a fabric tab pull to the flap for easy opening.
Practical tip. Reinforce the mouth. The opening of an eyeglass case takes the entire wear of insertion and removal, and it is where the lining separates from the exterior first. A second line of stitching takes two minutes and significantly extends the case’s life.
Common mistake. Making it too tight. A case that grips the glasses feels secure in the hand and is a constant source of stress on the frame every time the glasses go in. Add clearance, and let the closure do the holding.
Safety note. Do not claim impact protection, crush protection, or scratch-proofing. A fabric case reduces contact with other objects; it does not protect glasses from being sat on, dropped on a hard surface, or crushed. The lining must be smooth with no abrasive seams in the lens area, and the closure must be positioned away from the lenses. Take the case out of use if the lining traps grit, a seam becomes rough, or hardware becomes exposed.
Material fit and construction notes
- Suitable fabrics: One or two mid-weight wovens with a smooth or lightly textured face. Coated and faux-leather samples work if tested. Avoid anything rough, heavily piled, or shedding.
- Minimum practical sample size: Two panels around 7 × 4 in (18 × 10 cm) usable each for a standard case, or a single piece of about 7 × 8 in (18 × 20 cm) folded. (measured around your largest frames with 1/2-inch ease)
- Do not substitute without testing: Chenille, heavy pile, and loose weaves — they shed onto lenses. Coated samples where a snap will be set.
- Adapting to your swatches: The case is small, so a single sample usually covers it. Use the case as the destination for one sample you particularly like.
- Match panels for: Thickness, so the case does not twist.
- Direction: Match pile direction if the case will be visible in a bag or pocket.
- Structure: Light interfacing optional; reinforced mouth mandatory; smooth lining required.
- Seam and edge finish: Enclosed construction, graded seams, clipped curves, reinforced opening.
- Test first: The closure on a doubled scrap, and a full fit test with the actual glasses.
- Closure reinforcement: Interfacing patch behind both closure halves.
- Intended contents and limits: Everyday glasses and sunglasses. No protection claim. Not for valuable eyewear until you have genuinely tested it in use.
- Cleaning and storage: Remove the glasses before cleaning. Spot-clean only within documented care. Dry completely before closing. Store the case open when not in use so it does not hold moisture.
- Repair or retire if: The lining traps grit or develops a rough spot, the opening frays or separates, hardware becomes exposed, the closure fails, or the case stops holding its shape.
Maker’s Workshop Note: Installing an internal 3.5-inch metal flex frame (squeeze-to-open spring frame) turns an upholstery offcut into a sleek, snap-shut case that opens with one hand. Line the inside with high-density optical microfiber cloth so your glasses are gently buffed clean every time you slide them in or out.
Decorative dry-use projects
13. Non-Heated Desk Mat and Writing-Pad Cover
What it looks like. A flat fabric mat with a stable backing, flat seams, and cleanly finished corners, sized for a desk or to wrap a writing pad. The surface is the fabric; the backing is chosen for compatibility with the desk finish.
Best use. A decorative surface on a desk, console, or side table, and a way to use one large sample or several pieced panels that all need to lie completely flat.
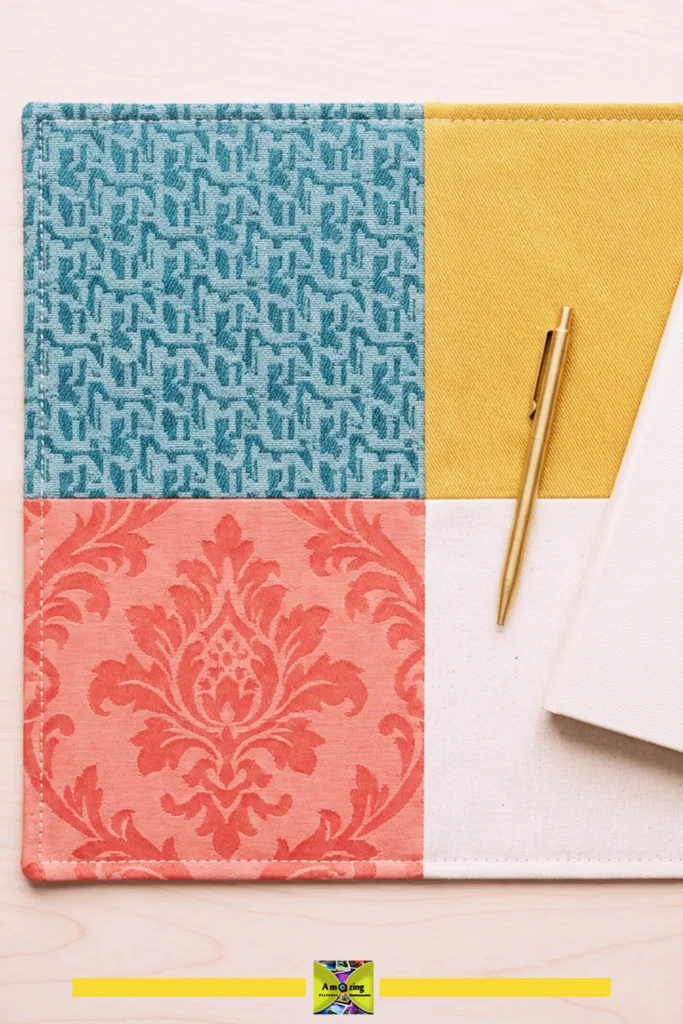
Difficulty. Beginner to intermediate. Simple construction, demanding finishing.
Approximate time. 2–3 hours
Materials
- One large sample, or two to four samples pieced into a panel
- Backing fabric or a backing layer selected for compatibility with the furniture finish test non-slip underlay on an inconspicuous corner of fine wood finishes first
- Firm interfacing or a thin sew-in stabilizer to keep the mat flat
- All-purpose polyester thread
Tools
- Ruler and a large square, or a cutting mat with gridlines
- Fabric shears or rotary cutter and mat
- Sewing machine with a needle suited to the fabric
- Clips
- Iron and press cloth
- A large flat surface for blocking and checking flatness
Instructions
- Decide the mat size from the desk space and from the largest sample or panel you can produce. A mat that is 1 inch (2.5 cm) too small reads as a mistake; one that is slightly generous reads as deliberate.
- Piece the panel if needed. Match straight grain on every joined piece and press each seam flat as you go — a mat is the one project where every seam error shows.
- Cut the backing layer and the interfacing or stabilizer to the same size.
- Assemble in the order that keeps the final seam accessible: place the backing face down, the interfacing or stabilizer on top, and the panel face up, then sew around all four sides, leaving a turning gap on one long edge.
- Trim the corners diagonally, close to but not through the stitching. Turn the mat right side out.
- Press the mat flat, pressing from the centre outward, and pay particular attention to the corners. Let it cool completely before moving it.
- Close the turning gap by hand for the cleanest edge.
- Topstitch around the perimeter, consistent distance from the edge. This is what stops the layers shifting and the corners curling.
- Lay the mat on the flat surface it will live on and check for rocking. If it rocks, the problem is almost always a corner that has not been turned out fully or a seam that has drawn up. Fix it before use.
- Test the mat on an inconspicuous area of the actual furniture finish before leaving it in place. Check again after a few days for any marking or dye transfer.
Customization. Piece the panel from four coordinated samples in a symmetrical layout. Use a contrasting binding instead of a turned edge. Add a narrow strip of a third sample as a border. Quilt the mat lightly with a few straight lines to hold the layers and add texture.
Practical tip. The corners decide how the mat reads. A mat with flat, square, fully turned corners looks made; one with rounded or puckered corners looks homemade regardless of how good the fabric is. Turn the corners out with a blunt point, press hard, and check them on a flat surface before topstitching.
Common mistake. Skipping the back-of-furniture test. A backing that is incompatible with a desk finish can mark, haze, or react with the surface, and the damage usually shows up after the mat has been sitting there for a while. Test on an inconspicuous area first, and check again after a few days.
Safety note. Dry use only. This is a decorative surface, not a food-contact surface and not a heat-protective surface. Never use it as a trivet, under a hot dish, or anywhere a hot object will sit on it, and make no claim that the backing prevents scratches, stains, or moisture marks. Take it out of use if it curls, rocks, transfers dye, or exposes a hard edge.
Material fit and construction notes
- Suitable fabrics: Mid-weight wovens that lie flat and press well. Best use for a single large sample or a set of similar-weight samples that piece neatly.
- Minimum practical sample size: One panel around 24 × 14 in (60 × 35 cm) usable for a small desk mat, or several pieces pieced to that size. (proportioned to your clear desktop footprint)
- Do not substitute without testing: Heavy jacquards that will not lie flat, and coated samples that crease permanently along the fold lines.
- Adapting to your swatches: Piece the panel with straight-grain joins and match the seam lines deliberately rather than trying to hide them.
- Match panels for: Thickness and stretch — this is the project where a mismatched panel is most visible, because it has to lie perfectly flat.
- Direction: Match pile direction across all joined pieces, and align warp and weft with the mat’s edges.
- Structure: Thin interfacing or sew-in stabilizer to keep it flat; backing layer chosen for furniture compatibility.
- Seam and edge finish: Turned and topstitched perimeter, diagonal-trimmed corners, hand-closed gap.
- Test first: The backing against the actual furniture finish, and the pieced panel’s flatness before assembly.
- Closure reinforcement: None — no closure on this project.
- Intended contents and limits: A decorative surface for dry desk items. No food, no heat, no moisture, no scratch-prevention claim.
- Cleaning and storage: Spot-clean within documented care. Dry fully and flat before replacing on furniture. Store rolled around a large tube, not folded, to prevent crease lines.
- Repair or retire if: It curls or rocks, transfers dye, marks the furniture, develops a hard edge, or the topstitching breaks.
Maker’s Workshop Note: To keep your desk mat stationary on slick wooden or glass tabletops, back it with natural rubber mesh or a thin faux-suede backing glued with water-based contact cement. Keep this mat designated for writing pads and keyboards; synthetic upholstery weaves can melt if subjected to steaming ceramic coffee mugs.
14. Reversible Pattern-Matched Console Runner
What it looks like. A long, narrow fabric panel with straight, clean edges and pattern-matched joins, reversible so either side can face up. Two different faces, one object.
Best use. A console, sideboard, dresser top, or dining table for decorative dry use only — a surface for a vase, a lamp, or a tray.
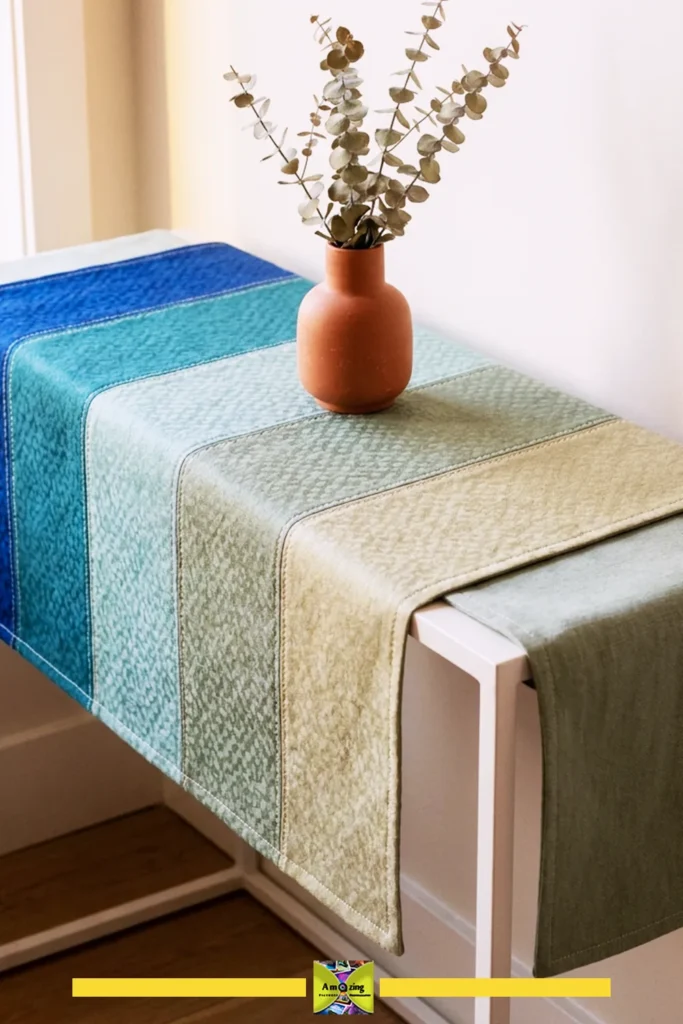
Difficulty. Intermediate. The construction is simple; the pattern matching and the finish are not.
Approximate time. 3–4 hours including matching and pressing
Materials
- Four to eight samples for one face, coordinated by weight and palette
- Lining or second-face fabric for the reverse
- Light interfacing or sew-in stabilizer to help it lie flat (test first)
- All-purpose polyester thread
Tools
- Long ruler and square, or a cutting mat with gridlines
- Fabric shears or rotary cutter and mat
- Sewing machine with a needle suited to the fabric
- Clips
- Iron, press cloth, and a large flat pressing surface
- A long flat surface for checking flatness
Instructions
- Measure the surface the runner will sit on, and decide on a drop at each end — enough to hang slightly, not so much that it becomes a trip risk or catches on chair backs.
- Group your samples by weight and pick a palette of two to four colours. Decide the panel sequence on paper before cutting anything: how many panels, what width each one is, and in what order.
- Cut the panels to a consistent width. Consistent panel width is what makes a mismatched runner read as designed rather than assembled.
- Match the pattern at each join where the fabric allows — one strong line, not every line. Where it does not allow, cut the panels so the pattern is deliberately centred within each panel instead, and let the joins be clean breaks.
- Sew the panels into a strip. Press each seam flat as you go, and keep the strip straight — check it against a long straightedge after every two or three joins.
- Trim the strip to a true rectangle using a square and a long ruler. Any curve in the strip becomes a curve in the finished runner.
- Cut the reverse face panel to the same dimensions. Interface or stabilize both faces if a test shows it helps them lie flat.
- Sew the two faces right sides together, leaving a turning gap on one long side. Trim the corners diagonally, turn, and press carefully — pressing the seams flat is what makes it hang properly.
- Close the gap by hand. Then topstitch around the perimeter, consistent distance from the edge.
- Lay the runner on the actual surface and check that it lies flat without rocking, that the ends hang evenly, and that the pattern reads correctly from the direction it will be seen.
Customization. Reverse the panel order on the second face so the runner genuinely changes character when turned. Use a solid reverse for a quiet option. Create a light-to-dark gradient across the panels. Repeat a single neutral between every patterned panel to give the eye a rest. Run a narrow binding around the perimeter rather than a turned edge.
Practical tip. Consistent panel width does more for a mismatched runner than any amount of careful pattern matching. When you cannot match the pattern, match the dimensions and the topstitching instead, and the object will look intentional.
Common mistake. Cutting every panel to fit the samples rather than to a consistent measurement. Random widths and random lengths produce a runner that reads as leftovers, no matter how good the individual fabrics are. Decide the width first, then cut every panel to it.
Safety note. Decorative dry use only. This is not a tablecloth for meals, not a food-contact surface, and not a heat-protective mat. Do not place hot dishes, candles, or open flames on it. Keep the ends clear of walkways so nobody catches a foot on them, and keep them out of reach of children and pets.
Material fit and construction notes
- Suitable fabrics: Mid-weight wovens of similar thickness. This is the best project for a large group of similar-weight samples that differ in colour and pattern.
- Minimum practical sample size: Panels of consistent width, typically 8–12 in (20–30 cm) each, at whatever length your samples allow. (sized with a 6-inch overhang on either console side)
- Do not substitute without testing: Heavy jacquards mixed with light drapery weights, and coated samples that will not press flat.
- Adapting to your swatches: Let the samples dictate the number of panels and the runner’s total length, then adjust the end drop to suit. Never force a runner longer than the fabric allows.
- Match panels for: Thickness above all, then weight and stretch. Differing thicknesses create ridges along the joins.
- Direction: Match pile direction across every panel — on a long flat surface, a pile panel running the wrong way is immediately visible.
- Structure: Light interfacing or sew-in stabilizer on both faces if needed to lie flat.
- Seam and edge finish: Enclosed construction with a turned and topstitched perimeter, or a bound perimeter, with pressed-open joins.
- Test first: The join stack on the machine, and the finished runner’s flatness on the actual surface.
- Closure reinforcement: None.
- Intended contents and limits: Decorative dry use. Vases, lamps, and trays — nothing hot, nothing wet, nothing food-contact.
- Cleaning and storage: Spot-clean within documented care. Dry fully and flat. Store rolled around a tube rather than folded, so crease lines do not set along the panel joins.
- Repair or retire if: Seams pucker or open, the runner curls or rocks, dye transfers to the surface beneath, or the panels develop ridges along the joins.
Maker’s Workshop Note: When combining diverse swatches into a long runner, arrange them by optical weight: place deeper tones and larger geometric motifs toward the outer ends, keeping quieter weaves in the center. At the corners, clip a 45-degree miter out of the hem allowance to ensure sharp, non-bulky corners that lie completely flat.
15. Reinforced Curtain Tieback Pair
What it looks like. A matched pair of fabric straps with reinforced ends and a suitable hook or holdback, used to hold a lightweight curtain back from a window.
Best use. Restraining a lightweight curtain in a room where a fabric tieback suits the décor better than a metal holdback.
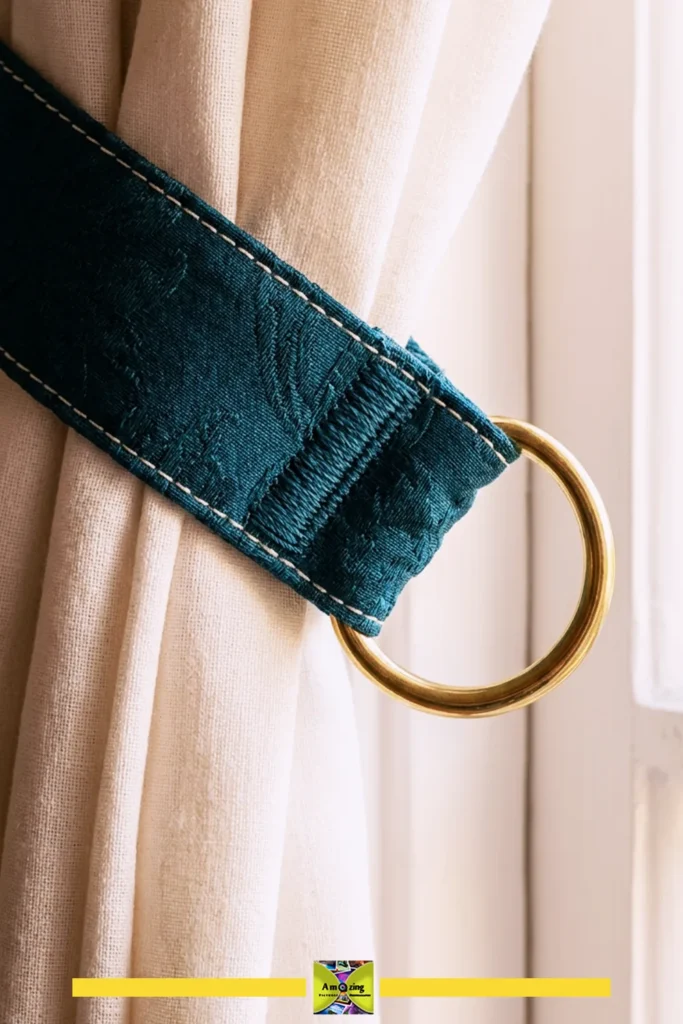
Difficulty. Beginner.
Approximate time. 1–1.5 hours for the pair
Materials
- Two samples, or one sample cut into two matched straps
- A light interfacing or sew-in stabilizer for the strap ends (test first)
- Two hooks, rings, or holdbacks selected for the curtain weight and the mounting surface using solid brass rings rated for drapery tension
- All-purpose polyester thread
Tools
- Tape measure, chalk or removable marker
- Fabric shears or rotary cutter and mat
- Sewing machine with a needle suited to the fabric
- Clips
- Iron and press cloth
- Screwdriver or the tool required for the wall hardware
Instructions
- Measure the curtain in the position it will be held: the distance around the gathered fabric from the mounting point to the mounting point. Add a small allowance. Measure both sides separately — windows are not always symmetrical.
- Decide the strap width from the curtain’s weight and the scale of the room. A wide strap on a sheer curtain looks heavy; a narrow one on a heavy curtain looks inadequate.
- Cut two straps to the same length and width. Cut the reinforcement pieces for both ends.
- Fold and press the strap’s long edges to the wrong side, then fold again and press, creating a double-fold strip. If the fabric is too thick to double-fold, bind the raw edge instead.
- Reinforce both ends: add the interfacing or stabilizer patch, or double the fabric over, so the hardware cannot pull through.
- Topstitch along both long edges, then bar tack each end heavily — several passes, or a dense zigzag. The ends take the entire load.
- Add the hardware: an eyelet set through the reinforced end, a fabric loop sewn and bar tacked, or a ring threaded through a folded end. Test each end by pulling firmly before it goes anywhere near a curtain.
- Mount the holdback or hook into the wall or window frame, using hardware appropriate to the substrate. Check the manufacturer’s guidance for the material you are fixing into.
- Fit the tiebacks with the curtain hanging. Confirm the curtain is held gently — a tieback should restrain a lightweight curtain, not compress it.
- Check the finished arrangement for any loop, gap, or slack that a child or a pet could reach. If there is one, change the arrangement.
Customization. Match the strap width to the curtain’s leading edge. Use a contrasting binding on the strap’s reverse for a visible detail when the curtain moves. Make a wider version as a curtain holdback over a hook. Use the same sample as a coordinating project for a matched set.
Practical tip. Curtain hardware is a safety area, not a decorative one. Cord-safety guidance for window coverings is specific: cords should be kept out of children’s reach, furniture and cribs should be moved away from windows and cords, cords should never be knotted or tied together, and hold-down or tension devices on continuous-loop cords must stay installed and functional. A tieback must never interfere with, bypass, or remove a window covering’s cord-safety device. Check current CPSC guidance before installing anything near a window in a home with children or pets.
Common mistake. Using a tieback as a load-bearing strap. Tiebacks hold light fabric in place. They are not handles, not restraints, not furniture anchors, and not straps for lifting anything. A tieback that has been used to pull on will fail at the end, usually without warning.
Safety note. Lightweight curtain restraint only. Never use as a handle, a child restraint, a furniture anchor, a safety strap, or for any load-bearing purpose. Position tiebacks so they do not create a loop a young child or a pet can reach — this is the same hazard class as window-covering cords, which CPSC identifies as a leading cause of strangulation deaths in young children, at roughly nine deaths a year in children under five. Do not obstruct or interfere with any cord-safety device, tension device, or hold-down the window covering relies on. Keep cords out of reach and never knot them together.
Material fit and construction notes
- Suitable fabrics: Mid-weight wovens with a firm hand that will hold a fold. A tieback needs to keep its shape under a light pull.
- Minimum practical sample size: Two straps around 12 × 4 in (30 × 10 cm) usable each, depending on the measurement. (measured around your gathered drape plus 2 inches ease)
- Do not substitute without testing: Stretchy backed samples — a tieback that stretches will not hold. Heavily coated samples that crack along the fold line.
- Adapting to your swatches: The strap is narrow, which makes it an excellent use for the long, thin offcuts that no other project can use.
- Match panels for: Stretch — this is the critical property. Both straps should stretch the same amount or the pair will hang differently.
- Direction: Match pile direction across both straps so the pair reads as a set.
- Structure: Reinforced ends mandatory; light interfacing along the strap if the fabric is soft.
- Seam and edge finish: Double-fold and topstitched, or bound, with heavily bar tacked ends.
- Test first: Pull-test each finished end firmly before mounting, and check the hardware against the substrate.
- Closure reinforcement: Bar tacks at every end and at every hardware attachment point.
- Intended contents and limits: Lightweight curtain restraint only. Nothing else, ever.
- Cleaning and storage: Remove from the window before cleaning. Spot-clean within documented care. Dry fully before refitting. Store flat, not knotted.
- Repair or retire if: Ends fray or pull, bar tacks loosen, the strap stretches, the hardware loosens or pulls, or the fabric creases permanently at the fold.
Maker’s Workshop Note: Heavy velvet or blackout drapes place significant shear stress on tiebacks. Use 1-inch solid cast brass or welded steel O-rings at the ends rather than cheap plastic rings. Fasten the ring tabs to the tieback body using an enclosed ‘box-with-an-X’ stitch pattern sewn with heavy-duty topstitching thread.
Making unrelated samples look intentional
The hardest part of working with sample books is not the sewing. It is making six fabrics that were never meant to sit together look like they were chosen.
Choose a palette before you choose a pattern. Two to five colours per project, or per coordinated set. Fewer is almost always better. Pick one dominant, one or two supporting, and one accent.
Match weight and hand before you match print. Two fabrics of the same weight in clashing colours will look far better together than two perfectly colour-matched fabrics of different weights. Weight is what the eye reads as “these belong together” at a distance.
Group by undertone. Warm with warm, cool with cool. A warm cream and a cool grey in the same object will fight even if both are neutral, because they read as different whites.
Let one fabric lead. Pair one bold motif with quieter solids and textures. If two fabrics both want to be the focal point, the object has no focal point.
Repeat one neutral. A single consistent lining across multiple projects ties a set together more effectively than matching exteriors would.
Repeat a dimension. Consistent panel widths, consistent pocket heights, or a consistent overall size make unrelated fabrics read as a deliberate collection.
Repeat a construction detail. The same topstitch distance on every project in a set, the same binding, the same seam allowance. Consistency of making is what separates “coordinated” from “miscellaneous.”
Coordinate the hardware. Zippers, binding, thread, snaps, and any visible hardware should come from the same small family. A brass snap on one piece and a silver one on the next breaks the set.
Align direction. Stripes, checks, geometric motifs, and pile direction should all run consistently. On paired items, mirror the placement so they read as a left and a right.
Use measured colour blocking where matching fails. A fixed, repeated sequence of colours — A, B, A, C — reads as design. A random arrangement reads as leftovers.
Conceal the structure. Interfacing, stabilizer, and reinforcement should be invisible from the outside. Visible structure usually means the finish was an afterthought.
Keep raw edges finished. An unfinished raw edge on an upholstery fabric will fray, and no amount of good colour planning survives a fraying edge. Every edge inside and out gets a finish.
Restrain the trim. Tassels, beads, lettering, and unrelated embellishments compete with fabric that is already visually strong. Let the material be the focal point.
Photograph pile consistently. Pile fabrics change colour with light direction. Photograph every pile project from the same angle, or the set will look mismatched in your own photos when it is not.
Show the source. Photograph sample books and loose remnants beside the finished project. It answers the question every reader has, and it makes the transformation legible.
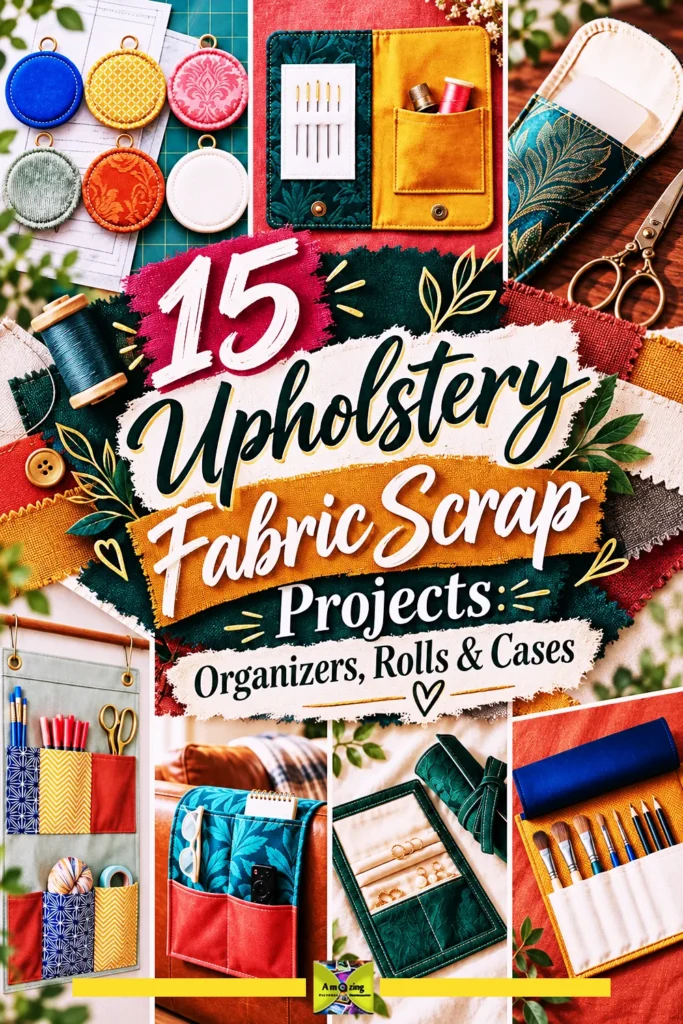
Care, maintenance, and knowing when to retire a project
Follow the most restrictive requirement in the assembly. A finished object is only as washable as its least washable component — the outer fabric, the lining, the interfacing, the stabilizer, the thread, the zipper, the closure, the hardware, and any rigid insert. If any one of them cannot be washed, the object cannot be washed. Work that out before construction, not after.
Remove inserts before cleaning. Every project in this collection that has a rigid insert has a removable one for exactly this reason.
Never assume machine washing. There is no universal washing or drying instruction for a project made from unidentified upholstery samples. Spot-clean only where documented care supports it, and test any cleaning method on an offcut first.
Test for colour transfer before contact. A saturated upholstery fabric next to a light lining, a paper pattern, a painted desk, a light upholstered chair, or clothing can transfer dye. Test by leaving a damp white cloth against the fabric for a period, then check both surfaces.
Dry completely before closing, folding, stacking, filling, or storing. Moisture trapped in a closed fabric object is the setup for mold. CDC guidance treats porous items that stay wet for more than 24 to 48 hours as likely mold-affected and directs that soft materials which cannot be thoroughly cleaned and dried be discarded rather than salvaged.
Check the stress points regularly. Seams, bindings, fold lines, zipper ends, snaps, grommets, and mounting points are where these objects fail. A two-minute inspection every few months catches a repair before it becomes a replacement.
Retire the object when any of these appear: mold or a persistent odour, dye transfer, severe abrasion, open seams, loose or pulled hardware, an exposed or shifted insert, delamination, a brittle or cracked coating, a lining that traps grit, or a closure that no longer holds. None of these is a cosmetic issue at this scale — each one is a reason the object is no longer doing its job.
Troubleshooting upholstery scrap projects
Fabric and edge problems
The sample is smaller than expected once the labels and holes are out. This is the most common disappointment in this whole category. Measure usable area before choosing a project, not after cutting. If you are already committed, switch the piece to a smaller role — a pocket, a lining, a binding strip, a pattern weight cover — rather than trying to force it into the panel it no longer fits.
Paper labels will not come off. Stop pulling. Trim around the label and design the project so it lands inside a seam allowance, behind a lining, or on an interior surface. If it must go, work from the mechanical options outward and test each on an offcut. Never soak a sample whose fiber content you do not know.
Staple fragments are still hiding. Go back over both faces under strong light, flex the fabric along every fold, and run a magnet as a first pass — remembering that a magnet finding nothing proves nothing. Cut away and discard any piece you cannot confirm is clean. Do not sew anything you are unsure about.
The composition is unknown. Treat it as heat-sensitive and moisture-sensitive: no fusing, no soaking, low temperature with a press cloth, sew-in stabilizer rather than fusible, and test everything on an offcut. If fiber knowledge is essential to the project, choose a different sample.
A loose weave is unraveling quickly. Stabilise the edge before doing anything else — a narrow zigzag, an overcast, or a strip of fusible interfacing on the reverse if the fabric tolerates it. Handle the piece as little as possible until the edge is secured. Bind rather than fold wherever you can.
Chenille yarns are pulling from the edge. Chenille sheds and pulls at cut edges. Stabilise the edge immediately, avoid sharp folds, and consider binding rather than hemming. Cut with a rotary cutter on a mat rather than shears where the pile allows, and seal or overcast every cut edge before assembly.
Velvet pile is crushed. Pile crushed by a flat iron or a hard press does not always recover. Prevent it: press from the reverse over a thick towel, use steam rather than pressure, and never rest the iron on the face. Once crushed, try steam and gentle brushing — but test on an offcut first, because recovery varies by fabric.
Faux leather is cracking near a seam. The coating has failed along the perforation line, usually because the stitch length was too short or the needle was dull. Longer stitches, a sharp needle, and no backstitching all reduce the risk. Once the coating has cracked there is no fix; retire the piece.
Coated fabric is sticking to the presser foot. Use a non-stick foot, a roller foot, or a walking foot if you have one. A strip of matte tape on the underside of a standard foot is a common workaround. Sewing on the backed side where possible, or placing tissue paper over the surface and tearing it away afterwards, also works. Test any workaround on an offcut first.
Layers are shifting while cutting. Cut one layer at a time, or hold the layers with clips rather than pins. On pile and coated fabric, pattern weights are more reliable than pins — which is one of the reasons the pattern-weight project exists.
Machine and stitching problems
Pattern motifs will not align. Match one strong line rather than every line. If exact matching is impossible, switch to deliberate centring within each panel. Forcing a match that nearly works is worse than not attempting it.
Pile is running in opposite directions. Re-cut the offending panel if you have fabric, or commit to alternating direction deliberately and repeat it consistently across the whole object so it reads as a design decision.
Mismatched thickness is creating ridges. Grade seam allowances so the layers taper rather than stack, and consider pressing seams open where the fabric allows. Where the difference is severe, redesign so the thick and thin panels are not joined along a visible line.
Pins disappear into thick fabric. Stop using pins on thick, piled, or coated fabric. Use clips, and count them in and out.
The machine is skipping stitches. Check three things in order: the needle (bent, blunt, or the wrong type for the fabric), the needle size relative to the thread, and whether the fabric is being pulled. A leather needle on a woven fabric, a dull needle on dense jacquard, and a needle too small for the thread are the three most common causes.
A needle is bending or breaking. You are asking the machine to do too much. Reduce the stack, grade the seams, start away from the bulk, use a hump jumper, and hand-walk the difficult sections. If it still breaks, redesign the construction — do not keep replacing needles.
Thread is nesting beneath the work. Usually a threading or tension issue rather than a fabric issue. Re-thread completely, top and bobbin, check the bobbin is wound evenly and seated correctly, and re-test on the same layered offcut. If the problem only appears on thick stacks, the needle is likely deflecting.
The presser foot stalls at a bulky seam. Use a hump jumper to keep the foot level. Reduce presser-foot pressure if the machine allows. Start the seam away from the bulk. Never push or pull the fabric through.
Fabric is puckering beside the topstitching. Likely too much tension, too long a stitch on a thin fabric, or a topstitch line that is fighting a seam beneath it. Test tension on the same stack, shorten the stitch slightly, and consider whether the topstitch is needed at all.
Seam allowances are too thick at the corners. Grade aggressively, trim interfacing out of the seam allowance, clip or notch the corners, and consider switching from a boxed corner to a dart.
Binding is missing the reverse edge. Sew the first pass from the front with a consistent seam allowance, then check the reverse before stitching. Clips along the folded edge help. If you are consistently missing, your binding width does not match your seam allowance — adjust one or the other.
Construction and finishing problems
Fusible interfacing is not adhering, or it damaged the face. The heat was wrong, the fabric surface was incompatible, or the fabric was coated or backed. Stop fusing. Switch to a sew-in stabilizer, which solves the problem entirely. Adhesive show-through from a fusible is usually permanent.
Adhesive is showing through. It will not come out. This is why test-fusing on an offcut before committing to a visible panel is not optional.
The zipper is wavy. Unequal thickness on either side of the zipper seam, or the zipper was stretched during installation. Match your panel thicknesses, and never pull the zipper tape as you sew it.
Snaps or grommets are pulling through. The fabric was not reinforced. Add an interfacing patch or a doubled square of fabric at every snap and grommet location before setting it — which means planning reinforcement into the pattern, not adding it after the fact.
Finished-object problems
Pockets are sagging. The pocket edge was not reinforced, the fabric stretches, or the contents are heavier than the design allows. Reinforce the pocket top edge with interfacing or a doubled layer, and reduce what goes in the pocket.
The catchall tray will not sit flat. Almost always the rigid insert — warped, too thin, or not fully flat — or a base seam that has drawn up. Check the insert against a straightedge on a flat surface before blaming the fabric.
The mail sling is tipping. The base is too narrow relative to the height, or the contents are sitting too high. Widen the base, reduce the height, or move the heavy items to the bottom.
The armchair organizer is sliding. The under-seat panel is not reaching far enough, the fabric is too smooth against the cushion, or the contents are too heavy for the design. Extend the under-seat section, add a grip layer if the fabric tolerates it, and lighten the contents.
The hanging panel is bowing. The backing is not stable enough, the top band is not reinforced, or the load is uneven. Add a firmer backing, reinforce the entire top band, and distribute weight evenly.
Pattern-weight filler is leaking. Stop using the weight immediately. Find and contain the spill completely — the filler must not reach a work surface, a floor, a child, or a pet. Rebuild the weight with a new, fully sealed inner pouch, or discard it.
The scissors sheath insert has shifted. Open the sheath and check whether the insert has moved toward one end, leaving a single fabric layer where a blade tip sits. Either re-secure the insert with stitching above and below it or a fitted pocket, or retire the sheath.
The eyeglass case lining is bunching. The lining was cut to the same size as the exterior and cannot accommodate the turn of cloth. Cut the lining slightly smaller than the exterior, or add a small pleat at the base and press it flat.
The desk mat backing is marking furniture. Remove it immediately and check the surface. Some backings are incompatible with some finishes, and the reaction can be irreversible. Test on an inconspicuous area before the mat goes into service, and do not rely on a claim that a backing prevents scratches, stains, or moisture marks.
Dye is transferring to a lighter surface. Upholstery dyes can migrate, particularly with moisture, heat, or friction. Remove the object, check both surfaces, and test any fabric for dye transfer before it contacts a light surface again.
Finished projects look random rather than coordinated. Almost always one of four things: too many colours, mismatched weights, inconsistent dimensions, or inconsistent topstitching. Fix the easiest one first — repeat the dimensions and the topstitching, and the set will start reading as a group even if the fabrics have nothing in common.
Safety when working with upholstery remnants and samples
- Material selection. Work only with clean, identifiable, uncontaminated material. Reject moldy, pest-damaged, chemically exposed, flood-affected, smoke-damaged, or heavily soiled fabric outright. Fabric removed from furniture with an unknown history does not enter the sewing room.
- Metal and hardware. Hidden staples, pins, grommets, and broken fasteners are the defining hazard of this material. Inspect every piece by sight and touch, on both faces, before cutting. Wear eye protection when removing or setting metal hardware. Never sew over anything you have not confirmed is clean.
- Cutting. Use a stable, fully supported cutting surface at a comfortable height. Cut away from your body. Keep the supporting hand outside the blade path and behind the blade at all times. Lock rotary cutters when they are not in use and store them closed and out of reach. Use sharp shears and let them do the work rather than forcing them.
- Sewing-machine hazards. The needle is a pinch and puncture hazard. Keep fingers clear of the needle area. Switch the machine off before changing a needle, foot, bobbin, or any setup, as directed by its manual. Never force fabric through the machine and never pull it from behind the presser foot — both deflect the needle, which is how needles break and fragments fly.
- Hand sewing. Use a hand needle and thimble suited to the fabric’s resistance. Pushing a needle through dense upholstery fabric without a thimble is how needles end up in a finger. Cut thread with scissors, not your teeth.
- Pressing. Check fiber and care information before applying heat. Test temperature, steam, and pressure on an offcut every time. Keep the iron stable on its heel or base, away from cords, adhesives, loose fibers, and solvents, and never leave it unattended near a child or a pet. Switch off and unplug equipment after use as the manufacturer’s instructions specify.
- Fibers, adhesives, and coatings. Ventilate when using adhesives, sealants, or cleaning products. Keep all of them away from heat, sparks, and open flames. Avoid compressed air for cleanup — it spreads fine fiber and dust through the room and into your lungs. Use a lint roller and a damp cloth instead.
- Never burn fabric to identify it. Flame and odour tests are an uncontrolled fire hazard and an uncontrolled chemical exposure, and the results are not reliable enough to be worth either risk.
- Small components. Needles, clips, pins, zipper parts, snaps, rivets, and grommets are choking and puncture hazards. Keep them contained, count them, and keep them away from children and pets. Check the floor and the work surface for dropped pins and broken needle fragments at the end of every session, not just when you notice one is missing.
- Setting hardware. Secure the workpiece on a stable surface. Never hold a small fabric piece in your hand while cutting, drilling, punching, or hammer-setting anything.
- Loads and mounting. Keep contents lightweight, dry, and non-fragile. Calculate the completed weight before mounting anything on a wall, a door, or a piece of furniture, and match the mounting hardware to the structure behind it. Nothing in this collection is load-bearing, structural, or safety equipment.
- Claims. Make no unsupported protective, medical, food-safe, child-safe, pet-safe, flame-resistant, nonslip, or load-bearing claims for anything you make from these materials. Upholstery fabric has properties as a fabric in an intended application; a cut, sewn, lined, and loaded handmade object has different properties and none of the original testing.
- Retire failed projects. When seams, backing, inserts, closures, or hardware fail, the object is finished. Repair it properly or take it out of use. A patched-over failure on a pocket, a hanging panel, or a weighted object is how the next failure becomes an injury.
A word about reuse, donation, and disposal
The honest language here is reuse, repurpose, use a remnant, and give an existing textile another practical use. Those are accurate descriptions of what the projects in this guide do.
What they do not do is make a finished object zero-waste, sustainable, green, environmentally friendly, recyclable, biodegradable, or compostable. Describing a handmade object that way ignores almost everything about it.
Consider what a single sample book contains before it becomes a pile of craft fabric: cotton, linen, wool, polyester, acrylic, nylon, and rayon-derived fibers, often blended; foam, latex, and backing compounds; coatings and stain treatments; flame-performance treatments; adhesives; paper labels; cardboard headers; plastic hangers and spines; staples; grommets; and mixed-fiber thread. A finished object made from those materials is a mixed-material assembly. Whether any part of it can be recycled depends on the programme, the material, and the local infrastructure, and it can change. No one can promise in advance that a handmade project will be accepted.
Before you dispose of anything, check what will actually be accepted. Local donation, reuse, textile-collection, recycling, construction-waste, and disposal options vary enormously by location, and the same organisation’s rules change over time. Programmes may reject:
- Sample books as a whole unit
- Coated, backed, or laminated textiles
- Mixed-fiber and glued material
- Very small scraps
- Material with metal staples, grommets, or hardware still attached
- Anything contaminated, damp, or mouldy
Confirm current acceptance with the specific organisation — a manufacturer, a local government, a textile-recovery service, a reuse organisation, a waste authority, or the receiving organisation itself — before you make any claim about what happens to the material. Some programmes accept commercial quantities only, some charge a fee, some are mail-in, and some operate only in specific regions.
One more thing worth saying plainly. An intact, labelled, clean sample is often more useful uncut. It can match a repair for someone else’s furniture, serve as a design reference, be donated to a programme that will route it to the right place, or be sold. Cutting it into a coaster destroys all of that permanently. Choose projects you genuinely need, and let the rest of the material stay whole until the right use appears.
Choosing what to keep. Keep material you can realistically use — pieces with enough sound area for a project you have actually planned, organised so you can find them. Offer the rest to a maker, a sewing group, a creative-reuse centre, or a programme that will find it a home. Discard small, frayed, unlabelled fragments that no project will consume, according to local requirements. A smaller, organised stash of usable material is worth more than a large one you cannot work through.
A note on other reclaimed materials. Rigid reclaimed materials bring a different set of hazards to a craft room: sharp edges, drilling risks, and finishing problems that fabric does not have. Fabric samples bring hidden metal, fiber contamination, and heat sensitivity that rigid materials do not. If you are comparing reuse projects across material types, our plastic bottle cap crafts collection covers the rigid-material side — useful context, but the safety and preparation rules do not transfer in either direction.
Frequently asked questions
Small, structured objects that suit dense, low-stretch fabric: zippered pouches, fold-flat trays, armchair and hanging organizers, tool rolls, needle books, scissors sheaths, pattern weights, eyeglass cases, desk mats, and console runners. The material’s weight and abrasion resistance work in your favour on anything that gets handled; its bulk works against you on anything with tight curves, deep gathers, or many layers. Start with a needle book or a pattern-weight set, and work up to a zippered pouch once you know how your fabric behaves.
Projects that fit inside a sample’s genuine dimensions and turn its pre-finished edges and dense hand into an advantage. A reference folio, a pattern-weight set, a scissors sheath, and a needle book are all excellent — they use small pieces well, need little fabric, and take advantage of the fabric’s body. Large samples suit pouches, trays, and desk mats. The constraint is not what the fabric can become; it is what your measured usable area allows.
Photograph every label first, then remove the outer binding, then pull staples individually with pliers — gripping the crown and rolling it out rather than levering upward. Cut around any staple you cannot free cleanly and discard that piece. Work on a stable surface and wear eye protection, because staple legs and grommet fragments travel. Never sew over a staple you could not remove. Sweep the surface and the floor afterwards.
Usually not, and never on a general instruction. Upholstery fabric is often coated, backed, laminated, or treated, and water can shrink it, bleed dye, activate adhesive, or delaminate a backing. Upholstered furniture coverings are also exempt from the FTC’s Care Labeling Rule, which means many samples genuinely have no care instruction at all. Look for documented care guidance and follow it; where none exists, spot-clean the smallest possible area and test on an offcut. Damp-wipe, air dry completely, and never store anything damp.
Needle type matters more than size, and the right answer depends on the fabric’s structure. For woven upholstery, a jeans/denim needle in 100/16 or 110/18 is a common choice — it has a reinforced blade and a modified point that penetrates dense weave without deflecting. Universal needles in 100/16 and 110/18 also work for heavy fabric. A leather needle has a cutting point and is the wrong tool for woven textiles, because it severs the weave along every stitch. For thin faux leather and faux suede, a sharp Microtex-style needle is usually recommended. Always test on the actual layered stack. Note that industrial upholstery machines use a different needle system (DPx17/135×17) than domestic machines (flat-shank 130/705 H) — they are not interchangeable.
Reduce the bulk before you sew, then keep the presser foot level. Grade seam allowances so layers taper instead of stacking, and trim interfacing out of seam allowances where you can. Use a hump jumper — a wedge placed under the back of the presser foot as the needle approaches the thick section — to keep the foot level and the feed dogs engaged. Start seams away from bulky corners, hand-walk the difficult sections with the handwheel, and never push or pull the fabric. Do not improvise a hump jumper with a button or a sewing gauge; those can break and fly.
Match weight and hand before you match colour or pattern. Pick a palette of two to five colours, choose one fabric to be the focal point, and repeat something across the project — a panel width, a topstitch distance, a lining, a hardware finish. Where patterns cannot be aligned, use a fixed, repeated colour-blocking sequence rather than a random arrangement. Consistent dimensions and consistent making are what make unrelated fabrics read as a deliberate set.
Sometimes, and never automatically. Upholstery samples commonly contain mixed fibers, coatings, backings, adhesives, paper labels, cardboard, and metal staples, and many textile-recovery programmes reject sample books, coated textiles, glued fabric, very small scraps, contaminated material, and anything with metal still attached. Options vary enormously by location and change over time — some organisations accept mail-in for a fee, some accept commercial quantities only, and some operate only in specific regions. Confirm current acceptance directly with the organisation before making any claim. An intact labelled sample is often better donated whole than cut into craft material.
Final thoughts: start with the sample you already have
The reason most sample books sit in a cupboard is that the first decision — which project, which fabric, how much of it — is the hard one, and most guides skip straight to the sewing.
So start smaller than you think you should. Take one sample. Photograph its label. Check it for staples and grommets on both faces and get the metal out. Measure the usable area properly, excluding the label hole and the glue mark. Write the number on the back. Then make a needle book or a set of pattern weights from it — something small, useful, and finished in an afternoon.
You will learn more from that one object about how your fabrics cut, fray, feed, and press than from any roundup of ideas. And you will have a reference folio started, a stash that is sorted, and a realistic sense of which of the fifteen projects your material can actually carry.
All measurements, completion times, needle and thread selections, stitch settings, pressing temperatures, load limits, and care instructions in this guide are starting points. Upholstery fabric is not one material; verify every one of them against your own fabric, your machine’s manual, the manufacturer’s documentation, and a test on an offcut before you rely on it.
Posted by: Med Houssem · In: Fabric & Textile Crafts