What Can You Make From a Retired Bike Inner Tube?
A retired bicycle inner tube is a strange and useful material. It is thin, strong, flexible, and already cut into a rough tube shape that wraps neatly around the objects you carry. It is also a technical product with a job: holding air under pressure inside a tire. Treat it like a universal craft sheet and you will be disappointed, frustrated, or — in a few specific cases — at risk. Treat it like what it is, and it becomes one of the most satisfying reclaimed materials to work with.
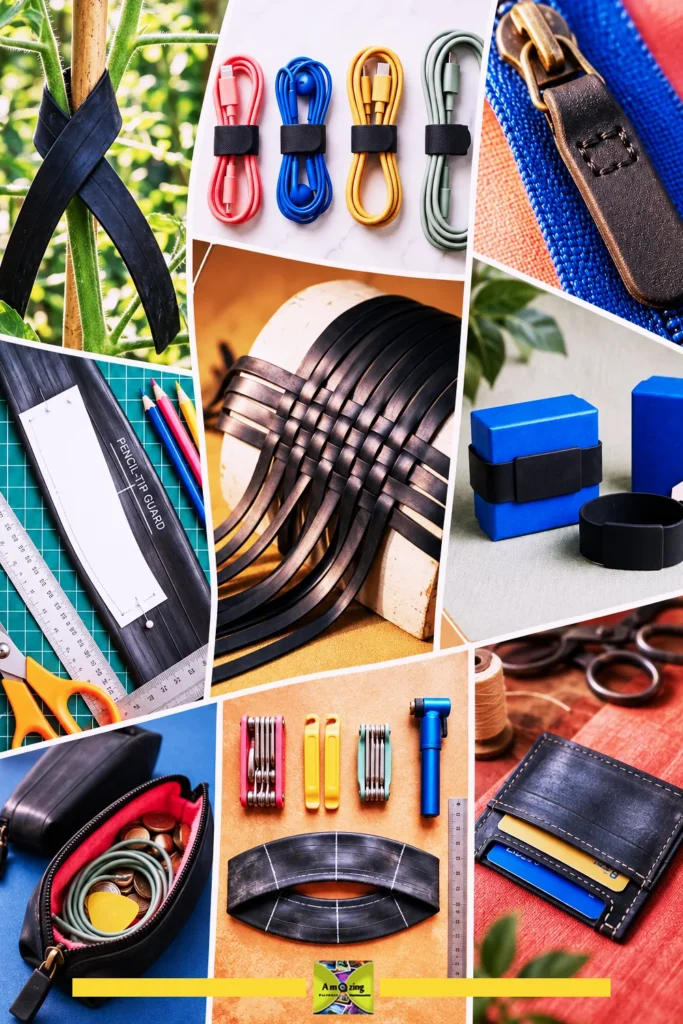
This guide is for crafty adults who want polished, practical results. It assumes you might have a punctured tube in a drawer, or easy access to a bike shop that gives away used ones. It walks you through deciding whether a tube should be repaired, recycled, or repurposed; how to identify and clean the material; how to cut and stitch it safely; and fifteen projects you can complete from the instructions here without opening another tutorial.
None of the projects are load-bearing, food-contact, safety-critical, or waterproof. Each one says so plainly. That honesty is the point. If you have worked through another material-specific reuse guide — like our plastic bottle cap crafts collection — the identify, prepare, attach, and test discipline will feel familiar.
Before any project, decide what this tube’s next life should be. You have roughly three good options, and a few fallbacks.
- Repair it. If the puncture is small and the tube is otherwise sound, a proper repair returns it to bicycle service — which is almost always the highest-value use of the material.
- Recycle it intact. If a local shop or manufacturer take-back program accepts it, leave the valve in and the tube uncut.
- Repurpose it. If it cannot be safely repaired and no program is available, clean, inspect, and use it in one of the projects below.
Do not treat “I want to make a thing” as the automatic first choice. A tube that still holds air for a ride is still doing its original job. Crafting is for the tube that is genuinely done.
Before You Cut: Is This Tube Actually Retired?
Repair, Recycle, or Repurpose — A Quick Decision Guide
Ask in this order:
- Is it safely repairable for bicycle use? A small puncture in an otherwise sound tube is a repair job, not craft material. Follow bicycle-maintenance guidance — from a repair manual, the tube manufacturer, or a qualified shop — not this article.
- Does a recovery program want it? Many programs require the tube to be intact, dry, separated from the tire, and free of liquid sealant. Cutting it removes that option. Check first.
- Is it contaminated or degraded? Sealant-filled, moldy, oil-soaked, chemically exposed, brittle, tacky, or unidentified material should be set aside for disposal guidance — never cut, washed into a drain, or placed inside a project.
- Is it genuinely useful to you? Choose a project you will actually use. Do not accumulate a drawer of degraded scraps “for someday.”
Check Recovery Programs Before You Cut
In the United States, the best-documented current program is Schwalbe’s inner tube take-back, operated with Tannus and participating dealers. It accepts butyl bicycle inner tubes of any brand but not sealant-filled tubes, and it expects tubes to arrive intact through participating shops. The recycling process (devulcanization at Schwalbe’s facility in Indonesia) recovers rubber for new tubes. Schwalbe states its standard tubes already contain roughly 20% recycled material.
Program rules change. Before you assume a tube can be recycled — or that a cut, glued, stitched, or hardware-bearing project can still be — check the current terms with the manufacturer, a participating dealer, or your local waste authority. The date you checked belongs in your notes. (Program details above were verified as of the research date noted in the source list; re-verify before publishing.)
Know Your Material: Butyl, Latex, and TPU Are Not the Same
Why Appearance Can’t Identify a Tube
Black color and flexibility do not prove a tube is butyl. Common bicycle inner tubes are made of three distinct materials:
- Butyl rubber (synthetic) — the everyday workhorse. Cheapest, heaviest, easy to patch, holds air for weeks. This is what most “rubber” craft advice assumes.
- Natural latex — lighter, far more elastic, loses air quickly, harder to patch. Natural latex also carries allergy/sensitivity considerations that butyl does not.
- Thermoplastic polyurethane (TPU) — the newest option, very light, excellent air retention, but it requires a specific patch kit and different cutting, bonding, and heat precautions.
The only reliable way to identify a tube is packaging, molded markings, or manufacturer documentation — not appearance, odor, stretch feel, or a burn test. A burn test is not just unreliable; it is dangerous and banned from this guide. If you cannot confirm the material, treat it as unknown and be more conservative with cleaning, adhesives, and any heat (there should be no heat at all).
How Construction Affects Your Usable Area
Even within one material, a tube is not uniform. It has molded seams, a reinforced valve base, possibly a patch or two, printed markings, and walls that change thickness slightly around the tube. Age, storage (heat, sunlight, ozone from motors or air purifiers), and chemical exposure change what remains usable.
The original air-holding ability of a tube tells you nothing about its abrasion resistance, tear resistance, load capacity, or long-term craft durability. A tube can be airtight and still be the wrong choice for a project that flexes constantly.
Why Stretch Direction and Curl Matter
An inner tube stretches differently around its circumference than along its length. Cut a closed tube open and it will often curl toward the inner surface — a built-in “edge roll” you must flatten or work around. Grain-like stretch direction matters: place the stretch where the project needs give (a closing flap) and avoid it where it needs stability (a straight edge under a zipper).
Rubber-to-rubber surfaces also grip each other, which is why layers stick and feed unevenly through a sewing machine. Every needle hole you make is permanent and can start a tear, so stitch length, seam allowance, and reinforcement are decisions, not afterthoughts.
How to Inspect and Prepare a Retired Inner Tube
Source It, Identify It, Record It
When you get a tube, record what you can: brand, model, stated material, size (e.g., 700×28c or 26×2.1), valve type, repair history, sealant status, and source. A sticky note or a photo of the box is enough. This information decides your cleaning and adhesive choices later.
Separate the tube from tires, rim strips, tubeless tape, valve extenders, and any sharp rim debris. These are different materials with different handling.
Inspect the Outside and Inside
Deflate the tube completely before you do anything else, and never puncture an inflated tube. Then look for:
- Exterior: mold, road oil, fuel, cleaners, solvents, adhesive residue, deep cuts, stretched-thin areas, embedded glass or wire, cracks, hardening, brittleness, delamination, tackiness, and persistent odors.
- Interior: only after you have confirmed no recovery program wants the tube intact, and only with a controlled cut. Look for liquid sealant, unidentified powder, mold, or residue.
Wear suitable gloves for the first dirty handling, and eye protection when removing metal hardware or cutting near the valve.
When to Reject a Tube
Reject — do not try to clean, cover, or use — any tube with liquid sealant, unknown interior powder, hazardous residue, persistent chemical odor, mold, severe tackiness, brittle or cracked areas, delamination, or unidentified contamination. Liquid sealant and unknown residues should never be rinsed into a household drain. Follow manufacturer or local hazardous-waste guidance for unusual chemicals.
How to Clean and Dry a Suitable Tube
Use mild soap and water only when suitable for the confirmed material and residue. Wipe both surfaces rather than soaking. Skip bleach, fuel, harsh solvents, and any universal “just soak it in X” recipe. Rinse when appropriate, dry completely, and let any remaining odor dissipate in a ventilated spot away from heat and direct sunlight. Do not use compressed air, aggressive abrasion, or high heat to speed this up.
Flatten, Measure, Sort, and Store
Sort usable pieces by material, circumference, wall thickness, stretch, color, printing, patching, surface texture, and condition. Measure the usable length and width after you exclude valve bases, punctures, splits, and degraded areas. Store clean tubes or flattened panels in labeled, ventilated containers away from heat, flame, ozone-generating equipment, sharp objects, sunlight, children, and pets.
Pattern Planning and Safe Cutting
Make a Paper Pattern First
Before cutting your best section, make a full-size paper pattern and test every seam, fold, and allowance on a scrap. This is the single step that separates clean results from ragged, mismatched panels. Mark the stretch direction and note where the curl will land.
How to Split and Cut the Tube
Deflate and flatten the tube before marking. Establish one clean reference edge, then split lengthwise with the work fully supported. Decide whether to preserve a printed marking, a sound patch, or the valve base as a visual detail — only ever as something that is structurally irrelevant.
Choose your tool by control, not speed:
- Heavy-duty scissors for controlled straight and curved cuts.
- A rotary cutter only on a proper mat with a suitable ruler and a stable hand.
- A utility or craft knife only on a stable mat with the supporting hand outside the blade path.
Always cut away from your body, make controlled passes rather than forcing a dull blade, round internal corners, and avoid sharp notches that start tears.
Marking, Punching, and Blade Safety
Mark only with a product you have tested for visibility and transfer — some markers show fine now and bleed onto paper or fabric later. Punch holes with the piece flat on a stable backing, never held in your hand. Keep metal valves, patches, pins, and hardware out of blade paths and machine-needle paths. Store and dispose of blades safely.
Stitching and Joining Inner Tubes
Can You Sew Inner Tubes on a Home Machine?
Often, yes — but not on default settings, and not without testing. The material is tacky, stretches under the foot, and does not “heal” around needle holes.
Start by testing a complete layered seam on an offcut of the same stack you will actually sew. Use clips instead of pins (pins add unnecessary holes). Manage drag with a compatible nonstick or walking foot. Begin stitching away from bulky intersections, and never pull the work from behind the presser foot or force a stalled machine. Reduce seam bulk without thinning critical reinforcement.
Do not prescribe one needle, thread, or tension for every tube. A thicker butyl panel, a TPU tube, or a lined seam may each need a different needle (commonly a heavier or leather/denim needle), a different thread (strong polyester is typical), and a different tension (often higher than normal). These are manufacturer-guidance and offcut-test decisions, not universal settings. The same trial-and-error with needle, thread, and presser foot applies when sewing upholstery fabric scraps, another reclaimed material that does not feed like quilting cotton.
Seam-and-Edge Comparison
| Approach | Best for | Finish | Flexibility | Main failure point | Notes |
|---|---|---|---|---|---|
| Raw straight cut | Simple panels | Clean, industrial | High | Edge can tear | Round corners; avoid notches |
| Rounded edges | Openings, flaps | Softer, safer | High | Inconsistent radii | Template corners |
| Folded edge | Card sleeves, tags | Polished, bulky | Medium | Fold creeps | Test fold allowance |
| Bound edge | Wear-prone openings | Durable, tidy | Medium | Adds bulk | Use a compatible binding |
| Lined turned construction | Sleeves, pouches | Seams hidden | Medium | Lining stretches differently | Test lining + tube together |
| Lapped seam | Panels, patches | Flat, strong | Medium | Exposed edge | Stitch well inside edge |
| Butt seam + backing strip | Reversible panels | Flat | Medium | Backing shows through | Use wider sound strip |
| Flat stitched panel | Reinforced openings | Very strong | Lower | Perforation line if too close | Longer stitch spacing |
| Hand-laced join | Decorative accents | Rustic | High | Uneven holes | Punch first, lace second |
| Zipper insertion | Pouch, pencil case | Functional | Medium | Wavy tape | Clip, don’t pin; test |
| Snaps (reinforced) | Closures | Functional | Low at joint | Pull-through | Back with wider material |
| Rivets (reinforced) | Permanent joins | Industrial | Low at joint | Pull-through | Washer/backing needed |
| Eyelets/grommets (reinforced) | Slots, tags | Professional | Low at joint | Elongating hole | Punch small, set firmly |
| Buckles/sliders (light-duty) | Closures only | Functional | Low | Load beyond rating | Never load-bearing |
| Separate rigid insert | Tray, basket base | Stable | n/a | Exposed edge | Enclose all edges |
Adhesives and Hardware That Actually Work
Adhesive Comparison
There is no single best adhesive for every tube. Your choice depends on the confirmed material, the mating surfaces, and whether the joint must flex. Always check the specific product’s instructions and test on an offcut with a full cure before trusting a seam.
| Option | Compatible with | Prep | Cure | Flex after cure | Limits |
|---|---|---|---|---|---|
| Puncture-repair adhesive (vulcanizing fluid) | Its labeled repair use only | Per kit | Per kit | n/a | Not a general construction glue |
| Rubber/contact adhesive (polychloroprene/neoprene) | Butyl-to-rubber, rubber-to-fabric | Clean, dry; abrade only if product allows | Open time then clamp | Flexible | Solvent odor; ventilation required |
| Flexible urethane/elastomer adhesive | Only where specifically rated | Clean, dry | Longer cure | Flexible | Must be rated for the exact materials |
| Cyanoacrylate (super glue) | Small rigid accents | Clean, dry | Fast | Brittle | Clouding, cracking on flex |
| Two-part adhesive | Only when formulated for the materials | Per product | Longer | Varies | Mix and clamp per instructions |
| Fabric adhesive | Tube-to-lining only | Clean, dry | Per product | Medium | Test stretch mismatch |
| Double-sided tape | Temporary layout only | Clean, dry | Instant | Low | Not structural |
| Hot-melt adhesive | Low-stress decorative positioning only | Clean, dry | Fast | Peels/softens | No flex, no load |
| Stitching | Nearly everything | — | Immediate | High | Needle holes permanent |
| Lacing | Decorative joins | Punch holes first | Immediate | High | Uneven if holes drift |
| Snaps / rivets / eyelets | Reinforced closures | Back with wider material | Immediate | Low at joint | Pull-through if unbacked |
| Buckles/sliders | Light-duty closures only | Back slot | Immediate | Low | Never load-bearing |
Why Puncture Cement Isn’t a General Glue
Repair cement is formulated to vulcanize a patch onto a tube — one specific job. It is not a general construction adhesive. PVA (white/wood glue) will not form a reliable flexible rubber bond. Hot-melt bonds peel and soften. Some solvent-based products can swell or damage the material. Adhesive also cannot restore degraded rubber — if the tube is brittle or cracked, no glue fixes that. A bond must fully cure before you flex or load it.
Hardware: Snaps, Rivets, Eyelets, and Reinforcement
Every punched hole, snap, rivet, and eyelet needs a wider, sound backing — a round washer or an internal patch of good tube — so edges cannot abrade the project and the hardware cannot pull through. Keep hardware away from thin, cracked, patched, or valve-adjacent material. Choose low-profile hardware that will not snag or mark nearby surfaces. Treat every attachment as replaceable, test it with non-fragile contents, and retire it at the first sign of tearing. The same backing-and-pull-through rules apply to other flexible reclaimed materials, such as the old leather belt crafts we cover separately.
Linings, Inserts, Closures, and Reinforcement
A lining improves feel, protects contents, or hides seams — but a lining does not prove scratch protection or impact protection. Match lining care and stretch to the tube. Reinforce zipper ends, pocket openings, slots, folds, pull tabs, and closure points. Enclose rigid inserts so no sharp edge is exposed, and make inserts removable when cleaning requirements differ. For a rigid tray or basket base, reclaimed board from our cereal box crafts works with the same enclosed-edge rule. Test every closure and light-duty attachment gradually, with non-fragile contents.
Everyday Accessories
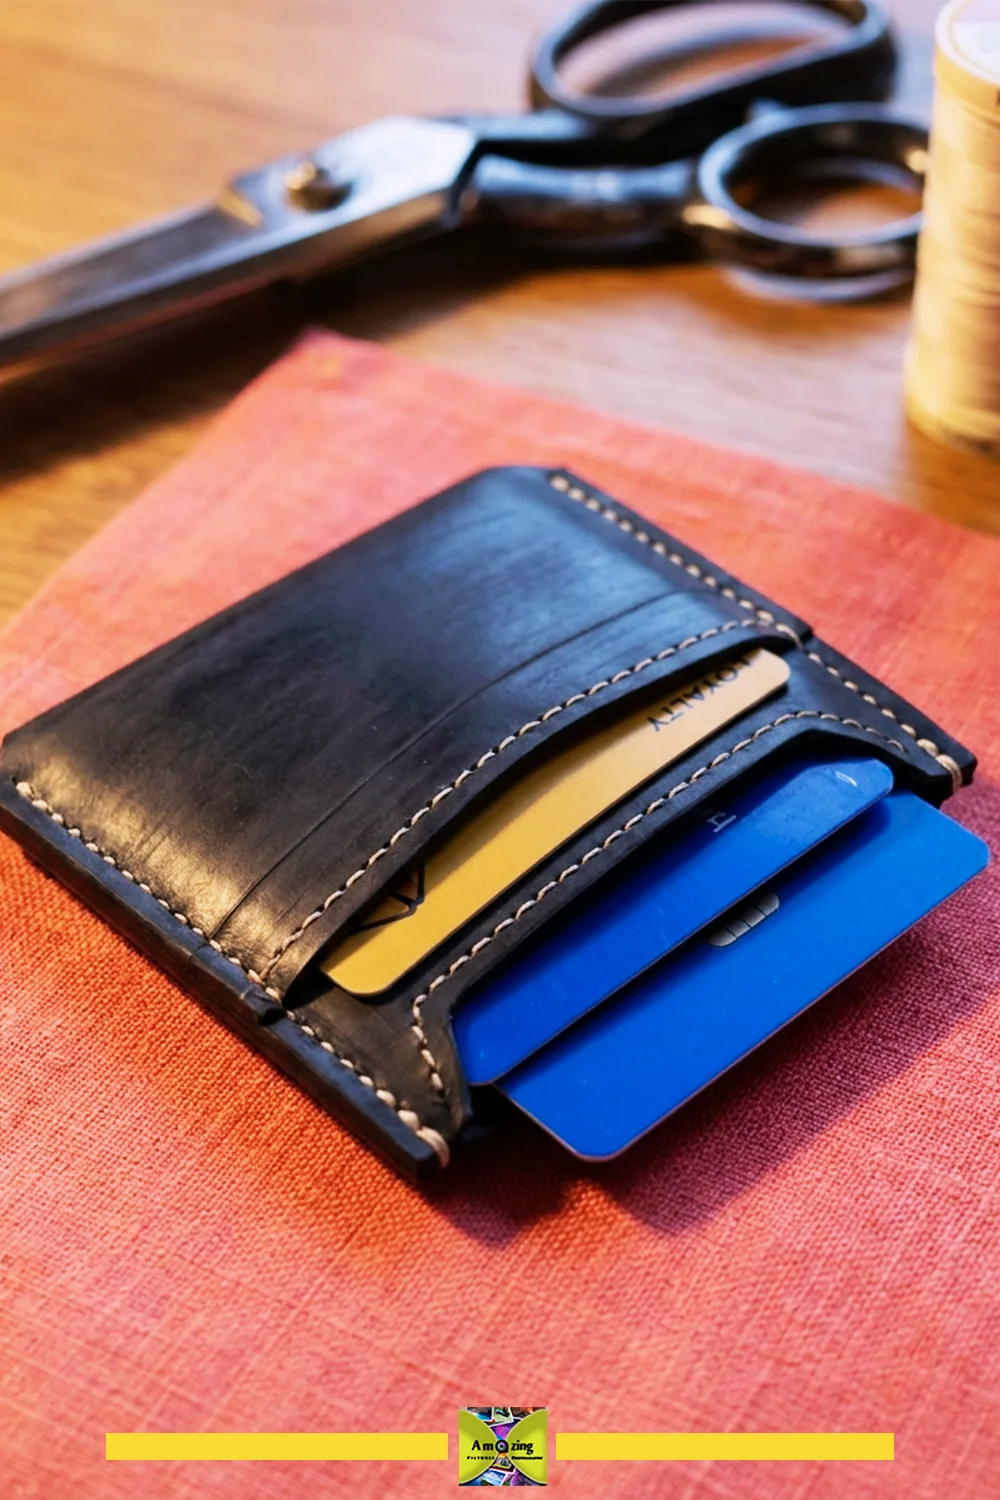
1. Minimal Card-and-Cash Sleeve
What it looks like: A slim two-pocket sleeve with rounded corners, a reinforced top opening, and a single line of topstitching.
Best use: A few cards and folded cash in a pocket or small bag.
Difficulty: Easy.
Approximate time: About 45–60 minutes including cutting and test stitching on a scrap.
Materials: One clean, smooth butyl tube section (a road-tube or narrow MTB tube works well); optional thin lining only if you want a softer feel; strong polyester thread.
Tools: Heavy-duty scissors, paper pattern, ruler, clips, a chalk or water-erasable marker tested for transfer, a sewing machine with a nonstick/walking foot (or a hand needle and awl).
- Measure your cards, add about 10 mm (⅜ in) width and length, and cut a paper pattern for the back panel and two slightly shorter pocket panels. (calibrated for standard 85.6 mm × 53.98 mm cards with 5 mm perimeter ease)
- Test the fold allowance on a scrap: fold the bottom, clip, and check the cards still fit without stretching.
- Cut the back panel and two pockets from the tube, placing the stretch direction across the width so the pockets keep their shape.
- Round all exposed corners with the template so no sharp notch starts a tear.
- Stack the pockets on the back, clip (don’t pin), and stitch around three sides with a seam allowance you tested. Reinforce the top opening with a second row or a folded edge.
- Fold, press flat, and test with real cards before carrying.
Customization: Keep a molded brand marking as a visible detail; use two sheens of black for a subtle two-tone; align printed graphics across the fold.
Practical tip: Leave the top opening slightly wider than the card width and test it with the thickest card you actually carry.
Common mistake: Cutting the pocket to the exact card size — the fold and seam allowance eat the fit.
Safety note: No loose blades, medicine, or anything sharp. This is not waterproof or RFID-shielding; it simply holds cards
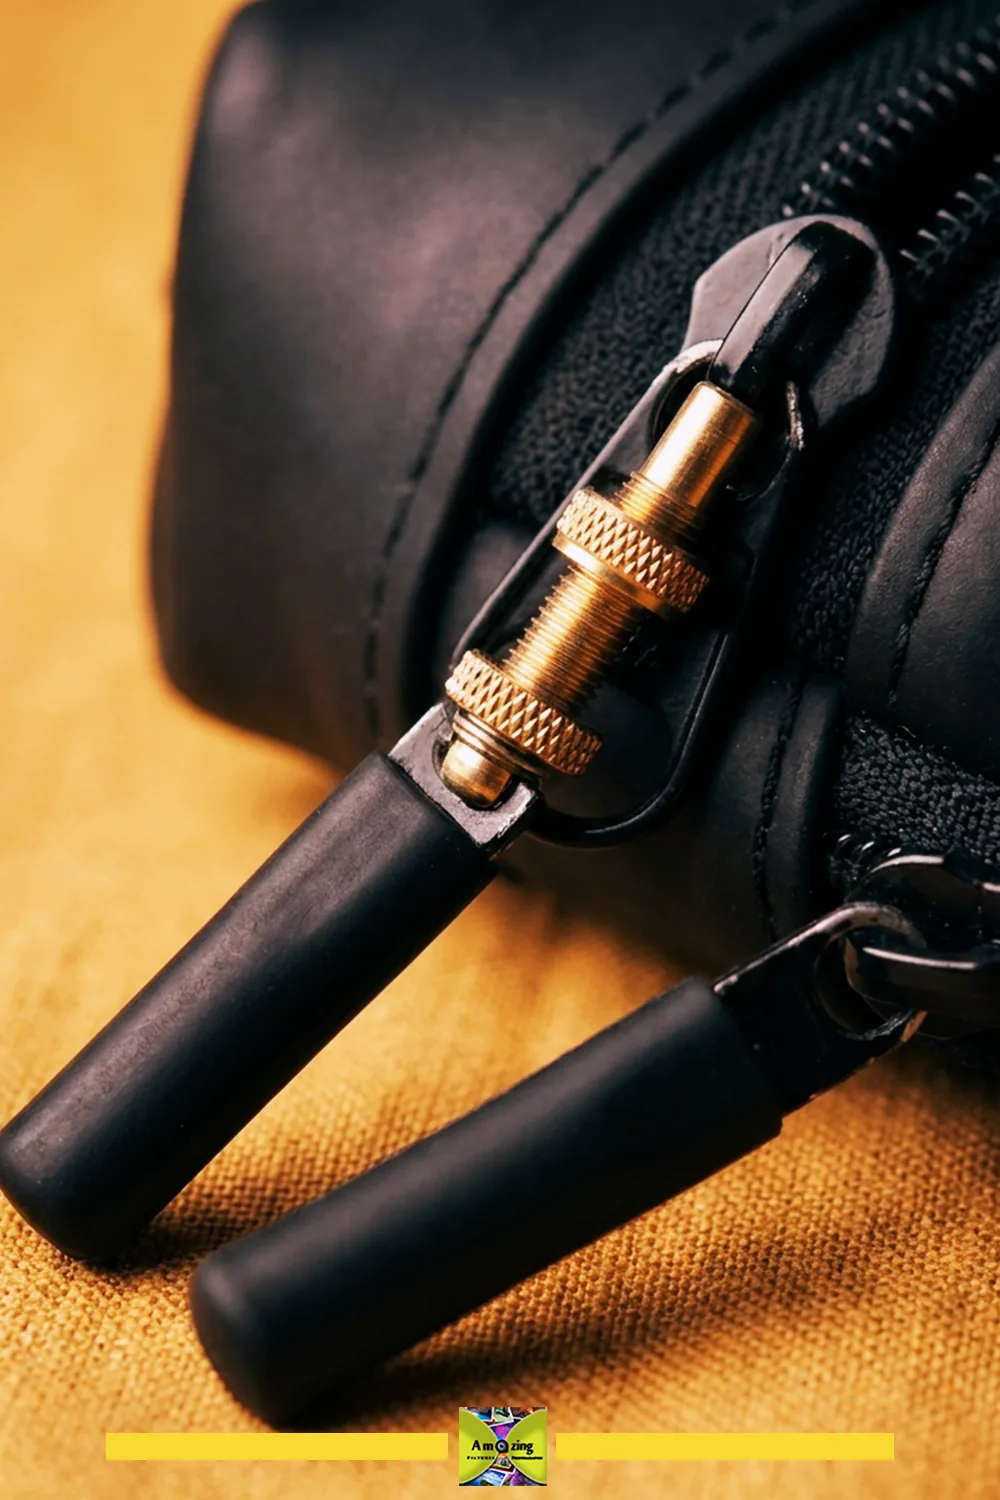
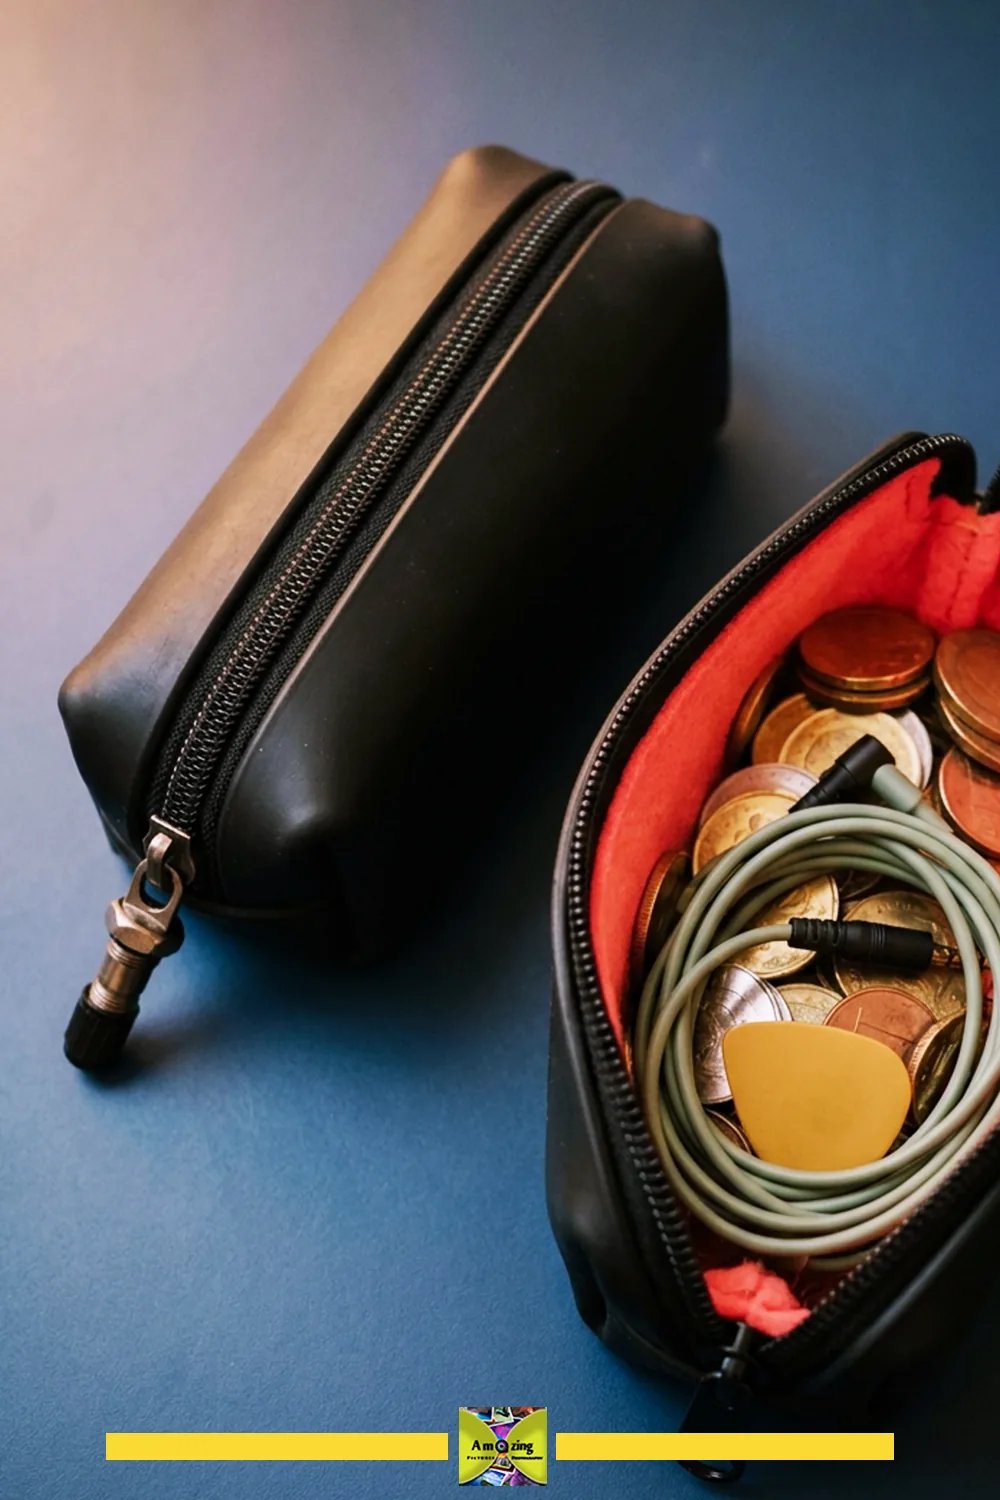
2. Compact Zippered Pouch
What it looks like: A small flat pouch with a top zipper, enclosed zipper ends, and an optional lining.
Best use: Coins, earbuds, or a small repair-patch kit in a bag.
Difficulty: Intermediate.
Approximate time: About 1.5–2 hours.
Materials: A wide MTB or cruiser tube section (wider tubes give a taller pouch); a short separating or non-separating zipper slightly longer than the pouch opening; optional felt or canvas lining; strong polyester thread.
Tools: As above, plus a zipper foot or nonstick foot, and clips.
- Decide the pouch’s finished height and width from its intended contents, then add seam allowance and zipper allowance to a paper pattern. (using a #4.5 nylon coil zipper cut to 18 cm / 7 in)
- Cut two equal panels. Fold and test how the zipper tape will sit — clip, never pin, through the rubber.
- Sew the zipper to both top edges with a tested stitch, keeping the tape straight and un-wavy.
- Enclose the zipper ends with small tube tabs so the metal stop cannot snag.
- Sew the side and bottom seams, trim bulk carefully without thinning reinforcement, and turn.
- Add a lining only if it serves a clear purpose (softer feel, seam coverage) and matches the tube’s stretch.
Customization: Use the metal valve as a zipper pull (a common, genuinely useful touch); pick a lining color that shows at the zipper edge; add a single accent panel.
Practical tip: Sew the zipper tape to each panel separately before joining the two sides — it stays flatter.
Common mistake: Forcing a wavy zipper tape and ending up with a pouch that won’t close flat.
Safety note: Not waterproof, not impact-protective. Never store leaking liquids, food, or sharp blades.
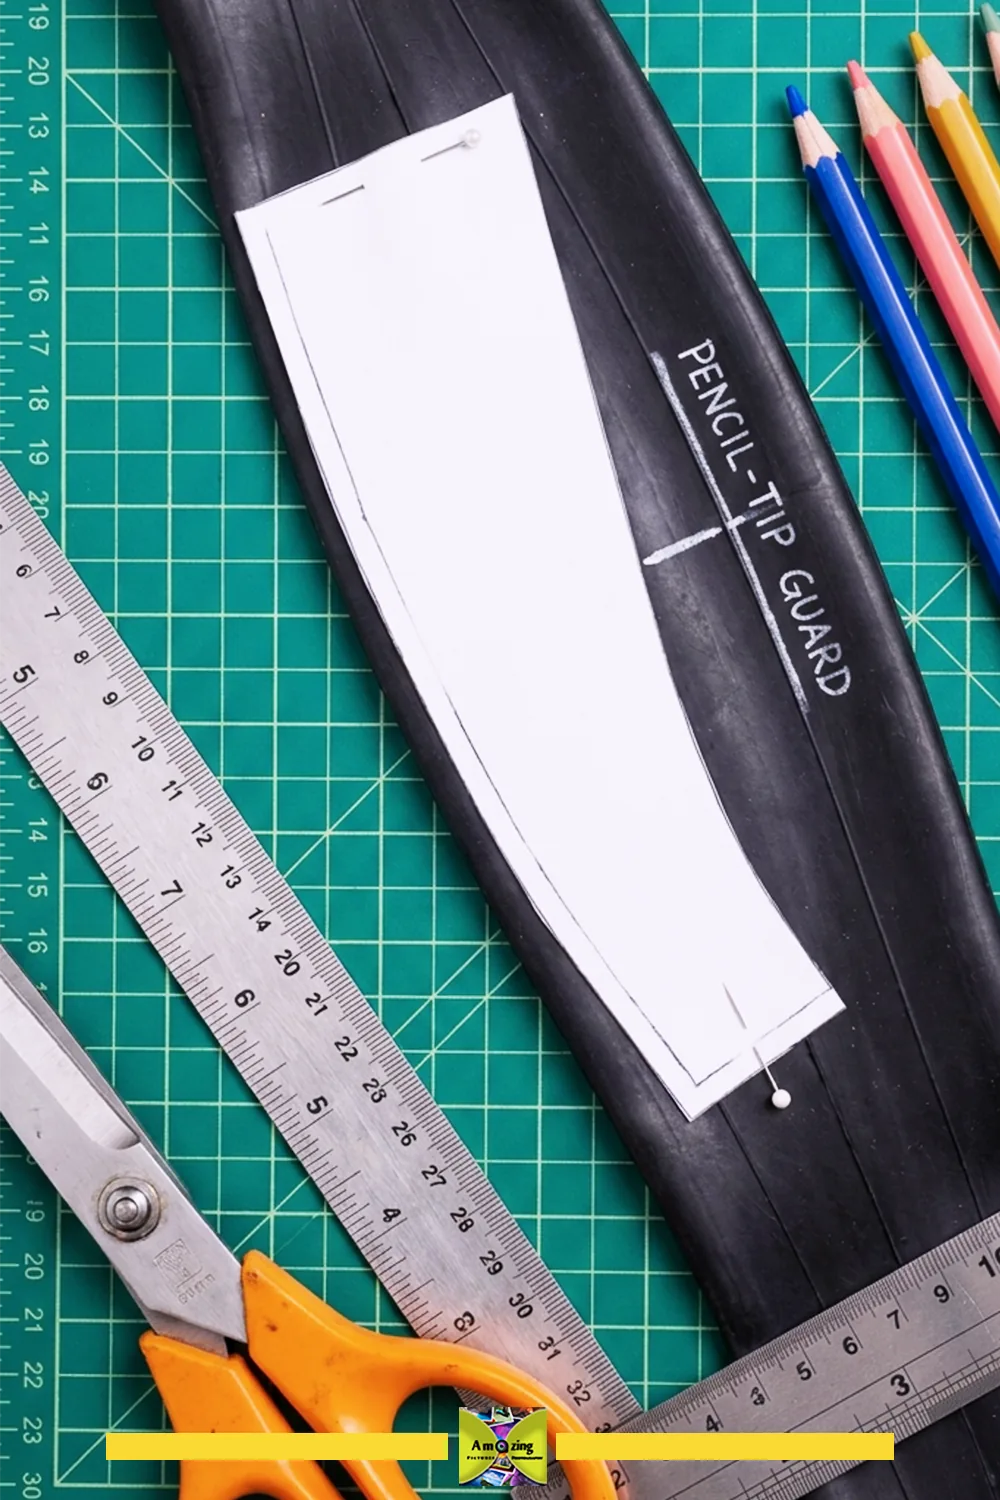
3. Flat Pencil and Art-Tool Case
What it looks like: A flat envelope-style case with a full-length closure and a protected tip area.
Best use: Pencils, markers, or dry art tools in a bag.
Difficulty: Easy to intermediate.
Approximate time: About 1–1.5 hours.
Materials: A long, clean tube section; a closure strip (a thin tube band or a low-profile snap); optional lining.
Tools: As above, plus snap-setting tools if you use a snap.
- Measure the longest tool, add clearance, and cut a paper pattern for a back panel and a flap.
- Cut the back panel with the stretch direction running lengthwise so it does not sag.
- Add a simple tip guard — a folded strip or a separate stitched pocket — so sharp pencil points do not press through.
- Fold the flap, test the closure position, and attach a closure (a tube band or a snap set through a reinforced area).
- Test with real tools, including the heaviest and longest.
Customization: Color-block the flap in a single accent shade; stitch a small tool name or initial; keep topstitching straight and consistent.
Practical tip: A full-length closure beats a single point closure for keeping tools from sliding out.
Common mistake: Claiming impact protection. This case organizes tools; it does not protect them from crushing.
Safety note: No loose razor blades or leaking pens. Retire if the flap closure tears.
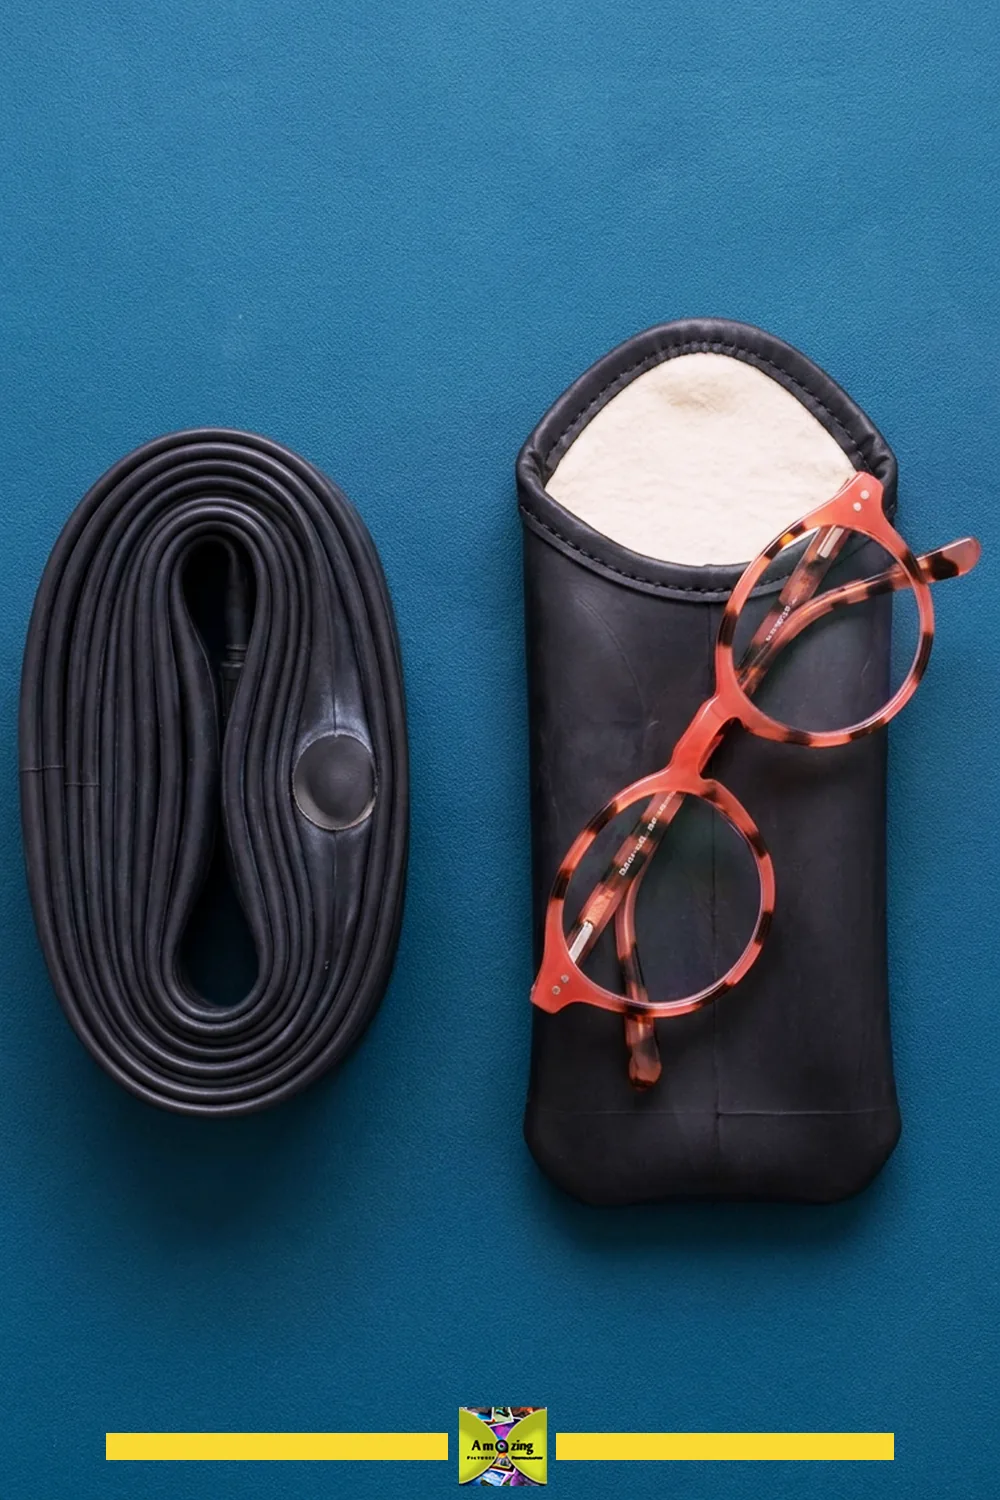
4. Soft Eyeglass Sleeve
What it looks like: A soft slip sleeve with a smooth lining and protected seams.
Best use: Keeping dust and light scuffs off glasses in a bag or on a desk.
Difficulty: Intermediate.
Approximate time: About 1.5 hours.
Materials: A clean tube section; a verified smooth lining (microfiber or soft felt) that will not scratch; thread.
Tools: As above.
- Measure the glasses closed, add generous width, and make a paper pattern. (measured with 10 mm perimeter ease around closed frames)
- Cut the tube outer and the lining to the same pattern, then test the lining against the lenses on a scrap — smoothness is a real, tested property, not an assumption.
- Sew the lining and the tube so that the seams face outward or are enclosed, with no raw edge near the lenses.
- Reinforce the opening with a folded or bound edge.
- Test repeatedly: slide the glasses in and out, and watch for any seam or hardware that could press on a lens.
Customization: A single printed marking centered on the front; a subtle two-tone; a small tab to grip.
Practical tip: Make the lining slightly larger than the tube so it is never pulled tight against the lenses.
Common mistake: Assuming any fabric is “scratch-proof.” Test the exact lining against a lens on scrap before committing.
Safety note: Honest limits: this sleeve protects against dust and light scuffs, not crushing, drops, or impact. It is not archival storage.
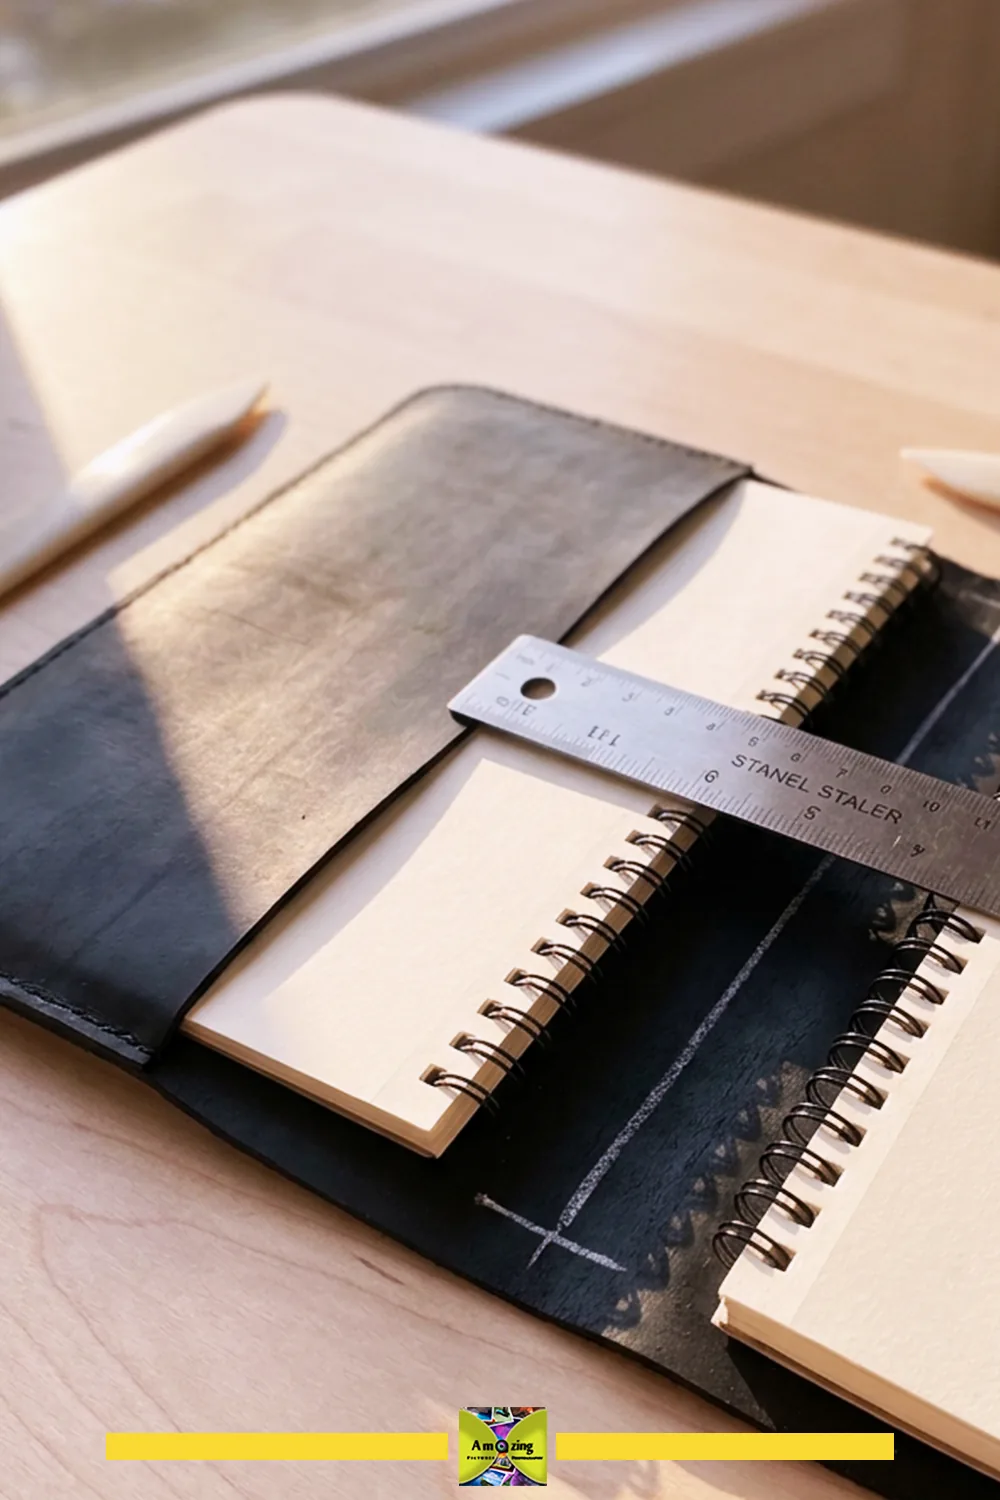
5. Removable Notebook Jacket
What it looks like: A flat jacket with inner-tube exterior panels, a paper-specific fit, reinforced spine clearance, and a replaceable elastic-free closure.
Best use: Protecting a softcover notebook in a bag, refreshed or swapped as the notebook fills.
Difficulty: Intermediate.
Approximate time: About 1.5–2 hours.
Materials: Two tube panels (front and back); a connecting spine piece of tube or compatible fabric; optional corner pockets to hold the cover; a replaceable closure (a tube band, not glued elastic).
Tools: As above.
- Measure the notebook closed, including thickness, and add spine clearance so the cover does not bind when opened. (measured with a 2.5 cm / 1 in spine allowance for pocket journals)
- Cut front, back, and spine pieces. Use the tube’s lengthwise stretch across the spine so it flexes.
- Build simple corner pockets from tube or lining so the cover is removable, not permanently glued to the notebook.
- Stitch the panels with a tested seam, reinforcing the spine edges.
- Fit the closure so it can be replaced without tearing the cover — a loop-and-band closure beats a glued elastic.
Customization: A printed marking or valve-base shape as a focal detail; one restrained accent panel; matched topstitching.
Practical tip: Make the corner pockets from a material that grips paper without gluing — the cover should come off cleanly.
Common mistake: Cutting to the exact cover size and ignoring the spine thickness, so the jacket binds.
Safety note: Not waterproof, not archival, not drop protection. Do not use for documents that cannot tolerate residue transfer — test first.
6. Privacy-Conscious Luggage Tag
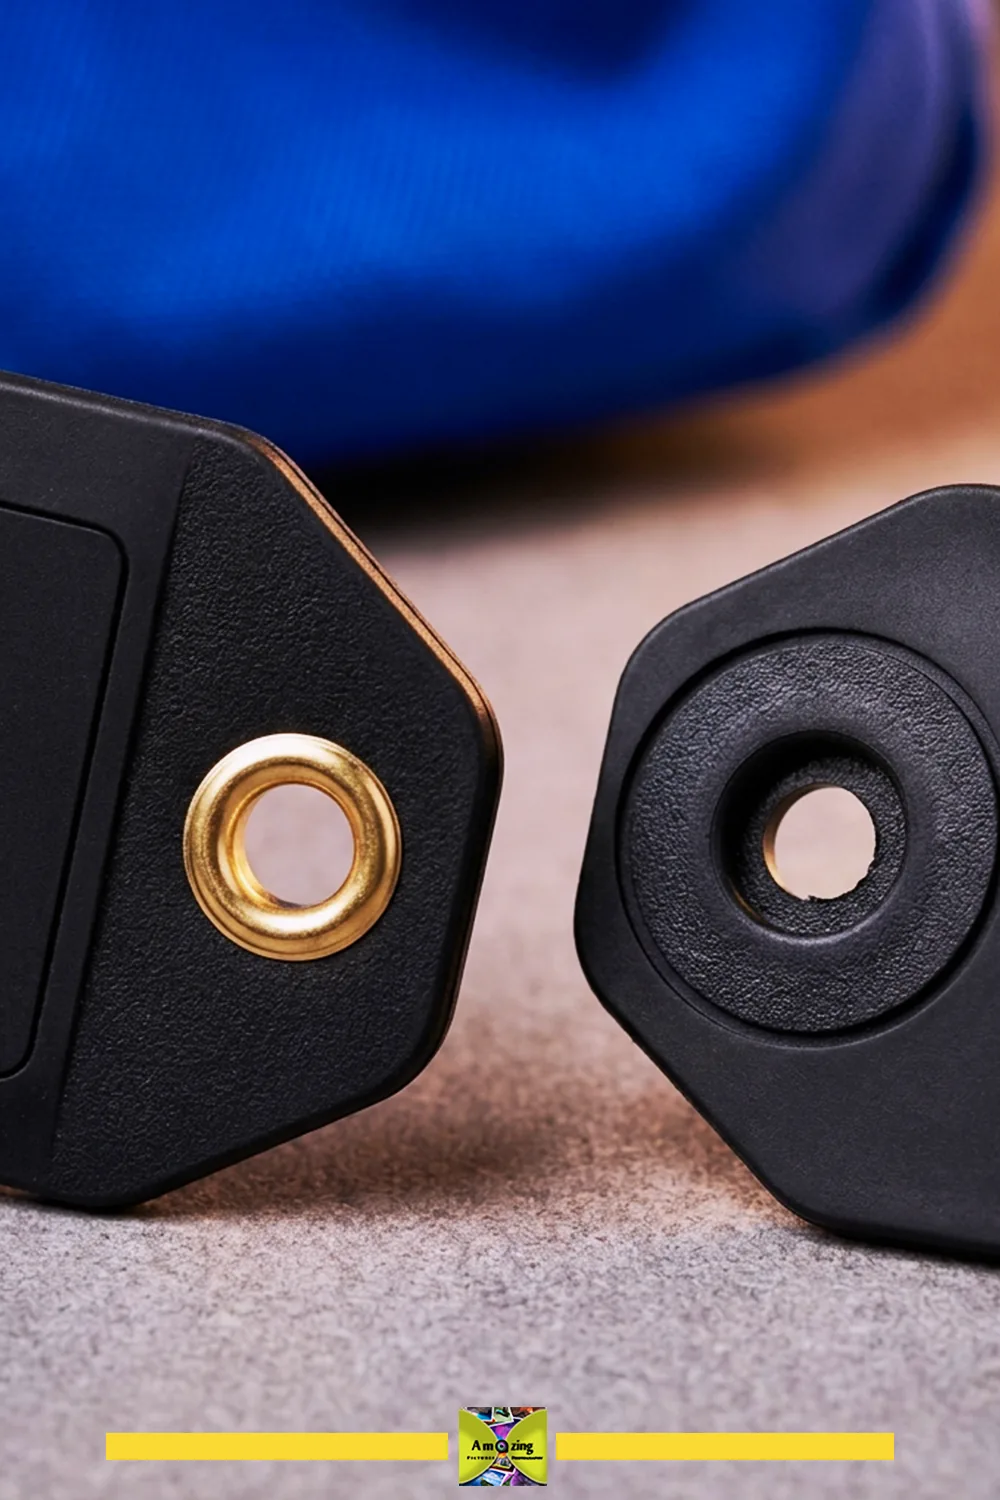
What it looks like: A small two-layer tag with a covered information card and a reinforced attachment slot.
Best use: Identifying a bag without displaying your details to everyone nearby.
Difficulty: Easy.
Approximate time: About 45 minutes.
Materials: A small clean tube section; a clear or opaque card window made from a compatible lining/plastic only if you test it; a backing strip; an eyelet or a stitched slot.
Tools: As above, plus eyelet-setting tools if you use an eyelet.
- Decide the card size from a standard business card or a smaller privacy card. (fitted with a 3/16-inch solid brass eyelet for reinforcement)
- Cut two tag panels with rounded corners.
- Build a pocket so the card slides in with your name and phone on one side only, keeping the address hidden until opened.
- Reinforce the attachment slot with a wider backing strip, then set an eyelet or stitch a bound slot.
- Pull-test the slot before use, and check it cannot slip off or tear.
Customization: A single printed marking; a colored backing strip; a coordinating eyelet finish.
Practical tip: The privacy point is the feature — design the pocket so only the name is visible from the outside.
Common mistake: Leaving a raw punched slot unreinforced, which tears at the airport.
Safety note: This is identification, not a handle. Never use it as a load-bearing grip on heavy luggage, and replace it at the first sign of pull-through.
Desk and Craft Organization
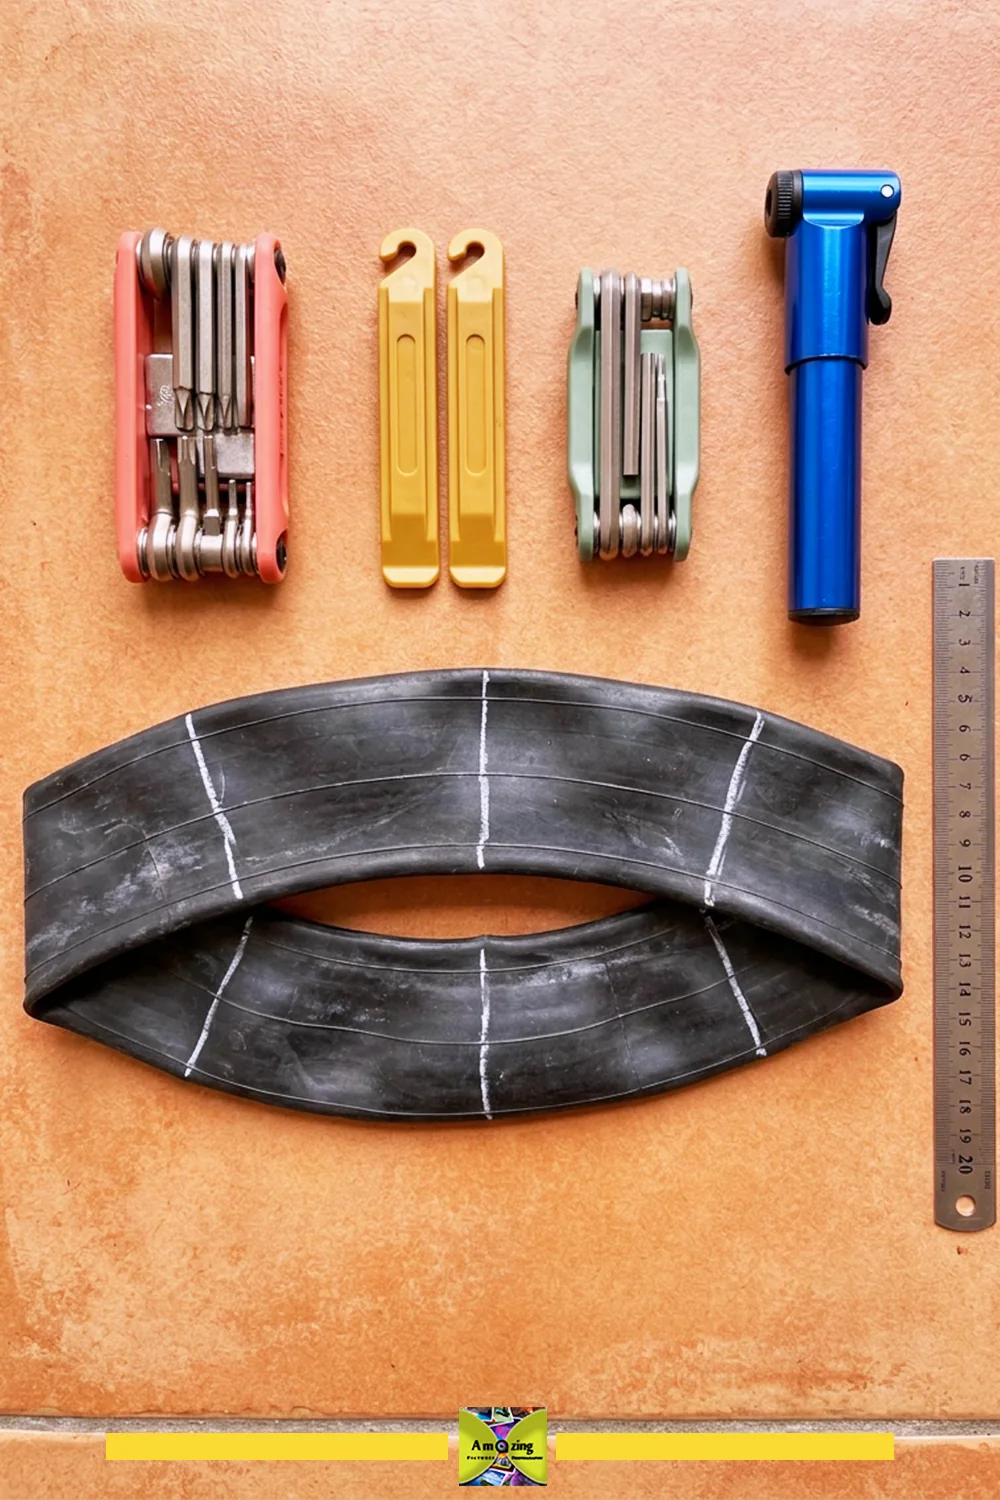
7. Roll-Up Repair Tool Organizer
What it looks like: A flat roll with fitted pockets and a separate closure strap.
Best use: A few lightweight hand tools — a small multi-tool, tire levers, hex keys — rolled into a bag.
Difficulty: Intermediate to advanced.
Approximate time: About 2.5–3 hours.
Materials: A long, wide tube section; closure strap (a tube band); thread; optional lining.
Tools: As above.
- Lay out each tool and mark pocket widths from the actual tools, not a guess. (custom-spaced to 3.5 cm for levers, 4.5 cm for multi-tool)
- Cut the back panel with stretch running lengthwise, and cut pockets from a second section.
- Stitch the pockets, testing that each tool slides in and out without stretching the rubber or catching.
- Add the closure strap at the rolled diameter you measured, and reinforce its attachment.
- Limit contents to lightweight manual tools; test the roll repeatedly before carrying.
Customization: A dedicated pocket for each tool; printed markings as labels; a single accent strap.
Practical tip: Make one pocket slightly oversized for the multi-tool — it is always the bulkiest item.
Common mistake: Overloading. This is for a few light tools, not a full socket set; the roll is not a load-bearing strap.
Safety note: Never carry loose blades or heavy tools in a way that could drop them. Retire if a pocket seam or the closure tears.
8. Light-Duty Drawer or Box Pull Tabs
What it looks like: Short rounded tabs screwed or stitched through reinforced holes.
Best use: Adding a small grip to lightweight drawers, storage boxes, or bin lids.
Difficulty: Easy.
Approximate time: About 30 minutes for a set of four tabs.
Materials: A clean tube section cut into strips; a rigid backing (small washer or internal tube patch) for each hole; short flat-head screws or a tested adhesive.
Tools: Scissors, punch, screwdriver (or adhesive per instructions).
- Cut strips to a length you can grip with two fingers, with rounded ends. (backed with 1/2-inch stainless steel flat washers)
- Reinforce each attachment hole with a wider backing so it cannot pull through.
- Attach with a short screw through the backing, or a tested adhesive that has fully cured.
- Pull-test each tab before use, and check the drawer still opens and closes freely.
Customization: A matched pair of tabs per drawer; a single accent color; aligned printed markings.
Practical tip: Screw through the backing, not the raw tube, so the tab does not stretch and tear around the screw.
Common mistake: Using these on a heavy or jamming drawer. If the drawer needs real force, these tabs will fail.
Safety note: Lightweight drawers or boxes only — use them where failure could not cause injury or release a heavy load. Replace at the first sign of tearing or pull-through.
9. Removable Clamp-Jaw Facing Pads
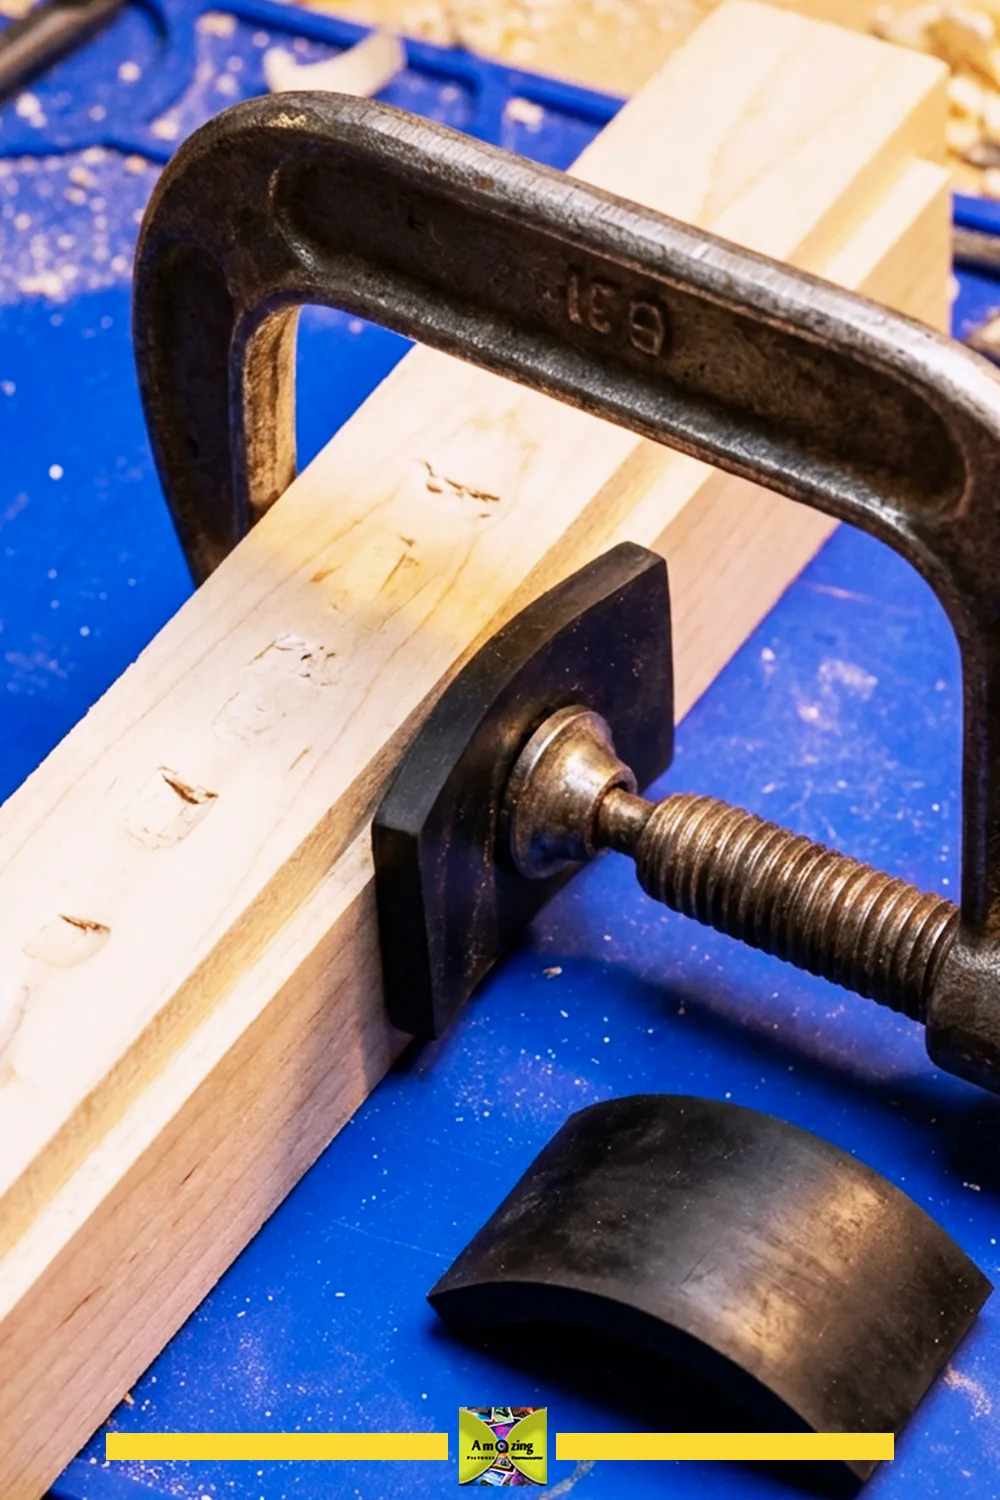
What it looks like: Small shaped pads that slip over a clamp jaw to soften its contact.
Best use: Protecting a workpiece from jaw marks during light craft assembly.
Difficulty: Easy.
Approximate time: About 30 minutes for four jaws.
Materials: A clean tube section; a scrap to test marking and transfer.
Tools: Scissors, a paper template of the specific jaw.
- Trace the exact jaw shape of one specific clamp — these are not universal pads. (sized with 1/8-inch perimeter lip ease)
- Cut the pad with rounded edges and a fold or pocket so it stays on the jaw but removes cleanly.
- Test on an inconspicuous matching surface for black marks, chemical transfer, adhesive residue, and slipping.
- Remove the pad if it shifts during use.
Customization: A subtle color mark to label jaw size; a smooth finish on the contact side.
Practical tip: Cut the pad to one clamp and label it — a loose pad on the wrong clamp is worse than no pad.
Common mistake: Claiming it prevents every dent or protects valuable finishes. It softens contact; it does not guarantee a mark-free surface.
Safety note: Use only where a slipped clamp cannot cause injury. Remove any pad that slips, marks, or transfers residue.
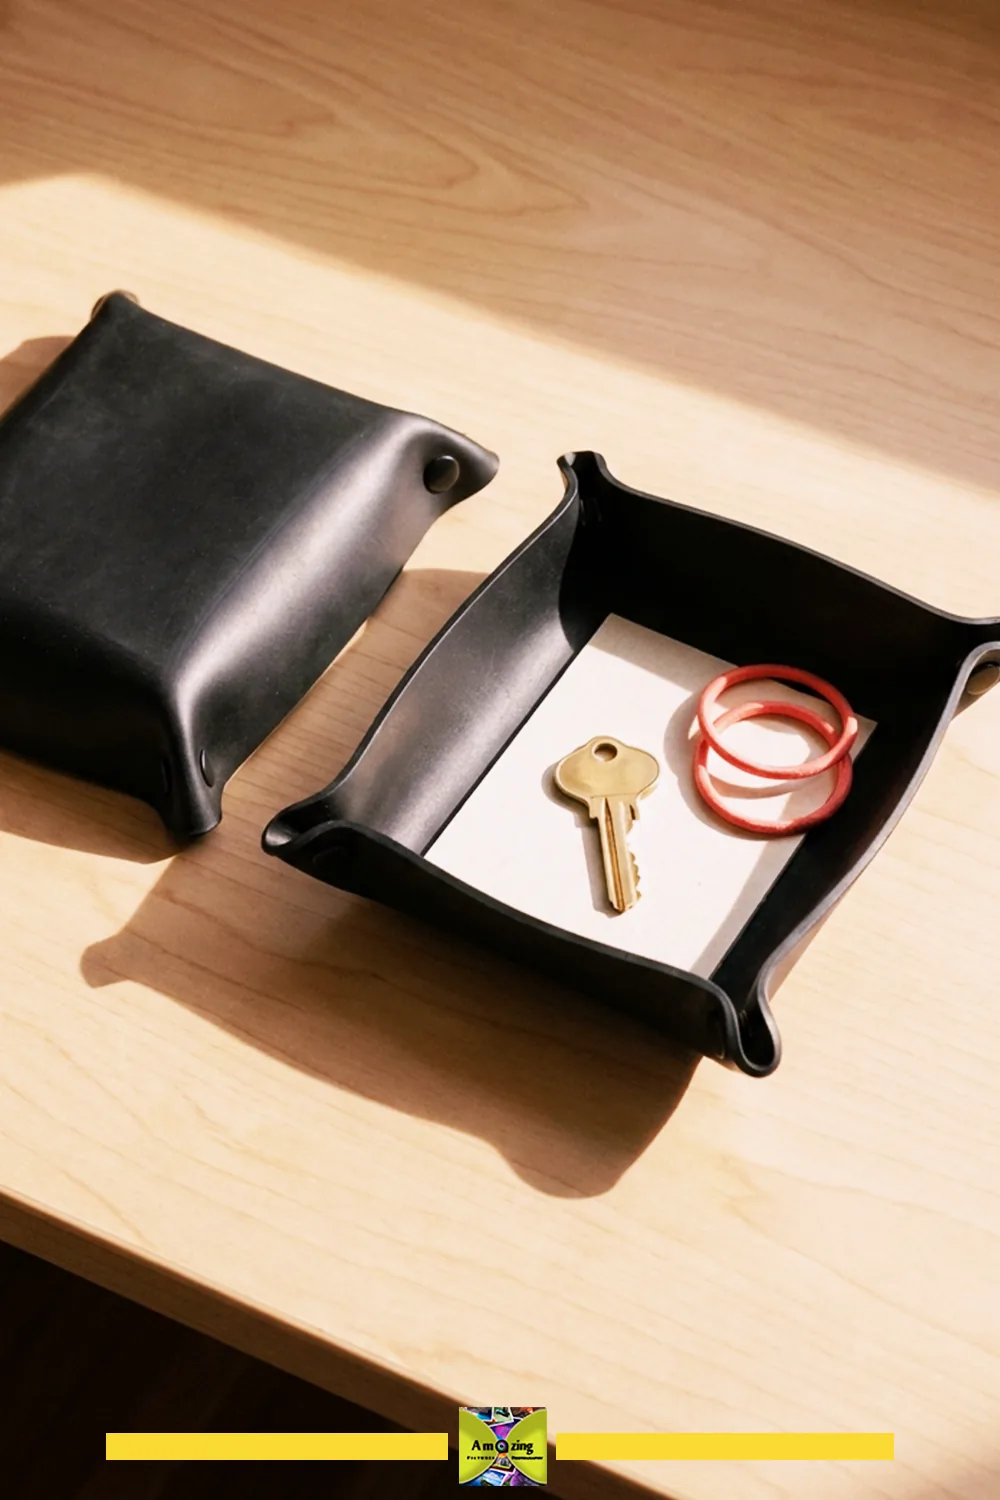
10. Fold-Flat Desktop Catchall Tray
What it looks like: A shallow four-corner tray that folds flat for storage, with reinforced corners and a removable rigid insert.
Best use: Corralling keys, coins, or a few pens on a desk.
Difficulty: Intermediate.
Approximate time: About 1.5–2 hours.
Materials: A clean tube panel; a removable rigid insert (cardboard or thin plastic) with enclosed edges; thread or a tested adhesive.
Tools: As above.
- Decide the tray footprint from what it will hold, then add wall height and corner folds to a paper pattern. (sized to 18 × 18 cm with 3 cm wall folds)
- Cut the panel, then fold and stitch or bond the four corners so they hold a shallow wall.
- Reinforce each corner with a second layer so it keeps its shape.
- Make a removable insert whose edges are fully enclosed, so it can be taken out for cleaning.
- Test that the tray sits flat and holds lightweight dry objects without sagging.
Customization: A single accent corner; a printed marking centered on the base; matched stitching.
Practical tip: Make the insert removable — the tube and the insert clean differently.
Common mistake: A tray that will not sit flat because one corner fold is stiffer than the others.
Safety note: Lightweight dry objects only. No food, hot tools, liquids, sharp items, heavy hardware, or breakables.
11. Small Woven Desk Basket
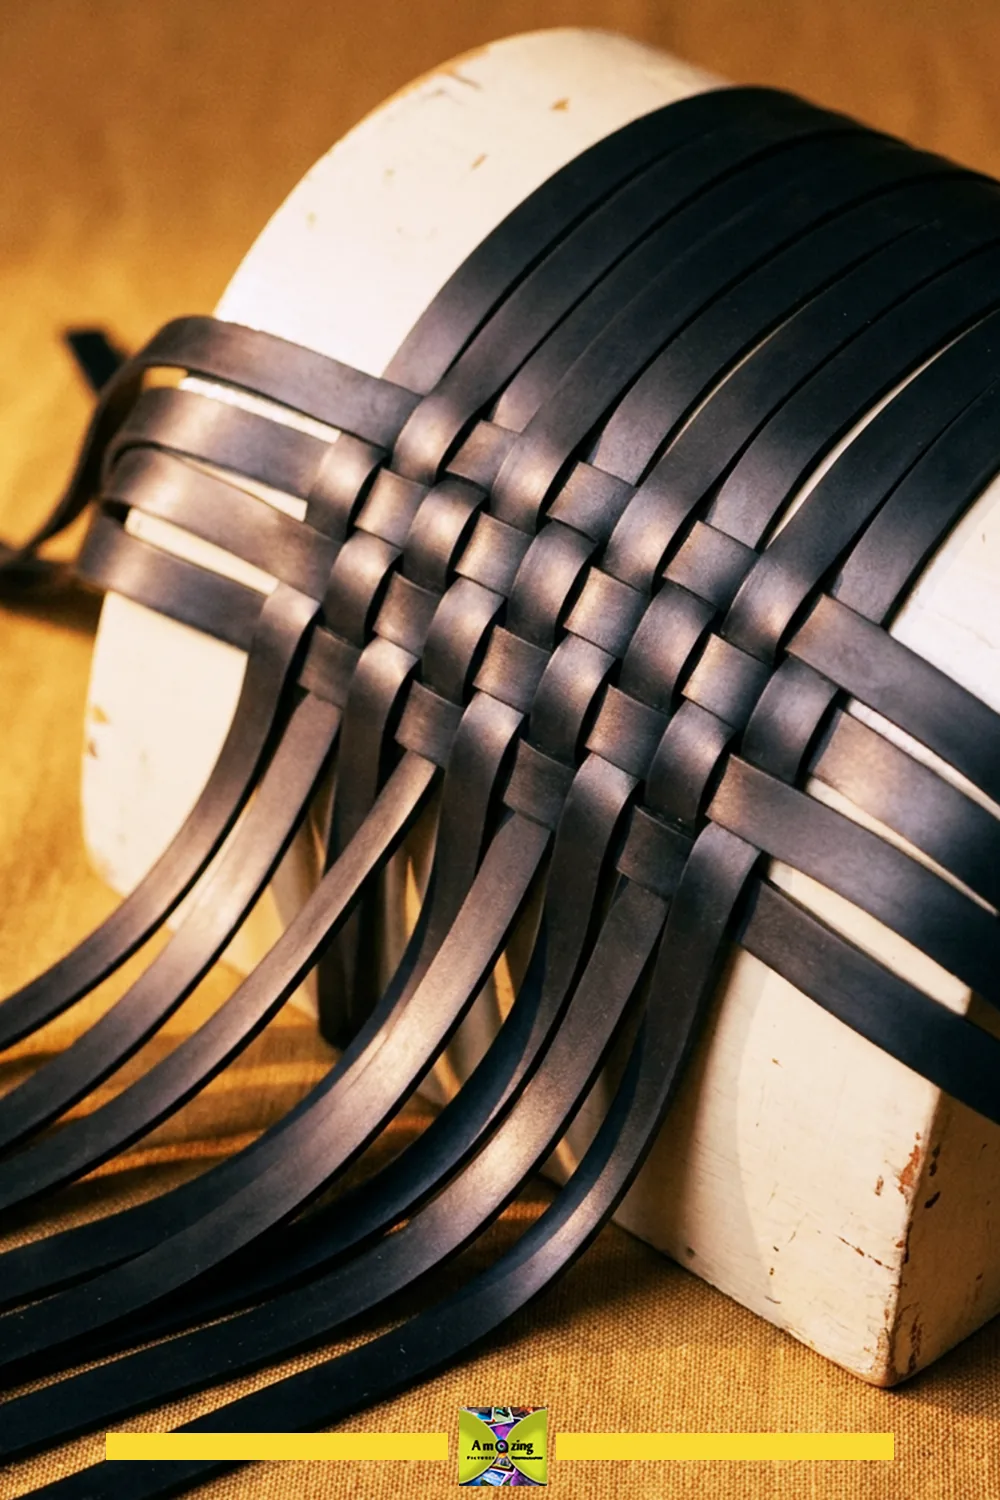
What it looks like: A small laced basket from consistent tube strips around a stable form, with a rigid base.
Best use: Holding a few lightweight dry items — rubber bands, clips, or a small stationery stash.
Difficulty: Advanced.
Approximate time: About 3–4 hours.
Materials: Several strips cut to a consistent width from one tube; a rigid base with enclosed edges; a simple form (a small box or bowl) to shape around.
Tools: Scissors, punch or awl, clips.
- Cut strips to one consistent width so the weave stays even; trim to equal length from the same tube. (cut to uniform 15 mm / 0.6 in strip width)
- Build or cut a rigid base and wrap its edges so nothing sharp is exposed.
- Weave or lace the strips around the form, keeping tension even and punching holes rather than tearing.
- Tuck and reinforce the top edge, and remove the form only when the shape holds.
- Test with conservative, lightweight contents.
Customization: Alternate the tube’s two sheens for a subtle checker; a single accent strip at the rim.
Practical tip: Cut all strips at once from one flattened tube so their width and stretch match.
Common mistake: A basket that loses shape because the strips were cut with inconsistent width or stretch.
Safety note: Lightweight dry items only. No food, cosmetics, hot tools, liquids, sharp items, or heavy hardware.
Gifts and Small Practical Makes
12. Replaceable Zipper-Pull Tabs
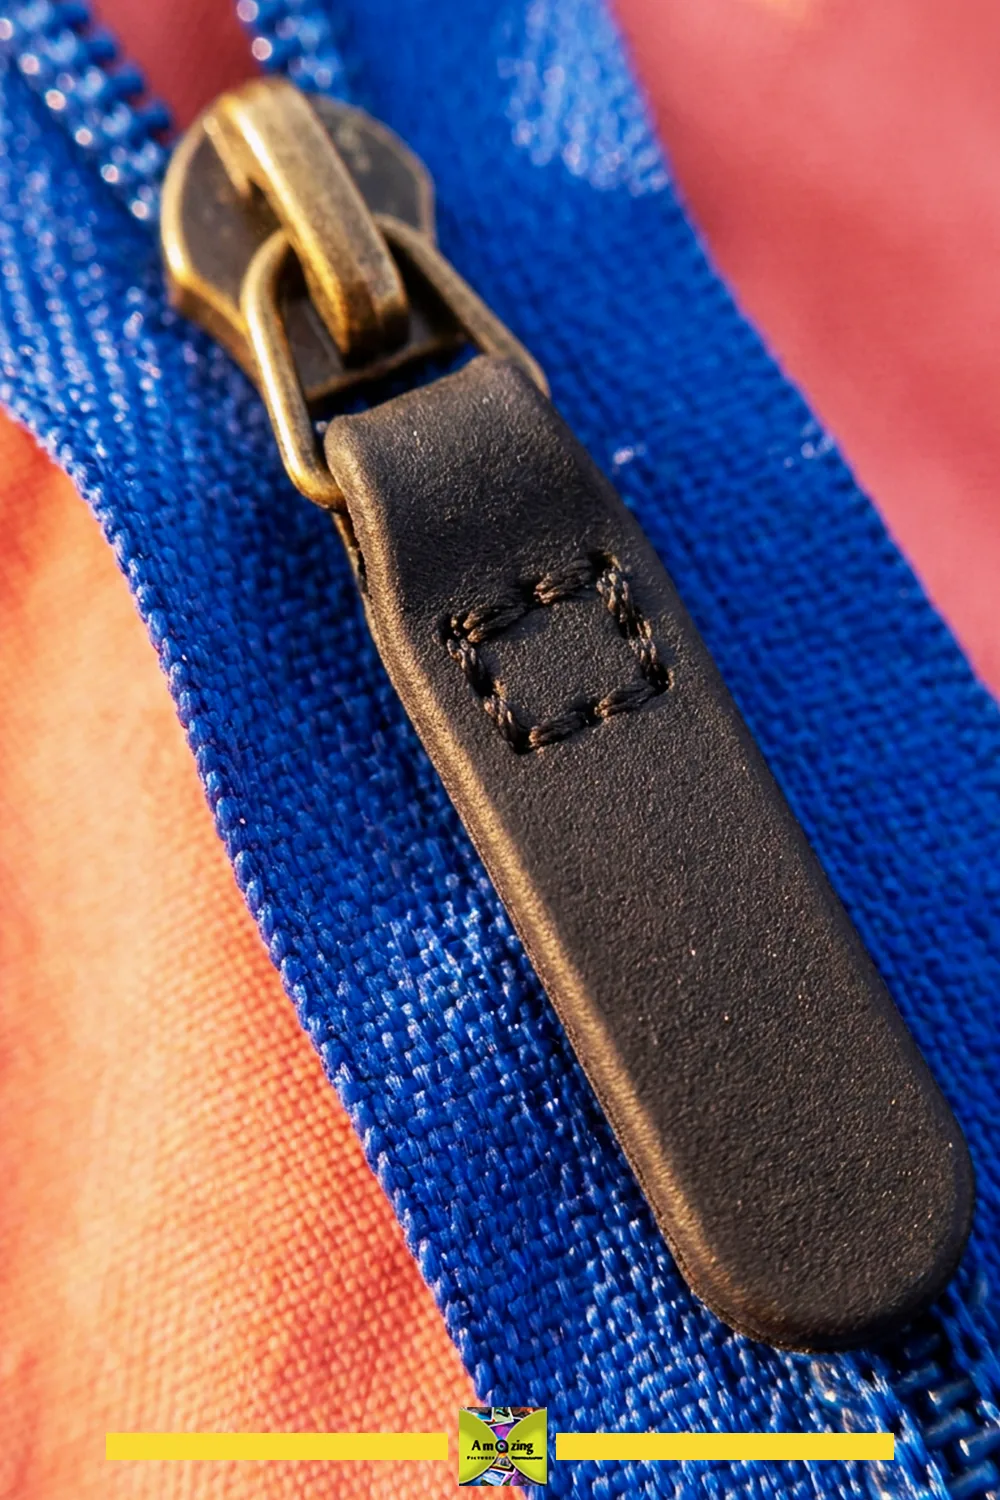
What it looks like: Short rounded tabs that slip or stitch onto a zipper pull.
Best use: Making a small pouch or organizer easier to open.
Difficulty: Easy.
Approximate time: About 15 minutes for three pulls.
Materials: A small clean tube strip; a ring or stitched loop if needed.
Tools: Scissors, punch.
- Cut a short strip with rounded ends sized to the specific zipper pull. (sized to 60 mm × 10 mm with tapered ends)
- Form a loop or slot and reinforce it so the tab cannot tear at its attachment.
- Attach it so it can be replaced without cutting the zipper itself.
- Pull-test after complete cure or stitching before relying on it.
Customization: A single accent color; a printed marking on the tab.
Practical tip: The replacement point is the feature — attach it so you can swap it out when it wears.
Common mistake: Using these on safety equipment, emergency exits, protective gear, or high-load luggage closures. They are for ordinary pouches only.
Safety note: Never on safety-critical or high-load closures. Replace at the first sign of tearing.
13. Adjustable Cable-Keeper Bands
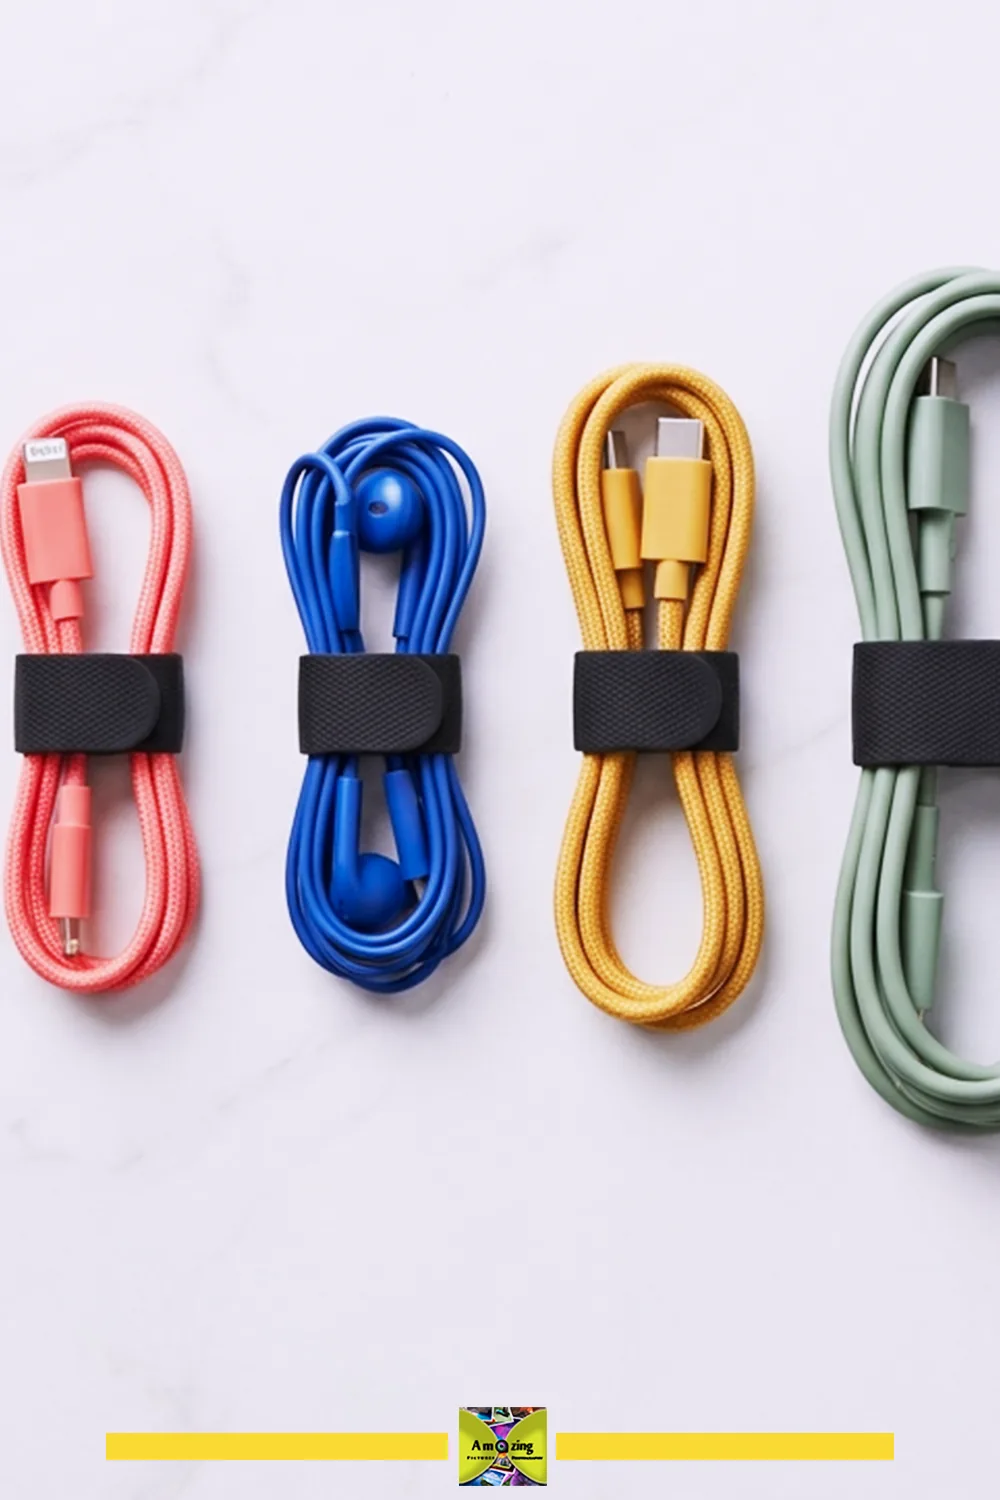
What it looks like: Short bands with rounded ends that wrap around a coiled cord.
Best use: Taming a disconnected, cool, undamaged charging cable or earbud cord.
Difficulty: Easy.
Approximate time: About 15 minutes for four bands.
Materials: A thin tube strip; a low-profile closure (a slit or a small snap through reinforcement).
Tools: Scissors, punch, optional snap-setting tools.
- Cut a band to a length that wraps your specific cord without stretching it tight. (cut to 20–25 mm width from road and MTB tubes)
- Round the ends and reinforce any slit or snap so it cannot tear.
- Close it so it holds the coil loosely — no tight bends and no pressure on the plug or strain relief.
- Test on a disconnected cord only.
Customization: A color-coded band per cable; a printed marking as a label.
Practical tip: Size the band to the coil, not to the uncoiled cable, so it never sits tight.
Common mistake: Wrapping too tightly, which stresses the plug and strain relief and can crease the cord.
Safety note: Disconnected, cool, undamaged cords only. Never on live or hot cords, and never as a tight cinch.
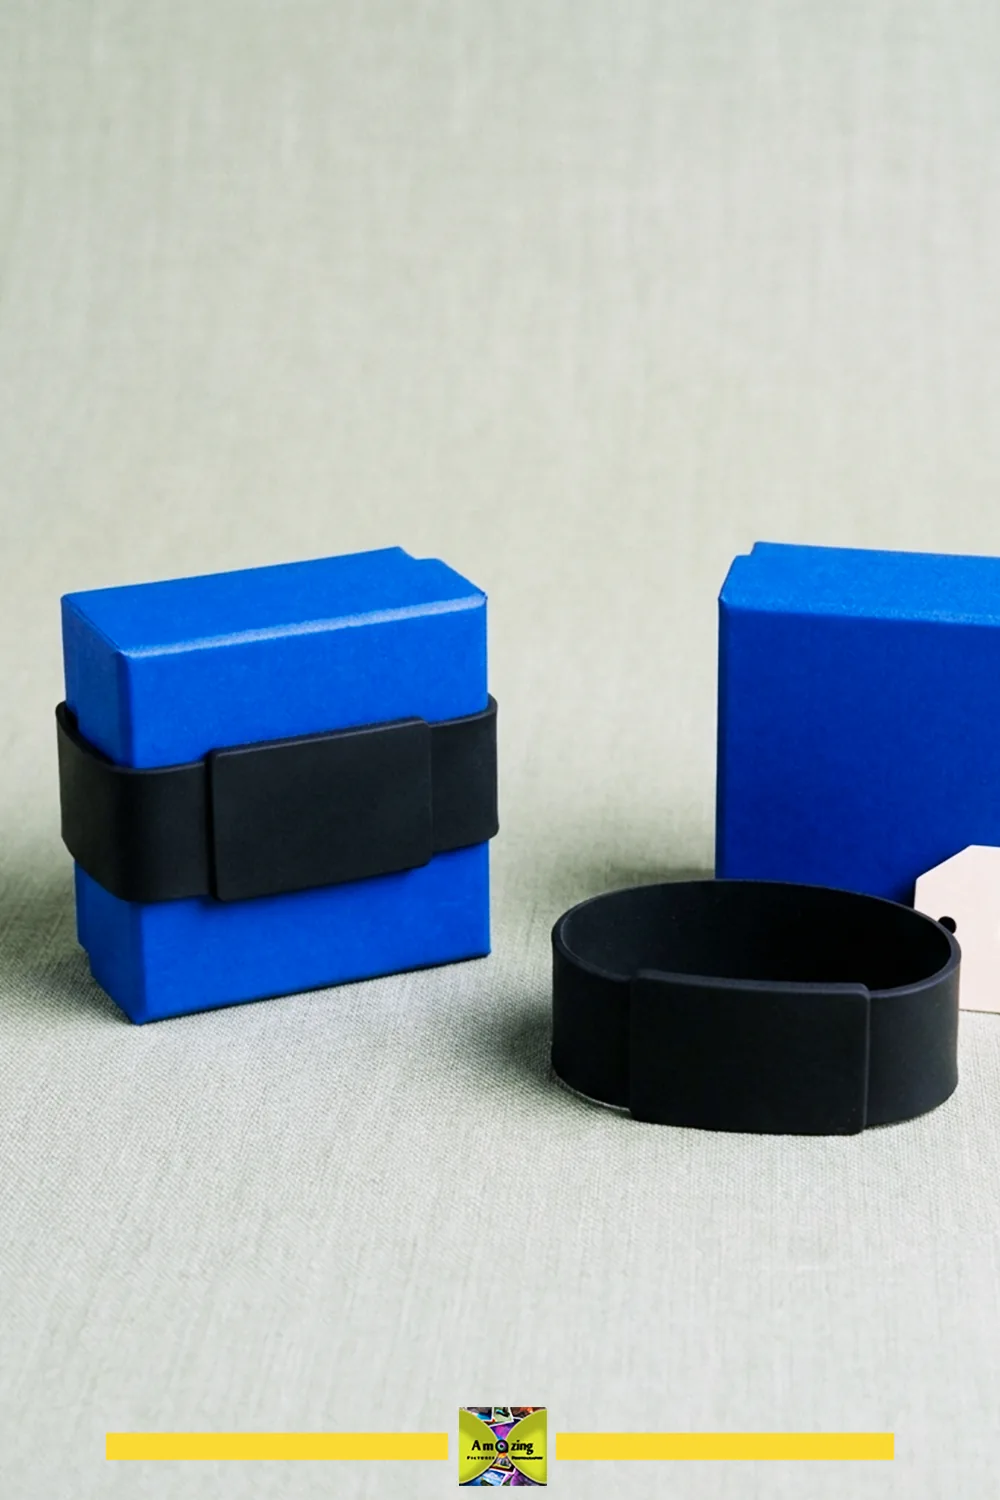
14. Reusable Gift-Box Bands
What it looks like: A flat band with a small decorative panel that slides over a gift box.
Best use: A reusable alternative to ribbon on a small box.
Difficulty: Easy.
Approximate time: About 30 minutes for four jaws.
Materials: A clean tube band cut to the box’s girth; a small flat accent panel.
Tools: Scissors, a tested adhesive or thread.
- Measure the box’s girth and cut a band that slides on and off without overstretching the tube or tearing the box. (cut 15% shorter than box perimeter for snug tension)
- Round the ends and add a small flat accent panel, stitched or bonded after a full cure.
- Test the fit: it should slide off cleanly and leave the box unmarked.
- Check for dye or residue transfer on the box before gifting.
Customization: A single accent panel in one restrained color; a printed marking as a monogram.
Practical tip: A band that slips on is reusable; one that must stretch is a one-time ribbon.
Common mistake: Cutting the band to a tight fit so it deforms the box or leaves a mark.
Safety note: Keep the band away from small children (small detachable pieces are a hazard), and never overstretch it.
Light-Duty Household Helpers
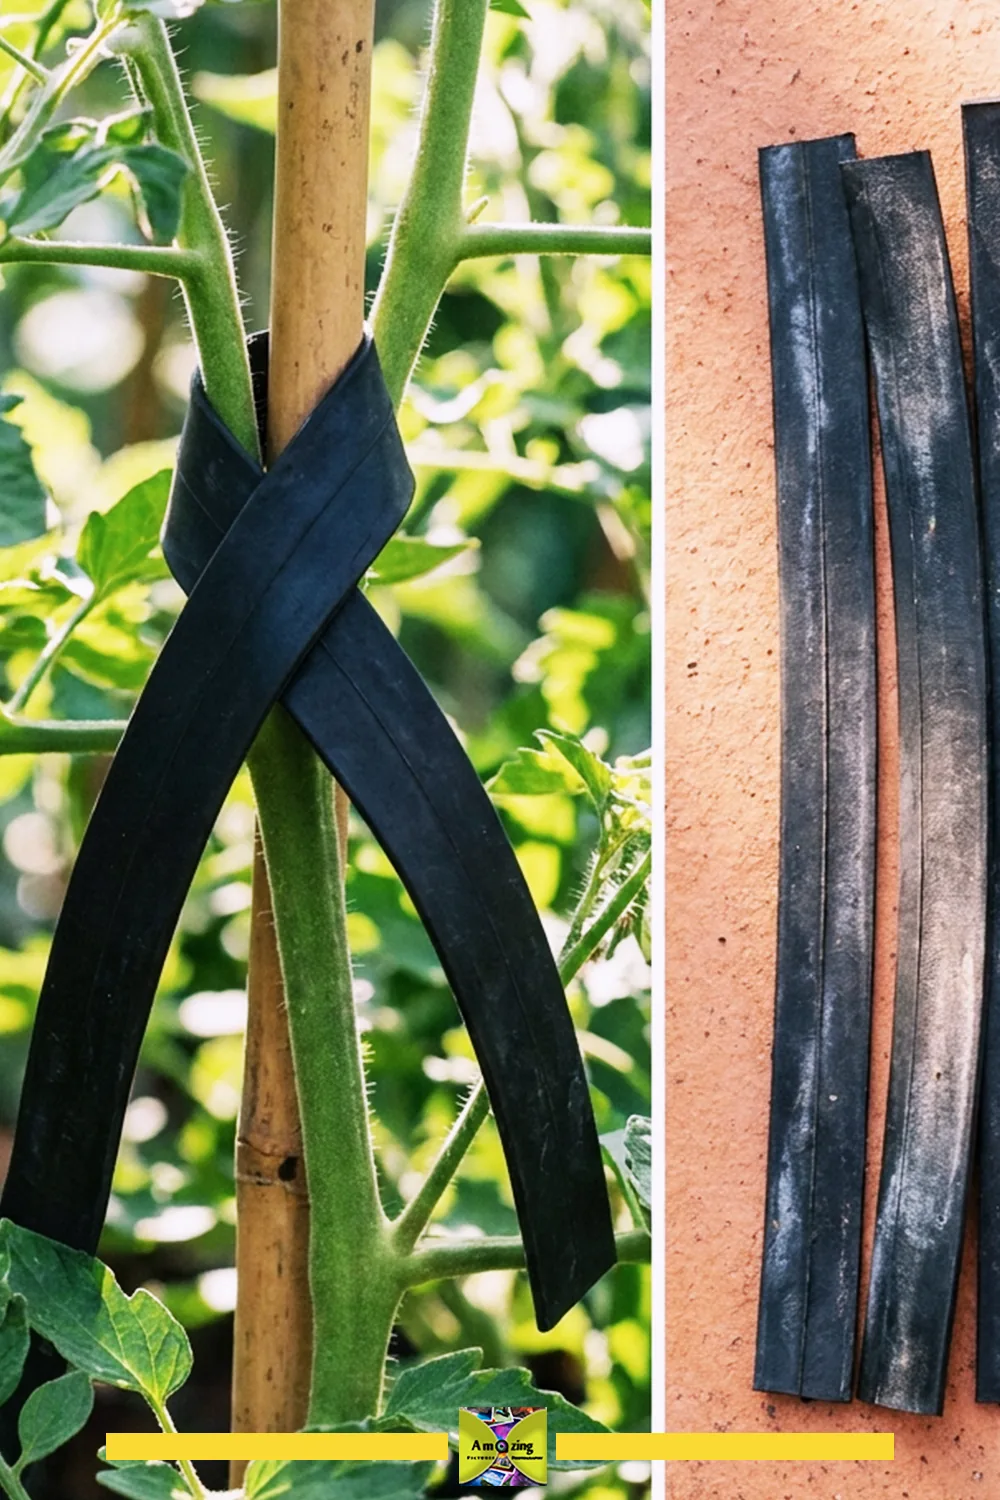
15. Wide Seasonal Plant-Support Ties
What it looks like: Wide flat strips used as loose ties around soft plant stems.
Best use: Gently supporting non-woody garden stems to a stake for one season.
Difficulty: Easy.
Approximate time: About 15 minutes for 10–12 ties.
Materials: A clean tube cut into wide strips; scissors.
Tools: Scissors only.
- Cut wide strips — width matters more than length here, because a wide contact surface is what keeps the tie from cutting the stem. (cut to 25–30 mm wide to prevent stem chafing)
- Wrap loosely, leaving space for growth and movement, and secure so it can be adjusted.
- Check the ties frequently through the growing season.
- Remove immediately if a tie rubs, constricts, traps moisture, transfers residue, or becomes brittle.
- Collect every piece at the end of the season so no fragments remain in the soil or become litter.
Customization: Wider strips for larger stems; a consistent width so ties look intentional in the garden.
Practical tip: Check after rain and heat — moisture and UV both shorten the tie’s life.
Common mistake: Leaving a tie on too long. As the stem grows, the tie constricts; as the rubber ages outdoors, it hardens and can rub.
Safety note: Non-woody stems only, based on current horticultural guidance for your plants. No trees, grafting, edible-plant contact, or structural support. These are not biodegradable and not permanently weather-durable — collect every piece.
How to Make Mismatched Tube Pieces Look Intentional
Black and mismatched tube pieces can read as “random patches” or as a coordinated set. The difference is restraint.
- Limit accent colors to roughly one to four. Group materials by sheen, thickness, and stretch before color.
- Use molded printing, sound patches, and valve-base shapes as deliberate focal details — but only where they carry no structural load.
- Align embossed lines and printed graphics across panels and folds.
- Repeat panel widths and corner radii. Repetition reads as design; random shapes read as scrap.
- Keep topstitching distance and stitch style consistent across the whole piece.
- Choose one coordinated metal finish for zippers, snaps, rivets, and eyelets.
- Pair matte black rubber with canvas, felt, or another compatible reclaimed lining only where it improves function, not as decoration.
- Create contrast through texture rather than beads, glitter, fringe, or tassels.
- Conceal reinforcement and raw insert edges.
- Clean fingerprints and dust before photographing, and light dark rubber to show surface detail without glare. Show the original tube markings beside a clean finished edge and a reinforced attachment.
Care, Maintenance, and When to Retire a Project
Follow the most restrictive requirement among the tube, lining, thread, adhesive, coating, zipper, hardware, and insert. Avoid universal machine-wash, dry, solvent, oil, polish, or disinfectant instructions. Wipe only with a method you have tested on the known material, and dry completely before closing, stacking, filling, or storing.
Keep finished pieces away from direct sunlight, heaters, sparks, ozone sources, oils, and sharp edges. Check seams, folds, punched holes, rivets, snaps, zipper ends, and closures regularly. Test for dye or residue transfer before any piece touches pale fabric, paper, finished wood, electronics, or valuables.
Retire a project when it becomes sticky, brittle, cracked, swollen, delaminated, strongly odorous, moldy, stained by unknown residue, or torn around hardware.
Troubleshooting Common Inner Tube Craft Problems
- The material is unknown — treat it as unknown: be more conservative with cleaning and adhesives, and use no heat.
- Liquid sealant or powder appears after cutting — stop, do not rinse it down a drain, and follow manufacturer or local hazardous-waste guidance.
- Persistent road residue or odor — mild soap and water, then full drying and ventilation; if it will not clear, reject the tube.
- The tube stays tacky after cleaning — it may be degraded or chemically exposed; reject rather than cover it.
- The split tube curls tightly — flatten under gentle weight or work with the curl direction instead of fighting it.
- Layers stick together — use clips, not pins, and a nonstick or walking foot.
- The marker won’t show or transfers later — test a different marker on scrap, including a transfer test onto pale paper.
- Scissors drag or make jagged edges — sharpen or switch to heavy-duty scissors, and make controlled passes.
- The rotary cutter skips — a fresh blade, a firm mat, and a ruler that will not slip.
- A knife leaves a notch that tears — round the notch and avoid sharp internal corners.
- Narrow strips stretch unevenly — cut all strips from one flattened tube at once, and mark the stretch direction.
- Rounded corners look mismatched — cut them all from one rigid template.
- Layers shift during layout — clip at corners and start stitching away from bulky intersections.
- Clips leave dents — use wider, flat-faced clips and remove them promptly.
- The machine will not feed the rubber — a nonstick or walking foot, correct tension, and a test seam; never force it.
- Skipped stitches or thread nesting — check needle, tension, and the material stack; test on an offcut.
- A needle bends or breaks — the stack is too thick or you are hitting hidden metal; stop and re-evaluate.
- Very close stitches create a perforation line — lengthen the stitch spacing.
- Seams puckering or rolling — ease the feed, don’t pull from behind, and test the stretch direction.
- Zipper tape is wavy — sew each side separately and clip, don’t pin.
- The lining bunches or stretches differently — cut the lining slightly larger and test the pair together.
- Contact adhesive stays tacky — respect open time, clamp, and full cure before flexing.
- A bond peels during flexing — the adhesive was not rated for flexible rubber, or it did not fully cure.
- Cyanoacrylate is brittle or cloudy — it is the wrong product for flexing rubber; switch to a rated flexible adhesive.
- Hot-melt releases — expected under flex; use it only for low-stress decorative positioning.
- A punched hole elongates — back it with a wider sound patch and keep the hole small.
- A snap, rivet, or eyelet pulls through — add a washer or backing strip and reset.
- A zipper pull tears at its slot — reinforce the slot with a wider backing.
- Cable bands press too tightly — size to the coil, not the uncoiled cable.
- Drawer tabs stretch — reinforce the hole and use them only on lightweight drawers.
- Clamp pads slip or mark — re-shape to the specific jaw or remove them.
- The tray will not sit flat — even out the corner folds and check the insert.
- The woven basket loses shape — cut consistent strips and use a stable form and rigid base.
- Plant ties rub or constrict — loosen, widen, and check more often.
- Black residue transfers — clean, dry, and test before contact with pale or valuable surfaces.
- The set looks like random patches — apply the styling rules above: repeated widths, aligned graphics, consistent topstitching, one metal finish.
Safety When Working With Retired Inner Tubes
- Use only clean, known, fully deflated retired tubes.
- Check recovery-program requirements before cutting.
- Reject liquid sealant, unknown powder, mold, fuel, oil, solvent, chemical exposure, sharp debris, persistent odor, and degraded material.
- Be aware of latex sensitivity, and treat unknown material with caution.
- Wear gloves for dirty initial handling, and eye protection where cutting, punching, or hardware removal can create flying fragments.
- Use a stable, well-lit cutting surface, and keep hands outside scissor, knife, punch, and rotary-cutter paths.
- Cut away from your body. Retract, cap, store, and dispose of blades safely.
- Secure material flat before punching or setting hardware. Never hold a small piece in your hand while cutting, drilling, punching, or hammer-setting it.
- Respect sewing-machine needle and pinch hazards; switch equipment off before setup changes, as the manual directs.
- Never stitch over a valve, hidden metal, pins, clips, rivets, snaps, or other hardware.
- Use ventilation and exact label compliance for adhesives, cleaners, and coatings, and keep rubber, solvents, adhesives, coatings, and lint away from heat, sparks, and open flame.
- Never burn, melt, heat-shape, iron, or run heat identification tests on unknown material.
- Keep blades, needles, snaps, rivets, eyelets, zipper parts, valve pieces, and offcuts away from children and pets.
- Avoid direct food contact and any unsupported protective, medical, exercise, electrical, child-safe, pet-safe, transport-security, waterproof, or load-bearing claim.
- Retire a project as soon as its attachment, seam, hardware, or material begins to fail.
Frequently Asked Questions
What can I make from old bicycle inner tubes?
Card sleeves, zippered pouches, pencil cases, eyeglass sleeves, notebook jackets, luggage tags, tool rolls, drawer tabs, cable bands, gift-box bands, clamp pads, desk trays, woven baskets, and plant ties. Choose items you will actually use, and skip anything load-bearing, food-contact, safety-critical, or waterproof.
How do I know whether a bicycle tube is safe to use for crafts?
Identify the material from labeling (not appearance), inspect both surfaces for sealant, powder, mold, oil, or embedded debris, and reject anything contaminated or degraded. A tube that could be repaired for bicycle use should be repaired first, and a tube a recovery program wants should be left intact.
How should an old inner tube be cleaned before crafting?
Mild soap and water, wiped rather than soaked, then fully dried and aired — but only when suitable for the confirmed material and residue. Never rinse sealant or unknown residues down a drain, and never use bleach, fuel, harsh solvents, or heat.
Can bicycle inner tubes be sewn on a home sewing machine?
Often yes, with a heavier (leather/denim) needle, strong polyester thread, higher tension, and a nonstick or walking foot — but always test a complete layered seam on an offcut first. Some stacks are safer hand-stitched.
What adhesive works on bike inner tubes?
There is no universal answer. A flexible rubber/contact adhesive (polychloroprene) is a common starting point for butyl, but it must be rated for the exact materials and tested with a full cure. Puncture-repair cement is not a general glue, and cyanoacrylate and hot-melt are poor choices for flexing rubber.
How can holes for snaps or rivets be reinforced?
Back every hole with a wider, sound piece of tube or a round washer so the hardware cannot pull through, keep the hole small, and keep hardware away from thin, patched, or valve-adjacent material.
Are old bicycle inner tubes waterproof after stitching?
No. The material is water-resistant, but every needle hole is permanent and a stitched seam is not watertight. Do not trust a stitched or punched project to keep valuables dry.
Can bicycle inner tubes be recycled in the United States?
Butyl tubes may be accepted through programs like Schwalbe’s take-back with participating dealers, but rules vary and sealant-filled tubes are excluded. Check current program terms before assuming a tube — or a cut, glued, or hardware-bearing project — is recyclable.
Final Thoughts: Start With One Clean Tube
The best first project is the smallest one you will genuinely use: a card sleeve, a set of cable bands, or a luggage tag. Start with one clean, identified, fully inspected tube, make a paper pattern, test a seam on scrap, and finish that single item before building a collection.
A retired inner tube rewards the maker who respects what it is — a technical product with a limited but real second life — rather than the maker who imagines it as a free sheet of all-purpose rubber. Choose a project you need, use conservative limits, test as you go, and retire anything that begins to fail. The result is a small, useful, honest thing that looks deliberate rather than scrap.
Posted by: Med Houssem · In: Upcycling