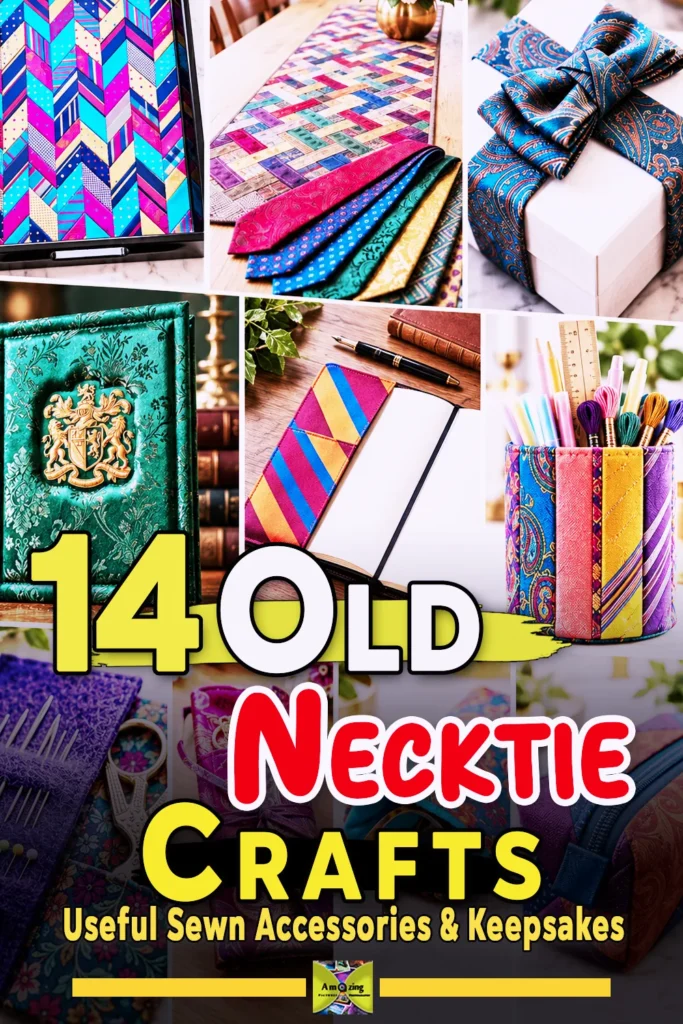
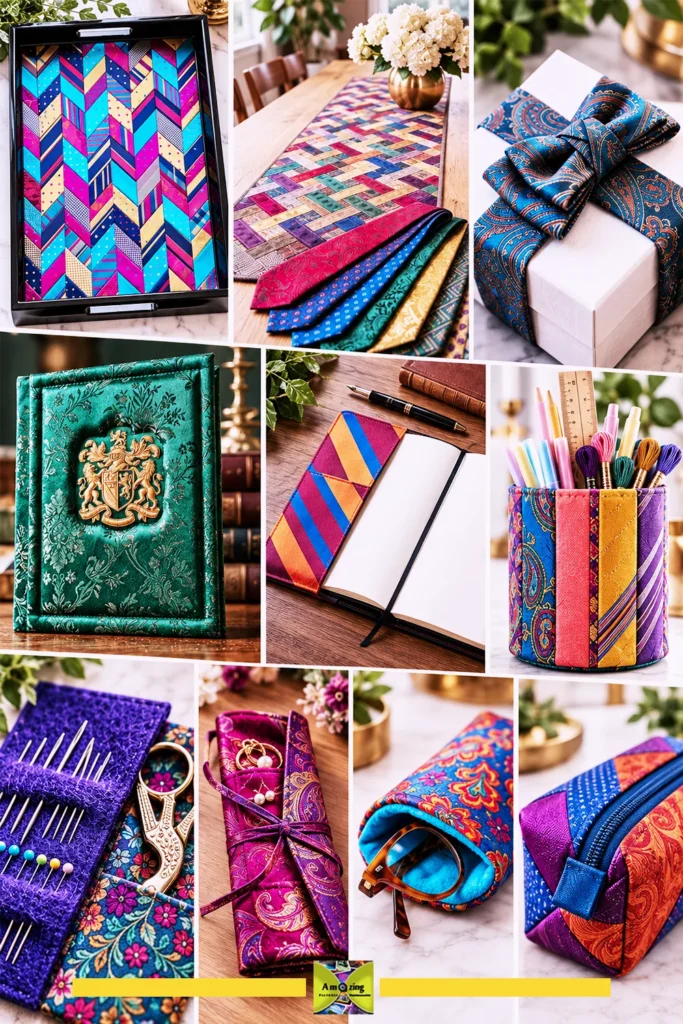
Old necktie crafts are one of the most satisfying ways to give a clean, genuinely unwanted tie a second useful life. A single tie hides more usable fabric than it looks like from the outside, and a small stack of coordinated ties can become a polished zipper pouch, an eyeglass sleeve, a fitted notebook cover, or a fold-flat valet tray without a single trip to the fabric store.
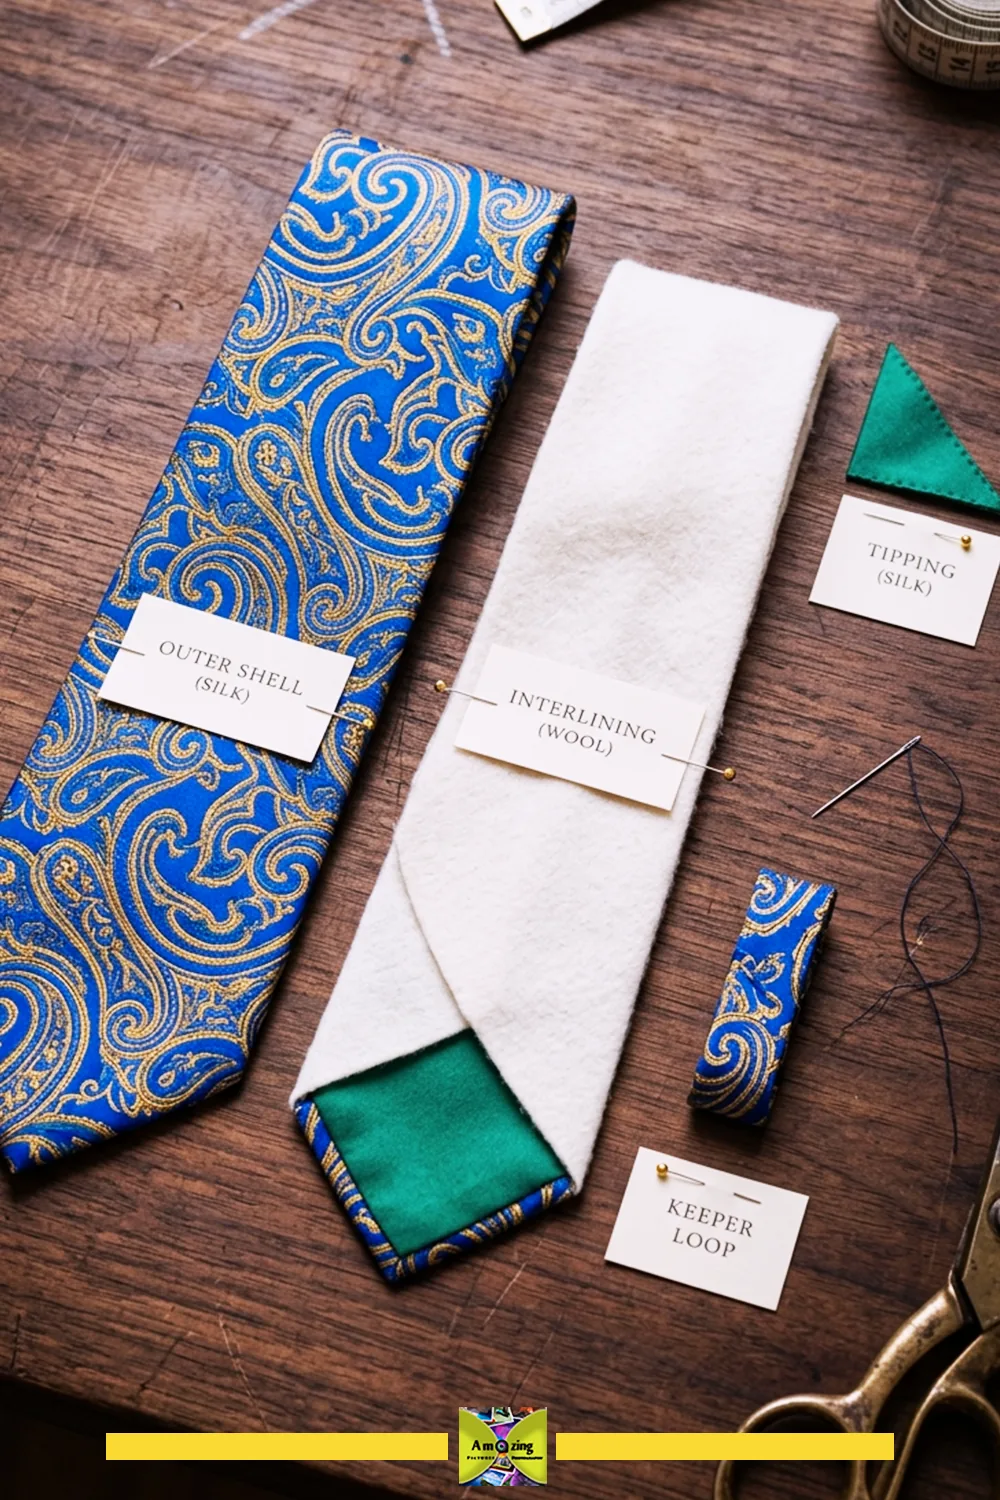
But neckties are not ordinary strips of cloth. They are constructed textile objects: a bias-cut outer shell, a center seam, an interlining, tipping at the tips, a keeper loop, bar tacks, and a slip stitch. That construction is exactly why a tie drapes so well — and why cutting one open changes how the fabric behaves. Understanding it before you cut is what separates a neat, durable project from a wobbly pouch that frays and distorts.
This guide covers the whole process in order: deciding whether a tie should be cut at all, documenting it, identifying fiber through its labels, inspecting it, deconstructing it safely, cleaning and pressing it only when appropriate, planning patterns around the bias, stabilizing and stitching it, and finishing 14 complete projects. If a tie is meaningful to you or your family, start with the first section and take your time.
Should You Cut That Tie? A Decision Guide First
Before you reach for a seam ripper, decide whether this particular tie should stay intact. A necktie is one of the few garments where a single item can carry real wearable, collectible, or sentimental value.
Keep, repair, sell, donate, preserve, or cut?
Run through these questions in order:
- Is it still wearable? If the tie is clean, undamaged, and in current style, wearing it — or giving it to someone who will — preserves more value than cutting it ever could.
- Is it repairable? A loose bar tack, a small pulled thread, or a fraying tipping can often be fixed with a few hand stitches. Repair keeps the original object intact.
- Is it collectible or historically meaningful? A vintage silk from a known maker, a club or regimental tie, or a tie with a documented history may be worth preserving intact or selling rather than cutting.
- Is it sentimental? A tie worn to a wedding, graduation, or funeral, or one that belonged to a family member, may mean more intact — photographed, stored properly, or used in a single carefully planned keepsake — than divided among several casual crafts.
- Could it be donated? A clean, wearable tie is welcome at many thrift stores and professional-clothing charities. Cut or glued scraps are generally not.
- Is it genuinely unwanted, damaged, or unsuitable for wear? Only when the answer is a clear yes should you move it to the craft pile.
Get permission before cutting a tie that isn’t yours
Never cut a tie that belongs to someone else, is borrowed, or may carry family significance without explicit permission. This includes ties from an inherited collection, a deceased relative, a workplace, a school, a club, or a theater wardrobe. When in doubt, ask first. A tie you cut cannot be uncut.
Photograph and document before any alteration
Before a single stitch is removed, photograph the complete front, back, label, tipping, keeper loop, construction, damage, and any distinctive motif. Record the owner, occasion, approximate date, maker, country of origin, fiber label, care guidance, dimensions, and any known history. Preserve labels or written records when they contribute to a memory project. This documentation is what turns a craft project into a respectful keepsake — and it is the only way to record provenance after the tie is gone.
Necktie Anatomy: What You’re Actually Working With
Understanding the parts of a tie changes every decision you make downstream.
The shell, center seam, interlining, tipping, keeper loop, bar tacks, and slip stitch
A classic necktie has several distinct parts:
- Shell (or envelope): the visible outer fabric, usually three pieces — the wide blade, the narrow tail, and the neck section between them.
- Center seam: the join that runs down the back of the tie. On a hand-finished tie it is a slip-stitched closure; on a machine-made tie it may be sewn or fused.
- Interlining (or lining): the hidden inner layer that gives the tie body and lets it recover from knotting. Quality interlinings are often wool or wool-blend; cheaper ones are synthetic.
- Tipping: the finished facing at each end. It can be self-tipped (same fabric), a contrasting or satin tipping, or untipped with a hand-rolled hem.
- Keeper loop (or keeper): the small band on the back of the wide blade that holds the tail in place.
- Bar tacks: short, dense stitches that anchor the folds and stop the tie from coming undone.
- Slip stitch: the long, flexible stitch that lets a tied necktie return to shape after being knotted.
- Labels: maker, fiber content, care, and country of origin, usually near the narrow end or under the keeper.
Fused vs. hand-finished, woven vs. knit, and multi-fold construction
Traditional, higher-quality ties are cut on the bias, hand-folded, and slip-stitched closed over a wool interlining. Machine-made ties may fuse the shell to an interlining with heat and adhesive, which changes how they respond to pressing and deconstruction. Multi-fold ties (three, four, six, seven, or more folds) fold the shell over itself more times for extra body. A knit tie is a different animal entirely — a single knitted tube that will curl and stretch when cut, and needs different stabilization from a woven shell.
Why the shell is cut on the bias — and why it stretches
Tie shells are cut on the bias, roughly 45 degrees to the grain, so the fabric drapes fluidly and the knot holds its shape without corkscrewing. The trade-off is that bias-cut fabric stretches, narrows, twists, and “grows” when it is no longer supported by the interlining. Open a tie, and the shell will relax and change shape. This is normal, not a mistake — but it means you must let the opened shell rest before measuring, and you must stabilize or handle it carefully while sewing.
How to Choose, Document, and Prepare Neckties for Crafts
Start with ties the owner has clearly released
Only craft with ties the owner has explicitly let go of. That may be you, or it may be someone else who has given clear permission.
Read the fiber and care labels (and accept when there is no label)
The fiber-content and care labels are your best source of truth. In the United States, textile products are generally required to carry labels listing fiber content by generic name and percentage, country of origin, a manufacturer or RN number, and care instructions. Read them before you do anything else.
A label that says “100% silk” or “65% polyester, 35% wool” tells you what you are working with. A missing, faded, or illegible label means you cannot confidently identify the fiber — appearance, feel, shine, and odor are not reliable tests. Treat unlabeled ties as unknown fiber and choose the most conservative handling.
Inspect for mold, pests, contamination, and damage
Under bright light, check every tie for:
- mold or mildew (visible growth, staining, or a persistent musty odor)
- insect damage (small holes, casings, or live pests)
- smoke residue, cosmetics, body oils, food residue, grease, or chemical odor
- unstable dye (a test later can confirm this)
- water marks, weak folds, pulled yarns, abrasion, fading, or brittle fabric
- failing seams, damaged tipping, or crumbling interlining
Reject unsafe or degraded textiles rather than hiding them
Do not hide a contaminated or seriously degraded tie inside a project by covering it with lining, paint, or fragrance. A tie with mold, pests, severe odors, unidentified chemical exposure, unstable dye, deep contamination, or badly degraded fabric should not become part of something you will handle, wear, or keep in your home. Dispose of it according to local guidance, or set it aside for a professional assessment if it is valuable.
Sort, measure, and plan before you cut
Sort your craft-candidate ties by documented fiber, weave, thickness, stretch, sheen, texture, motif, color, care requirement, dimensions, and condition. Measure the usable area after excluding stains, holes, stretched folds, seams, labels, and damaged edges. Plan projects before cutting so the broad blade, narrow tail, and small offcuts are all used efficiently. Keep one expendable tie of similar fiber and weight specifically for tests.
How to Deconstruct a Necktie Without Wrecking the Fabric
Deconstruction is where most of the usable fabric is won or lost. Go slowly.
Work clean, photograph, and measure first
Work on a clean, well-lit surface. Photograph and measure the intact tie first, and record its overall length, blade width, and tail width. Note the location of the center seam, bar tacks, keeper loop, label, and tipping.
Open the center seam and separate every layer
- Locate the center seam on the back. Snip the thread only where the stitch path is clearly visible, never through the shell.
- Remove the keeper loop and labels carefully, cutting only their own attaching stitches, and set them aside if they are meaningful.
- Remove the bar tacks and the slip stitch one stitch at a time. Do not pull the tie apart — pull the thread out.
- Open the folds gradually, without stretching the bias-cut shell.
- Remove the interlining and tipping only after documenting their orientation, so you can tell how the layers were placed.
- Check every layer for pins, staples, repair stitches, adhesive, or sharp debris.
A seam ripper is useful, but only when you can see the stitch path. Keep the tool point away from your supporting hand and away from the shell itself; a fine pair of scissors works where the seam is tight.
Let the opened shell relax, then measure again
After opening, lay the shell flat and let it rest before measuring. Do not force old fold lines flat with aggressive pressing. Keep the opened shell flat between clean protective layers. Make a full-size paper tracing of valuable or unusual components before cutting. Save the broad intact areas for primary panels, and reserve narrow sections for bindings, tabs, dividers, and small accents. Salvaged interlining, keeper loops, and strong stitching thread can be kept for small projects or tests.
Cleaning and Pressing Necktie Fabric Safely
There is no single cleaning or pressing recipe that works for every tie. Default to the most conservative approach.
Follow the care label — and don’t casually override “dry clean only”
If a care label is present, follow it. “Dry clean only” means the fiber, dye, or construction may be damaged by water and agitation — silk, wool, and some rayon-derived fabrics are the common culprits. Do not casually hand-wash a dry-clean-only tie. When a tie is valuable, delicate, or has unknown fiber, a professional assessment is the safer choice than any home method.
Spot-cleaning risks: rings, dye movement, and interlining distortion
Spot cleaning can create rings, move dye, change texture, or distort the interlining — and cleaning an intact tie is different from cleaning a separated shell panel. If a label supports moisture, test first on a concealed, expendable area, then blot rather than rub where authoritative guidance supports it. Avoid bleach, strong solvents, uncontrolled stain removers, prolonged soaking, twisting, and wringing. Support wet delicate fabric fully, and dry it completely in a suitable shape away from direct heat and sunlight.
Pressing on the bias without shine or stretching
Before using an iron or steamer, confirm the fiber and care guidance, and test temperature, steam, pressure, press cloth, and dwell time on an offcut. Press rather than slide the iron across bias-cut fabric, because sliding stretches it. Use a press cloth and gentle pressure to avoid shine and flattened texture, and let the fabric cool before moving it. Keep hot equipment stable and away from children, pets, cords, adhesives, and loose fabric, and switch off and unplug it afterward according to the manufacturer’s instructions.
Tested Material Note: When testing sample offcuts from both vintage 100% silk twill and polyester jacquard ties, I found that an iron set strictly to low/silk heat (around 275°F–300°F / 135°C–150°C) without onboard steam yielded the crispest, safest results. Always sandwich the bias-cut shell between two layers of dry, unbleached cotton muslin as a press cloth. Lower the iron vertically onto the fabric for 3 to 5 seconds, lift straight up without sliding or dragging across the bias grain, and let the panel cool completely on the flat board before moving it. This completely prevents edge shine, eliminates seam impression ridges, and keeps the bias weave from stretching out of true.
Fiber Basics: Silk, Polyester, Wool, and Unknowns
How different fibers behave with moisture, heat, needles, and adhesive
- Silk drapes beautifully but is heat- and moisture-sensitive, can water-spot, and shows needle marks and adhesive. Press low and slow, with a press cloth.
- Polyester and microfiber are more tolerant of moisture but melt under high heat and can shine if over-pressed.
- Wool interlinings hold shape but may felt or shrink with heat, moisture, and agitation.
- Cotton and linen press at higher heat and are generally forgiving, but printed cotton can still bleed dye.
- Rayon-derived fibers and acetate can weaken when wet and are often dry-clean-only; acetate melts at fairly low heat.
- Blends take on the limits of their most delicate component.
Why appearance can’t confirm fiber content
Shine, softness, “crackle,” weight, and odor cannot reliably identify a fiber. A polyester jacquard can look and feel like silk. Only a readable label, documentation, or a laboratory analysis establishes fiber content. In the absence of a label, assume the fabric is delicate and untested.
Mixed-tie projects follow the most restrictive care
When you combine several ties — or a tie with a lining, stabilizer, thread, or closure — the finished project follows the most restrictive care requirement among every component. If one element is dry-clean-only, the whole project is effectively dry-clean-only or spot-clean-only.
The narrow, tightly woven panels in a necktie behave very differently from the stretch-knit fabric in an old sweater: grain matters here, stretch does not. If you also have retired knitwear to repurpose, the old sweater crafts guide covers the separate inspection, cutting, and stabilization decisions that apply to fabric that moves in every direction.
Planning, Patterns, and Cutting on the Bias
Inventory, measure, and group compatible panels
Create an inventory of your usable tie panels before choosing projects. Measure the opened shell at several points, then group ties with compatible weight, stretch, care, and pressing requirements.
Full-size paper patterns with seam and turn-of-cloth allowances
Make full-size paper patterns before cutting. Include seam allowances and turn-of-cloth allowances based on the actual layered thickness of shell plus stabilizer plus lining. Universal dimensions are not useful here — the width of your usable panel, the scale of the motif, and the intended contents all change the design. Mark every example measurement for firsthand confirmation.
Grain, motif, stripe, and nap placement
Place pattern pieces on the intended grain or bias direction. Center paisley, medallions, stripes, dots, and checks. Mirror placement on paired components, and align directional designs consistently. Use controlled color blocking where exact matching is impossible, and keep permanent folds or wear marks away from high-stress areas. Cut major panels before small accents, and preserve the largest useful offcuts. Mark the less visible side with a tested removable tool.
Safe cutting: shears, rotary cutter, and pattern weights
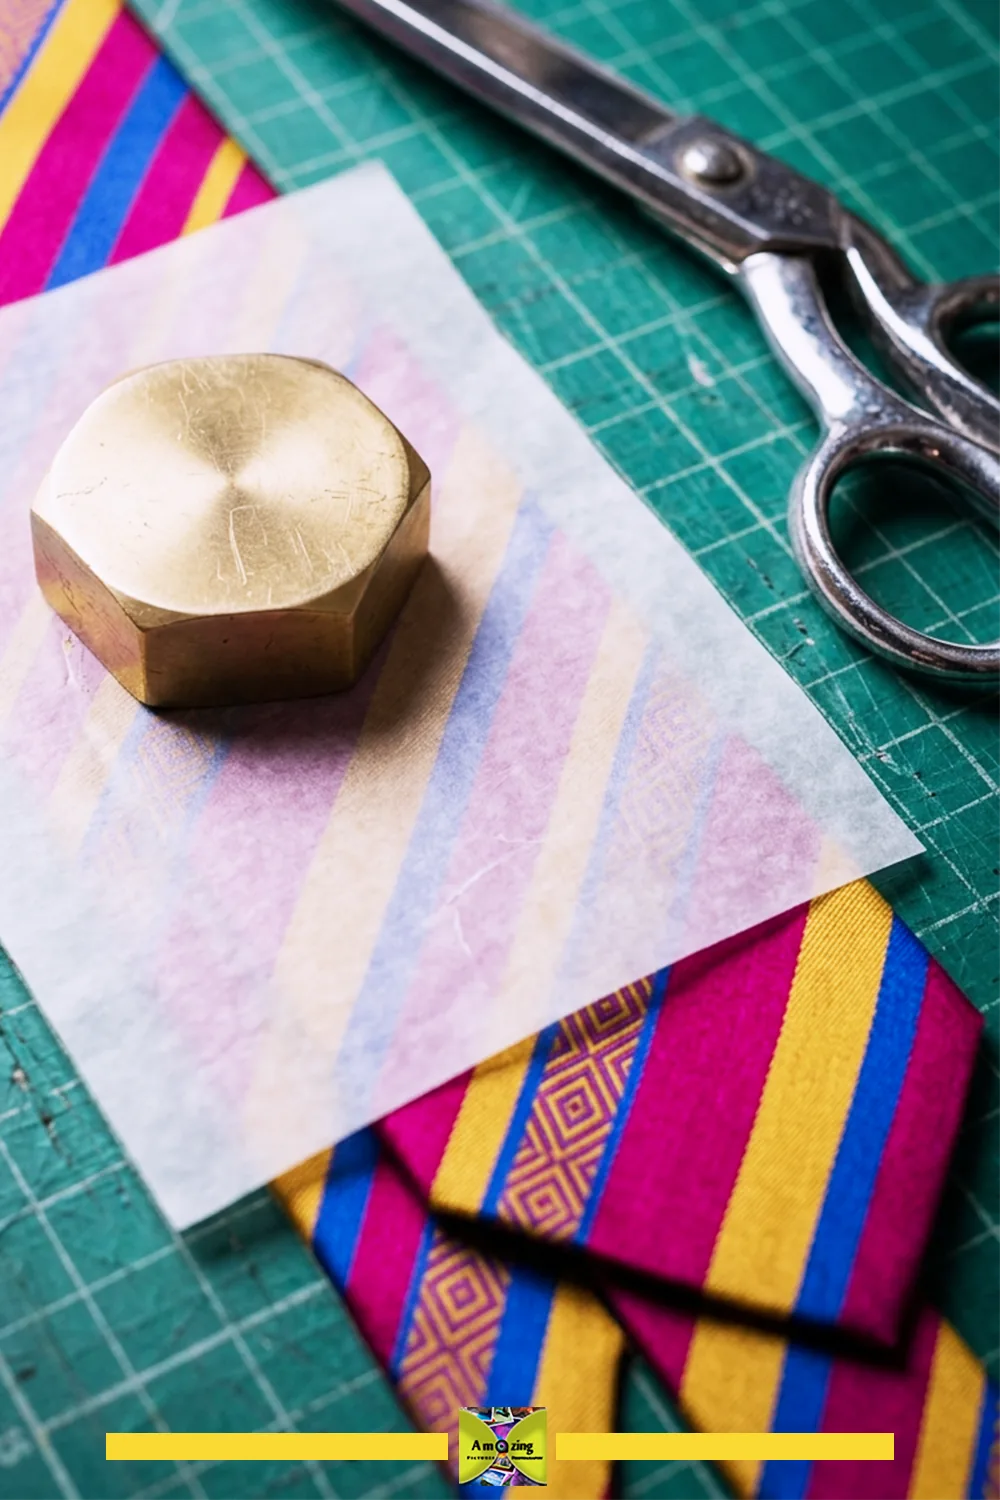
Use sharp fabric shears, or a rotary cutter only on a proper mat with stable hand placement. Cut away from your body, keep your supporting hand outside every blade path, and cut one manageable layer at a time when fabric shifts. Prefer pattern weights over pins where pinholes may remain visible on fine fabric. Store and discard damaged blades safely.
Stabilizers, Linings, Seams, and Reinforcement
Comparison table: interfacing, backing, lining, inserts, and seams
| Option | Suitable for | Tools | Bulk & stiffness | Heat/adhesive | Finish | Bias control | Care conflict | Reversibility | Limitations & failure points | Testing |
|---|---|---|---|---|---|---|---|---|---|---|
| Leave panel unsupported | Stable, small, low-stress panels | Shears, pins | None | None | Unlined | Weak | None | High | Bias panels distort while stitching | Sample seam |
| Lightweight sew-in interfacing | Slippery shells | Shears, needle | Low | None | Enclosed | Good | Low | High | Adds a layer to every seam | Sample seam |
| Medium sew-in stabilizer | Baskets, trays, covers | Shears, needle | Medium | None | Enclosed | Strong | Low | Medium | Stiffens drape | Sample seam |
| Fusible interfacing | Only after heat/adhesive test | Iron, press cloth | Low–medium | Requires test | Can show through | Strong | Low | Low (damage risk) | Bubbling, spotting, show-through | Offcut test first |
| Woven backing | Runners, covers | Shears | Medium | None | Visible inside | Strong | Low | Medium | Adds weight | Sample seam |
| Smooth lining | Pouches, sleeves, rolls | Shears | Low | None | Enclosed | Good | Low | High | Lining creep if mis-sized | Fit test |
| Padded lining | Eyeglass sleeves, album covers | Shears, batting | Medium | None | Enclosed | Good | Low | Medium | Bulk at corners | Fit test |
| Removable rigid insert | Valet tray, basket base | Board, template | High | None | Removable | Strong | Low | High | Insert shifts or scratches | Fit test |
| Straight seams | Most woven panels | Machine | Low | None | Visible | Moderate | Low | High | Frays on delicate fabric | Sample seam |
| Narrow zigzag | Stretch or fraying edges | Machine | Low | None | Visible | Good | Low | High | Less precise | Sample seam |
| Lapped seams | Lightweight shells | Machine | Low | None | Topstitched | Good | Low | High | Show-through on sheer | Sample seam |
| Bound seams | Fray-prone jacquards | Bias tape, needle | Medium | None | Enclosed | Strong | Low | High | Bulk | Sample seam |
| Turned-and-topstitched | Pouches, sleeves, folios | Machine | Low–medium | None | Clean | Good | Low | High | Perforated look if over-stitched | Sample seam |
| Fully lined | Pouches, rolls, covers | Lining, machine | Medium | None | Enclosed | Strong | Low | Medium | Lining creep | Fit test |
| Edge binding | Runners, trays, baskets | Binding, needle | Low–medium | None | Clean edge | Good | Low | High | Bulky corners | Sample seam |
| Zipper insertion | Pouch, roll | Zipper, foot | Medium | None | Visible | Good | Low | Low | Wavy zipper | Full test after build |
| Button + reinforced loop | Folio, roll closures | Button, needle | Low | None | Visible | Local | Low | High | Pull-through on fine fabric | Pull test |
| Snaps through reinforcement | Closures | Snap, tool | Low | None | Visible | Local | Low | Low | Pull-through | Pull test |
| Hook-and-loop closure | Light closures | Hook-and-loop | Low | None | Visible | Local | Low | Medium | Snags fine silk | Pull test |
| Fabric adhesive (low-stress only) | Keepsake box, gift bands | Adhesive | Low | Varies | Can show through | Local | Low | Low | Bleed-through, stiffening | Offcut test first |
| Hand stitching | Detail, difficult layers | Hand needle, thimble | Low | None | Visible | Controlled | Low | High | Slow | Sample |
This table is a starting point, not a verdict. No single stabilizer, seam, adhesive, needle, or closure is universally best.
Why fusibles can damage delicate fabric
Fusible interfacing can stiffen, spot, bubble, or show through delicate or satin-like fabric — and it bonds with heat, which is exactly what can damage silk, acetate, or unknown fibers. Only use a fusible after you have tested heat and adhesive compatibility on a matching offcut, and always use a press cloth and the lowest workable setting.
Reinforcing openings, folds, zipper ends, snaps, and corners
Very short stitches can weaken delicate fabric. Narrow seam margins can fray or pull apart. Excessive topstitching creates permanent visible holes. Heavy hardware can pull through a small tie panel, and adhesive alone is unsuitable for loaded, folded, washable, or frequently handled seams unless the product and construction are verified. Reinforce closures, pocket openings, zipper ends, and repeated folds with extra stitching, a small backing patch, or both.
Sewing Machine and Hand-Sewing Setup
Needle, thread, stitch, and presser-foot choices — and why they need testing
Match your setup to the thinnest and most delicate layer in your stack. Test needle, thread, stitch length, tension, and presser-foot pressure on a matching offcut before sewing any real panel. A machine that sews cotton easily may push, pull, or skip stitches on a bias-cut silk shell.
Handling slippery layers and bulky intersections
Use a walking foot, roller foot, or Teflon foot if your machine offers one, to keep bias layers feeding evenly. Grade seam allowances at intersections by trimming layers to different widths rather than cutting them all at once — this keeps corners flat and prevents bulky bumps that can jam a presser foot or break a needle.
Hand-basting, clips, and controlled detail work
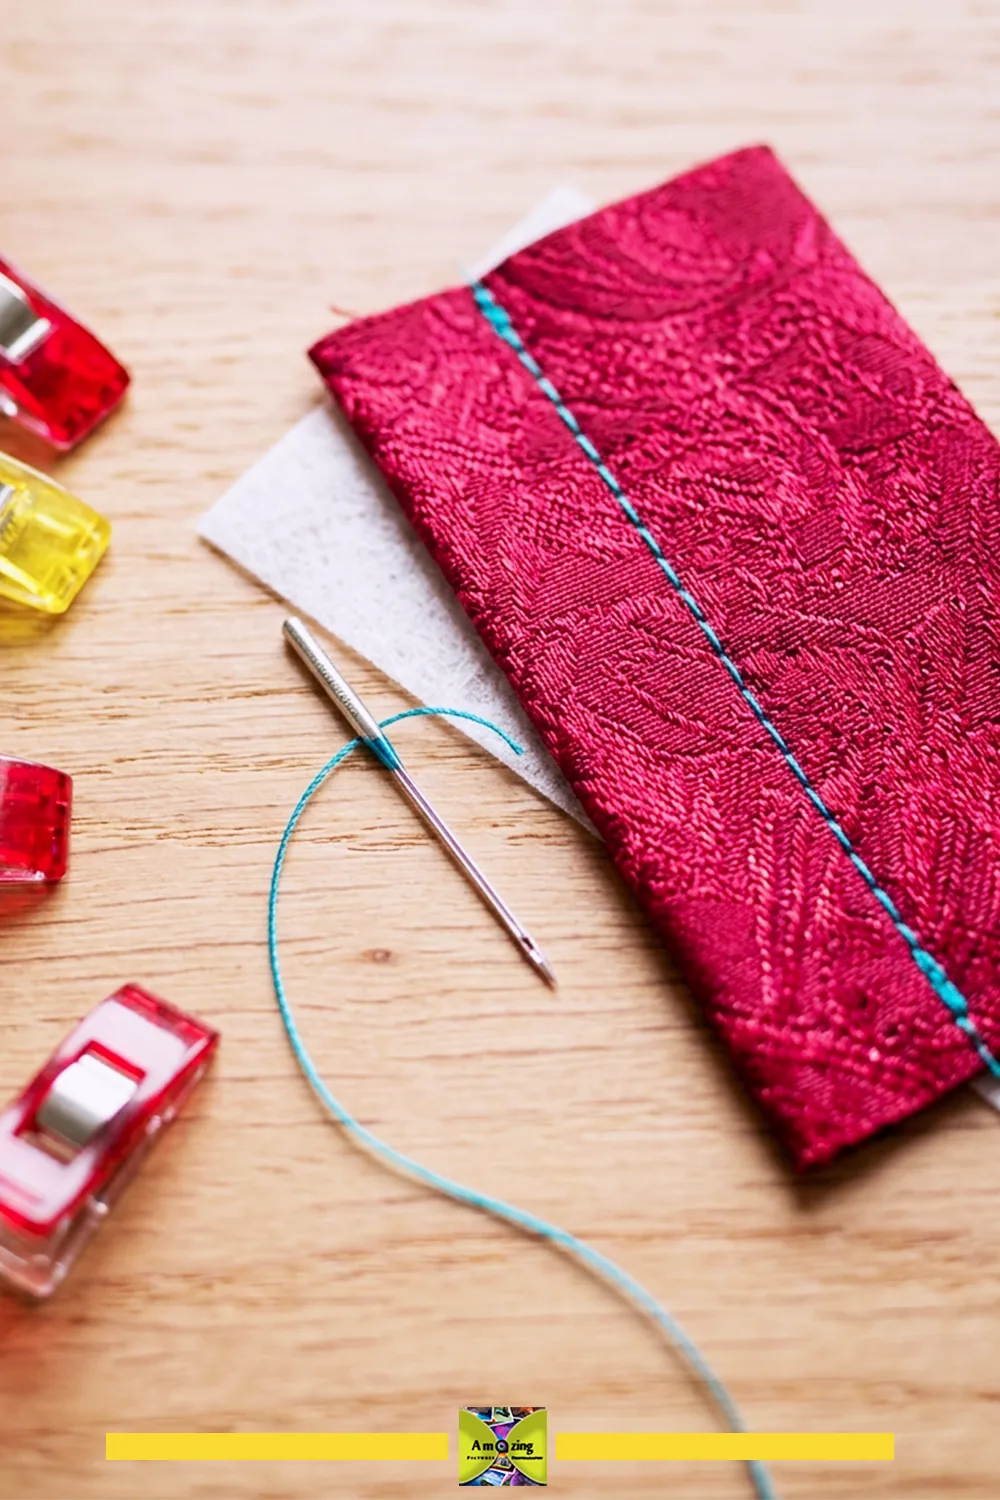
Select a fine hand needle and thimble for detail work. When a construction is too delicate, dense, or bulky for your machine, redesign it or hand-stitch it rather than forcing it. Keep fingers clear of the needle and switch the machine off before changing a needle, foot, or setup.
Portable Accessories
1. Slim Lined Zipper Pouch
What it looks like: A slim, flat zipper pouch with a tie-panel front, a coordinated back, and an enclosed smooth lining.
Best use: Coins, earbuds, lip balm, a slim charger, or other small, clean, lightweight items.
Difficulty: Beginner.
Approximate time: About 2–3 hours (mark for firsthand confirmation).
Materials: two compatible tie panels (or one panel plus a lining-only back), smooth lining fabric, a zipper longer than the pouch opening, thread, and a light sew-in interfacing if the panels are slippery.
Tools: shears, seam ripper, pins or clips, ruler, iron with press cloth, sewing machine with zipper foot.
- Make a paper pattern from your usable panel and intended contents, adding seam allowances and a turn-of-cloth allowance (confirm on a sample).
- Cut two shell panels and two lining panels on the intended grain; center any motif.
- Stabilize the shell panels with light sew-in interfacing if they are slippery or bias-cut.
- Test a zipper seam on offcuts to confirm needle, thread, and stitch.
- Attach the zipper between a shell panel and a lining panel, then repeat on the other side.
- Reinforce the zipper ends with a bar tack or back-and-forth stitches.
- Sew the remaining seams, leaving a turning gap in the lining, grade the corners, and turn.
- Close the turning gap, press with a press cloth, and test the zipper repeatedly.
Customization: palette, motif placement, topstitching color, zipper finish, lining color.
Practical tip: Use a zipper a few inches longer than the finished opening and trim the ends after sewing — it keeps the ends clean and reduces bulk at the corners.
Common mistake: Cutting the bias shell without stabilization, so the pouch grows and the zipper becomes wavy.
Safety note: No sharp hardware should be exposed; keep zipper pulls and small parts away from young children.
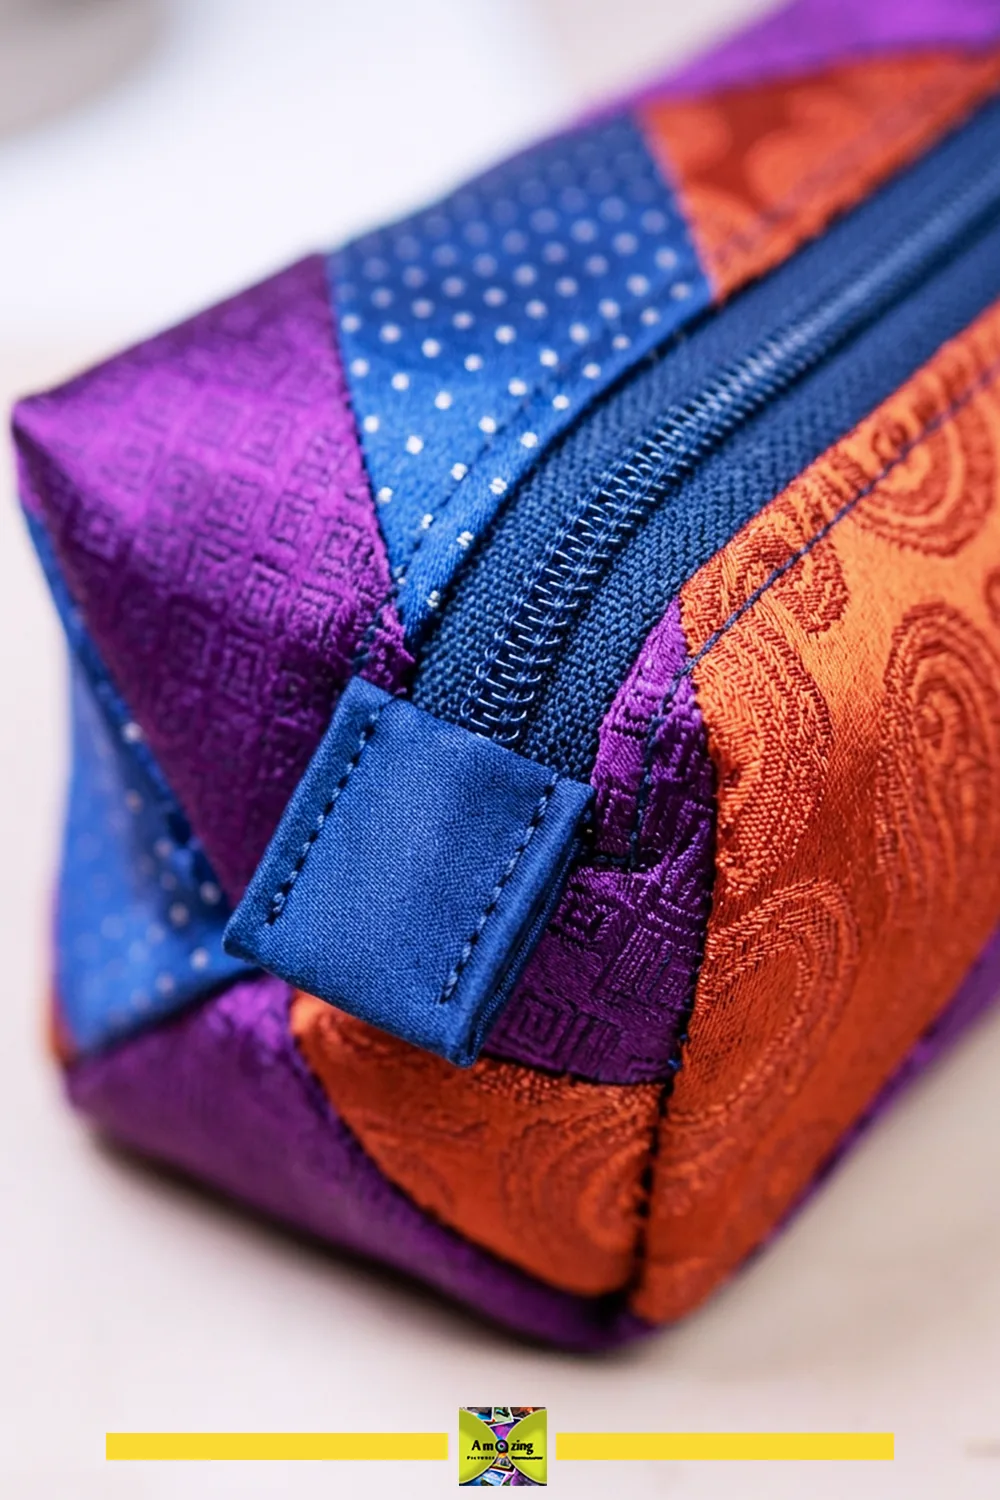
Author Tip: When piecing tie blades together for a zipper pouch, the biggest hurdle is the diagonal bias seam stretching unevenly under the sewing foot. In my shop tests, basting a lightweight featherweight sew-in interfacing to the wrong side of each tie strip before joining them eliminated all puckering. For the zipper itself, use a #3 nylon coil zipper rather than metal teeth—it allows you to trim excess length safely and doesn’t add bulky weight to the delicate tie silk. Always install 1-inch folded fabric tabs at both ends of the zipper tape; this creates square, professional pouch corners that turn out cleanly without any unsightly pinched puckers.
2. Soft Eyeglass Sleeve
What it looks like: A soft, open-ended or flap-closed sleeve sized to one pair of glasses.
Best use: Keeping a spare pair of reading glasses from scratches in a bag or drawer.
Difficulty: Beginner.
Approximate time: About 1–2 hours (mark for firsthand confirmation).
Materials: one tie panel large enough for the folded sleeve, smooth or lightly padded lining, thread, and optional light sew-in interfacing.
Tools: shears, ruler, pins or clips, iron with press cloth, sewing machine.
- Measure the glasses folded and make a paper pattern with a comfortable ease allowance and seam allowances (confirm).
- Cut the shell and lining; test that the lining is smooth enough not to scratch lenses.
- Enclose all seams so no raw stabilizer or seam edge touches the glasses.
- Fold and stitch the sleeve, reinforcing the opening edges.
- Test the fit without overstretching, then check that the glasses slide in and out easily.
Customization: closure flap, topstitching, motif placement, lining color, a small loop for a hook.
Practical tip: Test the lining against a lens in an inconspicuous spot before committing — a scratchy lining defeats the purpose.
Common mistake: Claiming the sleeve prevents crushing or impact. It does not; it only reduces light scratching when handled gently.
Safety note: Be honest about limits: a soft sleeve is not impact protection, and it is not for storing glasses under heavy objects.
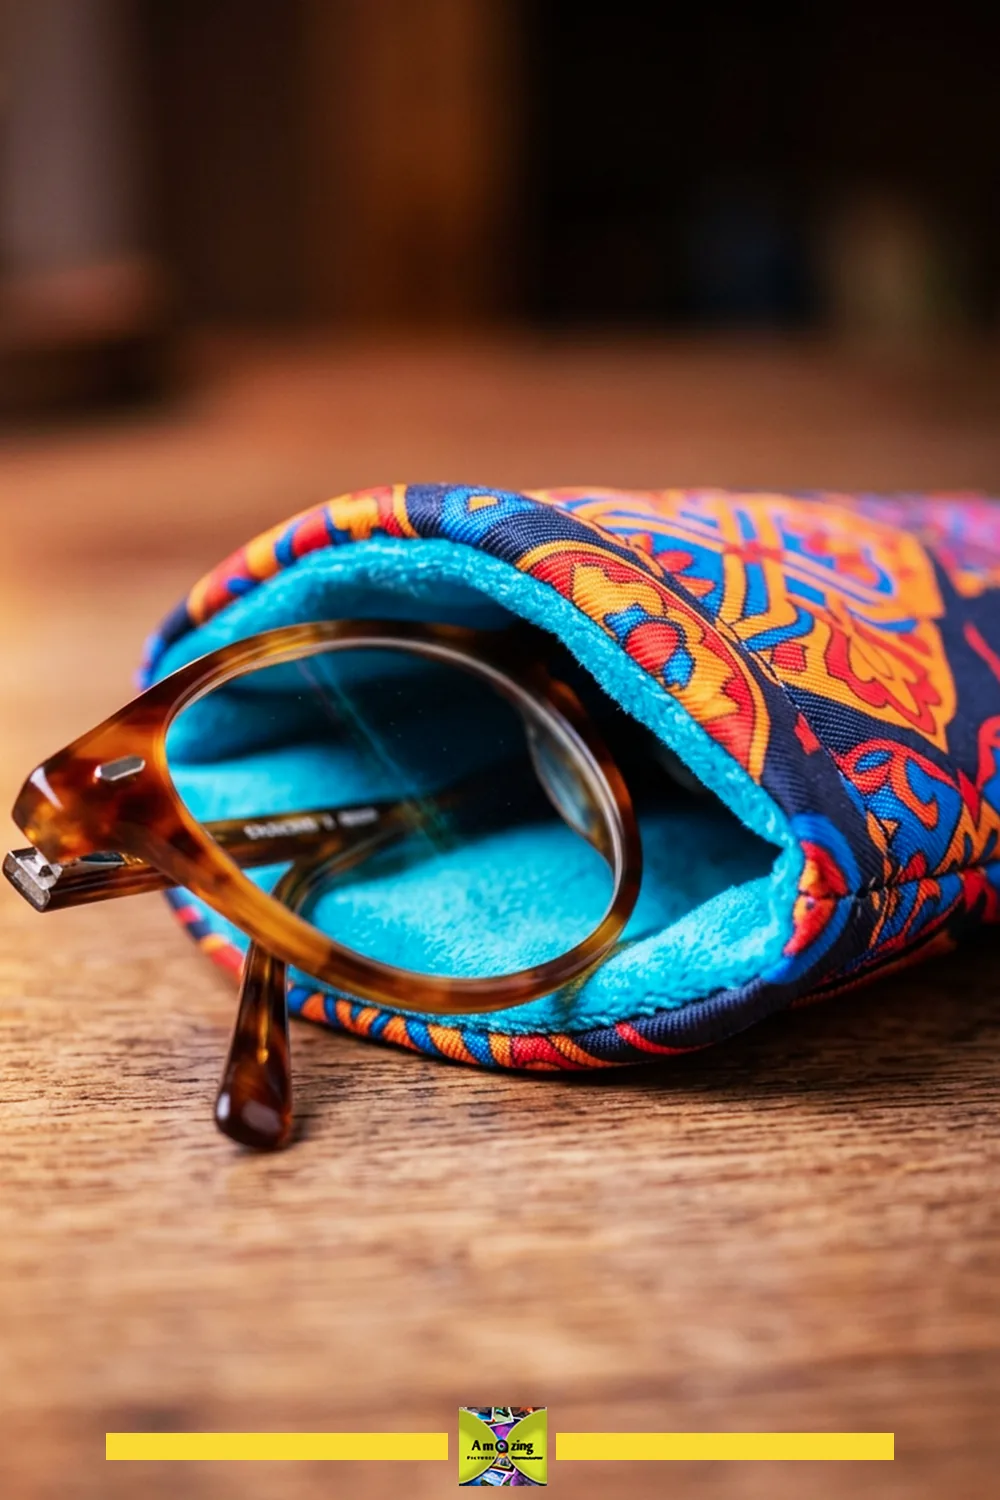
Tested Material Note: For the inner sleeve lining, I tested high-density optical microfiber cloth, washed cotton flannel, and Habotai silk directly against anti-reflective coated optical lenses. While flannel felt soft initially, microscopic lint shed quickly onto the glass. The clear winner was a premium 100% optical-grade microfiber cloth (the kind used for camera lenses) stitched with the plush side facing inward, backed by an ultra-thin 1/16-inch low-loft needle-punched batting. It provides zero-drag gliding, completely eliminates micro-abrasions or scratches on plastic and polycarbonate lenses, and absorbs stray facial oils every time you slide your glasses into the sleeve.
3. Minimal Card-and-Note Sleeve
What it looks like: A slim, flat sleeve for a few cards or folded notes, with a reinforced opening and rounded corners.
Best use: Business cards, a few credit or loyalty cards, or folded notes.
Difficulty: Beginner.
Approximate time: About 1–1.5 hours (mark for firsthand confirmation).
Materials: one or two small tie panels, light interfacing, thread, and optional lining.
Tools: shears, ruler, pins or clips, iron with press cloth, sewing machine.
- Measure the intended contents and make a pattern with ease and seam allowances (confirm).
- Cut shell and lining panels, rounding the corners on the pattern.
- Stabilize and stitch the sleeve, reinforcing the opening.
- Turn, press with a press cloth, and test that cards slide in and out without catching.
Customization: corner radius, topstitching, a divider stitch, motif placement.
Practical tip: Round the corners on the paper pattern first — it is much easier to match than cutting rounded corners freehand.
Common mistake: Making the sleeve too tight, so cards bind at the corners.
Safety note: Keep cards and personal items only; this is not a wallet for coins or heavy use.
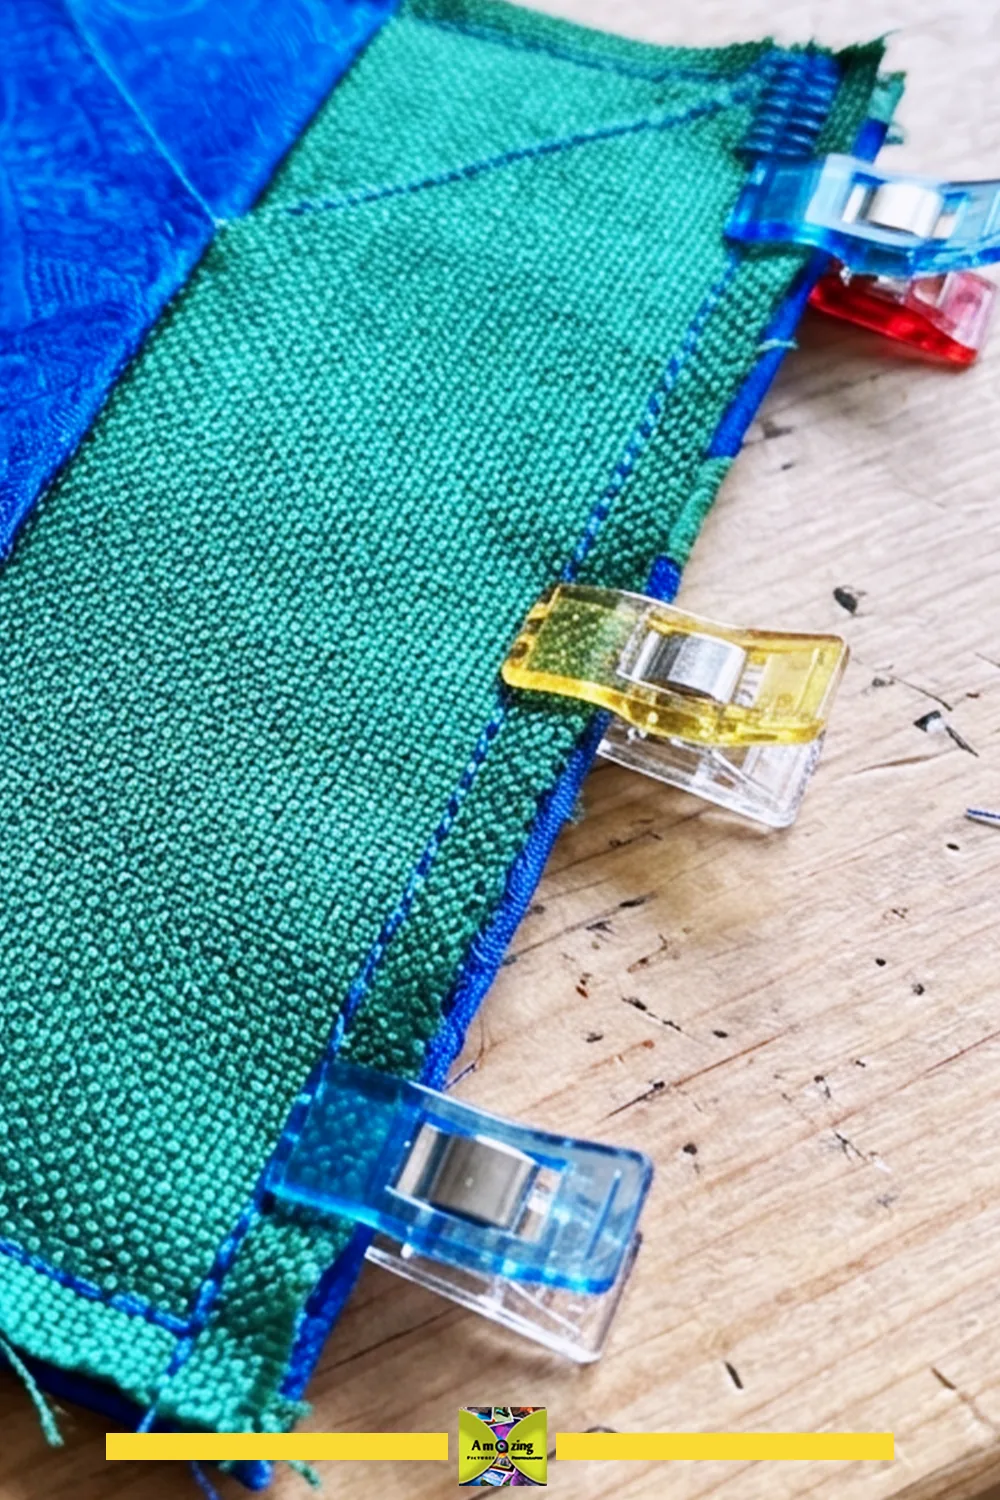
Author Tip: Don’t make the mistake of sizing your pattern directly to the exact dimensions of a standard credit card (3.375 x 2.125 inches). Once you layer the tie shell, a structured non-woven stabilizer, and a thin silk lining, the ‘turn-of-cloth’ thickness steals nearly 3/16 inch of interior clearance. I cut my finished outer template to 4.25 x 2.75 inches, allowing a snug 1/4-inch seam allowance. This leaves an interior pocket that holds 4 to 5 cards and folded banknotes securely without stretching the tie seams or requiring you to pry cards out with pliers.
4. Compact Travel Jewelry Roll
What it looks like: A roll-up case with smooth lining, separate compartments, a protective flap, and a light closure.
Best use: A few pieces of jewelry for travel — kept separate so they don’t tangle.
Difficulty: Intermediate.
Approximate time: About 3–4 hours (mark for firsthand confirmation).
Materials: two or three coordinated tie panels, smooth lining, light stabilizer, a light closure (ribbon tie or loop-and-button), and thread.
Tools: shears, ruler, pins or clips, iron with press cloth, sewing machine, hand needle.
- Decide how many compartments you need and measure the largest piece of jewelry, then make a pattern with allowances (confirm).
- Cut the outer panel, lining, and compartment strips.
- Stabilize the outer panel and assemble the compartments onto the lining.
- Attach the closure, reinforcing the attachment point so it cannot pull through.
- Assemble, turn, and topstitch the edges.
- Load it with non-fragile items first and test the roll for fit and closure.
Customization: number of compartments, flap shape, closure type, lining, motif placement.
Practical tip: Test the roll with lightweight, non-fragile items before trusting it with delicate jewelry.
Common mistake: Making no claim about anti-tarnish — the roll separates and cushions; it does not prevent tarnish, and it should not be oversold.
Safety note: Enclose all raw edges and closures; remove from use if a closure pulls through or sharp parts escape.
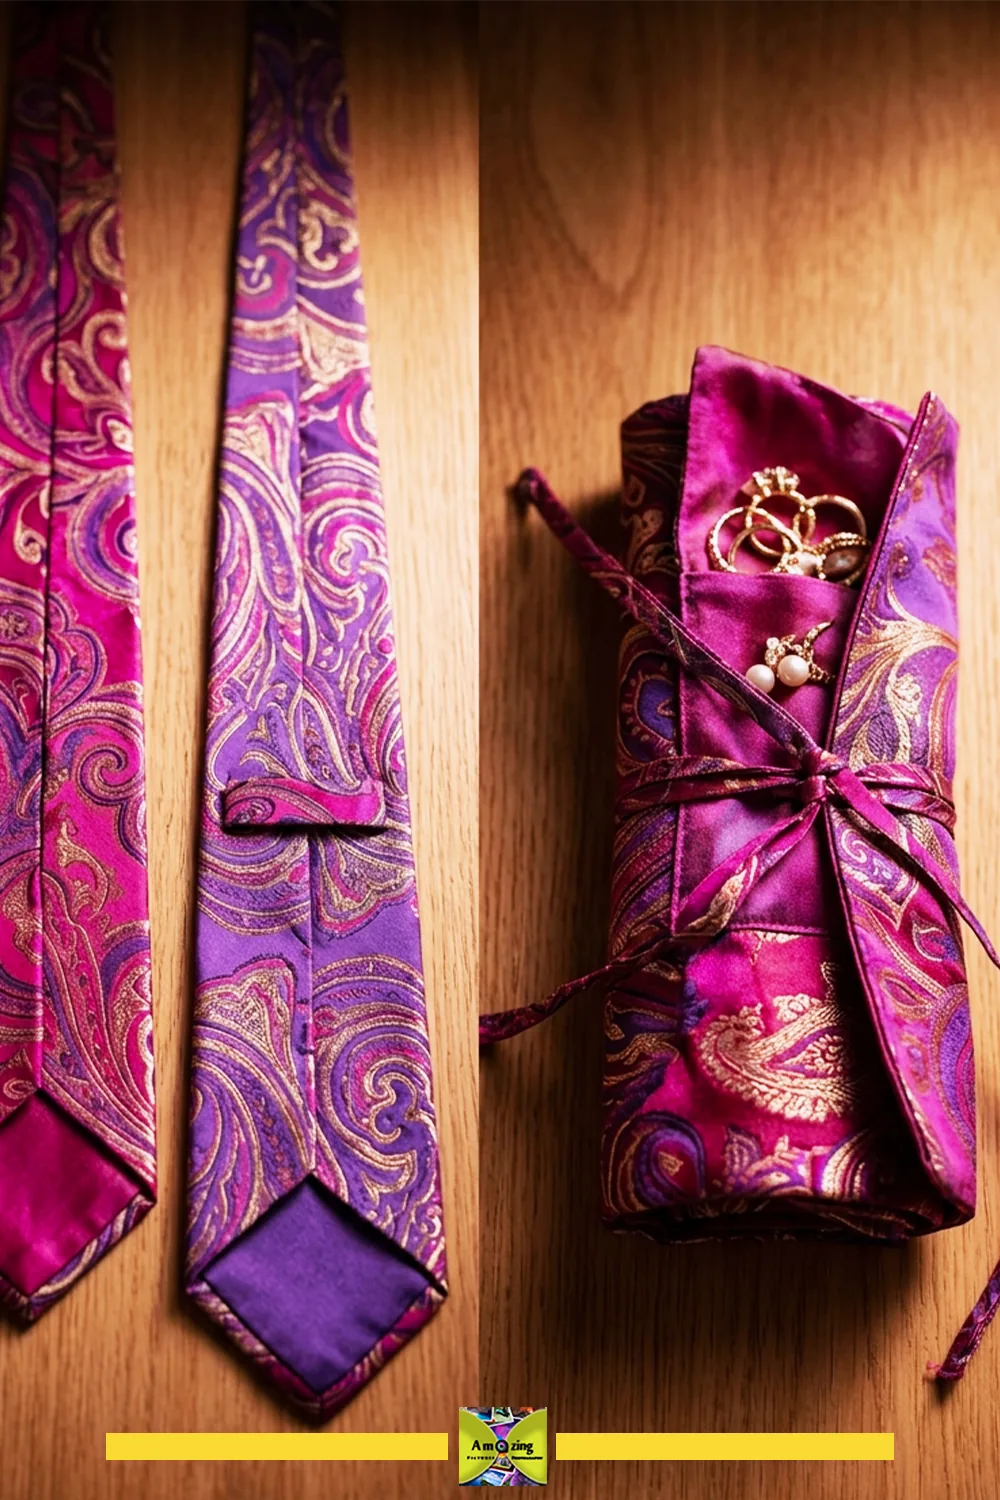
Author Tip: Avoid magnetic snaps or heavy metal buckles on a travel jewelry roll—they create hard pressure points that can dent softer gemstones and scratch metal settings when packed tightly into luggage. Instead, I use a 3/8-inch wide double-faced silk ribbon or a 14-inch salvaged necktie tail folded and stitched into a slender tie cord, anchored securely into the side seam during final assembly. Wrapping the soft tie cord twice around the cylinder and tucking the end under itself provides an adjustable, snug closure that automatically expands or contracts depending on how many pieces of jewelry are loaded inside.
Sewing and Desk Organization
5. Roll-Up Pen and Dry-Art-Tool Case
What it looks like: A flat roll with varied pocket widths, a protective flap, and a separate light closure.
Best use: Pens, pencils, brushes, and dry art tools kept separate and contained.
Difficulty: Intermediate.
Approximate time: About 3–4 hours (mark for firsthand confirmation).
Materials: one long or two joined tie panels, lining, light stabilizer, closure, and thread.
Tools: shears, ruler, pins or clips, iron with press cloth, sewing machine.
- Measure your longest tool and make a pattern with varied pocket widths and allowances (confirm).
- Cut the outer panel, lining, and pockets.
- Stabilize the outer panel, hem the pocket tops, and stitch the pocket dividers.
- Add a flap and a light closure, reinforcing the closure attachment.
- Assemble, turn, and topstitch, then test with the actual tools.
Customization: pocket widths, flap size, closure, a label pocket, motif placement.
Practical tip: Make the widest pocket first, then divide it with parallel topstitching rather than sewing many separate pieces.
Common mistake: Sewing pockets for tools that don’t fit because you never measured the actual tools.
Safety note: Keep sharp pointed tools capped or contained; this is for dry tools, not wet or food-contact items.
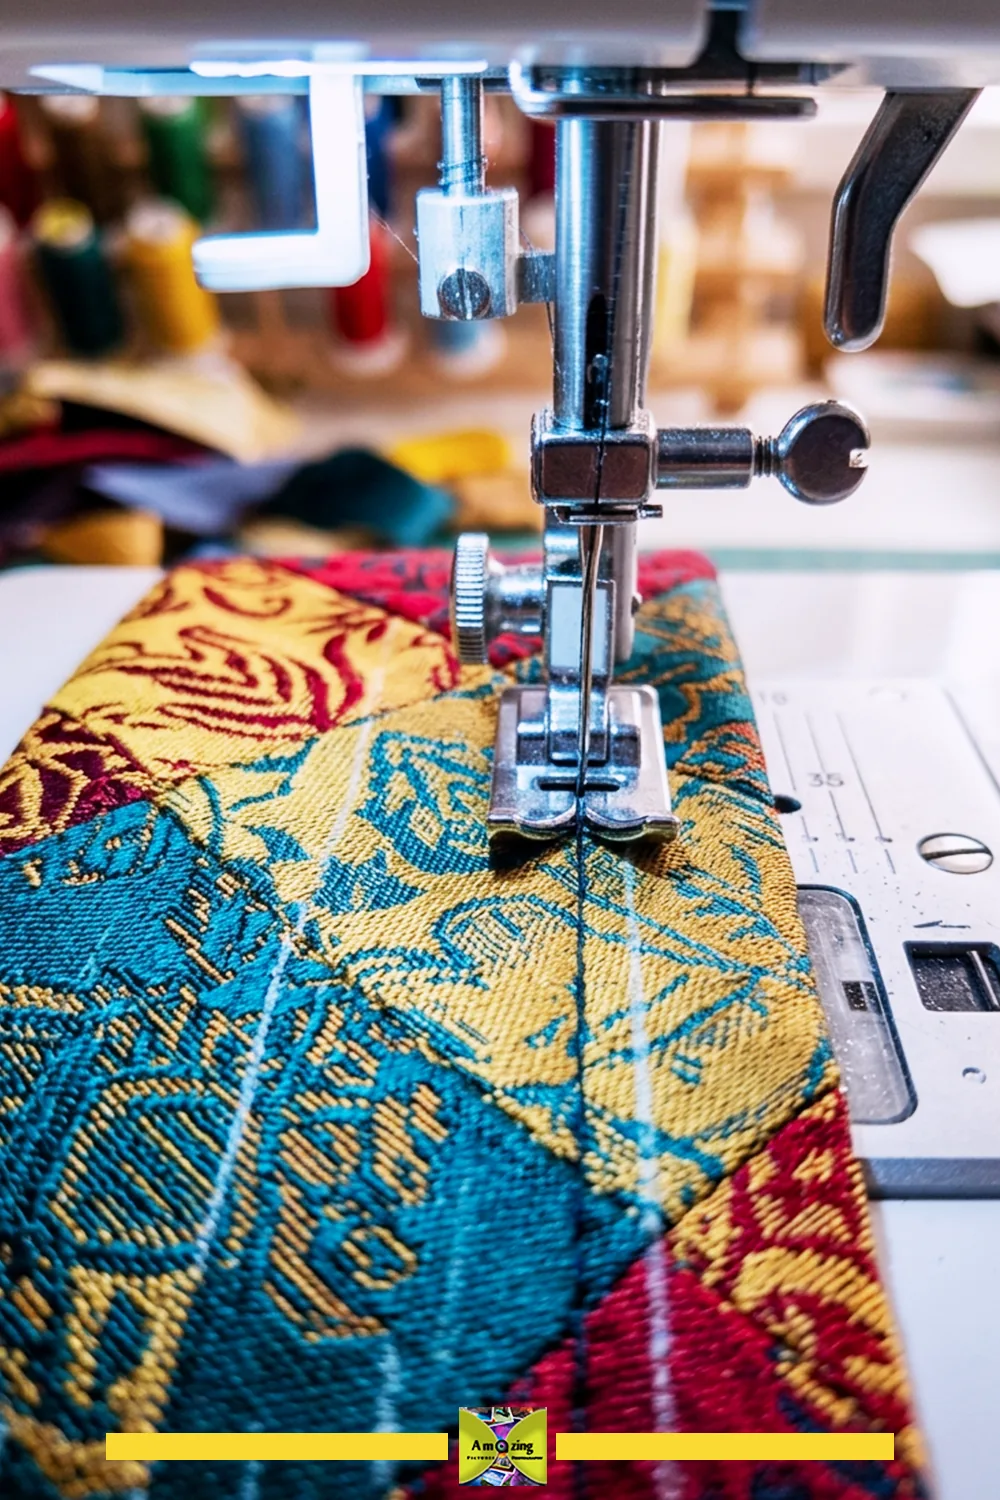
Tested Material Note: When testing roll-up cases across various weights of reclaimed ties, unsupported tie shells curled along the bias edges whenever pens were inserted. I tested three stabilizers: fusible fleece, heavy duck canvas, and Pellon 808 Craft-Fuse. The best performer was a medium-weight sew-in craft stabilizer (such as Pellon 808 or a dense cotton canvas preshrunk before cutting) basted to the outer tie panel. It provides sufficient vertical rigidity so pens don’t sag, yet rolls effortlessly into a tight cylinder without developing sharp creases or surface bubbling.
6. Hand-Sewing Notions Folio
What it looks like: A folding folio with enclosed needle storage, thread pockets, and reinforced folds.
Best use: Keeping hand-sewing needles, thread, a small scissors, and a thimble contained and organized.
Difficulty: Intermediate.
Approximate time: About 3–5 hours (mark for firsthand confirmation).
Materials: two coordinated tie panels, firm stabilizer, lining, small closure, felt or wool for needle pages, and thread.
Tools: shears, ruler, pins or clips, iron with press cloth, sewing machine, hand needle.
- Measure your scissors and thread spools, then make a pattern with allowances (confirm).
- Cut the cover, lining, stabilizer, and needle-page inserts.
- Assemble the needle pages so needles are fully enclosed and cannot slide out.
- Add thread pockets and a closure, reinforcing the folds and closure point.
- Assemble the cover, turn, topstitch, and test that needles stay put.
Customization: page count, closure, needle-page material, thread pocket layout, motif placement.
Practical tip: Use a firm felt or wool needle page so needles grip rather than slide — and test that no point can poke through.
Common mistake: Leaving needles only loosely contained, so they escape into the bag.
Safety note: Remove from use if sharp items can escape, seams open, or the closure fails.
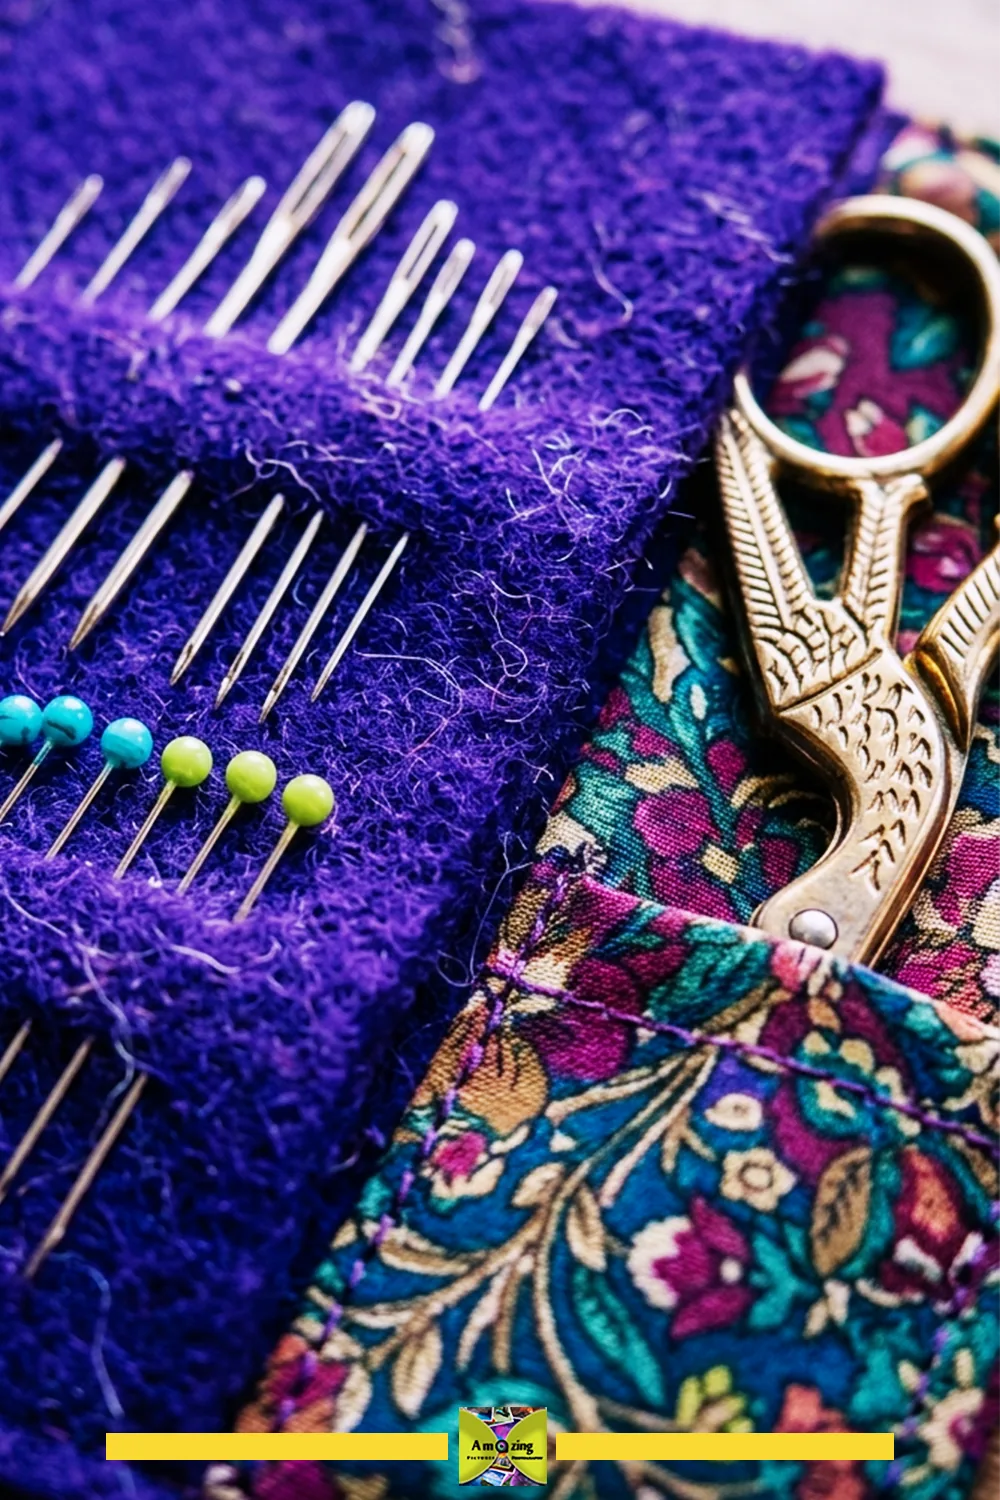
Author Tip: For the interior needle pages, never use cheap synthetic acrylic craft felt—the coarse synthetic fibers catch on fine embroidery needles and can dull sharp points over time. I consistently use 100% pure wool felt (1.2 mm thickness) or repurpose an unwoven wool interlining salvaged from an old luxury men’s necktie. Pure wool contains natural lanolin, which lubricates needle shafts and actively resists moisture, preventing fine steel hand-sewing needles and pins from developing rust or oxidation over long-term storage.
7. Fold-Flat Valet Tray
What it looks like: A shallow tray with stabilized sides, reinforced corners, and a removable rigid insert.
Best use: Holding keys, a watch, coins, and other lightweight dry objects on a desk or entry table.
Difficulty: Intermediate.
Approximate time: About 3–4 hours (mark for firsthand confirmation).
Materials: two or three coordinated tie panels, firm stabilizer, a removable rigid base insert, and thread.
Tools: shears, ruler, pins or clips, iron with press cloth, sewing machine.
- Decide the finished tray size and make a full-size template from the actual base and sides (confirm).
- Cut the outer panels, stabilizer, and corner reinforcement.
- Assemble the sides with square corners, reinforcing each corner with extra stitching.
- Insert the removable rigid base and test that the tray sits flat.
- Test that the insert is easy to remove and that the corners hold their shape.
Customization: size, corner height, insert finish, motif placement, topstitching.
Practical tip: Make the rigid insert removable so the fabric shell can be gently cleaned or the insert replaced.
Common mistake: Skipping corner reinforcement, so the tray collapses or the corners sag under weight.
Safety note: Dry, lightweight contents only; no medicine, leaking cosmetics, hot objects, loose blades, or valuable breakables.
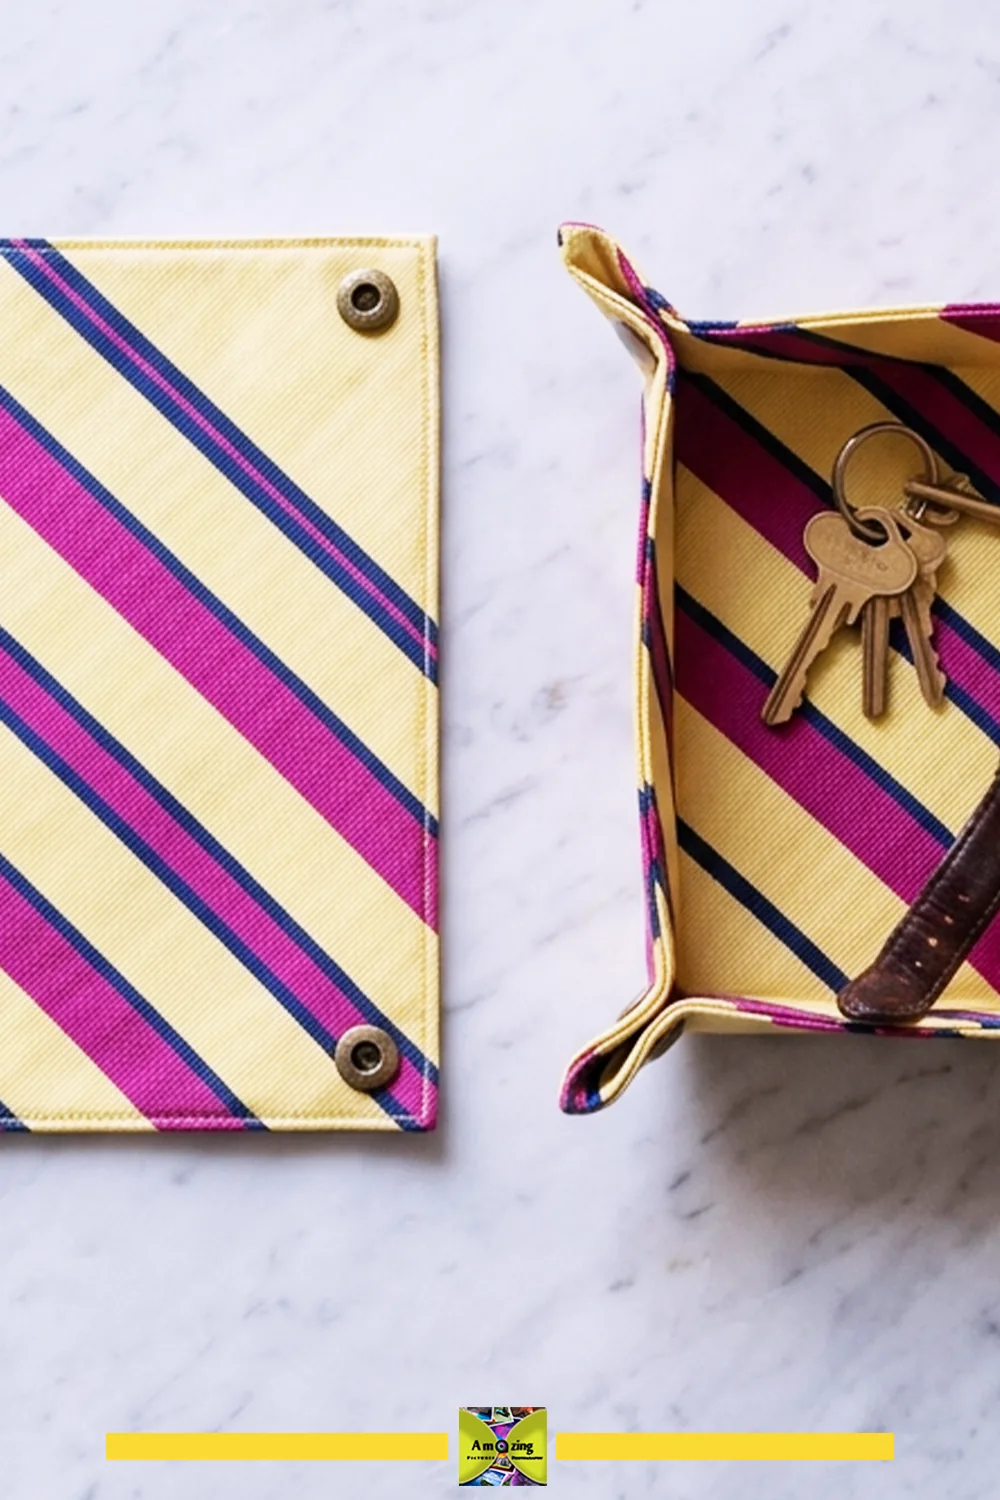
Tested Material Note: To make a valet tray that stands upright crisply but still unfastens completely flat for packing, the internal core must be rigid yet resilient. I tested 2mm chipboard, craft foam, and heavy Peltex 71F ultra-firm stabilizer. Peltex 71F (or a 1.5mm flexible polypropylene sheet) cut exactly 1/4 inch smaller than the finished tray perimeter produced flawless results. It keeps the bottom base perfectly flat, holds the 1.5-inch tray walls rigidly vertical without bowing when corner snaps are fastened, and doesn’t crack or warp if it encounters slight ambient humidity on a nightstand.
8. Small Structured Desktop Basket
What it looks like: A small upright basket assembled from compatible tie panels over a stable lining or backing.
Best use: Holding lightweight desk supplies like clips, sticky notes, or a few pens.
Difficulty: Intermediate.
Approximate time: About 3–5 hours (mark for firsthand confirmation).
Materials: three or four compatible tie panels, firm stabilizer or backing, lining, and thread.
Tools: shears, ruler, pins or clips, iron with press cloth, sewing machine.
- Decide the finished basket size and make a template from the base and sides (confirm).
- Cut the outer panels, backing, and lining.
- Assemble the base and sides over the stable backing so the basket holds its shape.
- Reinforce the corners and top edge.
- Load it with lightweight supplies and check that it stays upright.
Customization: size, handle or no handle, top edge finish, motif placement.
Practical tip: A removable stiff base insert keeps a fabric basket upright without making the whole thing impossible to flatten for storage.
Common mistake: Making the sides too soft, so the basket slumps as soon as it is loaded.
Safety note: Lightweight dry supplies only; retire the basket if the structure collapses or the backing shows through.
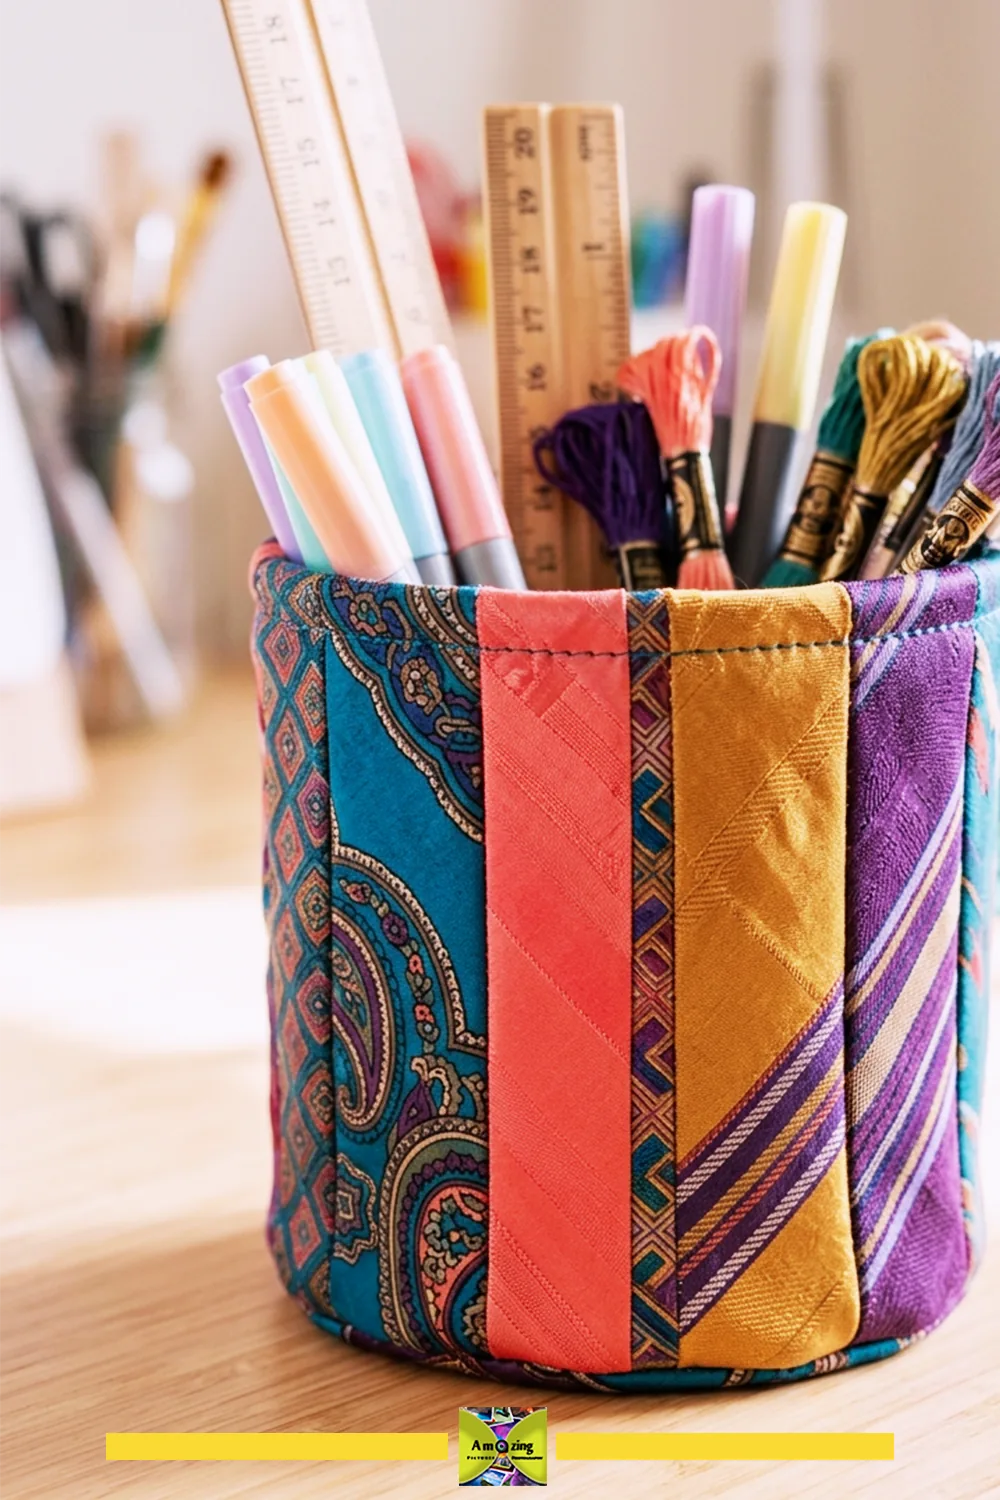
Author Tip: An upright desktop basket made from flexible tie fabric will easily collapse under its own weight unless you pair the tie shell with an ultra-firm, dense foundation. In my studio, I back the exterior tie patchwork with heavy fusible buckram or double-sided extra-firm Peltex, and line the interior with a sturdy 8 oz cotton canvas. When assembling the cylinder or box corners, stitch with a heavy-duty size 90/14 jeans needle and slowly walk your machine’s handwheel across the thick base seams to guarantee neat, bulletproof joins that stand upright without sagging.
Gift and Keepsake Projects
9. Removable Notebook or Journal Jacket
What it looks like: A removable cover fitted to one specific notebook or journal, with stabilized panels and adequate spine movement.
Best use: Protecting and personalizing a favorite notebook without gluing to it.
Difficulty: Intermediate.
Approximate time: About 2–3 hours (mark for firsthand confirmation).
Materials: one or two tie panels, medium stabilizer, lining, and thread.
Tools: shears, ruler, pins or clips, iron with press cloth, sewing machine.
- Measure your specific notebook — width, height, and spine — and make a pattern with allowances for the cover to fold around it (confirm).
- Cut the outer panels, stabilizer, and lining.
- Assemble the front and back panels with the stabilizer enclosed.
- Leave enough spine allowance that the notebook opens flat without the cover binding.
- Test the fit by sliding the notebook in and opening it fully.
Customization: pocket for loose notes, closure, motif placement, spine accent panel.
Practical tip: Add a little extra spine width and test with the actual notebook open, not just closed.
Common mistake: Making the spine too tight, so the cover binds and the notebook won’t lie flat.
Safety note: This is a decorative and protective jacket for a book, not a structural or load-bearing case.
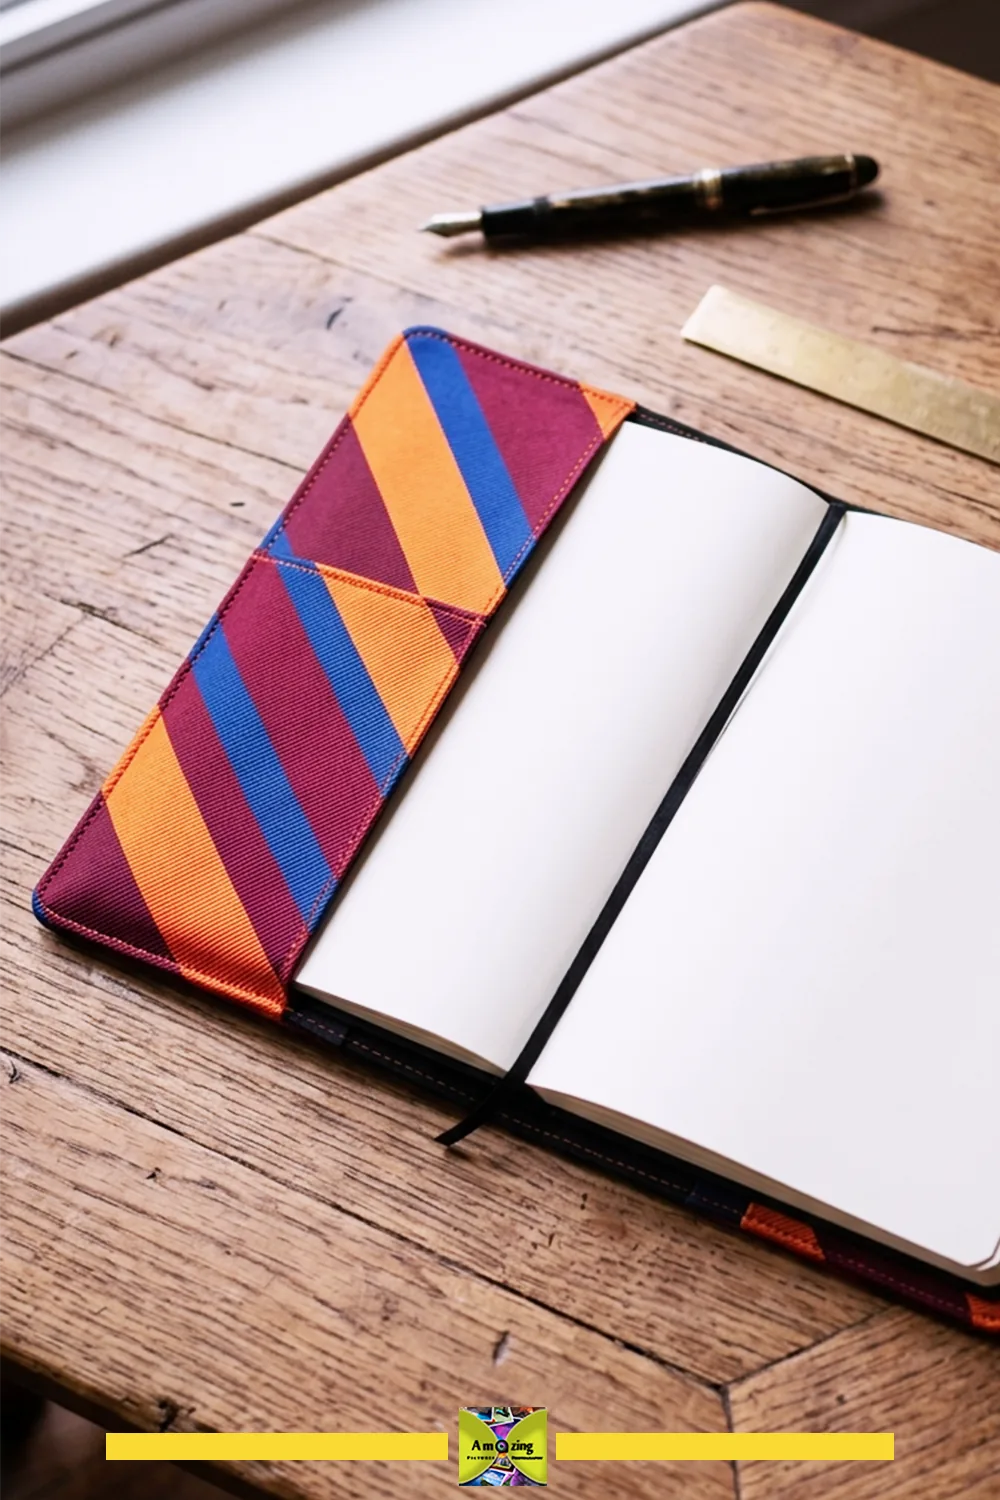
Author Tip: When sizing a fabric jacket for a standard A5 or 5.5 x 8.5-inch hardbound journal, always measure the notebook closed with a ruler wrapped over the spine—a 192-page book will add 5/8 inch to the total span compared to laying it flat open. I cut the inner pocket flaps at least 3 inches wide (half the cover’s width); shallower flaps will pop off whenever the notebook is opened flat on a desk. Adding a narrow 1/4-inch strip of sew-in stay tape along the raw folded edge of each flap prevents the bias tie fabric from stretching out of shape through years of daily use.
10. Padded Photo-Album or Memory-Book Cover
What it looks like: A padded cover that preserves selected motifs and labels on a photo album or memory book.
Best use: A keepsake cover for a memory book, with meaningful tie motifs kept visible.
Difficulty: Intermediate.
Approximate time: About 3–5 hours (mark for firsthand confirmation).
Materials: two or three tie panels, padded lining, medium stabilizer, thread, and preserved labels if desired.
Tools: shears, ruler, pins or clips, iron with press cloth, sewing machine, hand needle.
- Measure the specific album or book and make a pattern (confirm).
- Select and position the meaningful motifs and preserved labels before cutting.
- Cut the outer panels, padding, and lining, enclosing the padding cleanly.
- Assemble the cover with enough spine allowance.
- Test the fit and the opening motion.
Customization: preserved label placement, motif selection, padding thickness, closure.
Practical tip: Preserve a maker’s label as a visible detail — it can be the most meaningful part of a memory cover.
Common mistake: Claiming archival protection. Ordinary craft materials are not archival; do not oversell the cover as preservation-grade.
Safety note: No archival-storage claim; this protects cosmetically, not to conservation standards.
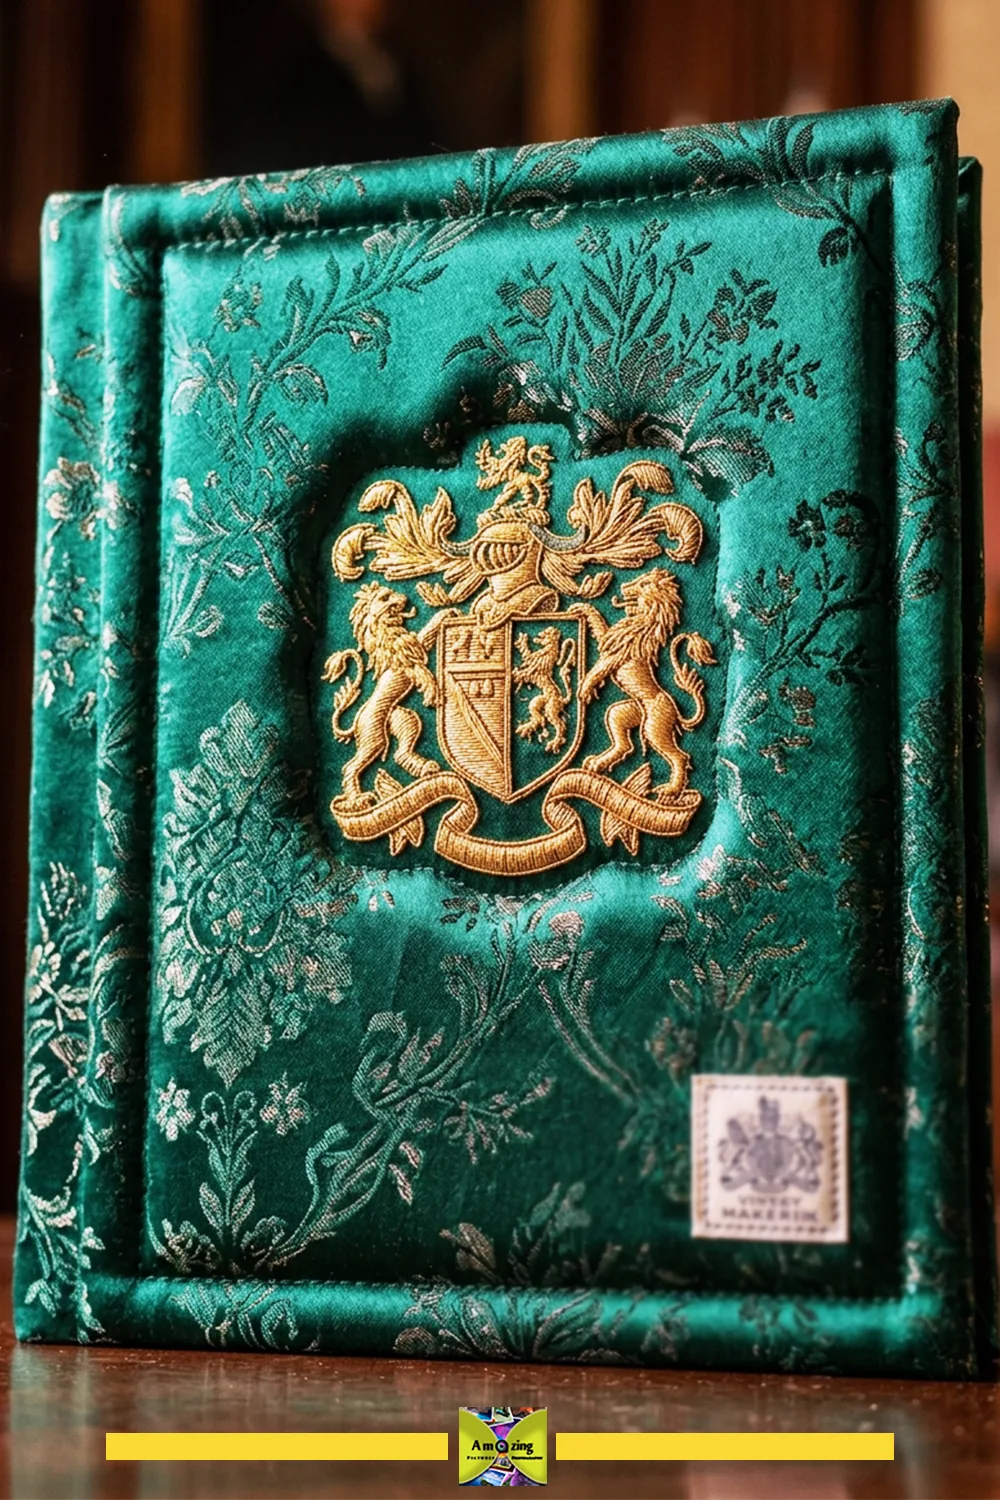
Author Tip: If the necktie belonged to a parent, grandparent, or marked a milestone like a wedding or retirement, preserve that history directly inside the finished heirloom. When I craft memory covers, I carefully unpick the original woven maker’s label or monogram tag from the tie tail and hand-stitch it onto the inside front flap. Pair it with a small, neatly typed acid-free card slipped into an interior pocket recording the wearer’s name, the years it was worn, and the specific family memories attached to it. That personal provenance turns a beautiful textile cover into an unforgettable family treasure.
11. Fabric-Covered Keepsake Box
What it looks like: An existing box covered with coordinated tie sections, with clean corners and lined edges.
Best use: Storing lightweight keepsakes in a decorative, personalized box.
Difficulty: Intermediate.
Approximate time: About 3–4 hours (mark for firsthand confirmation).
Materials: two or three tie sections, a sound existing box, fabric adhesive tested for the fabric, and optional lining.
Tools: shears, ruler, iron with press cloth, adhesive, bone folder or smoothing tool.
- Choose a sound, sturdy box and measure each surface (confirm).
- Cut tie sections to cover each surface with clean corners and lined edges.
- Test the adhesive on an offcut for bleed-through and stiffening before applying.
- Apply the fabric to the box, smoothing as you go and folding corners cleanly.
- Let the adhesive cure fully before use, and check that no edge lifts.
Customization: motif placement per panel, lining, edge finish, a preserved label on the lid.
Practical tip: Cut each panel slightly oversized, then trim after smoothing, so the motif sits exactly where you want it.
Common mistake: Skipping the adhesive test, so it bleeds through the face or stiffens the silk.
Safety note: No archival-storage claim; keep contents lightweight and dry, and let adhesive cure completely before contact with keepsakes.
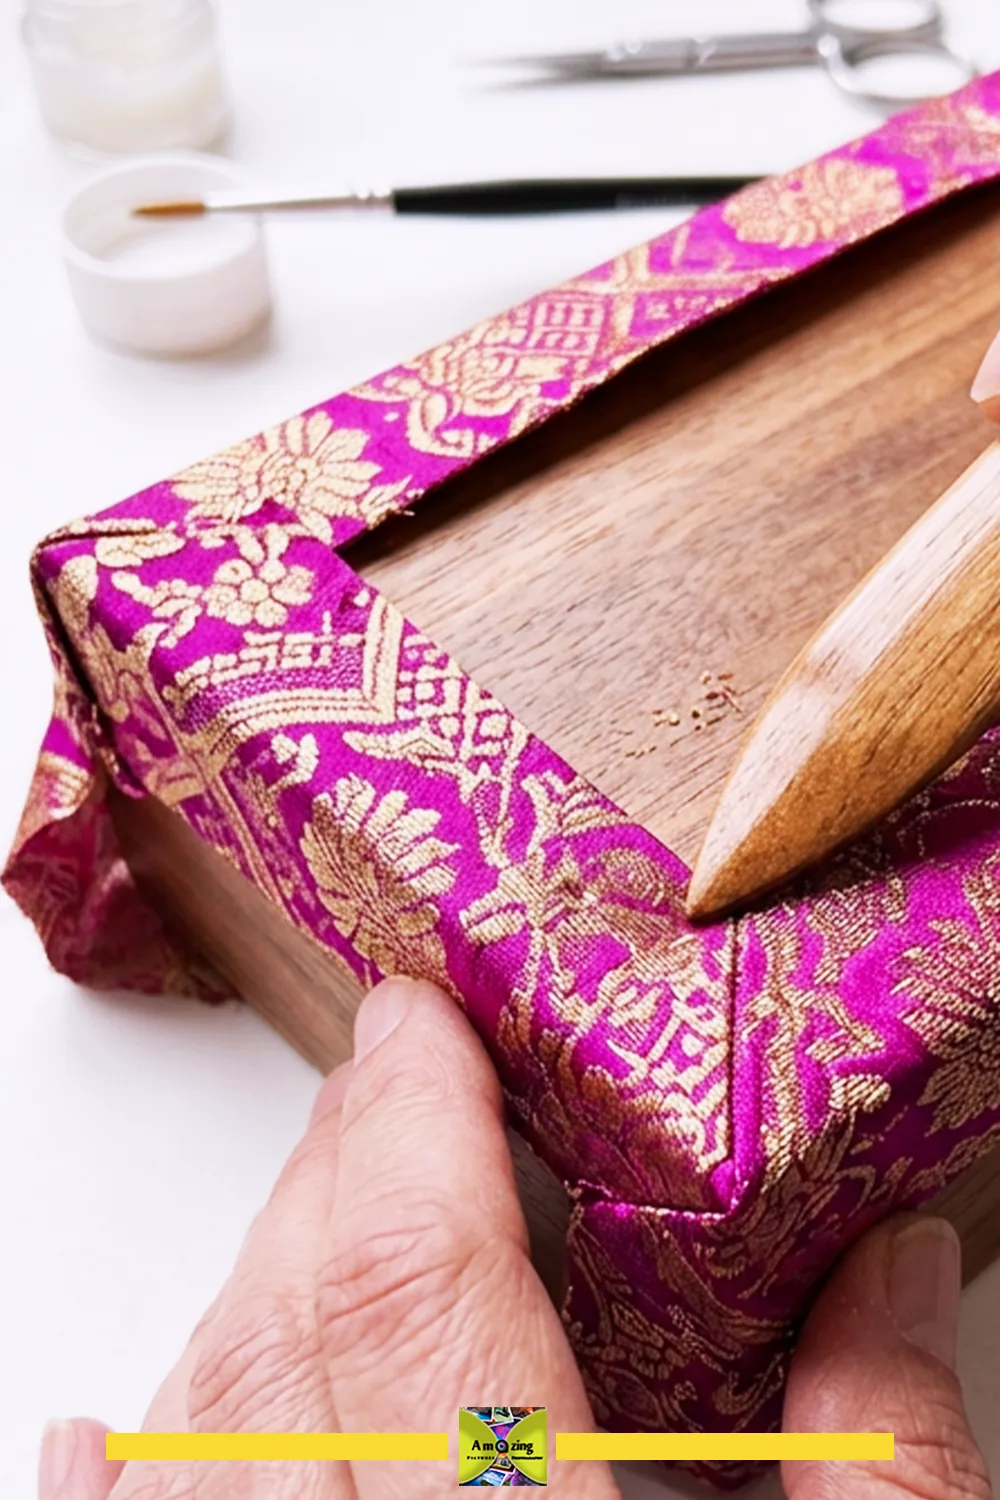
Tested Material Note: Adhesives are notorious for bleeding through thin necktie silk, leaving dark, irreversible grease-like stains and crunchy spots. In extensive workshop testing across PVA glue, hot glue, spray adhesives, and bookbinding paste, the only reliable method was professional neutral-pH bookbinding paste (or methyl cellulose mixed 50/50 with Lineco Jade PVA), brushed in an ultra-thin, almost-dry layer onto the cardboard base—never directly onto the silk. Alternatively, applying heat-activated double-sided fusible web (like Wonder-Under) to the wrong side of the tie panel first seals the fibers, preventing any wet glue bleed-through when mounting it to the box.
12. Reusable Decorative Gift Bands and Flat Bows
What it looks like: Flat fabric bands and bows that wrap around a gift box and remove without damaging it.
Best use: Decorating a gift box with a reusable, non-elastic band.
Difficulty: Beginner.
Approximate time: About 30 minutes–1 hour per band (mark for firsthand confirmation).
Materials: narrow tie sections, thread or light adhesive, and optional interfacing.
Tools: shears, ruler, iron with press cloth, sewing machine or hand needle.
- Measure the actual box and cut a band long enough to wrap with a little overlap (confirm).
- Fold and stitch the band so all raw edges are enclosed.
- Make a flat bow from a narrow section, enclosing all decorative parts securely.
- Attach the bow to the band so it can be removed without overstretching the fabric.
- Test removal and re-use, and check that no small part can detach.
Customization: band width, bow style, motif placement, color.
Practical tip: Use an overlap and a soft closure rather than tight elastic, so the band removes without overstretching the tie fabric.
Common mistake: Adding small detachable beads or parts that could come loose around young children or pets.
Safety note: No elastic unless its enclosure and failure behavior are tested; no small detachable parts where young children or pets can reach them.
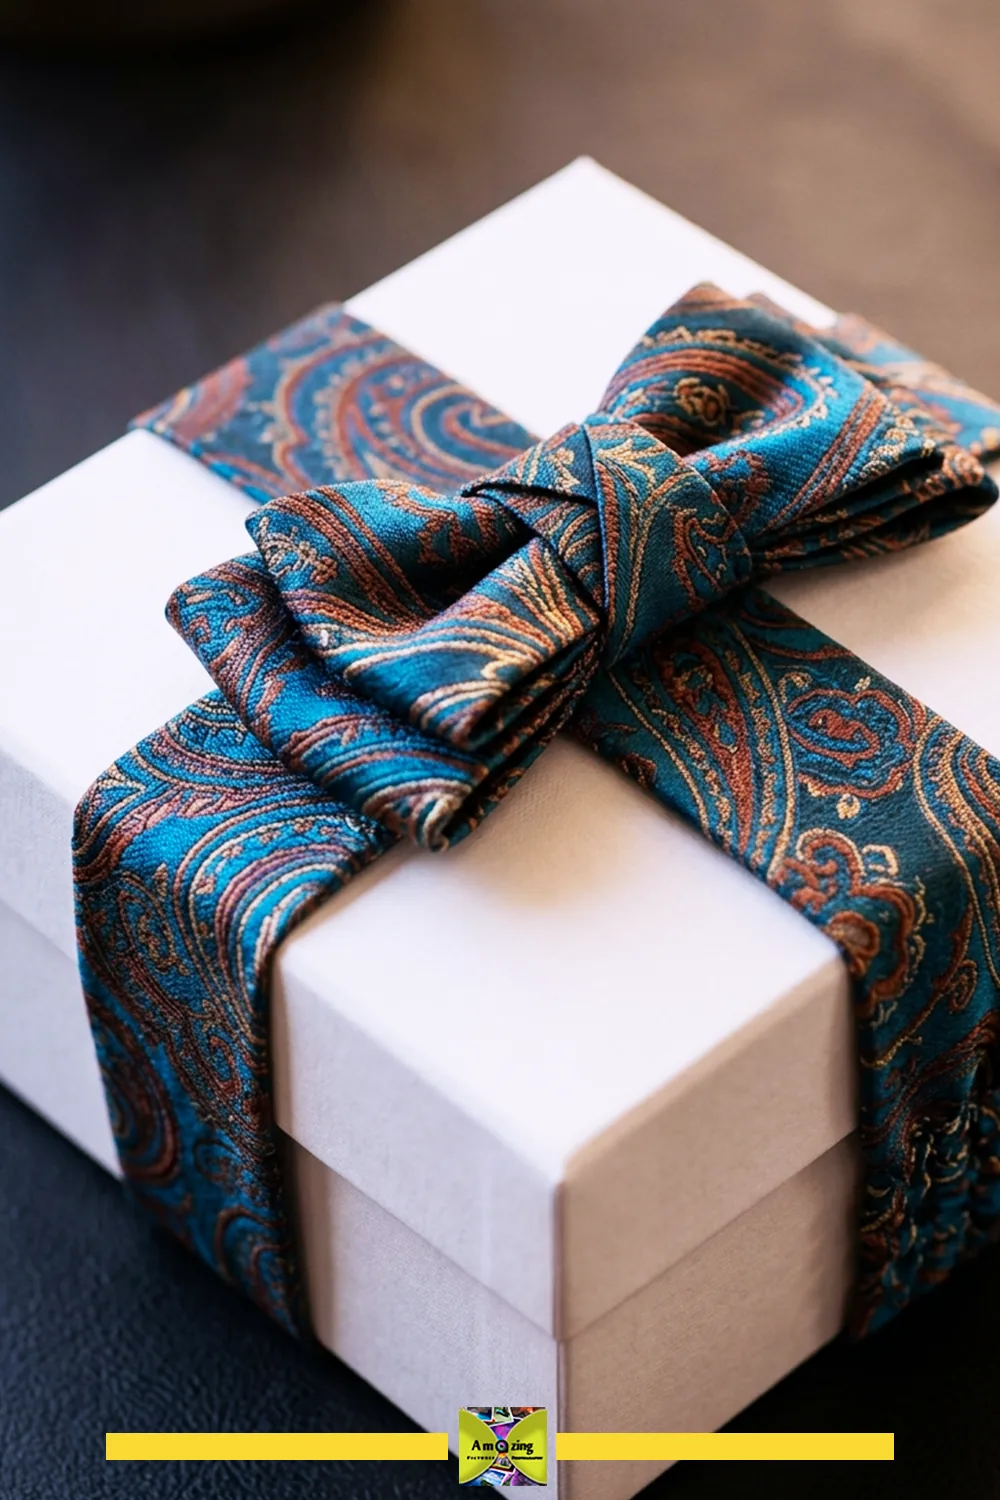
Author Tip: For reusable gift bands that fit varying box sizes without sagging, I integrate a 2-inch segment of 1-inch wide braided elastic into the bottom of the band, concealed beneath a folded sleeve of matching necktie fabric. For the closure, low-profile hook-and-loop dots or a pair of flat, fabric-covered snap buttons work wonderfully. A tailored flat bow—made by folding a 5-inch length of the wide tie blade and wrapping the center with a narrow strip of the tie tail—gives a crisp, high-end department-store presentation that recipients can save and reuse year after year.
Decorative Home Uses
13. Reversible Console or Table Runner
What it looks like: A reversible runner made from compatible tie panels, with straight edges and a stable backing.
Best use: Decorative, dry-use covering for a console or table.
Difficulty: Intermediate.
Approximate time: About 4–6 hours (mark for firsthand confirmation).
Materials: several compatible tie panels, stable backing, and thread.
Tools: shears, ruler, pins or clips, iron with press cloth, sewing machine.
- Measure the table or console and make a full-size template with straight edges (confirm).
- Cut and arrange the tie panels into a measured composition, aligning stripes and motifs.
- Piece the panels, then add the stable backing.
- Bind or turn the edges so they are clean and straight.
- Lay it in place and check that it lies flat without twisting or rippling.
Customization: panel arrangement, border, backing color, motif progression.
Practical tip: Press each seam as you go, and keep the straight edges truly straight — a runner reveals any waver immediately.
Common mistake: Skipping the backing, so the bias panels twist and the runner ripples.
Safety note: Decorative dry use only; no direct food contact, heat protection, or spill-protection claim.
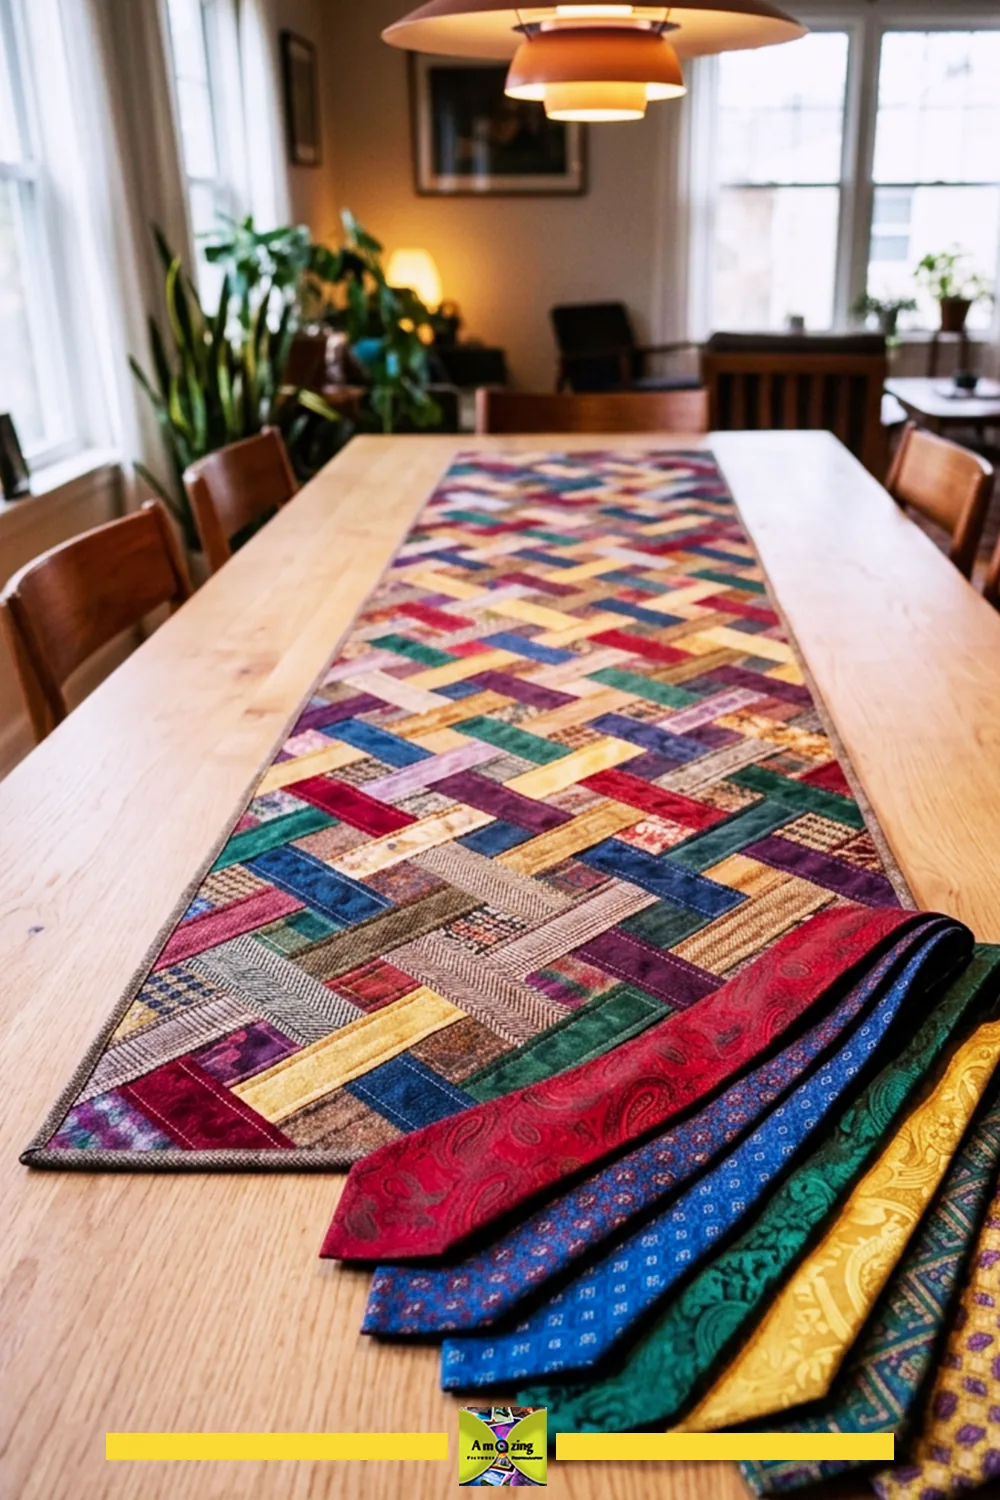
Tested Material Note: Because pieced neckties consist of multiple bias angles joined together, a long table runner will inevitably ripple, twist, or buckle if backed with a lightweight fabric. I tested cotton sheeting, linen, and 10 oz pre-washed cotton duck canvas. The 10 oz cotton duck was the indisputable winner: its balanced plain weave completely anchors the bias diagonal seams, gives the runner satisfying tabletop heft without requiring batting, and prevents the ends from curling up over time. Always pre-wash and press your canvas backing on high heat before cutting to eliminate future shrinkage.
14. Removable Under-Glass Decorative Tray Liner
What it looks like: A measured tie-fabric composition sealed beneath a separate rigid transparent panel.
Best use: Lining the base of a glass-topped tray for decoration, kept away from direct food contact.
Difficulty: Intermediate.
Approximate time: About 2–4 hours (mark for firsthand confirmation).
Materials: several tie panels, a light backing or stabilizer, and thread or low-stress adhesive.
Tools: shears, ruler, pins or clips, iron with press cloth, sewing machine or adhesive.
- Measure the inside base of the tray and make a template (confirm).
- Arrange and piece the tie panels into a flat composition.
- Stabilize the composition so it lies flat and square.
- Place it beneath the separate rigid transparent panel, not in direct contact with food or liquids.
- Confirm the panel sits flat and the liner stays clean and dry.
Customization: composition, motif placement, border, panel arrangement.
Practical tip: Keep the fabric composition sealed beneath the rigid panel — this is the one decorative project where the tie fabric is intentionally not handled or washed.
Common mistake: Placing the fabric in direct food contact, or claiming it protects against heat or spills.
Safety note: Keep away from direct food contact; this is decorative only, and the rigid panel — not the fabric — is the surface that can be cleaned.
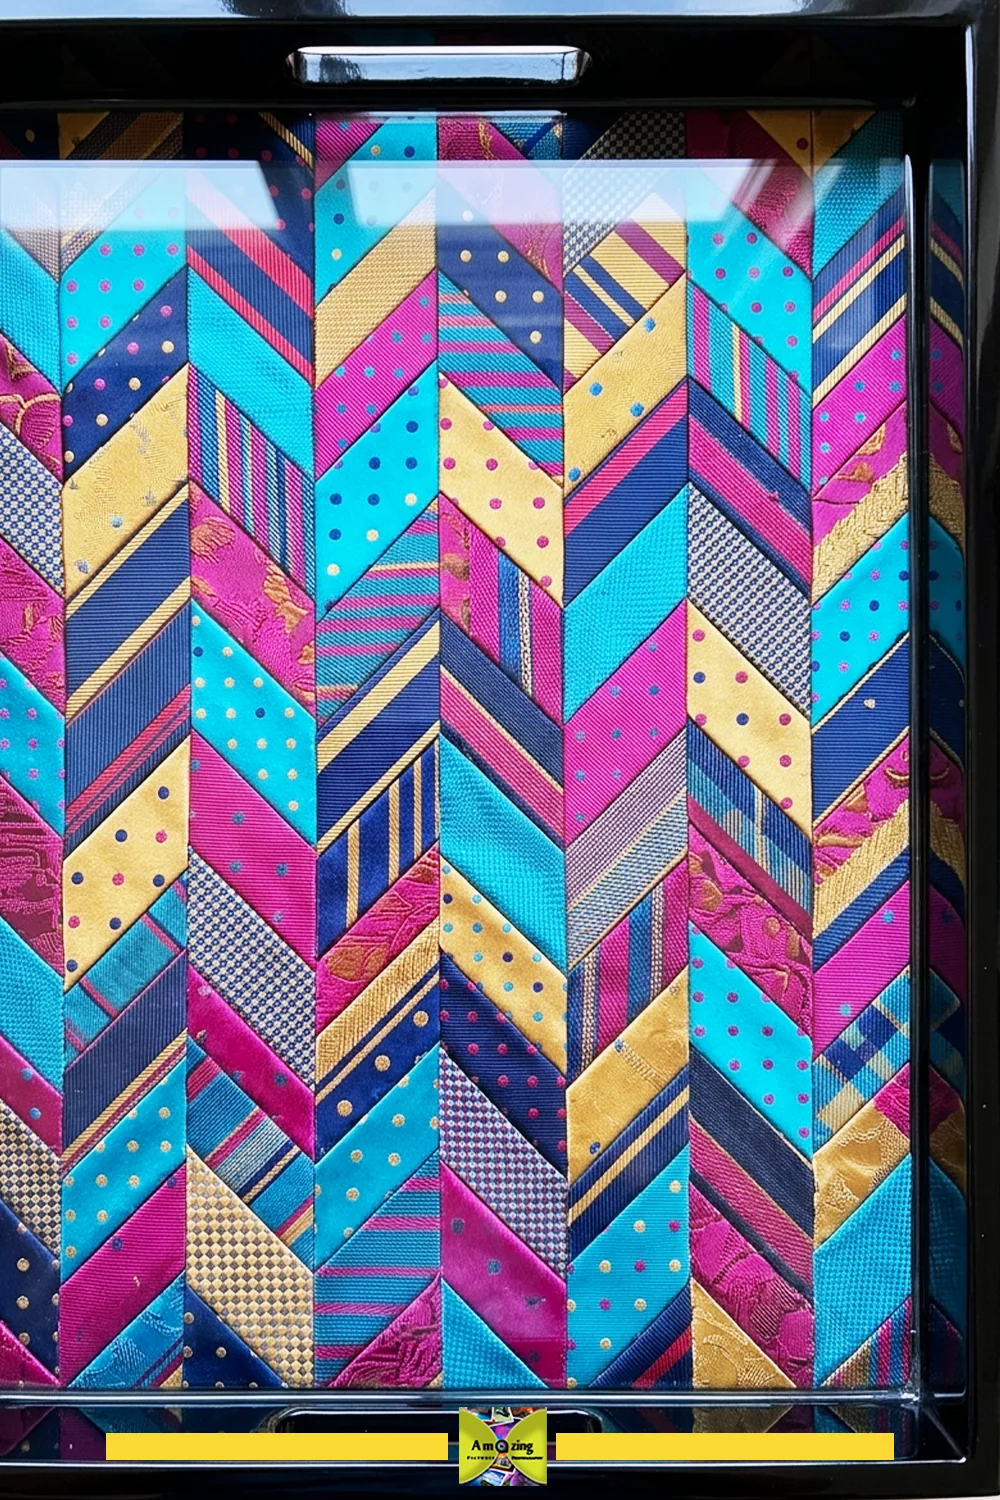
Author Tip: When arranging necktie segments under glass, embrace the natural pointed geometry of the tie tips (tipping). A classic chevron or herringbone layout—where the triangular blade tips interlock like fish scales—creates a mesmerizing, dimensional mosaic that highlights the subtle contrasts between matte repp stripes and luminous silk foulards. Before final framing, tack each piece to a backing sheet of acid-free museum mat board using tiny dots of removable archival glue dots or archival framing tape. This keeps the composition perfectly aligned without allowing pieces to shift when the glass pane is lowered into place.
How to Make Mismatched Neckties Look Intentional
Mismatched neckties can look deliberate, not random, with a few simple constraints:
- Limit each project or coordinated set to roughly two to five colors.
- Group fabrics by weight, sheen, texture, and care needs before matching patterns.
- Choose a shared undertone so warm and cool pieces don’t clash.
- Pair one bold paisley, stripe, or medallion with quieter geometric or solid panels.
- Repeat one neutral lining across several projects to unify them.
- Center distinctive motifs and align stripes and directional patterns.
- Mirror motif placement on paired components.
- Use measured color blocking when exact matching is impossible.
- Create light-to-dark or warm-to-cool progressions.
- Repeat panel dimensions, keep seam allowances and topstitching consistent, and coordinate zippers, binding, thread, buttons, snaps, and visible metal finishes.
- Conceal stabilizers, reinforcement, and raw insert edges.
- Avoid excessive beads, fringe, lettering, glitter, and unrelated trim — let the tie patterns and sheen stay the focal point.
- Photograph reflective silk-like fabric against a matte neutral backdrop, and show labels, bias grain, clean seams, matched motifs, and reinforcement in close-up.
Troubleshooting Common Necktie Craft Problems
- No readable fiber or care label: treat the tie as unknown fiber and use the most conservative handling; don’t guess from appearance.
- A valuable or sentimental tie selected by accident: stop before cutting, and run it through the decision guide.
- A stain or odor remains after safe assessment: don’t hide it — reject the tie or seek a professional assessment.
- Dye transfers during a moisture test: stop; the fabric is not colorfast, and the project will transfer dye.
- The tie changes shape after deconstruction: normal bias behavior; let it rest flat, then measure and stabilize.
- Permanent fold lines refuse to relax: don’t force them flat with aggressive pressing; place seams away from them.
- Bias fabric stretches during layout: stabilize first, or support it while you pin and cut.
- Silk-like fabric slides under a paper pattern: use pattern weights, and cut one layer at a time.
- A knit tie curls after cutting: use a firmer stabilizer and treat knit ties separately from woven shells.
- A woven jacquard frays quickly: finish edges immediately with a bound or zigzag seam.
- Fine yarns snag on tools or rough hands: smooth any rough tool edges and handle gently.
- A marking tool bleeds through or won’t disappear: test a new marker on an offcut first.
- A rotary cutter pushes fabric instead of cutting: replace the blade and use a proper mat.
- Motifs fail to align: center and mirror placement on the paper pattern before cutting.
- Mixed tie fabrics have incompatible weights: group by weight and sheen before matching patterns.
- Pins leave visible holes: use clips or pattern weights on fine fabric.
- Layers shift during sewing: hand-baste, use a walking foot, or clip more often.
- The machine skips stitches: check the needle type, condition, and thread, then re-test on an offcut.
- Fine fabric draws into the needle plate: use a fine-fabric foot or a straight-stitch plate.
- Thread nests beneath the work: re-thread with the presser foot up and check tension.
- Seams pucker: reduce tension or presser-foot pressure, and test again.
- Topstitching looks perforated: use a longer stitch and a finer needle.
- Bias panels grow longer during construction: support and stabilize, and don’t stretch while sewing.
- Fusible interfacing bubbles, spots, or shows through: stop using it and switch to sew-in interfacing.
- Adhesive bleeds through the face: test on an offcut and use less, or switch to stitching.
- Bulky corners refuse to turn cleanly: grade seam allowances and trim without cutting stitching.
- Lining becomes larger than the shell: cut the lining slightly smaller and re-fit.
- Zippers become wavy: stabilize the seam and avoid stretching the bias shell as you sew.
- Snaps or buttons pull through delicate fabric: add a backing patch at each closure point.
- A notebook cover binds at the spine: add spine allowance and test with the book open.
- A valet tray refuses to sit flat: use a removable rigid insert and square the corners.
- A desktop basket loses shape: add a firm backing or a removable base insert.
- A covered-box corner lifts: re-trim and re-adhere, and let the adhesive cure fully.
- A runner twists or ripples: add a stable backing and press each seam flat.
- Dye or adhesive transfers to furniture: test on a matching inconspicuous area before use.
- Finished projects look random rather than coordinated: apply the color and repetition rules above.
Care and Maintenance
Finished projects follow the most restrictive care requirement among the shell, lining, stabilizer, thread, zipper, adhesive, closure, hardware, and insert. There is no universal washing, drying, ironing, steaming, solvent, or disinfecting instruction. Remove rigid inserts before cleaning where the design permits. Test dye and residue transfer before contact with pale fabric, paper, books, furniture, or valuable objects, and dry completely before closing, folding, stacking, filling, or storing. Store projects away from direct sunlight, dampness, pests, heat, and crushing. Check seams, folds, bindings, zippers, snaps, loops, and corners regularly, and repair early fraying before it spreads. Retire any project that develops mold, persistent odor, dye transfer, brittle fabric, severe abrasion, open seams, exposed inserts, loose hardware, or failing closures. Mark every cleaning interval and durability statement for authoritative or firsthand confirmation.
Safety When Repurposing Neckties
- Select clean, documented, uncontaminated ties.
- Decide permission and preservation before cutting sentimental textiles.
- Reject moldy, pest-damaged, chemically exposed, flooded, heavily soiled, or deeply stained material.
- Use seam rippers, scissors, craft knives, and rotary cutters safely: cut away from your body and keep hands outside every blade path.
- Work on stable cutting mats in a well-lit area, and store and discard blades, needles, pins, and broken machine needles safely.
- Mind the sewing-machine needle and pinch hazards; switch the machine off before changing a needle, foot, or setup.
- Never force stitching through bulky intersections, and keep fingers clear of the needle.
- Use material-specific pressing temperatures and press-cloth tests; never press at high heat on unknown fibers.
- Never burn fibers, use open-flame tests, or use heated cutting to identify material.
- Ventilate and follow label instructions for adhesives, cleaners, sprays, and coatings, and keep textiles, lint, cleaners, and adhesives away from heat, sparks, and flame.
- Keep needles, pins, zipper parts, snaps, buttons, and other small components away from children and pets.
- Make no unsupported medical, protective, child-safe, pet-safe, flame-resistant, waterproof, archival, structural, or load-bearing claims.
- Retire a project when its fabric, seam, insert, closure, or hardware begins to fail.
Frequently asked questions
Compact, useful projects work best: zipper pouches, eyeglass sleeves, card sleeves, jewelry rolls, pen-and-tool rolls, sewing-notions folios, valet trays, desktop baskets, notebook jackets, photo-album covers, keepsake boxes, gift bands, table runners, and under-glass tray liners. Choose projects that let the reclaimed fabric remain a meaningful part of the finished object.
Usually not, or not casually. A wearable, repairable, collectible, or sentimental tie often holds more value intact — worn, repaired, sold, donated, or preserved and documented. Get permission before cutting a tie that belongs to someone else or carries family significance, and document it before any alteration.
Photograph and measure first. Then open the center seam by snipping visible stitches, remove the keeper loop and labels, remove bar tacks and the slip stitch one stitch at a time, open the folds gradually without stretching the bias shell, and separate the interlining and tipping only after documenting their orientation.
Not as a blanket rule. Respect a “dry clean only” label, and do not casually hand-wash silk or unknown fibers. If a label supports moisture, test on a concealed expendable area first and blot rather than rub. When in doubt, leave a valuable tie to a professional.
Because the shell is cut on the bias, roughly 45 degrees to the grain, so it drapes and knots well. Once the interlining no longer supports it, the bias fabric relaxes and can stretch, narrow, and twist. Let it rest flat, then stabilize and handle it carefully.
There is no single best choice. Lightweight sew-in interfacing is often the safest starting point for slippery or bias-cut shells because it avoids heat and adhesive damage. A fusible should only be used after testing on a matching offcut. Choose based on the fabric, the project, and a sample seam.
Usually yes, if the machine can handle the layered stack and you test needle, thread, stitch, tension, and presser-foot pressure on a matching offcut. Delicate, dense, or bulky constructions may need hand stitching or a different design.
Clean, wearable ties are often welcome at thrift stores and professional-clothing charities. Cut, glued, fused, contaminated, or tiny scraps are generally not accepted, and recycling options vary by area. Confirm current acceptance with the receiving facility or local textile-recovery program before claiming anything.
Final Thoughts: Start With One Small Project
The best old necktie crafts begin with restraint. Preserve the ties that still have wearable, collectible, or sentimental value, and save the seam ripper for the clean, genuinely unwanted ties that are ready for a second job. Start with one small, forgiving project — a card sleeve or a gift band — test your fabric and machine on offcuts, and let the tie’s own patterns and sheen do the visual work. Reclaimed necktie fabric is narrow, bias-cut, and finicky in places, but treated with respect it becomes polished, personal, and genuinely useful.
If structured, material-focused reuse guides are useful to you, the plastic bottle cap crafts collection applies the same approach to a completely different material — a practical next stop for readers who like working through the full preparation and safety picture before they pick up a tool.
Sources and Further Reading
The following authoritative sources informed the guidance in this article on fiber content, care labeling, deconstruction, and sewing methods.
- Federal Trade Commission — Clothing and Textiles guidance (fiber and care labeling requirements)
- 16 CFR Parts 303, 300, and 423 — Textile Fiber Products Identification Act, Wool Products Labeling Act, and Care Labeling Rule
- Threads magazine — “Ties to Bind: Turn Neckties into Bias Binding” (deconstruction and bias method)
- Put This On — “The Necktie Series, Part I: Construction and Quality”
- The Textile Eye — Necktie Glossary (Peter Kuklinski)
- Zak Foster — “Five things I learned about working with silk ties”
- OTAA — “How to Clean Neckties”
- WeAllSew / Baby Lock — “DIY Dapper Tie” (tie construction and sewing)