Shipping boxes have a way of piling up in the hallway, waiting for recycling day. Before you flatten the next one, it’s worth knowing what to do with cardboard boxes beyond the bin: with a little fabric, paper and glue, they can become sturdy organizers that work in almost every room.
This list covers 17 projects, from a mail sorter for the entryway to drawer dividers, a gift-wrap station, a seed packet file and a cat scratcher. Whether you’re short on storage or just short on budget, most of these take an hour or an afternoon and use boxes you already have.
Before You Start
- Pick clean, dry boxes. Skip any that are damp, musty or have been stored in a garage with pests.
- Corrugated shipping boxes are stronger than cereal or shoe boxes. Save them for anything that carries weight.
- Use a fresh craft knife blade and a cutting mat. A dull blade crushes the corrugation instead of cutting it.
- Fabric glue, spray adhesive and a hot glue gun all work on cardboard. Test on a scrap first so the glue doesn’t soak through your fabric.
1. Sort Mail by the Door
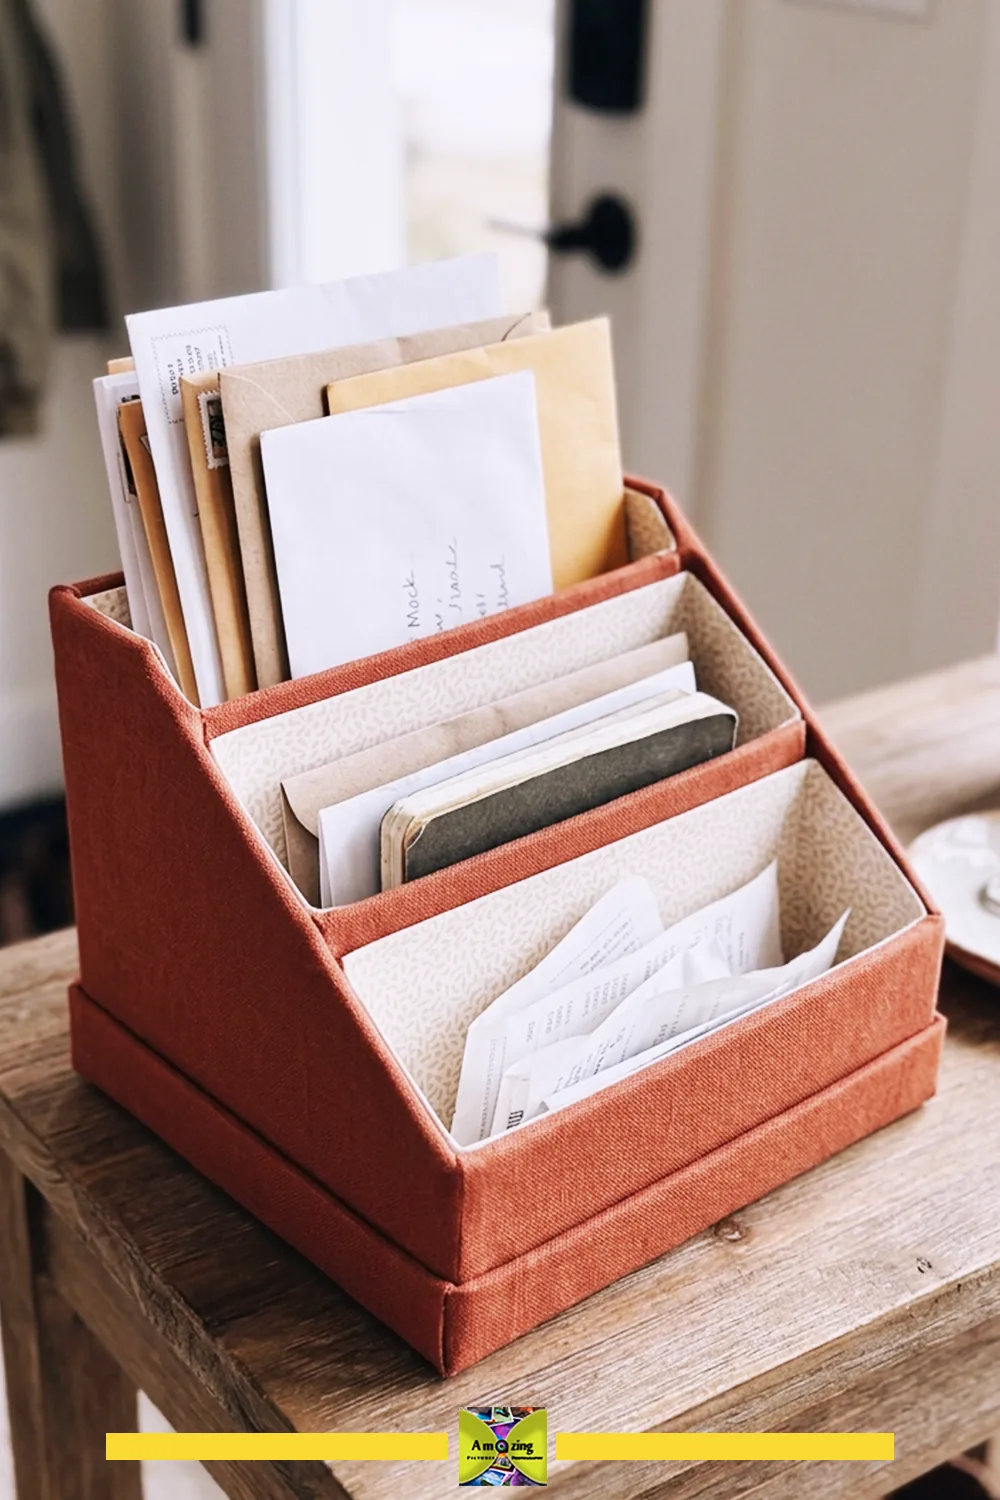
Letters, bills and flyers tend to land on whatever surface is closest to the door. A few small boxes, trimmed to different heights and covered in fabric, give each kind of paper its own slot. Stagger the heights so you can read every envelope at a glance, and keep one slot for anything that needs action this week.
You’ll need: a few small sturdy boxes, fabric, fabric glue or spray adhesive, a craft knife, a ruler
Time: About an hour, plus drying
Skill level: Beginner
2. Wrap Boxes Into Fabric Bins
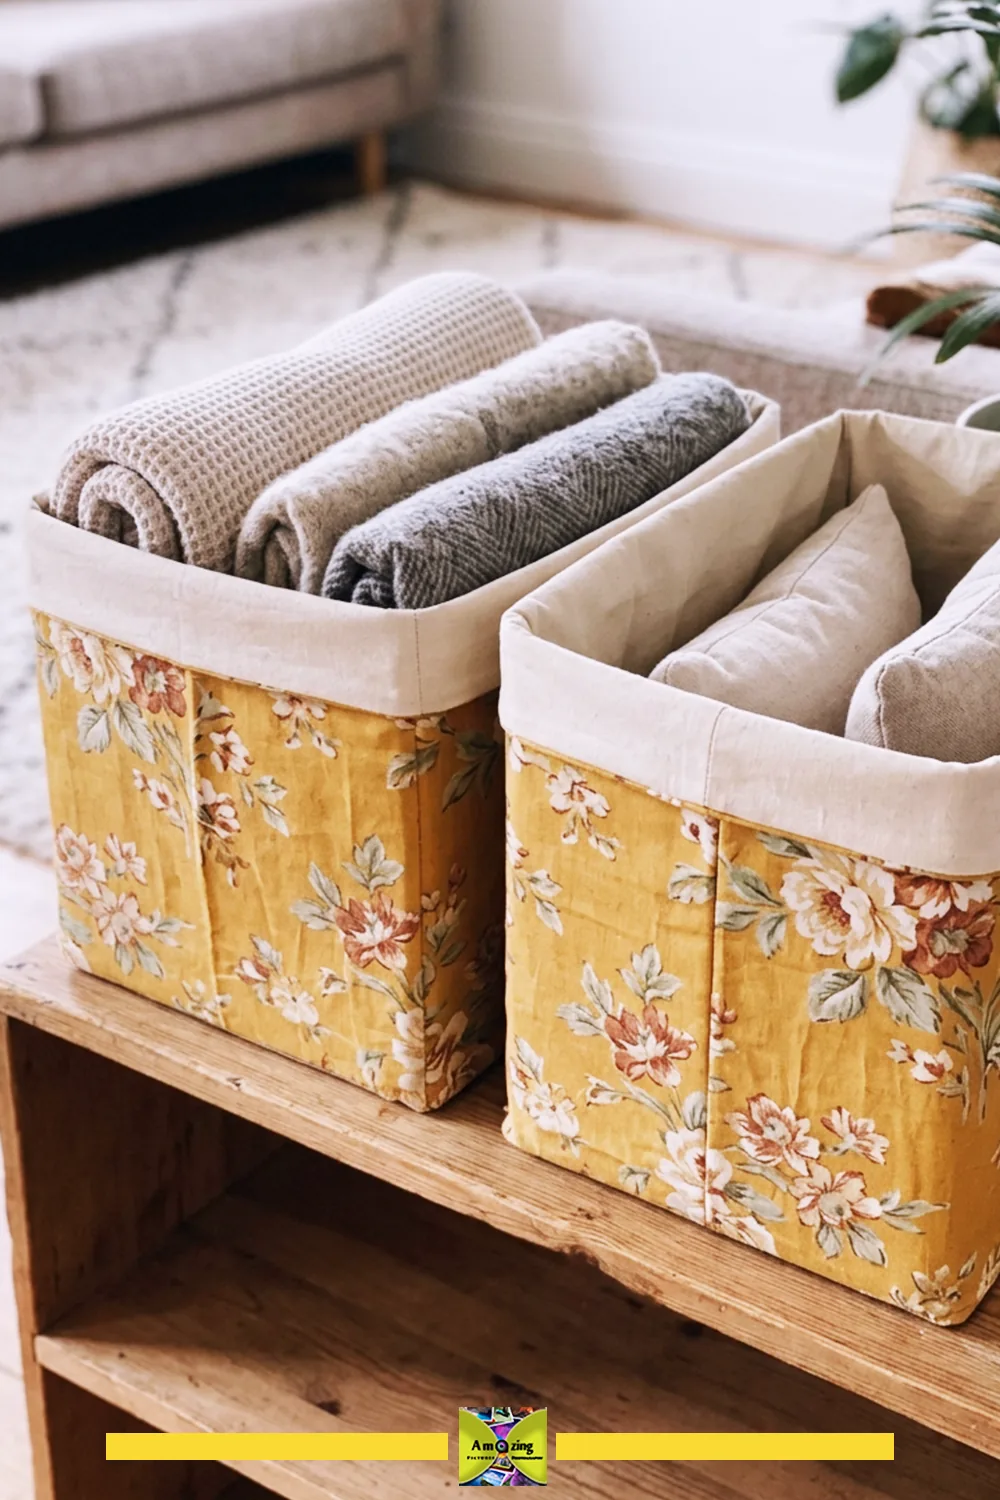
A plain shipping box becomes a shelf-worthy bin once it’s wrapped in a floral fabric. Cut the flaps off, wrap the outside, then fold the fabric over the top edge so no raw cardboard shows. Bins like these hold folded towels, spare pillowcases or throw blankets, and they look tidier than a row of mismatched baskets.
You’ll need: matching boxes, fabric, spray adhesive or glue, scissors
Time: An afternoon for a pair
Skill level: Beginner
Take note: Cardboard softens if it gets damp, so keep these bins out of bathrooms and away from floors that get mopped.
3. Divide a Messy Drawer
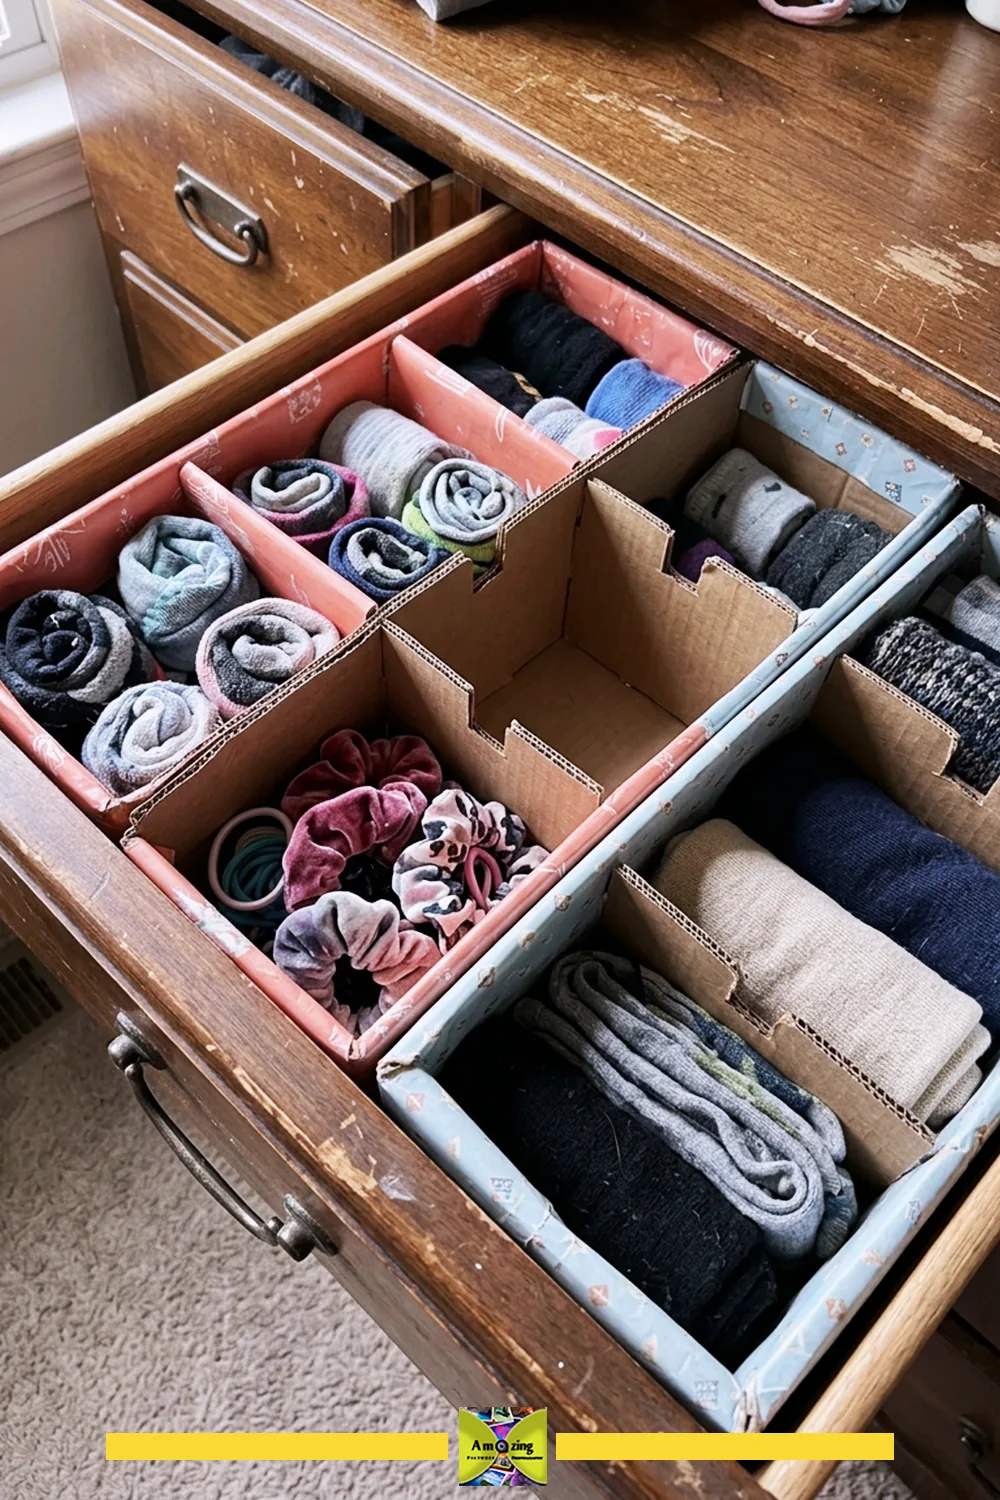
Socks, hair ties and small accessories stop drifting together once a drawer has walls. Measure the inside of the drawer, cut cardboard strips to that depth, and slot them together in a grid with matching notches. Nothing is glued in, so you can pull the grid out and rearrange it whenever your storage needs change.
You’ll need: flat cardboard sheets, a ruler, a pencil, a craft knife
Time: Under an hour
Skill level: Beginner
Author tip: I’d cut each strip a few millimetres shorter than the drawer’s inside height, so the grid doesn’t catch on the dresser frame when you close it.
4. Build Mini Drawers for Hair Clips
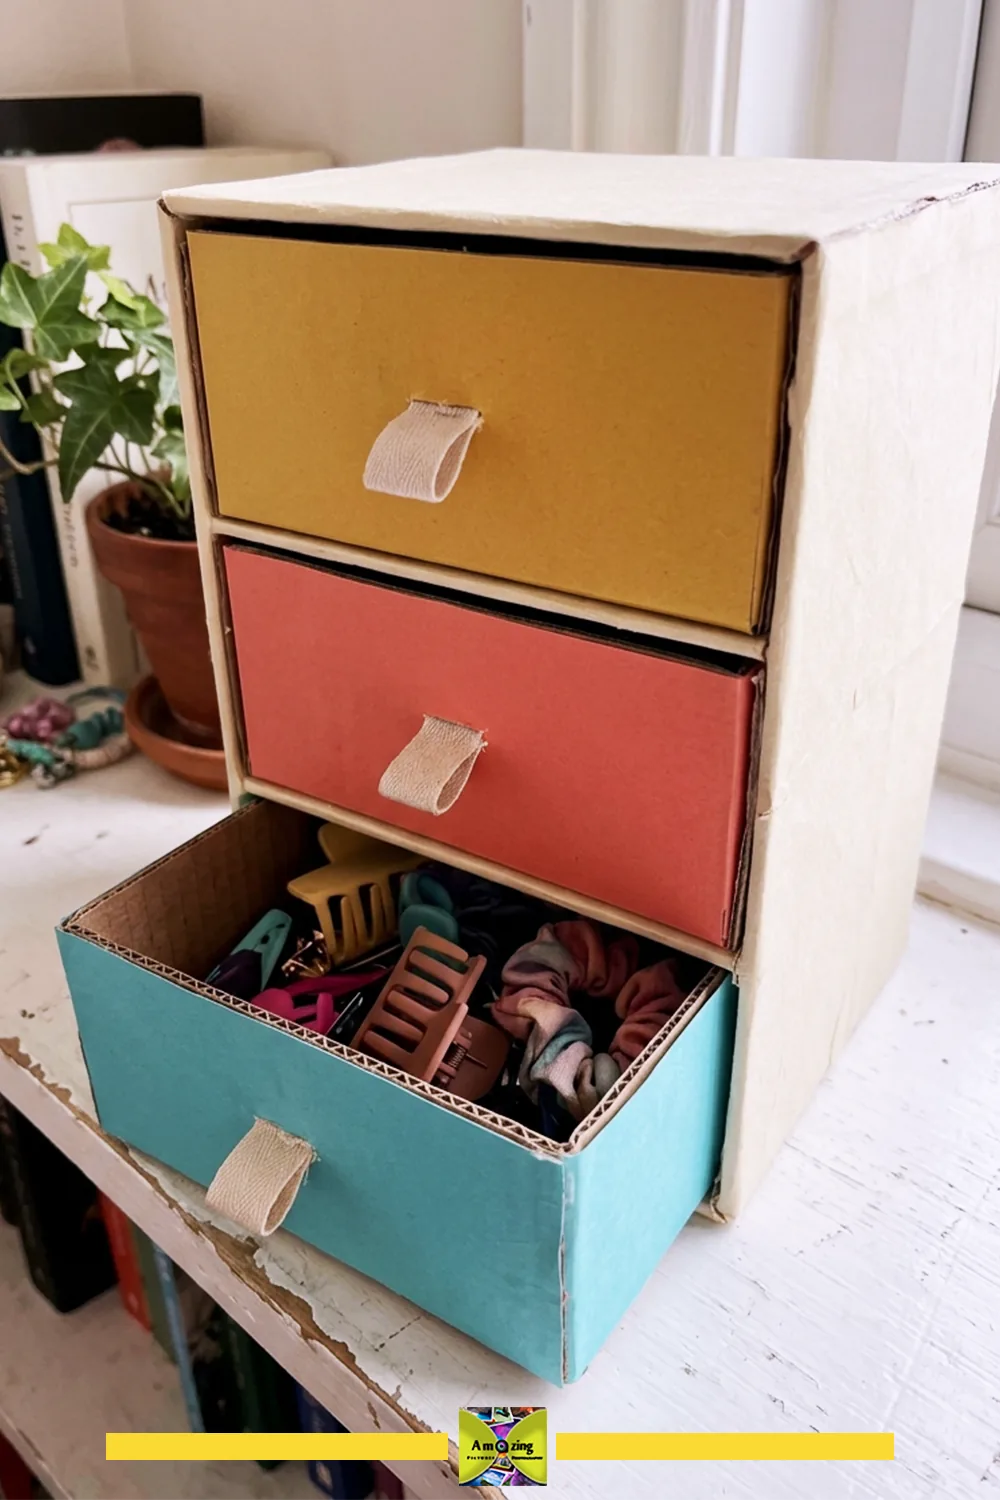
Small boxes slide inside a cardboard shell to make a set of mini drawers, each with its own colorful front and a fabric pull tab. They’re sized for the little things that vanish in a big drawer: clips, scrunchies, bobby pins. Paint or paper each front in a different color so you know which drawer holds what without opening it.
You’ll need: matching small boxes, a larger box or cardboard for the shell, paint or patterned paper, fabric scraps for pulls, glue
Time: An afternoon
Skill level: Intermediate
RELATED: How to Make a Mini Basket From Cardboard
5. Turn a Shoebox Into a Jewelry Tray
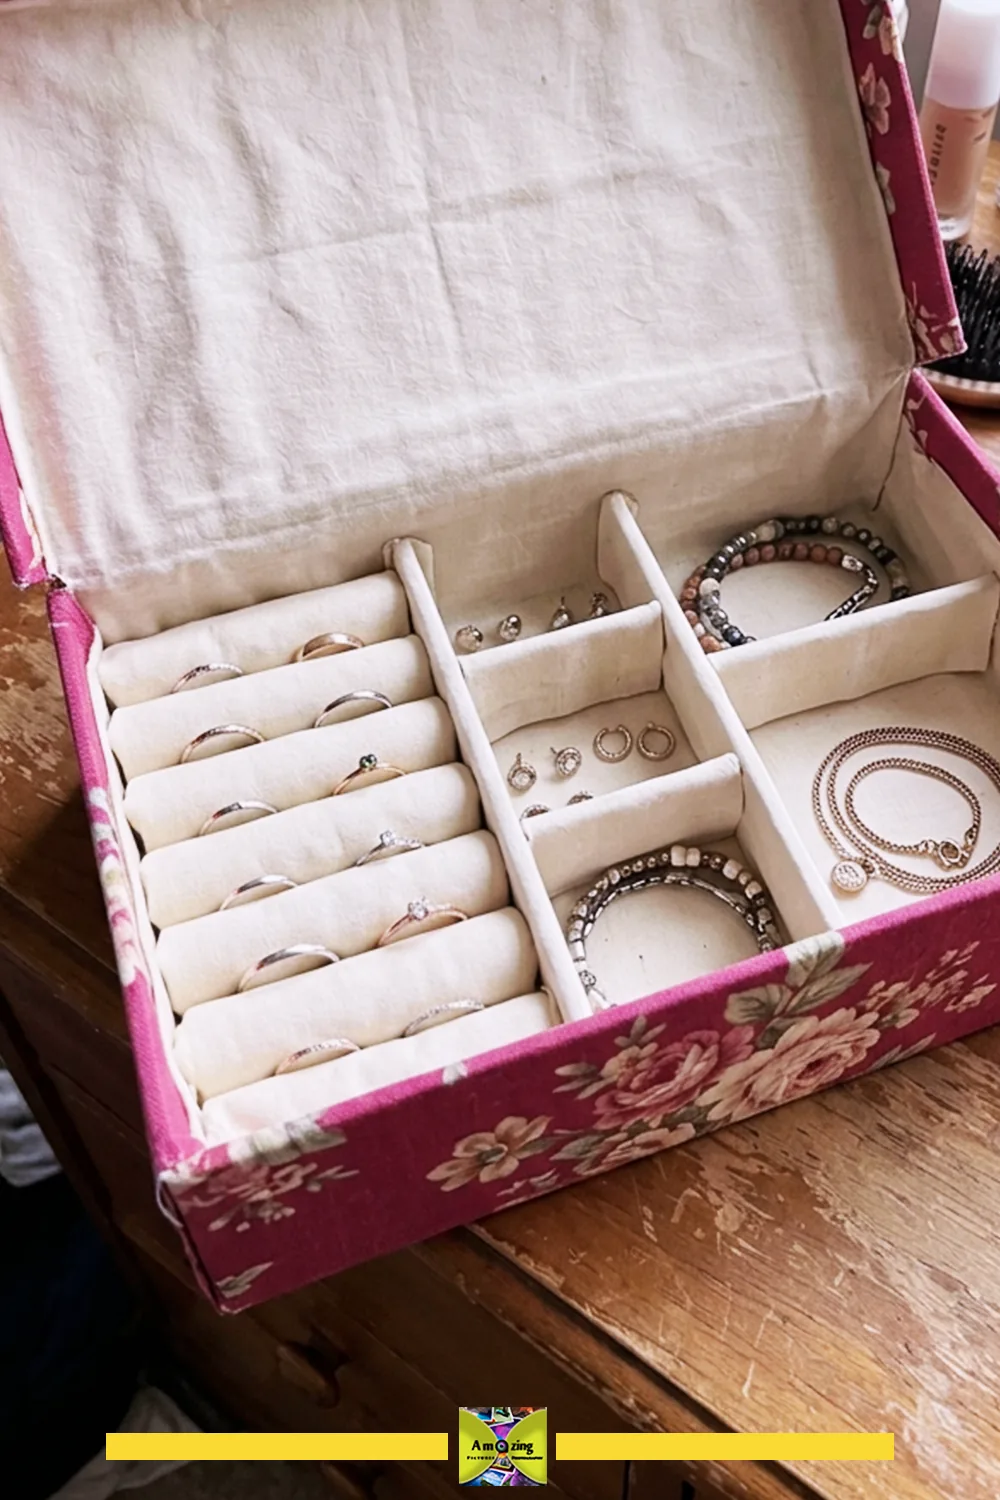
A shoebox is already the right depth for jewelry. Add cardboard dividers to make compartments for rings, bracelets and earrings, then line the inside so pieces don’t slide or scratch. The lid keeps dust off, and the whole box tucks onto a dresser or into a drawer.
You’ll need: a shoebox with a lid, cardboard for dividers, fabric or felt for lining, glue
Time: About an hour
Skill level: Beginner
6. Keep Remotes by the Bed
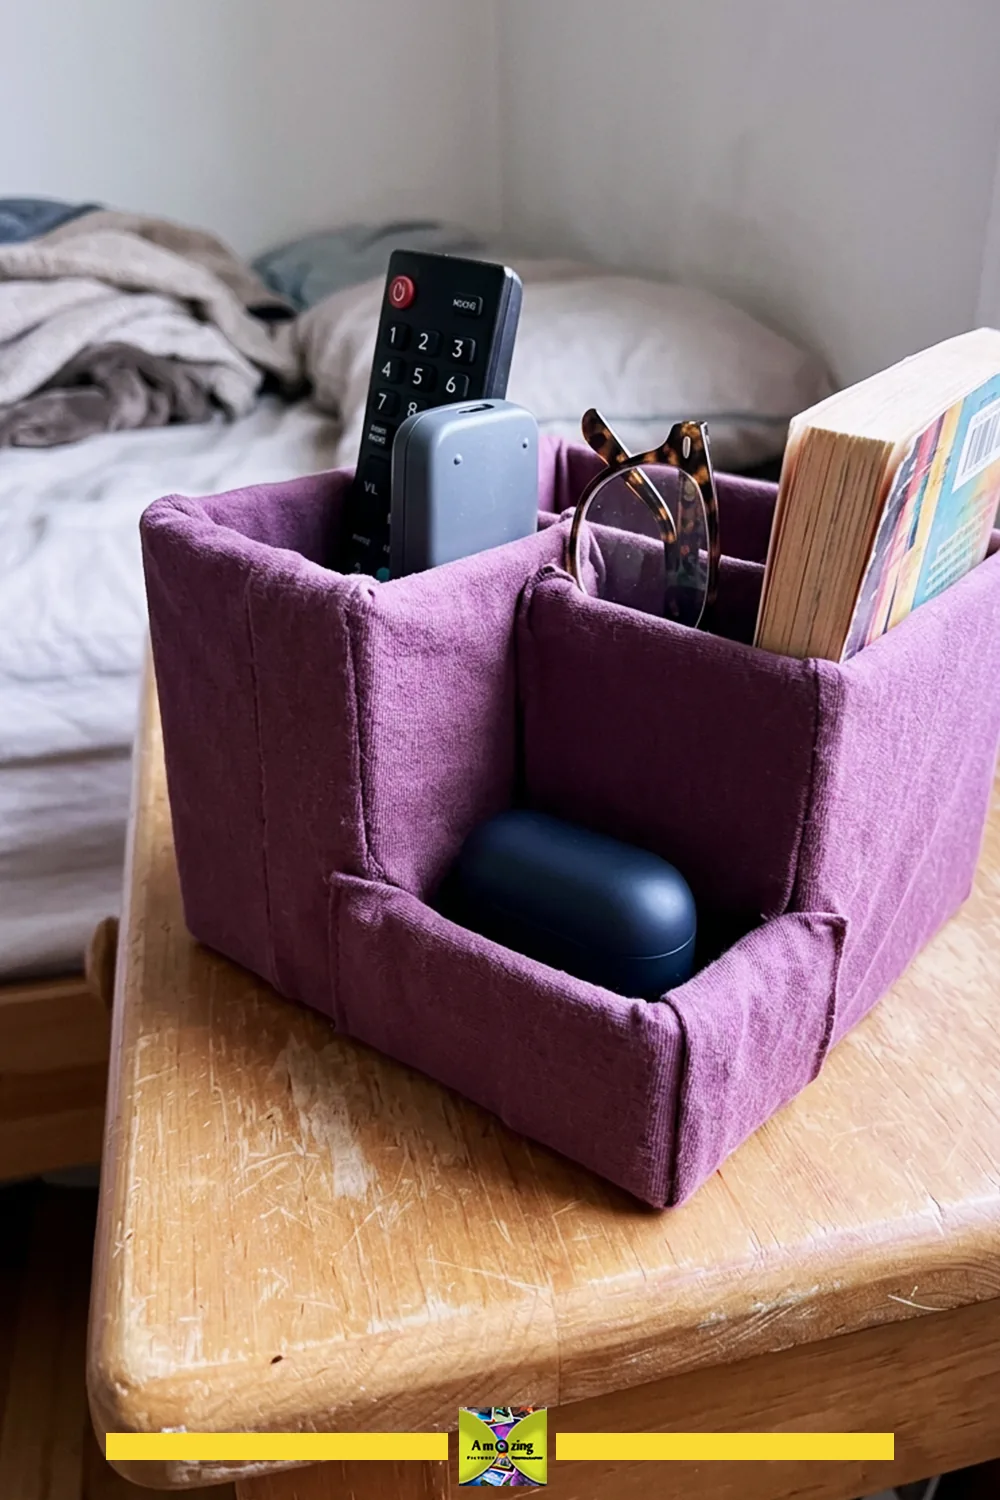
Remotes, reading glasses and a book always seem to end up on the floor beside the bed. A small box covered in fabric, with a divider or two inside, gives everything a place on the nightstand. Choose a fabric that matches your bedding, and the caddy will look like it came with the room.
You’ll need: a small box, fabric, glue, cardboard for dividers
Time: About an hour
Skill level: Beginner
7. Corral Charging Cables
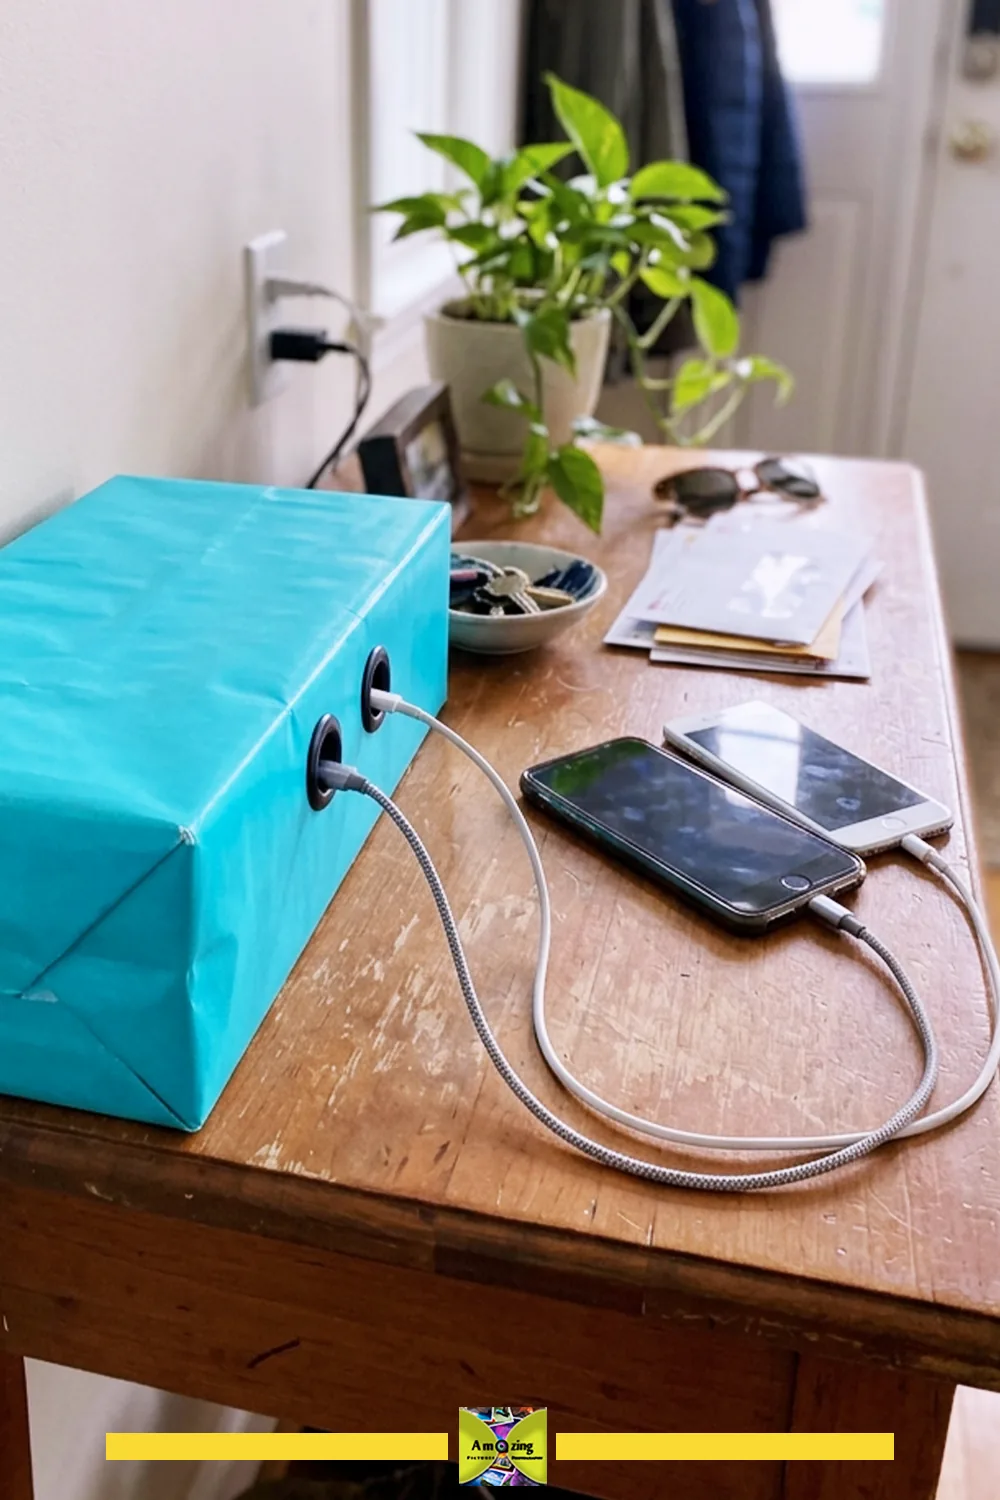
A paper-wrapped box with a few slots turns a tangle of chargers into a tidy charging corner. Cables run through the box, and the devices rest on top or alongside while they charge. Label each slot if several people share the station.
You’ll need: a small lidded box, decorative paper, glue, a craft knife
Time: Under an hour
Skill level: Beginner
Take note: Keep chargers and power bricks outside the box so they can stay cool, and only run the cables through it.
Author tip: I’d cut the cable slots slightly wider than the plug ends, so you can pull a cable out without tearing the edge of the box.
8. Cover a Desk Caddy in Denim
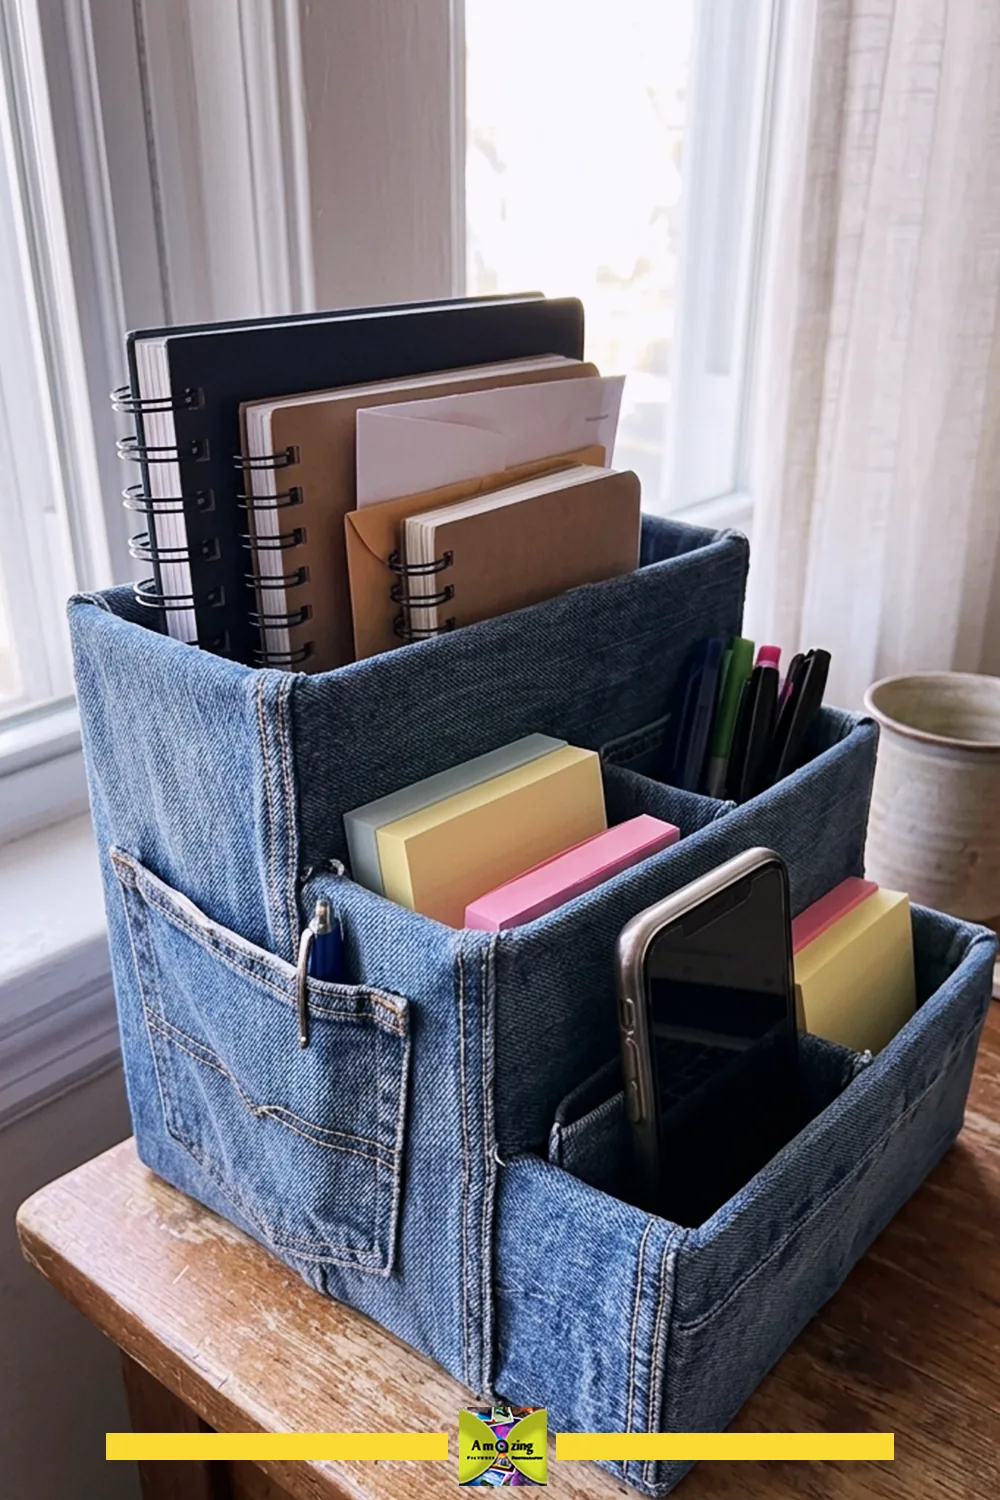
Small boxes glued side by side, then covered in denim from an old pair of jeans, make a desk caddy with a slot for everything. Notebooks go in the tall section, pens and sticky notes in the short ones, and the phone gets its own spot. Keep the jeans’ seams and pockets visible for a little extra character.
You’ll need: several small boxes in different heights, denim from old jeans, fabric glue, scissors
Time: An afternoon
Skill level: Beginner
RELATED: How to Make a Cardboard Nightstand That Looks Store-Bought
9. Stand Wrapping Paper Upright
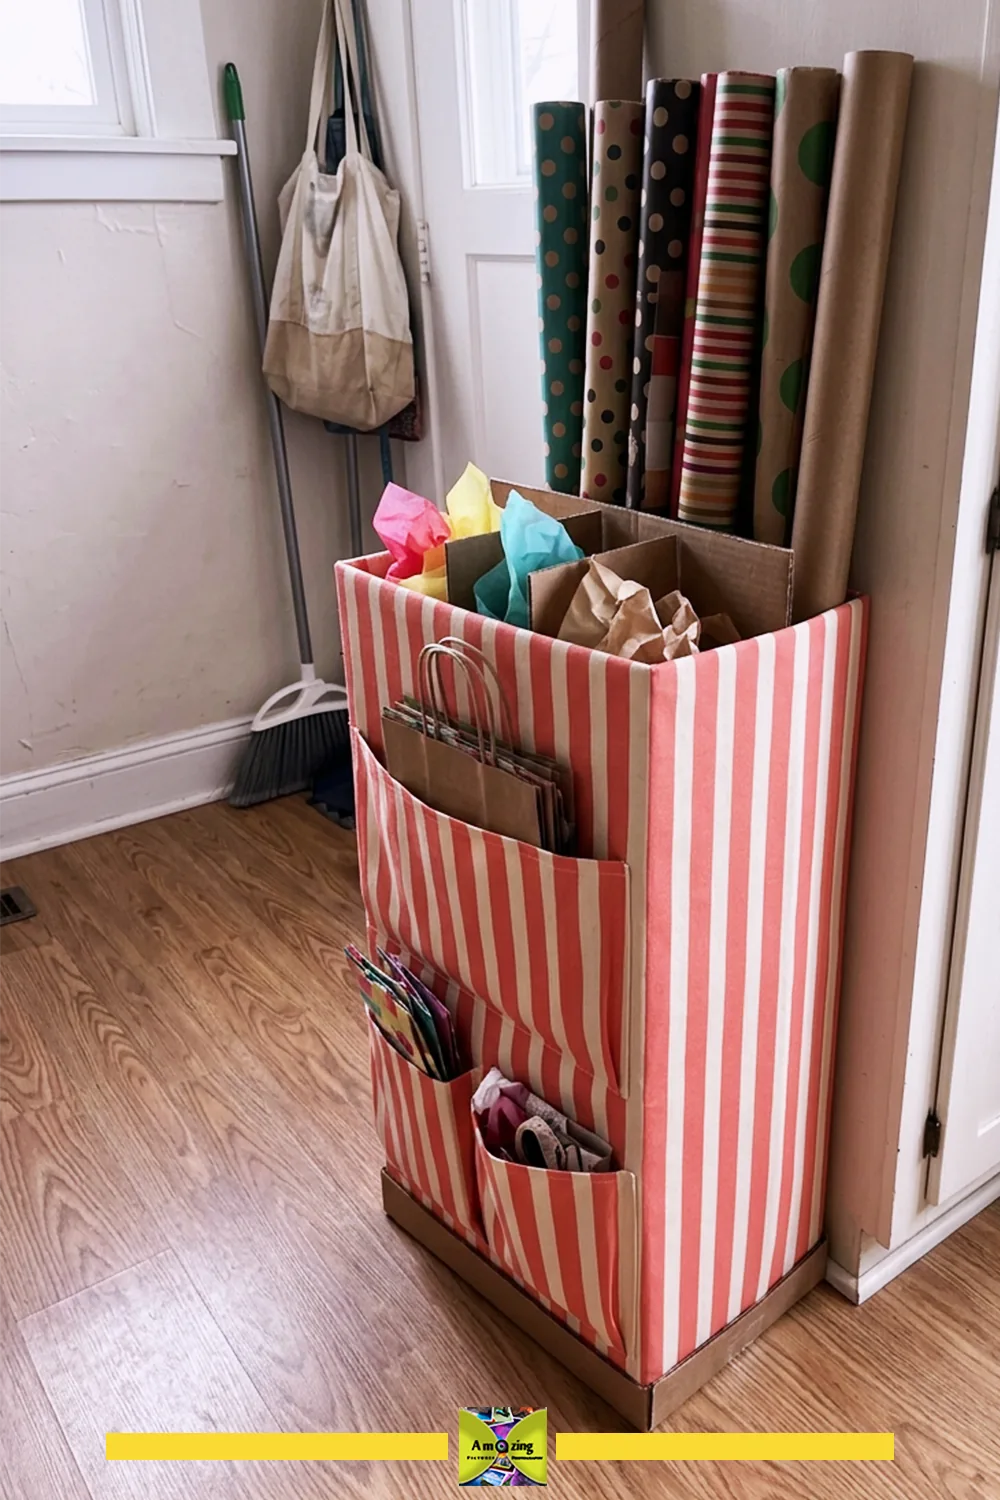
Rolls of wrapping paper crush and unravel when they’re stored flat. A tall box covered in striped fabric keeps them standing, with extra compartments for gift bags and tissue paper. Slide it into a closet corner, and everything for wrapping a present lives in one place.
You’ll need: a tall, sturdy box, fabric, glue, cardboard for dividers
Time: An afternoon
Skill level: Beginner
10. Line a Sewing Box With Scraps
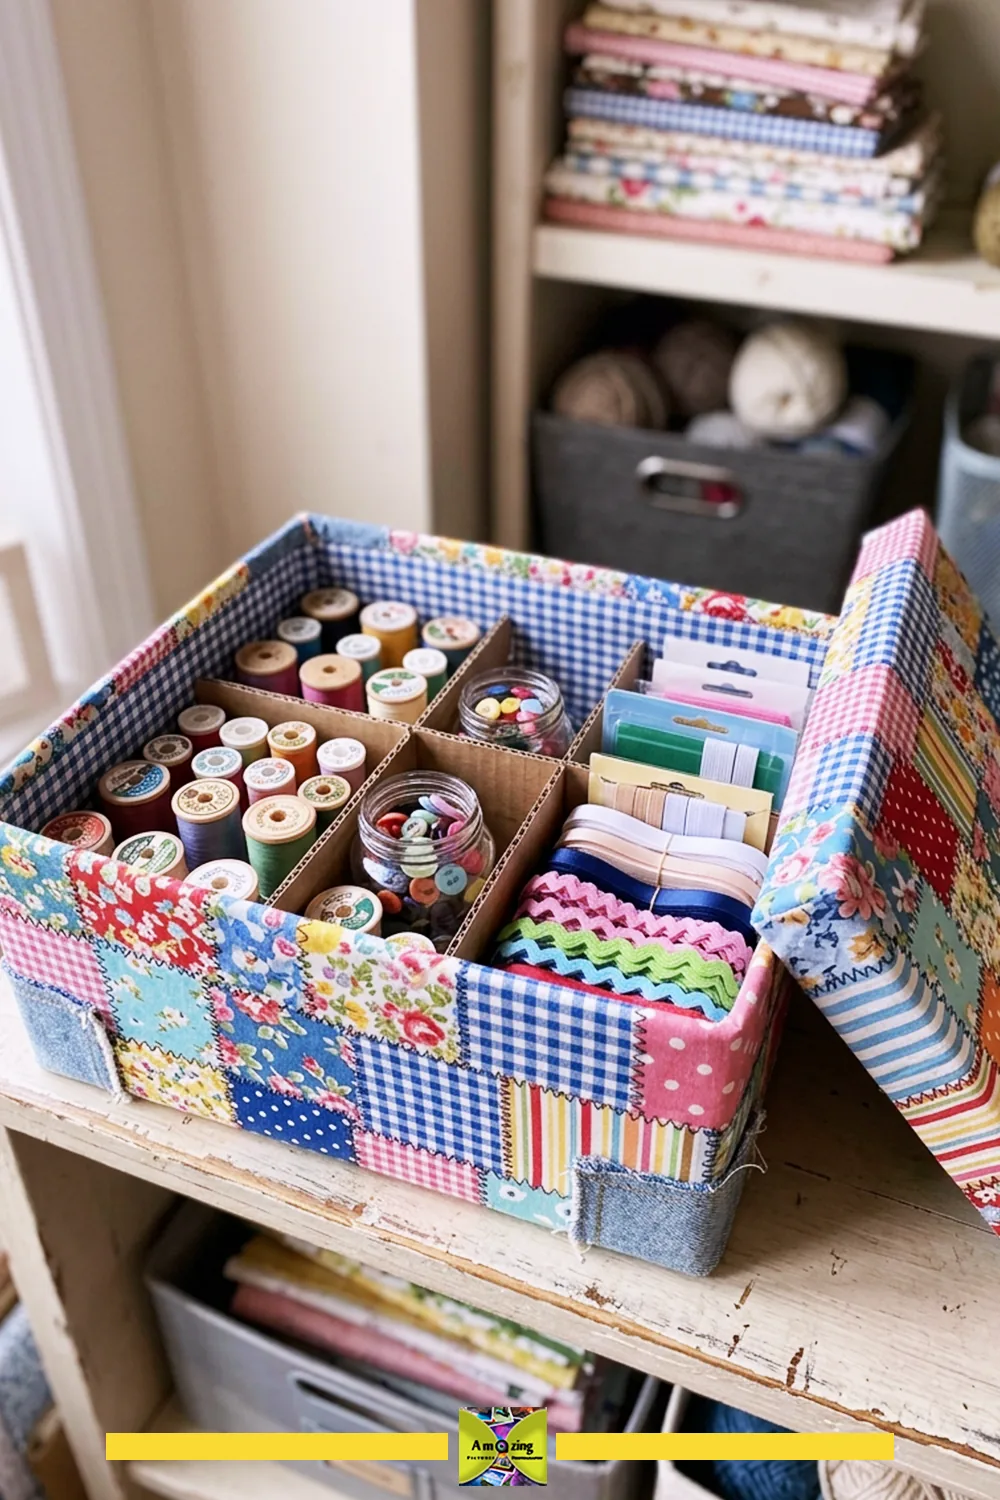
A sturdy box lined with leftover fabric becomes a sewing kit that’s pretty enough to leave out. Spools of thread, jars of buttons and small notions sit in their own sections, so you’re not digging for a needle mid-project. Patchwork the lining from scraps and it uses up fabric you’d otherwise toss.
You’ll need: a sturdy box, fabric scraps, glue, cardboard for dividers
Time: An afternoon
Skill level: Beginner
11. File Fabric Scraps Like Folders
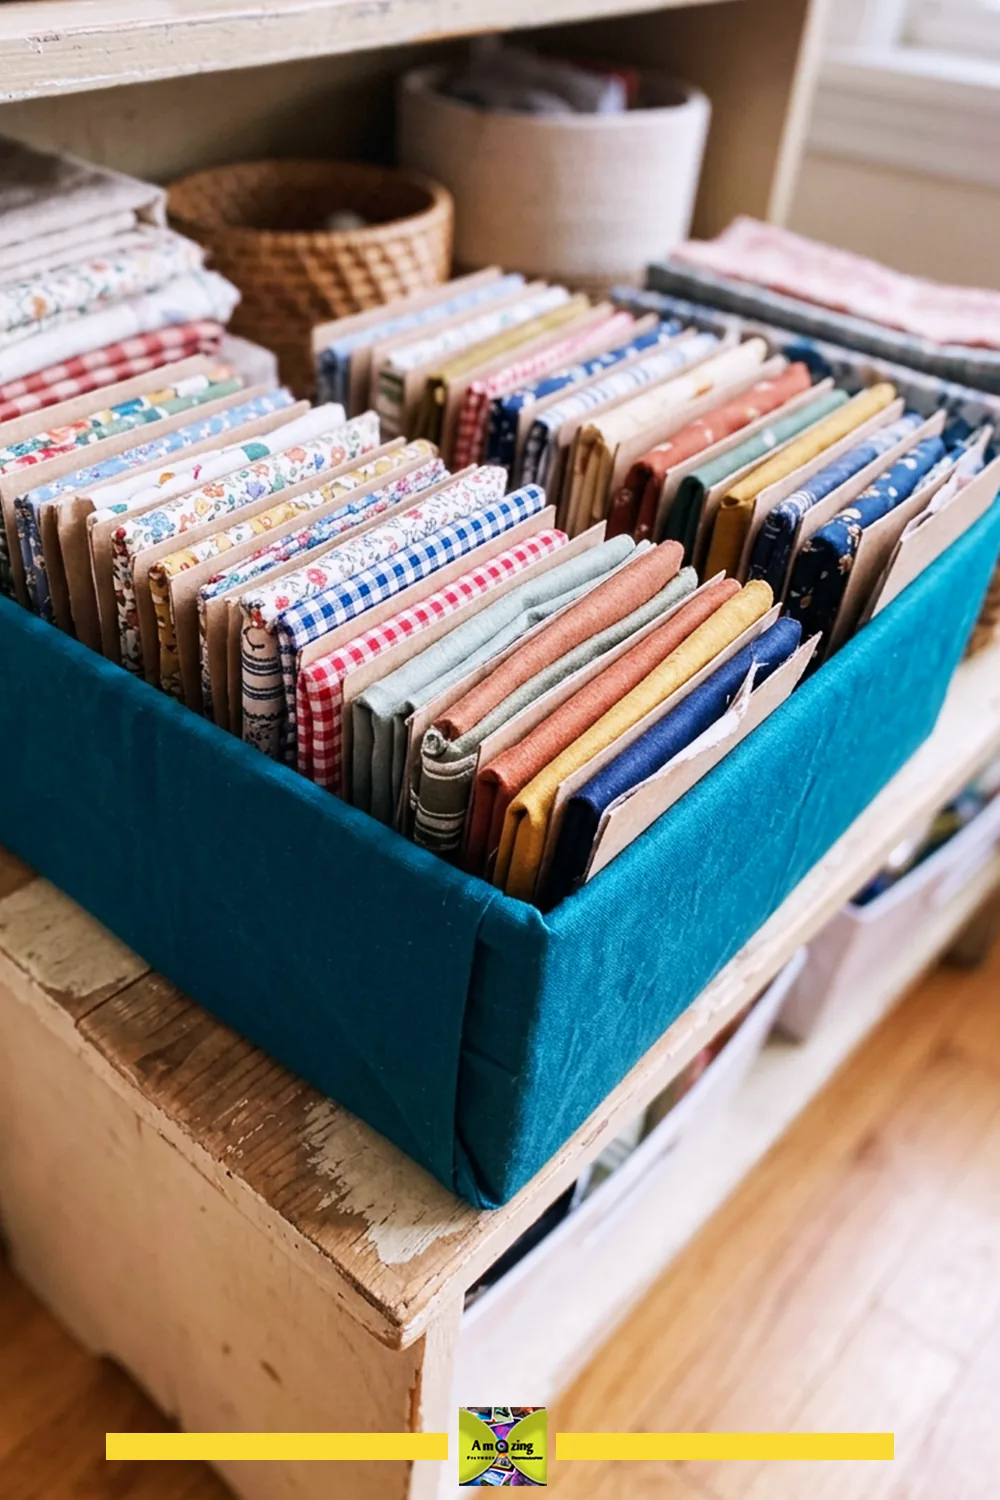
Folding fabric scraps and standing them on edge, like files in a drawer, shows you every color at once. Cut the top off a piece of packaging, cover it in fabric, and sort the scraps by color or size. You’ll reach for scraps far more often when you can see them all.
You’ll need: a sturdy box, fabric for covering, glue, scissors
Time: Under an hour
Skill level: Beginner
Author tip: I’d fold every scrap to the same width as the box, so the stack stays upright and nothing slumps to the bottom.
12. Cover a Keepsake Box With a Map
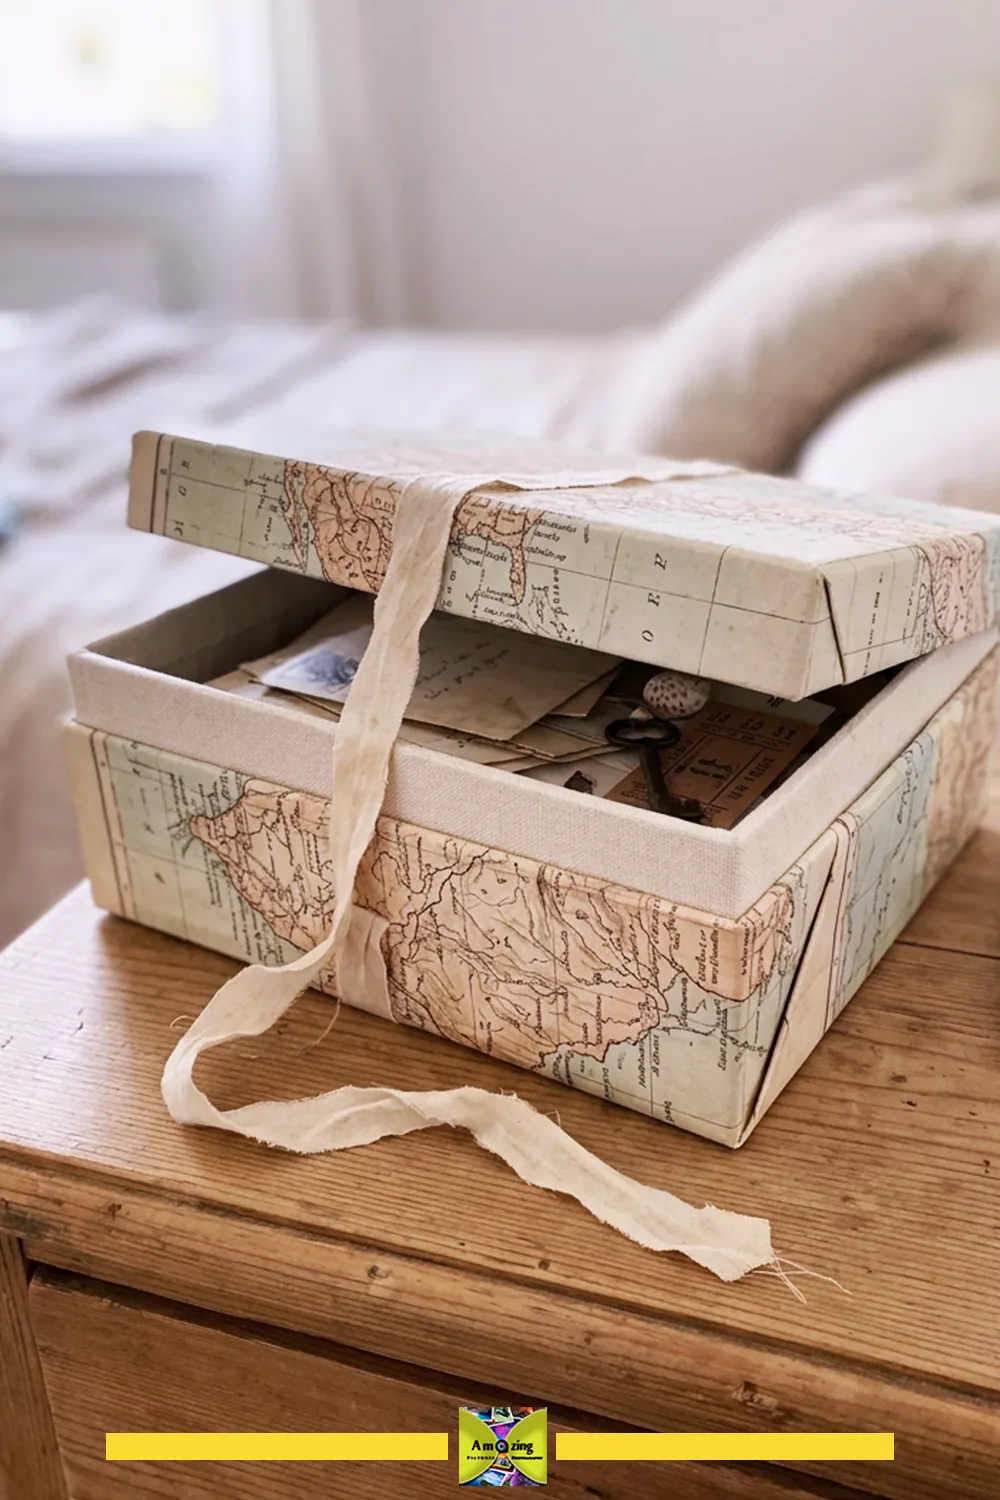
An old road map gives a plain box a travel-journal look, and it’s an easy way to keep letters, tickets and photos together. Wrap the map around the box and lid separately, folding the edges inside for a neat finish. If you have the choice, pick a section of the map that means something to you.
You’ll need: a box with a lid, an old map, spray adhesive or glue stick, scissors
Time: About an hour
Skill level: Beginner
RELATED: 15 Old Map Crafts for Organizers and Keepsakes
13. Frame Pressed Flowers
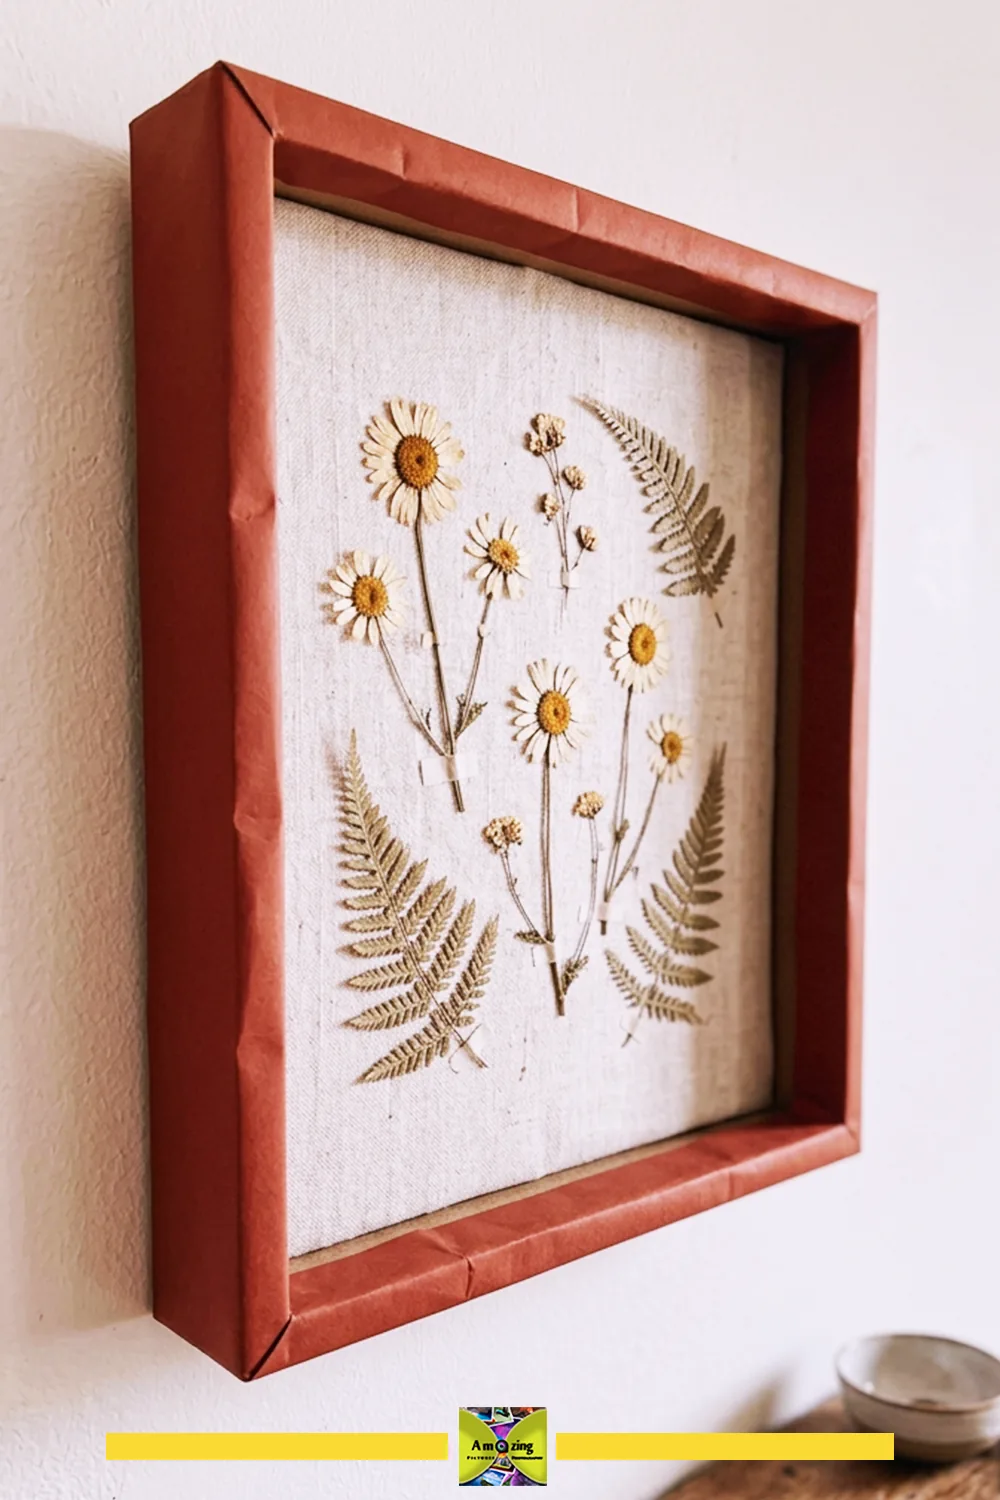
A shallow box with a painted cardboard frame makes a shadow box for pressed daisies and ferns. Mount the flowers on a fabric background so they have something soft to sit against, then hang the box like a picture. It’s a good home for flowers from a wedding, a garden or a walk you want to remember.
You’ll need: a shallow box, cardboard for the frame, paint, fabric, pressed flowers, glue
Time: An afternoon
Skill level: Beginner
14. Tab Your Seed Packets
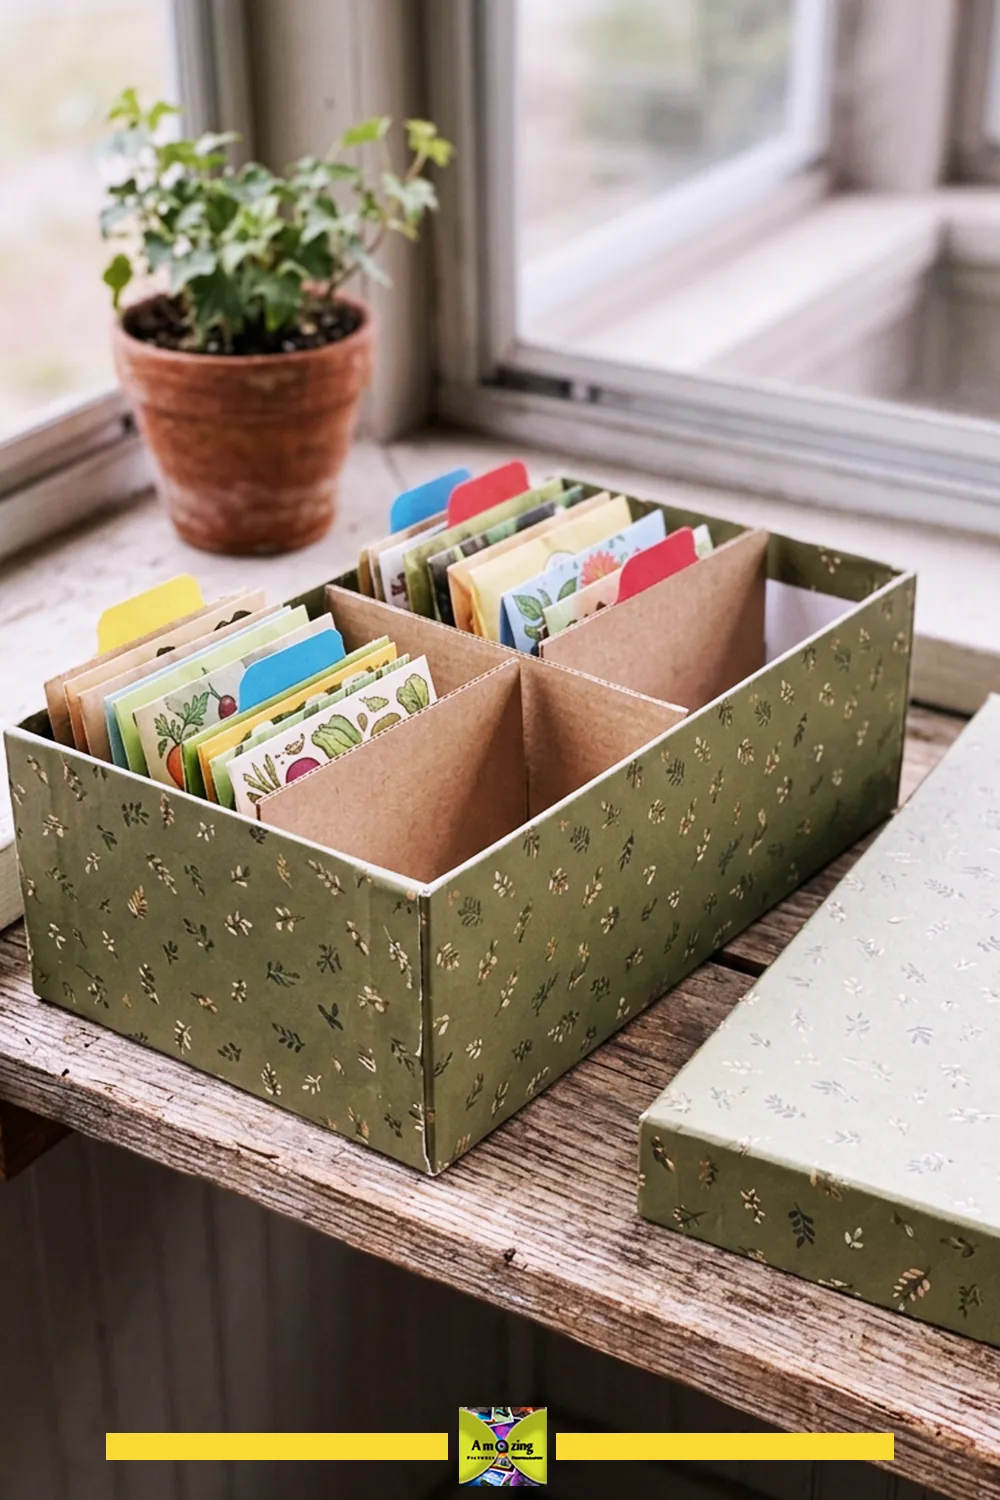
Seed packets fit almost exactly into a shoebox standing on end. Add cardboard dividers with colored tabs, and you can sort by crop, planting month or garden bed. Covering the box in decorative paper is optional, but it makes the box easier to spot on a crowded shed shelf.
You’ll need: a shoebox, cardboard for dividers, decorative paper, glue, markers
Time: Under an hour
Skill level: Beginner
15. Store Bulbs in a Vented Box
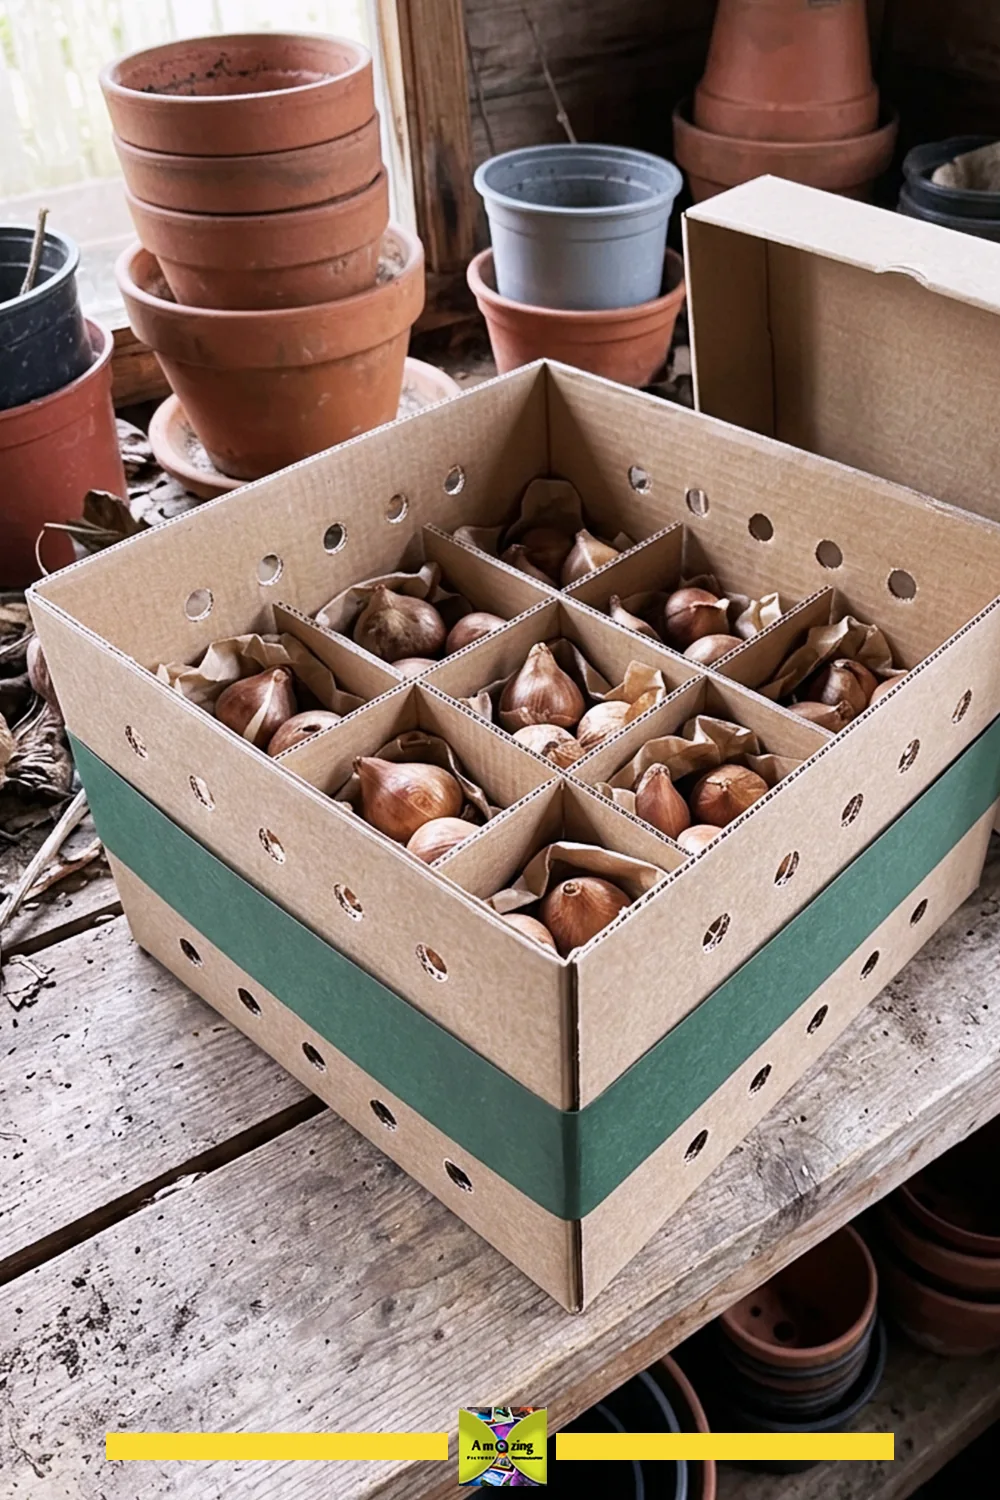
Bulbs lifted for storage need to stay dry and get plenty of air, or they can rot. A cardboard box with air holes punched in the sides, plus divided compartments, keeps different varieties apart and lets moisture escape. Label each section so you know what you’re planting next season.
You’ll need: a sturdy box, cardboard for dividers, a pencil or awl to punch holes, a marker
Time: Under an hour
Skill level: Beginner
Take note: Keep the box somewhere cool, dry and out of reach of pets. Bulbs are not food, and some are toxic to animals.
RELATED: 15 Cereal Box Crafts for Adults
16. Smother Weeds With Cardboard
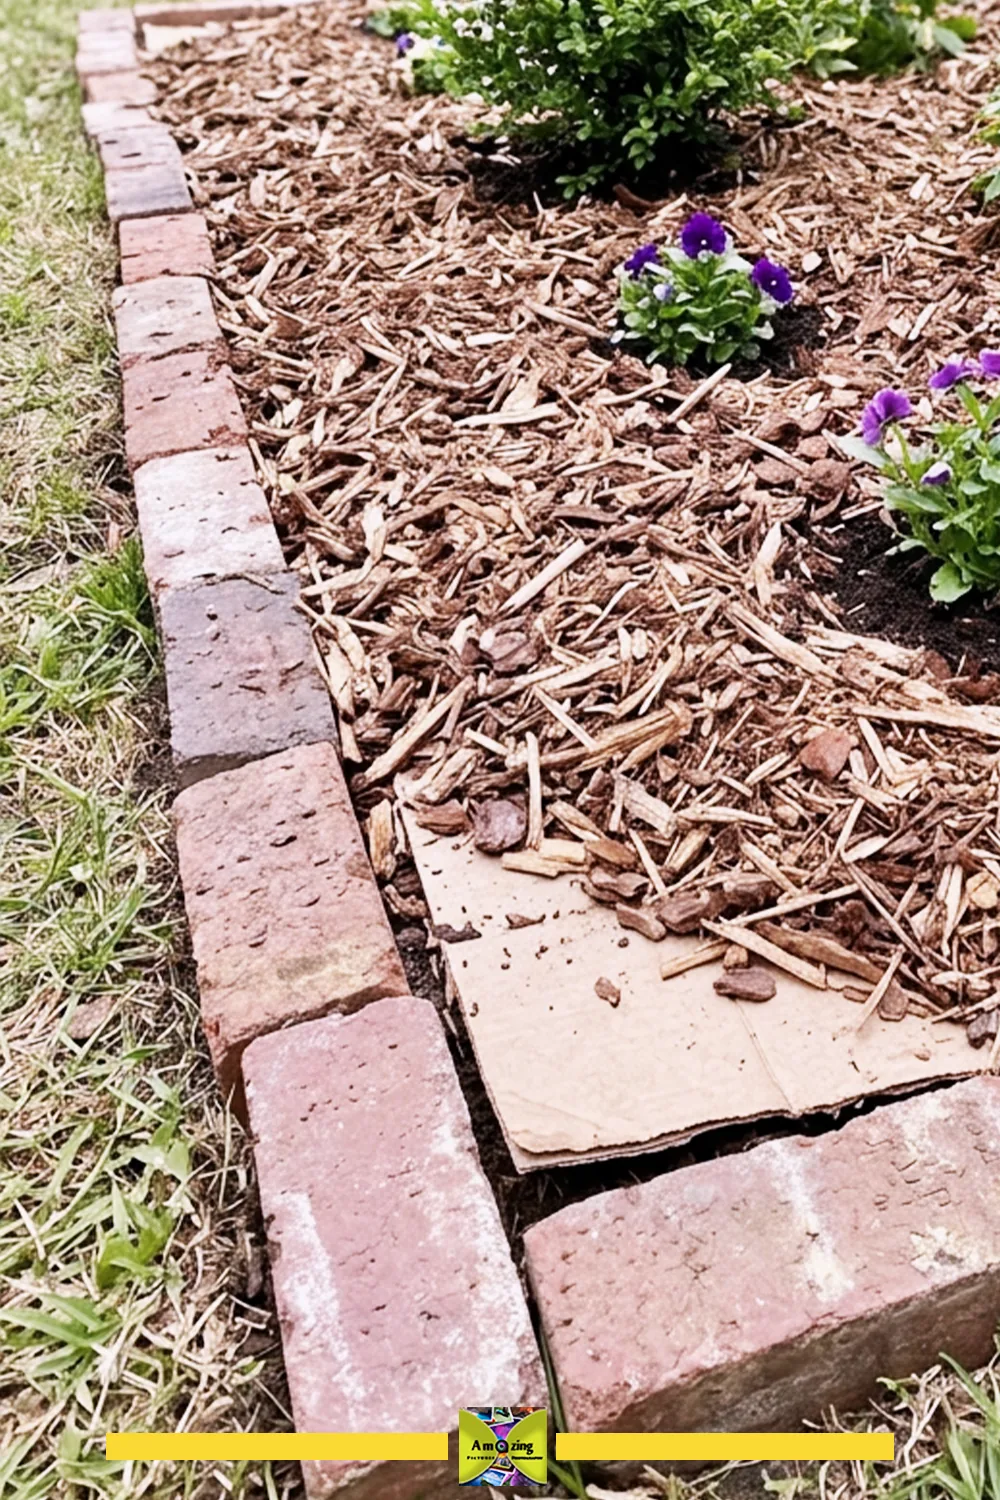
Flattened boxes laid under mulch block light from weeds and slowly break down into the soil. Overlap the sheets so no gaps let weeds through, water them well, then cover them with a thick layer of mulch. It’s one of the most useful ways to get rid of a pile of shipping boxes.
You’ll need: plain brown cardboard, mulch, a hose or watering can
Time: An hour or two, depending on bed size
Skill level: Beginner
Take note: Strip off tape, labels and any glossy printed areas first. Plain brown corrugated cardboard is the safest choice for garden soil.
Author tip: I’d soak the cardboard before laying it, so it stays flat while you spread the mulch and starts breaking down sooner.
17. Make a Cat Scratcher
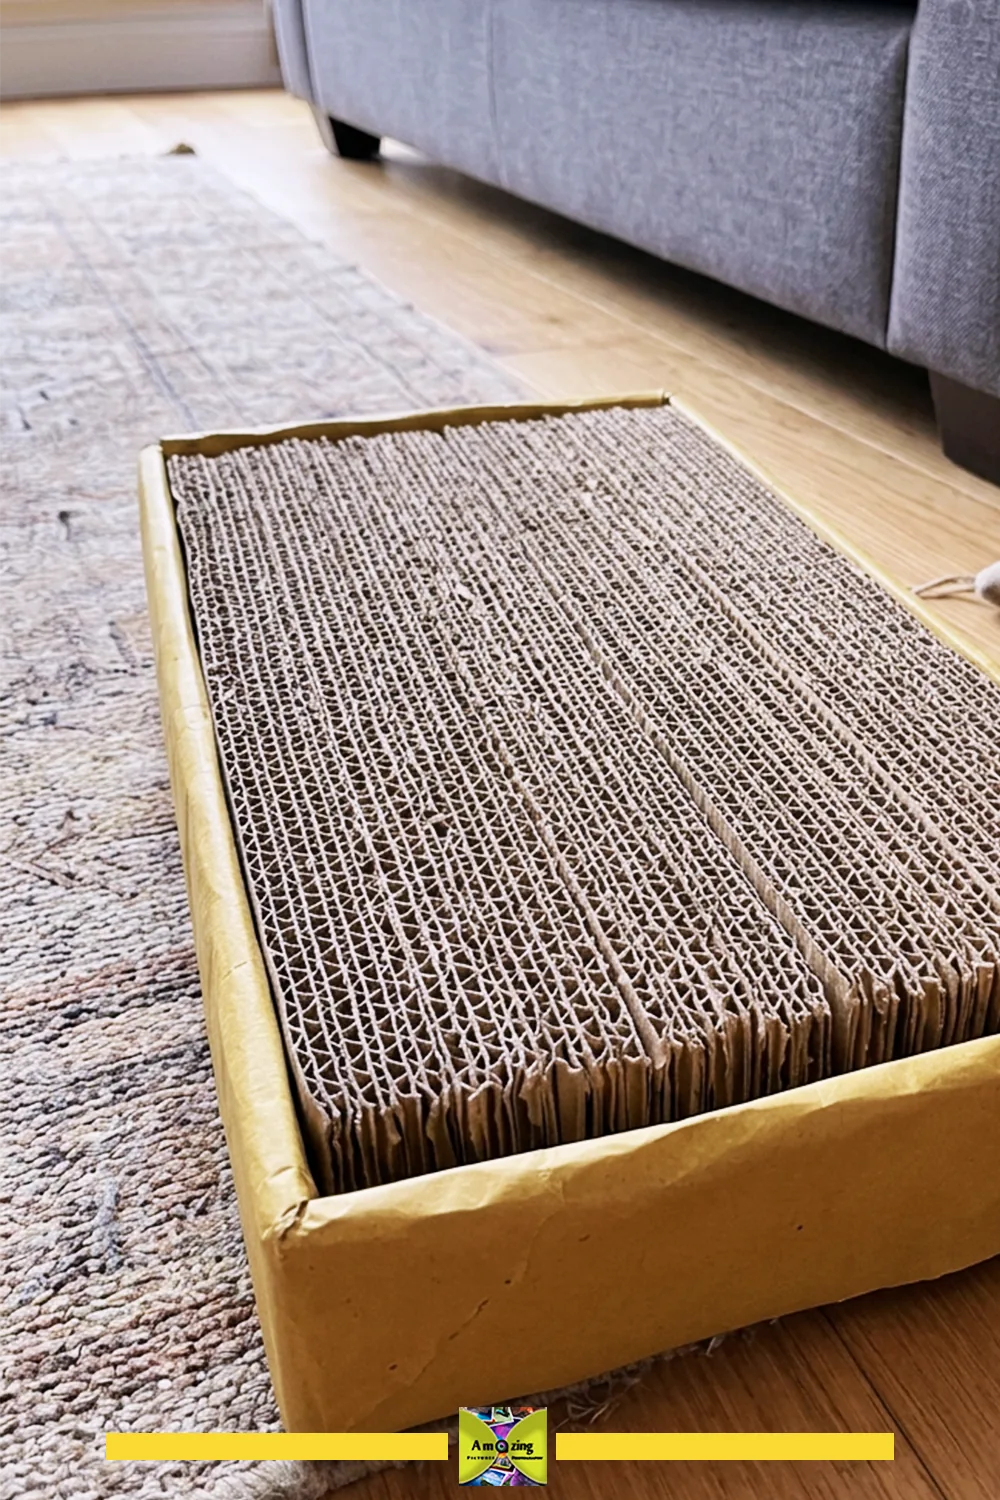
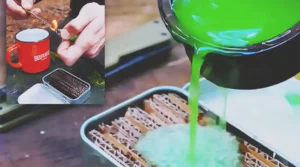
Strips of corrugated cardboard packed tightly on edge make a scratching surface most cats like. Cut the strips to the depth of a shallow box, stand them up so the corrugated edges face up, and pack them in until they hold each other in place. When the top wears out, flip the insert or cut a new one.
You’ll need: shipping boxes, a craft knife, a ruler, a shallow box to hold the strips
Time: About an hour
Skill level: Beginner
Take note: Use plain cardboard with no staples, and avoid glues and inks your cat might chew.
Cardboard won’t last forever, but a fabric-covered box can stay useful for years when it’s kept dry. If you’re new to working with boxes, start with the drawer dividers or the seed packet file. Neither needs more than a ruler and a knife, and you’ll get a feel for how cardboard cuts and folds. Which box is waiting in your hallway right now, and what will you turn it into?
More Cardboard Projects
- Amazing Cardboard DIYs: Expensive-Looking Home Decor
- DIY Jewelry Box Craft That Looks Expensive but Is Easy to Make
- How to Make Easy Fire Starters From Cardboard and Wax
Posted by: Med Houssem · In: Cardboard Crafts