Scrap Wood Projects · Nov 20, 2026 · 16 min read
Small Scrap Wood Projects for Beginners: 18 Simple Ideas for Offcuts
A pile of offcuts in the garage can feel like clutter, but it is really a free supply of materials for small scrap wood projects for beginners. You do not need a workshop, only a few basic tools and some patience with the sandpaper.
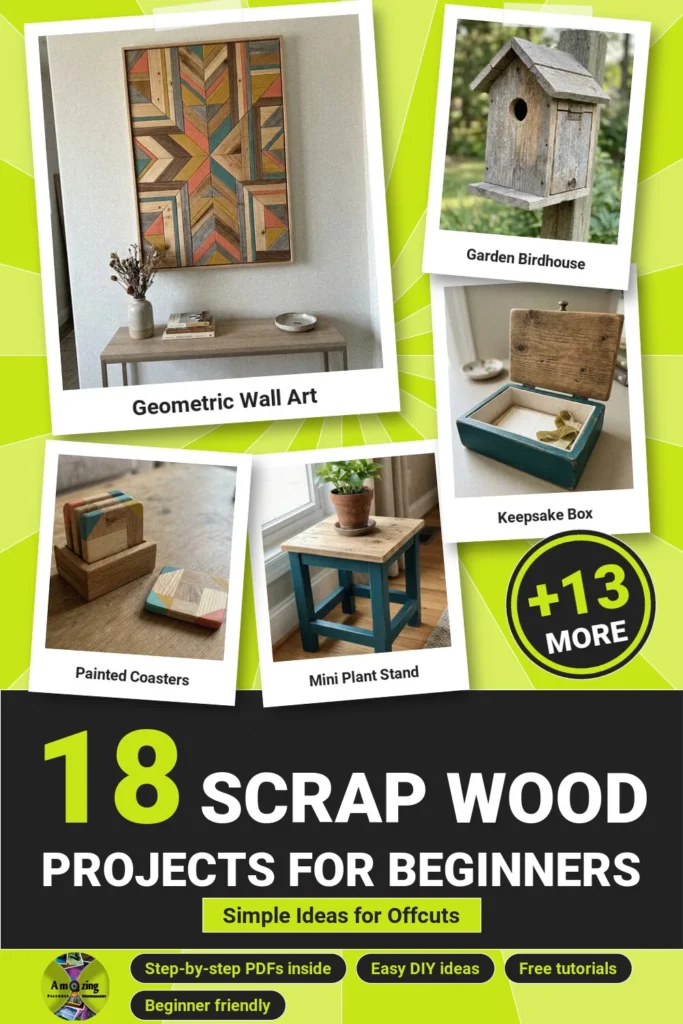
Here are 18 simple ideas, from a phone stand and bookends to a tea box and a birdhouse, ordered from the quickest wins to the slightly more involved builds. Every project comes with a photo of the finished piece, a step-by-step illustration and a printable PDF. Whether you are picking up a saw for the first time or just tidying a stash of leftover boards, there is an easy place to start.
Before You Start
- Check every piece for nails, staples and splinters before you cut or sand.
- Sand all edges smooth, especially on anything you will handle every day.
- Wear safety glasses and a dust mask when cutting or sanding, and paint or seal in a well-ventilated space.
- Start with an Easy project (14 of the 18 are) and move to the four Medium builds once you feel comfortable.
- Anything that hangs on a wall needs wall anchors or screws into studs.
Quick Wins to Start With
These are the fastest projects here. Each one turns a single offcut or a few small pieces into something you will use the same day.
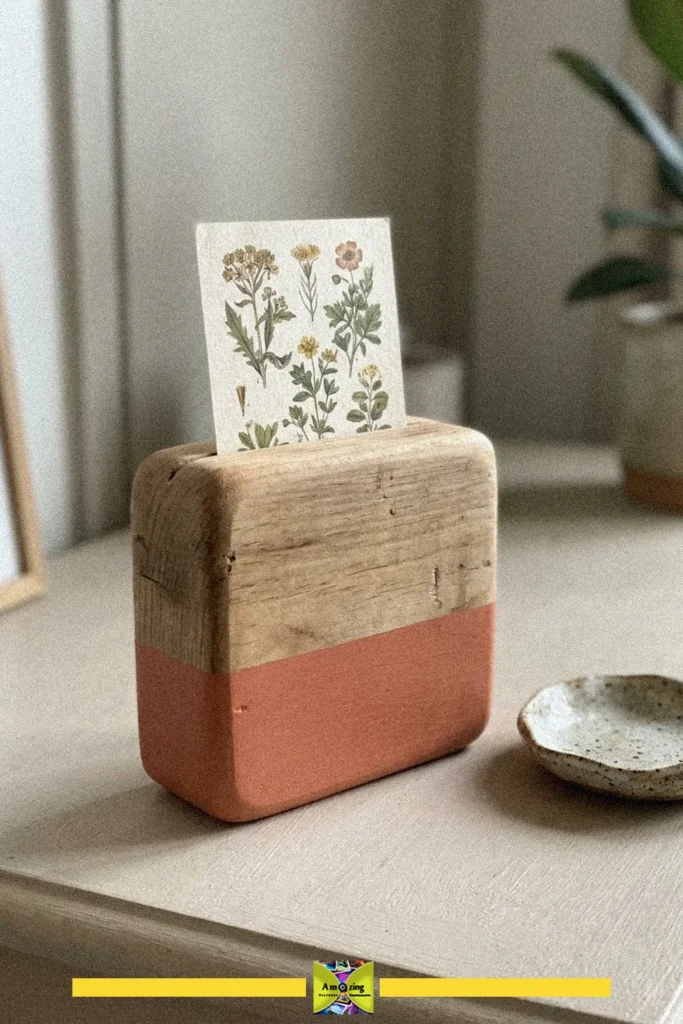
1. Display a Card on a Photo Block
Got an offcut with a flat end? Paint the bottom and it becomes a little stand for a favorite card, print or note. It is about the simplest finish-in-one-sitting project on this list, and it makes a sweet small gift too. Let the paint dry fully before you handle it.
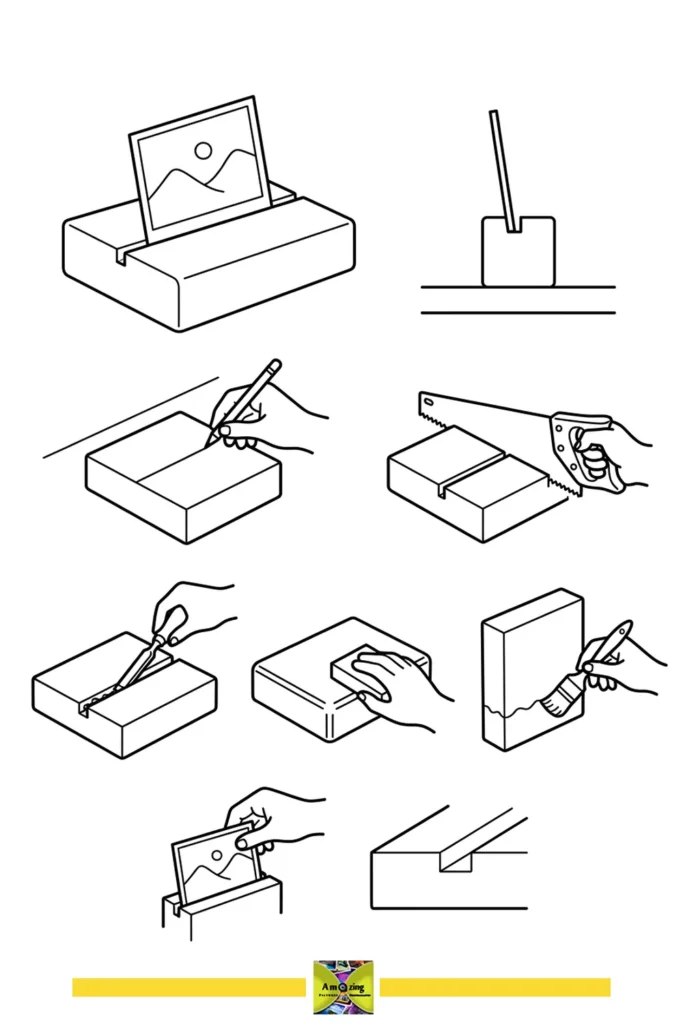
- Time 25 minutes
- Level Easy
- Type Photo & Memo Displays
You will need: scrap wood block, pencil, hand saw, ruler or measuring tape, screwdriver or chisel, sandpaper, paintbrush, paint or wood finish, photo.
2. Prop Up Your Phone With a Wood Block
A chunky block with one slot cut into it holds your phone upright for video calls, recipes or reading. Solid wood stays put where a lightweight plastic stand slides around. Sand every edge smooth so the phone sits without catching, then set the stand on a flat surface.
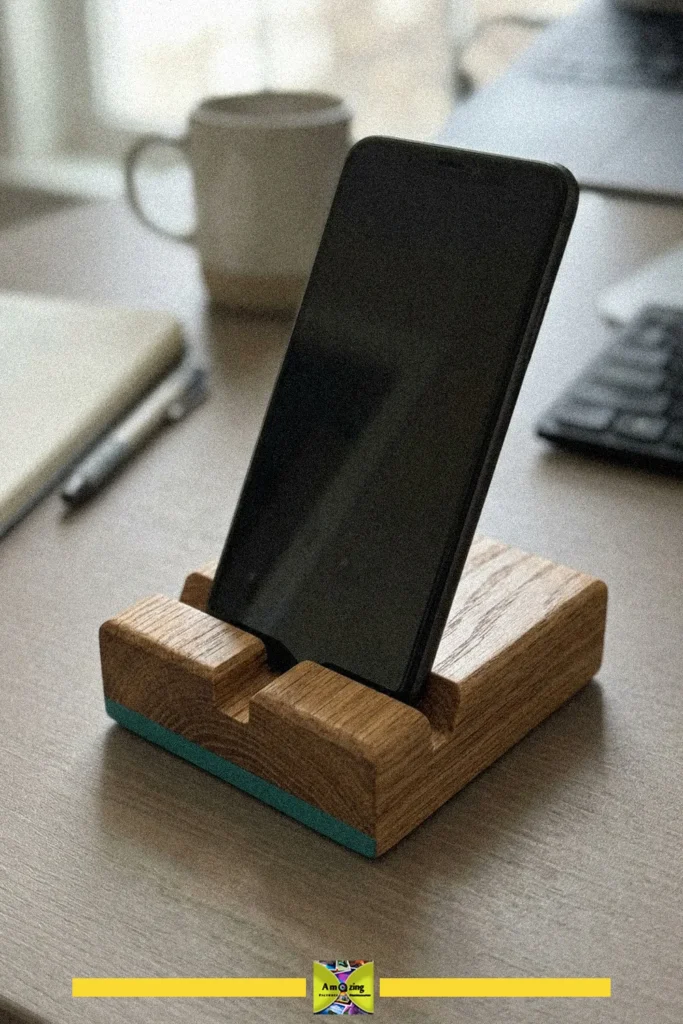
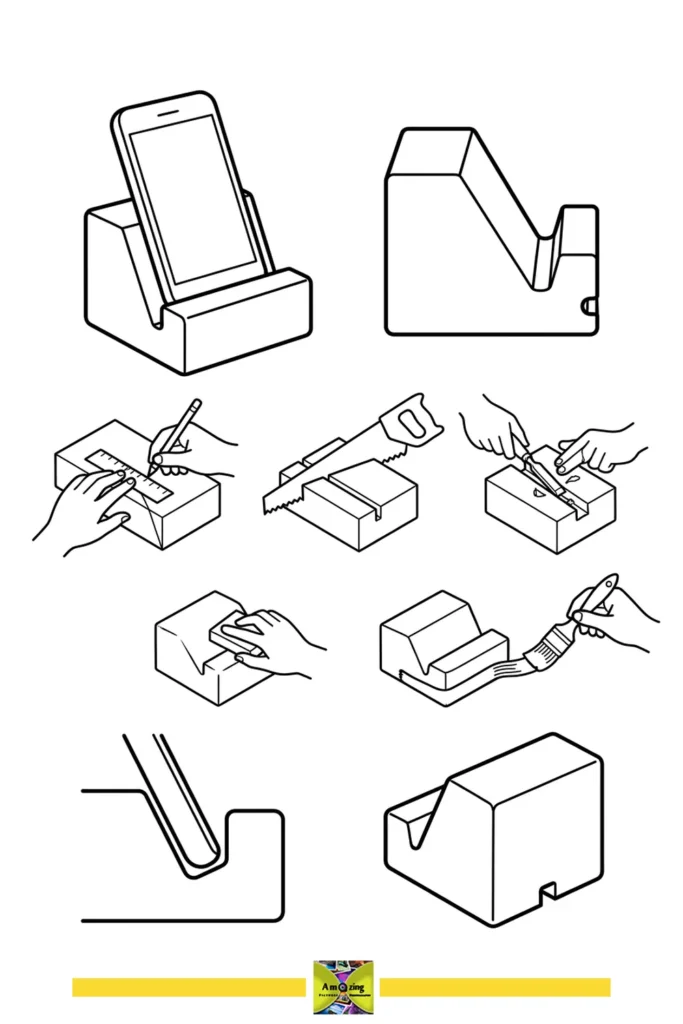
- Time 30 minutes
- Level Easy
- Type Craft Room Organization
You will need: scrap wood block, pencil, ruler, handsaw, sandpaper, paintbrush, paint.
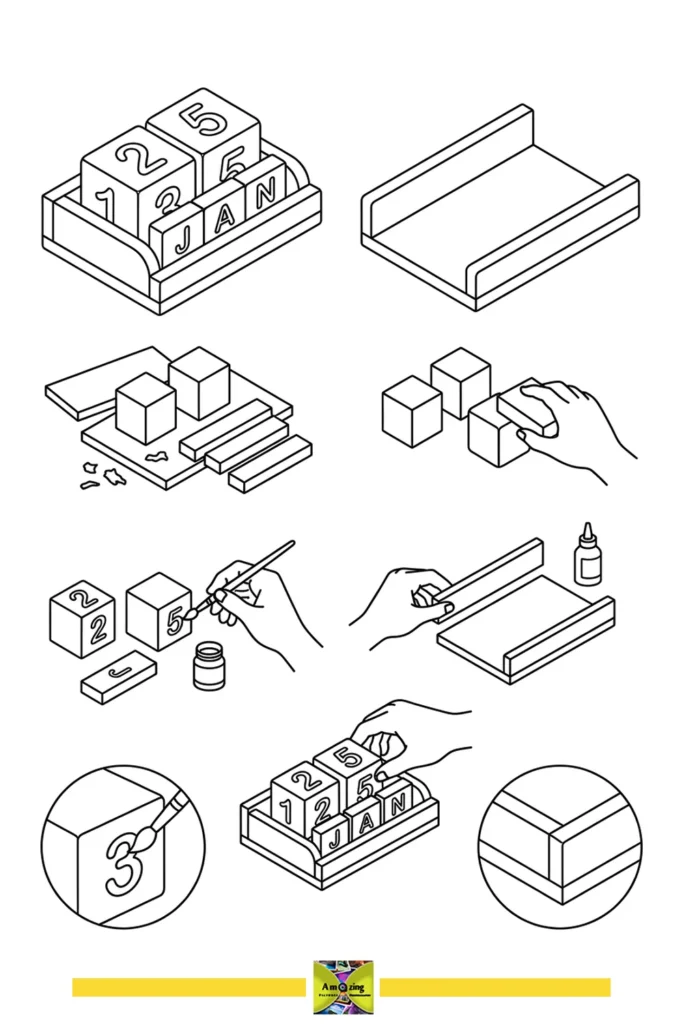
3. Make Desktop Calendar Blocks
A few small wooden blocks and a simple holder show the day and month in your own paint or handwriting. Changing the date each morning becomes a tiny daily ritual. Give each coat of paint time to dry before you handle the blocks, or fingerprints will show.
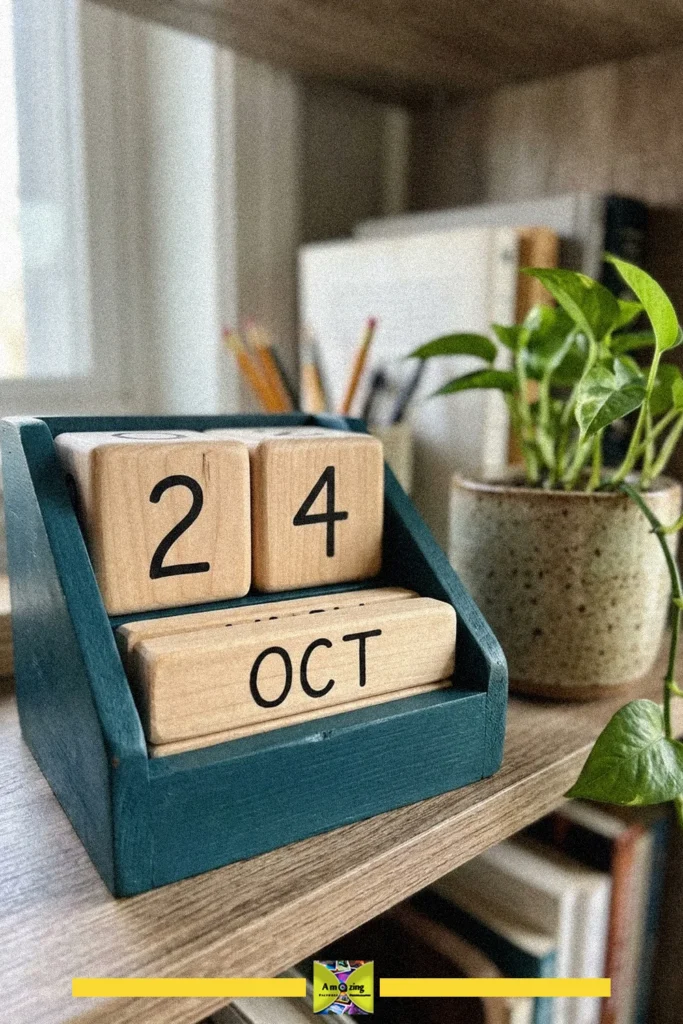
- Time 40 minutes
- Level Easy
- Type Photo & Memo Displays
You will need: wood blocks, wood strips, wood board, sandpaper, glue, paint, paintbrush.
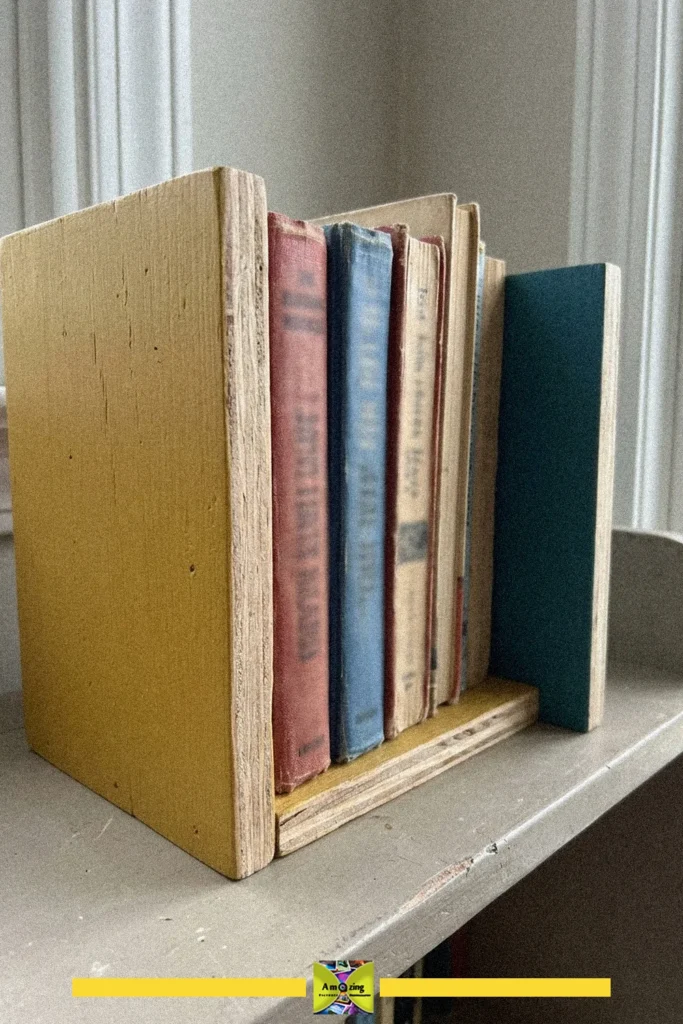
4. Stack Chunky Bookends
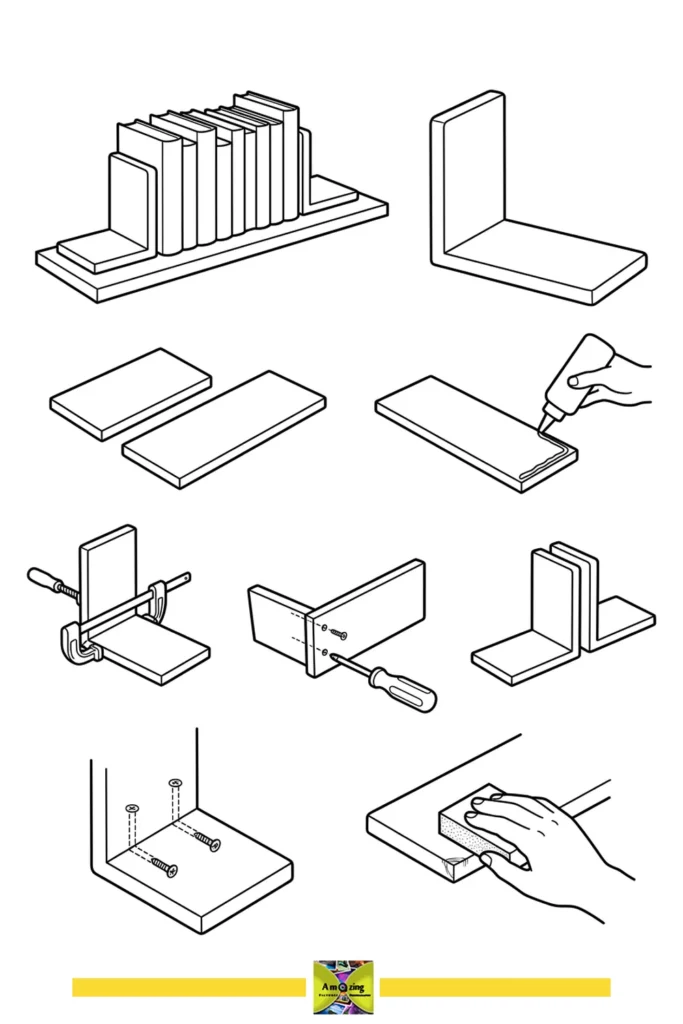
Thick offcuts make bookends that do not tip over. Keep the shape chunky and simple, and the rustic look suits vintage books especially well. Choose pieces heavy enough to hold a row of books upright, and round off the edges so they glide against the covers.
- Time 30 minutes
- Level Easy
- Type Craft Room Organization
You will need: Scrap wood pieces, Wood glue, Clamps, Screws, Screwdriver, Sandpaper.
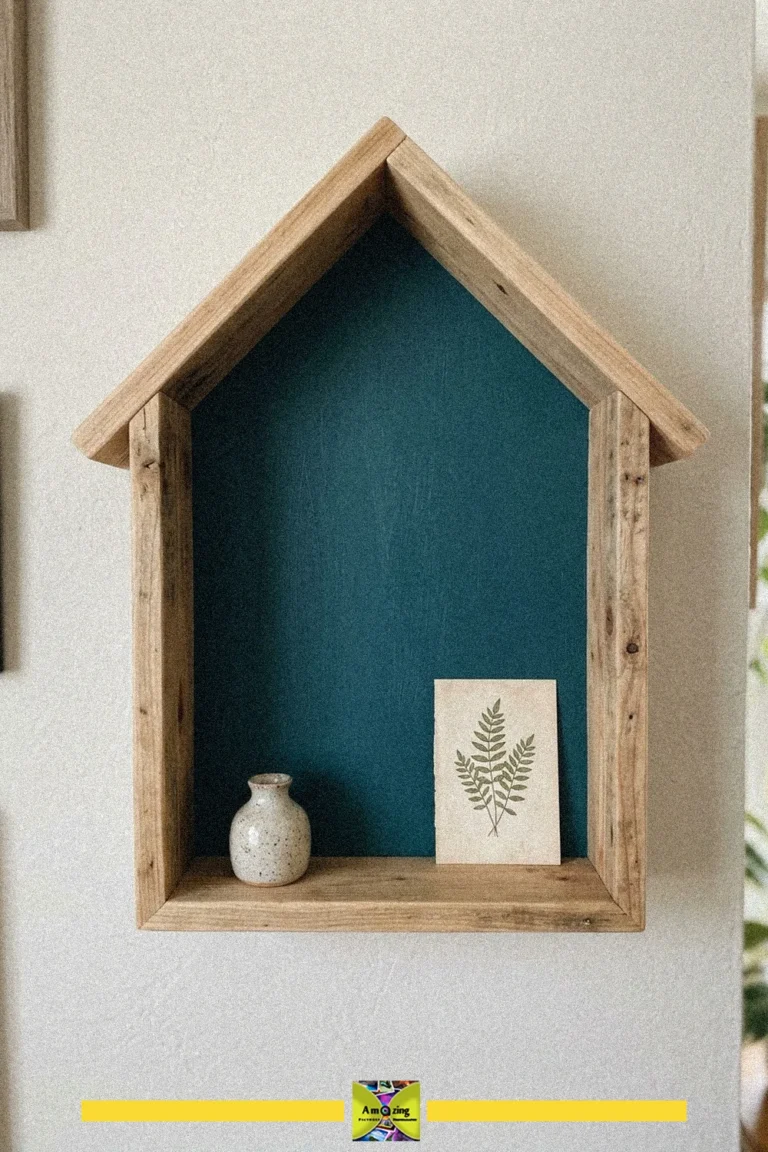
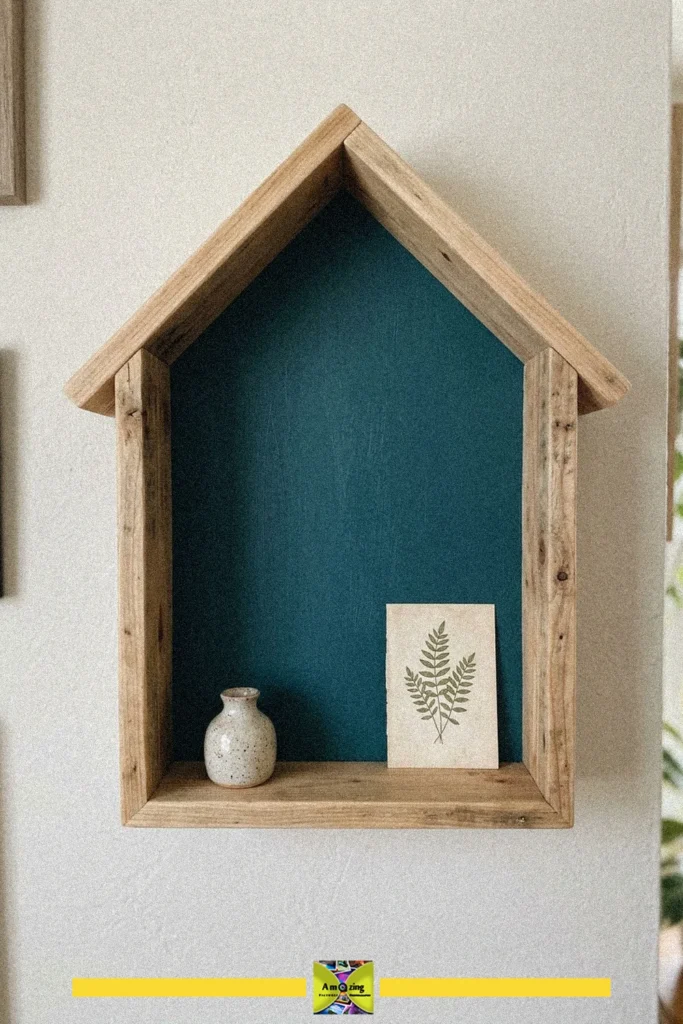
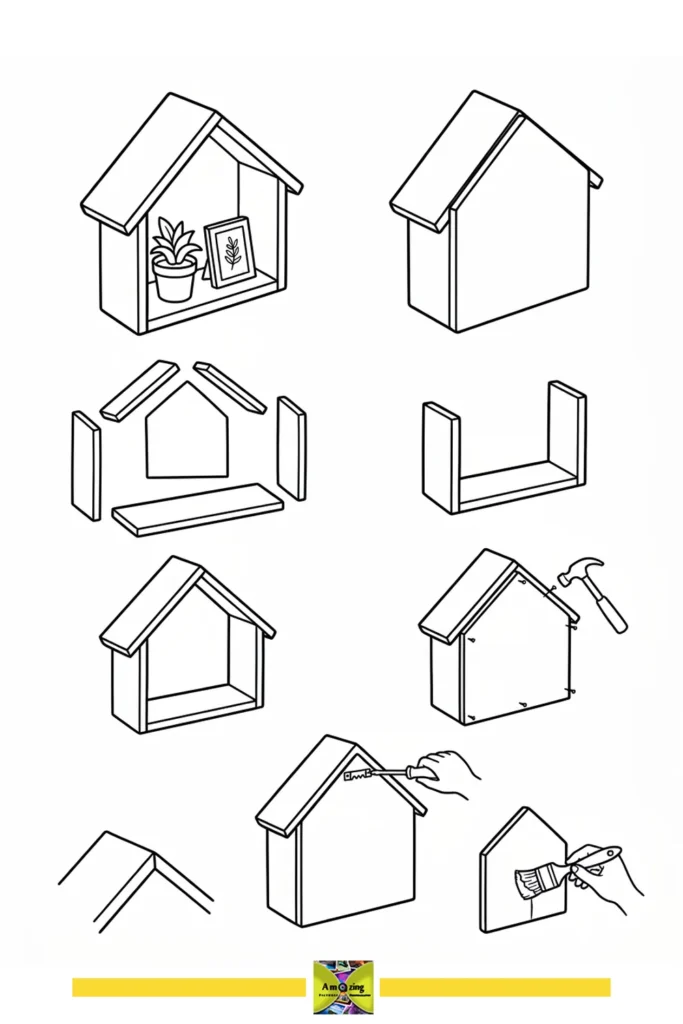
5. Hang a House-Shaped Shelf
A little house shape turns scraps into a shelf for a small vase, a botanical print or other treasures. The teal back panel makes whatever you display stand out. Fix it firmly to the wall and keep to light items so it stays steady for years.
- Time 40 minutes
- Level Easy
- Type Photo & Memo Displays
You will need: scrap wood pieces, wood glue, nails, hammer, paintbrush, paint.
Craft Room and Workshop Helpers
If you make things, these small organizers pay for themselves quickly, and they use up the odd pieces that never fit anything else.
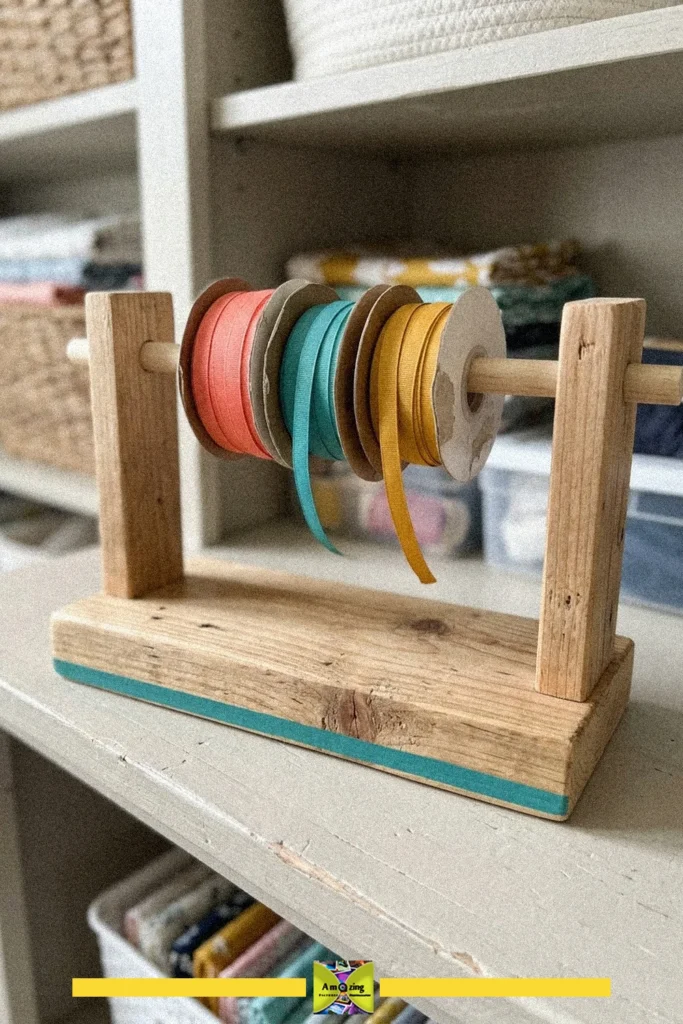
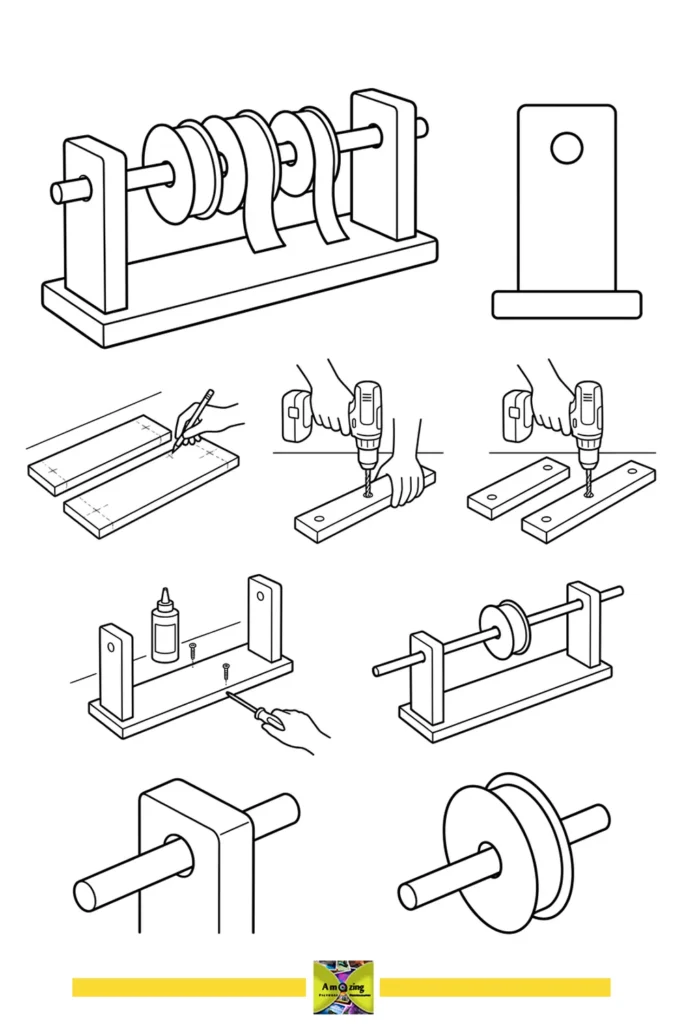
6. Keep Ribbon Spools Tidy
Short wood pieces make a holder that keeps ribbon spools visible and tangle-free, so you can spot the color you want at a glance. It is compact enough for a shelf or worktable. Sand the rough edges and park it on a steady surface so it does not tip when you pull off a length.
- Time 30 minutes
- Level Easy
- Type Craft Room Organization
You will need: scrap wood pieces, dowel rod, wood glue, screws, drill, screwdriver, pencil.
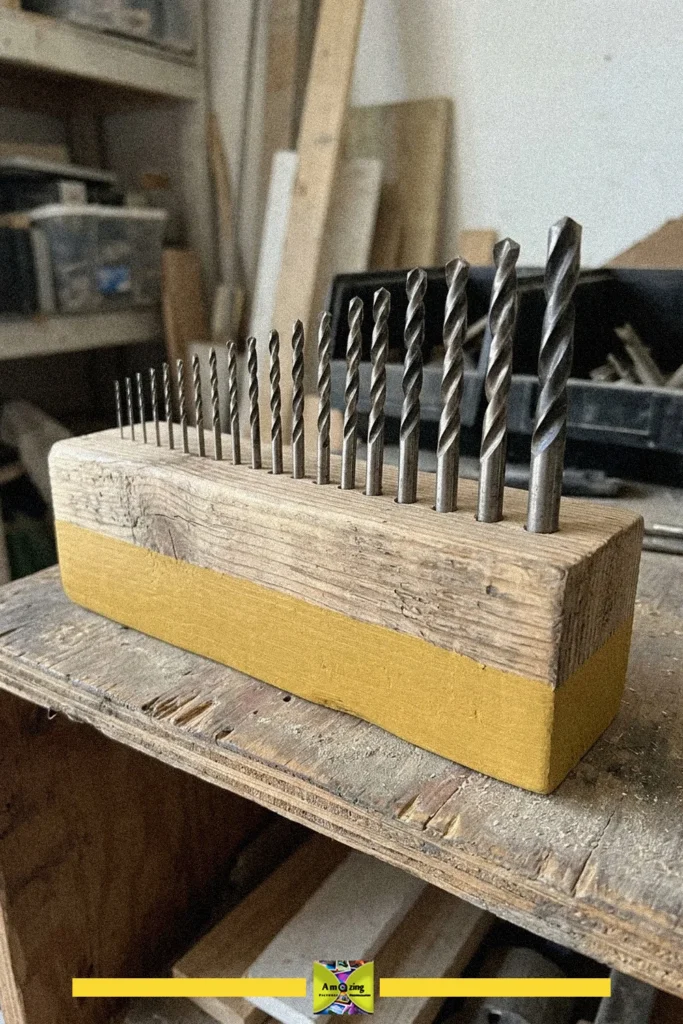
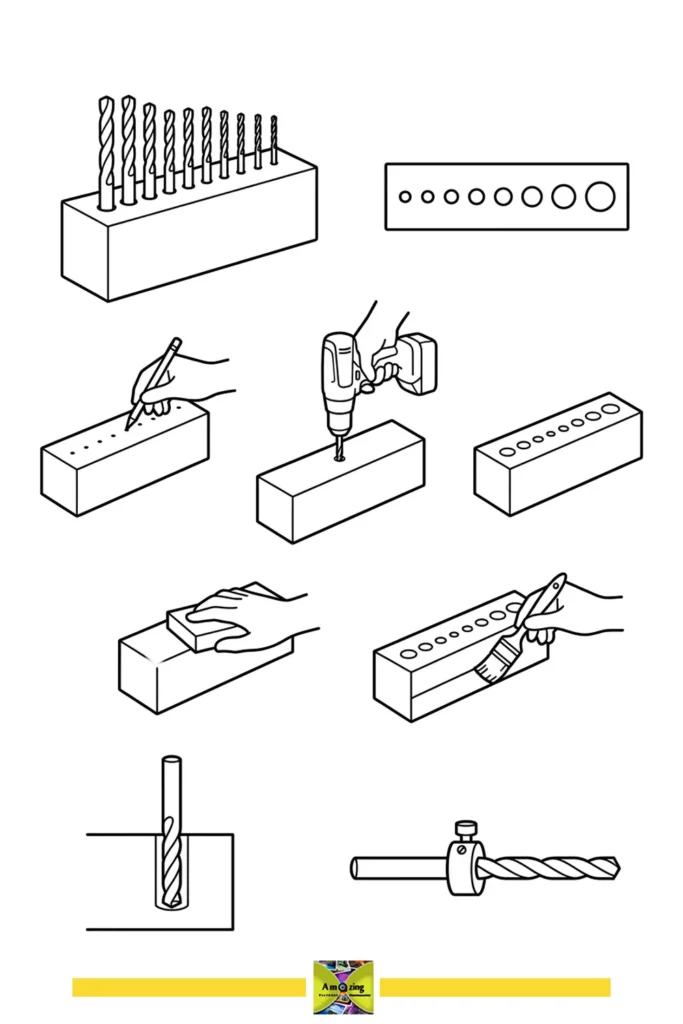
7. Sort Drill Bits by Size
A single block of scrap wood can hold your drill bits upright and in size order instead of rattling around in a drawer. It is small enough for a crowded workbench or shelf. Make sure the block sits flat, so it stays put when you pull a bit out.
- Time 25 minutes
- Level Easy
- Type Craft Room Organization
You will need: scrap wood block, drill bits, pencil, drill, sandpaper, paintbrush, wood finish or paint, ruler or measuring tape, stop collar (optional).
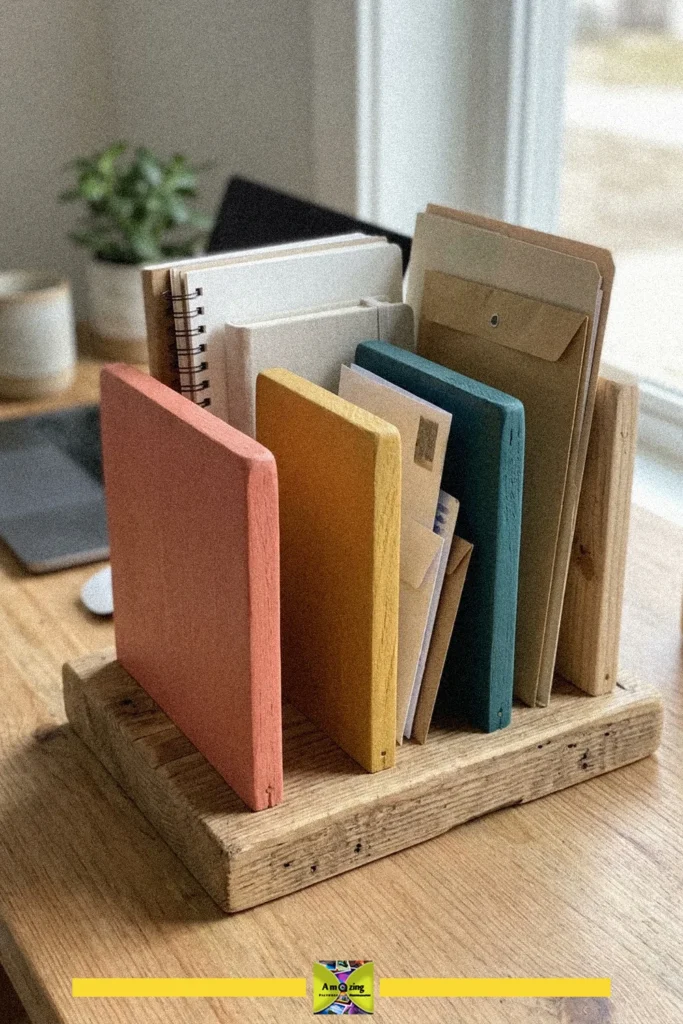
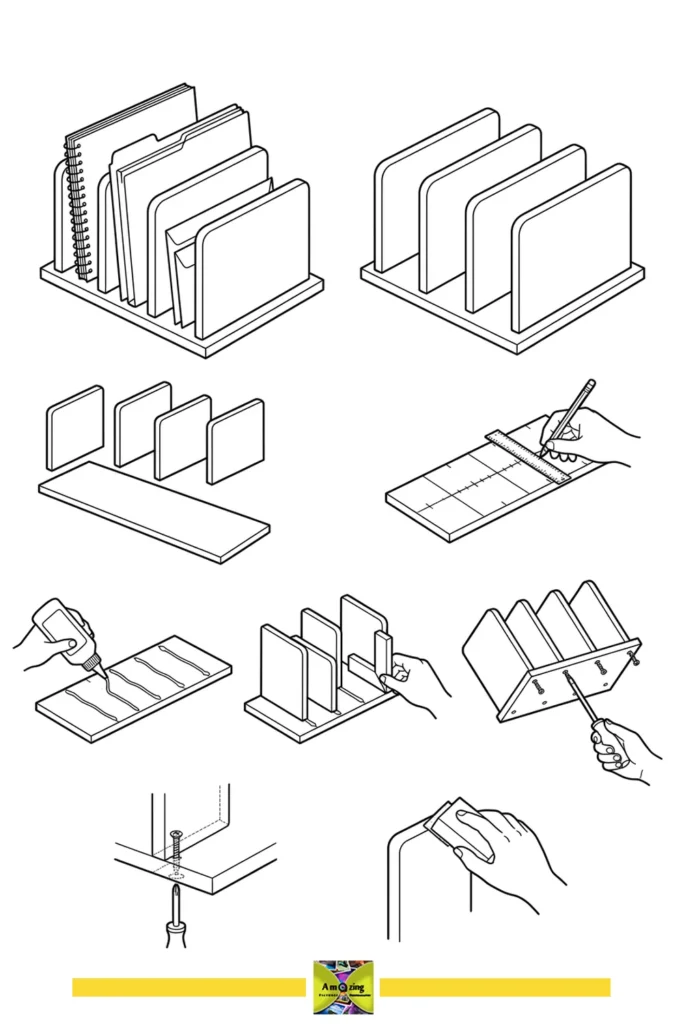
8. Build a Desktop File Sorter
Slots for folders, notebooks and mail keep a desk clear. This version mixes painted sections with natural wood tones, so it looks like decor as well as storage. It is built from reclaimed wood and sits solidly on a desk or table. Sand the edges well before you start filing.
- Time 30 minutes
- Level Easy
- Type Craft Room Organization
You will need: scrap wood pieces, wood glue, ruler, pencil, screws, screwdriver, sandpaper.
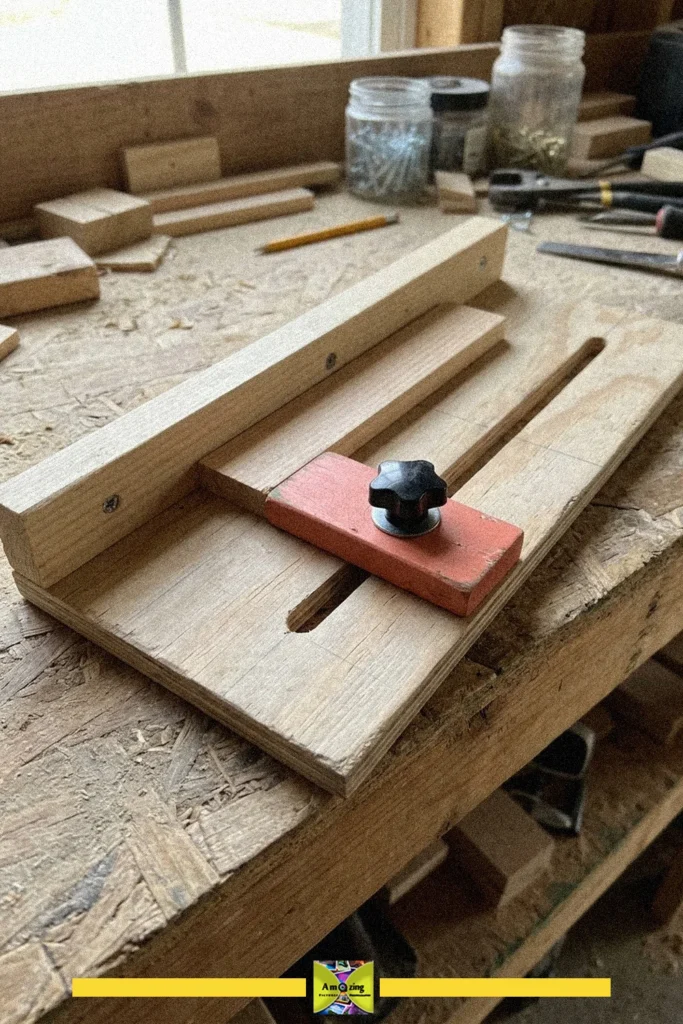
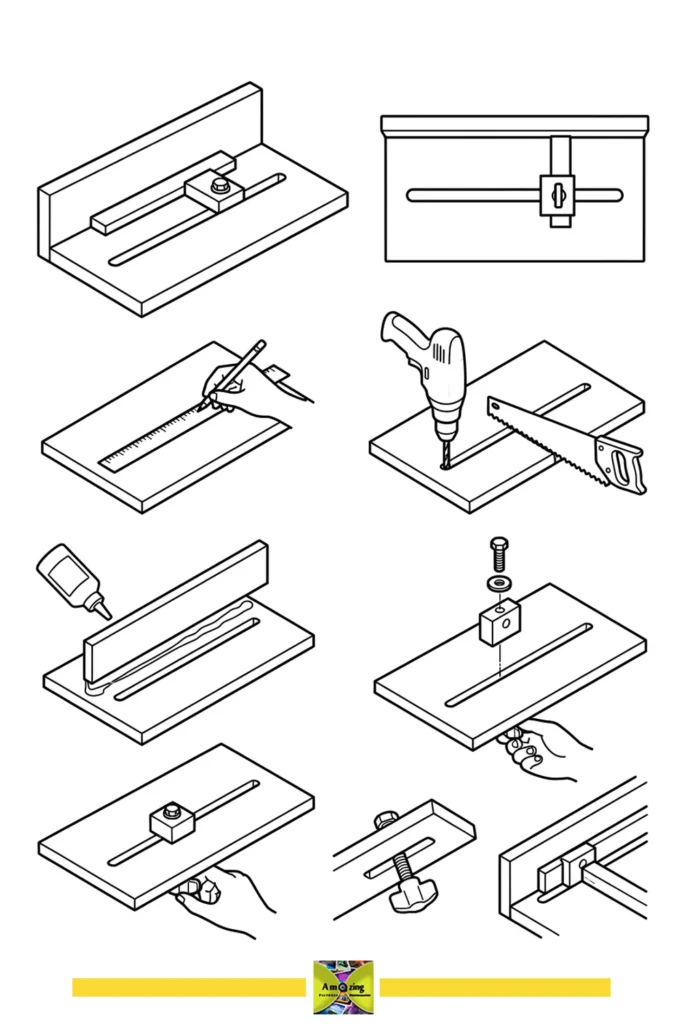
9. Craft a Measuring Stop for Repeat Cuts
A block slides along a groove and locks in place with a knob, so every piece you cut comes out the same length. It earns its keep once you start making multiples, like the coasters or bookends in this list. Tighten the knob before each cut, and take care with sharp tools.
- Time 30 minutes
- Level Easy
- Type Craft Room Organization
You will need: Wood board, Wood strip, Ruler, Pencil, Saw, Drill, Wood glue, Bolt, Washer, Nut, Wooden block.
Entryway and Kitchen Projects
Useful pieces for the places you pass every day. The last two here are Medium builds, so save them for when you have a couple of easier projects behind you.
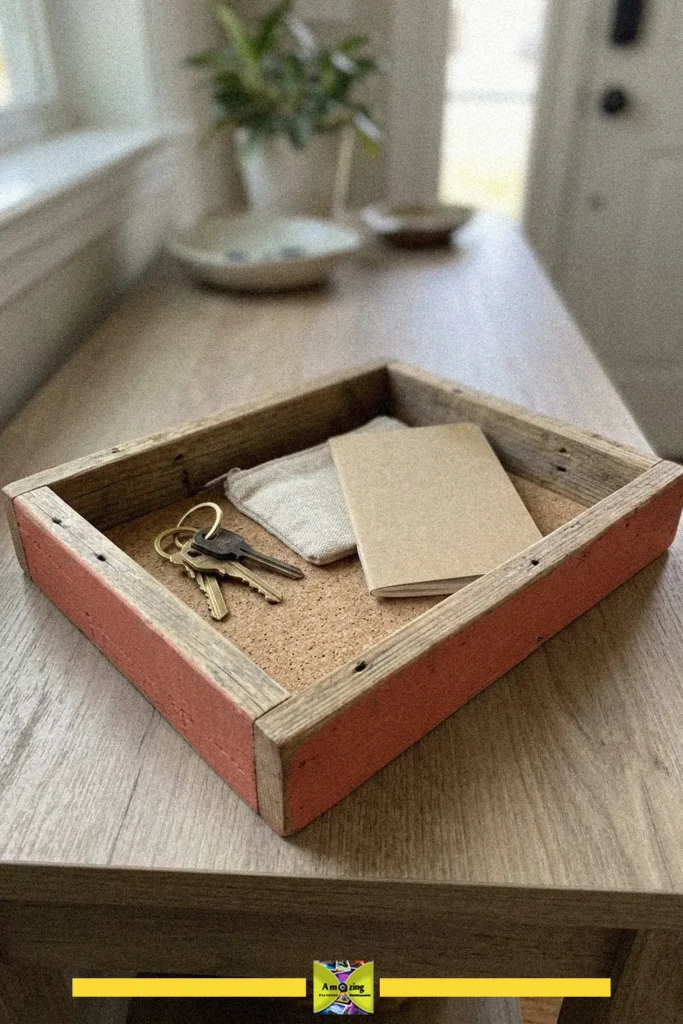
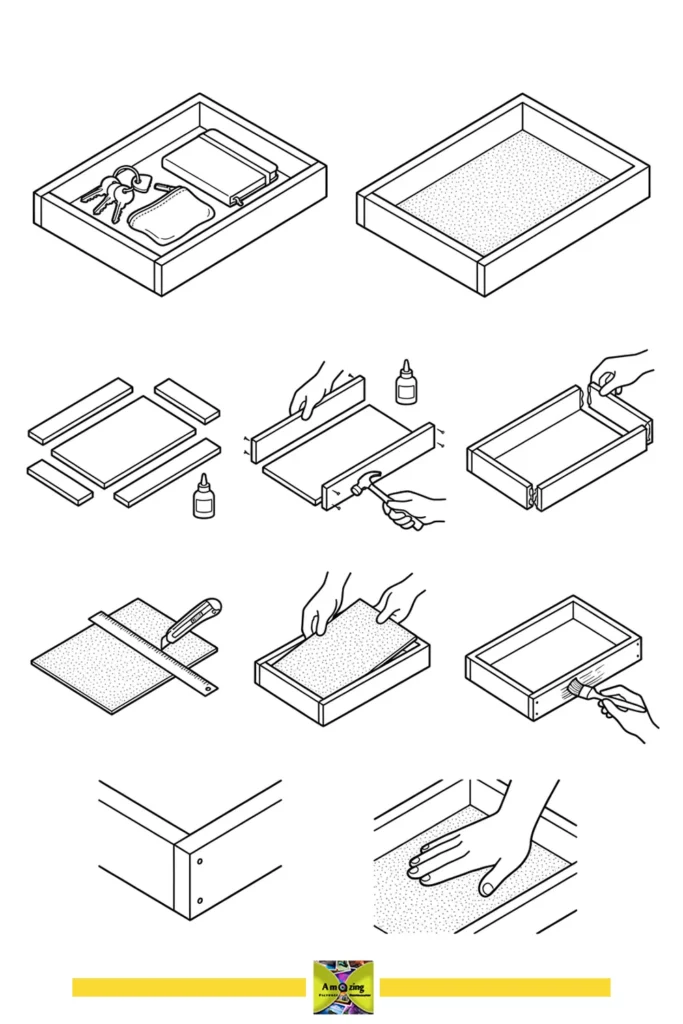
10. Corral Keys in a Catchall Tray
A wood frame with a cork base gives your keys, wallet and small essentials a landing spot by the door. The cork keeps things from sliding and from scratching. Check the frame for splinters or sharp edges before anything goes inside.
- Time 35 minutes
- Level Easy
- Type Entryway & Home Storage
You will need: wooden boards, glue, hammer, nails, ruler, utility knife, sandpaper, paintbrush.
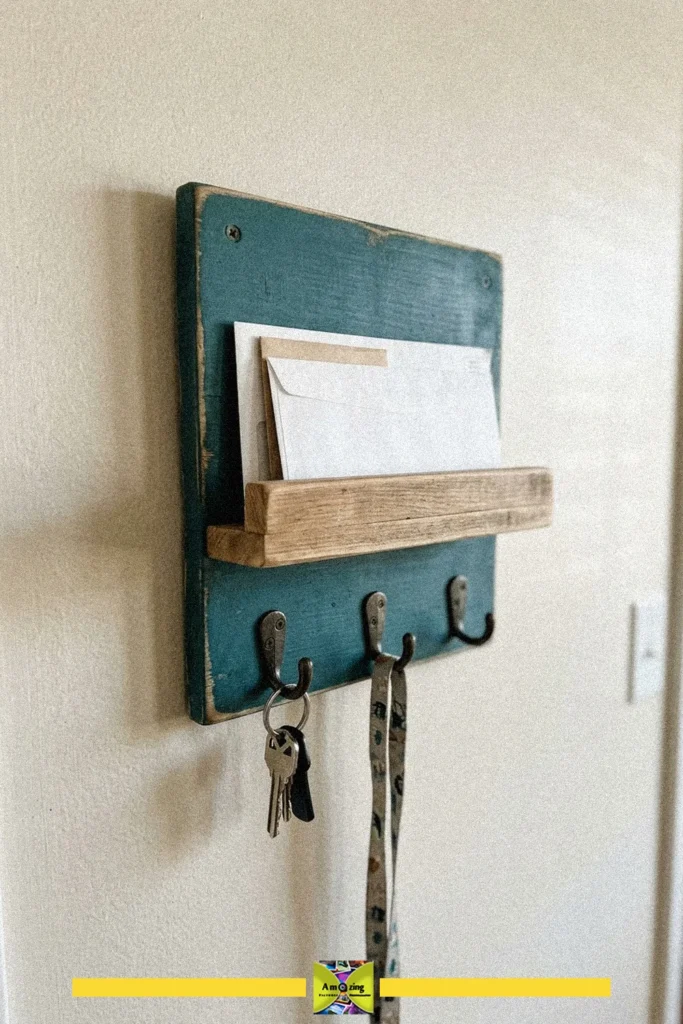
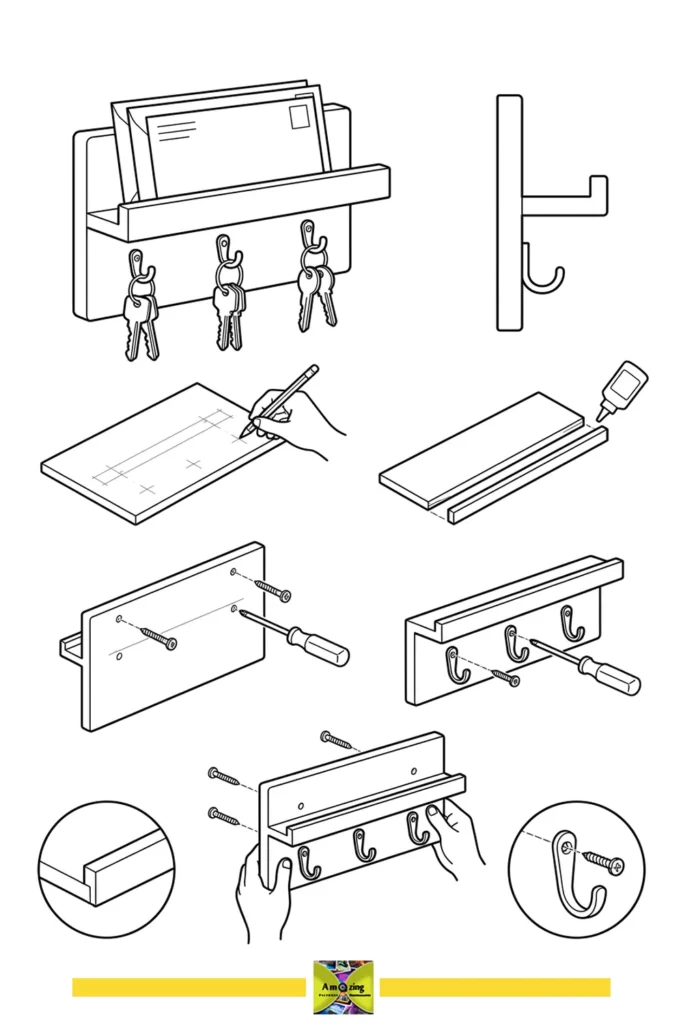
11. Hang a Key Rack With a Mail Shelf
Hooks for keys and a small shelf for post live on one board, which makes leaving the house less of a hunt. The compact size works in a narrow hall. Mount it with wall anchors or screws into studs so it can carry keys and mail safely.
- Time 30 minutes
- Level Easy
- Type Entryway & Home Storage
You will need: Wooden board, Wooden strip, Wood glue, Screws, Screwdriver, Hooks, Pencil.
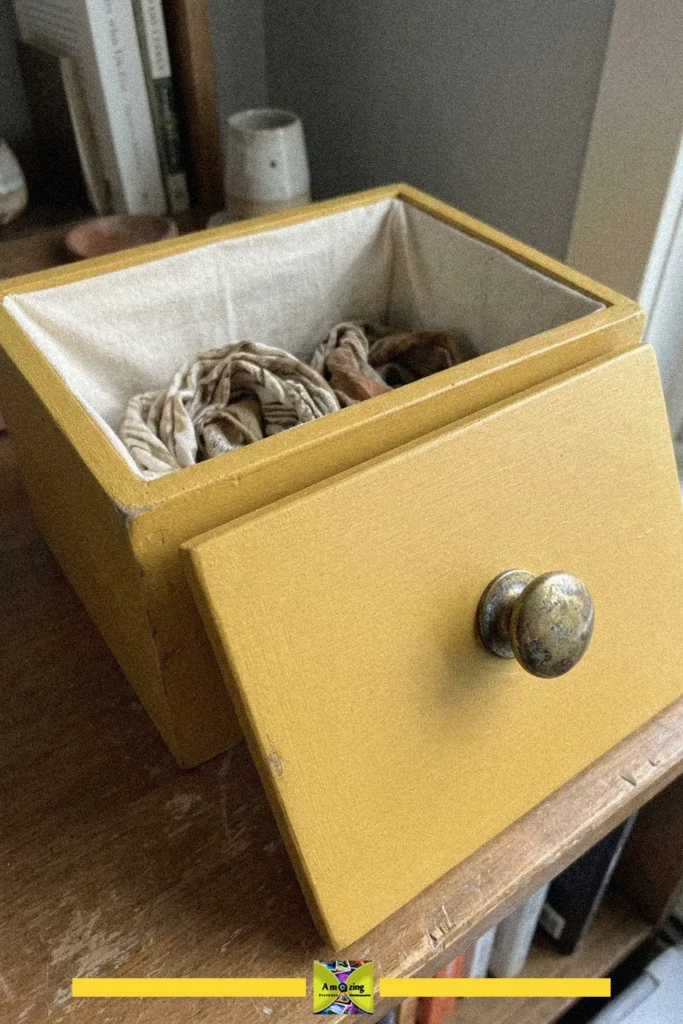
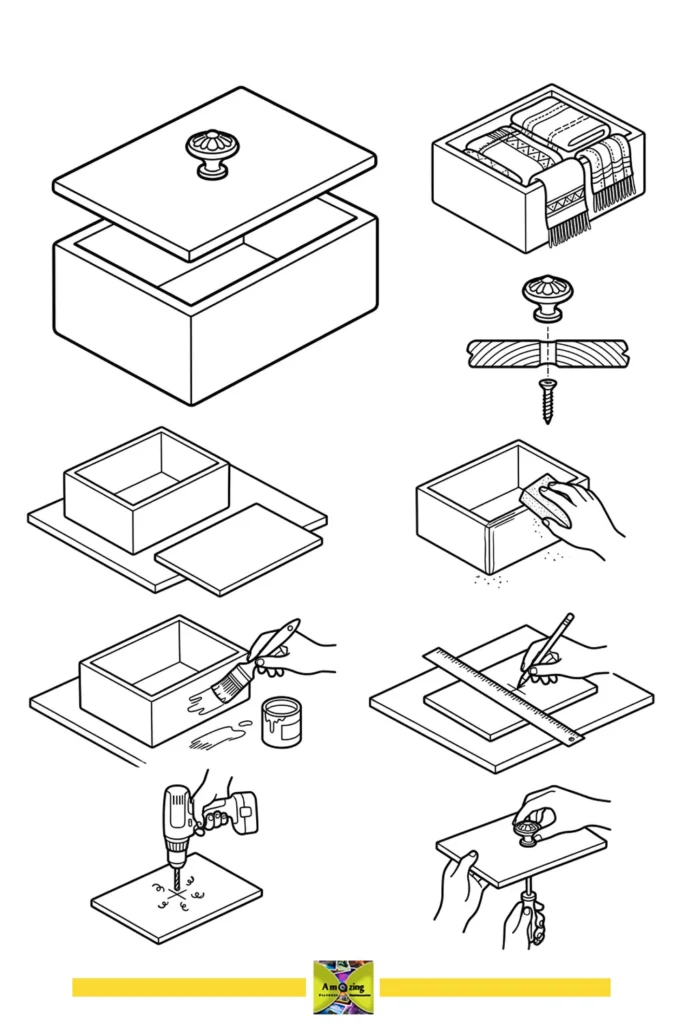
12. Add a Vintage-Style Lid Handle
A wooden storage box is much easier to open with a knob on the lid. This one is painted yellow and lined with fabric, which makes a cheerful home for scarves and small accessories. Fix the handle firmly and choose one that is comfortable to grip, especially if the box will hold heavier things.
- Time 25 minutes
- Level Easy
- Type Craft Room Organization
You will need: wooden box with lid, handle or knob, screw, drill, paint or finish, paintbrush, sandpaper, ruler, pencil.
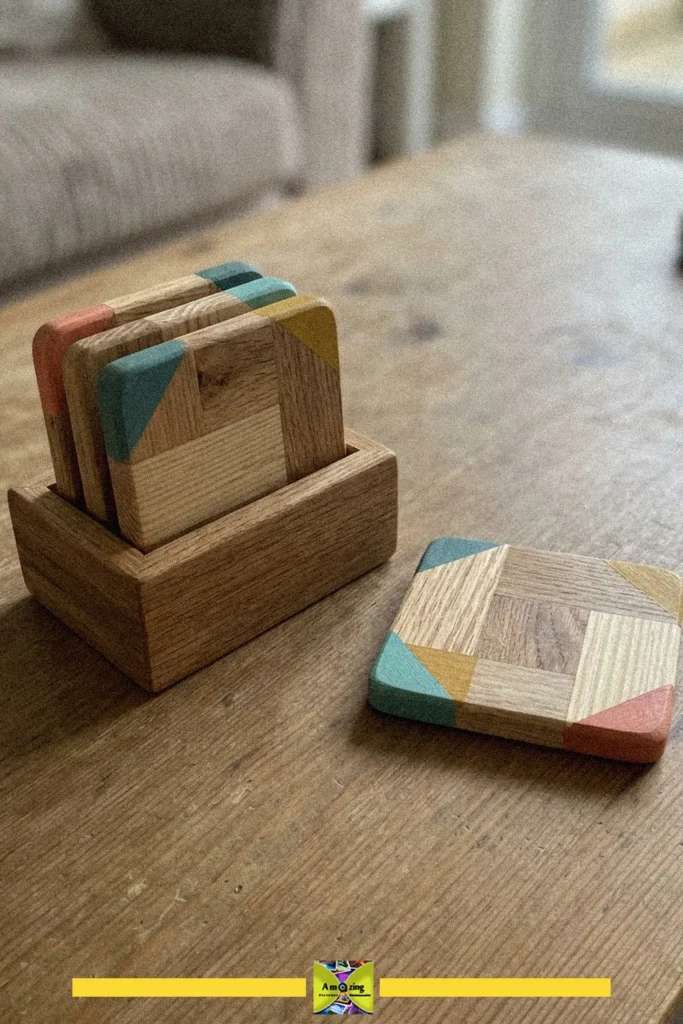
13. Paint Coasters With a Matching Holder
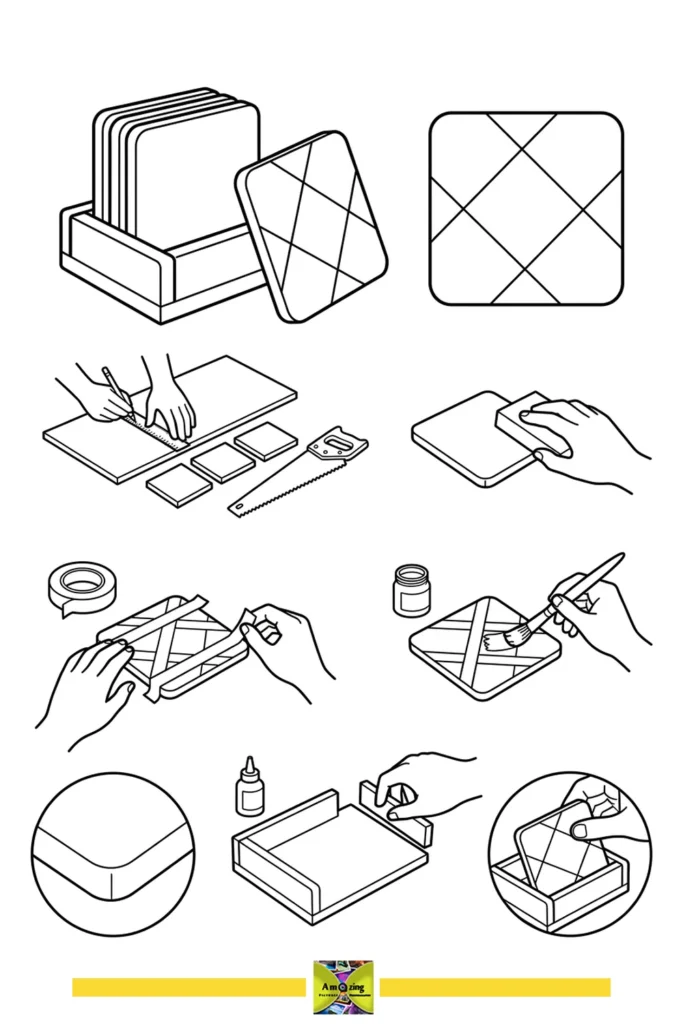
Square offcuts with painted corners make bright geometric coasters, and a little wooden holder keeps the set together. It is one of the more involved projects here, mostly because there are several pieces to make. Seal the wood with a food-safe finish, and wipe the coasters clean rather than soaking them.
- Time 40 minutes
- Level Medium
- Type Entryway & Home Storage
You will need: scrap wood pieces, saw, sandpaper, masking tape, paint or wood stain, paintbrush, glue.
14. Sort Tea Bags in a Wooden Tea Box
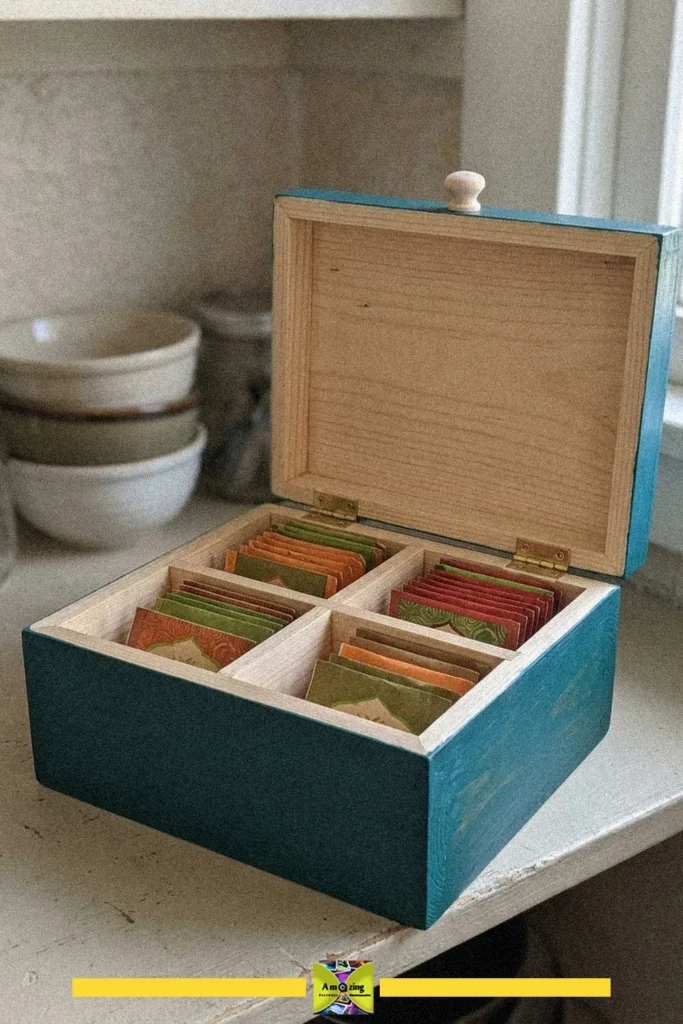
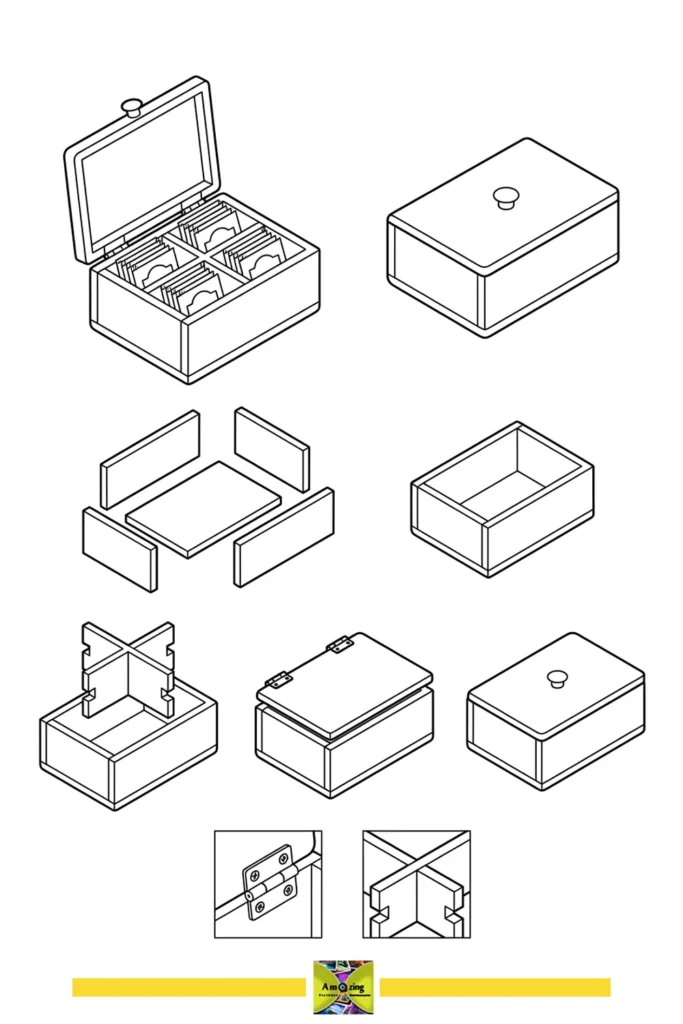
Divided compartments keep different teas separate, and the natural finish gives a rustic, cozy feel on a kitchen counter. It is built from scrap boards and sized to fit on a shelf or worktop. Keep the box dry and clean so no moisture reaches the tea.
- Time 1 hour
- Level Medium
- Type Entryway & Home Storage
You will need: wooden boards, small knob, hinges, screws, wood glue.
Gifts and Garden Projects
Finish with projects that look good given away or set outside. A handmade box, a bold wall piece, a plant stand and a birdhouse all use up your best offcuts.
15. Build a Keepsake Box With a Ribbon
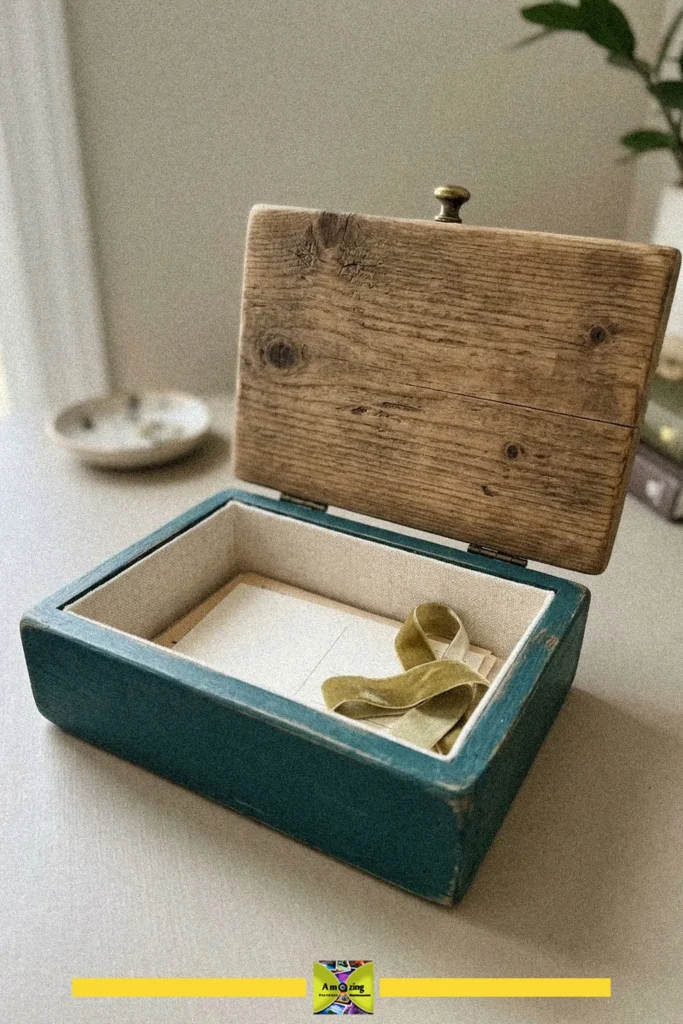
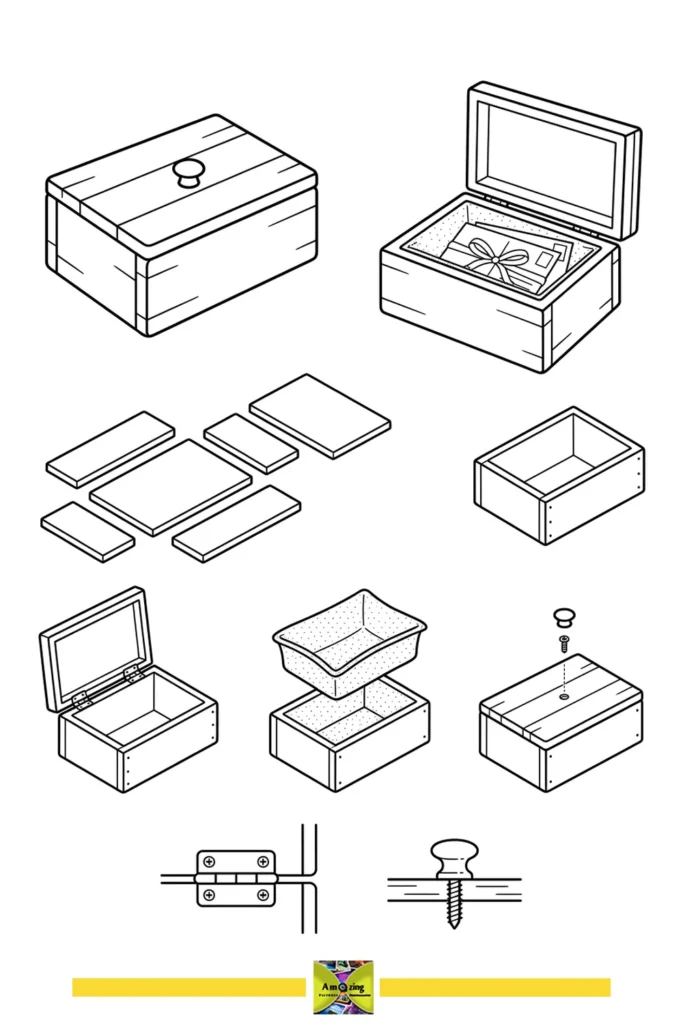
Teal sides and a rustic wood lid make a small box for letters, charms and other treasures. A soft lining and a ribbon inside give it a finished feel, which makes it a lovely gift. Check your boards for splinters, sand the edges, and pick a soft lining to protect what goes inside.
- Time 40 minutes
- Level Medium
- Type Entryway & Home Storage
You will need: scrap wood boards, wood glue, small screws, hinges, screwdriver, knob or handle, sandpaper.
16. Piece Together Geometric Wall Art
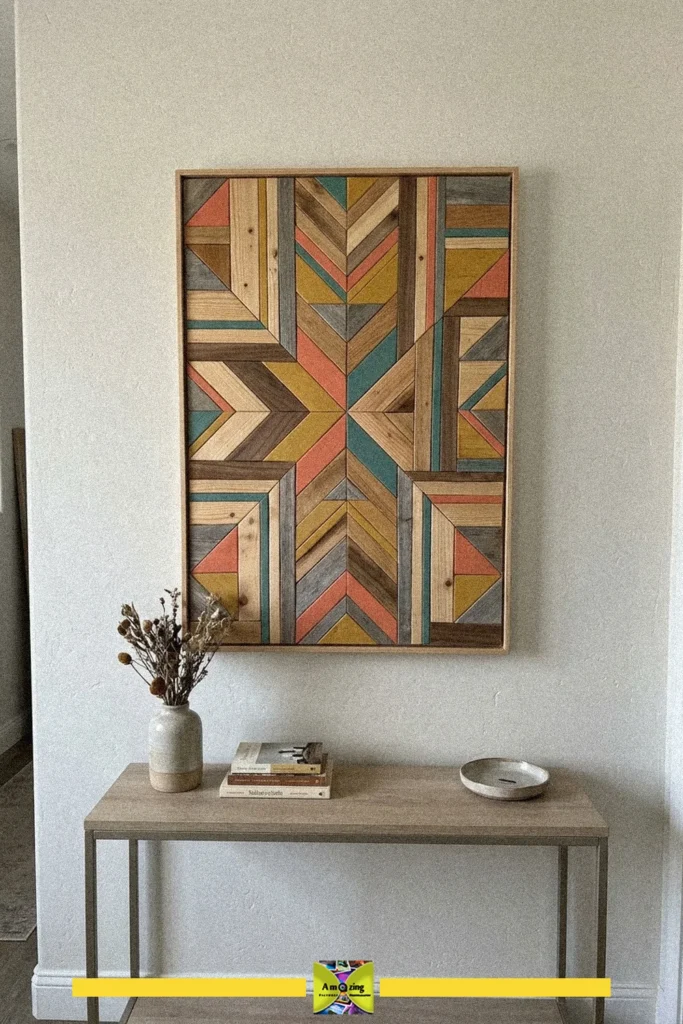
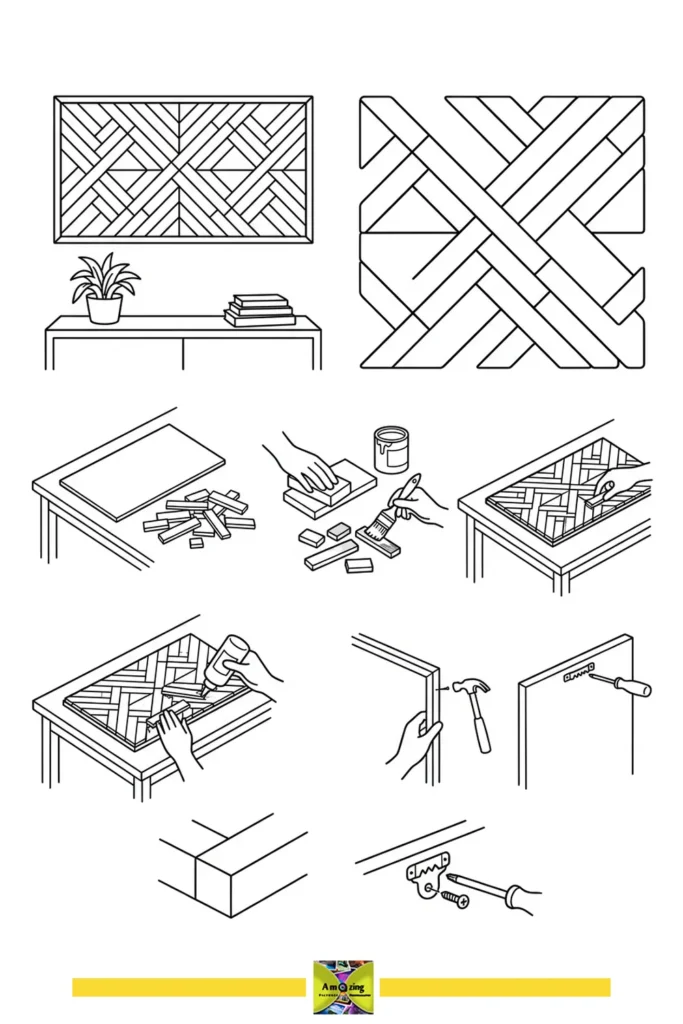
Bright painted wood pieces fit together into a bold geometric panel that fills a blank wall. It is a smart way to use offcuts of different sizes. Sand the edges until smooth before you paint, then hang it above a console or shelf.
- Time 45 minutes
- Level Medium
- Type Art & Painting
You will need: scrap wood pieces, glue, paint or wood finish, paintbrush, wooden board or backing, frame, hammer, sawtooth hanger, screws, screwdriver.
17. Lift a Plant on a Mini Stand
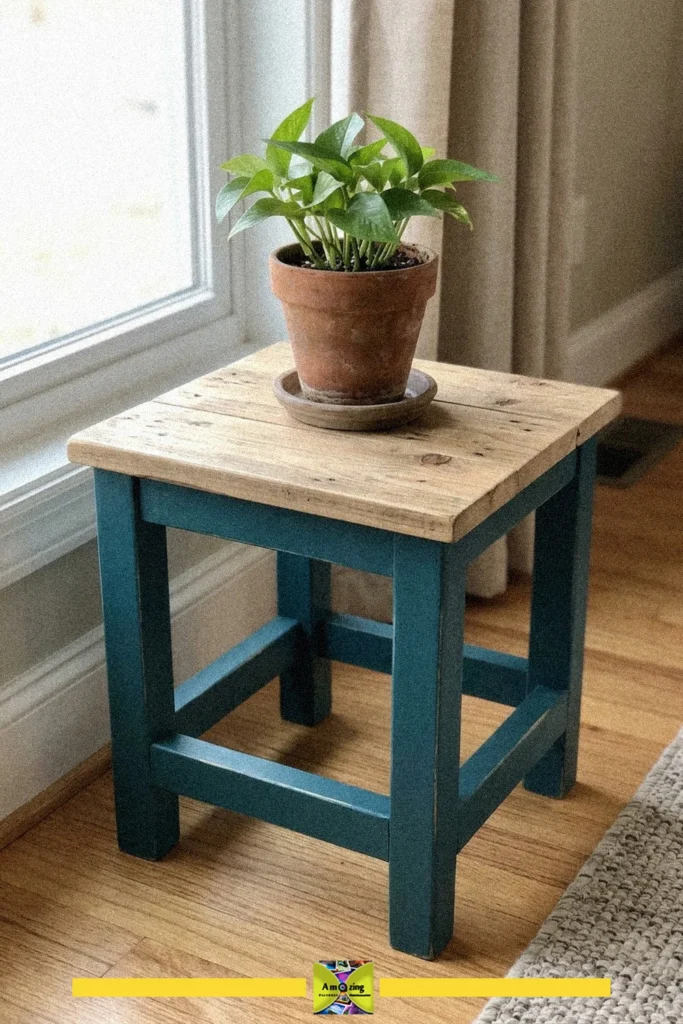
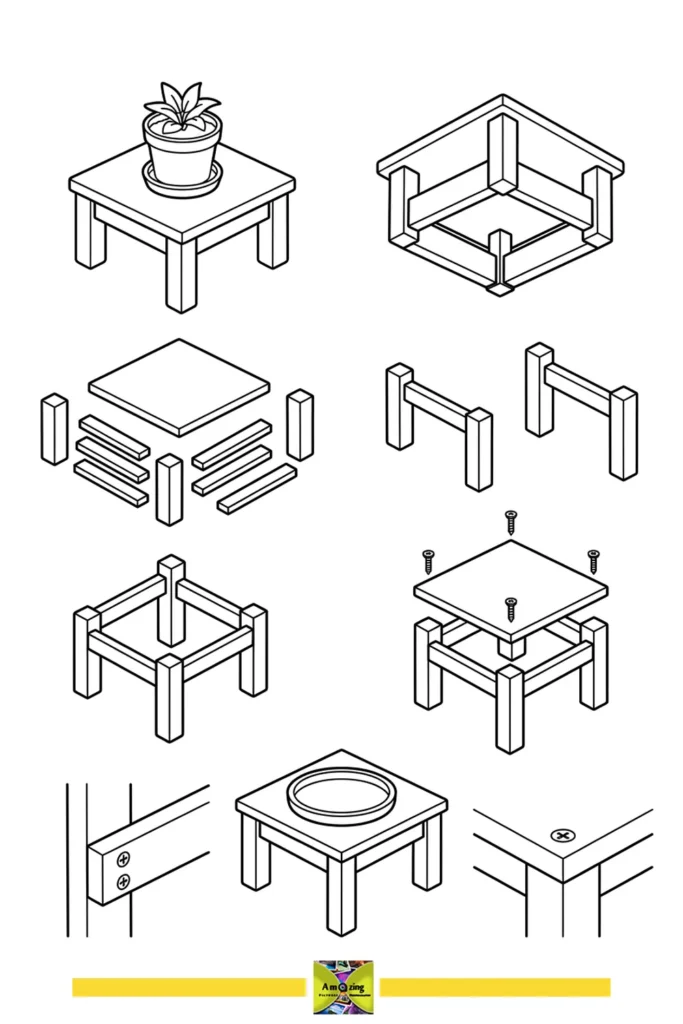
A natural wood top on short painted legs raises a plant off the floor or windowsill. The blue legs give it a modern farmhouse look. Put a saucer under the pot, because water will mark the wood, and sand the edges before you paint.
- Time 30 minutes
- Level Easy
- Type Garden & Plants
You will need: Four wooden legs, Four short wood pieces for supports, Four long wood pieces for frame, Square wooden top, Wood screws, Screwdriver or drill.
18. Finish With a Garden Birdhouse
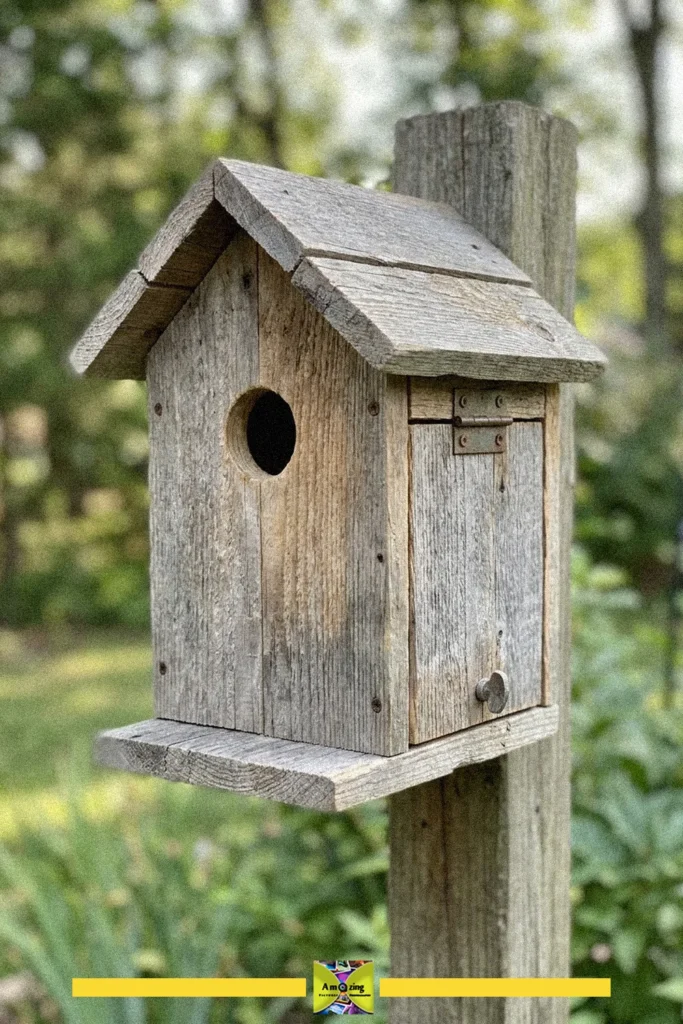
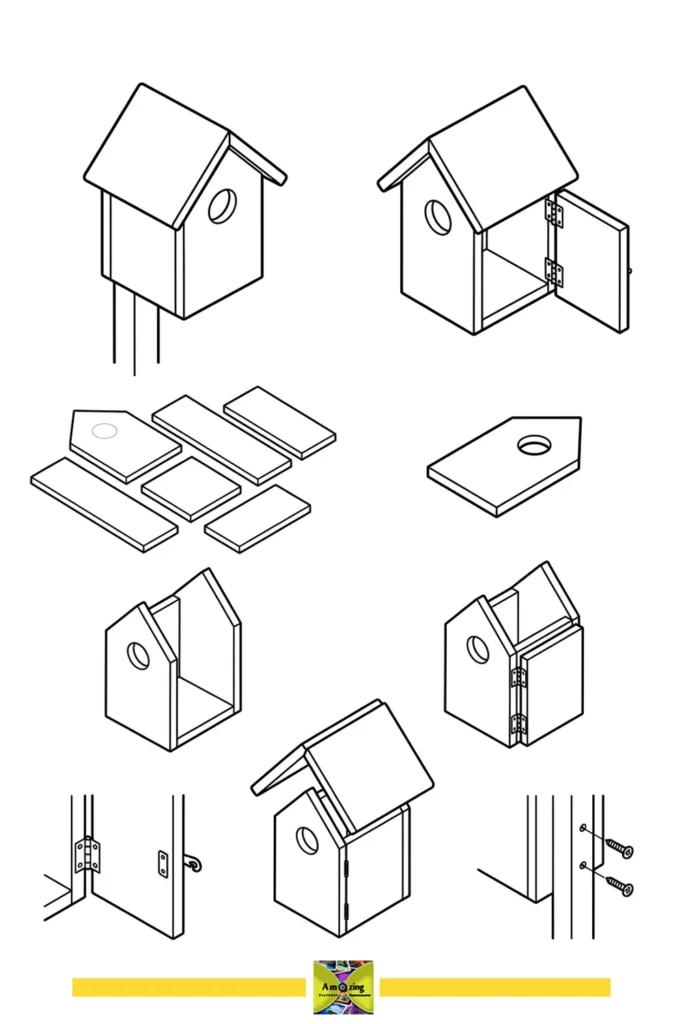
Weathered offcuts give a birdhouse a natural look that blends into a garden, and it makes a good handmade gift for anyone who feeds the birds. Before you assemble anything, check the scrap for nails and staples.
- Time 30 minutes
- Level Easy
- Type Garden & Plants
You will need: Scrap wood pieces, Small hinges, Screws, Screwdriver or drill.
Scrap wood is forgiving when you start small. If you are not sure where to begin, make the photo block or the phone stand, since both are quick, then move on to the tea box or keepsake box when you want a bigger challenge. Which of these 18 will you make first? Tell us in the comments, and share your own favorite use for offcuts.
More Wood and Upcycling Ideas
- 6 Easy Scrap Wood DIY Projects for a Tidier Home
- Creative Pallet Shelf Ideas for Every Room
- DIY Mini Raised Bed From a Single Pallet
- What to Do With Leftover Buttons: 18 Ideas for a Jar of Vintage Buttons