Old leather belt crafts turn something you already own into something you’ll actually use… a drawer pull with real character, a curtain tieback that keeps its buckle, a wall organizer that holds the mail, a set of straps that keeps folded blankets tidy. The catch is that “leather belt” is a broad label. Two belts can look alike on the front and behave completely differently the moment you cut into them: one is full-grain hide that will last for years, the other is bonded or coated material that cracks and peels within a season.
That’s why this guide starts with assessment instead of instructions. Before you cut, you’ll learn how to decide whether a belt should be repaired, donated, resold, or dismantled; how to identify its material without a destructive burn test; how to clean and inspect it; and how to choose a fastener that can actually hold the load. Then you’ll find 15 projects with enough detail to recreate each one — plus the techniques that separate a polished, intentional piece from a scrap glued to a board.
Not every belt behaves like full-grain leather, and no single attachment method is best for every job. Where a technique depends on your specific belt, tools, or measurements, this article says so and marks exactly where your own test results belong.
If the idea of sorting and preparing a reclaimed material before you build appeals to you, another material-specific reuse collection on this site applies the same assess-first approach to plastic bottle caps.
What Can You Make From Old Leather Belts?
Here is a quick orientation. This article covers fifteen projects organized into four groups:
- Home Hardware and Organization — drawer and cabinet pulls, curtain tiebacks, a wall-mounted mail organizer, and a storage-box wrap with a lid pull
- Decorative Projects — a framed geometric wall panel, a belt-wrapped wreath, and a display-only tray inlay
- Storage and Carrying Accessories — blanket bundle straps, an exercise-mat carrier, a tool-roll closure, and a reusable gift-box band
- Small Projects From Offcuts — a journal closure, a concealed-information luggage tag, cable wraps, and a cuff bracelet
Plus a full belt-selection and preparation guide, a material-basics section, an attachment comparison table, aesthetic guidance, troubleshooting, and a dedicated safety section.
Feel free to jump to the group that interests you most. Every project includes a materials list, a tools list, numbered instructions, customization ideas, a practical tip, a likely mistake, and a photo opportunity.
Before You Cut: How to Choose, Clean, and Prepare an Old Belt
Repair, donate, resell, or repurpose?
The first decision isn’t “what should I make” — it’s “should I cut this at all.” A belt that is merely out of style, too long, or slightly worn is often more useful as a belt than as raw material. If the strap is sound and the buckle works, consider keeping it, having it repaired or shortened, reselling it, or donating it to an organization that accepts clothing and accessories. A serviceable belt is usually worth more to someone as a belt than as a craft supply.
Cut for crafting when the belt has a problem that makes it unusable as-is: deep cracks at the fold, a buckle area that has torn through, a stain that won’t come out, or a length so wrong it can’t be adjusted. If the belt is contaminated — mildew, chemicals, or an odor you can’t identify — handle it separately rather than bringing it into your craft space. Local reuse, donation, textile-collection, leather-recovery, and disposal options vary widely, so check what your area accepts before assuming a dirty or damaged belt can simply go in a donation bin.
Read the label first
If the belt has a brand stamp, a sewn-in tag, or an embossed mark, read it before anything else. Labels can name the material (“genuine leather,” “bonded leather,” “PU,” “man-made material”) and sometimes the country or care instructions. In the U.S., footwear and some other goods must be labeled by material composition under Federal Trade Commission rules, but belts are not always as clearly marked, and secondhand belts often have no label at all.
A label is a strong clue, not a guarantee. “Genuine leather” is a real material but a lower grade of it, and “man-made material” or “PU” means no animal hide at all. Use the label as your starting point, then confirm with the visual checks below.
Identify the material without a burn test
You do not need to light anything on fire. A belt’s edge, grain, and label tell you most of what you need:
- Genuine leather shows a fibrous, layered edge; a slightly irregular grain; and small natural variations. It bends with a soft crease that springs back, and it may absorb a drop of water slowly. If only “genuine leather” is printed and no higher grade is named, expect a corrected, coated, lower-grade hide.
- Bonded leather is leather scraps and fibers pressed with adhesive and coated with a plastic film. Its edge looks powdery or crumbly, the surface is unnaturally uniform, and it is rigid and prone to cracking when bent. It peels in flakes rather than wearing like hide.
- Coated split leather is a lower hide layer with a painted or plastic surface. It can look convincing until it bends or flexes, when the coating separates from the base.
- Synthetic leather (PU or PVC) has no animal material. The back is usually a woven or knit fabric backing, the edge is smooth and precise, and the surface is perfectly uniform with a repeating stamped grain. It feels plasticky, stays cool, and often has a chemical smell.
- Woven textile belts are cotton, nylon, polypropylene, or a blend. They are clearly woven, may have a fabric label, and behave like fabric rather than hide — they cut and fray differently and should be finished by heat-sealing or stitching, not burnishing.
The most reliable single check is the edge and backing: a fibrous edge and a non-fabric back point to real or bonded leather; a smooth, precise edge over a woven backing points to synthetic. If you cannot tell after reading the label and looking at the edge, treat the belt as coated or synthetic and avoid promising results only real leather would deliver.
Inspect the full length for damage
Spread the belt flat in bright light and run it through your hands, front and back. Check for:
- Cracks and deep creases, especially at the hole where it was buckled and along the fold line. Surface creases are cosmetic; cracks that open when bent are structural.
- Peeling, delamination, or flaking — a coating separating from the base layer means bonded, coated, or synthetic material, and it will keep peeling once cut.
- Mildew or mold — discolored spots, a musty odor, or a fuzzy surface growth, most likely if the belt was stored damp.
- Odors — smoke, petroleum, mildew, or an unidentifiable chemical smell that may never fully air out.
- Enlarged or torn holes — holes that have stretched oval or begun to tear at the edge are weak points.
- Loose or broken stitching along a stitched edge.
- Corroded, sharp, or damaged hardware — a rusty buckle, a bent prong, or a burr that could scratch.
- Thin, stretched, or worn sections, especially near the buckle.
Mark anything questionable with a small piece of tape or a chalk mark so you can cut around it.
Reject belts that aren’t worth using
Set a belt aside — or dispose of it through the correct channel — if it is heavily contaminated, carries a persistent odor, is extensively cracked or delaminated, or has corroded or unsafe hardware. A bonded or synthetic belt that is already peeling is rarely worth the effort: it will keep peeling after cutting, and it cannot be burnished or conditioned like real leather. A belt that is too weak for its intended new job is a liability, not a material.
Clean by material type
Cleaning depends on what the belt actually is, so work from the material you identified:
- Genuine leather — wipe with a barely damp cloth to lift surface dirt. For deeper cleaning, use a leather-specific cleaner or saddle soap, applied in small circular strokes and wiped clean, following the product’s instructions. Avoid soaking, bleach, ammonia, alcohol, household wipes, and furniture polish, which can strip natural oils and dry out the hide.
- Coated, bonded, or synthetic leather — wipe with a damp cloth and mild dish soap, then dry thoroughly. Do not use leather conditioner on these: it cannot absorb and will sit on the plastic surface as a greasy film.
- Woven textile belts — wash gently by hand in cool water with mild detergent, rinse, and air-dry flat. A machine wash may be acceptable if the label allows it, but agitation can pull the weave.
Always clean before any cutting, gluing, or conditioning. Dirt and oils are what make adhesives fail and paint peel.
Dry completely before storing or building
A damp belt is the enemy of adhesive, paint, and hardware. After cleaning, air-dry the belt flat at room temperature, away from direct heat and sunlight — heat shrinks and cracks leather. Confirm it is dry all the way through before you cut, glue, or store it. If a belt was soaked, blot it dry with a cloth and let it air out fully; it can take a day or more.
Remove, save, and sort hardware
Take the buckle, keeper, and any snaps, rivets, screws, or studs off before you cut the strap. Snap-in and screw-back buckles come apart easily; a sewn or riveted buckle needs the stitching cut or the rivet drilled out — go slowly and protect the leather around it. Keep the hardware sorted by size, finish, and type in a small divided container.
Save the buckle even if the strap is ruined. A solid brass or stainless-steel buckle can outlast several straps and become the focal point of a journal closure, a gift-box band, or a luggage tag. Sort the straps themselves by material, width, thickness, flexibility, color, condition, and usable length so you can pull the right piece for each project.
Measure usable sections and make a cutting plan
Lay out each strap and measure the straight, undamaged sections — skip the cracked fold, the torn holes, and the worn buckle area. Note the width and thickness, because both decide which fasteners and tools will work. Then plan your cuts so you:
- preserve the strongest sections for anything that will carry or hold weight,
- keep decorative stitching, embossing, existing holes, keepers, and the buckle where they’ll be seen,
- cut clean, straight lines with rounded corners where the end will show,
- leave a little extra length so you can trim to a final fit.
Test tools and finishes on an offcut
Before you commit to the whole belt, cut a small hidden or scrap section and test on it: the cutting method, any hole punching or drilling, edge finishing, adhesive, dye, paint, and conditioner. Every belt is a little different, and an offcut is where you find out that a coating peels, a punch won’t pass through, or an adhesive won’t bond — without ruining the project. This single habit prevents most of the failures described in the troubleshooting section below.
Store prepared straps and hardware
Once cleaned, cut, and sorted, store the prepared straps flat or loosely rolled in a dry, breathable container — never folded sharply, which sets permanent creases, and never in a sealed plastic bag, which traps moisture and invites mildew. Keep metal hardware in a separate dry container so it doesn’t mark or corrode the leather. Label the container so the whole stash stays findable.
Material Basics: How Different Belts Behave
Genuine vs bonded vs coated vs synthetic vs woven
The five categories behave differently at every step — cutting, punching, gluing, and finishing:
- Genuine leather cuts cleanly with a sharp blade, punches well, accepts conditioner, and can be burnished to a smooth edge. It is the most forgiving and durable, but it varies by grade: a thin corrected-grain belt is weaker than a thick full-grain strap.
- Bonded leather cuts and then keeps flaking at the edge. It is weak, rigid, and cannot be burnished or conditioned. It is only worth using for low-stress, purely decorative work, if at all.
- Coated split leather cuts fine until the coating separates from the base at the cut edge. Keep cuts straight and seal or paint the edge to slow peeling, and avoid bending the piece sharply.
- Synthetic leather (PU/PVC) cuts smoothly but the fabric backing can fray and the plastic surface can crack when folded. Edge paint or a folded-and-stitched edge finishes it better than burnishing.
- Woven textile belts cut and fray like fabric. Melt-seal or stitch the ends; do not try to punch and burnish them like leather.
Why conditioner is not universal
Leather conditioner is made to soak into animal hide and replace lost oils. On coated, bonded, or synthetic material there is nothing for it to soak into — it sits on the plastic surface as a greasy film that attracts dust and can interfere with adhesive. Conditioner also can’t repair a belt that is already cracking or delaminating. Use it only on confirmed genuine leather, only when the leather is dry and stiff, and always test on an offcut first. Avoid food-grade oils (coconut, olive, vegetable) and petroleum jelly, which can turn rancid or seal the surface.
How coatings crack and peel
Coated, bonded, and synthetic belts carry a plastic or painted surface over a base layer. Every time the material flexes, that coating and the base move at slightly different rates. Over years the bond fails, and the coating cracks, then lifts, then flakes — a process that accelerates once you cut the belt, because a cut edge gives the coating a free edge to peel from. You can slow it with edge paint or a sealer, but you cannot stop it. This is why projects that flex — wearables, tiebacks, straps that bend — are the wrong use for an already-peeling belt.
Choosing a cutting method
Match the cutting tool to the material’s thickness and layers:
- Utility knife with a fresh blade and a metal straight edge — the best general choice for straight cuts in genuine and coated leather, especially thicker straps. Score lightly, then cut in several passes rather than forcing one deep cut.
- Rotary cutter on a cutting mat — fast and clean for thinner, flexible straps and woven textile belts.
- Heavy-duty scissors or shears — fine for thin or synthetic belts, but they can crush thick leather and leave a rough edge.
- No matter the tool, avoid cutting through embedded hardware. Cut around rivets, snaps, and studs, or remove them first.
Cutting, punching, drilling, and finishing edges
- Mark cut lines on the back side or with low-tack tape or a light pencil; avoid permanent markers that can stain the visible face.
- Cut on a stable, protected surface (a cutting mat or scrap wood), away from your body, with the free hand behind the blade path.
- Punch holes with a rotary punch or a drive punch and a mallet over a scrap-wood or poundo board — never over a hard surface that will blunt the punch, and never into your hand.
- Drill only for very thick or multi-layer stacks, at low to moderate speed, with the piece clamped and a scrap-wood backer underneath. A spinning bit can grab and twist the strap.
- Finish cut edges on genuine leather by sanding, then beveling, then burnishing with a slicker, water or gum tragacanth, and a little edge wax or dressing. On coated or synthetic edges, use edge paint or a folded, stitched edge instead — burnishing does not work on plastic.
Hole spacing, punch size, and hardware length
- Space holes away from the edge — a hole too close to a cut edge tears through under load. Keep a margin at least as wide as the hole itself, more for a strap that will carry weight.
- Match the punch to the fastener. The hole should just fit the rivet post, Chicago screw post, or snap — snug, not loose. A loose hole lets the fastener rock, spin, and eventually pull through.
- Match the fastener length to the combined thickness. A rivet post or Chicago screw post should be slightly longer than the stack it passes through (the strap plus any backing, washer, or other layer) so it can set or thread tightly — but not so long it bottoms out before it clamps.
- Test on scrap first. Punch a sample hole and set one rivet or screw in an offcut before drilling the real piece. This is where you confirm the hole size and the post length are actually right.
Choosing the Right Attachment
There is no single best fastener for belt crafts. The right choice depends on the materials, whether the joint is decorative or load-bearing, whether you need to remove it later, and what tools you own. The table below compares the main options.
Attachment methods compared
| Method | Suitable materials | Best uses | Reversible? | Tools required | Likely limitations | Testing needs |
|---|---|---|---|---|---|---|
| Stitching (saddle stitch or machine) | Genuine leather, woven textile | Flexible joins, strap loops, closures, wearables | No (cut to undo) | Awl, needles, waxed thread; or a leather-capable machine | Time-consuming; holes must be pre-punched and evenly spaced | Pull-test the seam on an offcut before trusting it |
| Rivets | Genuine leather, multi-layer stacks | Permanent, high-strength joins; strap ends; belt loops | No | Rivet setter, mallet, matching punch | Post length must match stack; weak or double-cap rivets can work loose | Set one on scrap and try to wrench it apart |
| Chicago screws (post/binding screws) | Leather to leather, leather to wood, fabric | Removable joins; anything you may repair or adjust | Yes | Screwdriver or hex key only | Threads can loosen over time; post length must match | Check tightness after a week of use; add thread locker if needed |
| Snaps | Thin, flexible leather and fabric | Light-duty, frequently opened closures (gift band, journal) | No (but reusable in use) | Snap setter, matching punch | Pull through thin or weak material; wear with repeated opening | Tug each set snap; reinforce the back if it dimples |
| Bolts / machine screws with washers | Leather to rigid backing (wood, board) | Mounted projects; drawer pulls; wall organizers | Yes | Drill, screwdriver, washers | Needs a rigid substrate and correct pilot hole; head can protrude | Confirm the head and washer clamp without crushing |
| Staples | Woven textile, thin leather on soft substrate | Temporary or hidden attachment; upholstery-style wraps | Semi (pull out) | Staple gun | Low strength; can tear thin or coated material | Only for light, non-loaded, hidden attachment |
| Adhesive | Porous surfaces; lightweight decorative work only | Surface inlay, non-stressed trim | No | None special | Weakens on conditioned/coated/flexible surfaces; fails on stressed joints | Cure a sample and try to peel it apart |
Decorative vs load-bearing attachment
A joint that only has to hold its own weight — a strip inlaid into a tray, a decorative wrap — can use lighter methods. A joint that will be pulled, carried, hung, or leaned on needs a mechanical fastener: stitching, a rivet, a Chicago screw, or a bolt with a washer. The dividing question is simple: if this connection fails, does something fall, break, or injure someone? If yes, use a mechanical fastener and test it before trusting it.
Why adhesive alone fails on stressed joints
Adhesive has no mechanical grip. On a drawer pull, a curtain tieback, a wall-organizer band, or a carrying strap, the joint is repeatedly pulled and flexed, and glue — especially on a conditioned, coated, or flexible surface — will eventually creep, peel, or shear. Adhesive is fine for a tray inlay or a purely decorative trim that sits still, but it should never be the only thing holding a handle, a strap, or anything that carries or mounts weight.
Protecting surfaces from metal hardware
Rivets, Chicago screws, and bolts all have metal that can scratch the furniture, wall, or skin it touches. Use washers, backing plates, or a felt or leather pad between the metal and the surface; countersink or recess the head where it would rub; and smooth any burr on cut metal with a file. On a drawer pull or wall organizer, the fastener that faces the drawer face or wall is the one that will do the scratching — cushion it.
Home Hardware and Organization
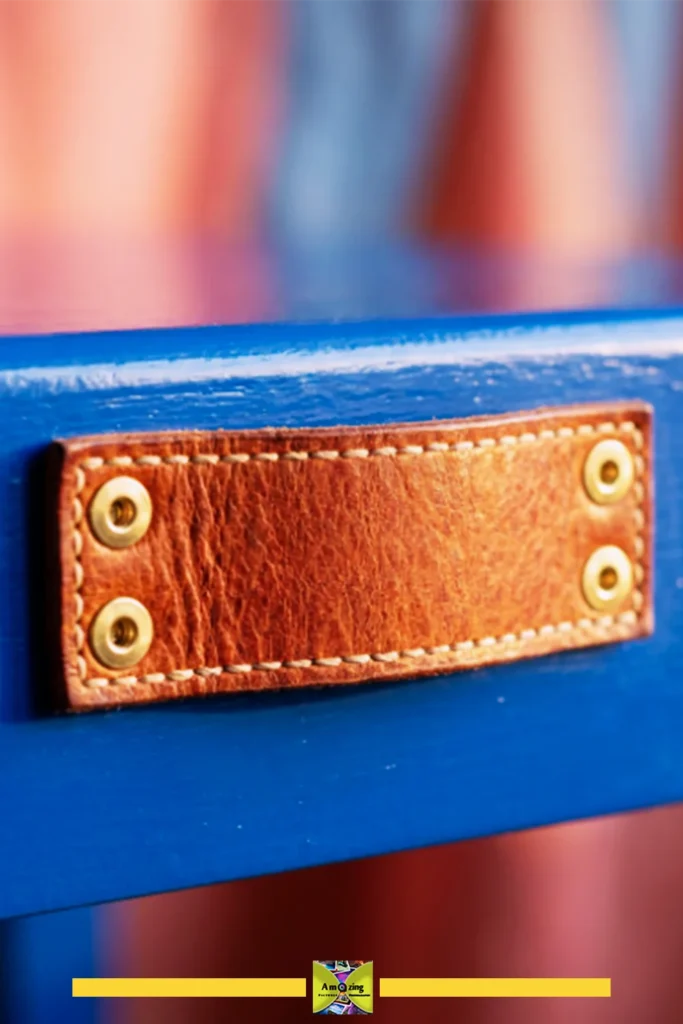
Project 1 — Old-Belt Drawer and Cabinet Pulls
What it looks like: Short loops of belt screwed flat to a drawer or cabinet front, with the buckle, stitching, or patina showing as a deliberate rustic detail.
Best use: Replacing broken or dated hardware on a dresser, cabinet, or storage chest with pulls that have real character.
Difficulty: Beginner.
Approximate time: 15–30 minutes per pull.
Materials:
- One or more sound belt sections
- Short machine screws or Chicago screws with washers that match the strap thickness
- Optional felt or leather washers to protect the drawer face
Tools:
- Measuring tape or ruler
- Utility knife or heavy scissors
- A punch or drill with a bit matched to your screws
- Screwdriver
- A pencil or awl for marking
Steps:
- Cut a belt section for each pull, roughly 10–15 cm (4–6 in) long, keeping a strong, undamaged portion. If you want the buckle or a keeper on the pull, cut so it sits centered.
- Mark two hole positions at each end of the strip, at least 1 cm (⅜ in) from the cut ends so the screw won’t tear through.
- Punch or drill the holes, then use them to mark the matching positions on the drawer front.
- If drilling the drawer, drill pilot holes slightly smaller than your screw threads.
- Mount each strip flat, or loop it and fasten both ends at one point for a raised pull. Add a washer (and a felt washer against the wood) so the metal doesn’t crush or scratch the face.
- Tighten until snug, not crushed — overtightening deforms the strap and can split thin or coated leather.
Customization:
- Keep the original stitching on the outside
- Use the buckle as the grip end
- Match all pulls in one width and finish
- Combine with a second, darker strap for a two-tone look
Practical tip: Use a washer under every screw head and a felt pad on the wood side — a metal head tightened directly onto leather chews through it in months.
Common mistake: Skipping the pilot hole in the drawer, which can split the wood, or mounting the strip with screws too close to the cut end, which tears through the first time someone tugs it.
Safety note: A pull that will be tugged daily is a loaded connection — use mechanical fasteners, not adhesive, and test one pull firmly before mounting the rest.
Measure the drawer front, folded leather, washer, and nut as one stack before buying hardware. Choose a screw that fully engages the nut without projecting into the drawer, then drill the pilot hole to the screw’s core diameter and test one pull firmly before installing the rest.
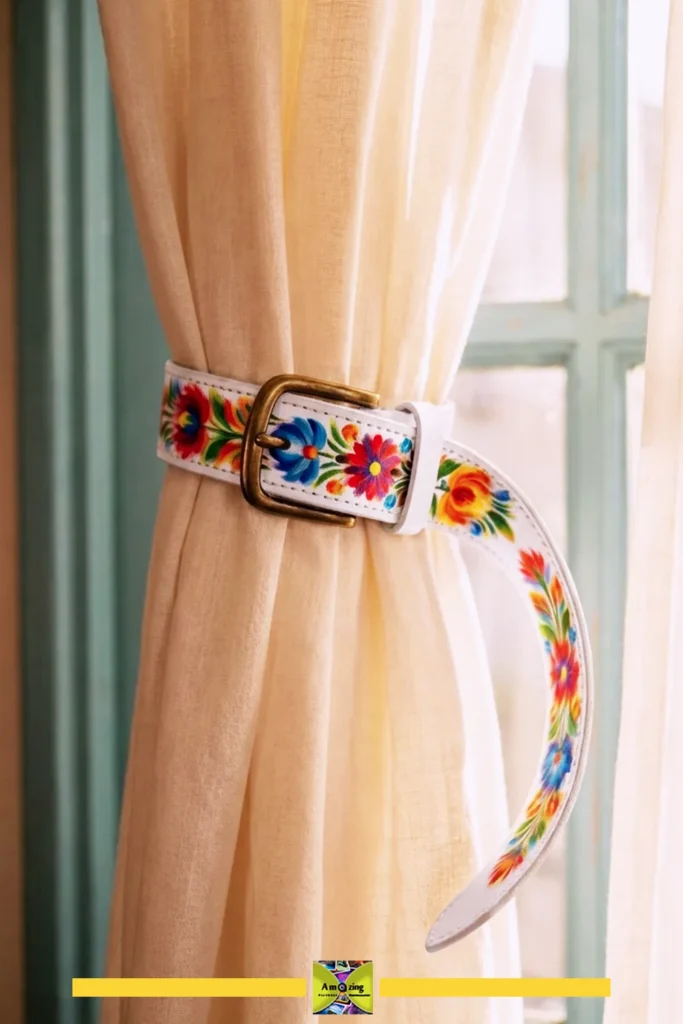
Project 2 — Adjustable Curtain Tiebacks
What it looks like: A belt wrapped around a gathered curtain and fastened through its existing buckle or keeper, holding the drape back in a way that looks intentional rather than improvised.
Best use: Tying back curtains in a bedroom, living room, or office while keeping the belt’s buckle as the visible fastener.
Difficulty: Beginner.
Approximate time: 15–30 minutes per tieback.
Materials:
- One or two belts long enough to wrap the gathered curtain plus overlap
- Optional a small sewn or riveted loop for mounting
Tools:
- Measuring tape
- Scissors or utility knife
- A punch if you need an extra hole
- A wall hook or cup hook for mounting (optional)
Steps:
- Gather the curtain to the width you want and wrap a measuring tape around it loosely to find the length the belt needs to reach, leaving extra to fasten.
- If the belt is long enough, fasten it around the curtain through the existing buckle hole. If the belt needs a new hole, punch one that lands where the buckle sits comfortably — not so tight it creases the curtain, not so loose it slips.
- Trim the loose tail only if it will not be needed for adjustability, and finish the cut end.
- For a fixed tieback, mount a cup hook or bracket on the wall and hang the looped belt over it; for a soft, removable tieback, simply wrap and buckle around the drape.
- Check the belt doesn’t grip so tightly it pinches the fabric, and that the buckle isn’t resting against a surface it could scratch.
Customization:
- Keep the buckle as the focal point
- Use a pair of matching belts on a wide window
- Let the tail hang loose for a relaxed look
- Add a keeper to hold the tail flat
Practical tip: Buckle the belt around a rolled towel first to judge the right tension before wrapping the actual curtain — a tieback that’s too tight permanently creases some fabrics.
Common mistake: Punching the new hole too close to an existing stretched hole, so the prong slips from one to the other and the tieback loosens.
Safety note: If a buckle or metal edge rests against the wall or furniture, pad it — a metal corner can rub a visible mark into paint over time.
Buckle the uncut belt around the gathered curtain before marking the final length. Leave at least two usable adjustment holes so the tieback can accommodate a fuller or lighter gather, and keep the buckle loose enough that it does not crush or permanently crease the fabric.
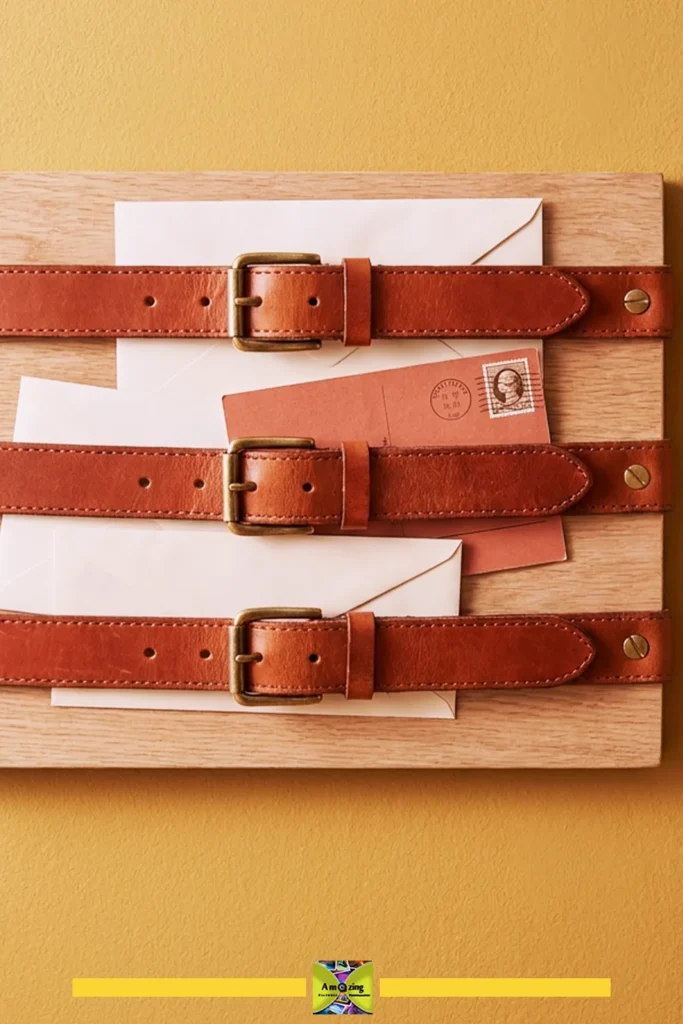
Project 3 — Wall-Mounted Mail and Paper Organizer
What it looks like: Several belt bands secured vertically or horizontally to a rigid backing board, each band forming a pocket that holds mail, envelopes, magazines, or papers against the wall.
Best use: An entryway or home-office organizer that keeps loose paper tidy — an under-covered, genuinely useful project.
Difficulty: Intermediate (requires a rigid backing and secure mounting).
Approximate time: 1.5–2.5 hours.
Materials:
- A rigid backing board (plywood, MDF, or a sealed wood board)
- Several strong belt sections cut to band length
- Machine screws or Chicago screws with washers
- Felt or leather pads
- Wall-mounting hardware rated for the loaded weight
Tools:
- Saw or pre-cut board
- Drill and bits
- Screwdriver
- Utility knife
- Punch
- Level
- Stud finder (if wall-mounting)
- Sandpaper
Steps:
- Cut or obtain a backing board and sand the edges smooth. Decide how many bands you need and how much each pocket should hold.
- Cut belt sections long enough to span the board with a little slack for papers to slide under — each band should sit slightly proud of the board, not cinched flat.
- Position each band across the board, leaving enough gap above it for the tallest item you’ll store. Mark both screw positions.
- Punch or drill holes in the belt ends, then through the board at the matching marks.
- Fasten each band with a machine screw or Chicago screw and a washer on the back. On a thin strap, add a washer on the front so the screw head doesn’t pull through.
- Test that mail slides in and out without catching, and that the bands don’t sag or twist.
- Mount the finished board to the wall into a stud, or with anchors rated for the total weight of the board plus its contents. Use a level.
Customization:
- Alternate band widths for a stepped look
- Stain or paint the board to match the room
- Angle the bands diagonally for a modern arrangement
- Add a small hook or label to each pocket
Practical tip: The board does the structural work — the belt bands only hold papers in place. Fasten every band mechanically, and don’t ask the leather itself to carry the organizer’s weight.
Common mistake: Cinching the bands flat against the board so papers won’t slide under them. Each band needs deliberate slack, or the organizer becomes decoration instead of function.
Safety note: Mount through the board into a stud or rated anchor. A loaded organizer is heavy, and adhesive-only wall mounting can release unexpectedly.
Make a paper mockup of the largest envelope or magazine you plan to store, then set the leather bands around that mockup before drilling. A little deliberate slack creates a usable pocket; too much makes papers slump. Fasten each band through the backing board with screws and wide washers, then test the mounted organizer with its intended load.
Project 4 — Storage-Box Wrap With a Lid Pull
What it looks like: A plain storage box wrapped in one or two belt straps, with a short belt section fixed to the lid as a matching pull.
Best use: Dressing up a plain cardboard, wood, or fabric storage box so it looks finished on a shelf, while giving the lid an easy-to-grip handle.
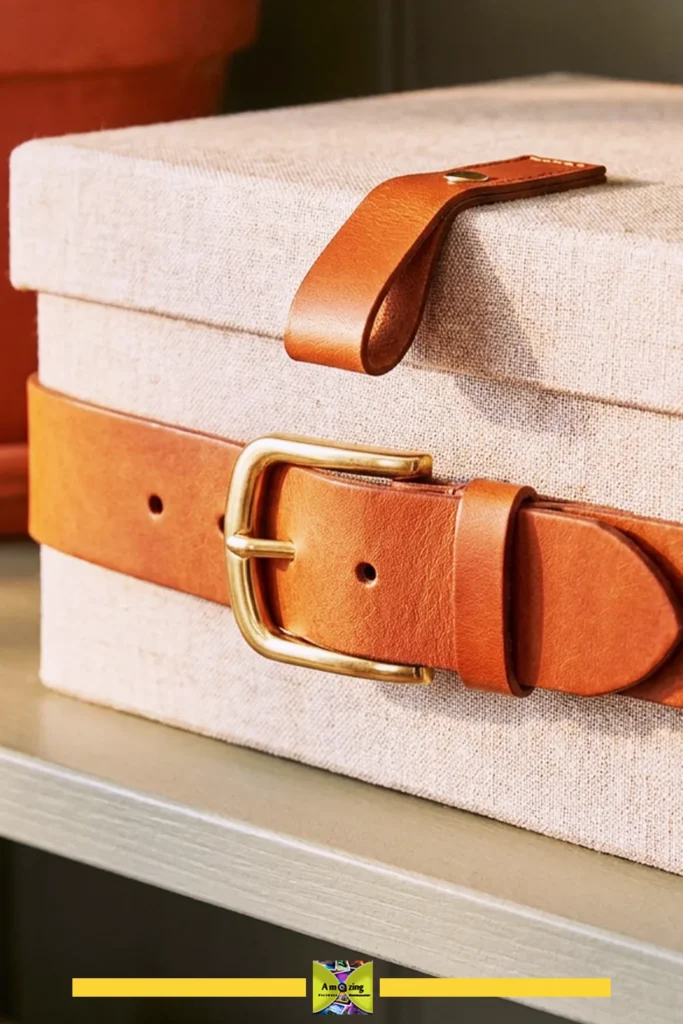
Difficulty: Beginner.
Approximate time: 45–90 minutes.
Materials:
- One or two belts long enough to wrap the box
- A short belt section for the pull
- Machine screws or Chicago screws with washers (or a stitched loop, for a fabric box)
- A sturdy box
Tools:
- Measuring tape
- Utility knife or scissors
- Punch
- Screwdriver
- Optional awl and needle if stitching
Steps:
- Measure around the box where you want the wrap, plus a little overlap.
- Cut the belt to length and finish the cut ends. For a permanent wrap, fasten the ends together behind the box with a Chicago screw or a stitched join; for a removable band, keep the buckle and fasten it in front.
- For the lid pull, cut a short strap section, punch two holes at the ends, and fasten it to the lid with screws and washers — or loop it and fasten both ends at one point for a raised handle.
- If the box is cardboard, add a washer or a small backing plate inside the lid so the screws don’t pull through.
- Check the wrap doesn’t shift and the lid opens easily by the pull.
Customization:
- Use two parallel straps of different widths
- Keep a buckle as a front detail on the wrap
- Match the pull and wrap in one finish
- Use the belt’s existing stitching as a trim line
Practical tip: For a cardboard box, back the pull’s screws with a small washer or a scrap of plastic inside the lid — otherwise the screw heads tear straight through the cardboard the first time the lid is lifted.
Common mistake: Gluing the wrap in place instead of fastening it, so it slides down the box or peels at the corners after a few weeks.
Treat the decorative wrap and the working lid pull as separate jobs. On cardboard or thin fiberboard, reinforce the pull from inside with a backing plate or wide washers so the fastener cannot tear through. Open and close the lid repeatedly before filling the box, watching for crushed corners, shifting straps, or enlarged holes.
Decorative Projects
Project 5 — Framed Geometric Belt-Strip Wall Panel
What it looks like: A shallow frame holding parallel or angular belt strips arranged in a deliberate geometric pattern, with the varied widths, colors, and stitching reading as an intentional composition.
Best use: Statement wall art for a hallway, living room, or home office that shows off the material rather than hiding it.
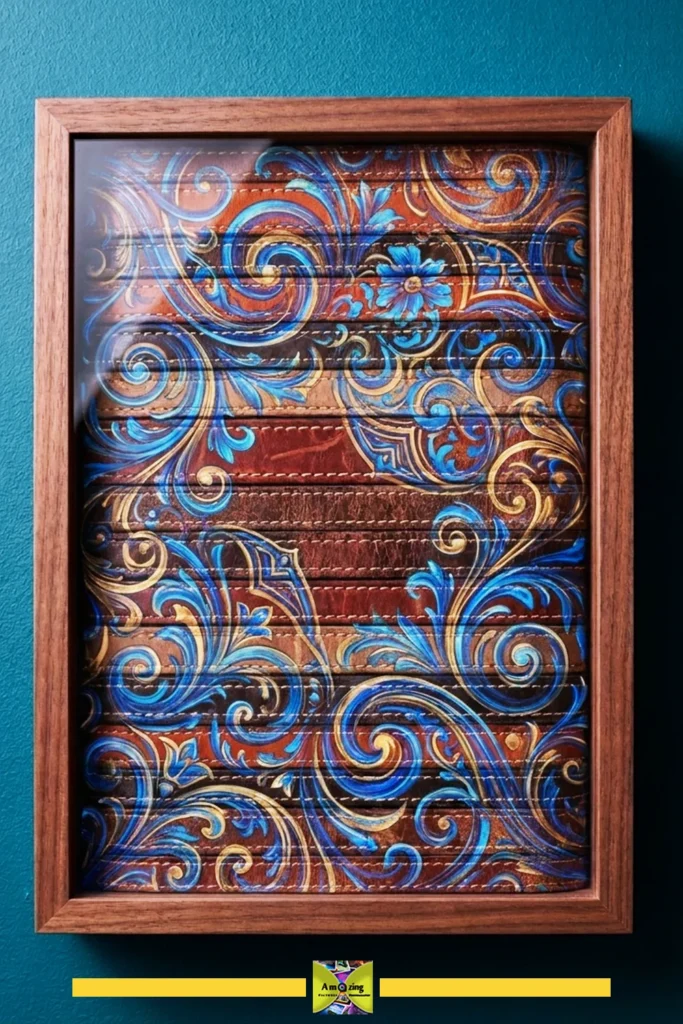
Difficulty: Intermediate.
Approximate time: 2–4 hours.
Materials:
- A shadow-box frame or a rigid board with a raised edge
- Several belt sections in a limited palette
- Strong adhesive (for non-stressed inlay) or small screws for a heavier panel
- A backing board cut to fit
Tools:
- Measuring tape
- Utility knife
- Straight edge
- Ruler
- Pencil
- Low-tack tape
- Optional small screws and drill
Steps:
- Choose a palette and a pattern before cutting — parallel verticals, a chevron, alternating diagonals, or a simple grid all read clearly.
- Cut belt sections to the lengths the pattern needs, finishing any ends that will show.
- Dry-lay the strips on the backing board and adjust the spacing until the composition looks deliberate. Photograph the layout.
- Attach each strip. For a lightweight decorative panel, a strong adhesive rated for the materials is acceptable; for a heavier panel, add a few small screws where they won’t show.
- Let any adhesive cure fully, then fit the panel into the frame and check the front.
- Mount with hardware rated for the panel’s finished weight.
Customization:
- Group strips by width with a deliberate progression
- Alternate dark and light straps
- Align existing stitching into one continuous line
- Leave a strip of bare board between each belt as negative space
Practical tip: Keep the pattern simple and the palette to two or three tones — too many widths and colors turn a geometric panel into visual noise.
Common mistake: Cutting every strip to a slightly different length so the composition reads as sloppy rather than intentional. Cut to a template and check against a straight edge.
Arrange every strip dry and photograph the layout before applying adhesive. Build from the center outward, use spacers to keep the gaps even, and clamp the strips beneath a flat board while the adhesive cures. Test the adhesive on an offcut first because conditioned leather and plastic-coated belts often resist bonding.
If you enjoy this kind of display, recycled-material wall decor projects gather more ideas in the same spirit.
Project 6 — Rustic Belt-Wrapped Wreath
What it looks like: A foam or wire wreath form wrapped in overlapping belt strips, with the buckles, stitching, and color variation creating a textured ring. All attachment points are concealed on the back.
Best use: A seasonal or year-round door and wall accent that uses long scrap strips and leftover buckles.
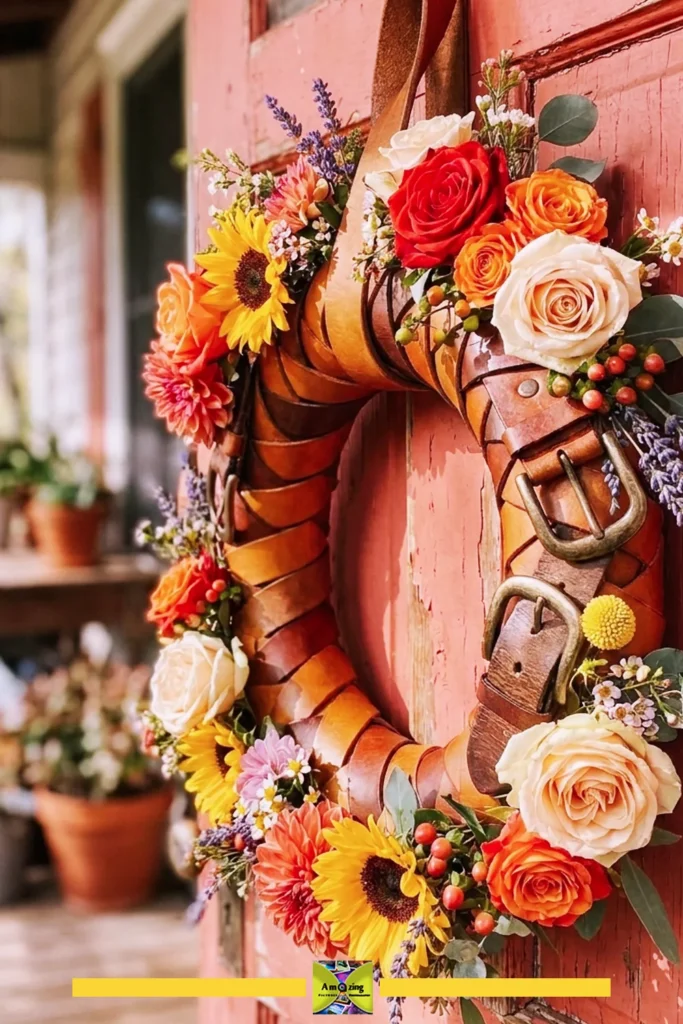
Difficulty: Beginner.
Approximate time: 1–2 hours.
Materials:
- A wreath form (foam or wire)
- Several belt strips
- Strong adhesive or small nails/pins for the back
- A hanging loop
Tools:
- Scissors or utility knife
- Low-tack tape or clips
- A small mallet if using nails
Steps:
- Cut belt scraps into strips long enough to wrap the form once with a little overlap.
- Anchor the first strip at the back of the form with adhesive or a small pin, then wrap it around, slightly overlapping each pass.
- Continue with additional strips, tucking every end to the back and fastening it there so no join shows on the front.
- Alternate widths, colors, and textures as you work, keeping the tension even but not so tight it warps a foam form.
- Add one or two buckles or keepers on the front as a focal point, securing them at the back.
- Attach a hanging loop to the back and check the wreath hangs level.
Customization:
- Use a single tonal palette for a restrained look
- Place one buckle at the top or bottom as the focal point
- Mix a textured woven belt with smooth leather for contrast
Practical tip: Fasten every end at the back and pull just snug — a wreath with visible joins on the front, or stretched too tight over a foam form, reads as improvised.
Common mistake: Overloading the ring with too many competing colors and textures so it looks cluttered rather than curated.
Safety note: Keep the wreath away from open flames and heat sources; leather, coatings, and textile belts are combustible.
Dry-wrap the form before cutting the whole belt so you can judge coverage and overlap. Point every seam in the same direction and place the heaviest buckle near the bottom, where its weight will not twist the wreath. Save two longer strips for hiding the beginning and final join.
Project 7 — Tray-Surface Belt Inlay (Display Only)
What it looks like: A tray or shallow board with belt sections inlaid edge-to-edge across its surface, forming a smooth, patterned top of varied leather tones.
Best use: A decorative catch-all tray for keys, glasses, or small objects — clearly non-food-contact and not for cutting.
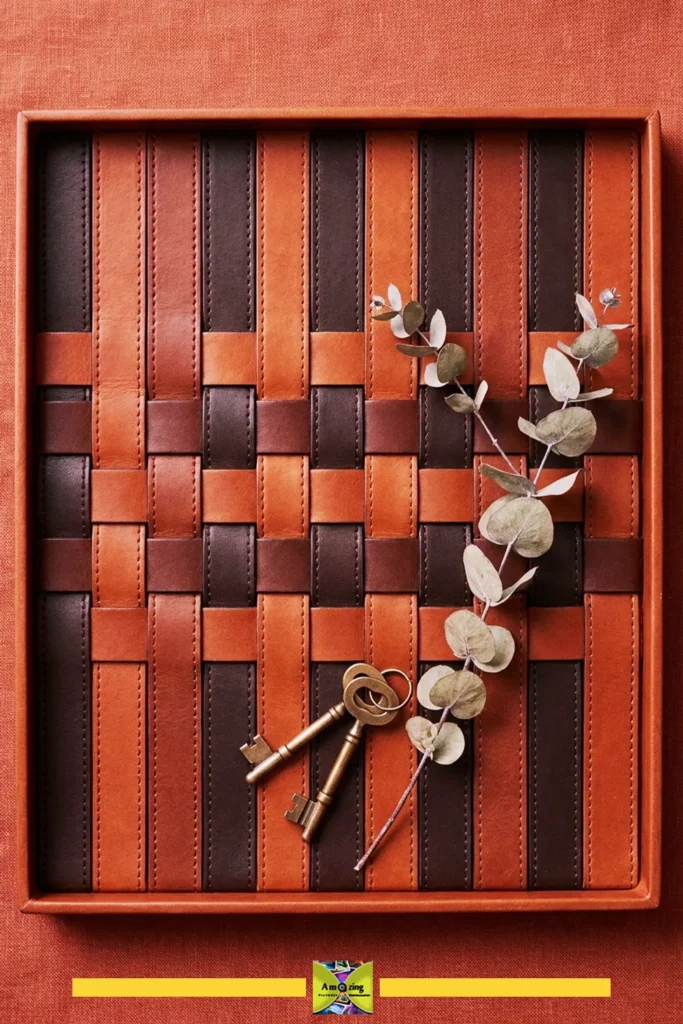
Difficulty: Beginner to intermediate.
Approximate time: 1–2 hours, plus adhesive cure.
Materials:
- A shallow tray or board with a recessed or rimmed surface
- Several belt sections of similar thickness
- Strong adhesive rated for the materials
- Optional edge trim
Tools:
- Measuring tape
- Utility knife
- Straight edge
- Sandpaper
- Clamps or weights
Steps:
- Choose belts of similar thickness so the finished surface sits as evenly as possible. Cut sections to fit the tray’s surface edge to edge.
- Dry-lay the pieces, aligning their edges and deciding the pattern (parallel strips, alternating tones, or a simple banded layout).
- Apply adhesive in a thin, even layer and press each strip into place, working from one edge across. Wipe any squeeze-out while it is still wet.
- Weight or clamp the pieces and let the adhesive cure fully, following the product’s curing time.
- Sand or trim any uneven edges, and add an edge trim or border if desired.
- Label or remember that the tray is for holding dry objects only — it is not sealed for food, and it is not a cutting surface.
Customization:
- Alternate light and dark straps for a banded top
- Align stitching into continuous lines
- Add a clear sealer if the tray will sit in a humid spot (test the sealer on an offcut first)
Practical tip: Sort by thickness, not just color — even a 1 mm difference between adjacent strips makes the surface feel uneven under a hand.
Common mistake: Treating the finished tray as food-safe or cut-resistant. Reclaimed leather is neither, and this is a display-and-catch-all piece, not a serving board.
Safety note: Do not use this tray for food, and do not cut on it. Coatings, dyes, and adhesives in reclaimed belts are not food-contact materials.
Storage and Carrying Accessories
Project 8 — Blanket Bundle Straps
What it looks like: Coordinated straps that wrap around folded blankets or linens and buckle or snap shut, keeping a stack tidy on a shelf or in a cupboard.
Best use: Bundling folded blankets, throws, or linens so they stay neat and stackable — a low-stress, genuinely useful storage project.
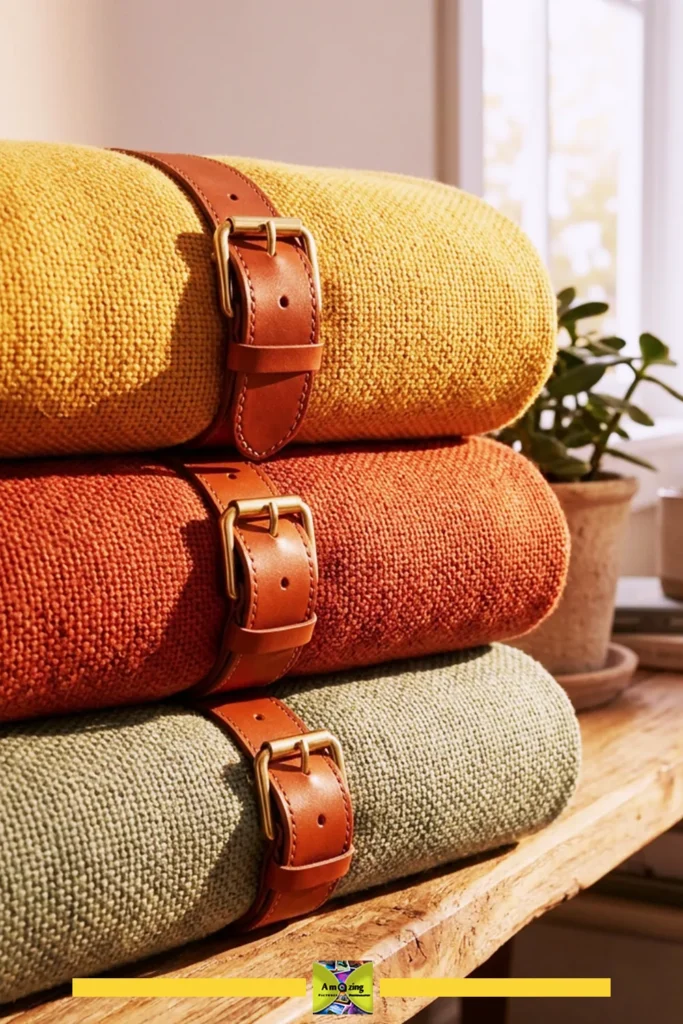
Difficulty: Beginner.
Approximate time: 20–40 minutes per strap.
Materials:
- One or more belts long enough to wrap a folded blanket with overlap
- Buckles or snaps
- A punch if adding holes
Tools:
- Measuring tape
- Utility knife
- Punch
- Snap setter (if using snaps)
Steps:
- Fold a blanket the way you’ll store it and wrap a measuring tape around it to find the strap length you need, leaving overlap to fasten.
- Cut the belt to length and finish the cut ends.
- Fasten the strap around the folded blanket through the existing buckle, or add a snap or hole where it holds snugly without compressing the fabric.
- Make a set in matching widths or a deliberate progression so the bundle looks coordinated, not random.
- Check the strap holds the bundle without sliding, and that the buckle doesn’t catch on the fabric.
Customization:
- Keep the buckles in one metal finish
- Use a single width for a matching set
- Label each strap with a small tag
- Use a keeper to hold the loose tail flat
Practical tip: Bundle the blanket first, then measure the strap — a strap cut to the blanket’s “flat” size will be too short to wrap the folded, fluffy bundle.
Common mistake: Fastening too tightly, which creases the blanket over time, or too loosely, so the strap slips off and the bundle unrolls.
Fold the blanket exactly as it will be stored, then measure around the bulky bundle with a flexible tape. Add enough overlap for the buckle and several adjustment holes instead of sizing the strap to a flat blanket. The finished band should hold the fold without compressing the fibers or leaving a deep crease.
Project 9 — Adjustable Exercise-Mat Carrier
What it looks like: A single strong belt buckled around a rolled exercise mat, with a short loop or second strap forming a shoulder or hand carry handle.
Best use: Carrying a rolled yoga or exercise mat to and from class — with the attachment strength confirmed before it’s trusted.
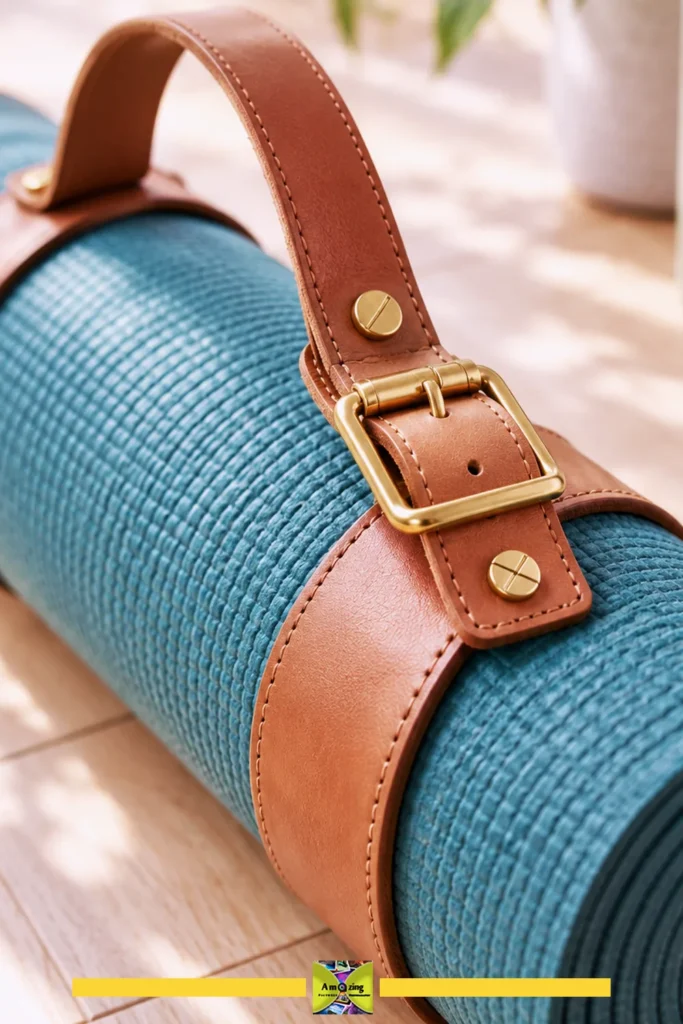
Difficulty: Intermediate (load-bearing; test first).
Approximate time: 30–60 minutes.
Materials:
- One sound, strong belt section long enough to wrap the rolled mat plus the handle
- A second short strap or a buckle for the handle
- Chicago screws or rivets with the correct post length
- Optional washers
Tools:
- Measuring tape
- Utility knife
- Punch
- Rivet setter or screwdriver
- Mat to test against
Steps:
- Roll the mat and measure around it. Cut a strap long enough to wrap the mat with overlap to fasten, keeping the strongest, least-cracked section.
- Make the carry handle: cut a short strap, loop it, and fasten the ends with Chicago screws or rivets to the main strap at two points spaced for a comfortable grip.
- Buckle the main strap around the rolled mat and confirm it grips without sliding.
- Test before use: Load it with the mat and lift, carry it a short distance, and tug the handle firmly. Watch for stretching, slippage, or hardware pull-through.
- Reinforce any point that stretches or loosens — add a washer, a longer post, or a second fastener — and re-test.
Customization:
- Use the buckle as the closure
- Add a short shoulder strap for hands-free carry
- Match the handle to the strap width
- Keep the mat lightweight and non-fragile
Practical tip: A mat carrier is a carrying load, not a decoration — build it from the strongest belt you have, fasten the handle mechanically, and lift-test it over a soft surface before carrying it anywhere.
Common mistake: Trusting an old, cracked, or bonded belt with a carrying load because it “looks fine.” Hidden weakness near the holes or fold is exactly where a carrier fails.
Safety note: Carry only a lightweight, non-fragile item. Test the completed carrier cautiously before normal use, and retire it if the strap stretches, cracks, peels, or the hardware pulls through.
Fit the carrier around the mat at its normal rolled diameter and position the handle close to the balance point before punching any holes. Use mechanical fasteners with washers or backing pieces, then perform a cautious static tug test over a soft surface. If a hole stretches or the coating begins to crack, retire that strap.
Project 10 — Tool-Roll Closure Strap
What it looks like: A belt strap sewn or riveted to a fabric tool roll as the closure, wrapping around the rolled-up organizer and buckling to keep it shut.
Best use: Closing a fabric tool roll or craft-supply roll so tools and supplies stay wrapped — an under-covered practical project.
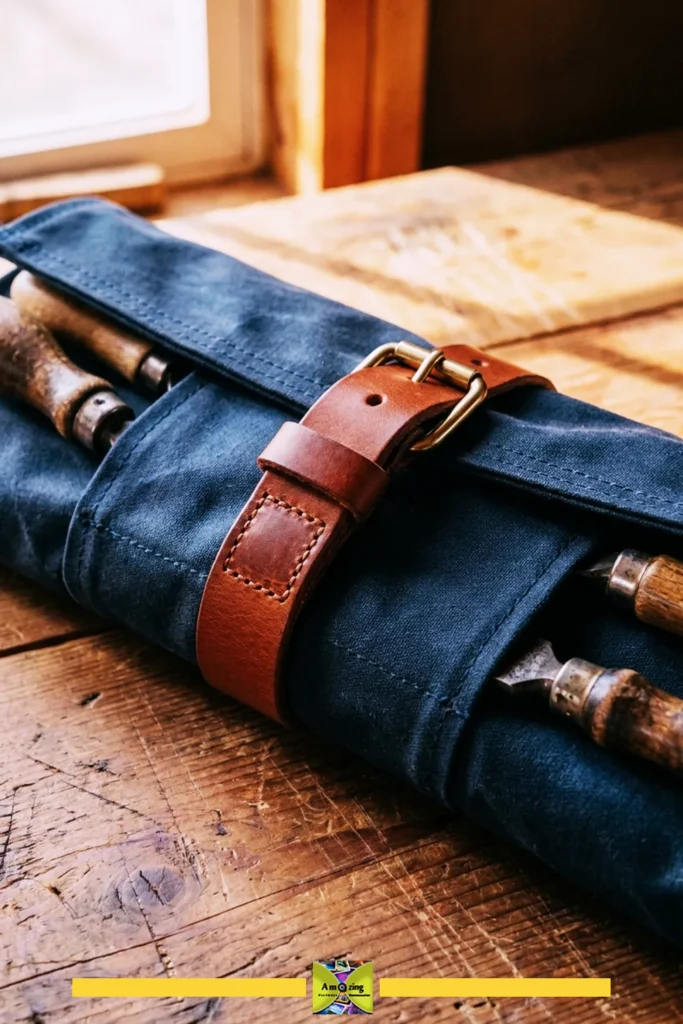
Difficulty: Intermediate.
Approximate time: 1–1.5 hours.
Materials:
- A fabric tool roll or a length of canvas to make one
- One belt strap long enough to wrap the filled roll
- Buckle
- Waxed thread or rivets
Tools:
- Awl and needles, or a rivet setter
- Punch
- Utility knife
- Measuring tape
Steps:
- Roll up the tool roll with its contents and measure the circumference to find the strap length you need.
- Attach one end of the strap firmly to the outside of the roll — stitch through the strap and the fabric, or rivet it, reinforcing the attachment point with a second line or a backing patch.
- Position the buckle at the free end so the strap wraps the roll and fastens snugly.
- Check the closure holds the roll shut without crushing the tools inside, and that the attachment point doesn’t flex or tear the fabric.
- Test by rolling and unrolling a few times, watching the attachment.
Customization:
- Match the strap color to the roll fabric
- Use the buckle as a visible front detail
- Add a small keeper to hold the tail
- Stitch a second reinforcement behind the attachment point
Practical tip: Reinforce the fabric where the strap attaches — the strap is stronger than the canvas, and the fabric is where the closure will tear if it’s going to.
Common mistake: Attaching the strap with a single line of stitching at the very edge of the fabric, which pulls loose the first time the roll is opened and closed.
Reinforce the fabric where the leather meets the roll. For stitching, a box-and-cross pattern spreads the pull across a wider area; for rivets, add a leather or fabric backing patch and correctly sized washers. Cycle the empty roll open and closed several times before trusting it with tools.
Project 11 — Reusable Gift-Box Band
What it looks like: A belt fastened around a gift box with its buckle or a snap, replacing ribbon with something the recipient can reuse.
Best use: A reusable, adjustable alternative to ribbon for a box of books, stationery, or small gifts — an under-covered, low-waste-by-reuse idea.
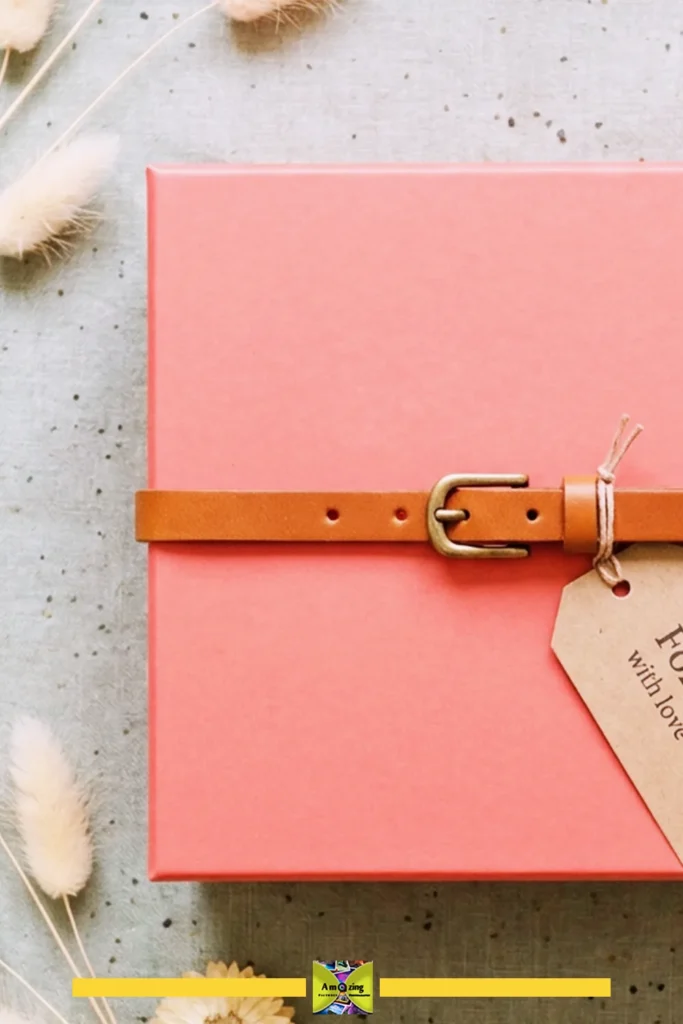
Difficulty: Beginner.
Approximate time: 15–30 minutes.
Materials:
- One belt long enough to wrap the box with overlap
- An existing buckle or a snap
- A punch if adding a hole
Tools:
- Measuring tape
- Utility knife
- Punch
- Snap setter (if using a snap)
Steps:
- Wrap the belt around the box and mark where it fastens snugly without crushing the corners.
- Fasten through the existing buckle hole, or add a snap or a new hole at the marked point.
- Trim and finish the loose end if it will not be reused at another size.
- Check the band can be opened and closed easily and sits square on the box.
Customization:
- Use the buckle as the front detail
- Add a small gift tag to the buckle
- Choose a belt width proportionate to the box
- Make bands in several sizes
Practical tip: Buckle the band around the empty box before adding the gift — the box’s corners are the first thing a too-tight band crushes.
Common mistake: Cutting the band to exactly the box’s measured perimeter with no overlap, so it won’t fasten once the corners add their thickness.
Measure around the closed box with a flexible tape and add the full buckle overlap before cutting. Place the buckle on a broad face rather than over a corner, then punch more than one adjustment hole so the band can be reused on another box. It should sit snugly without denting the lid or crushing the corners.
Small Projects From Offcuts
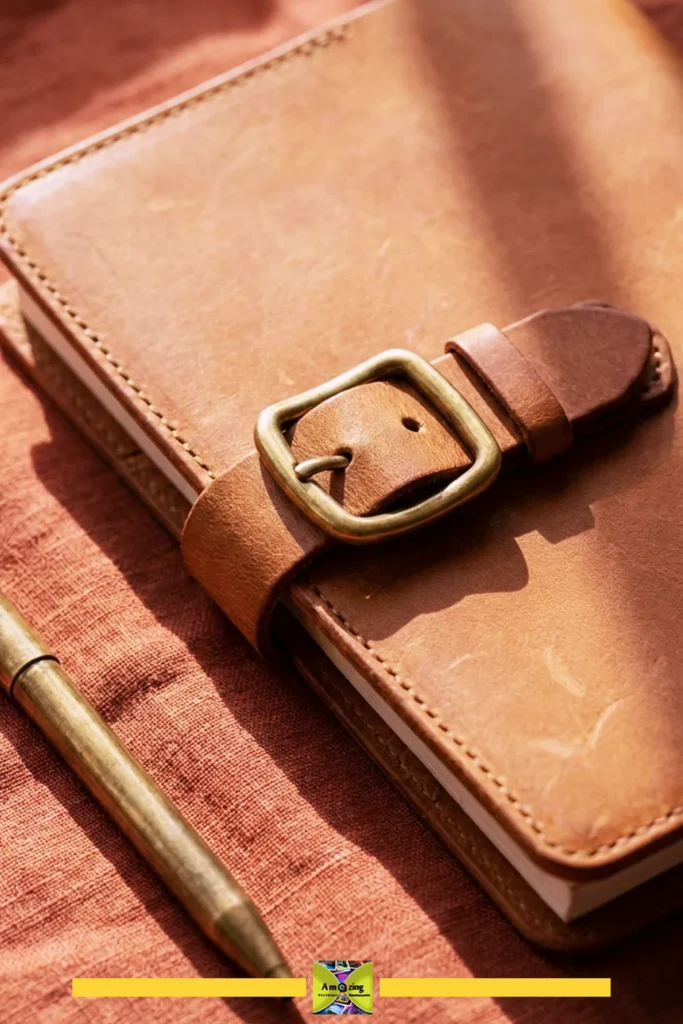
Project 12 — Journal or Sketchbook Closure
What it looks like: A short adjustable belt tab fixed to the back cover of a journal and buckled over the front, holding the book closed like a travel notebook.
Best use: A refillable journal or sketchbook closure that adds a leather detail and keeps pages flat — a good use for a short strap and a good buckle.
Difficulty: Beginner to intermediate.
Approximate time: 30–60 minutes. [TIME NOTE: confirm on your own first journal.]
Materials:
- One short belt section with a buckle
- Waxed thread and an awl, or Chicago screws with washers
- A journal or sketchbook
Tools:
- Awl and needle, or punch and screwdriver
- Utility knife
- Measuring tape
Steps:
- Decide whether the tab will fix to the back cover and buckle over the front, or wrap fully around. A back-mounted tab that folds over the front edge is simplest.
- Cut the strap to length with the buckle at the free end, leaving enough to fasten over the front cover.
- Attach the fixed end to the back cover — stitch through pre-punched holes, or use Chicago screws with washers so the cover isn’t torn.
- Buckle it over the front and mark where the prong should sit if a new hole is needed; punch it and test the fit.
- Confirm the closure holds the book shut without bowing the covers.
Customization:
- Use the buckle as the front detail
- Match the strap width to the journal
- Add a keeper to hold the tail
- Stamp or emboss an initial on the strap
Practical tip: On a paper or card cover, back the attachment with washers or a small patch — a bare screw or stitch pulls through a soft cover the first time the book is opened wide.
Common mistake: Cutting the tab so short the buckle sits on the front cover’s edge instead of its face, where it can catch and scratch the desk beneath.
Attach the strap to a sturdy removable cover rather than directly to paper pages. Pad any interior screw or rivet head so it cannot emboss the notebook, and position the buckle on the broad face of the cover, away from the edge. Check that the book still opens flat before setting the final fastener.
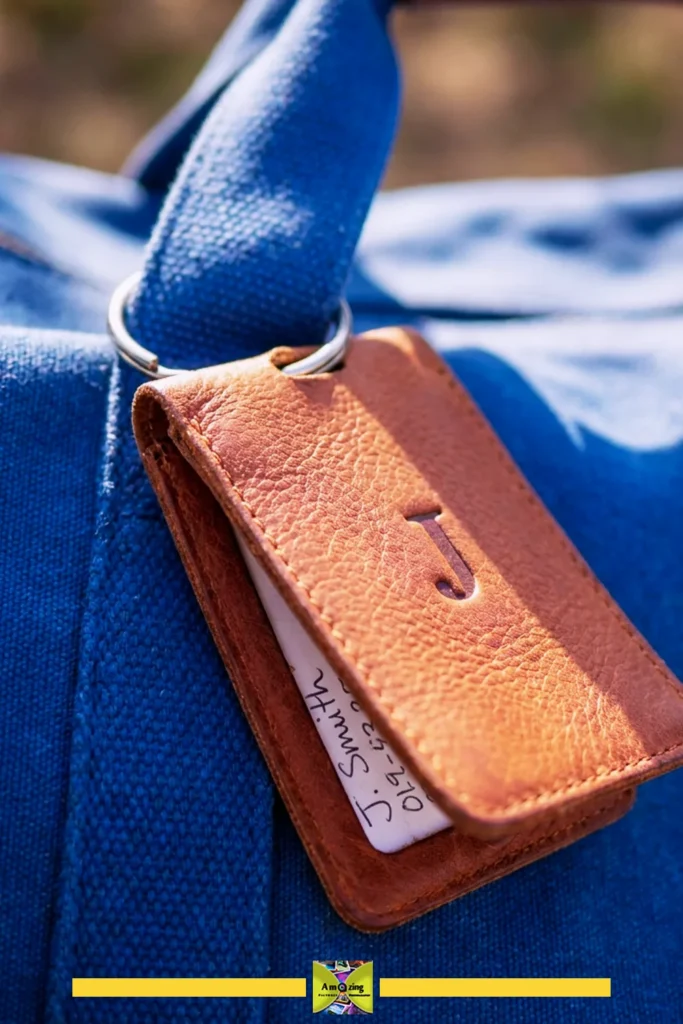
Project 13 — Concealed-Information Luggage Tag
What it looks like: A small leather tag with the owner’s contact details written on the inside of a folded or hidden flap, so the private information is not visible at a glance.
Best use: A personalized luggage or equipment tag that shows a name or design on the outside while keeping full contact details concealed — an under-covered privacy-aware idea.
Difficulty: Beginner.
Approximate time: 20–40 minutes.
Materials:
- One short, sound belt section
- A split ring or small loop for attaching
- Waxed thread or a rivet
- A fine-tip paint pen or a printable insert
Tools:
- Utility knife
- Punch
- Awl and needle or rivet setter
- Ruler
Steps:
- Cut a tag-sized piece, roughly 5–7 cm (2–3 in) wide and long enough to fold, plus a short loop section for the split ring.
- Fold the piece so the inner face becomes the concealed contact panel; write or insert the owner’s name and phone/email on that inner face.
- Close the tag so the written details are hidden — either by folding and fastening with a rivet or stitch, or by adding a simple flap that tucks or snaps shut.
- Punch a hole in the loop end and fit a split ring or loop for attaching to the bag.
- Check the tag opens and closes easily and that the contact details are genuinely concealed when closed.
Customization:
- Write only a first name or a design on the outside
- Use a snap so the flap opens easily
- Laminate a paper insert for a waterproof interior
- Add a small buckle as a decorative front
Practical tip: Put the private details on the hidden inner face and only a name or initial on the outside — a luggage tag is read by strangers at baggage carousels, and full contact details should not be on display.
Common mistake: Punching the split-ring hole too close to the edge, so the ring tears through when the tag is pulled.
Keep only the minimum contact information inside the concealed flap and reinforce the split-ring hole with a second leather layer or a small eyelet. Round every corner, close the tag, and tug firmly on the ring over a soft surface. Any stretching at the hole means the material is too weak for travel.
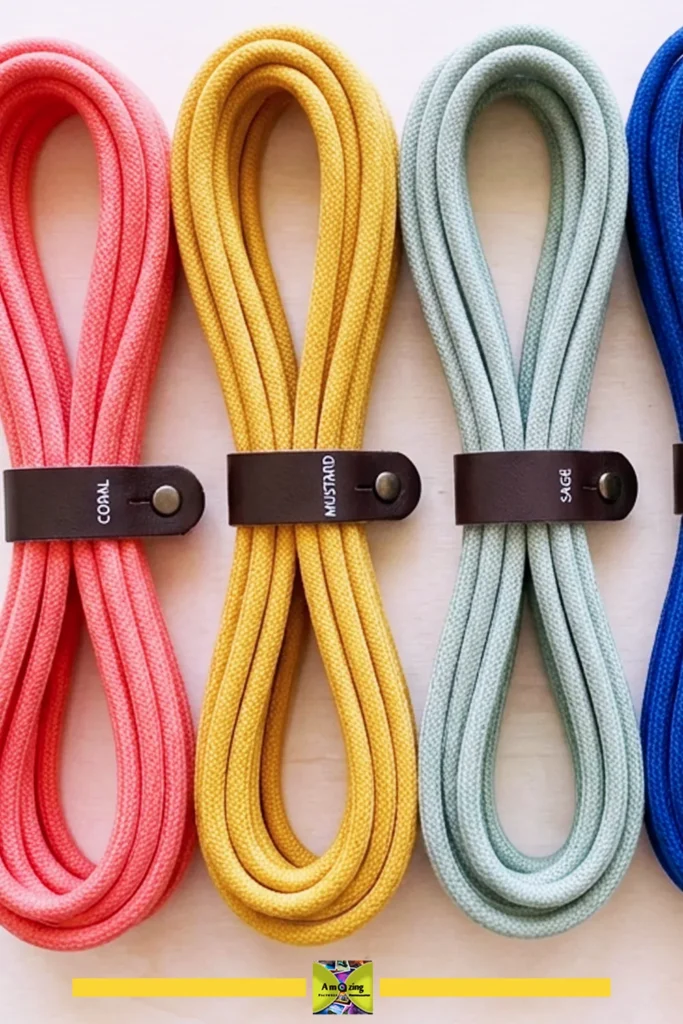
Project 14 — Reusable Cable Wraps
What it looks like: Small belt strips with a hole-and-slit or buckle that wrap around a disconnected cord or stored cable, keeping it coiled and tangle-free.
Best use: Tidying cords for headphones, chargers, and small accessories while disconnected and in storage — a fast use for narrow offcuts.
Difficulty: Beginner.
Approximate time: 15–30 minutes for a set.
Materials:
- Narrow, flexible belt offcuts
- A punch or small snap setter
Tools:
- Utility knife or scissors
- Punch
- Snap setter (if using a snap closure)
Steps:
- Coil the cord loosely — never tightly — and measure around the coil to find the wrap length you need.
- Cut narrow strips to length and finish the ends.
- Make the closure: cut a small slit near one end and a hole (or a snap) at the other, so the wrap can loop around the coil and fasten without gripping it tightly.
- Fit the wrap around the coiled cord and check it holds the coil together without pinching or kinking the cord.
- Label the wraps if you use them across different cords.
Customization:
- Use the belt’s existing holes as the fastening
- Make a color-coded set for different cords
- Add a small snap for a secure close
- Write a label on the strap
Practical tip: Wrap cords loosely — a cable wrap that pinches the cord can kink the cable at the fold and shorten its life.
Common mistake: Wrapping too tightly, which kinks the cord, or cutting the slit so the wrap slips open and the coil unwinds.
Safety note: These are for disconnected cords in storage only. Never wrap or fasten a cord that is connected to power.
Size each wrap around the finished coil rather than the bare cable. A hole-and-slit closure suits thin, flexible leather, while a snap is more dependable on thicker offcuts. Round the ends of every slit to slow tearing, and leave enough room that the cable keeps its natural curve without a sharp kink.
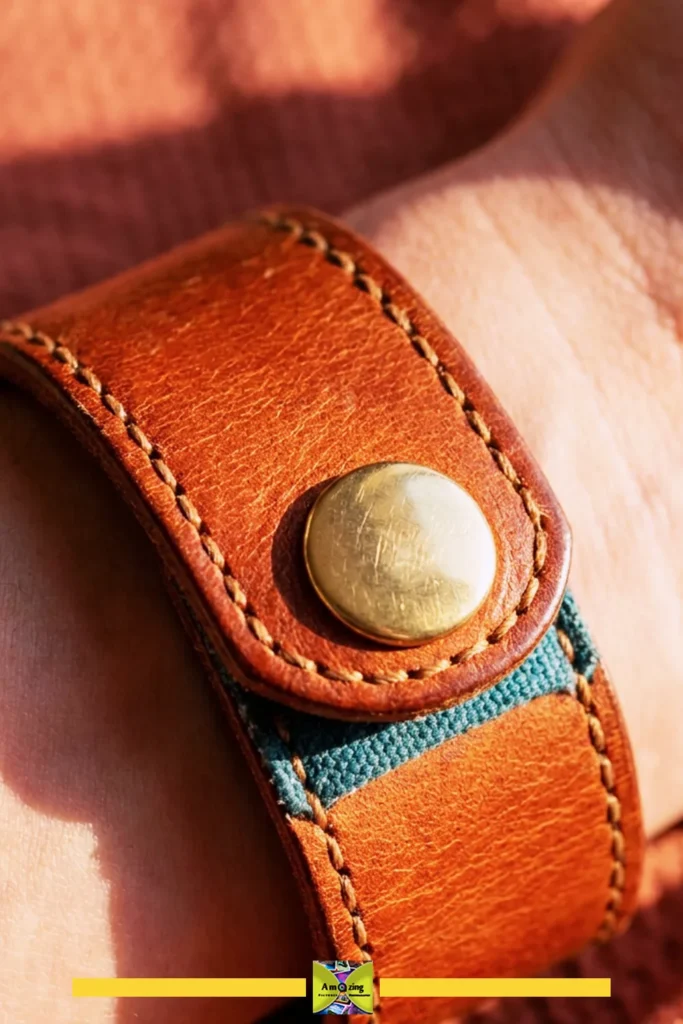
Project 15 — Simple Cuff Bracelet
What it looks like: A narrow bracelet made from a sound, flexible belt section, fastened with a snap or a buckle and finished so no rough edge touches the skin.
Best use: A personal accessory from a favorite worn belt — with clear skin-contact and hardware cautions.
Difficulty: Beginner.
Approximate time: 30–60 minutes.
Materials:
- One sound, flexible belt section
- A snap or a small buckle
- Optional a soft fabric lining for the inside
Tools:
- Measuring tape
- Utility knife
- Punch
- Snap setter (if using a snap)
- Fine sandpaper or an emery board
Steps:
- Measure your wrist loosely and cut a strap to that length plus overlap, from a section that is flexible and free of cracks, peeling, and rough edges.
- Round the corners and finish all edges so nothing sharp or rough touches the skin — sand, bevel, and burnish genuine leather; use edge paint or a folded-and-stitched edge on coated or synthetic material.
- Add the closure: a snap at the overlap, or a small buckle if the strap is long enough. Position it so no metal sits directly against the skin if possible.
- If the inside surface or the coating is unknown, line the inner face with soft fabric so bare skin isn’t in direct contact with the reclaimed material.
- Wear it for a short while first and check for any irritation before keeping it on.
Customization:
- Keep the original stitching as a detail
- Add a thin fabric lining in a contrasting color
- Use a snap for a clean close
- Stamp a small design on the outside
Practical tip: Line the inside — you don’t know what dye, coating, or adhesive a reclaimed belt carries, and a fabric lining removes the skin-contact question entirely.
Common mistake: Using a cracked or stiff section that digs in or breaks when it flexes, or leaving a rough cut edge that rubs the wrist.
Safety note: Avoid skin contact with unknown coatings, dyes, and adhesives, and with corroded metal. If the material can’t be confirmed skin-safe, line it or skip wearing it. Remove the cuff if it causes any irritation.
Use only clean, flexible material whose coating and condition you understand. Round and smooth the edges, cover the back of any metal hardware, and fit the cuff loosely enough to slide a fingertip underneath. Wear it briefly at first and remove it immediately if the leather, finish, or metal causes redness or discomfort.
How to Make Mixed Belts Look Intentional
The difference between “a pile of old belts” and “a collection” is restraint. A few habits make unrelated belts read as a deliberate set:
- Limit the palette to two to five coordinated tones. A handful of related colors looks curated; six unrelated colors looks random.
- Combine similar widths, or use a deliberate progression. Matching widths read as a set; a clear narrow-to-wide sequence reads as intentional design.
- Repeat one buckle finish or metal color. All-brass or all-nickel hardware ties pieces together even when the straps differ.
- Align existing holes and stitching. Matching stitch lines and hole positions into a continuous line makes a composition look planned.
- Create controlled contrast between dark and light straps. One light strap against dark ones — or vice versa — is a focal point; an even mix is noise.
- Balance distressed patina with clean new cuts. A weathered strap next to a crisp, freshly cut edge shows the material was handled, not just salvaged.
- Use symmetry, grids, alternating bands, or measured spacing. Even spacing and aligned rows signal intention; random placement signals “glued where they landed.”
- Hide rough joins on the back or underside. Every knot, screw, or glue join goes where it won’t be seen.
- Coordinate backing boards, boxes, fasteners, and surrounding décor. The board, the screws, and the shelf they sit on are part of the finished look.
- Edit the embellishment. Let the leather and the hardware carry the design; add studs, paint, or extra trim only where they earn their place.
When the belts are ready, the same restraint applies to the wall around them — see this coordinated wall display for a small-room makeover in the same spirit.
Troubleshooting Common Old Belt Craft Problems
- Leather cracking during bending — the material is too dry, too old, or it’s bonded/coated. Condition genuine leather first and test on an offcut; if it still cracks, don’t bend it in the project.
- Bonded or synthetic surfaces peeling after cutting — the coating is delaminating from the cut edge. Seal or paint the edge, and avoid using that belt for anything that flexes.
- Cuts becoming angled or ragged — the blade is dull, or you forced one deep pass. Use a fresh blade and a straight edge, and cut in several light passes.
- Punches failing to pass through thick layers — punch one layer at a time, over a scrap-wood or poundo board, with a sharp punch; drill only for very thick stacks, with the piece clamped.
- Holes stretching or tearing near an edge — the hole is too close to the edge or too large for the fastener. Move holes inboard and match the punch to the post.
- Rivets spinning, sitting crooked, or failing to clamp — the post length is wrong for the stack, or the hole is oversized. Match the post to the combined thickness and use a snug hole; set on scrap first.
- Chicago screws loosening during use — threads work loose under movement. Add a thread-locking compound and re-tighten; check them periodically.
- Snaps pulling through weak material — the material is too thin or the hole too close to the edge. Reinforce the back with a washer or a second layer, or move the snap inboard.
- Adhesive failing on conditioned, coated, or flexible surfaces — adhesive can’t grip an oily or plastic surface, and it shears when flexed. Clean, rough the surface lightly, and use a mechanical fastener for any stressed or flexible joint.
- Metal hardware scratching the underlying surface — add a washer, a felt or leather pad, or recess the head so the metal never touches the surface.
- Drawer pulls twisting or feeling loose — the screws are too short, or the holes are too large. Use longer screws, washers, and pilot holes; re-tighten.
- Curtain tiebacks slipping — the hole is stretched or the belt is too loose. Punch a fresh hole well away from the stretched one and test the tension.
- Wall-organizer bands sagging — the bands are too loose or fastened with adhesive. Fasten every band mechanically with deliberate slack, and check the screws are tight.
- Exercise-mat straps opening or stretching — the strap is too weak or the fastener is undersized. Use a strong, uncracked section, a correctly sized post, and re-test before carrying.
- Cable wraps becoming too tight — the wrap is cinched around the coil. Wrap cords loosely and size the wrap to the coil, not the bare cord.
- Mixed belts looking visually cluttered rather than intentional — limit the palette, repeat one finish, align holes and stitching, and hide the joins.
Safety When Working With Old Belts
- Cut away from your body on a stable, protected cutting surface, with the free hand behind the blade path. Use a sharp blade — dull blades slip.
- Secure thick material before punching or drilling. Clamp the strap or hold it firmly against a scrap-wood or poundo board; never punch or drill into your hand.
- Wear eye protection when drilling, punching, riveting, setting snaps, and removing hardware. Fragments and tool heads can fly, and ANSI Z87.1-rated safety glasses are a small, worthwhile cost.
- Keep fingers clear of punches, awls, drill bits, setters, blades, and impact zones. Grasp awls and edgers well back from the tip, and strike setters accurately.
- Check old buckles and hardware for sharp edges, burrs, corrosion, and hidden damage before handling; file or smooth any burr.
- Ventilate the workspace and follow labels when using adhesive, dye, paint, conditioner, or sealer. Some products release vapors that need airflow.
- Avoid open-flame material tests, burning holes, or heating unknown synthetic coatings. You don’t need a burn test to identify a belt, and heating unknown synthetics can release harmful fumes.
- Prevent small hardware from becoming accessible to young children or pets. Buckles, rivets, snaps, and split rings are choking hazards.
- Avoid unverified skin-contact claims for unknown coatings, dyes, adhesives, and corroded metal. Line the contact surface or skip the wearable.
- Test every carrying or mounted project cautiously before normal use. Load it with the intended item, lift and tug over a soft surface, and watch for stretching, slippage, or pull-through.
- Keep carried objects lightweight and non-fragile unless the completed attachment has been genuinely tested to hold more.
- Retire any project that cracks, stretches, peels, loosens, or shows hardware pull-through. When a reclaimed belt fails, it fails at the hole, the fold, or the fastener.
- Never present an old belt as safety equipment. Nothing here is a harness, restraint, or load-rated device.
Frequently Asked Questions
The most useful old leather belt crafts are drawer and cabinet pulls, curtain tiebacks, a wall-mounted mail organizer, storage-box wraps, a framed wall panel, a wreath, blanket bundle straps, a tool-roll closure, a reusable gift-box band, a journal closure, a luggage tag, cable wraps, and a cuff bracelet. Start by identifying the material and condition, then match the project to what the belt can safely do.
Read the label first, then look at the edge and backing. Genuine leather has a fibrous, layered edge and a non-fabric back; synthetic (PU or PVC) has a smooth, precise edge over a woven backing and a uniform, repeating grain. Bonded leather has a powdery or crumbly edge and peels in flakes. Avoid burn tests — the edge and backing are usually enough.
It depends on the material. For genuine leather, wipe with a barely damp cloth or a leather-specific cleaner; avoid soaking, bleach, ammonia, alcohol, and household wipes. For coated, bonded, or synthetic material, wipe with mild soap and water and dry thoroughly — do not condition it. For woven textile belts, hand-wash gently and air-dry. Always clean before cutting or gluing.
Use a utility knife with a fresh blade and a metal straight edge, cutting in several light passes rather than one forced cut, on a cutting mat. Cut away from your body. For thinner or synthetic belts, a rotary cutter or heavy scissors work. Never cut through embedded hardware — remove it or cut around it.
A rotary leather punch or a drive punch with a mallet, over a scrap-wood or poundo board. Match the punch size to the fastener so the hole is snug. For very thick or multi-layer stacks, drill slowly with the piece clamped and a backer board underneath. Test the hole on an offcut first.
For anything stressed or load-bearing, yes — rivets, Chicago screws, stitching, and bolts are all far stronger and more reliable than adhesive. Adhesive is only appropriate for non-stressed, decorative work on clean surfaces. It fails on conditioned, coated, and flexible material, so never trust it for a handle, strap, or mounted joint.
Rarely worth it. Once a bonded or synthetic coating has started to peel, it keeps peeling after cutting, and it can’t be conditioned or burnished like real leather. If you do use it, keep the piece flat and non-flexing, seal or paint the cut edge, and treat it as strictly decorative.
A good buckle can become the focal point of a journal closure, a gift-box band, a luggage tag, or a bracelet. Short offcuts make cable wraps, key fobs, tags, and small pull loops. Save the buckle even if the strap is ruined — solid brass or stainless hardware outlasts several straps.
Start With One Belt
Old leather belt crafts reward a small start. Pick one belt you’re ready to let go of, read its label, identify its material, and clean it. Then choose a single beginner project — a drawer pull, a cable wrap, or a journal closure — and test your cut and your fastener on an offcut before touching the good section. One finished piece will teach you more about how that specific material cuts, punches, and fastens than any list of fifteen, and it’ll keep the rest of your belt stash out of the “someday” pile.
Sources
Material identification and leather grades
- Leather Lady NC — How to Identify Quality Leather and Avoid Fake Leather
- eLeatherHub — Bad Leather vs Good Leather: How to Tell the Difference
- Rustic Belts — How to Identify Quality Leather
Leather care and cleaning
- HopLok Leather — How to Clean a Leather Belt: A Complete Guide
- USA Genuine Leather Co. — How to Care for a Leather Belt
- Holdform — How to Care for a Leather Belt: Clean, Condition and Store
Fasteners and hardware
- British Leather Supplies — Leather Fastenings Explained
- Ateliers Sajrom — What Are Chicago Screws? Uses & Sizing Tips
- Wawak — Chicago Screws for Leather, Fabric & Bag Making
Edge finishing and tools
- Tandy Leather — Mastering Leather Edges: Beveling, Burnishing, and Polishing
- LW Leatherworking — Perfecting Edge Bevelling Technique
Safety
- University of California ANR — Clover Safe (leather tool safety)
- Stecks Store — Safety Tips When Leatherworking
Disposal and textile/leather recovery
- Westchester County (NY) — Textile recycling guidelines
- StopWaste — Leather Remnants & Scraps
Posted by: Med Houssem · In: Fabric & Textile Crafts